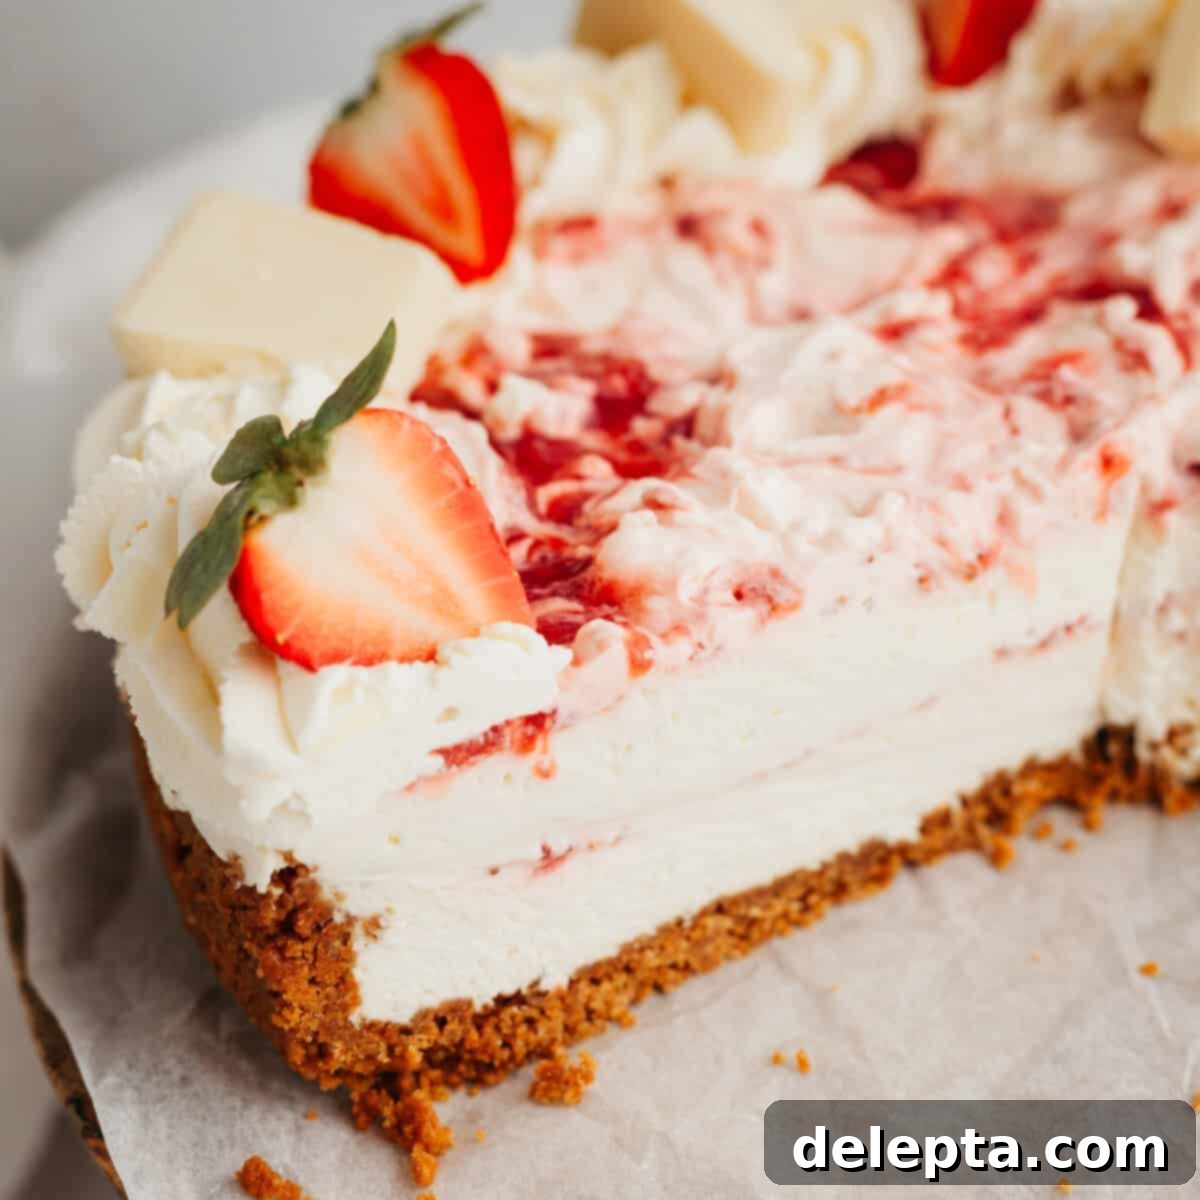
Irresistibly Creamy No-Bake Strawberry and White Chocolate Cheesecake with Biscoff Crust
Prepare to be enchanted by this truly irresistible **no-bake strawberry and white chocolate cheesecake**! This dreamy dessert is designed for ease without sacrificing an ounce of flavor or its luxuriously creamy texture. Made with just a handful of simple ingredients, it delivers a rich white chocolate cheesecake experience, beautifully complemented by a buttery Biscoff cookie crust and vibrant swirls of strawberry goodness. Forget the fuss of a water bath or a hot oven; this cheesecake is all about effortless elegance and pure indulgence.
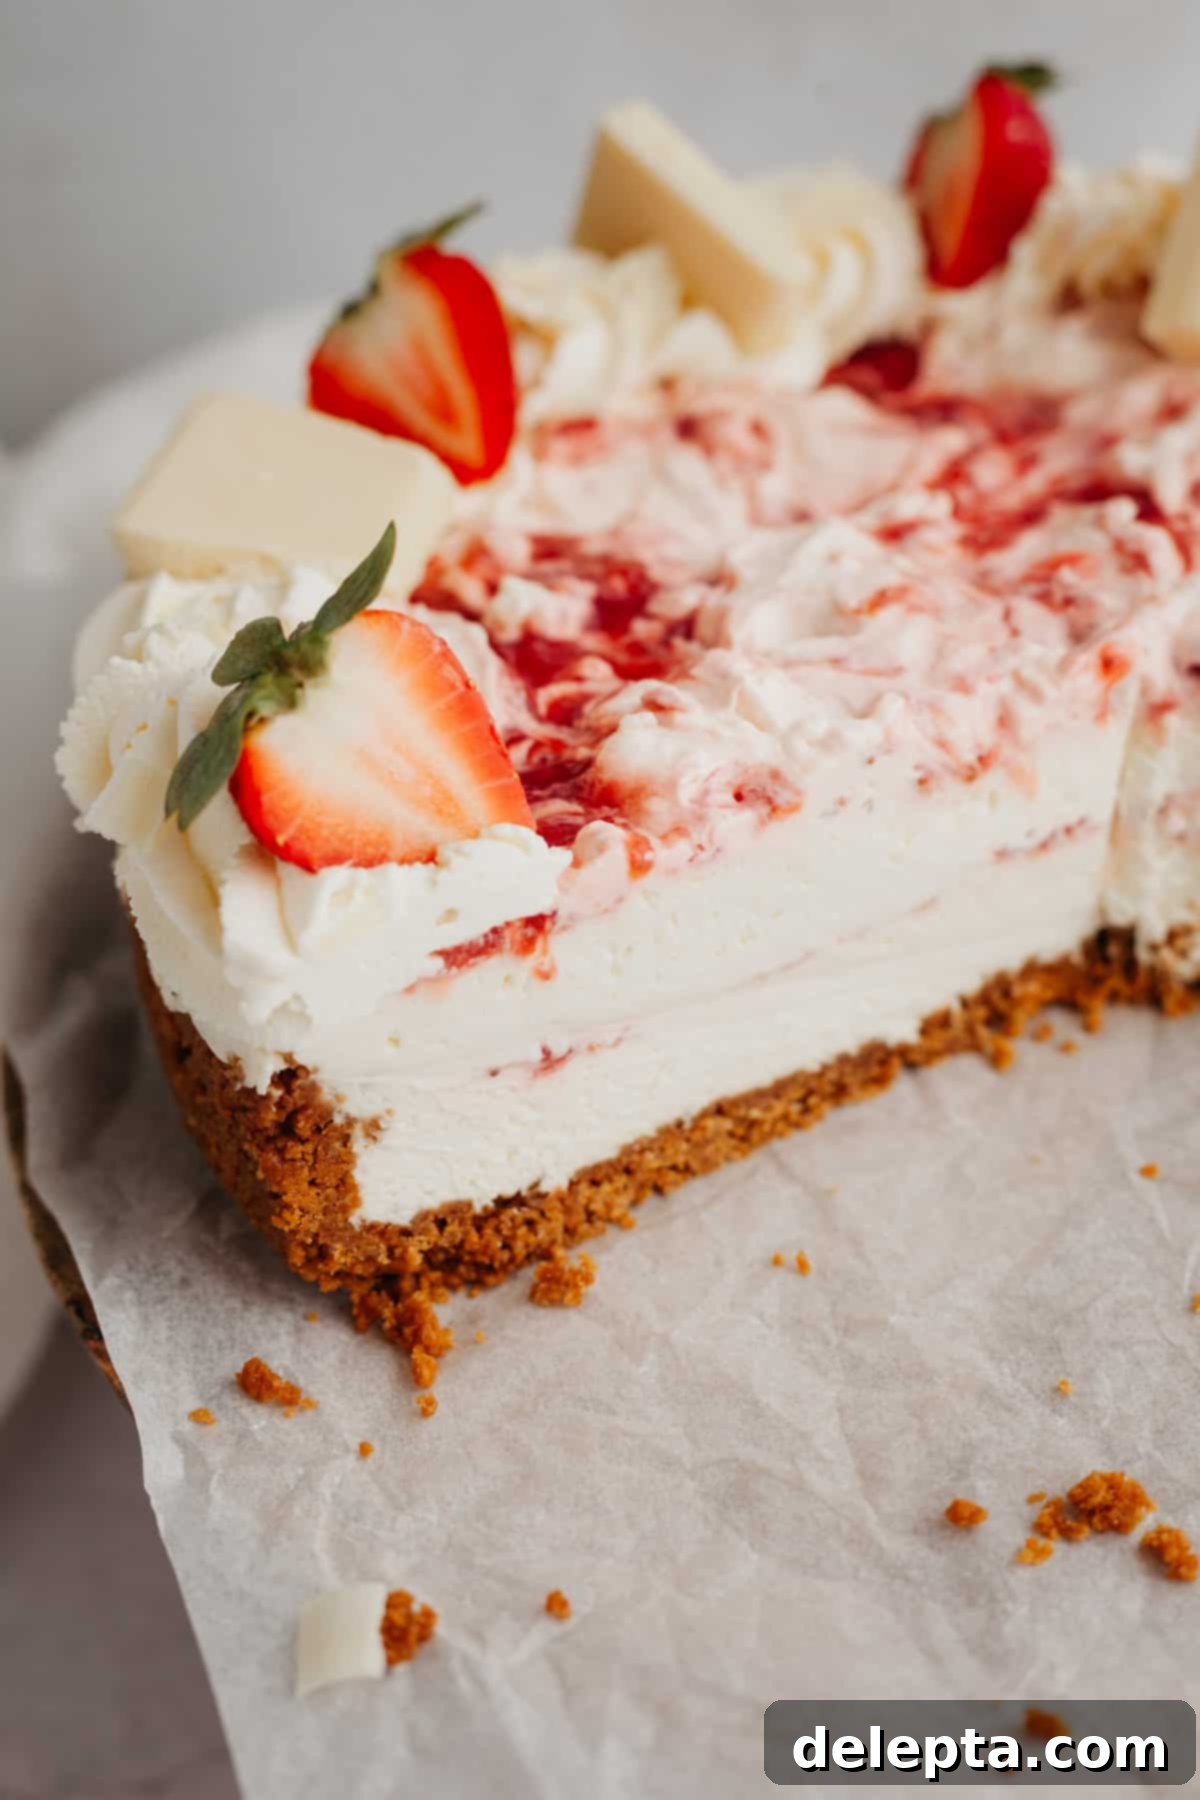
While the allure of a perfectly baked cheesecake, like a classic apple crisp cheesecake, is undeniable, there’s something uniquely satisfying about a no-bake version. It’s the ultimate dessert for those who crave decadence without the complexity. The absence of baking means no cracking, no worrying about over-baking, and absolutely no need for a fiddly water bath – which, for any home baker, is a definite win! Drawing inspiration from my popular peppermint bark cheesecake, this recipe simplifies the process, making it accessible to everyone while still delivering spectacular results.
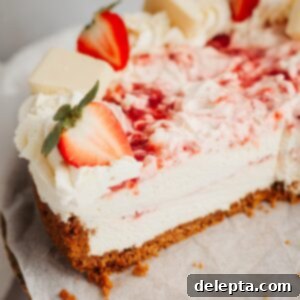
This delightful strawberry cheesecake features a foundation of a crisp, wonderfully spiced Lotus Biscoff cookie crust. Its unique caramel notes provide a fantastic counterpoint to the silky smooth white chocolate filling. Interspersed throughout the creamy filling are generous swirls of bright, homemade strawberry sauce, bursting with fresh fruit flavor. For convenience, you can easily substitute with your favorite store-bought strawberry jam, ensuring deliciousness every time.
Visually stunning and incredibly delicious, this strawberry and white chocolate cheesecake is the perfect centerpiece for birthdays, anniversaries, holidays, or any special occasion. Its vibrant colors and elegant presentation are sure to impress your guests, making it a memorable dessert for any celebration. The beautiful contrast of the rich white chocolate, the bright red strawberry swirls, and the golden-brown Biscoff crust truly makes it a showstopper.
If your love for strawberries knows no bounds, be sure to explore more of my delightful strawberry-infused creations. Indulge in my strawberry-filled cupcakes, a moist and tender treat with a sweet surprise inside. For chocolate lovers, the chocolate cake with strawberry filling offers a harmonious blend of rich cocoa and fresh fruit. And for a lighter, classic option, my vanilla strawberry cake is a perennial favorite, perfect for any gathering.
Why This No-Bake Strawberry White Chocolate Cheesecake Will Be Your New Favorite
Discover the many reasons why this easy no-bake cheesecake recipe is destined to become a staple in your dessert repertoire:
- Simple, Accessible Ingredients: You won’t need to hunt down exotic components for this recipe. We focus on readily available, straightforward ingredients that come together to create something truly extraordinary. This means less stress in the kitchen and more time enjoying the process (and the results!).
- Perfect for Making in Advance: One of the greatest advantages of a no-bake dessert is its party-friendly nature. You can prepare the homemade strawberry sauce up to 5 days ahead of time, and the entire cheesecake can be assembled and chilled up to 2 days in advance. This makes it an ideal choice for entertaining, allowing you to focus on your guests rather than last-minute baking.
- Bursting with Fresh Strawberry Flavor: This cheesecake isn’t shy on strawberry taste! Thanks to the luscious homemade strawberry sauce, every bite is infused with the bright, sweet, and slightly tart notes of fresh strawberries. It’s a taste of summer, no matter the season.
- Irresistible Biscoff Cookie Crust: The base of this creamy cheesecake is a revelation itself. The Lotus Biscoff cookie crust is wonderfully buttery, with distinctive spiced caramel notes that pair beautifully with the sweet white chocolate and fresh strawberries. It adds a delightful crunch and an extra layer of flavor complexity that elevates the entire dessert. It’s a step up from a traditional graham cracker crust, offering a gourmet touch.
- Luxuriously Creamy Texture: This no-bake cheesecake truly lives up to its “creamy” description. The combination of full-fat cream cheese, whipped heavy cream, and melted white chocolate creates a filling that is incredibly smooth, rich, and melts in your mouth.
- No Oven Required: For those hot summer days or simply when you want to avoid turning on the oven, this no-bake recipe is a lifesaver. It’s entirely stove-top and fridge-dependent, keeping your kitchen cool.
Essential Ingredients for Your Strawberry White Chocolate Cheesecake
Crafting this decadent no-bake cheesecake requires a selection of high-quality ingredients. Here’s a closer look at what you’ll need and some key tips for each:
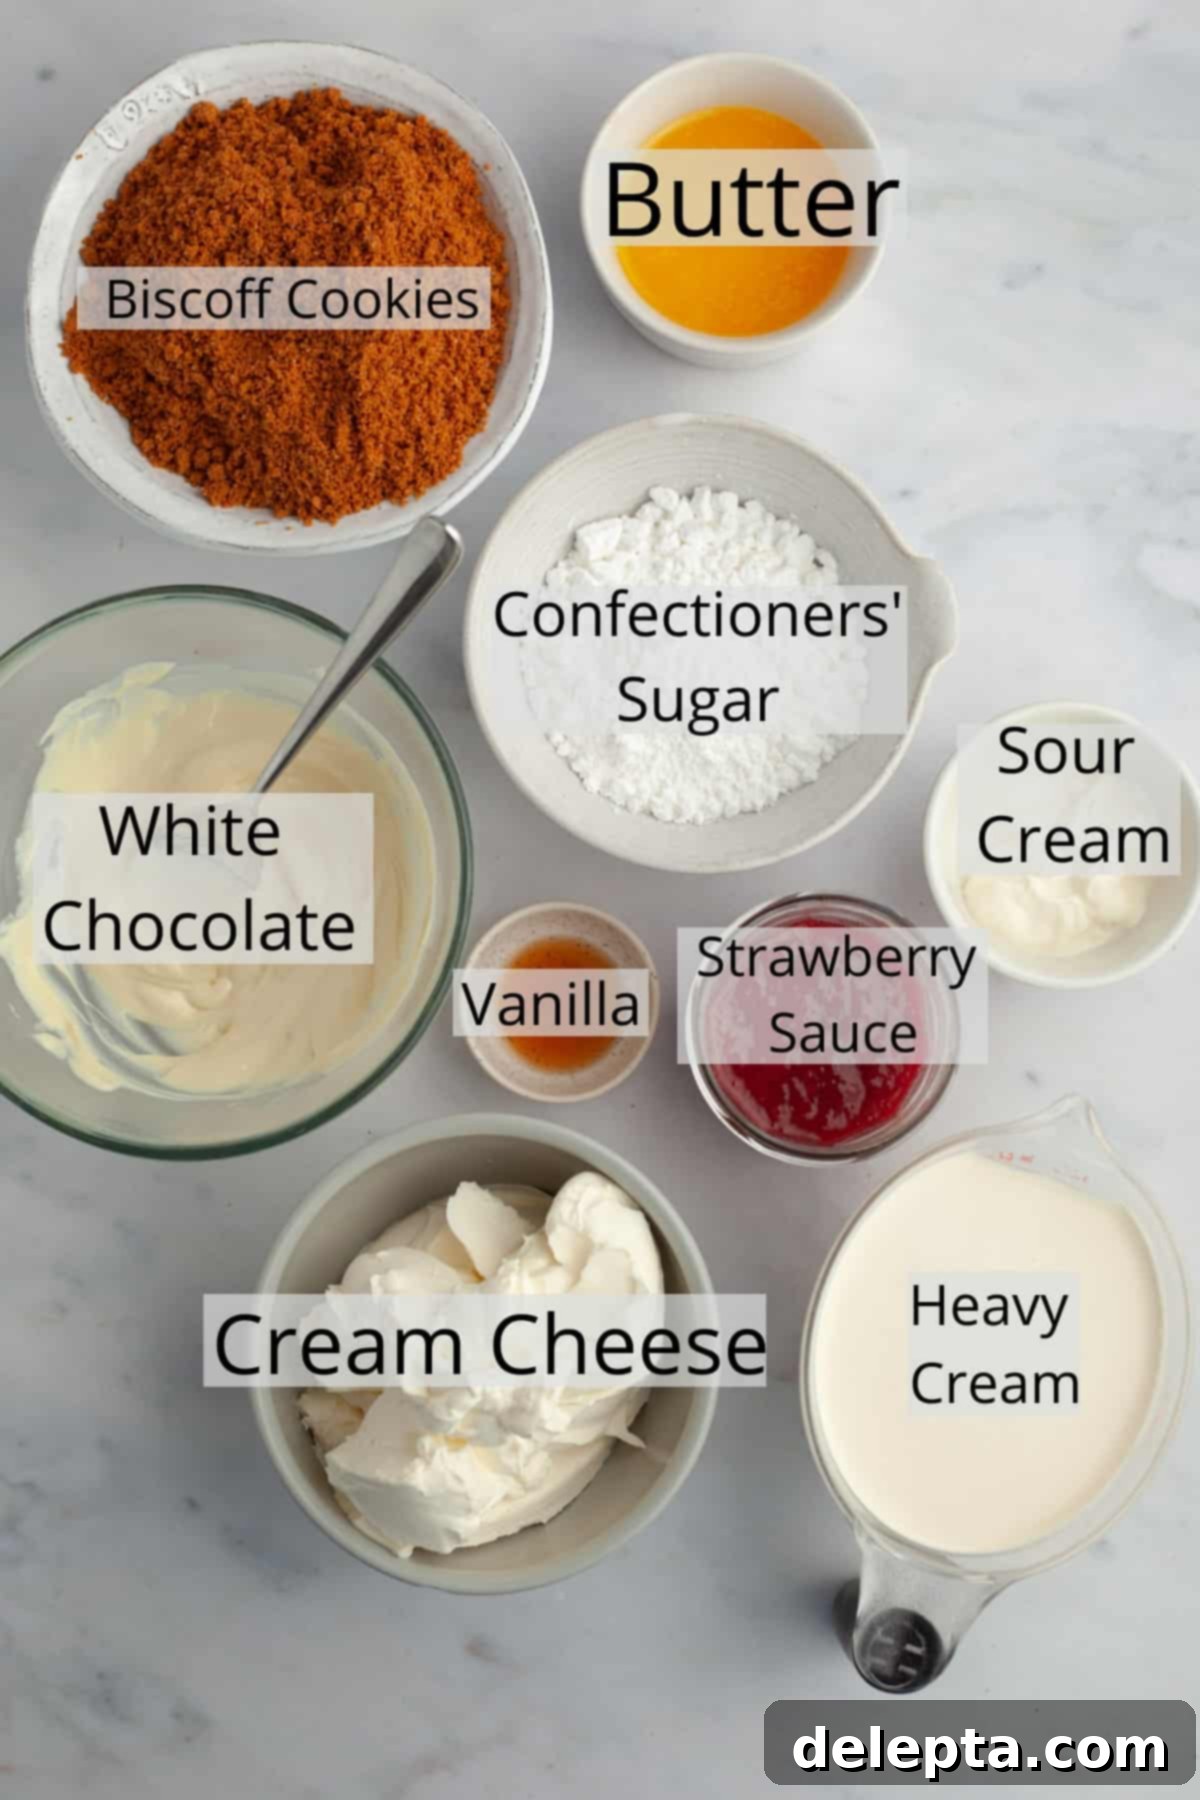
- Cream Cheese: For the ultimate creamy texture, I’ve rigorously tested this recipe with full-fat Philadelphia cream cheese, which provides the best structure and richness. It’s crucial for your cream cheese to be at room temperature for a lump-free, silky smooth filling. If you’re in Europe or a region where cream cheese often comes in tubs (which tend to have higher moisture content), I recommend patting it down thoroughly with a paper towel before using to remove any excess moisture. This small step helps ensure your cheesecake sets perfectly.
- Heavy Cream: This essential ingredient is whipped to stiff peaks and then gently folded into the cream cheese mixture, transforming the filling into a wonderfully light and airy consistency. In the UK, look for “double cream,” which is the equivalent. Ensure your heavy cream is very cold when whipping; this helps it achieve stiff peaks quickly and holds its volume.
- Confectioner’s Sugar: Also known as powdered sugar or icing sugar, this finely milled sugar dissolves seamlessly into the cheesecake batter, ensuring a smooth texture without any grainy bits. It provides the perfect level of sweetness to balance the tang of the cream cheese and sour cream. Sifting it before use is recommended to prevent lumps.
- White Chocolate: The star flavor of our filling! The quality of your white chocolate truly makes a difference here. Opt for a good quality white chocolate bar or chips that melt smoothly. You’ll need to melt it gently (either over a double boiler or in short bursts in the microwave) and allow it to cool slightly before incorporating it into the cheesecake batter. This prevents it from seizing and ensures a uniform, rich flavor.
- Strawberry Sauce: This recipe shines with my homemade strawberry sauce, which brings an unparalleled fresh fruit flavor and vibrant color. If time is a constraint, a high-quality store-bought strawberry jam can be used as a convenient alternative, offering a sweet and fruity swirl.
- Lotus Biscoff Cookies: These beloved spiced caramel cookies form the foundation of our crust. Their distinctive flavor harmonizes beautifully with white chocolate and strawberries, creating a unique and memorable taste profile. If Biscoff cookies aren’t available, digestive biscuits or graham crackers make excellent substitutions, providing a classic buttery crunch. To prepare the crust, crush the cookies into a fine powder using a food processor, a blender, or by placing them in a ziploc bag and crushing them with a rolling pin.
- Sour Cream: A small but mighty ingredient, sour cream introduces a subtle yet crucial tanginess to the cheesecake, cutting through the richness of the cream cheese and white chocolate. Like cream cheese, ensure your sour cream is at room temperature for smooth incorporation into the batter.
For precise measurements and detailed quantities, please refer to the comprehensive recipe card below.
Easy Step-by-Step Guide to Your No-Bake Cheesecake Perfection
Creating this stunning strawberry and white chocolate cheesecake is simpler than you might think. Follow these detailed steps for a flawless dessert every time:
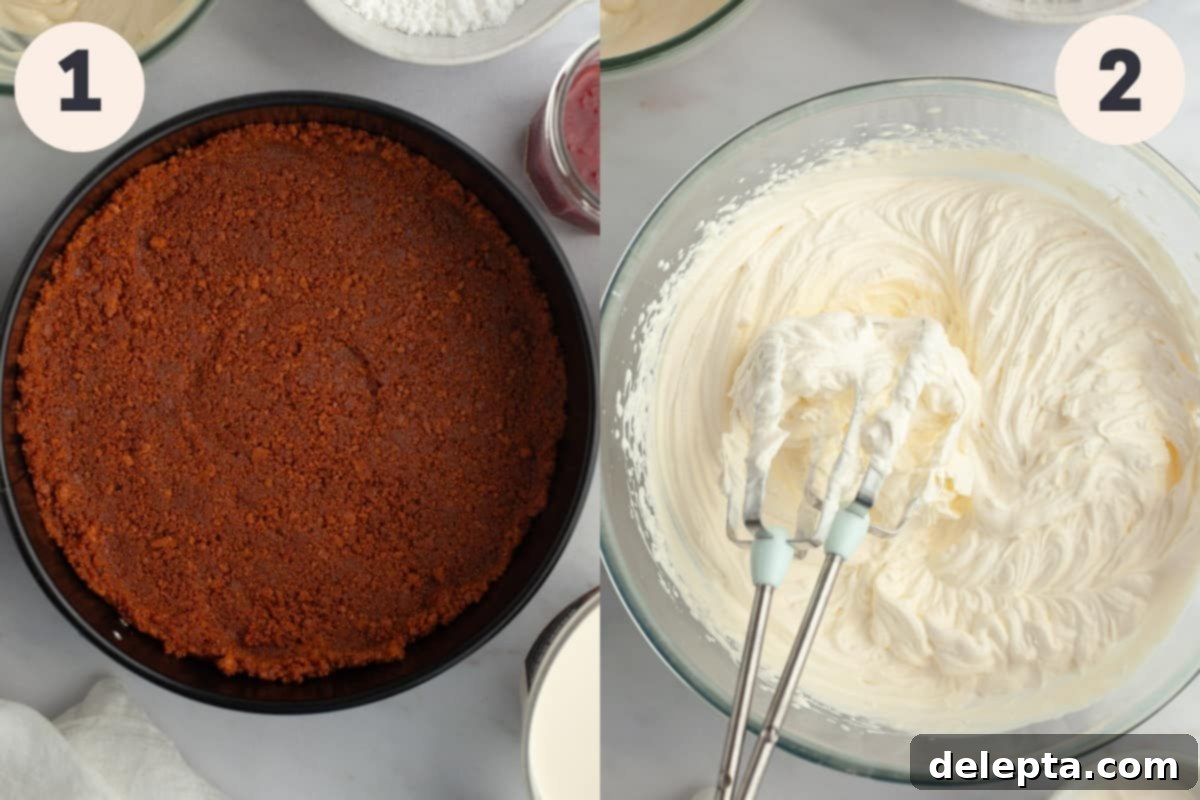
Step 1: Prepare the Biscoff Cookie Crust. Begin by thoroughly combining your finely crushed Biscoff cookies with the melted unsalted butter in a large bowl. Mix until every crumb is completely moistened, ensuring there are no dry patches remaining. This is crucial for a cohesive crust. Line the bottom of a 9-inch springform pan with parchment paper – this makes for easy removal later. Pour the moist cookie crumb mixture into the prepared pan. Using the bottom of a measuring cup or a flat-bottomed glass, firmly press the crumbs evenly into the bottom and slightly up the sides of the pan to form a sturdy crust. Once pressed, place the pan in the freezer for at least 20 minutes to allow the crust to firm up while you prepare the filling.
Step 2: Whip the Heavy Cream. In a separate large mixing bowl, using either a handheld electric mixer or a stand mixer fitted with the whisk attachment, whip the cold heavy cream until it forms firm, stiff peaks. Be careful not to over-whip it into butter. Once stiff, set the whipped cream aside; it will be gently folded into the cheesecake mixture later.
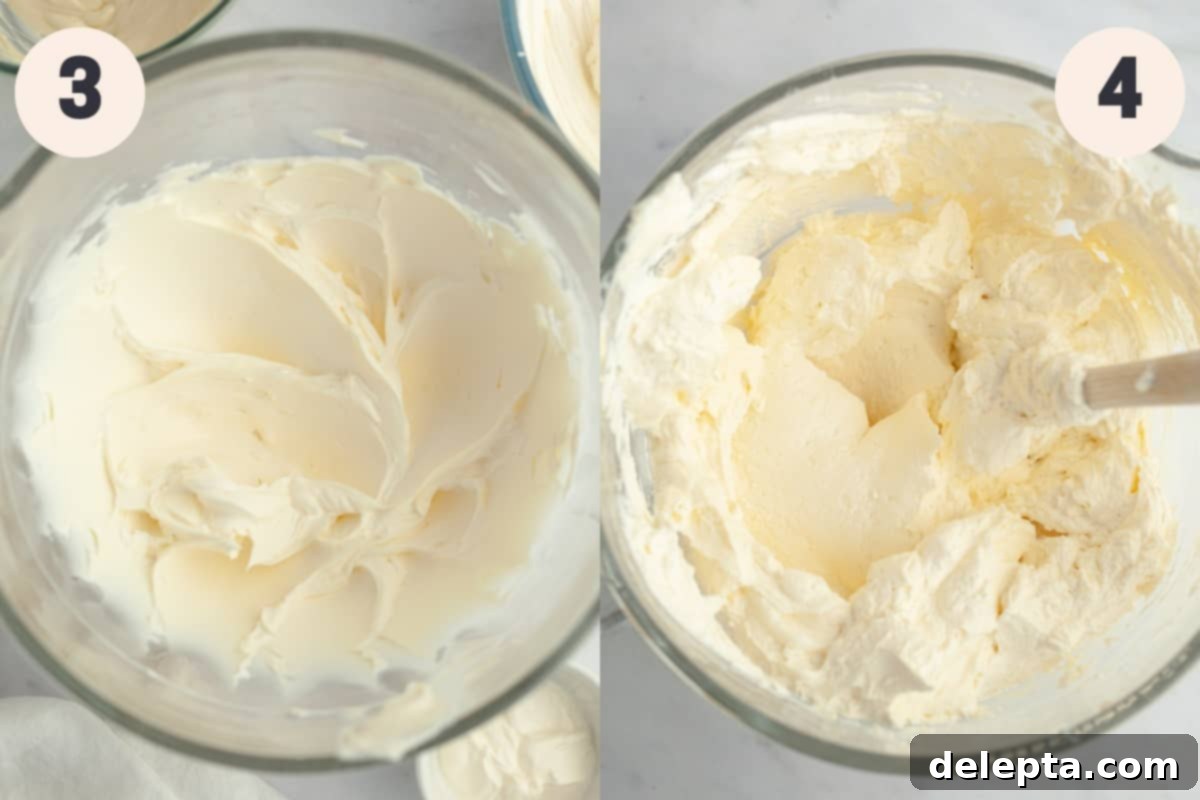
Step 3: Create the Creamy White Chocolate Base. In another large mixing bowl, preferably in a stand mixer fitted with the paddle attachment, beat the room-temperature full-fat cream cheese on medium speed until it is incredibly soft, smooth, and entirely lump-free. This can take a few minutes. Next, pour in the cooled melted white chocolate, room-temperature sour cream, sifted confectioners’ sugar, and vanilla extract. Continue to beat on medium speed until all ingredients are thoroughly combined and the mixture is perfectly smooth and velvety. Scrape down the sides of the bowl as needed to ensure everything is incorporated.
Step 4: Gently Fold in the Whipped Cream. With a rubber spatula, carefully and gently fold the previously whipped heavy cream into the white chocolate cream cheese mixture. Use an upward motion to incorporate the cream without deflating the air you’ve just whipped into it. Continue folding until the mixture is fully combined and uniform, creating a light and airy cheesecake filling. Overmixing at this stage can lead to a dense cheesecake, so handle with care.
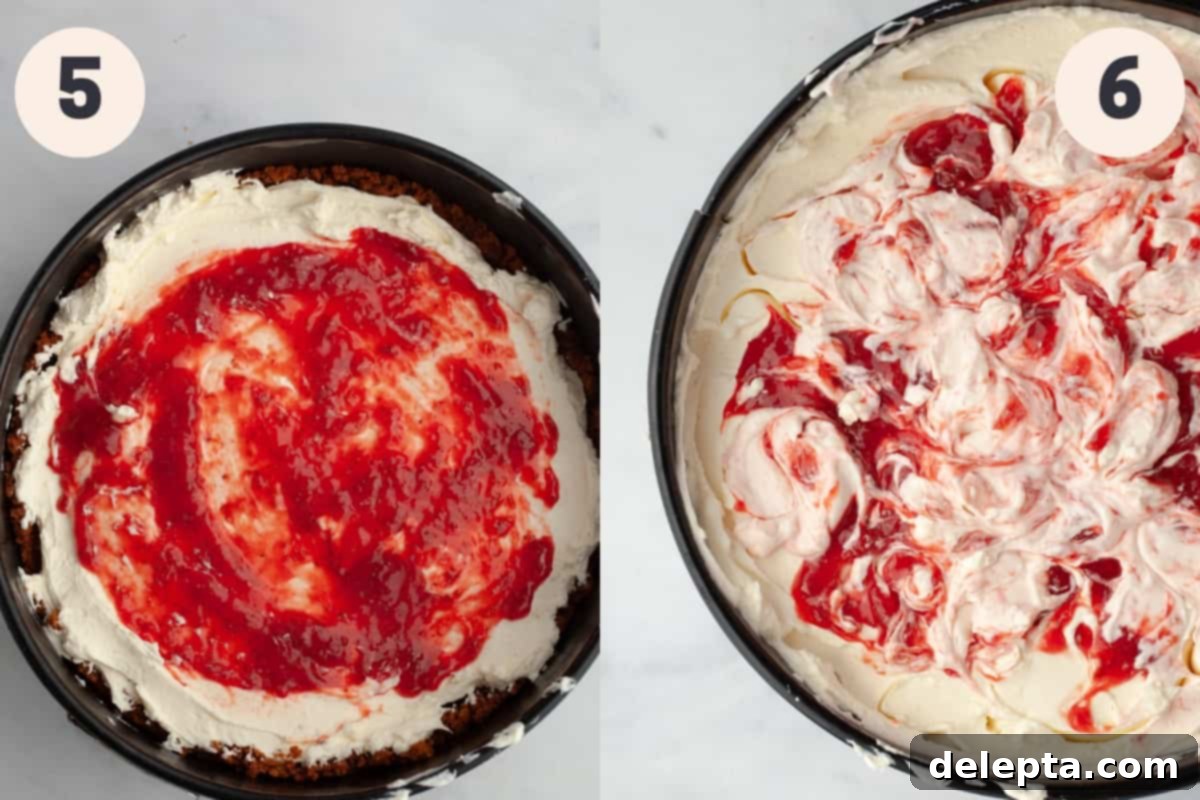
Step 5: Layer and Swirl the Cheesecake. Retrieve your chilled Biscoff crust from the freezer. Pour exactly half of the creamy cheesecake batter over the crust, spreading it gently and evenly with a small offset spatula. Next, dollop half of your homemade strawberry sauce (or jam) over this layer. Using the offset spatula or the back of a spoon, carefully spread the strawberry sauce, creating a distinct layer. Then, pour the remaining cheesecake filling on top, spreading it out smoothly to cover the strawberry layer entirely. Dollop the remaining strawberry sauce onto the top of the cheesecake. For an artistic swirl effect, use a toothpick or a skewer to gently swirl the strawberry sauce into the white chocolate filling, creating beautiful patterns. Be mindful not to go too deep, as this can create pockets in the finished cheesecake.
Step 6: Chill to Perfection. Once assembled, cover the top of the springform pan tightly with plastic wrap. This prevents any odors from the fridge from being absorbed and keeps the cheesecake fresh. Transfer the cheesecake to the refrigerator and allow it to chill for a minimum of 12 hours, or ideally, overnight. This extended chilling time is crucial for the cheesecake to firm up properly and achieve its perfect sliceable consistency. Patience is key for the best results!
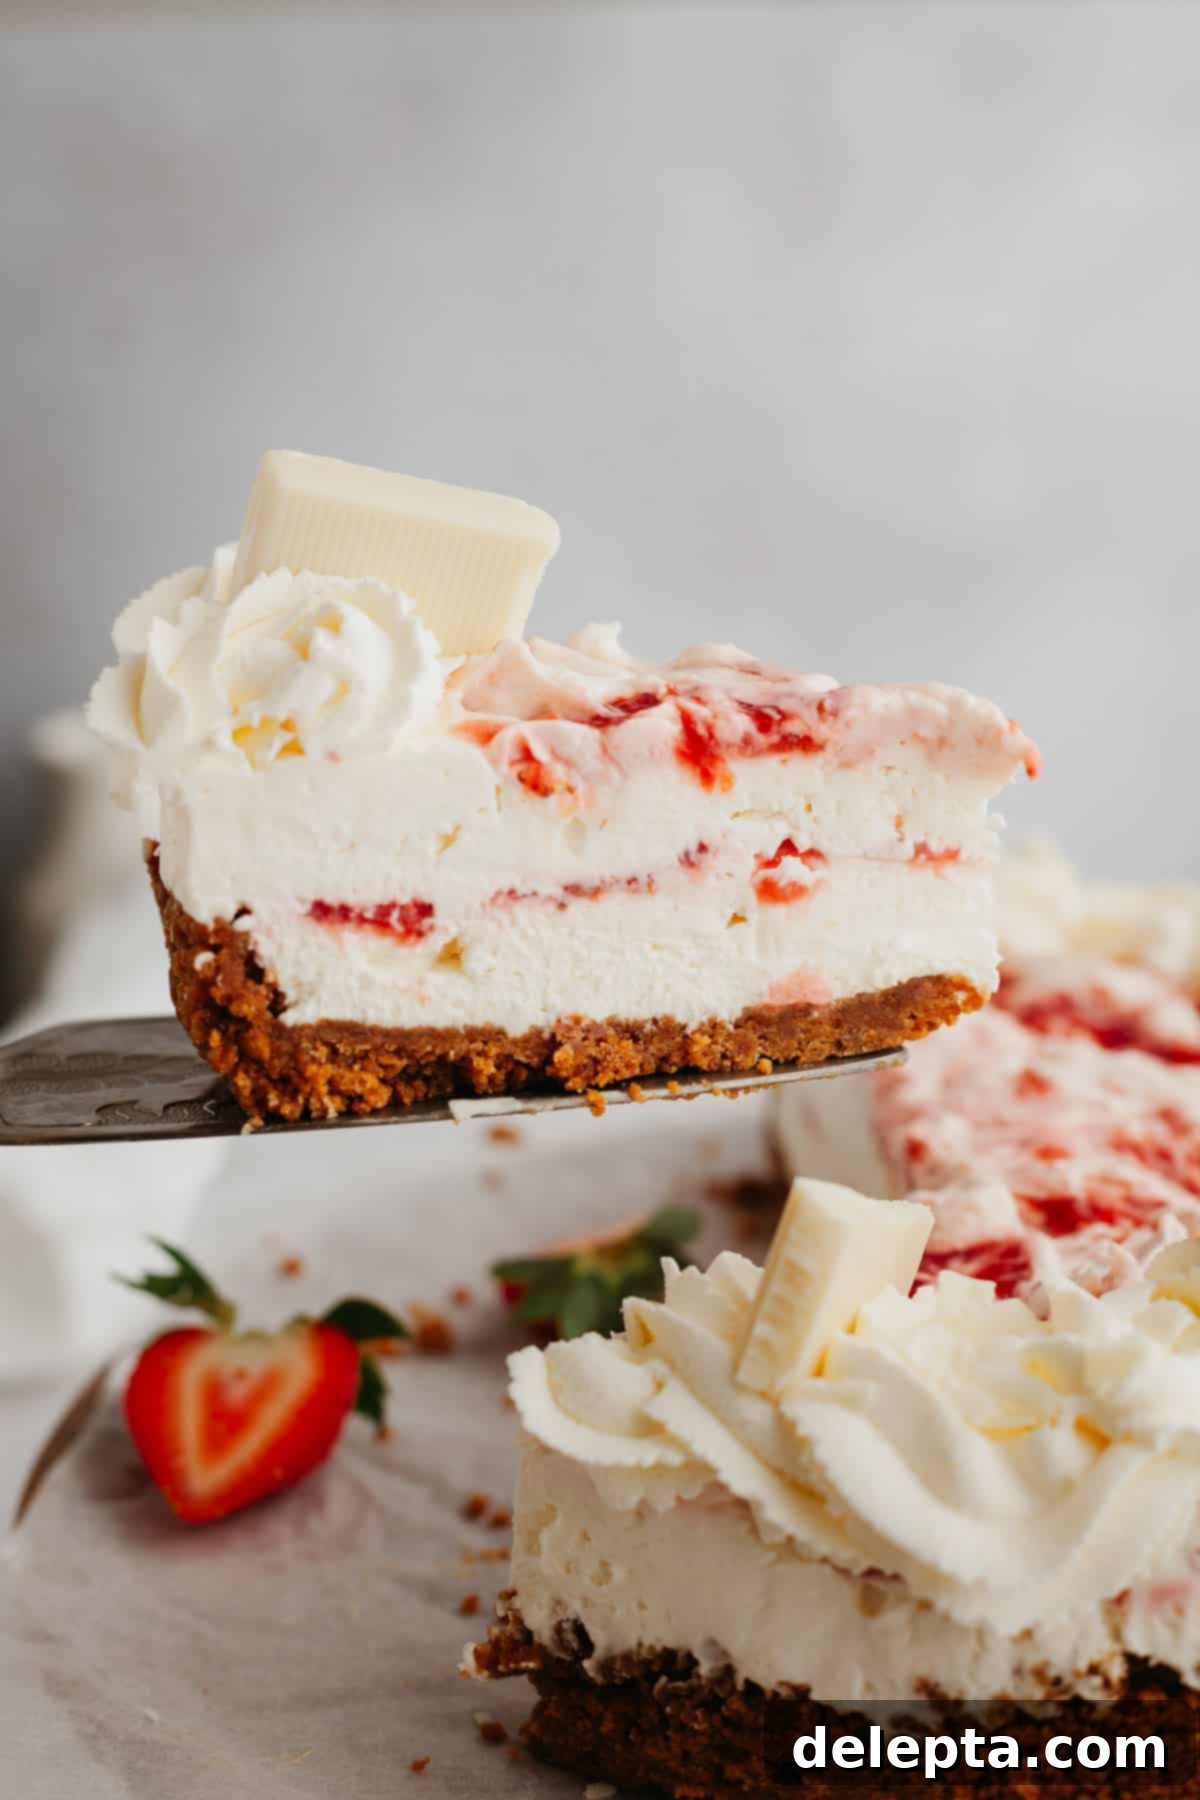
The next day, when you are ready to serve your magnificent no-bake strawberry and white chocolate cheesecake, carefully run a thin, sharp knife along the sides of the cheesecake and the inside rim of the springform pan. This helps to release the cheesecake cleanly from the pan. Then, gently unlatch and remove the sides of the springform pan. For a truly professional finish, decorate your chilled cheesecake with additional freshly whipped cream, vibrant fresh strawberry slices, and delicate pieces of white chocolate. This adds both visual appeal and an extra burst of flavor and texture.
Expert Tips & Tricks for a Flawless No-Bake Cheesecake
Achieve cheesecake perfection with these invaluable tips and tricks:
- Prioritize Chilling Time: This is arguably the most critical step for any no-bake cheesecake. While it might be tempting to cut corners, I’ve tested this recipe with just 6 hours of chilling, and the results were noticeably softer and harder to slice cleanly. For a truly set, beautifully firm, and elegant slice, I genuinely cannot overstate the importance of waiting at least 12 hours before serving. Overnight chilling is always the best option.
- Ensure Room Temperature Ingredients: The temperature of your cream cheese and sour cream is paramount for a smooth, lump-free cheesecake batter. Take them out of the refrigerator at least an hour before you plan to start mixing. This allows them to soften, making them easier to beat until creamy. Conversely, make sure your melted butter for the crust and your melted white chocolate for the filling are completely cool to the touch before adding them to their respective mixtures. Adding warm liquids can affect the texture and consistency of your cheesecake.
- Mastering Pan Removal: To ensure pristine, clean sides when removing your cheesecake from the springform pan, gently run a thin, sharp knife (or a small offset spatula) along the entire inner edge of the pan before unlatching the sides. This prevents the cheesecake from sticking and tearing as the pan expands.
- Achieve Perfectly Clean Slices: For bakery-worthy slices, always use a sharp, thin-bladed knife. The secret to an immaculate cut every time is to wipe the knife clean with a paper towel between *every single slice*. For an even smoother cut, briefly run your knife under hot water and then quickly wipe it dry with a paper towel before each slice. The warmth helps the knife glide through the cold cheesecake, preventing drag.
- Elevate with Piping: For a professional and elegant finish, piping fresh whipped cream along the sides or top of your cheesecake adds a beautiful decorative touch. I personally recommend using a Wilton 1M piping tip and a piping bag to create lovely swirls or rosettes. Alternatively, a simple dollop of whipped cream on each slice works wonderfully.
- Don’t Overmix the Whipped Cream: When incorporating the whipped cream into the cream cheese mixture, fold it gently. Overmixing can deflate the air, leading to a denser cheesecake. The goal is to keep the filling light and airy.
- Swirl with Care: When creating the strawberry swirls, use a light hand with your toothpick or skewer. Swirling too aggressively or too deeply can create air pockets within the cheesecake, which can affect its structure when sliced. Aim for elegant surface swirls rather than deep mixing.
Common Questions About This No-Bake Strawberry White Chocolate Cheesecake
Yes, absolutely! The recipe is quite adaptable. If you choose to use an 8-inch springform pan, your cheesecake will simply be taller and slightly thicker, resulting in more generous slices. Conversely, if you opt for a 10-inch pan, the cheesecake will be a bit thinner and wider, which might reduce the chilling time slightly, but the flavor will remain just as delicious. Keep in mind that for a 10-inch pan, you might want to increase the crust ingredients by about 25% to ensure adequate coverage.
Certainly! This recipe is wonderfully versatile, and you can easily customize the berry flavor to your preference or what’s in season. Feel free to swap out the strawberry jam or sauce for raspberry jam, blueberry jam, or even a mixed berry compote. Each will offer a delightful, unique twist to the white chocolate base. Ensure any alternative jam or sauce has a good consistency – not too watery – to maintain the cheesecake’s structure.
Yes, you can! If your preference is for a classic, plain no-bake cheesecake with strawberry swirls, simply omit the white chocolate from the recipe. The cheesecake will still set beautifully due to the heavy cream and cream cheese, though it will have a slightly less firm texture and a creamier, tangier flavor profile. You might consider adding an extra tablespoon or two of confectioners’ sugar if you prefer a sweeter, non-chocolate version, as white chocolate contributes significantly to the overall sweetness.
Absolutely! To make this no-bake cheesecake gluten-free, the easiest modification is to swap the Lotus Biscoff cookies for gluten-free graham crackers or a similar gluten-free cookie option for the crust. Ensure all other ingredients, like vanilla extract and chocolate, are certified gluten-free, although they typically are. The filling itself is naturally gluten-free.
The best way to prevent sticking is to line the bottom of your springform pan with a circle of parchment paper. Before assembling, lightly grease the sides of the pan with butter or non-stick spray (though this is less critical for no-bake). When it’s time to serve, running a thin, sharp knife around the edge of the cheesecake before releasing the springform collar will ensure a clean release every time.
Storage Solutions for Your Strawberry White Chocolate Cheesecake
Proper storage is essential to keep your delicious no-bake strawberry and white chocolate cheesecake fresh and delightful for as long as possible.
Once your cheesecake has fully set and been removed from the springform pan (or even if you leave it in the pan with the sides on), it should be stored in the refrigerator. Cover it tightly with plastic wrap or place it in an airtight container to prevent it from absorbing any unwanted odors from the fridge and to keep it from drying out. When stored correctly, this creamy no-bake cheesecake will maintain its excellent taste and texture for up to 5 days. It’s a fantastic make-ahead dessert, making it perfect for enjoying over several days or for serving at parties without last-minute stress. While some cheesecakes can be frozen, this particular recipe, due to its delicate, airy texture from the whipped cream, does not freeze well. Freezing can alter the consistency, making it icy and less creamy upon thawing. It’s best enjoyed fresh from the refrigerator within the recommended timeframe.
Expand Your Dessert Repertoire: More Cheesecake Delights!
If you loved this no-bake strawberry and white chocolate cheesecake, you’re sure to enjoy these other fantastic cheesecake creations:
- Pecan Pie Cheesecake
- No Bake Cheesecake with Mascarpone
- Apple Crisp Cheesecake
- Red Velvet Oreo Cheesecake (No Bake)
Have you made this delightful no-bake strawberry white chocolate cheesecake recipe? Please take a moment to rate it below! And don’t forget to share your creations and follow me on Instagram @alpineella and Pinterest! I absolutely love seeing what you bake!
Recipe Card: Strawberry and White Chocolate Cheesecake
Strawberry and White Chocolate No-Bake Cheesecake
Ella Gilbert
Pin Recipe
Save RecipeSaved!
Equipment
-
9″ springform pan
Ingredients
Cheesecake Crust
- 2 cups Lotus Biscoff cookies crushed into fine crumbs
- 7 tablespoons unsalted butter melted and cooled
Cheesecake Filling
- 2 cups heavy cream very cold (double cream in UK)
- 16 oz cream cheese full-fat, room temperature
- ¼ cup sour cream room temperature
- 1 cup confectioners’ sugar sifted
- 4 oz white chocolate good quality, melted and cooled
- 1 teaspoon vanilla extract
- ¾ cup strawberry sauce or high-quality strawberry jam
Whipped Cream Topping (Optional)
- 1 cup heavy cream cold, for topping
- 1-2 tablespoons confectioners’ sugar (optional, for sweetening whipped cream)
- Fresh strawberries and white chocolate shavings for garnish
Instructions
Crust Preparation
-
In a large mixing bowl, combine your finely crushed Lotus Biscoff cookie crumbs with the melted and cooled unsalted butter. Stir thoroughly until all the cookie crumbs are evenly moistened and there are no dry spots.2 cups Lotus Biscoff cookies, 7 tablespoons unsalted butter
-
Line the bottom of a 9-inch springform pan with parchment paper. Pour the prepared crust mixture into the pan. Use a rubber spatula or the flat bottom of a measuring cup to firmly press the crumbs into an even layer across the bottom and slightly up the sides of the pan. Place the pan in the freezer for 20 minutes to allow the crust to firm up.
Cheesecake Filling Assembly
-
In the bowl of a stand mixer fitted with the whisk attachment (or using a handheld electric mixer), whisk the very cold heavy cream on medium-high speed for approximately 3-5 minutes, until you achieve firm, stiff peaks. Be careful not to over-whip. Set the whipped cream aside.2 cups heavy cream
-
In another large bowl, preferably in a stand mixer fitted with the paddle attachment, beat the room-temperature full-fat cream cheese on medium speed for about 2-3 minutes until it is completely smooth and free of any lumps. Scrape down the sides of the bowl.16 oz cream cheese
-
Add the sifted confectioners’ sugar, cooled melted white chocolate, room-temperature sour cream, and vanilla extract to the cream cheese mixture. Beat on medium-high speed until all ingredients are well incorporated and the mixture is smooth and cohesive. Again, scrape the bowl as needed.¼ cup sour cream, 1 cup confectioners’ sugar, 4 oz white chocolate, 1 teaspoon vanilla extract
-
Using a rubber spatula, very gently fold the reserved whipped cream into the cheesecake mixture. Use an upward scooping motion to incorporate without deflating the cream. Continue folding until the mixture is completely combined, light, and airy.
-
Pour half of the cheesecake filling into your chilled Biscoff crust, spreading it evenly with a small offset spatula. Next, dollop half of the strawberry sauce (or jam) over this layer and gently spread it out. Pour the remaining cheesecake mixture on top and spread it smoothly. Finally, dollop the remaining strawberry sauce on the very top and use a toothpick or skewer to gently swirl the sauce into the cheesecake for a beautiful marbled effect.¾ cup strawberry sauce
-
Cover the springform pan tightly with plastic wrap and transfer it to the refrigerator. Chill for a minimum of 12 hours, or ideally, overnight, to allow the cheesecake to set completely. Once thoroughly chilled, run a thin knife along the inner edge of the pan before removing the springform sides for a clean release.
Optional Whipped Cream Topping & Garnish
-
Just before serving, place your cold heavy cream (and optional confectioners’ sugar for sweetness) in a medium mixing bowl. Use a handheld mixer or a stand mixer with the whisk attachment to whip the cream until it forms stiff peaks.1 cup heavy cream
-
Carefully transfer the whipped cream into a piping bag fitted with your desired tip (a Wilton 1M works beautifully for rosettes or borders). Pipe the fresh whipped cream along the sides or top of the cheesecake. Garnish with fresh strawberry slices, whole berries, and delicate white chocolate shavings for an exquisite finish. Slice and serve!
Notes
Heavy Cream: For those in the UK, “double cream” is the ideal substitute for heavy cream in this recipe. Ensure it’s very cold for optimal whipping.
Room Temperature: It is crucial that both the cream cheese and sour cream are at room temperature before you begin making this cheesecake. This ensures a perfectly smooth, lump-free filling.
Cream Cheese Consistency: If you are located in the UK, Europe, or any region where cream cheese is commonly sold in tubs, it generally has a higher moisture content compared to North American block cream cheese. To achieve the best texture for your cheesecake, simply place the cream cheese in a bowl and gently press a piece of kitchen paper (paper towel) on top to absorb any excess moisture before starting the recipe.
Strawberry Swirl Technique: The cheesecake filling is quite thick, which means when you create the strawberry swirls with a toothpick, it’s important to avoid pressing too far down. Swirling too deeply can create unsightly empty spaces or air pockets within the finished cheesecake, affecting its aesthetic appeal and slice integrity. Aim for beautiful surface patterns.
Storage: This white chocolate strawberry cheesecake should always be kept refrigerated. Store it in an airtight container or cover it tightly with plastic wrap to maintain its freshness and prevent it from drying out or absorbing other food odors. It will keep well in the fridge for up to 5 days. Please note that this particular recipe does not freeze well; the delicate texture can become compromised.
Nutrition Information
