Irresistible No-Bake Chocolate Peanut Butter Rice Krispie Treats with Crunchy Pretzels
Craving a delightful dessert that requires absolutely no oven time? Look no further than these incredibly easy and utterly delicious chocolate peanut butter rice krispie treats! This recipe delivers the ultimate sweet and salty satisfaction, combining the classic duo of chocolate and peanut butter with a satisfying crunch from crisp rice cereal and a delightful topping of salty mini pretzels. They are an absolute dream for anyone seeking a quick, fuss-free treat that’s ready in mere minutes and perfect for any time of day – whether it’s an after-school pick-me-up, a quick office snack, or a sweet ending to dinner. Best of all, they only take about 12 minutes to prepare, making them an ideal choice for busy schedules or spontaneous cravings.
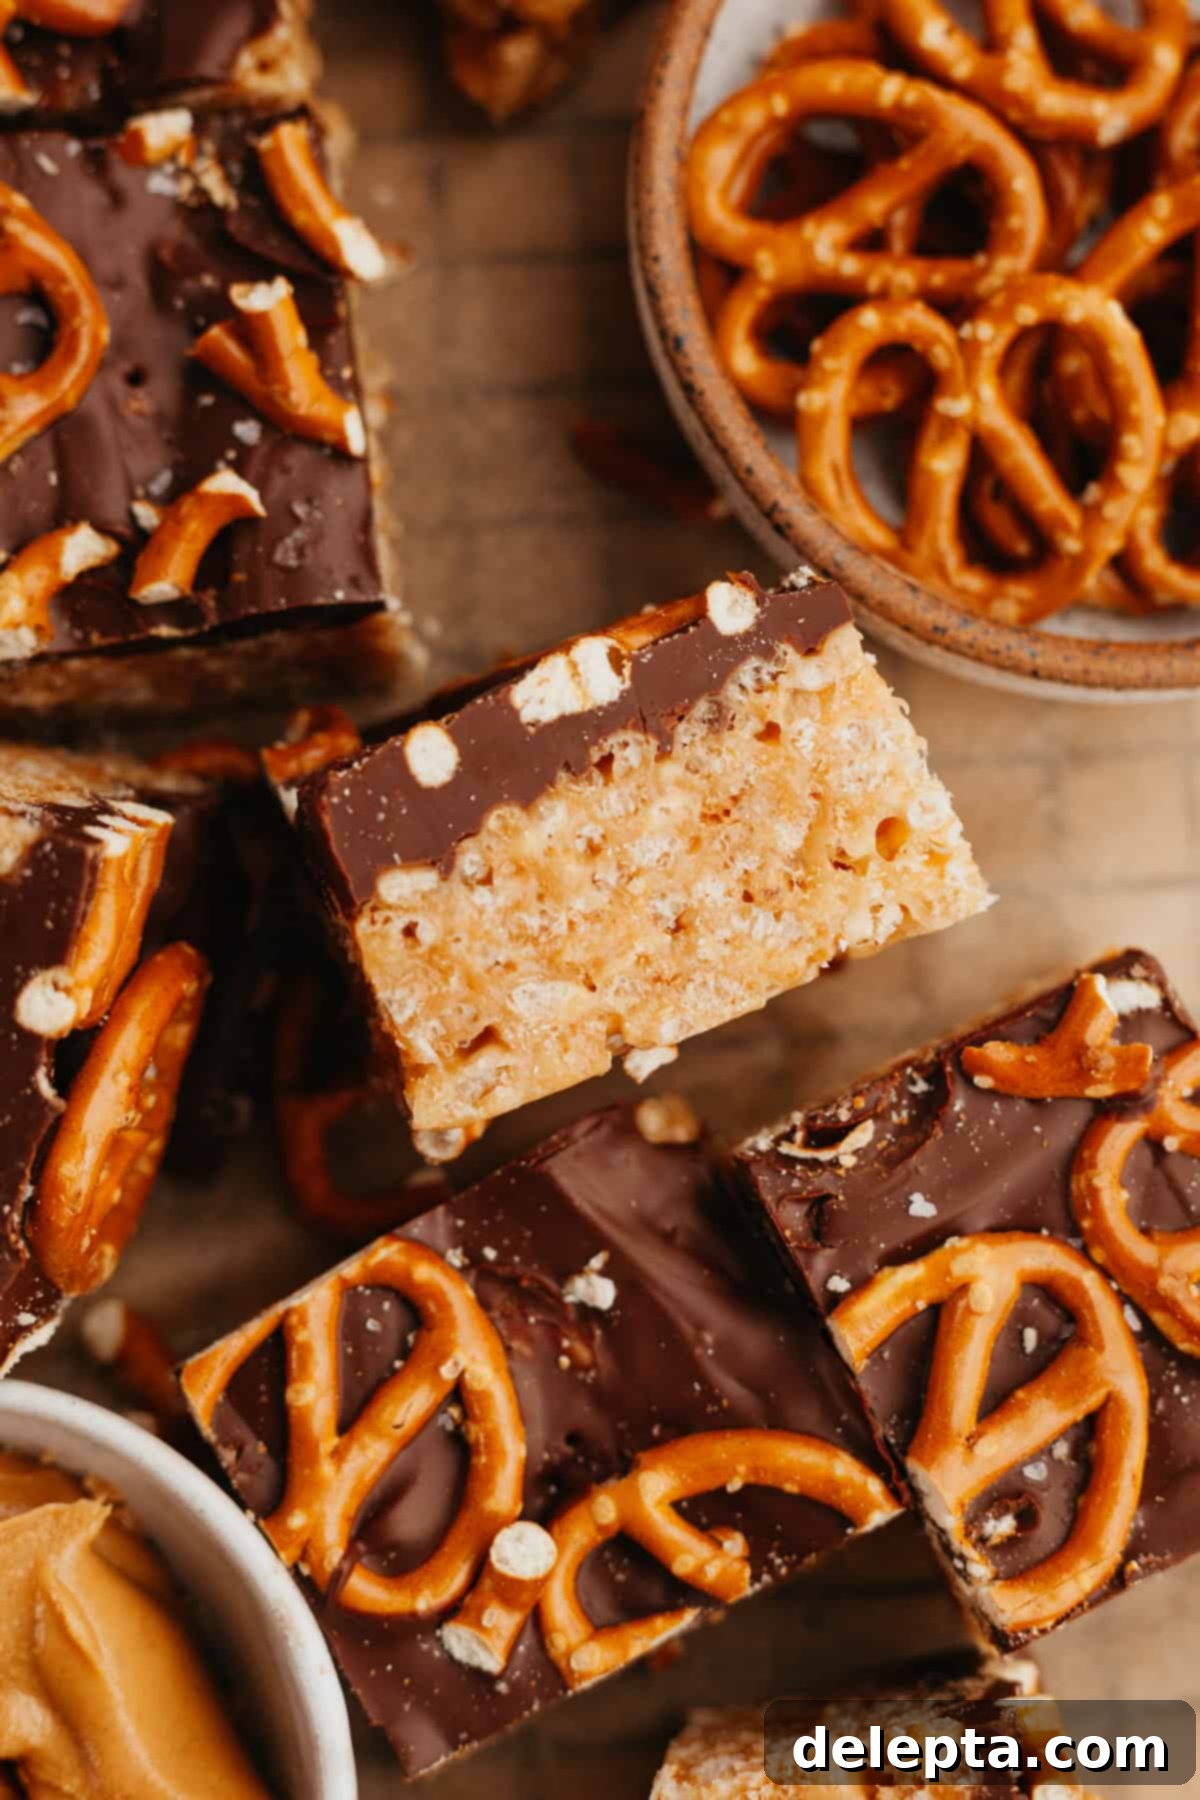
This beloved recipe was initially shared in July 2021 and has since been thoughtfully enhanced with improved techniques, secret ingredients, and fresh, mouth-watering photographs to ensure the very best experience for you. We’ve refined every detail to make these treats even more irresistible!
The timeless combination of chocolate and peanut butter reigns supreme for a reason. Its harmonious blend of rich sweetness and savory saltiness creates an unparalleled flavor profile that appeals to nearly everyone. For all the chocolate peanut butter aficionados out there, this recipe is specifically designed to be your new go-to. You simply won’t believe how incredibly easy it is to create such a show-stopping dessert that tastes like it came straight from a gourmet bakery!
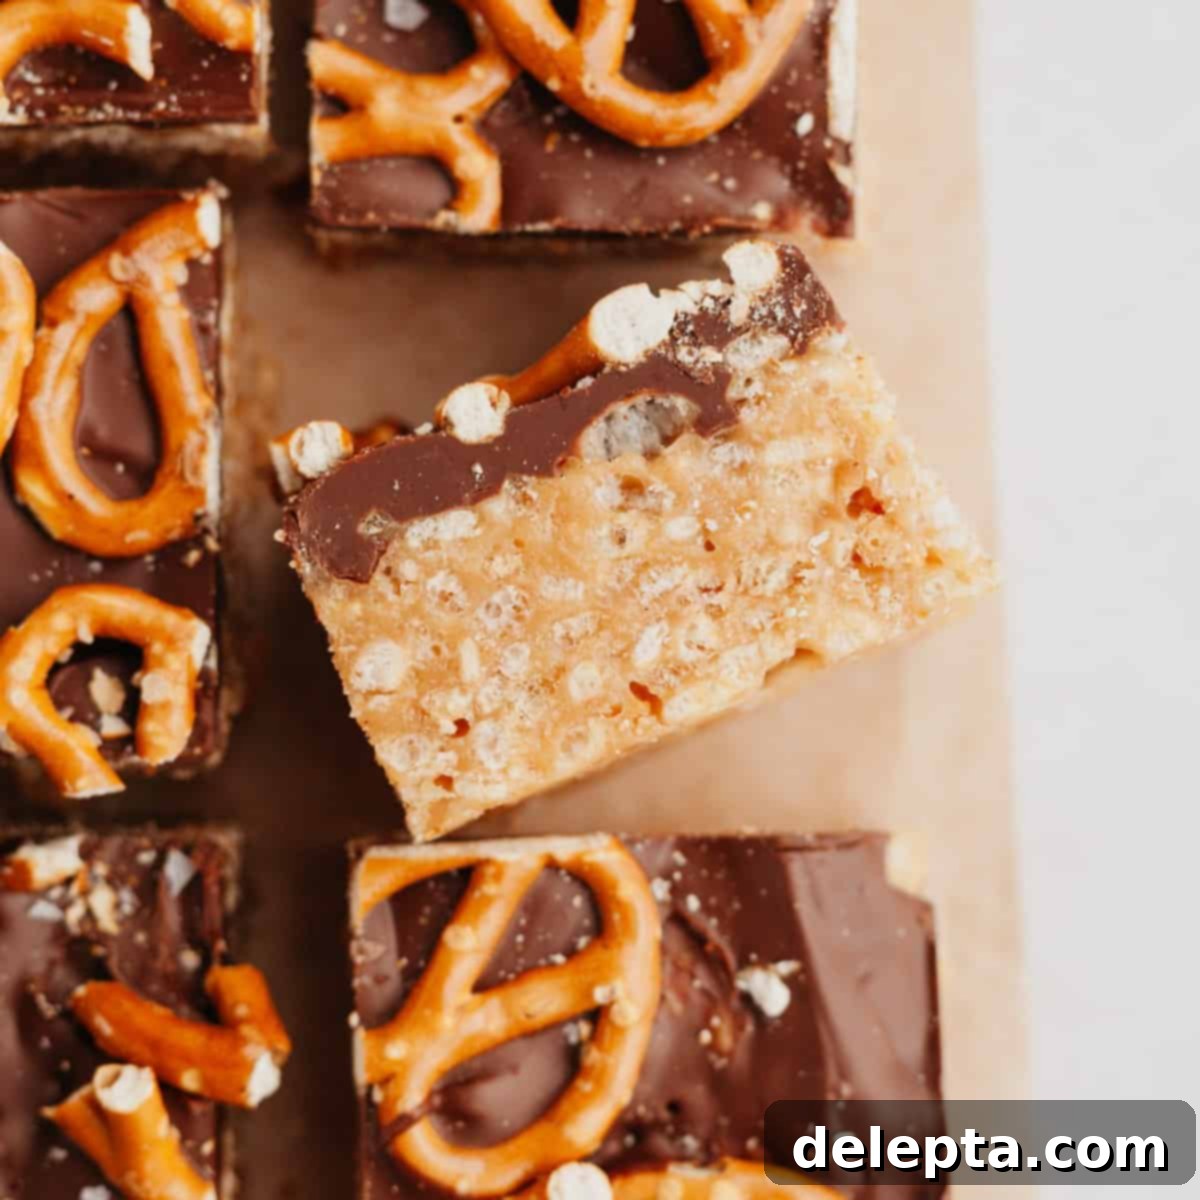
Drawing inspiration from my popular chocolate covered rice krispie treats, these chocolate peanut butter versions take indulgence to a whole new level of ooey-gooey goodness. Each bite features perfectly crisp rice cereal generously coated in a luscious, melted peanut butter marshmallow mixture, then crowned with a smooth layer of rich melted chocolate and a scattering of salty mini pretzels. The addition of the pretzels is truly a game-changer, adding an unexpected delightful crunch and enhancing that coveted sweet and salty contrast. It’s a fun, modern twist on a classic treat!
While these chocolate peanut butter rice krispie treats build upon the foundation of my existing recipes, I’ve incorporated a couple of special “secret ingredients” that truly elevate them. These additions ensure that your treats are not just good, but absolutely extraordinary, setting them apart from any other rice krispie recipe you’ve tried. Prepare for a flavor explosion!
If you’re a devout peanut butter enthusiast, be sure to explore more of my irresistible peanut butter creations. You simply must try my decadent Oreo Peanut Butter Pie, fudgy Brownies with Peanut Butter Cups, and my incredibly easy No-Bake Peanut Butter Fudge. Each recipe celebrates the rich, creamy, and utterly addictive flavor of peanut butter.
Why You’ll Adore This No-Bake Peanut Butter Chocolate Treat Recipe!
- Effortlessly Simple Recipe: Forget complex baking techniques or obscure ingredients! This recipe is a breeze to make, requiring just 11 common pantry staples. You’ll be amazed at how quickly you can whip up a batch of these extraordinary treats, even if you’re a complete novice in the kitchen. It’s perfect for those days when you want something homemade and delicious without a lengthy ingredient list or complicated steps.
- Unveiling Secret Ingredients: What makes these particular rice krispie treats stand out? It’s our two unique secret ingredients! These special additions are carefully chosen to significantly enhance the flavor profile and texture, transforming a simple classic into an unforgettable dessert. They amplify the rich, toasty notes and ensure an unparalleled gooeyness that will have everyone asking for your secret.
- The Perfect No-Bake Solution: When the weather is warm or you simply don’t want to heat up your kitchen, this no-bake recipe is your ultimate savior. It’s a fantastic alternative to traditional baked goods, allowing you to enjoy a homemade dessert without ever turning on the oven. Ideal for summer gatherings, quick desserts, or any time you need a sweet fix without the fuss.
- Versatile for Every Occasion: These classic treats are incredibly versatile and perfect for a wide array of occasions. Whether you’re preparing after-school snacks for hungry kids, contributing to a school bake sale, bringing a crowd-pleasing dessert to a potluck, or just need a satisfying bite after dinner, these chocolate peanut butter rice krispie treats are always a hit. Their universal appeal makes them suitable for celebrations, casual get-togethers, or simply enjoying at home.
Essential Ingredients for Your Chocolate Peanut Butter Rice Krispie Treats
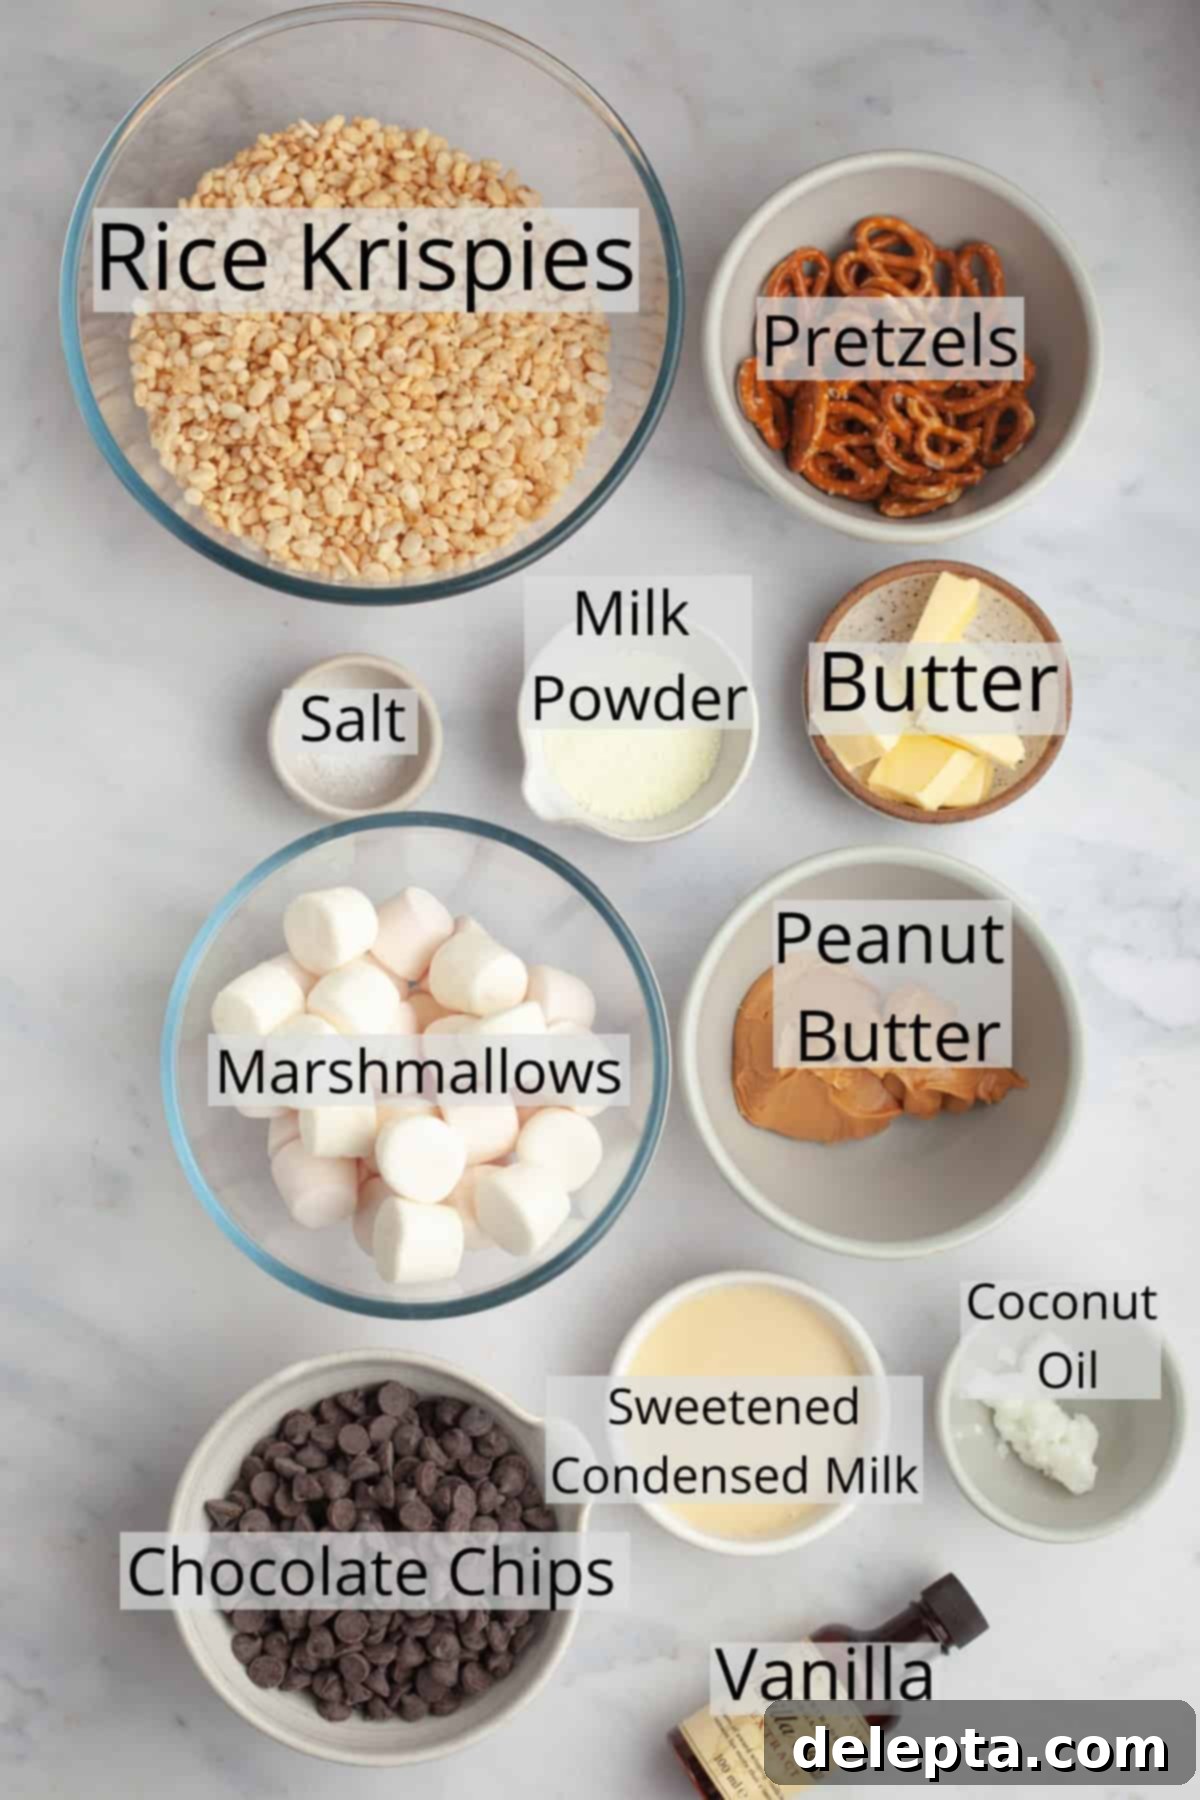
Gathering your ingredients is the first step towards creating these delectable treats. Here’s a breakdown of what you’ll need and why each component is crucial:
- Rice Krispies Cereal: The undisputed star of the show! This crispy puffed rice cereal provides that iconic texture we all know and love. Feel free to use either the well-known branded version or a generic store-brand equivalent – both will work perfectly to create the delightful crunch that defines these treats.
- Pretzels: My secret weapon for that irresistible sweet and salty kick! I highly recommend using mini salted pretzels. Their delightful snap and savory notes beautifully complement the richness of the chocolate and peanut butter, adding a fantastic textural contrast and enhancing the overall flavor profile.
- Marshmallows: These are essential for creating the gooey, sticky binder that holds everything together. You can use either regular-sized large marshmallows or mini marshmallows. If using mini marshmallows, they will melt slightly faster due to their smaller size. Ensure they are fresh for the best gooey results!
- Chocolate Chips: For the decadent topping, I typically opt for semisweet chocolate chips, as they offer a balanced sweetness that pairs wonderfully with the peanut butter. However, don’t hesitate to customize! Dark chocolate chips will provide a richer, less sweet experience, while milk chocolate chips offer a creamier, sweeter finish. You could even experiment with white chocolate chips, butterscotch chips, or for an extra peanut-y punch, peanut butter chips.
- Peanut Butter: The heart of the peanut butter flavor! For this recipe, I strongly advise using a smooth, creamy commercial peanut butter, such as Jif or Skippy. These types of peanut butter are stable and integrate seamlessly into the marshmallow mixture, contributing to the desired gooey texture. Natural peanut butter, with its separated oils and often thicker consistency, is not recommended as it can alter the texture of the treats, making them crumbly or greasy.
- Milk Powder (Our First Secret Ingredient!): This might seem unusual, but trust me, it’s a game-changer! Inspired by the brilliant King Arthur recipe, I discovered that adding milk powder to the butter while browning it significantly amplifies the deep, nutty notes of the brown butter. It acts as a powerful flavor enhancer, adding an incredible depth and complexity that elevates the entire treat. You can use either whole milk powder or non-fat milk powder.
- Sweetened Condensed Milk (Our Second Secret Ingredient!): Another unexpected but crucial addition! After seeing Jessie Sheehan’s clever use of it in her book, Snackable Bakes, I knew it belonged in my rice krispie treats. Not only does sweetened condensed milk impart an extra layer of rich sweetness, but more importantly, it makes these rice krispie squares incredibly much gooier and softer. This magical ingredient helps to keep your treats wonderfully pliable and fresh for days, preventing them from becoming hard and stale.
Exciting Substitutions & Creative Variations
Feel free to get creative with this recipe! While the core elements are fantastic as is, there are many ways to customize these chocolate peanut butter rice krispie treats to suit your taste or dietary needs:
- Milk Powder Alternatives: If you don’t have milk powder on hand, or prefer to omit it, that’s perfectly fine! The treats will still be delicious, though they might lack that extra layer of browned butter depth. You can use either whole milk powder or non-fat milk powder – both work effectively to enhance the flavor.
- Topping Innovations: The salted pretzels add an amazing crunch and salty balance, but the topping possibilities are endless! For a different flavor profile, consider adding chopped up mini peanut butter cups for an extra dose of peanut butter goodness. M&Ms, Reese’s Pieces, chopped candy bars, a sprinkle of flaky sea salt, or even colorful sprinkles can also make fantastic additions. Get creative and use your favorite toppings!
- Sweetened Condensed Milk vs. Evaporated Milk: This is a crucial distinction! Always ensure you are using sweetened condensed milk, which is thick and sweet, and not evaporated milk. Evaporated milk is unsweetened and much thinner, and will not provide the same gooey texture or sweetness that is essential for this recipe.
- Nut Butter Swaps: While the recipe is designed for smooth commercial peanut butter, if you have a nut allergy or prefer a different flavor, you can try other commercial nut butters like almond butter or cashew butter. Although I haven’t personally tested these variations, the smooth, stable consistency of commercial nut butters should yield similar results. Avoid natural nut butters that separate, as their texture can interfere with the setting of the treats.
- Chocolate Varieties: As mentioned, feel free to swap semisweet chocolate for dark, milk, or even white chocolate. Each will give a unique twist to the chocolate topping.
Effortless Step-by-Step Instructions
Making these gourmet rice krispie treats is incredibly simple! Just follow these easy steps for perfect results every time.
Step One: Prepare the Brown Butter Base
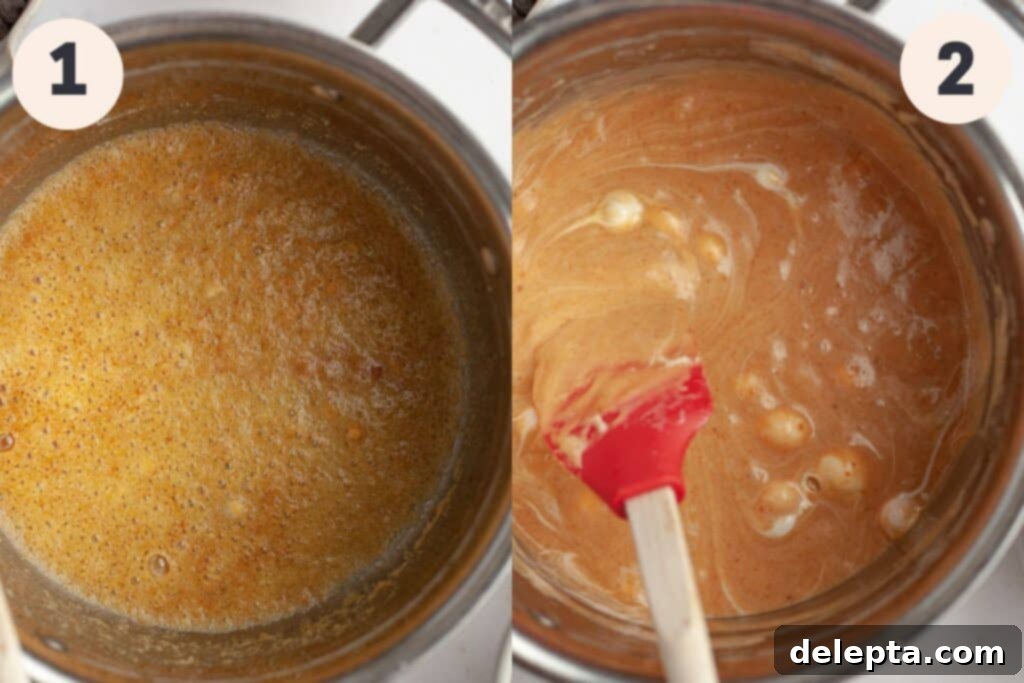
Begin by placing a medium or large heavy-bottomed pot or saucepan on your stove over medium-low heat. Add the unsalted butter and allow it to melt completely. Once melted, stir in the milk powder. Continue to cook, stirring constantly, until the butter begins to brown. You’ll notice small, golden-brown flecks forming at the bottom of the pot, and a wonderfully nutty, toasted aroma will fill your kitchen. This browning process develops an incredible depth of flavor.
Step Two: Create the Gooey Marshmallow Mixture
With the browned butter ready, immediately add the marshmallows, creamy peanut butter, sweetened condensed milk, kosher salt, and vanilla extract to the pot. Reduce the heat to low and stir continuously until all the marshmallows have completely melted and the entire mixture is smooth, homogenous, and beautifully combined. It should be warm, thick, and very gooey. Ensure the heat remains low to prevent burning the marshmallows.
Step Three: Combine with Rice Krispies
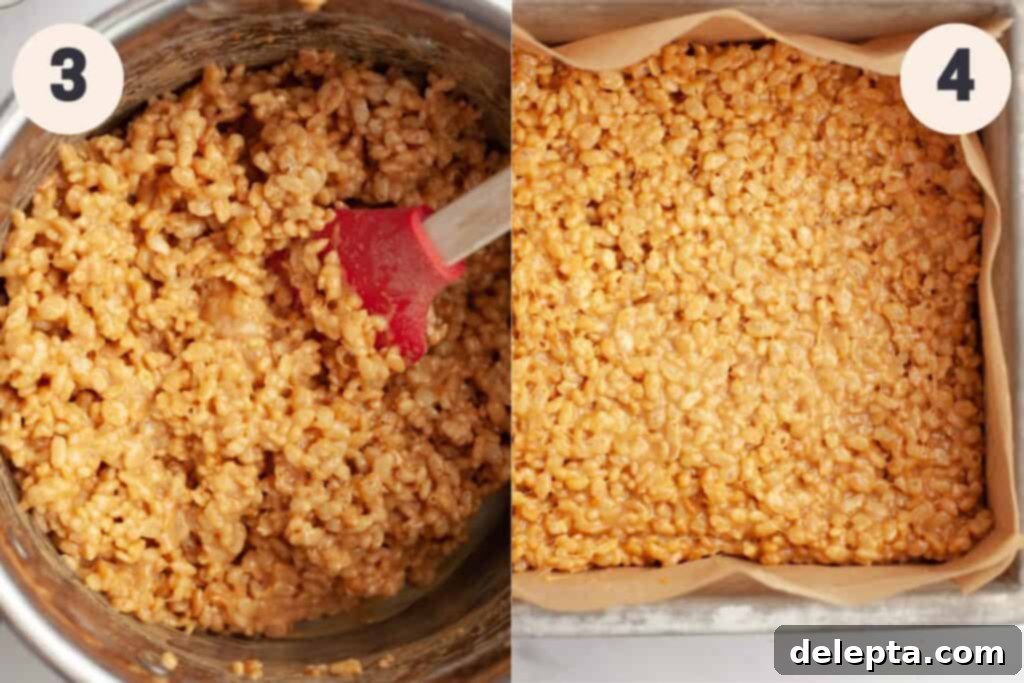
Remove the pot from the heat immediately. Pour the crisp rice cereal directly into the warm marshmallow mixture. Using a sturdy rubber spatula, gently fold and stir the cereal until it is evenly coated with the gooey mixture. Work quickly but gently to avoid crushing the cereal, which could result in a denser, harder treat. The goal is to ensure every piece of cereal is covered without overmixing.
Step Four: Press into the Pan
Transfer the peanut butter rice krispie mixture into an 8×8-inch square pan that has been meticulously lined with parchment paper. Ensure the parchment paper overhangs the sides of the pan, as this will create “handles” for easy removal of the set treats later. Use your rubber spatula, or even lightly greased fingertips, to gently press the mixture into an even layer across the bottom of the pan. Remember: press lightly! Over-compacting the cereal will result in tough, hard treats rather than delightfully chewy ones.
Step Five: Prepare the Chocolate Topping
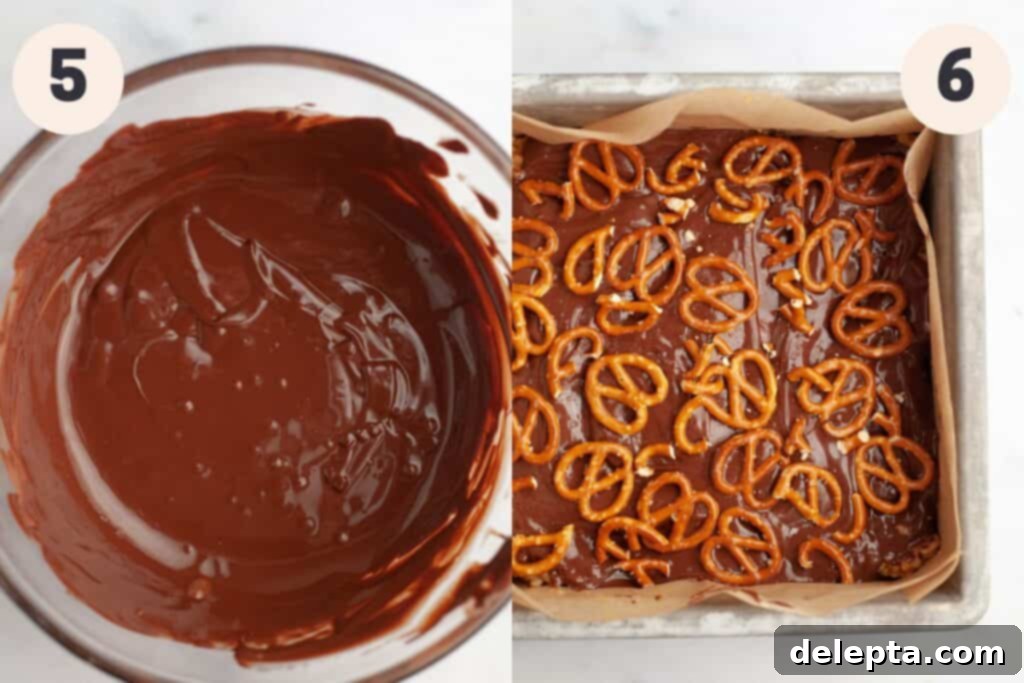
In a microwave-safe bowl, combine your chocolate chips with the coconut oil. Microwave the mixture in short bursts of 15-20 seconds. After each burst, remove the bowl and stir vigorously with a spoon. This method ensures that the chocolate melts smoothly and prevents it from scorching or seizing. Continue this process until the chocolate is completely melted and beautifully smooth and glossy.
Step Six: Top and Set
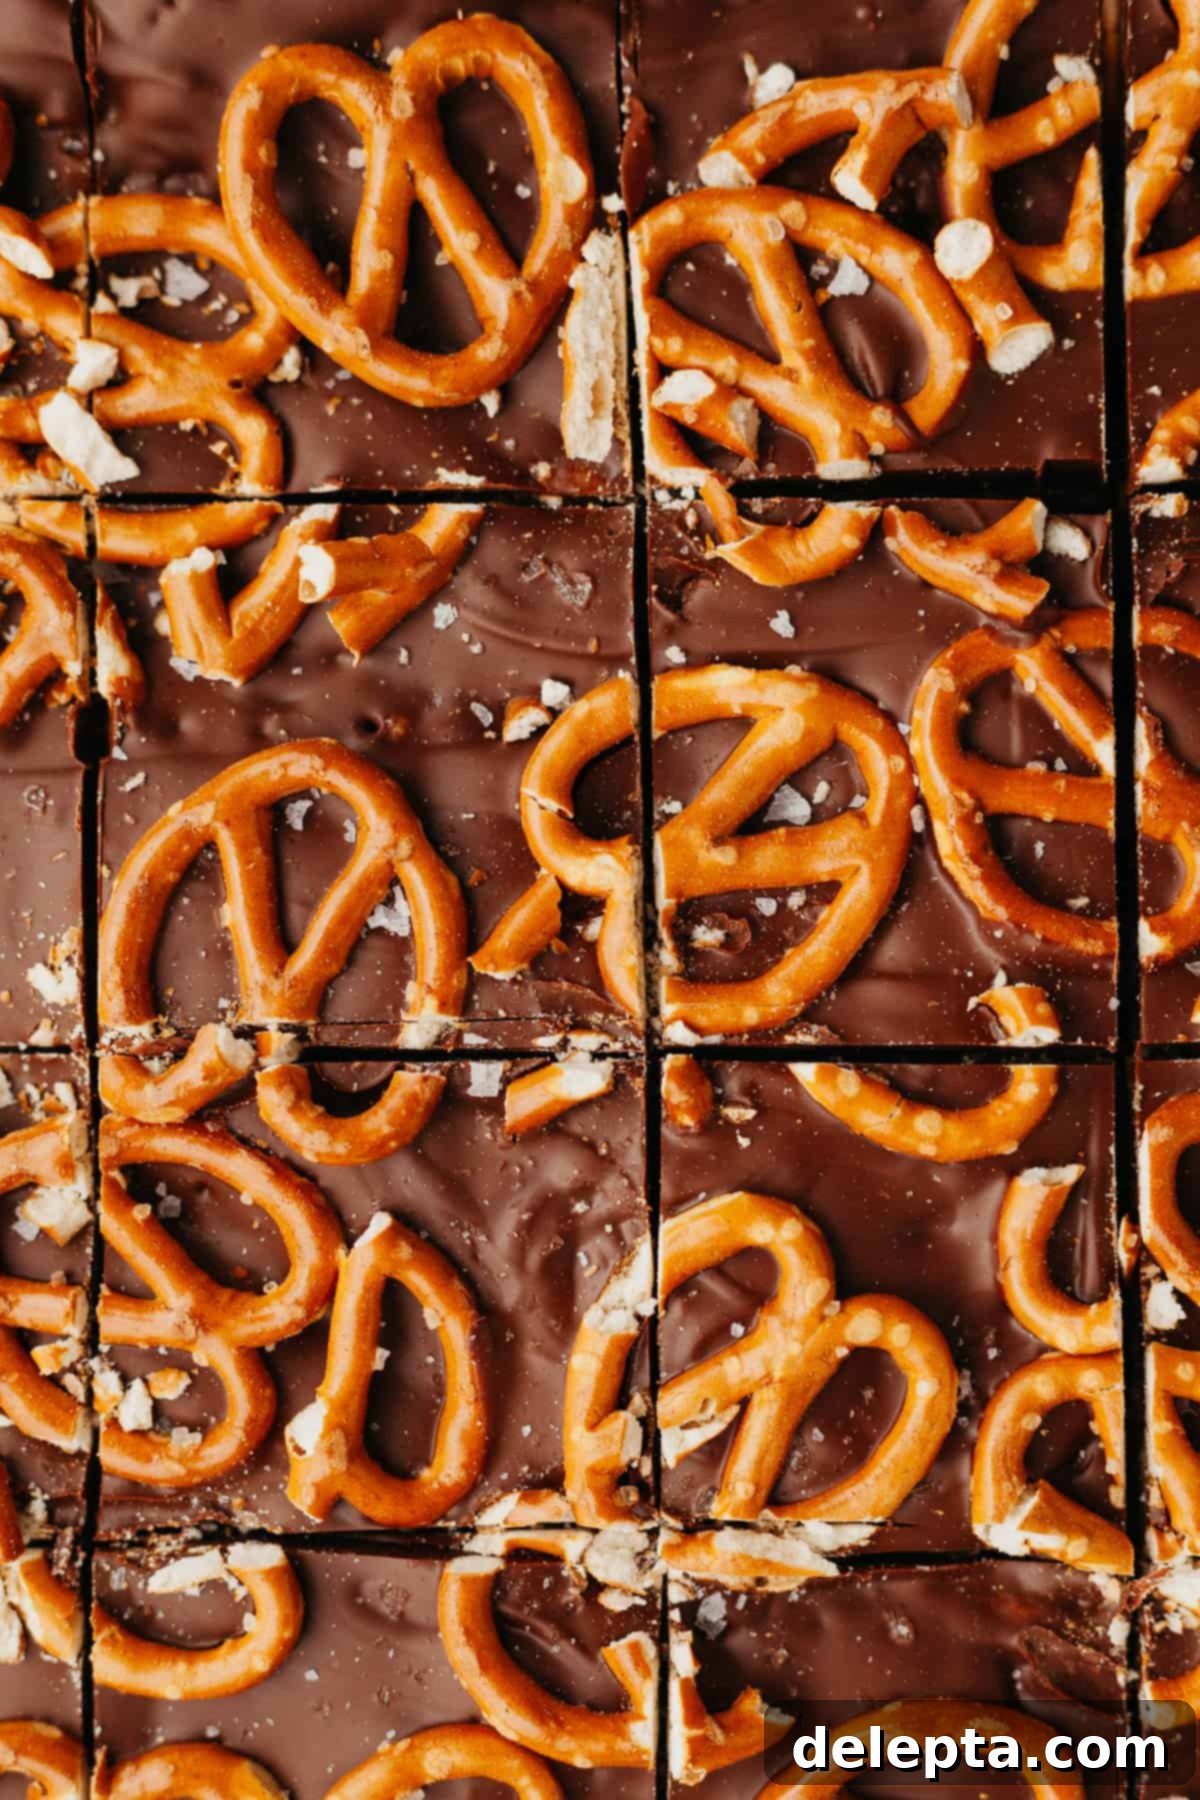
Pour the freshly melted chocolate topping evenly over the pressed rice krispie mixture in the pan. Use an offset spatula or the back of a spoon to spread the chocolate from edge to edge. Now for the fun part: decorate with your chosen toppings! I adore adding crunchy pretzels for that salty contrast, but you could also sprinkle with flaky sea salt, colorful sprinkles, or chopped mini peanut butter cups. Once topped, allow the treats to sit at room temperature for at least 2 hours to set completely, or place them in the refrigerator for about 1 hour to speed up the setting process before cutting into squares.
Expert Tips & Tricks for Perfection
Achieve the perfect chocolate peanut butter rice krispie treats every time with these valuable insights:
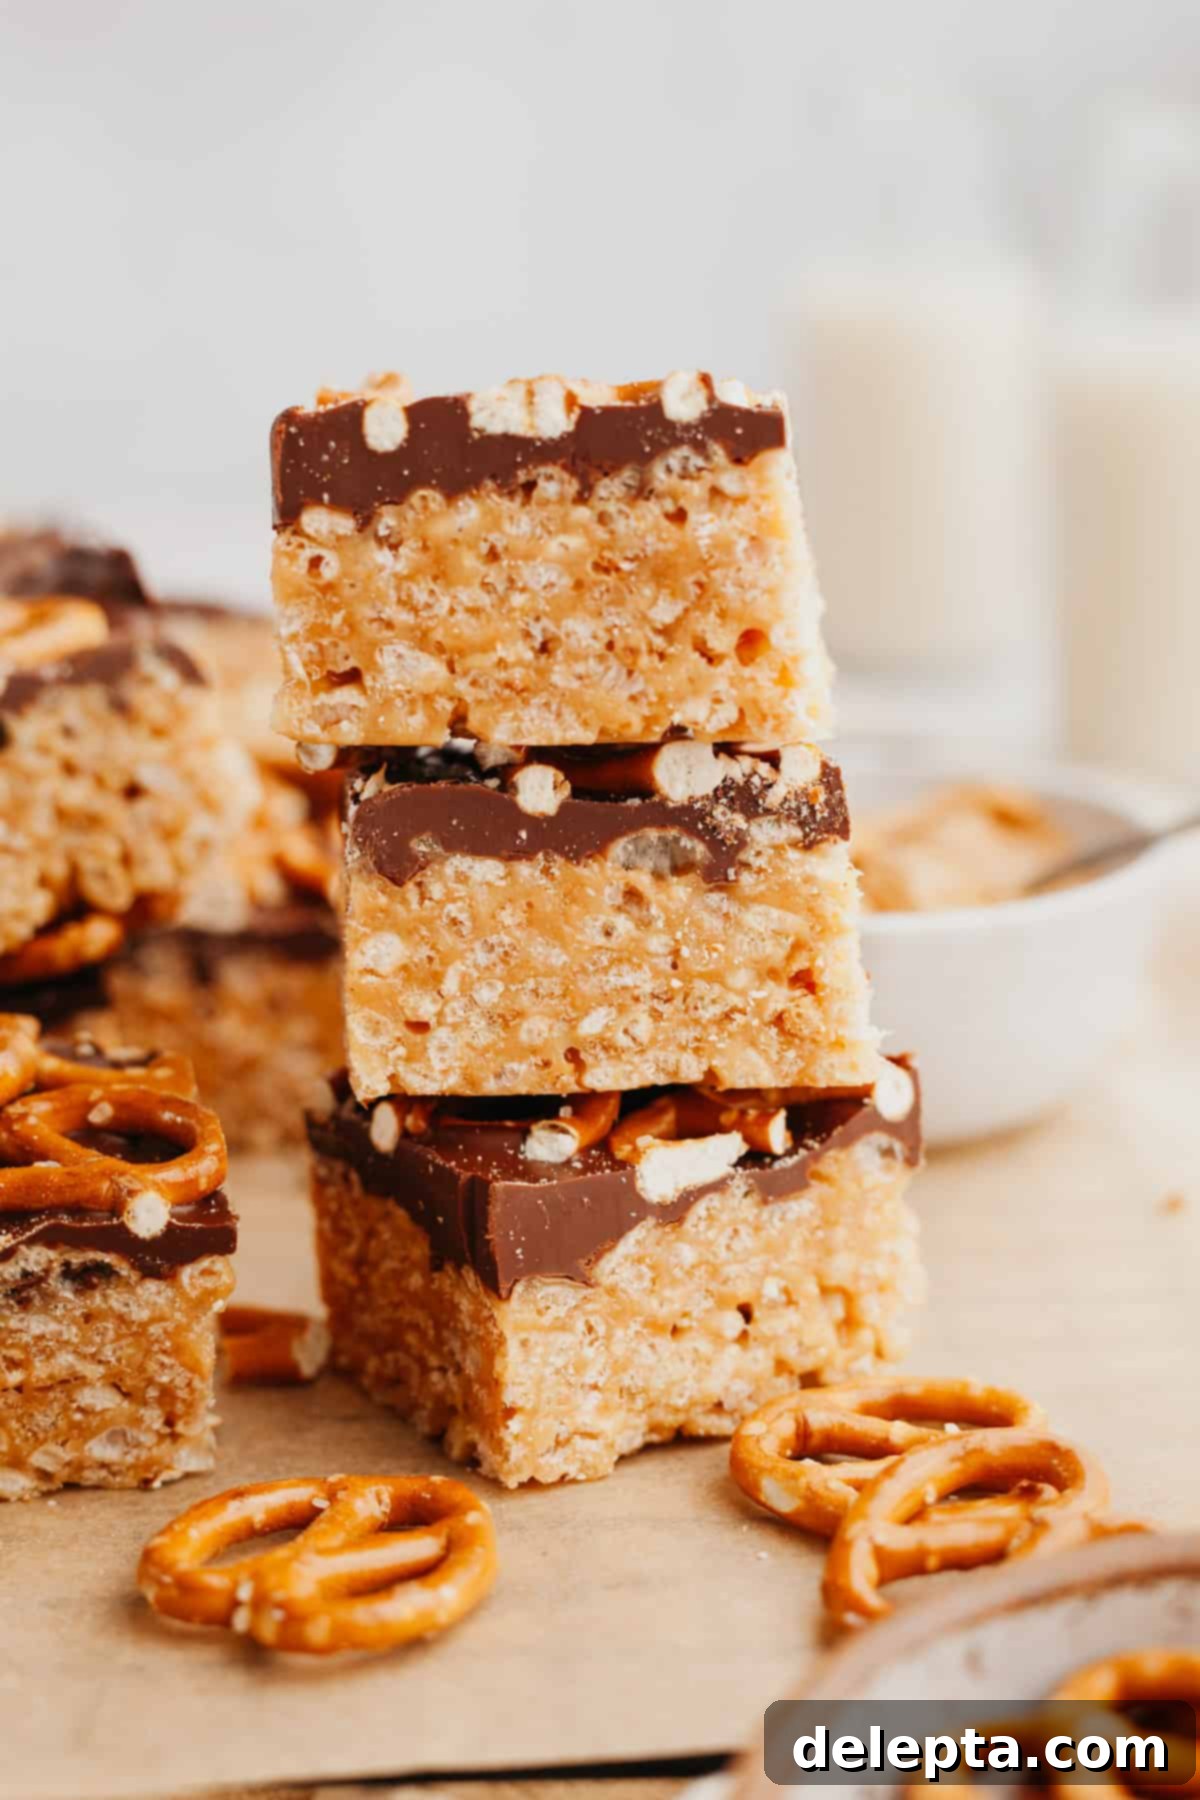
- Maximize Softness and Gooeyness: The secret to keeping these treats wonderfully soft and gooey for days lies in two key factors: always use fresh marshmallows (stale ones won’t melt properly) and, most importantly, incorporate the sweetened condensed milk. This magical ingredient ensures your treats remain delightfully tender and chewy, avoiding the dreaded hard and crunchy texture that often plagues older rice krispie treats.
- Master the Heat Control: When browning the butter and melting the marshmallow mixture, consistently maintain a medium-low heat. This gentle temperature is crucial to prevent the butter from burning (which can impart a bitter flavor) and ensures the marshmallows melt slowly and evenly without scorching. Patience here pays off in a superior flavor and texture.
- Speed Up Setting Time: If you’re eager to enjoy your treats sooner, simply place the pan of chocolate peanut butter rice krispie squares in the refrigerator. Chilling them will help the chocolate topping set much faster, allowing you to cut and serve in about an hour.
- Chocolate Customization: While semisweet chocolate chips offer a balanced flavor, don’t hesitate to experiment! Swap them out for dark chocolate for a more intense cocoa flavor, milk chocolate for extra sweetness, or even white chocolate for a creamier, milder profile. The choice is yours to tailor to your preference.
- Topping Versatility: The pretzels add a fantastic salty crunch, but they are entirely optional. If you prefer your treats plain, or want to try another topping, feel free to leave them out or substitute them with other favorites like flaky sea salt, sprinkles, or chopped mini peanut butter cups.
- Choose the Right Peanut Butter: For the best results, stick with a smooth, commercial-style peanut butter (like Jif or Skippy). These brands have a consistent texture and emulsified oils that integrate seamlessly into the marshmallow mixture. Natural peanut butter, which often separates and can be thicker, is generally not recommended as it can make the treats dry or crumbly.
- Don’t Over-Press the Cereal: When pressing the cereal mixture into the pan, be gentle. Applying too much pressure will compact the cereal, resulting in a dense, hard treat instead of a light, chewy one. A gentle, even pat is all that’s needed.
Frequently Asked Questions About This Recipe
The absolute key to achieving the perfect, smooth, and gooey texture in this recipe is to use a creamy, commercial-style peanut butter. Brands like Jif or Skippy are ideal. Avoid using natural peanut butter, as its tendency to separate oils can lead to a less desirable, often crumbly or greasy texture in the final treats.
Absolutely not! When you’re patting the cereal mixture into your prepared pan, it’s crucial to be very gentle. If you press too hard, you’ll compress the delicate rice cereal, which will result in a hard and overly crunchy bar instead of the wonderfully chewy, marshmallowy treat we’re aiming for. A light, even pat is sufficient.
For the best results and to ensure the chocolate topping is fully set, I recommend letting your treats sit at room temperature for a minimum of 2 hours before cutting into squares. If you’re short on time and want to speed up the process, you can place the pan in the refrigerator for about 1 hour.
Yes, absolutely! This recipe scales up beautifully. To double the batch, simply double all the ingredient quantities listed in the recipe card. You’ll then want to pour the larger mixture into a standard 9×13-inch baking pan, which is perfect for bigger gatherings or when you need more servings.
While I haven’t personally tested other nut butters, if you choose to use a commercial variety of almond butter or cashew butter (meaning, one that is smooth and stable, without separated oils, similar to Jif or Skippy), it should work as a substitute. Be mindful that natural nut butters with oil separation are not recommended as they can negatively impact the treat’s texture.
Storing Your Delicious Treats
To keep your chocolate peanut butter rice krispie treats fresh, soft, and delightful, it’s crucial to store them properly. After they have fully set and been cut into individual bars, transfer them to an airtight container. Keep the container at room temperature. Stored this way, these delicious treats will remain wonderfully soft and enjoyable for up to 4 to 5 days. I do not recommend freezing them, as the freezing and thawing process can significantly alter their desirable chewy texture, often making them crumbly or hard.
Explore More Delicious Recipes!
If you loved these chocolate peanut butter treats, you’ll surely enjoy these other sweet creations:
- Light & Fluffy Marshmallow Meringue Frosting
- Decadent Brown Butter Pumpkin Pie with Gingersnap Crust
- Cozy Pumpkin Spice Cupcakes with Marshmallow Frosting
- Aromatic Maple Espresso Glaze Icing
Have you made this incredibly easy and delicious recipe? Please share your experience and rate the recipe below! Don’t forget to connect with me on Instagram @alpineella and Pinterest. I absolutely love seeing your culinary creations!
Recipe

Gooey Chocolate Peanut Butter Rice Krispie Treats with Salty Pretzels
Ella Gilbert
Pin Recipe
Save RecipeSaved!
Equipment
-
8×8 inch baking pan
-
Large saucepan or pot
-
Rubber spatula
Ingredients
- 4 ½ cups rice krispies cereal
- ½ stick unsalted butter (4 tablespoons)
- 2 tablespoons milk powder (whole or non-fat)
- ¼ cup sweetened condensed milk
- 10 ounces marshmallows (mini or regular)
- ½ cup creamy peanut butter (like Jif or Skippy)
- ½ teaspoon kosher salt
- ¼ teaspoon vanilla extract
- 1 ½ cups semisweet chocolate chips (or your preferred type of chocolate)
- 2 teaspoons coconut oil (optional, for smoother chocolate)
- ¾ cup mini pretzels chopped (or whole, for topping)
Instructions
-
Prepare your baking pan: Line an 8×8 inch square baking pan with parchment paper. Make sure to leave an overhang on all sides; these will serve as convenient handles to easily lift the set rice krispie treats out of the pan later.
-
Brown the butter with milk powder: Place a large saucepan on the stove over medium-low heat. Add the unsalted butter and allow it to melt completely. Once melted, stir in the milk powder. Continue to cook, stirring constantly with a spatula, until the butter begins to brown and small, fragrant brown flecks appear at the bottom of the pan. This process enhances the flavor immensely.½ stick unsalted butter, 2 tablespoons milk powder
-
Melt marshmallows and peanut butter: Add the marshmallows, sweetened condensed milk, creamy peanut butter, kosher salt, and vanilla extract to the browned butter mixture. Stir everything continuously over low heat until the marshmallows have completely melted and all ingredients are smoothly combined into a luscious, gooey base. This should take approximately 3 minutes; ensure you keep the heat low to prevent scorching.¼ cup sweetened condensed milk, 10 ounces marshmallows, ½ cup peanut butter, ½ teaspoon kosher salt, ¼ teaspoon vanilla extract
-
Combine with cereal: Remove the saucepan from the heat. Pour the rice krispies cereal directly into the warm marshmallow mixture. Use a rubber spatula to gently fold and stir the cereal until it is thoroughly and evenly coated. Be careful not to overmix or press too hard, which can crush the cereal and result in tough treats.4 ½ cups rice krispies cereal
-
Press into pan: Pour the entire peanut butter rice krispie mixture into your prepared 8×8-inch pan. Using an offset spatula or lightly greased fingertips, gently press the mixture down into an even layer. Remember, a light touch is key to maintaining a chewy, soft texture.
-
Melt and spread chocolate topping: In a separate microwave-safe bowl, combine the semisweet chocolate chips with the coconut oil. Microwave in short bursts, typically 15 seconds at a time, stirring thoroughly after each interval to prevent burning. Continue until the chocolate is completely smooth and glossy. Pour this melted chocolate mixture over the pressed rice krispie treats and use an offset spatula to spread it evenly across the surface.1 ½ cups semisweet chocolate chips, 2 teaspoons coconut oil
-
Add toppings and set: Immediately scatter the chopped mini pretzels over the melted chocolate topping. You can arrange them neatly for 1 pretzel per bar, or sprinkle them haphazardly for a more rustic, “undone” look. Allow the treats to set at room temperature for at least 2 hours, or place them in the fridge for about 1 hour to speed up the setting process.¾ cup mini pretzels
-
Slice and serve: Once fully set, use the parchment paper overhang to lift the entire slab of treats out of the pan. Place on a cutting board and cut into 16 even squares. Enjoy your homemade, irresistible chocolate peanut butter rice krispie treats!
Recipe Notes
Marshmallows: You have flexibility here – both regular-sized large marshmallows or smaller mini marshmallows will work perfectly. If you’re looking for an alternative with marshmallow fluff, be sure to check out my specialized recipe for rice krispie treats with marshmallow fluff!
Peanut Butter: For this recipe, I specifically use and recommend a creamy, commercial-style peanut butter, such as Jif or Skippy, for optimal texture and consistency. If you happen to be using salted peanut butter, you might want to slightly reduce or completely omit the added kosher salt in the main recipe to maintain the flavor balance.
Salt: If you don’t have kosher salt available, you can use fine table salt. However, fine salt is much denser than kosher salt, so you should halve the amount called for in the recipe (e.g., ½ teaspoon kosher salt equals ¼ teaspoon fine salt).
Storage: Once your treats are sliced into 16 bars, store them in an airtight container at room temperature. They will maintain their soft, chewy texture and freshness for up to 5 days. Freezing these treats is not recommended, as it can adversely alter their delightful texture upon thawing.
This recipe was originally published in July 2021 and has been significantly updated with new step-by-step photos, enhanced instructions, and revised ingredient recommendations to ensure the best possible results.
Please note: My recipes are meticulously developed and tested using metric measurements (grams) for precision. I highly recommend using a kitchen weighing scale for the most accurate results. While US customary cup conversions are provided, I haven’t specifically tested the recipe using these volumetric measurements, so results may vary slightly.
Nutrition Information
