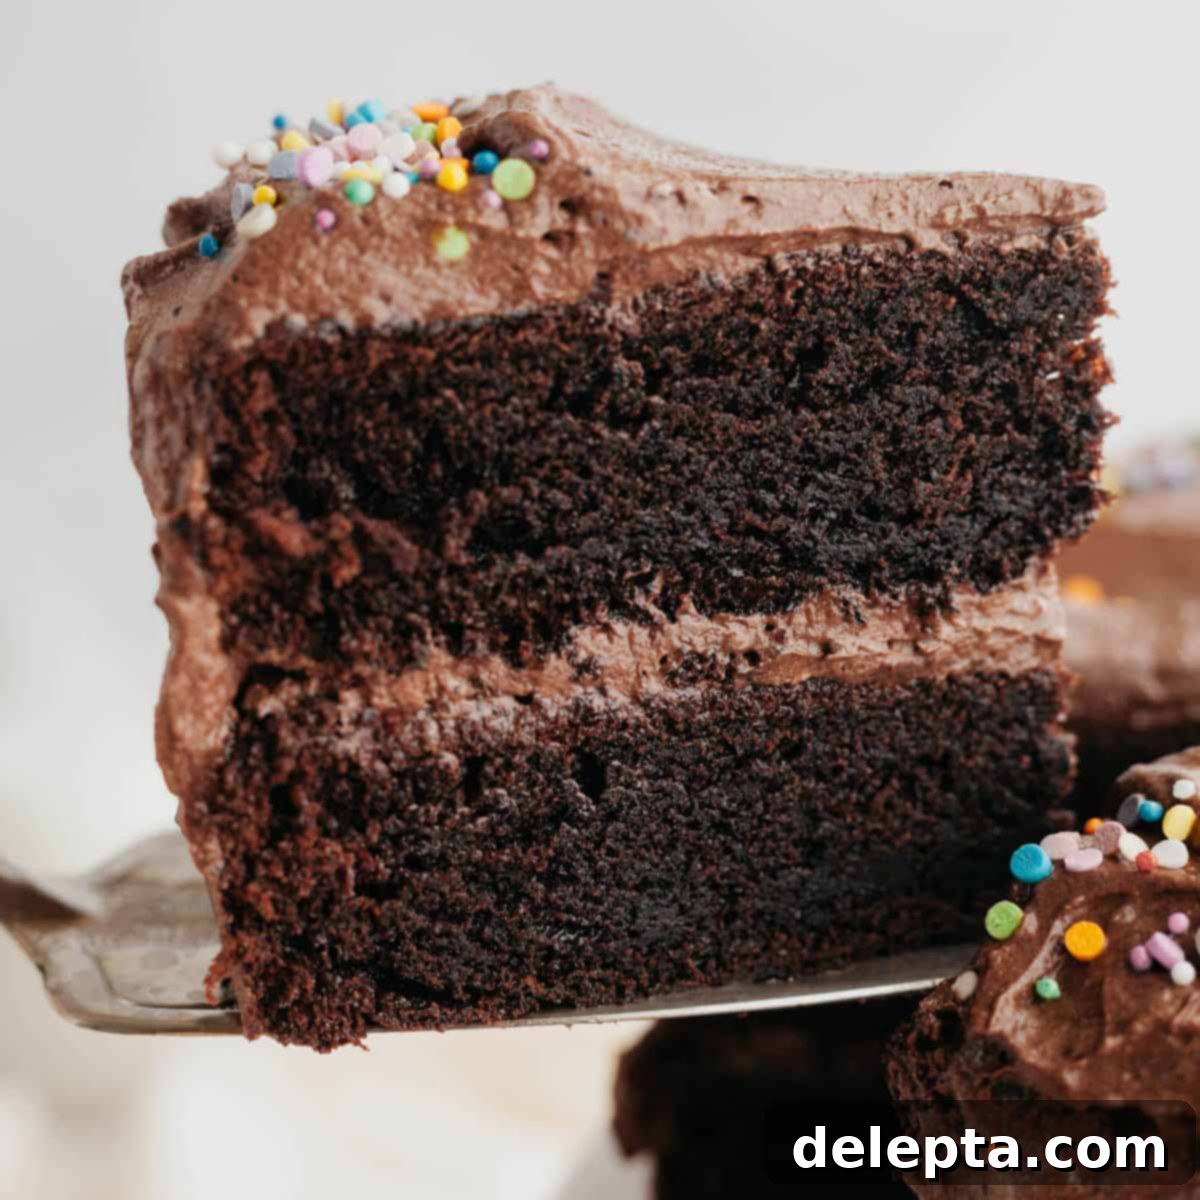
Decadent Moist Chocolate Cake with Tangy Cream Cheese Frosting: The Ultimate Celebration Recipe
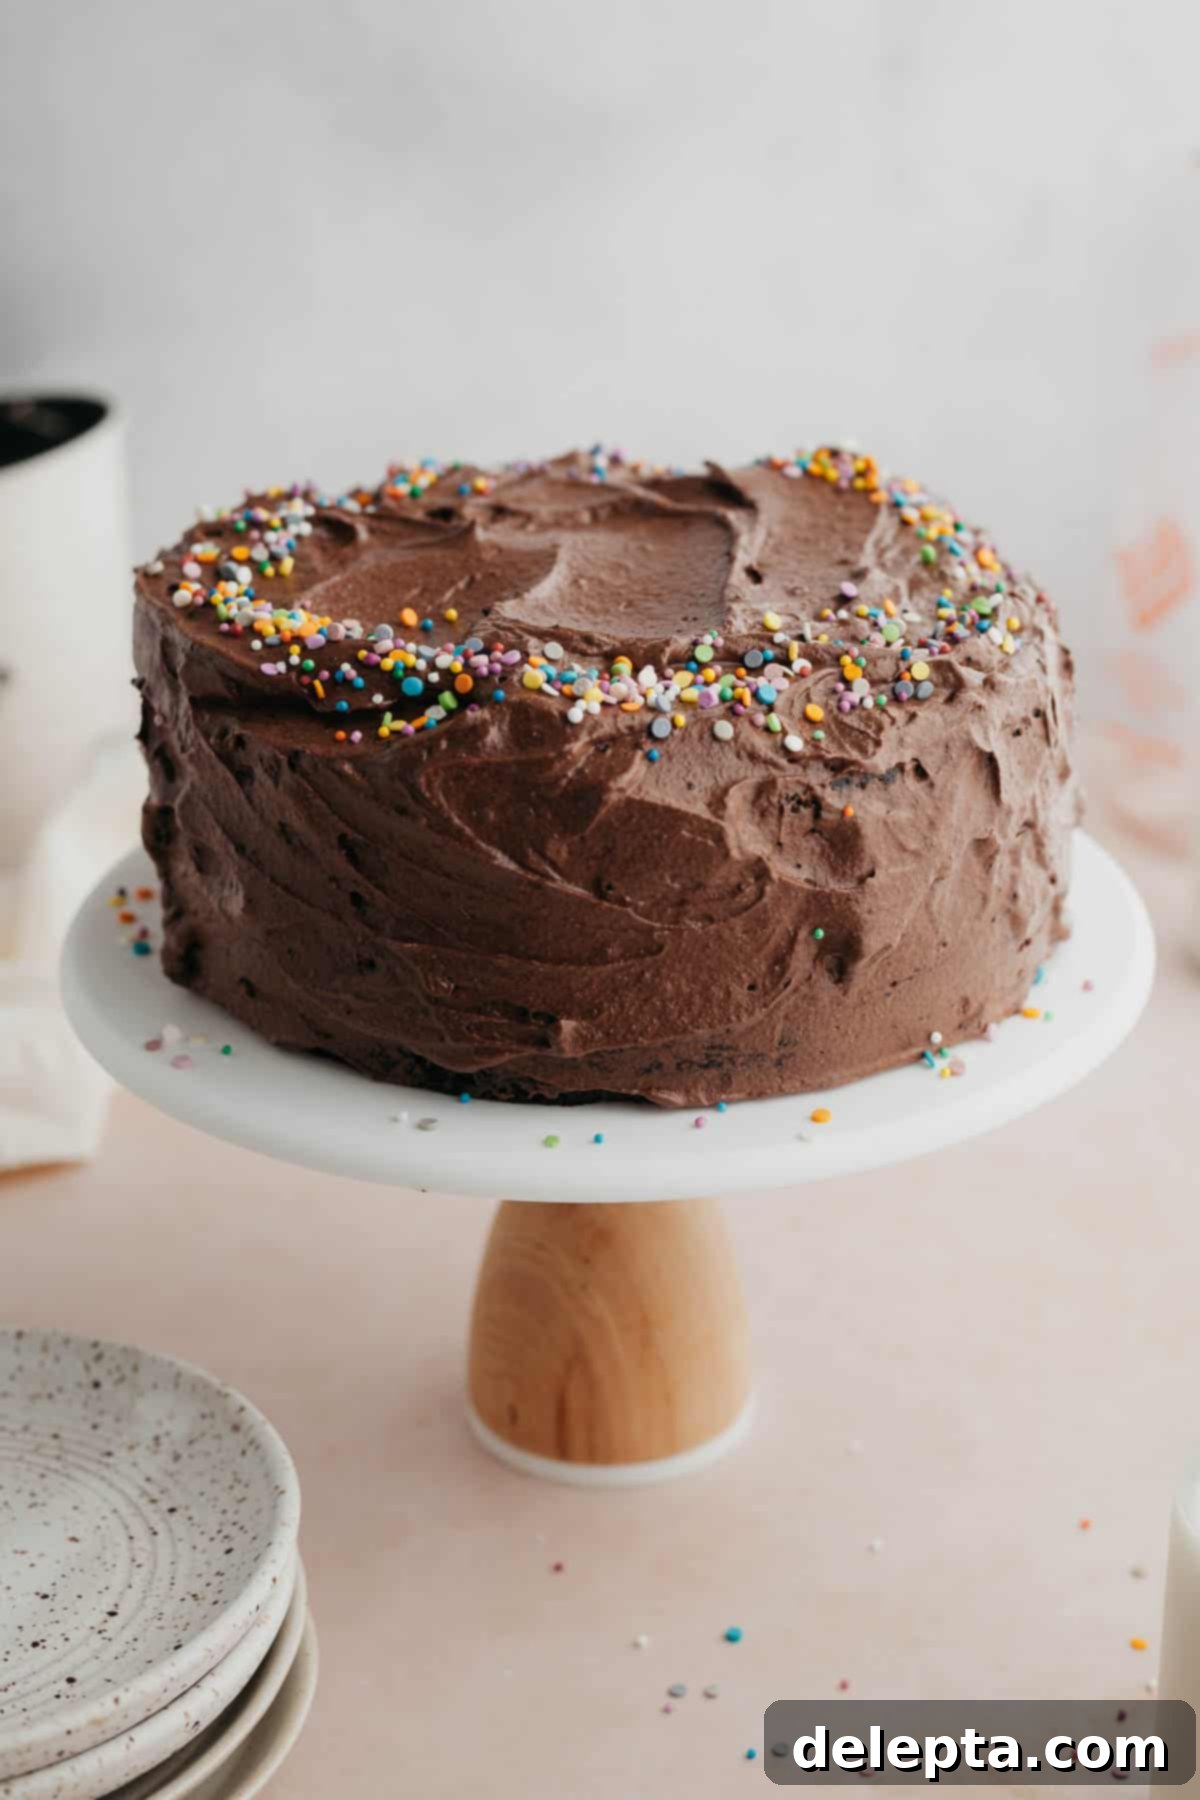
Prepare to fall in love with this extraordinary chocolate cake, perfectly crowned with a luscious, tangy chocolate cream cheese frosting. It’s a match truly made in culinary heaven, offering a delightful contrast between the rich, deep chocolate and the bright, creamy tang of the frosting. This chocolate cake with cream cheese frosting is not just a dessert; it’s a showstopper, making it the ideal centerpiece for any birthday celebration, holiday gathering, or simply a treat for the dedicated chocolate lover in your life (and yes, that often includes me!).
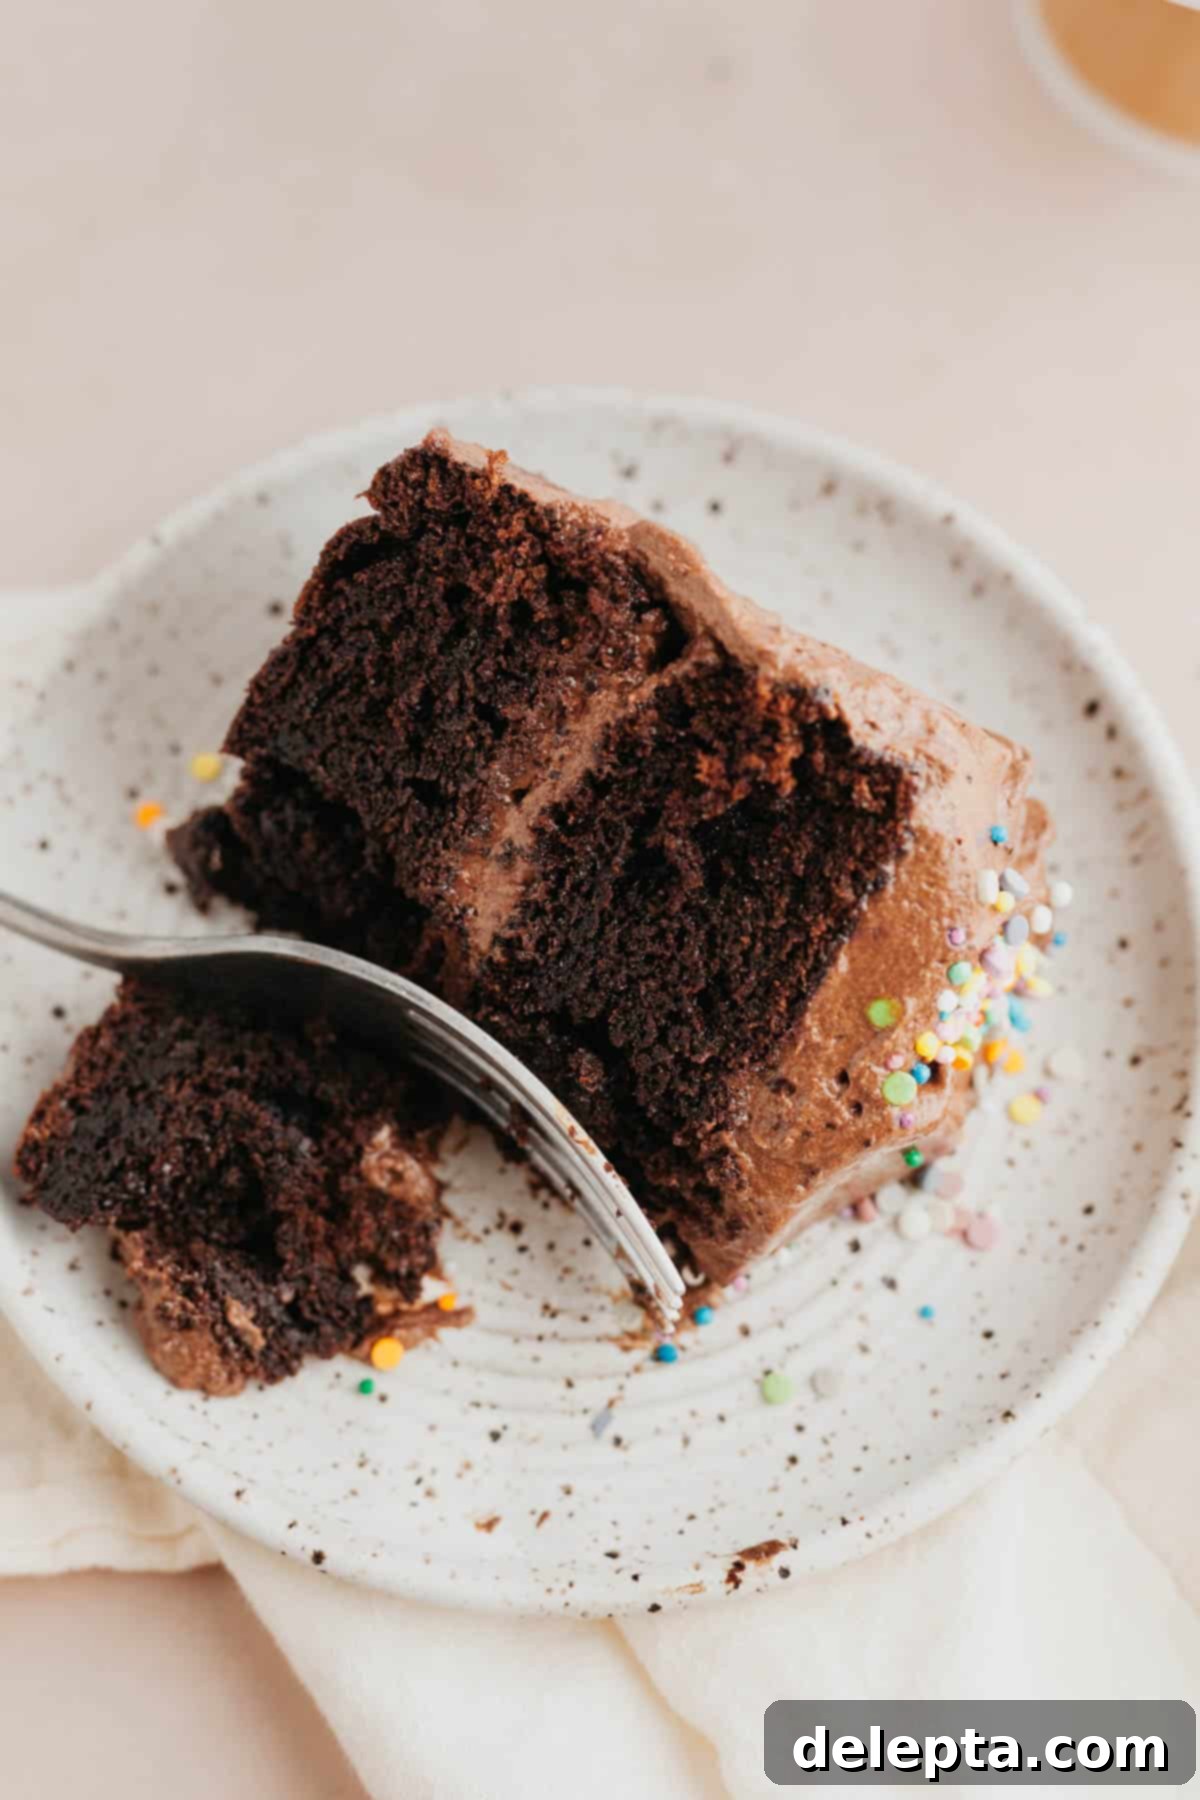
Every bite promises a symphony of flavors and textures: the tender, moist crumb of the chocolate cake yielding to the smooth, light, and perfectly sweet-tangy frosting. It’s designed to impress, yet surprisingly straightforward to make, guaranteeing a baking experience that’s as enjoyable as eating the finished product.
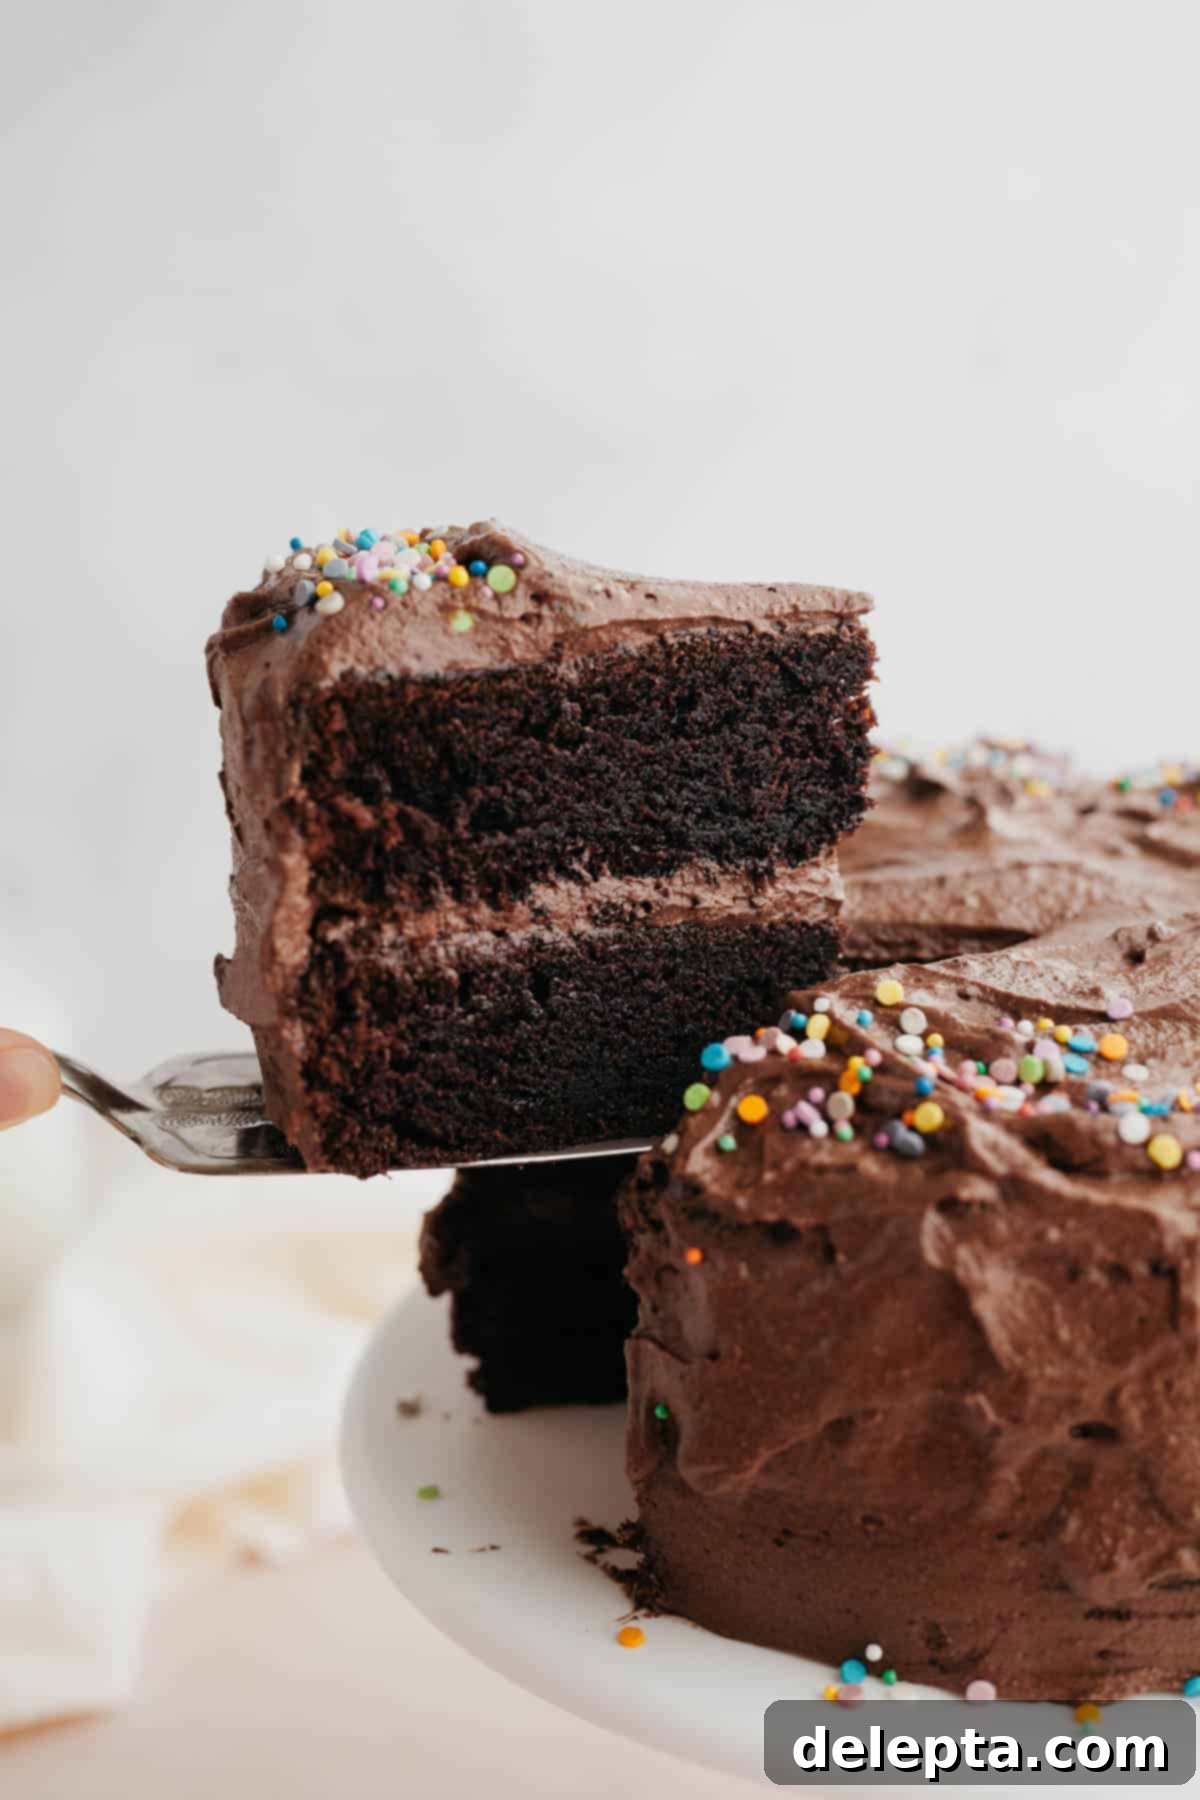
The foundation of this exceptional dessert is a truly irresistible chocolate cake layer. This isn’t just any chocolate cake; it’s the same signature recipe renowned for its incredible moistness and rich flavor, featured in my popular Nutella filled cake, chocolate walnut cake, and Matilda’s chocolate cake. What makes it so special? It’s an extra-moist dark chocolate cake, crafted with an oil base that ensures a super tender and luscious crumb every single time. This method helps lock in moisture, preventing the cake from drying out and keeping it wonderfully soft for days.
But the cake is only half the story. The truly decadent chocolate cream cheese frosting sets this recipe apart. Unlike traditional butter-heavy frostings, ours is built on a delicate whipped cream base. This innovative approach results in an incredibly light, airy, and fluffy frosting that perfectly complements the rich chocolate cake without overwhelming it. It offers a subtle tang from the cream cheese, beautifully balanced with the deep notes of cocoa powder, creating a harmonious flavor profile that is both complex and utterly delightful. You won’t miss the confectioners’ sugar here, as the balance of sweetness and tanginess is simply perfect.
If you’re continually on the hunt for impressive special occasion cakes, you absolutely must broaden your baking repertoire with some of my other celebrated creations. Explore the robust flavors of my chocolate coffee cake, indulge in the vibrant hues and subtle chocolate notes of the red velvet cake with chocolate chips, experience pure chocolate bliss with my chocolate cake with chocolate ganache, or savor the classic elegance of a vanilla cake with chocolate frosting! Each recipe is carefully developed to ensure a delicious and rewarding baking experience.
Why You’ll Adore This Chocolate Cake with Cream Cheese Frosting
This recipe is designed to be a favorite for many reasons, combining ease of preparation with incredible flavor and texture:
- Effortless Yet Elegant Cake: This recipe features a truly simple, oil-based chocolate cake that eliminates the need for creaming butter and sugar, making the preparation quicker and more forgiving. The secret to its unparalleled moistness lies in the generous use of buttermilk, which reacts with the baking soda to create a tender, soft, and exceptionally moist crumb that stays fresh longer. It’s a dark chocolate cake that truly shines.
- Dreamy Chocolate Cream Cheese Frosting: Forget heavy, overly sweet frostings. Our unique chocolate cream cheese frosting boasts a whipped cream base, resulting in an astonishingly light, airy, and creamy texture that melts in your mouth. Unlike traditional butter-based versions, this frosting feels less dense and more refreshing. A touch of cocoa powder is then folded in, infusing it with a delicate chocolate flavor that beautifully complements the rich cake without overpowering it, offering a delightful tangy counterpoint.
- Surprisingly Quick to Prepare: Despite its impressive appearance, the active preparation time for this entire recipe is incredibly fast, clocking in at around 20 minutes! While you’ll need to account for baking time and, crucially, allowing the cake layers to cool completely before frosting to ensure a perfect finish, the hands-on work is minimal. This makes it a fantastic option for when you want a homemade cake without spending hours in the kitchen.
- Perfect for Making Ahead: Planning a special event? This recipe is incredibly convenient for advanced preparation. The cake layers can be baked up to two days beforehand. Once thoroughly cooled, simply wrap them tightly in plastic wrap and store them at room temperature. This allows you to spread out your baking tasks and assemble the cake closer to serving time, saving you stress on the day of your celebration. You can even freeze the layers for longer storage, ensuring you always have a delicious base ready to go.
Gather Your Essential Ingredients!
High-quality ingredients are the cornerstone of any great cake. Here’s a detailed look at what you’ll need and some crucial tips for each:
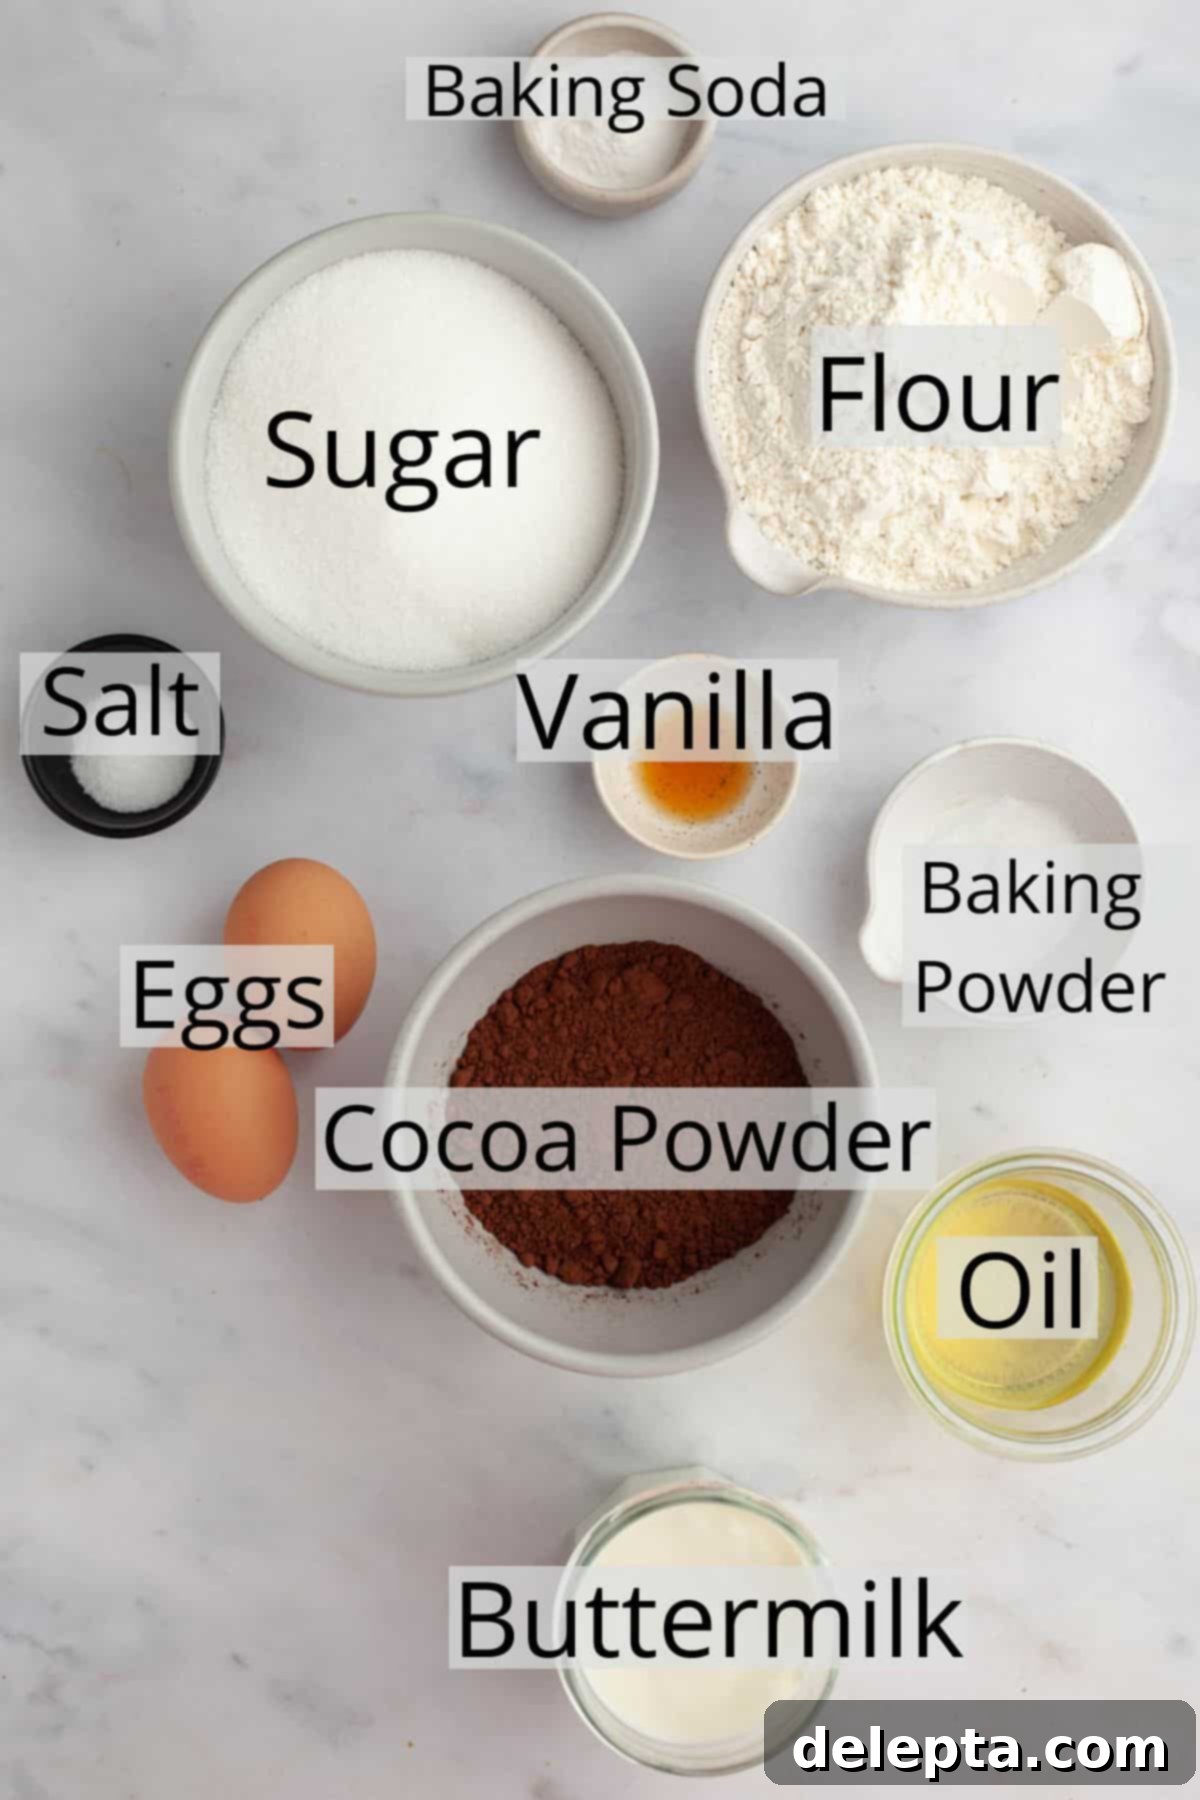
- All-Purpose Flour: For this specific recipe, I have exclusively tested it using all-purpose flour. The protein content and structure of all-purpose flour provide the ideal crumb for this moist chocolate cake. I do not recommend substituting with gluten-free flour or other specialty flours, as this would significantly alter the cake’s texture and overall outcome.
- Neutral Flavored Oil: An oil-based cake relies on the fat for its incredible moistness. It’s crucial to use a neutral-flavored oil such as canola oil, vegetable oil, or grapeseed oil. These oils will not impart any strong flavors that could compete with the rich chocolate. Avoid using strong-flavored oils like coconut oil or olive oil, as they can significantly impact the taste of your final cake, lending an undesirable undertone.
- Dutch Processed Cocoa Powder: The type of cocoa powder you use makes a substantial difference in both the color and flavor of your chocolate cake. I specifically developed and tested this recipe with Dutch processed cocoa powder. This variety has been treated with an alkali to reduce its acidity, resulting in a darker color and a smoother, less bitter chocolate flavor. If you’re unsure whether your cocoa powder is natural or Dutch processed, simply check the ingredient list. If it mentions “alkali” or “acidity regulators,” it’s Dutch processed. Natural cocoa powder is more acidic and would react differently with the baking soda in the recipe, potentially altering the cake’s rise and texture.
- Large Eggs: Consistency in baking is key, which is why this recipe has been precisely tested using large eggs. For best results, ensure your eggs are at room temperature. Room temperature eggs emulsify more effectively with other ingredients, leading to a smoother, more uniform batter and a finer cake crumb.
- Granulated Sugar: Standard granulated sugar provides the necessary sweetness and also contributes to the cake’s moisture and structure.
- Baking Soda and Baking Powder: These leavening agents work in harmony to give the cake its beautiful rise. Baking soda reacts with the acidic buttermilk and cocoa, while baking powder provides an additional lift, ensuring a light and airy texture.
- Kosher Salt: A touch of salt is essential in baking to enhance and balance the sweetness of the chocolate.
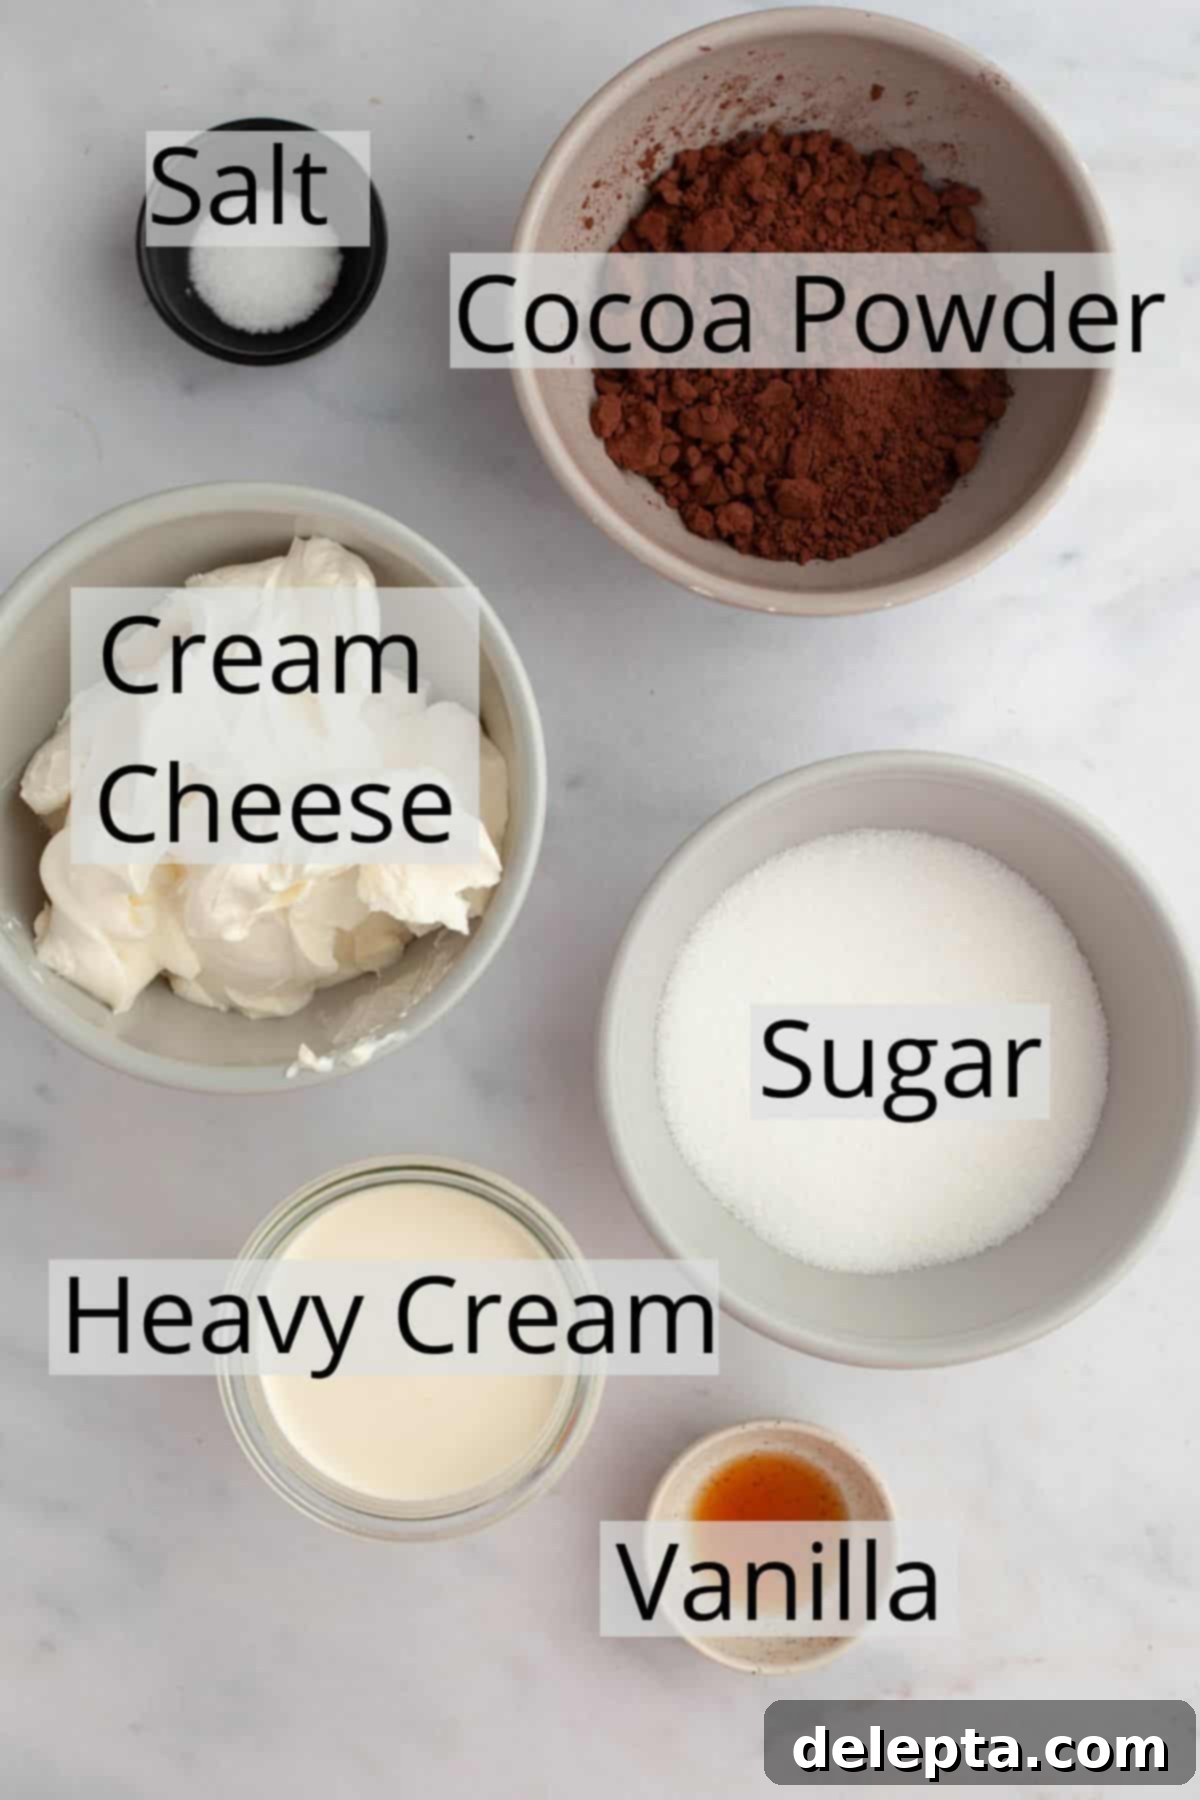
- Full-Fat Cream Cheese: The quality of your cream cheese will directly affect the texture and stability of your frosting. I exclusively tested this frosting with Philadelphia Cream Cheese, and it is crucial to use the full-fat block variety. Low-fat or whipped cream cheese will not provide the necessary structure or richness. If you are baking in Europe, where cream cheese often comes in tubs and has a higher moisture content, I highly recommend patting down the cream cheese with paper towels before adding it to your frosting mix. This simple step helps to remove excess water, ensuring your frosting is thick and stable.
- Heavy Cream (Cold): This is the base for our light and fluffy frosting. It is absolutely essential that your heavy cream is very cold when you begin whipping it. Cold cream whips up much more effectively and achieves a stable, airy consistency. Warm cream, on the other hand, will struggle to whip and may result in a runny frosting. Aim for a heavy cream with at least 35% fat content for best results.
- Vanilla Extract: Pure vanilla extract adds a lovely depth of flavor to both the cake and the frosting, enhancing the chocolate notes.
- Hot Water: Used in the cake batter, hot water helps to bloom the cocoa powder, intensifying its chocolate flavor and contributing to the cake’s incredible moistness and thin batter consistency.
Let’s Bake This Amazing Chocolate Cake!
Follow these detailed steps to create your perfect moist chocolate cake with its irresistible cream cheese frosting.
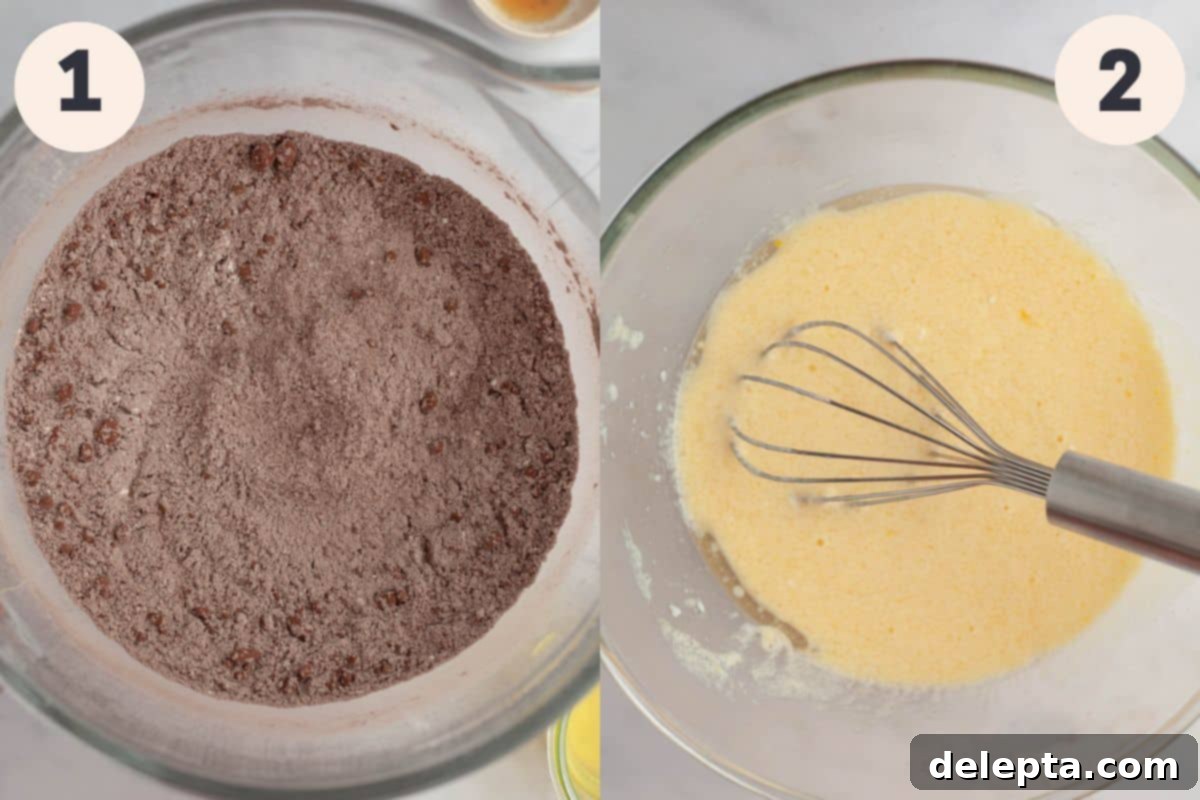
Step One: Prepare Dry Ingredients. In the spacious bowl of a stand mixer, fitted with the paddle attachment, meticulously combine all your dry ingredients: the all-purpose flour, rich cocoa powder, granulated sugar, baking powder, baking soda, and kosher salt. If you don’t have a stand mixer, a large mixing bowl and a sturdy whisk will work just fine. Whisk everything together thoroughly until it is well combined and no lumps of cocoa or flour remain. This ensures even distribution of leavening agents and flavor.
Step Two: Prepare Wet Ingredients. In a separate, generously sized jug or bowl, whisk together the wet ingredients until they are fully integrated and smooth. This includes your room temperature large eggs, neutral-flavored oil, tangy buttermilk, and fragrant vanilla extract. Whisk vigorously for about 30 seconds to ensure everything is well emulsified.
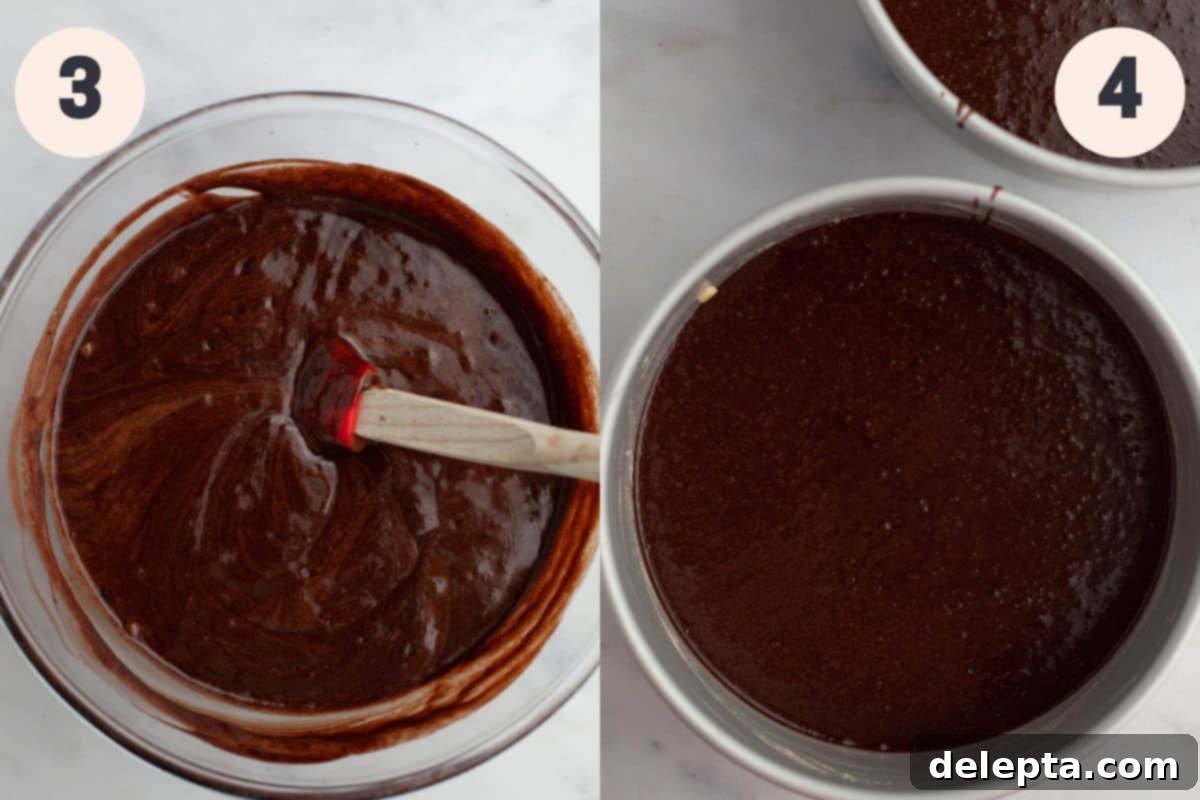
Step Three: Combine and Add Hot Water. With your stand mixer running on the lowest speed, slowly and gradually pour the whisked wet ingredients from the jug into the bowl containing the dry ingredients. Mix until just combined, being careful not to overmix. The batter will be thick at this stage. Next, slowly pour in the very hot water. This step is crucial as it “blooms” the cocoa powder, intensifying its flavor and making the batter quite liquidy. Continue mixing on low speed until everything is smoothly incorporated. Be cautious as there is a substantial amount of batter, and it will be quite thin. Keep the mixer speed low to prevent splashes.
Step Four: Bake the Cake Layers. Divide the liquid batter evenly between your two prepared 8-inch round cake pans. Ensure the pans are greased and lined with parchment paper circles at the bottom to prevent sticking. Bake in your preheated oven at 350 degrees Fahrenheit (175 degrees Celsius) for approximately 35-40 minutes. To check for doneness, insert a wooden skewer or toothpick into the center of the cakes; it should come out clean or with just a few moist crumbs attached. Allow the cakes to cool in their pans for about 10 minutes before carefully inverting them onto a wire rack to cool completely. Cooling completely is paramount before frosting to avoid a melted mess.
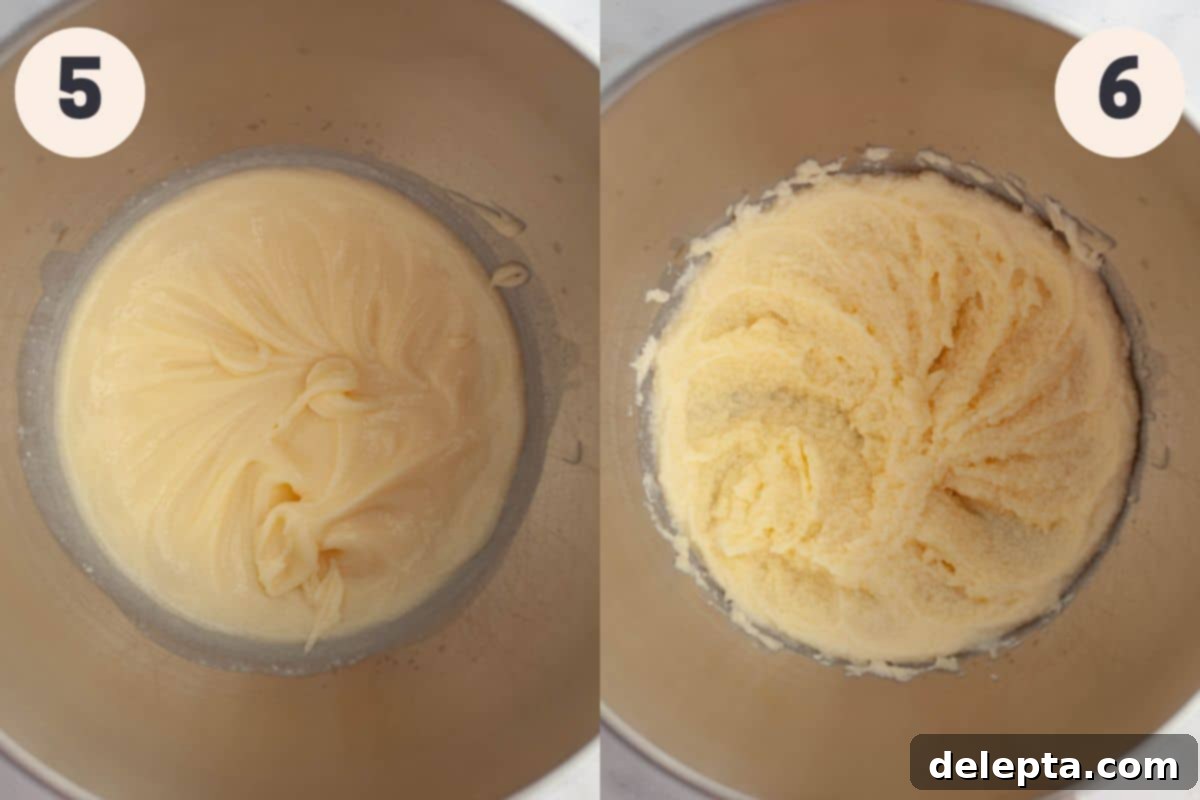
Step Five: Prepare the Whipped Cream Base. In a thoroughly chilled mixing bowl of a stand mixer, fitted with the whisk attachment, combine the very cold heavy cream, a pinch of salt, white granulated sugar, and vanilla extract. Begin mixing on a low speed for about 2 minutes. This initial gentle mixing allows the sugar to dissolve into the cream without immediately whipping it into a stiff consistency.
Step Six: Whip the Cream. Once the sugar has dissolved, increase the mixer speed to medium-high. Continue to beat the mixture for approximately 2 minutes. During this time, the cream will begin to thicken and should start to resemble the texture of thick Greek yogurt. It will be soft and fluffy but not yet firm.
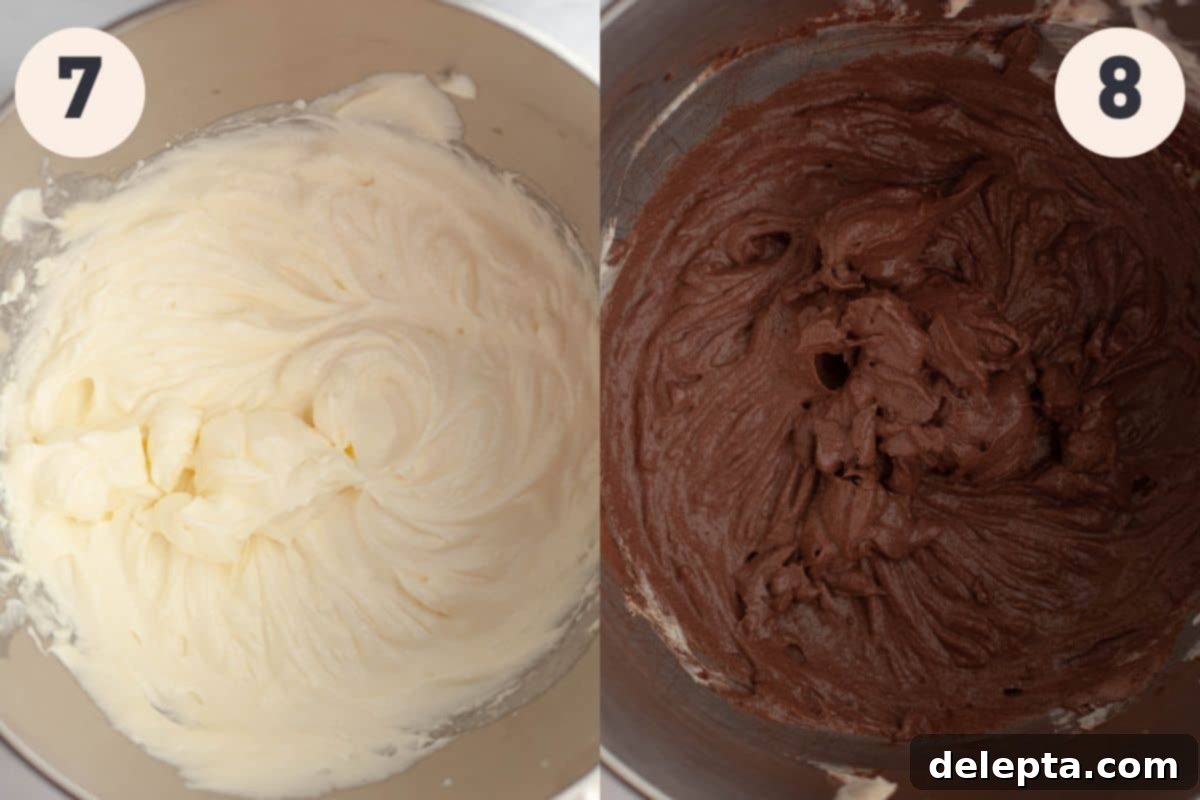
Step Seven: Incorporate Cream Cheese. Reduce the mixer speed to low. Add the cold, full-fat cream cheese to the whipped cream mixture, one tablespoon at a time. This gradual addition helps prevent lumps and ensures a smooth, uniform frosting. After all the cream cheese has been added, stop the mixer. Use a rubber spatula to scrape down the bottom and sides of the bowl thoroughly, ensuring all ingredients are well-mixed. Turn the mixer back on and beat on high speed for another 3 minutes, until the frosting becomes wonderfully light, fluffy, and firm enough to hold its shape.
Step Eight: Add Cocoa Powder. Finally, with the mixer still running on low speed, add the cocoa powder to the cream cheese frosting. Beat for another minute, stopping once again to scrape the sides of the bowl as needed, ensuring the cocoa powder is fully incorporated and evenly distributed, giving the frosting its beautiful chocolate color and flavor. Once complete, your tangy chocolate cream cheese frosting is ready to adorn your cooled chocolate cake! Proceed to frost your cake as desired.
Expert Recipe Tips & Tricks for Perfect Results
Achieve baking perfection with these valuable insights and techniques:
- Embrace a Digital Weighing Scale: For truly consistent and professional baking results, I cannot emphasize enough the importance of using a digital kitchen scale. Measuring ingredients by weight (especially in metric grams) is significantly more accurate than using volumetric cups, which can vary widely. Even a slight variation in flour or sugar can impact the final texture of your cake. A good kitchen scale is an affordable investment that will revolutionize your baking!
- Mind Your Ingredient Temperatures (Cake): For the cake layers, it is crucial that all your ingredients—eggs, buttermilk, etc.—are at room temperature before you begin mixing. Room temperature ingredients emulsify much more easily, resulting in a smoother, more homogeneous batter. This leads to a finer crumb structure and a more consistently moist cake.
- Mind Your Ingredient Temperatures (Frosting): Conversely, for the chocolate cream cheese frosting, the heavy cream and cream cheese must be thoroughly chilled. Cold temperatures are vital for the heavy cream to whip up properly and achieve stiff peaks. Cold cream cheese also helps create a stable, pipeable frosting. For an extra boost, consider placing your mixing bowl (and even the whisk attachment) in the fridge or freezer for at least 30 minutes, or even overnight, before making the frosting. This significantly aids in achieving a light and stable consistency.
- Don’t Overmix the Cake Batter: Once the wet and dry ingredients are combined, mix only until just incorporated. Overmixing can develop the gluten in the flour too much, leading to a tough, dry cake. A few small lumps are perfectly fine and often preferred.
- Avoid Opening the Oven Door: Resist the temptation to open the oven door frequently while your cakes are baking. Sudden drops in temperature can cause the cakes to collapse or bake unevenly. Only open the door once the minimum baking time has passed and you’re ready to check for doneness.
- Level Your Cake Layers (Optional but Recommended): For a truly professional-looking layer cake, once your cakes are completely cool, you might want to use a serrated knife or a cake leveler to gently trim off any domed tops, creating flat surfaces. This ensures your cake layers stack perfectly even.
- Explore Different Frosting Flavors: While this chocolate cream cheese frosting is divine, if you’re looking for variations, you’re in luck! If chocolate isn’t your preference, you can easily swap it out for my classic cream cheese frosting without butter. It uses the exact same whipped cream base but omits the cocoa powder, offering a bright, tangy, and purely vanilla-infused alternative. Alternatively, get creative with toppings like fresh raspberries, chocolate shavings, or a colorful array of sprinkles!
- Crumb Coat for a Smooth Finish: If you’re aiming for a super smooth exterior, especially if you’re new to frosting, consider doing a “crumb coat.” Apply a very thin layer of frosting all over the cake, sealing in any loose crumbs. Chill the cake for 15-20 minutes, then apply your final, thicker layer of frosting. This technique ensures a pristine, crumb-free finish.
Proper Storage for Lasting Freshness
To keep your delicious chocolate cake fresh and moist for as long as possible, proper storage is essential. This cake, especially with its cream cheese frosting, should be stored in the refrigerator.
Keep the entire cake tightly covered in an airtight cake carrier or under a cake dome in the fridge for up to 5 days. If you have any exposed cake edges (e.g., if you’ve served a slice), place small strips of parchment paper against these cut surfaces. This simple trick helps to prevent the exposed cake from drying out, keeping the remaining slices wonderfully moist. Always allow the cake to come to room temperature for about 30-60 minutes before serving for the best flavor and texture, as the cold can mute some of the nuances.
For longer storage, this cake also freezes beautifully. You can freeze individual slices or whole cake layers. For slices, wrap each piece tightly in plastic wrap, then again in aluminum foil, and place them in a freezer-safe container. Cake layers can be wrapped in two layers of plastic wrap and then foil. When you’re ready to enjoy, simply transfer the frozen slices or layers to the refrigerator overnight to defrost. Once thawed, let them come to room temperature before serving or frosting. The cake will maintain its quality in the freezer for up to 2-3 months.
Indulge Further: Try These Other Decadent Chocolate Recipes!
If you’re a true chocolate connoisseur, you’ll love exploring these other delightful creations, perfect for any occasion:
- Simple Moist Chocolate Walnut Cake
- Easy Chocolate Pudding Pie with Graham Cracker Crust
- Nutella Filled Cake
- Marbled Cheesecake Brownies
If you’ve had the pleasure of making this incredible chocolate cake, please do us a favor and leave a ⭐️ rating and a thoughtful review below! Your feedback is invaluable and truly helps others discover and enjoy these recipes. I absolutely adore seeing your culinary creations, so don’t hesitate to tag me on Instagram @alpineella so I can admire your work! You can also stay connected and find more baking inspiration by following along on Pinterest, Facebook, and TikTok!
Recipe
Chocolate Cake with Cream Cheese Frosting
Ella Gilbert
Pin Recipe
Save Recipe
Saved!
Equipment
-
2 8″ round cake pans
Ingredients
Chocolate Cake
- ¾ cup cocoa powder dutch processed
- 2 cups granulated sugar
- ¾ teaspoon vanilla extract
- ¾ teaspoon kosher salt
- 2 large eggs room temperature
- 2 cups all purpose flour
- 2 teaspoon baking soda
- 1 teaspoon baking powder
- 1 cup buttermilk room temperature
- ½ cup vegetable oil
- 1 cups very hot water
Chocolate Cream Cheese Frosting
- ¾ cup white sugar
- 1 cup heavy cream cold
- 1 teaspoon vanilla extract
- ½ teaspoon kosher salt
- 12 oz cream cheese cold
- ¾ cup cocoa powder
Instructions
Make Cake
-
Before you begin, for the best frosting results, place your stand mixer’s mixing bowl (and whisk attachment if possible) in the fridge overnight, or at least for one hour, to ensure it is thoroughly chilled. This aids in whipping the heavy cream to perfection.
-
Preheat your oven to 350°F (175°C). Prepare two 8-inch round cake pans by buttering or greasing them generously, then lining the bottoms with parchment paper. This ensures your cakes won’t stick and will release easily.
-
In the bowl of a stand mixer fitted with the paddle attachment (or a large mixing bowl with a whisk), combine all your dry ingredients: the all-purpose flour, cocoa powder, granulated sugar, baking powder, baking soda, and kosher salt. Mix on low speed until everything is well combined and uniform. Set this aside.¾ cup cocoa powder, 2 cups granulated sugar, 2 cups all purpose flour, 2 teaspoon baking soda, 1 teaspoon baking powder, ¾ teaspoon kosher salt
-
In a large jug or separate bowl, thoroughly whisk together the buttermilk, neutral vegetable oil, room temperature large eggs, and vanilla extract until completely smooth and emulsified.2 large eggs, 1 cup buttermilk, ½ cup vegetable oil, ¾ teaspoon vanilla extract
-
With the mixer running on its lowest speed, slowly pour the combined wet ingredients from the large jug into the dry ingredients in the stand mixer bowl. Mix until just combined and a uniform batter forms. Avoid overmixing.
-
While the mixer is still running on the lowest speed, slowly and carefully add the very hot water to the batter. The batter will become quite thin and liquidy at this stage, which is normal for this moist cake recipe. Continue mixing until fully incorporated. Ensure the mixer is on the absolute lowest speed to prevent any splashing.1 cups very hot water
-
Evenly pour the thin batter into your two prepared 8-inch cake pans. Bake for 35-40 minutes, or until a wooden skewer or toothpick inserted into the center of the cakes comes out clean.
-
Once baked, allow the cakes to cool in their pans for about 10 minutes. This allows them to firm up slightly before handling. Then, carefully invert them onto a wire rack and let them cool completely to room temperature before attempting to frost them. This step is critical to prevent your frosting from melting.
Make Frosting
-
In your pre-chilled mixing bowl (from Step 1) fitted with the whisk attachment, combine the cold heavy cream, kosher salt, white granulated sugar, and vanilla extract. Beat on low speed for 2 minutes. This initial low-speed mixing allows the sugar to dissolve without over-whipping the cream.¾ cup white sugar, 1 cup heavy cream, 1 teaspoon vanilla extract, ½ teaspoon kosher salt
-
Increase the mixer speed to medium-high and continue to beat for 2-3 minutes. The mixture should thicken significantly and achieve a consistency resembling thick Greek yogurt or soft peaks.
-
Reduce the mixer speed to its lowest setting. Add the cold cream cheese, one tablespoon at a time, allowing each addition to incorporate before adding the next. Once all the cream cheese is added, stop the mixer. Use a spatula to scrape down the bottom and sides of the bowl to ensure everything is thoroughly mixed. Resume beating on high speed for 3 minutes, until the frosting is thick, light, and wonderfully fluffy. Finally, add the cocoa powder and beat for another minute, scraping down the bowl again if necessary, until the cocoa is fully incorporated and the frosting is a beautiful chocolate color.12 oz cream cheese, ¾ cup cocoa powder
Assembly
-
Once your cake layers are completely cooled and your frosting is ready, it’s time to assemble! Place one cooled cake layer onto your serving plate or cake stand. Spread about half of the prepared chocolate cream cheese frosting evenly over the top of this layer. Carefully place the second cake layer on top. Apply the remaining frosting to the top of the second layer. Using an offset spatula, gently spread the frosting over the sides of the cake, creating a smooth finish. For a rustic, charming look, you can use a large spoon or the back of your offset spatula to create beautiful swoops and swirls on the top and sides of the cake. Finish with a flourish by adding sprinkles, chocolate shavings, or fresh berries if desired.
Notes
For the cake layers, it is essential that all your ingredients—including the buttermilk, eggs, and vanilla extract—are at room temperature before you begin the recipe. This promotes proper emulsion and results in a smoother, more uniform batter and a perfectly moist cake.
Salt: If you don’t have kosher salt readily available, you can substitute it with fine table salt. However, remember that fine salt is more concentrated. Therefore, use half the amount specified for kosher salt in the recipe. For example, 1 teaspoon of kosher salt can be replaced with ½ teaspoon of fine salt.
Buttermilk: If you find yourself without buttermilk, there are excellent substitutes. You can replace it with an equal amount of full-fat sour cream or thick Greek yogurt. Alternatively, you can easily make your own buttermilk at home: for every cup of buttermilk required, add 1 tablespoon of lemon juice or white vinegar to 1 cup of regular milk (whole milk works best). Stir gently and let it sit for 5-10 minutes until it slightly curdles.
Vegetable Oil: Any neutral-flavored oil will work well in this cake recipe. If you don’t have standard vegetable oil, alternatives like rapeseed oil or canola oil are excellent choices. Ensure the oil is flavorless to allow the rich chocolate notes to shine through.
Storage: To maintain its optimal freshness and moistness, store this cake tightly wrapped in an airtight container in the refrigerator for up to 5 days. For the best flavor and texture, always allow the cake to come to room temperature for at least 30 minutes before serving.
Making Ahead: This recipe is perfect for making ahead! You can bake the cake layers up to 2 days in advance. Once they are completely cooled, wrap each layer tightly in multiple layers of plastic wrap to prevent any air exposure. Store them in the refrigerator. For longer storage, the wrapped cake layers can be frozen for up to 2 months. If frozen, transfer them to the refrigerator overnight to defrost, and then allow them to come to room temperature before frosting and assembling your cake.
Nutrition
Carbohydrates: 71g
Protein: 8g
Fat: 29g
Saturated Fat: 13g
Polyunsaturated Fat: 6g
Monounsaturated Fat: 7g
Trans Fat: 0.1g
Cholesterol: 81mg
Sodium: 589mg
Potassium: 281mg
Fiber: 5g
Sugar: 49g
Vitamin A: 745IU
Vitamin C: 0.1mg
Calcium: 105mg
Iron: 3mg
Tried this recipe?Leave a comment below! You can also tag me on Instagram @alpineella so I can see what you made!
