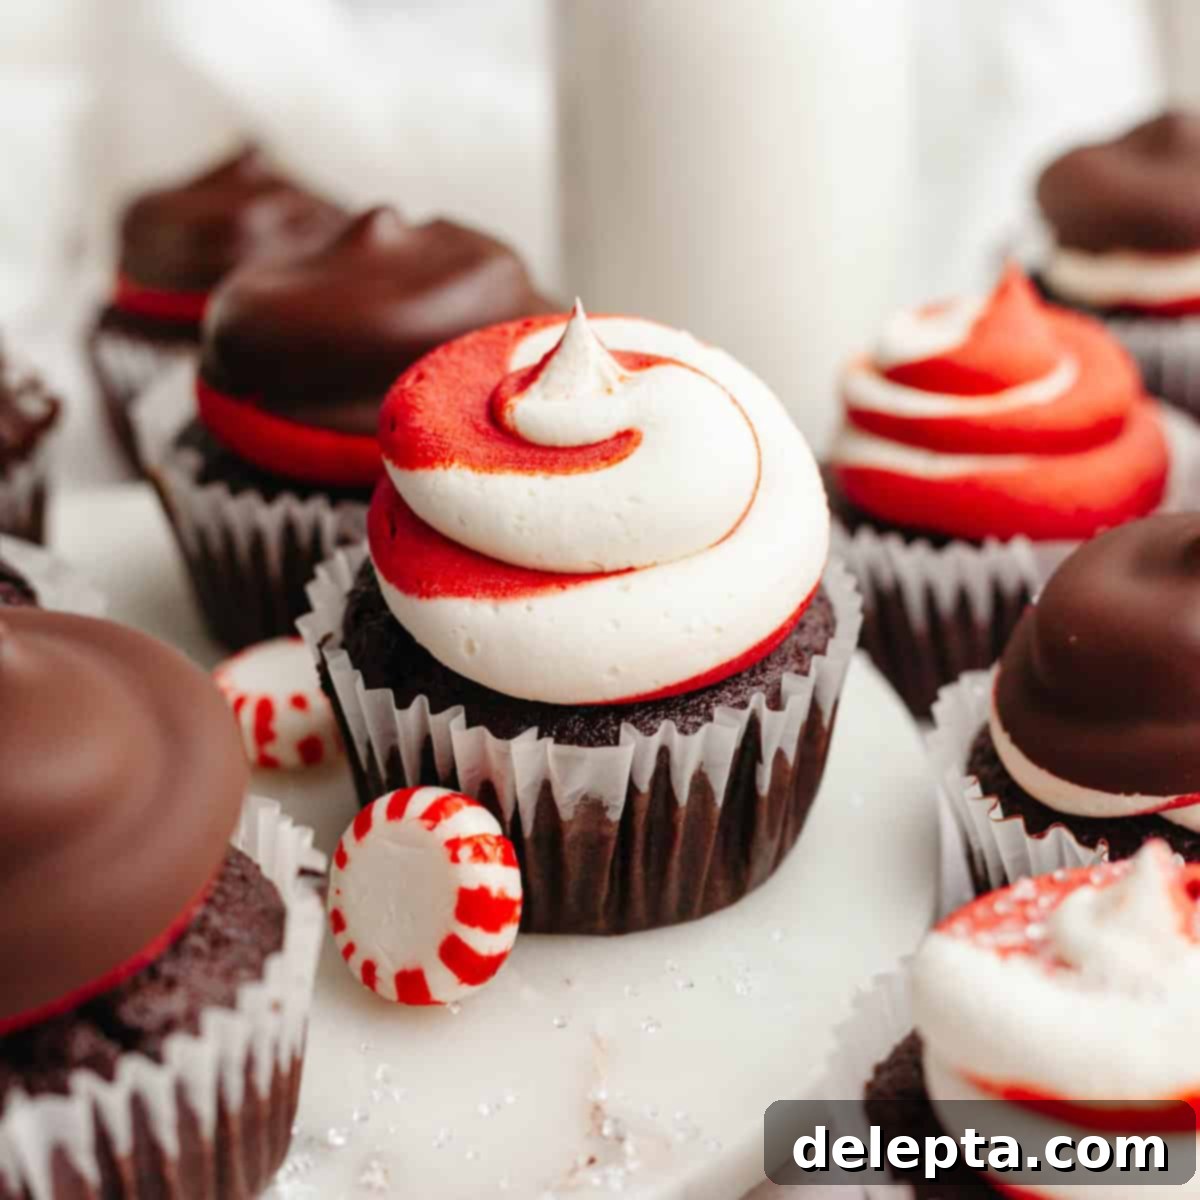
Festive Peppermint Chocolate Hi-Hat Cupcakes with Candy Cane Swirl Frosting
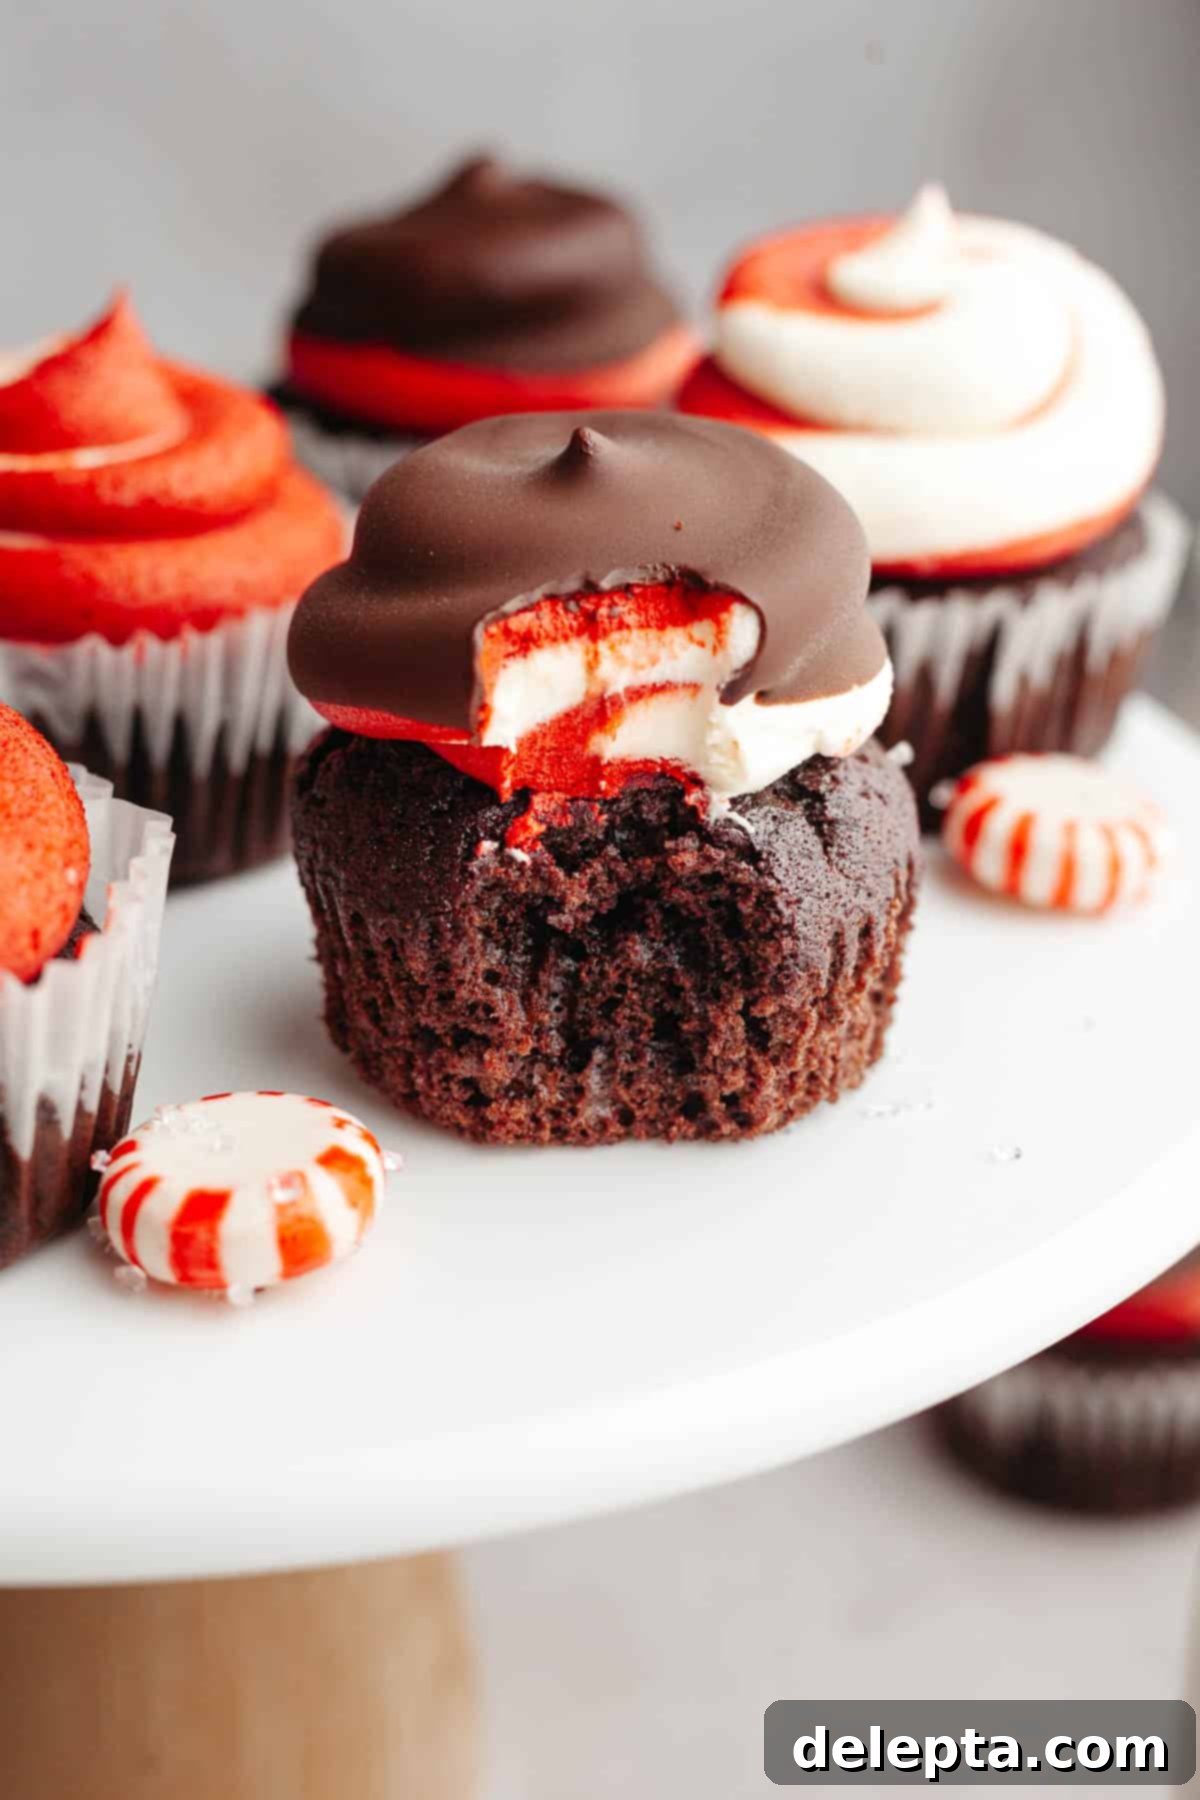
These delightful peppermint chocolate cupcakes are an absolute dream for any holiday gathering! Each moist chocolate cupcake is generously topped with a vibrant red and white candy cane swirled frosting, then elegantly dipped in a homemade chocolate magic shell. The result is a stunning “hi-hat” effect that makes them irresistibly fun and truly special for the holiday season. The best part? You don’t even need a stand mixer to whip up the tender cupcakes, and creating that impressive chocolate magic shell topping is surprisingly simple – I promise!
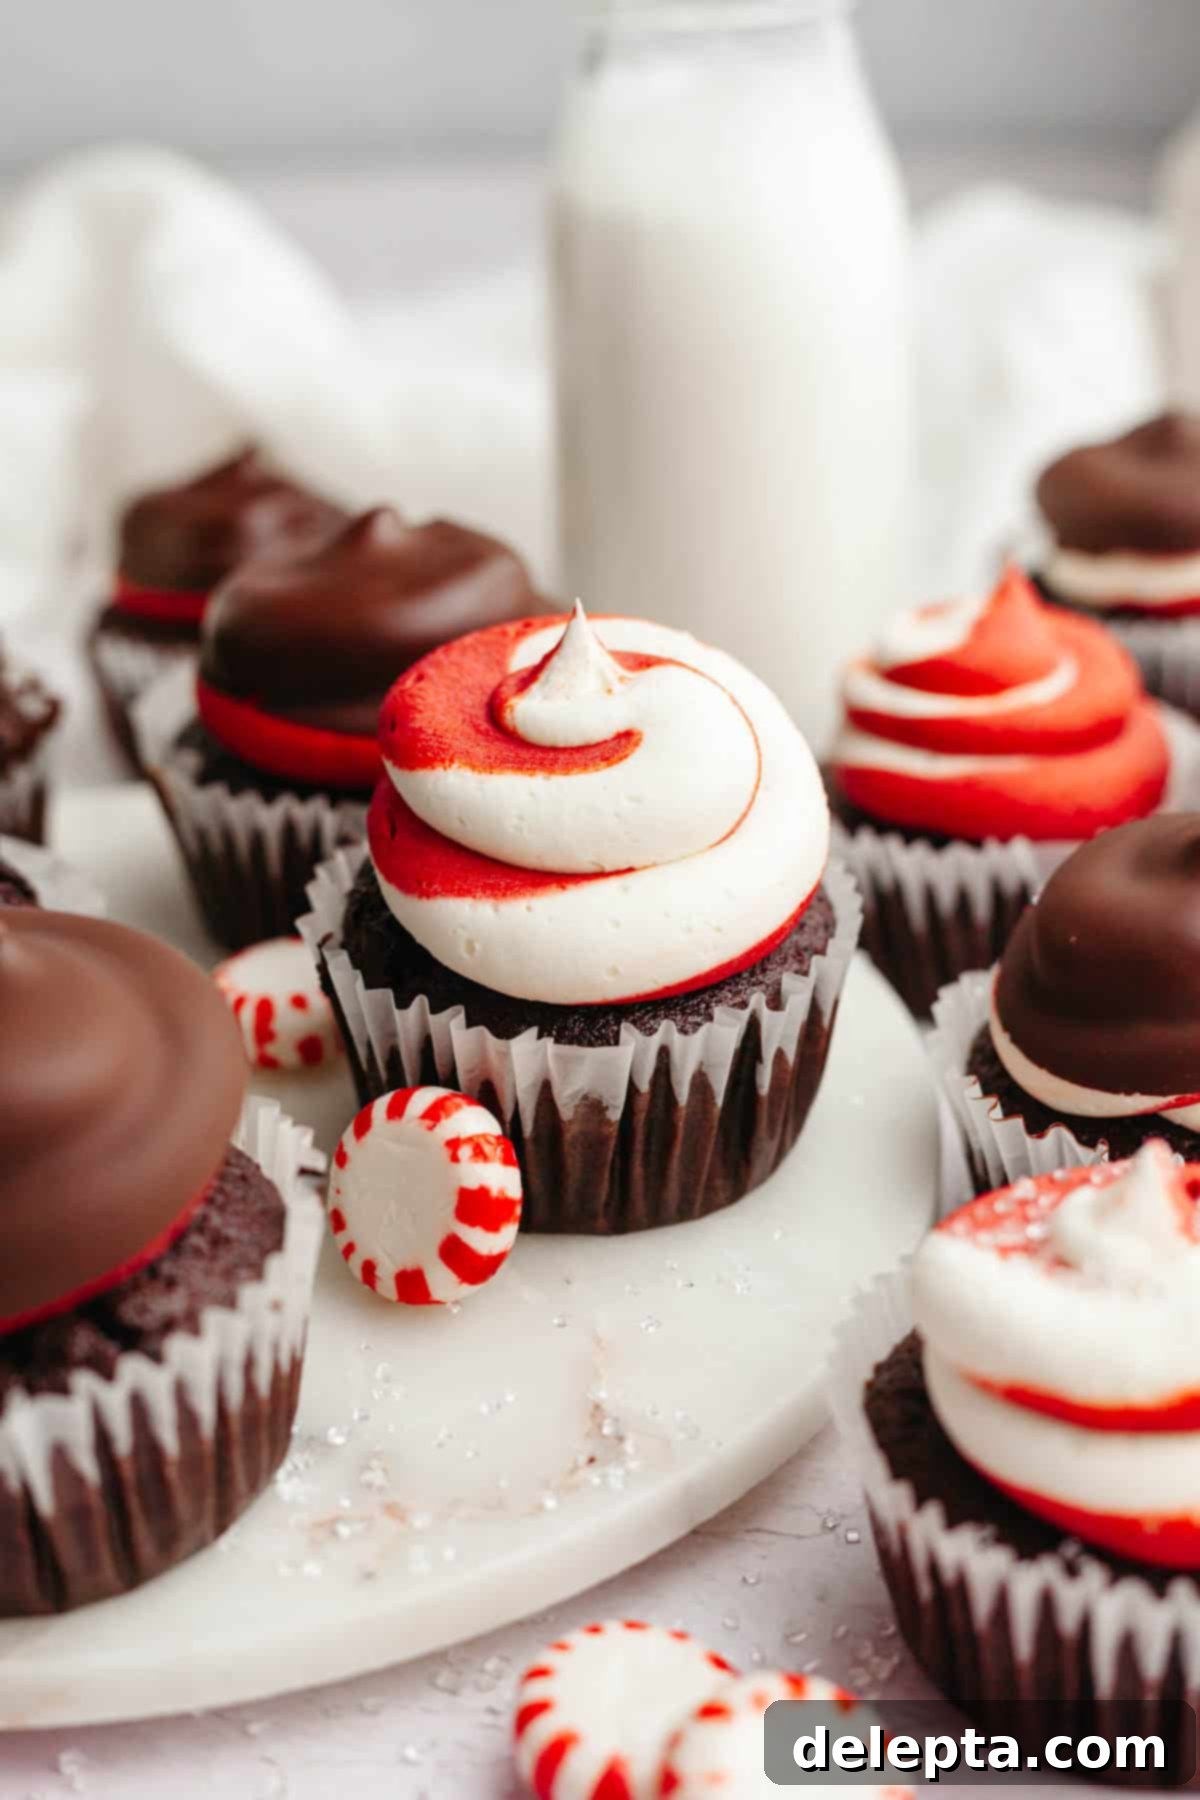
After perfecting my peppermint bark cheesecake, peppermint bark brownies, and even scrumptious peppermint bark cookies, it was clear that a festive cupcake version was absolutely essential for my holiday baking repertoire. I knew these would be the star of any Christmas party!
For these irresistible peppermint chocolate cupcakes, I’ve used my absolute favorite, tried-and-true chocolate cupcake recipe – the very one I rely on for my chocolate fudge cupcakes and most other cupcake creations. The secret twist? A generous addition of high-quality peppermint extract to both the rich chocolate batter and the fluffy American buttercream frosting. This ensures a consistent, delightful minty flavor throughout every bite, perfectly complementing the deep chocolate.
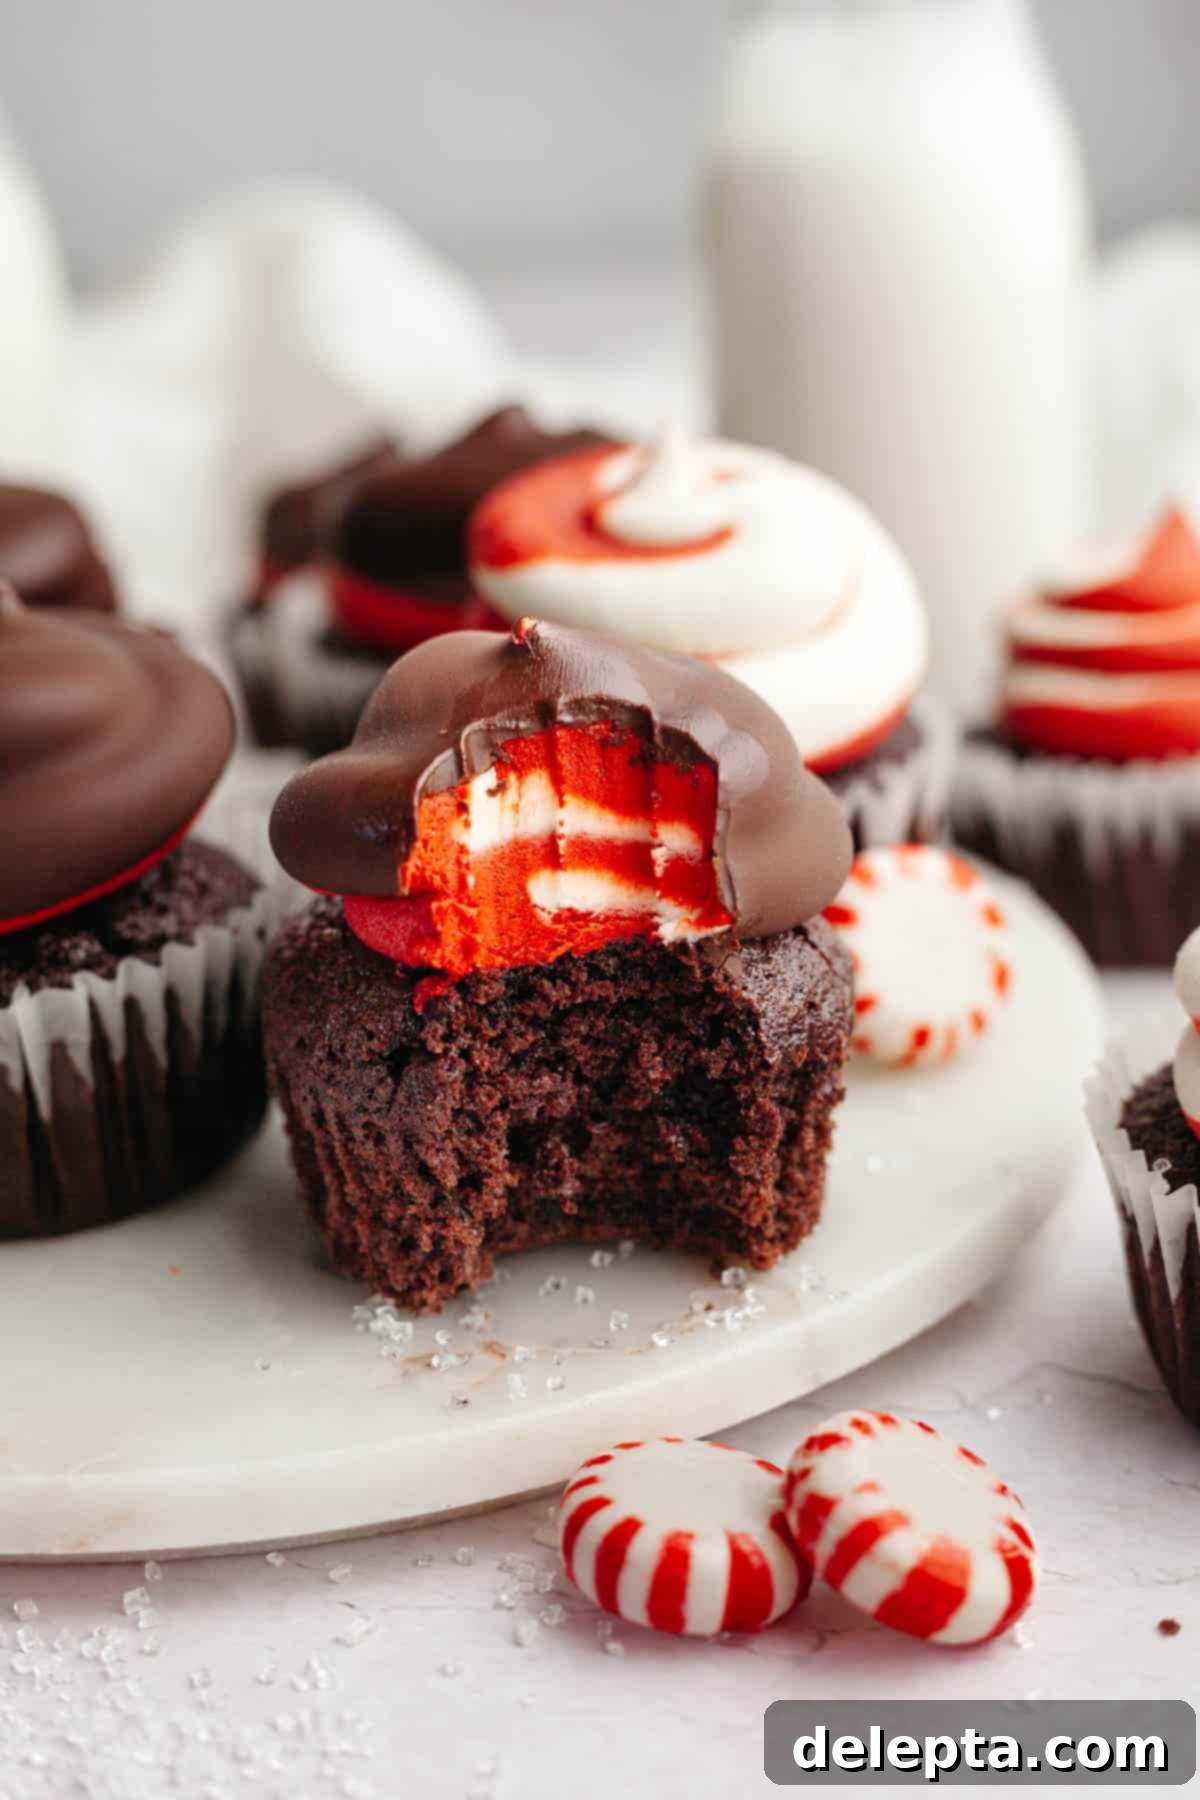
To elevate these holiday treats and make them truly stand out, I added a magical touch. After frosting the cupcakes with their signature red and white swirl, a quick chill in the freezer prepares them for their grand finale. Then, each frosty swirl is dipped into a smooth, melted chocolate mixture, instantly transforming into a glossy, crisp “hi-hat” shell. It’s an easy technique that yields incredibly impressive results, making these peppermint chocolate hi-hat cupcakes a showstopper!
[feast_advanced_jump_to]
Why You’ll Adore These Peppermint Chocolate Cupcakes!
- Festive Fave: Seriously, how can you not fall in love with these adorable candy cane chocolate cupcakes? Their striking red and white swirled frosting, reminiscent of classic candy canes, instantly evokes the spirit of Christmas. They’re not just delicious; they’re a visual delight! Imagine serving these gorgeous treats at your Christmas dinner, a holiday potluck, or even as a delightful surprise for Thanksgiving. They bring a joyful, celebratory touch to any festive table.
- Intense Peppermint Flavor: We’re not shy with the mint here! These cupcakes boast an incredibly balanced and refreshing peppermint flavor, thanks to the careful incorporation of peppermint extract in *both* the rich chocolate cupcake batter and the velvety buttercream frosting. Every single bite delivers that unmistakable cool, minty kick that pairs perfectly with the decadent chocolate. It’s a true celebration of the classic holiday flavor combination.
- Surprisingly Simple to Make: Don’t let their elegant appearance fool you! While these chocolate hi-hat peppermint cupcakes look incredibly fancy and intricate, I’ve designed this recipe with ease in mind. I’ve packed it with helpful tips and tricks to guide you through each step, ensuring that even novice bakers can achieve stunning, professional-looking results. Just like all my recipes, they’re engineered to be straightforward yet deliver maximum impressiveness, making you look like a baking superstar without all the fuss.
- Irresistible Chocolate Magic Shell: The unique hi-hat topping isn’t just for show – it adds an amazing textural contrast! That satisfying “crack” as you bite through the crisp chocolate shell into the soft, minty frosting and moist chocolate cake is pure bliss. It adds an extra layer of decadence and an element of surprise that sets these cupcakes apart from ordinary holiday desserts.
Gather Your Essential Ingredients
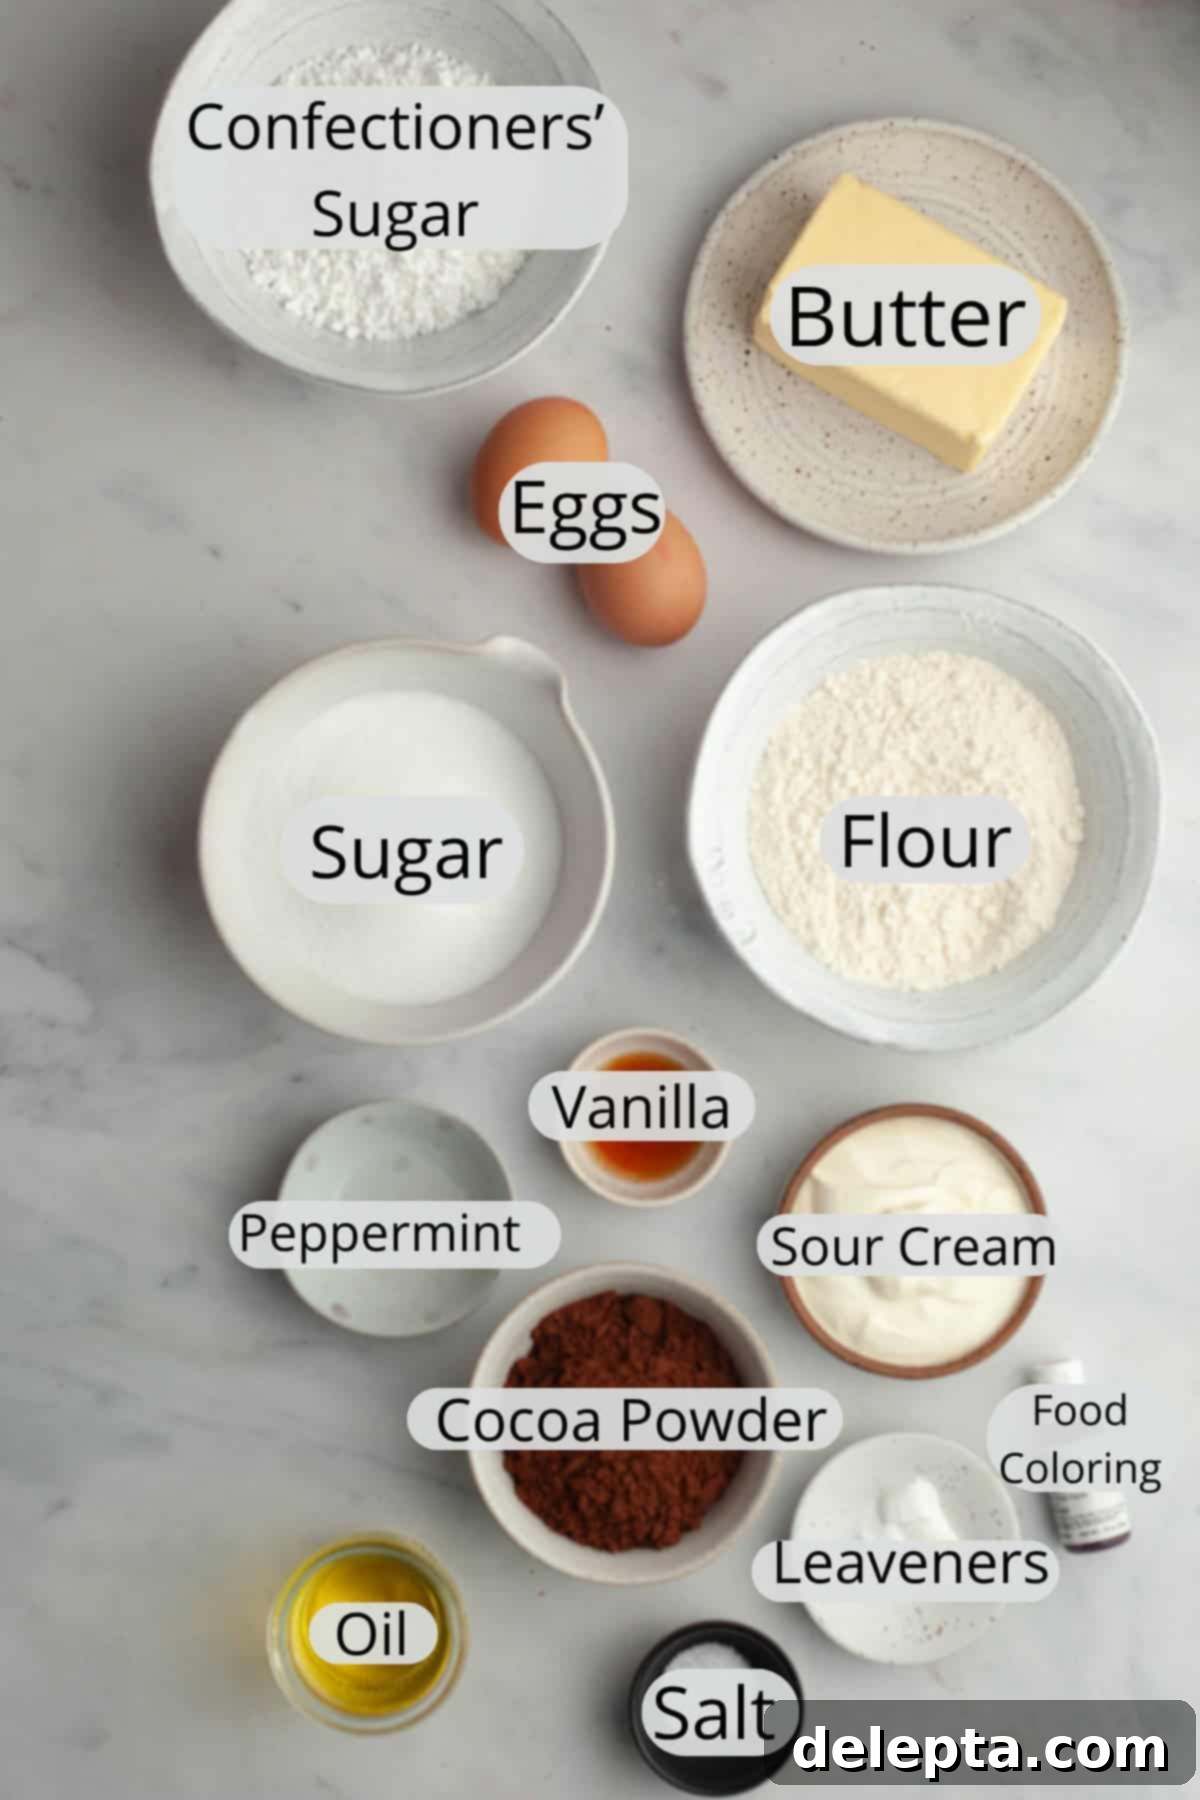
Achieving bakery-quality peppermint chocolate cupcakes starts with selecting the right ingredients. Ensure all cold ingredients, like eggs, sour cream, and butter, are brought to room temperature before you begin. This helps them emulsify properly, creating a smoother batter and a creamier frosting.
- Cocoa Powder: For a truly deep, dark, and rich chocolate flavor that perfectly complements the peppermint, I highly recommend using Dutch-processed cocoa powder. Unlike natural cocoa powder, Dutch-processed cocoa has been treated with an alkali, neutralizing its acidity. This results in a darker color and a mellower, less bitter chocolate taste, which pairs beautifully with the refreshing peppermint. If you’re unsure which type you have, simply check the ingredients label: look for terms like ‘alkali,’ ‘acidity regulators,’ or ‘Dutch-processed.’
- Neutral Oil: The secret to cupcakes that are consistently moist, tender, and stay fresh longer lies in using a neutral-flavored oil. Cocoa powder can sometimes lead to drier baked goods, so incorporating oil instead of relying solely on butter helps keep these cupcakes wonderfully soft and prevents them from drying out. Opt for oils like vegetable oil, canola oil, or sunflower oil. Avoid strong-tasting oils such as coconut oil or olive oil, as their flavors can overpower the delicate peppermint and chocolate balance.
- Sour Cream: To enhance the moisture content and give these cupcakes an incredibly tender crumb, I swear by full-fat sour cream. The fat contributes to richness, while the acidity helps to tenderize the gluten in the flour, resulting in a wonderfully soft and plush cupcake. If sour cream isn’t available, full-fat Greek yogurt makes an excellent substitute in a pinch, offering similar moisture and tang.
- Red Food Gel: Achieving that vibrant, eye-catching red swirl for your candy cane frosting requires a good quality red food gel. Food gels are far more concentrated and produce richer, more vivid colors than the liquid food dyes typically found in most grocery stores. This means you’ll use less product to get an intense hue, avoiding unnecessary liquid that could alter your frosting’s consistency. I often use Americolor Super Red for its intensity and true red shade. (A small note from my own experience: be careful not to accidentally mix in other colors, as I once did with a touch of maroon, which resulted in a slightly muted red in my photos – a mistake I definitely wasn’t going to remake with more butter and time!).
- Unsalted Butter: For the frosting, always use unsalted butter. This allows you complete control over the salt level in your buttercream, ensuring it’s perfectly balanced and not overly salty. Make sure it’s at room temperature for the best whipping consistency.
- Espresso Powder: Though it mysteriously didn’t make it into my ingredient photo, a touch of espresso powder is a game-changer for these chocolate cupcakes. It doesn’t make them taste like coffee, but rather deepens and intensifies the chocolate flavor, making it even more robust and complex. It also subtly hints at a delightful peppermint mocha flavor, adding another layer of sophisticated taste to these holiday treats. Don’t skip it if you can help it!
Simple Substitutions & Creative Additions
- Sour Cream: If you don’t have sour cream on hand, an equal amount of full-fat Greek yogurt can be used as a fantastic substitute. It provides similar moisture and a slight tang that enhances the cupcake’s flavor profile.
- Peppermint Extract: While the star of this recipe is undoubtedly the peppermint, if you’re not a fan of minty flavors (though why you’d be looking at a peppermint recipe then is a mystery!), you can simply omit the peppermint extract from both the batter and frosting. You’ll still have incredibly delicious chocolate cupcakes with festive red and white frosting! Alternatively, you could swap the peppermint for almond extract for an entirely different holiday twist.
- Espresso Powder: Don’t fret if you don’t have espresso powder in your pantry. While it significantly enhances the chocolate flavor, these cupcakes will still be wonderfully rich and delicious without it. Feel free to leave it out without major changes to the recipe’s structure.
- Decorating Variations: If the chocolate magic shell isn’t your preference, these cupcakes are equally stunning with other festive decorations. Consider sprinkling crushed candy canes directly onto the swirled frosting, adding a dusting of sparkling sugar for a glamorous touch, or topping with your favorite holiday sprinkles before the frosting sets.
- Chocolate Type for Magic Shell: While dark chocolate creates a beautiful contrast and rich flavor, you can experiment with milk chocolate for a sweeter shell or even white chocolate (tinted green or pink!) for a different aesthetic. Just ensure it’s high-quality melting chocolate.
How to Craft These Delicious Peppermint Chocolate Cupcakes
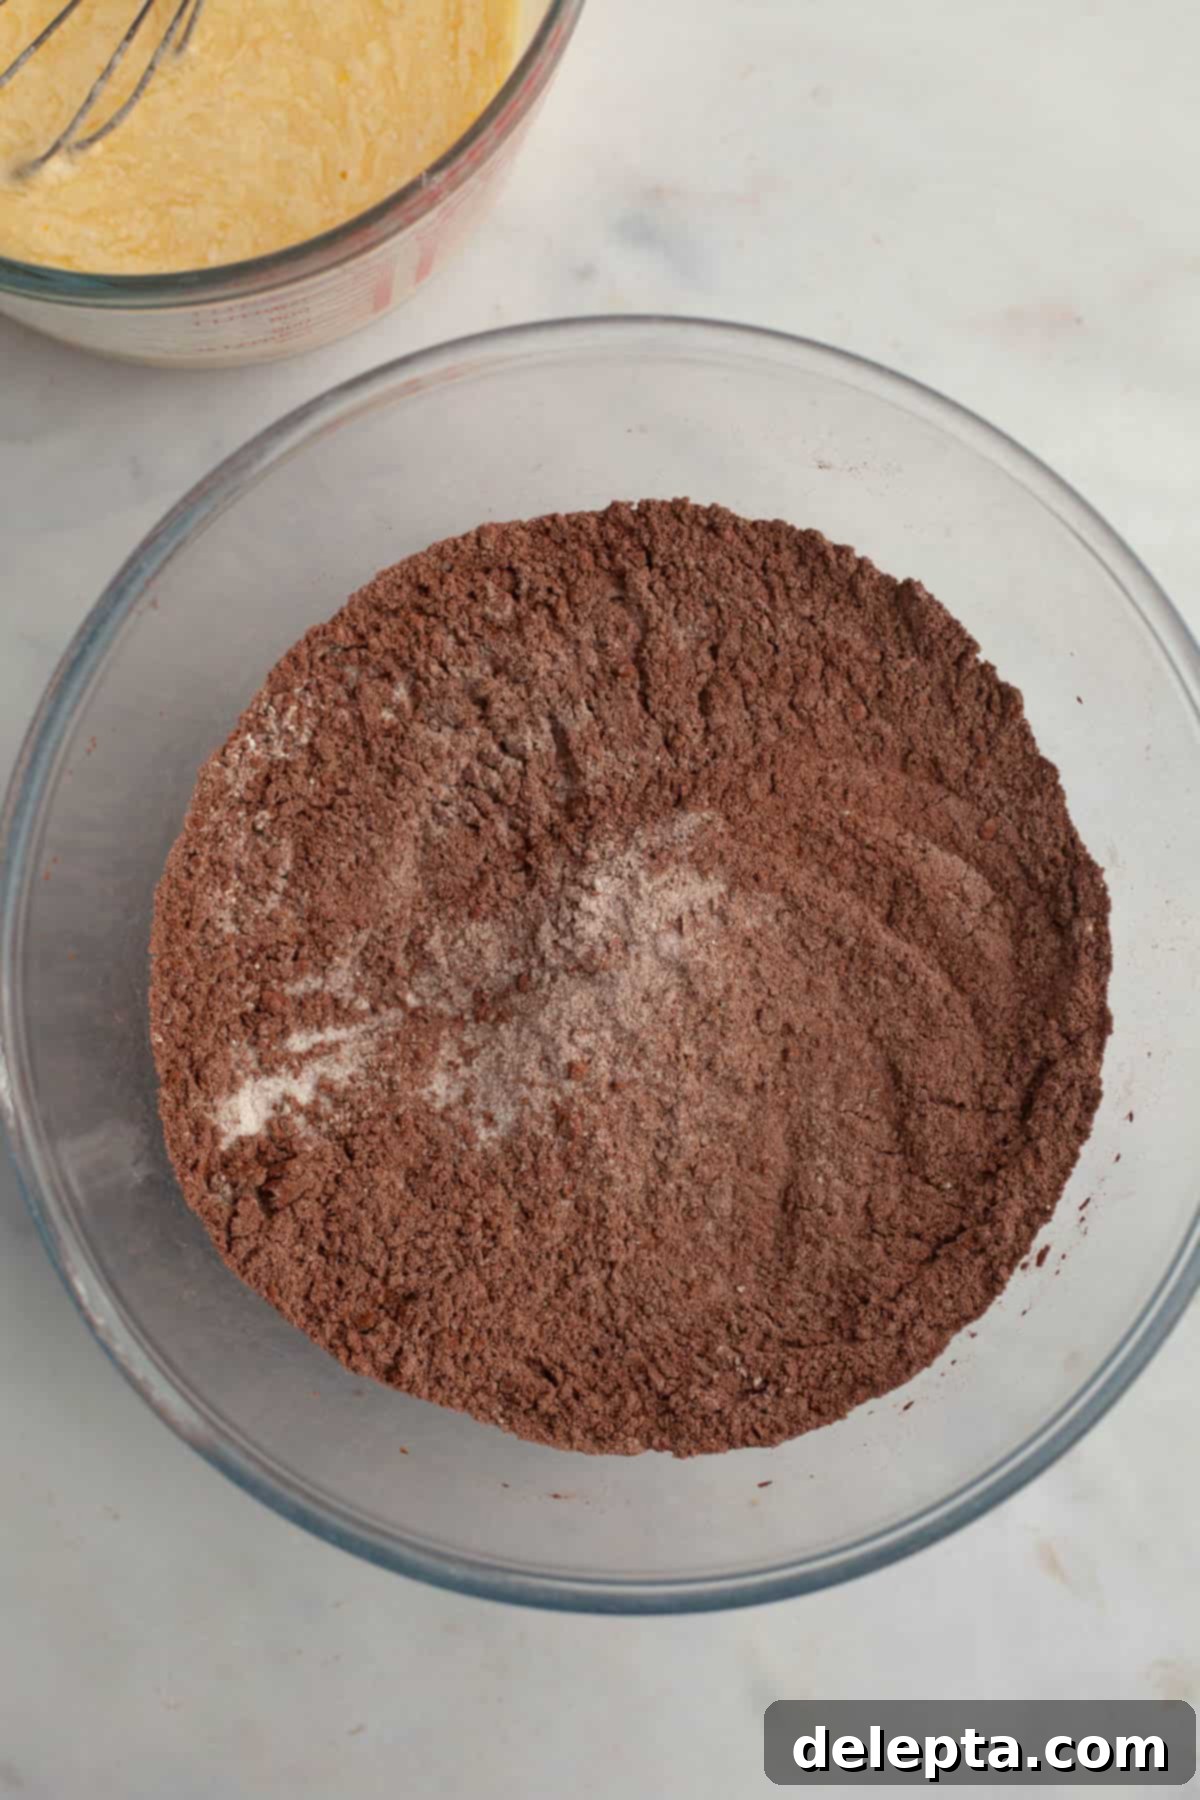
- Step 1: Begin by preheating your oven to 350°Fahrenheit (175°C) and lining two standard cupcake tins with paper liners. In a large bowl, meticulously whisk together all of your dry ingredients until they are thoroughly combined and free of any lumps. This ensures an even distribution of leavening agents and flavor. Set this bowl aside while you prepare the wet ingredients.
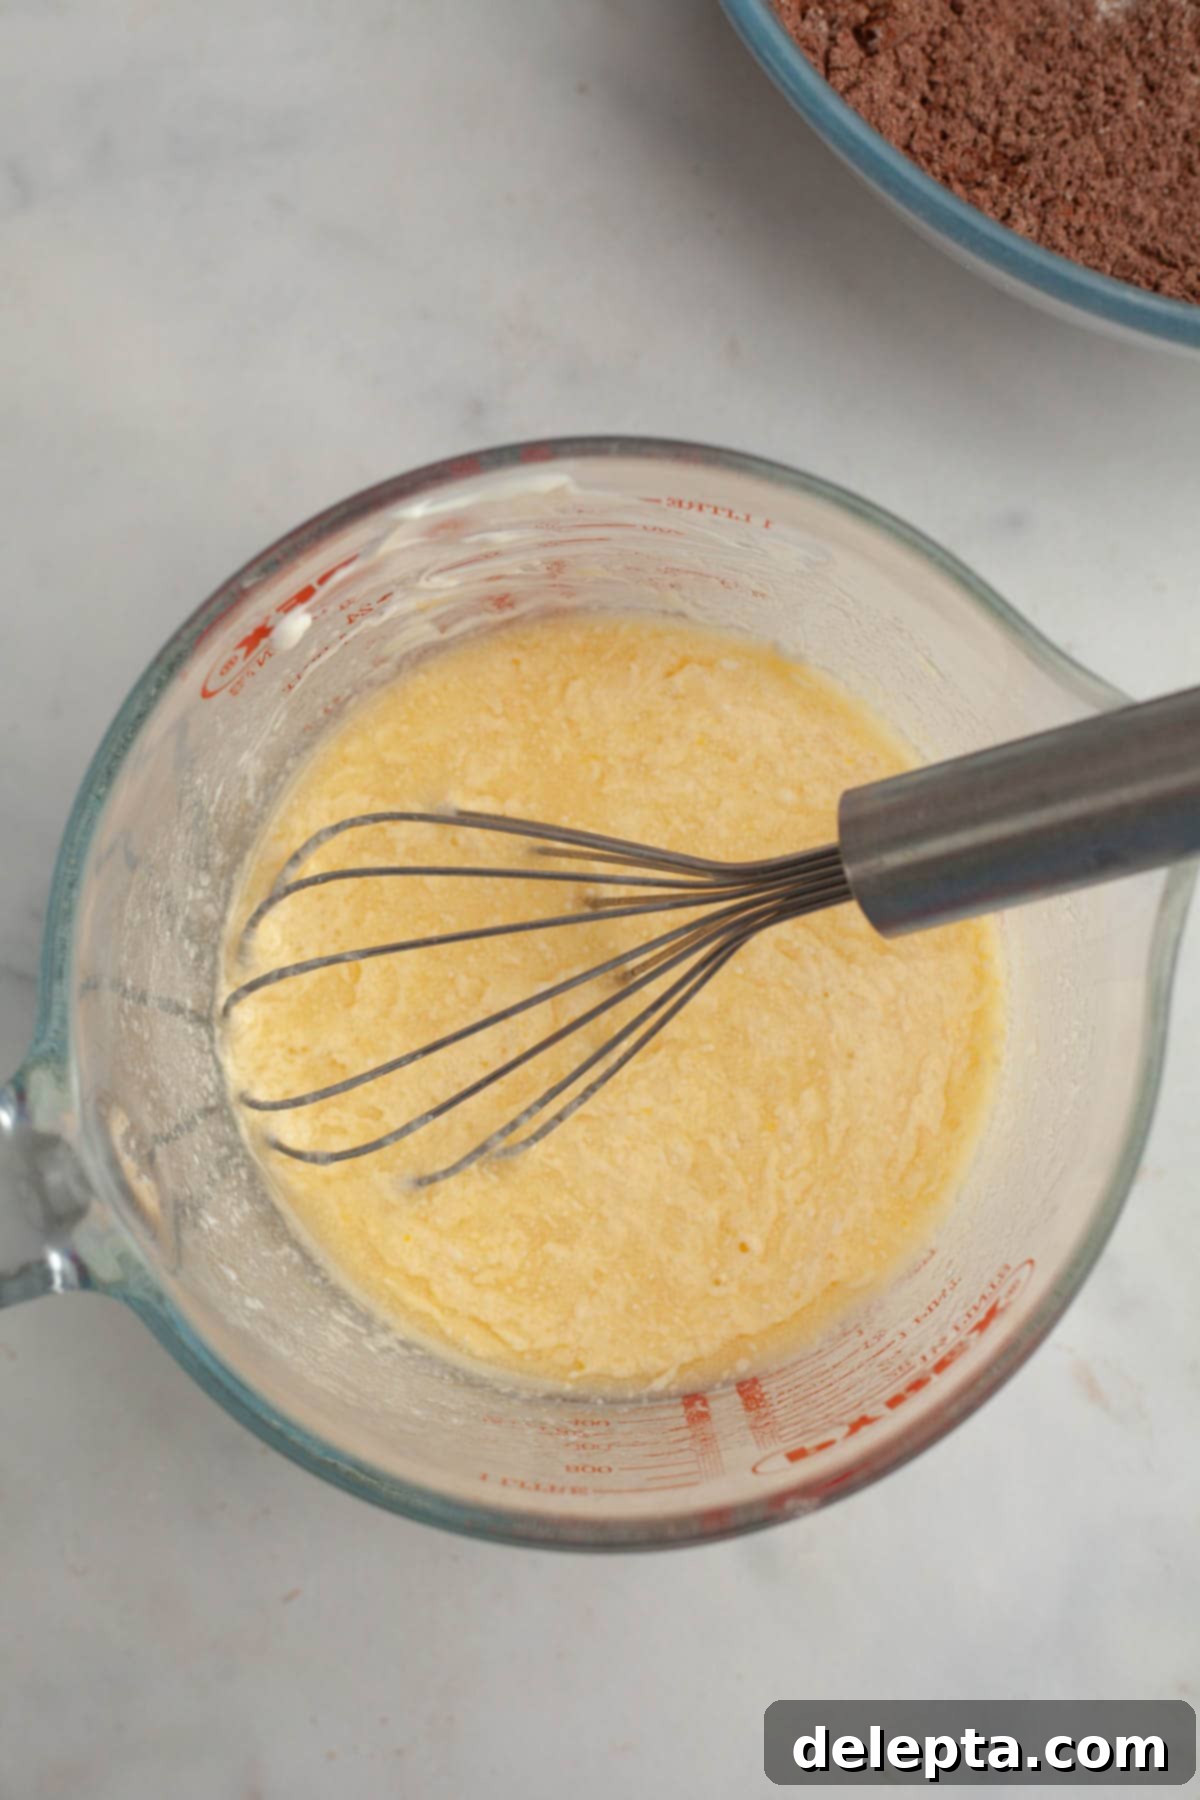
- Step 2: In a separate large jug or a medium-sized bowl, whisk together the wet ingredients – this includes your eggs, oil, vanilla extract, sour cream, and peppermint extract – until the mixture is completely smooth and well integrated. In another small mug or bowl, whisk the hot water and espresso powder together until the powder has fully dissolved, creating a potent coffee solution.
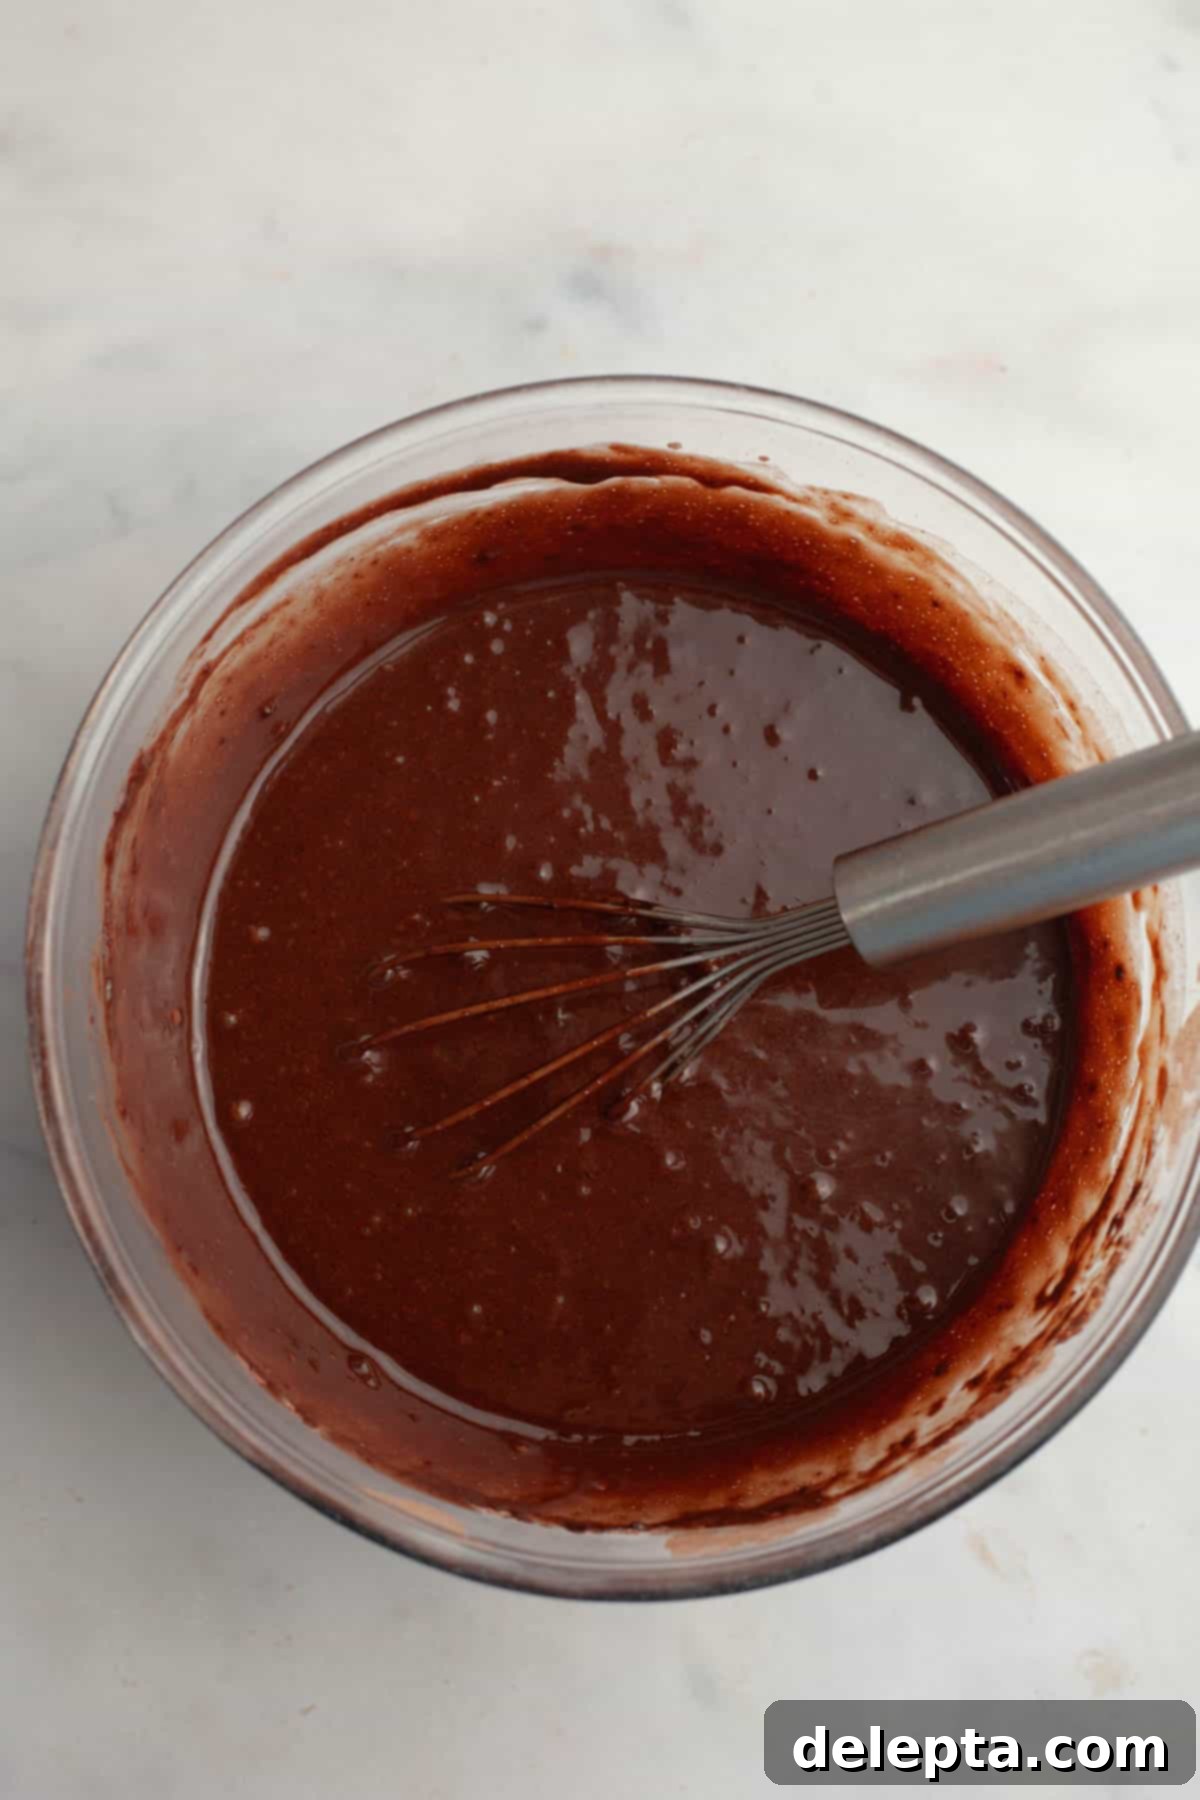
- Step 3: Carefully pour the combined wet ingredients into the large bowl containing your dry ingredients. Mix gently until they are just combined, being careful not to overmix, as this can lead to tough cupcakes. Finally, pour in the hot coffee mixture, stirring just enough to incorporate it, ensuring a smooth and flowing batter.
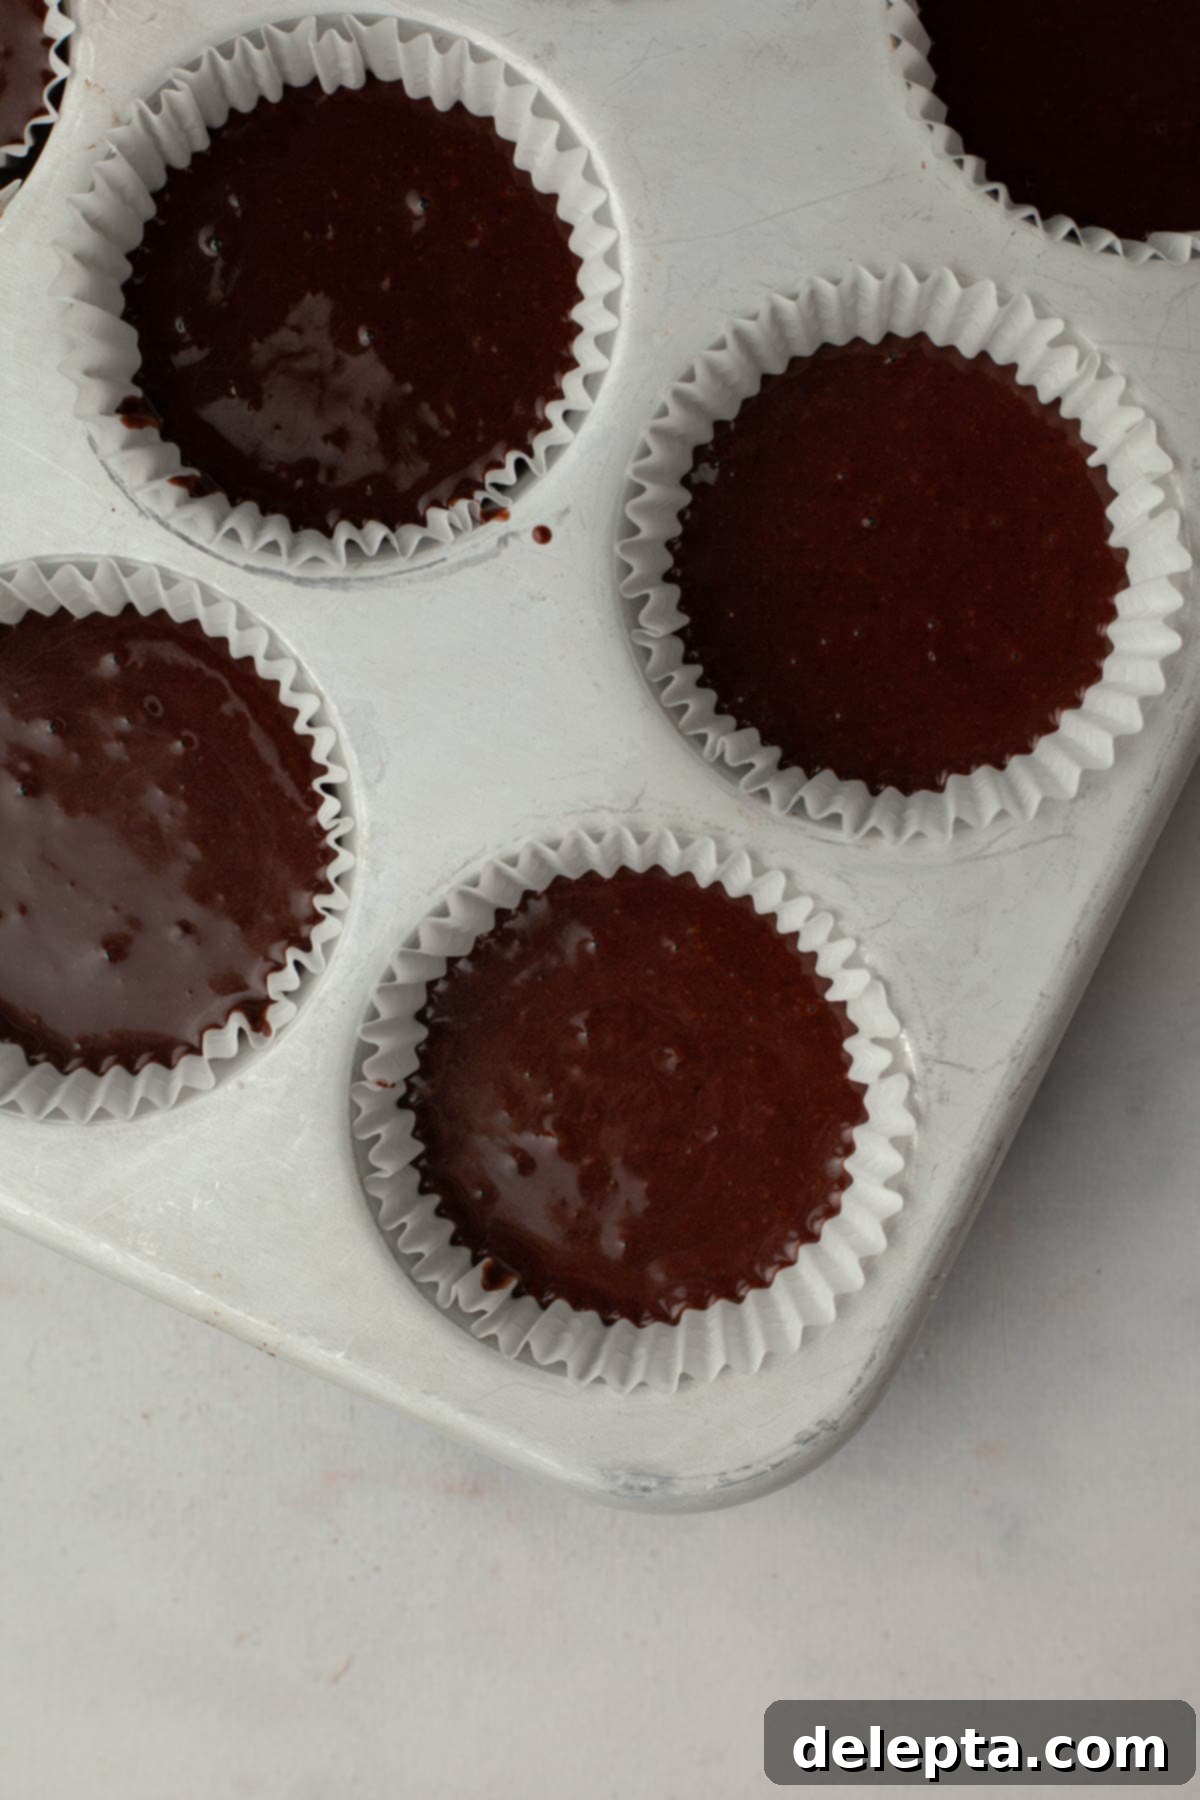
- Step 4: Fill each cupcake liner just over halfway with the prepared batter. To ensure even baking and optimal results, bake one tray of cupcakes at a time for approximately 18-20 minutes, or until a toothpick inserted into the center comes out clean. Once baked, allow the cupcakes to cool in the tin for about 10 minutes before transferring them to a wire cooling rack to cool completely.
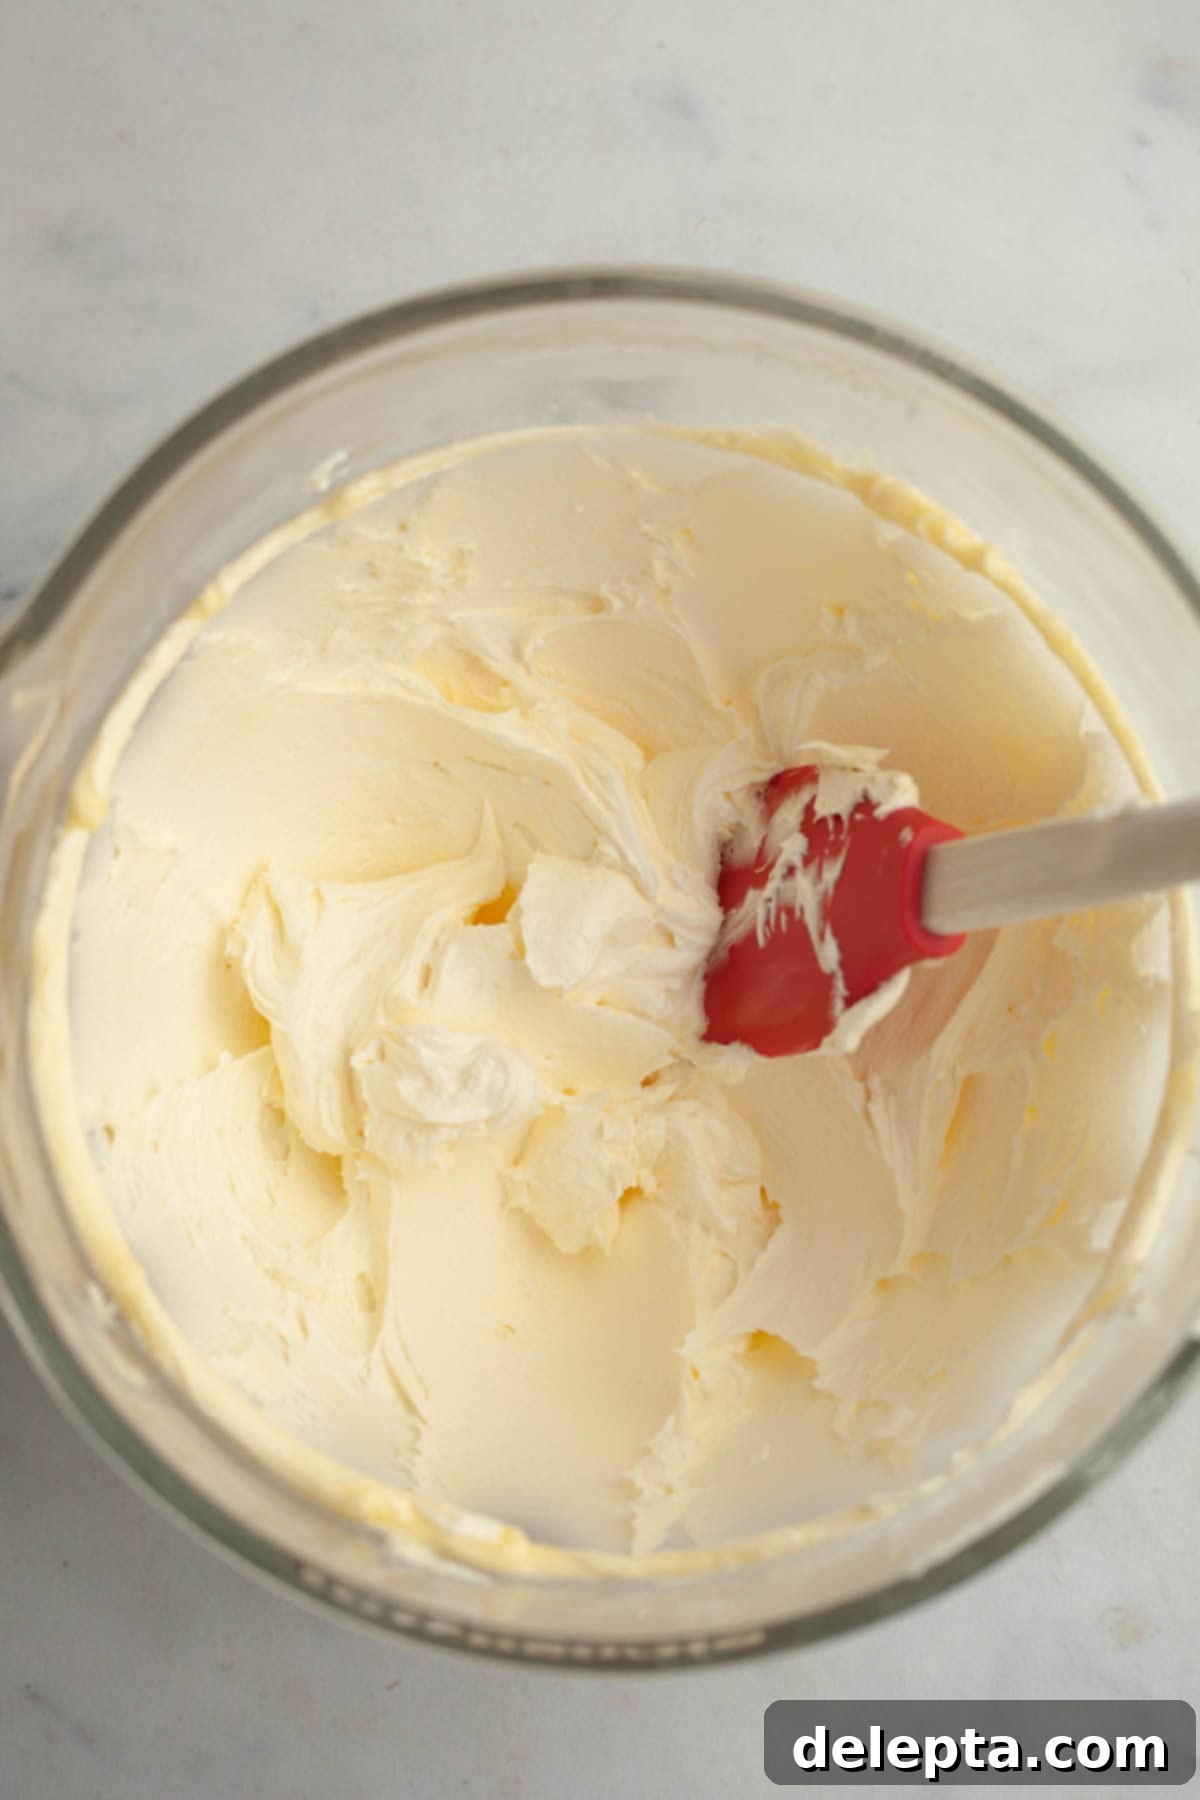
- Step 5: For the frosting, using either the bowl of a stand mixer with a paddle attachment or a large bowl with a handheld mixer, beat the softened unsalted butter and confectioners’ sugar together until the mixture is very thick and creamy. Then, incorporate the vanilla extract, peppermint extract, and a pinch of salt. Finally, gradually mix in the heavy cream until your frosting achieves a perfectly smooth, spreadable, and pipeable consistency.
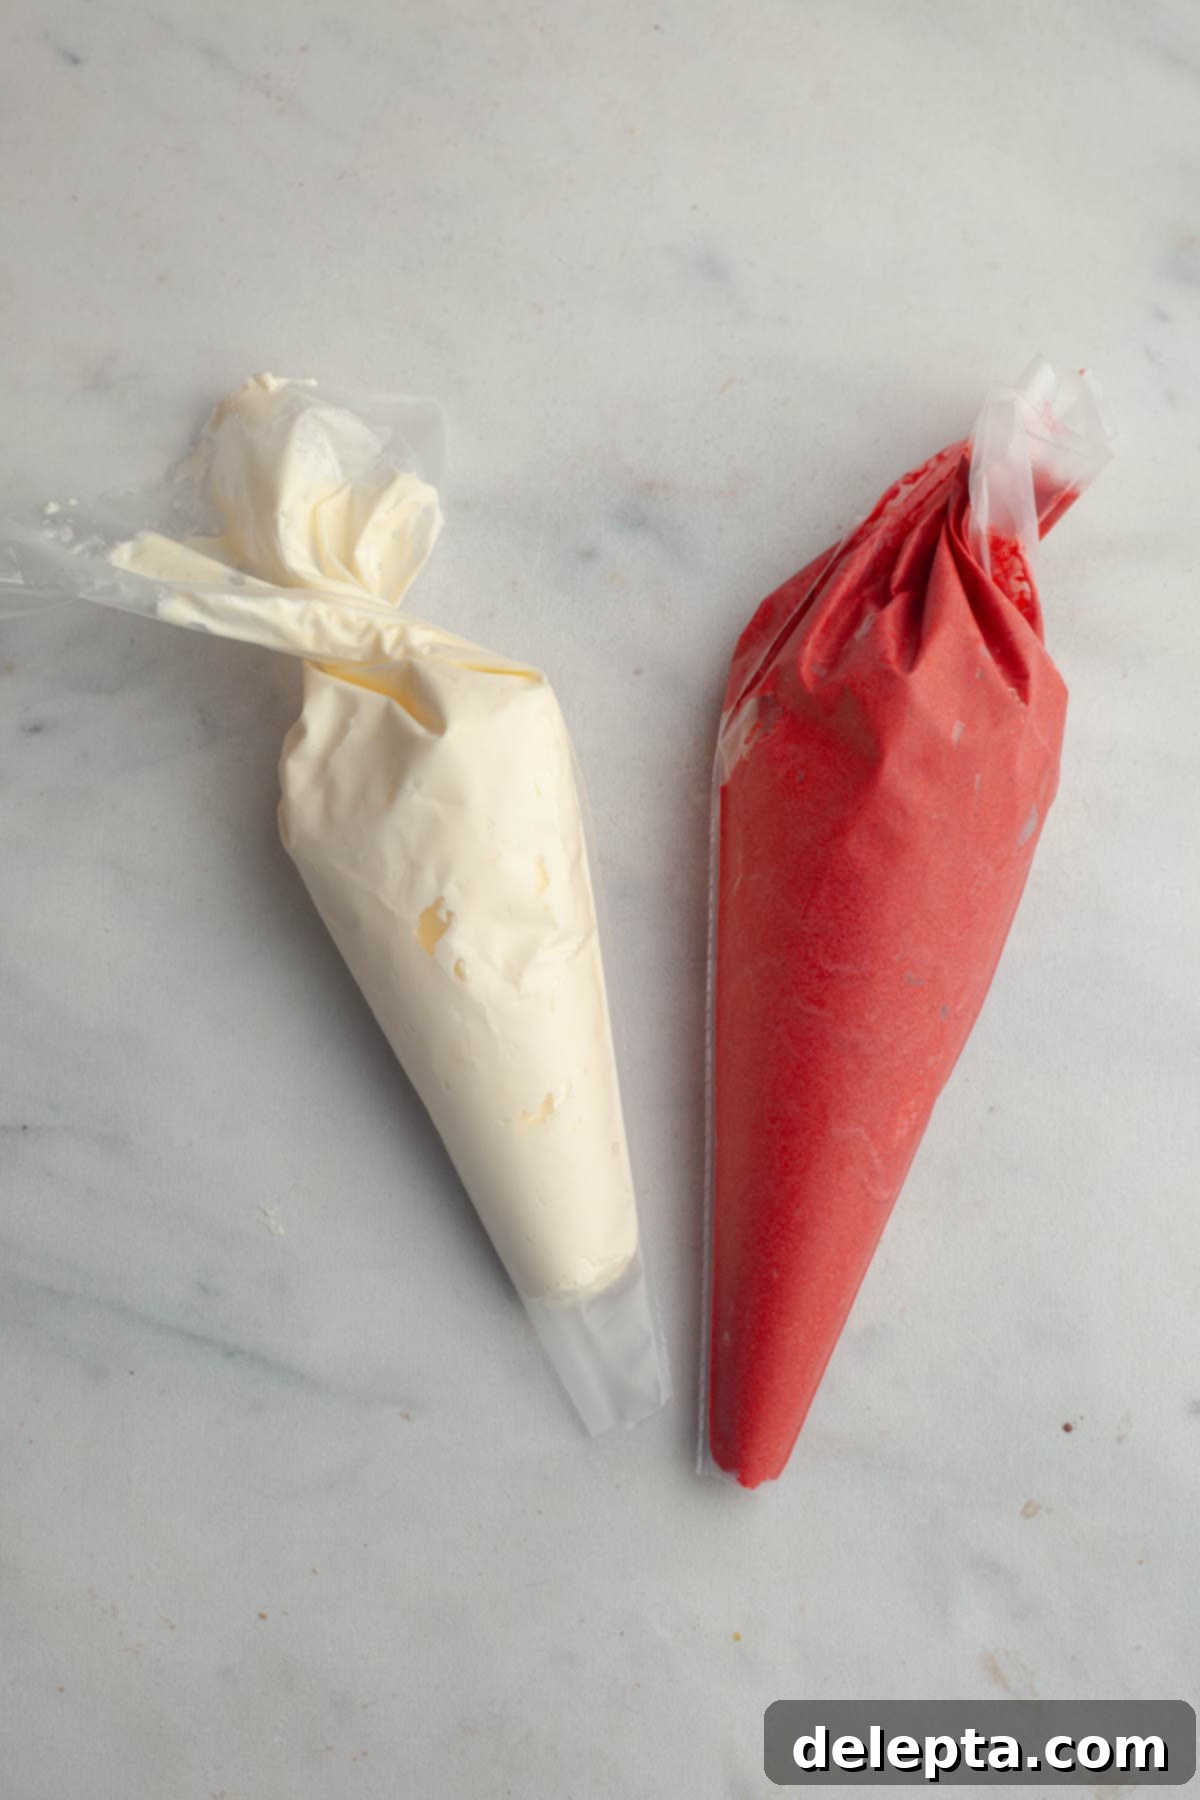
- Step 6: Divide the prepared frosting evenly into two portions. Color one half with your chosen red food gel until it reaches a vibrant, festive shade. Place each colored frosting into separate medium piping bags, then snip off the ends of both bags (ensuring the openings are relatively large for a good swirl). Now, carefully insert BOTH smaller piping bags into one larger piping bag that has been fitted with a large round piping tip. This clever technique allows both frosting colors to emerge simultaneously, creating that beautiful swirled effect effortlessly.
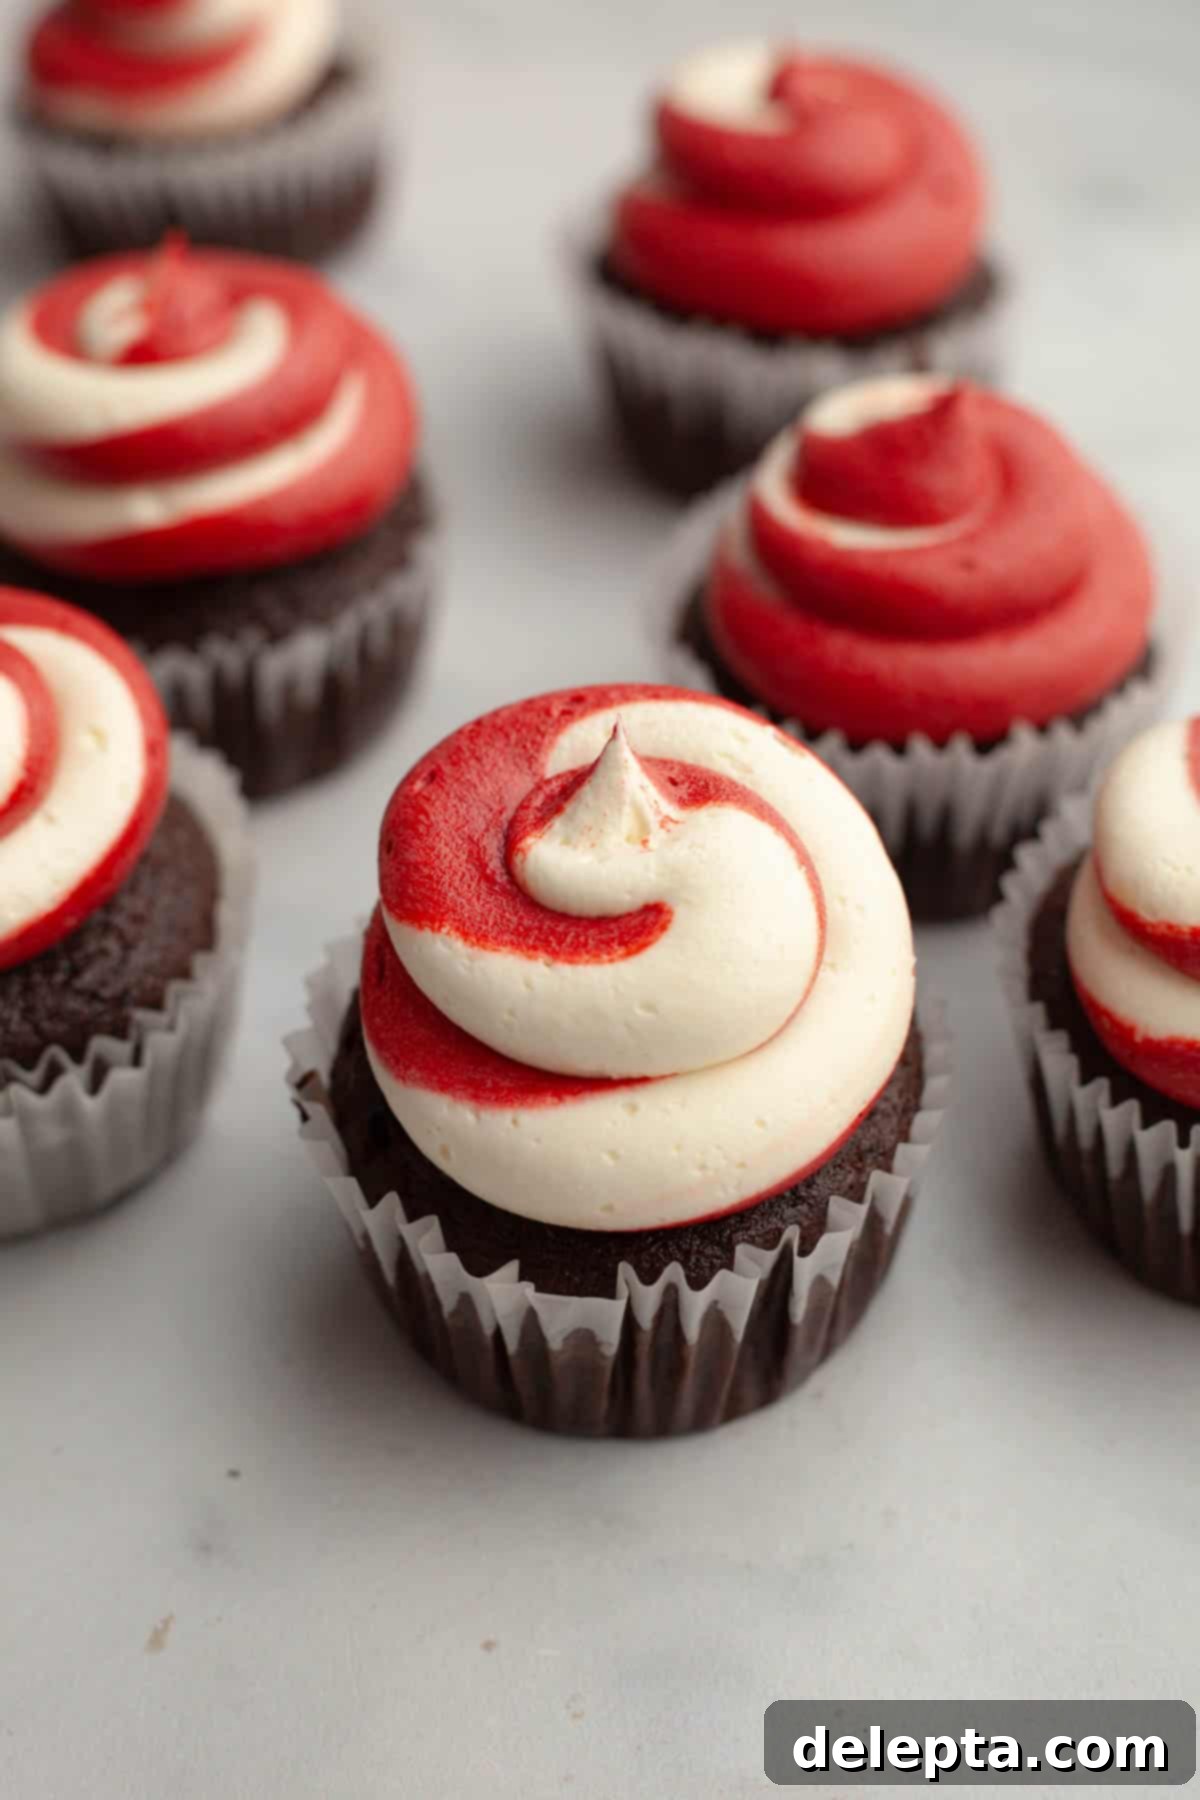
- Step 7: Pipe the festive swirled frosting onto each cooled chocolate cupcake, creating an appealing mound. If you desire the “magic shell” chocolate dip, immediately place the frosted cupcakes into the freezer for 20-30 minutes. This crucial step ensures the frosting is firm enough to withstand dipping without melting or detaching.
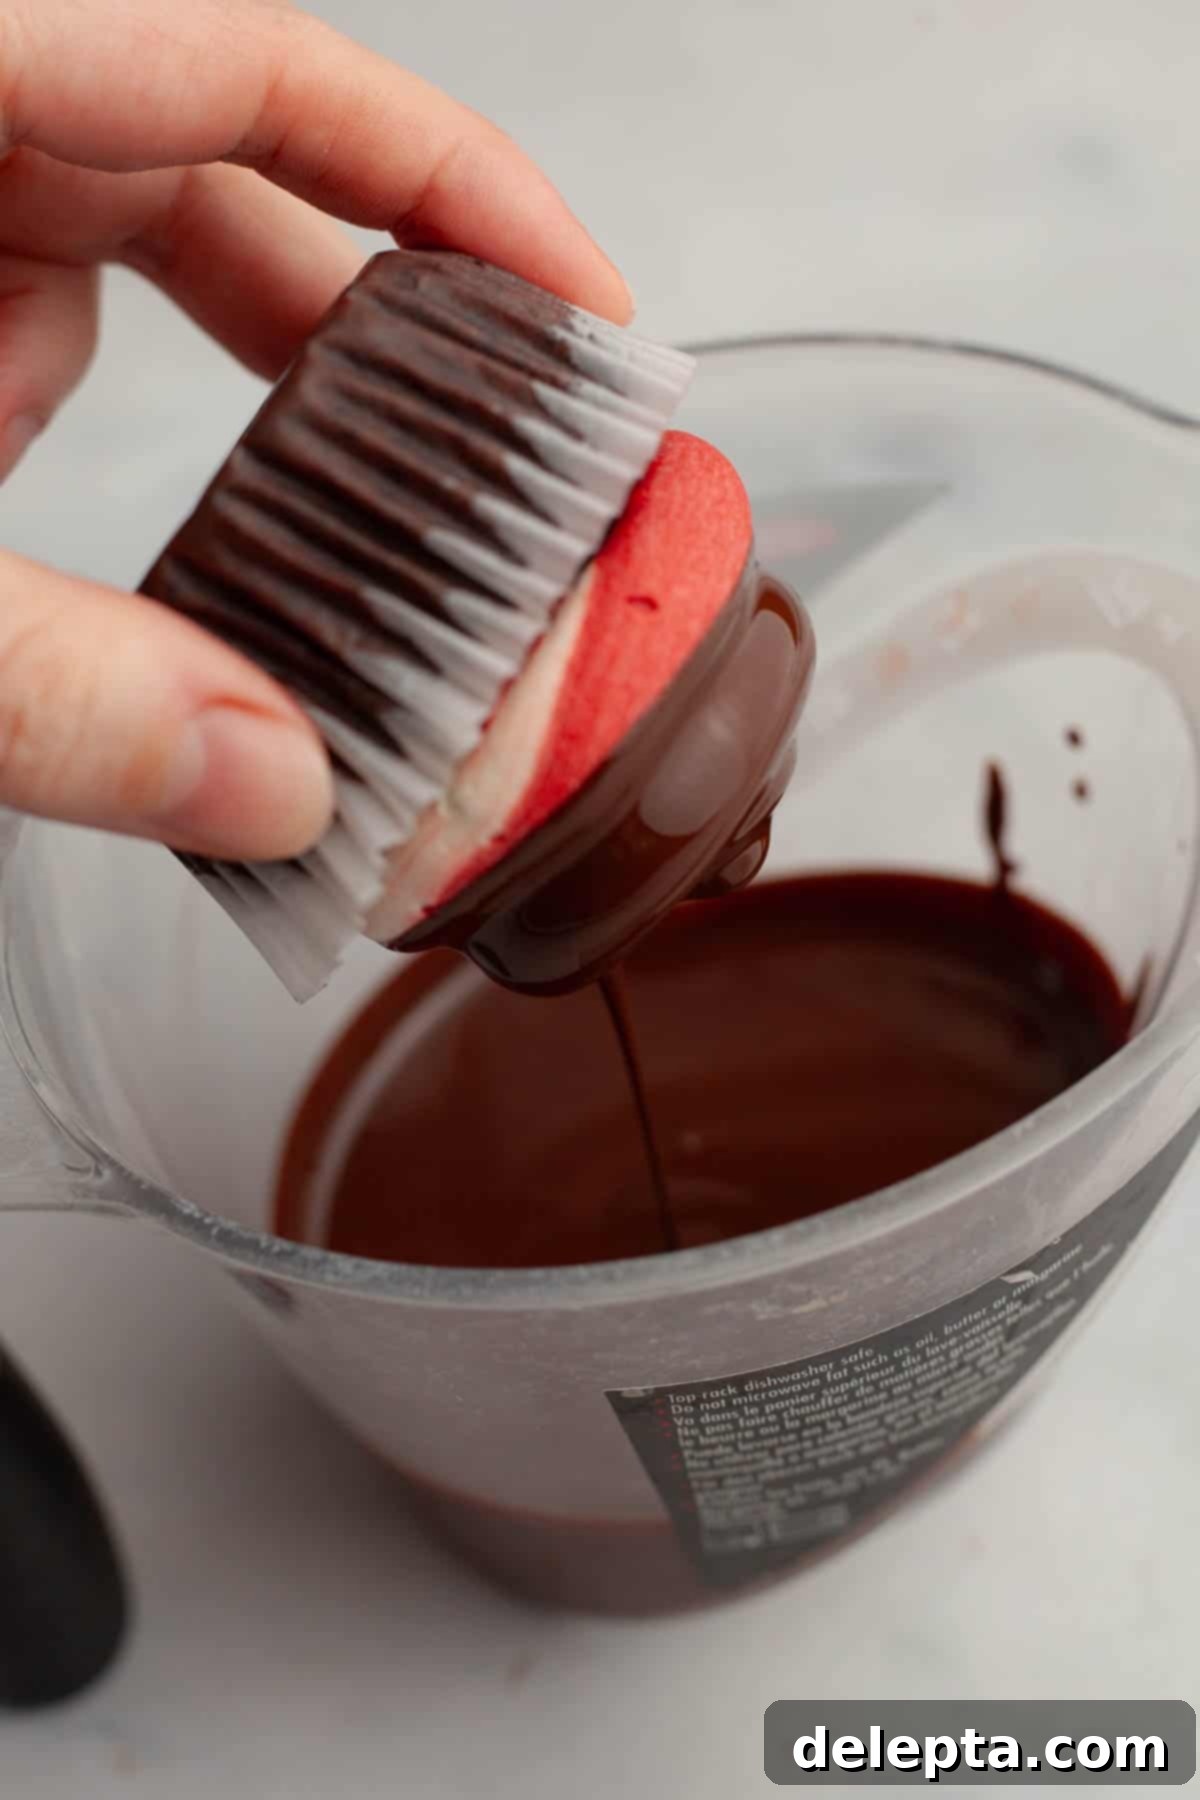
- Step 8: Prepare your homemade magic shell. In a microwave-safe bowl or jug, combine the chopped dark chocolate and neutral vegetable oil. Melt in short bursts (15-second increments), stirring thoroughly after each interval to prevent burning. Once completely smooth, remove the frozen cupcakes from the freezer. Dip each cupcake, frosting-side down, into the melted chocolate, allowing any excess to drip off. The contrast in temperature will cause the chocolate magic shell to set almost instantly, creating a perfect crisp coating.
My Essential Baking Tips for Perfect Cupcakes
- Smart Dipping for Hi-Hat Cupcakes: When it comes to dipping your frosted cupcakes into the melted chocolate for the magic shell, the container you use makes all the difference! It’s much easier to achieve a clean, even coating if you use a deep, narrow vessel, such as a tall coffee mug or a narrow measuring jug, rather than a wide, shallow bowl. This allows you to fully submerge the frosting without the chocolate spreading too thinly or getting on the cupcake liner.
- Mastering the Swirled Frosting: That gorgeous red and white candy cane swirl might look complex, but it’s surprisingly straightforward with this simple trick! You’ll need three piping bags: two medium-sized for your individual frosting colors and one large main piping bag with a large, round piping tip. After dividing and coloring your frosting, snip relatively large openings at the ends of the two smaller bags. Then, gently slide both of these into the larger piping bag, making sure their snipped ends align with the opening of the main piping tip. When you pipe, the two frostings will emerge simultaneously, beautifully intertwining to give you that stunning, festive swirl!
- The Precision of a Kitchen Scale: I cannot stress this enough: using a kitchen scale for baking, especially with ingredients like flour and cocoa powder, is a game-changer! Flour and cocoa powder are notorious for being easily over-measured when using volume cups, which can lead to dry, dense, or tough baked goods. A scale ensures absolute accuracy, guaranteeing your peppermint chocolate cupcakes are perfectly moist and tender every single time. It’s an inexpensive tool that significantly improves your baking success.
- Crucial Cupcake Freezing for Magic Shell: Do *not* skip the freezing step if you’re planning on dipping your frosted cupcakes in chocolate for the magic shell. This step is absolutely critical for two main reasons. Firstly, a well-chilled, firm frosting will stay securely on the cupcake when you turn it upside down for dipping, preventing any embarrassing frosting casualties. Secondly, the cold frosting ensures the melted chocolate sets almost instantly into a crisp, thin shell, rather than melting the frosting or creating a thick, clumpy coating.
- Don’t Overmix the Batter: When combining your wet and dry ingredients, mix just until no streaks of flour remain. Overmixing develops the gluten in the flour, which can lead to tough, chewy cupcakes rather than the light, tender texture we’re aiming for. A few small lumps are perfectly fine!
- Room Temperature Ingredients are Key: This tip applies to most baking, but it’s especially important for cupcakes and frosting. Room temperature eggs, butter, and sour cream emulsify much better, creating a smoother, more uniform batter and a lighter, airier frosting. Plan ahead and take these ingredients out of the fridge at least an hour before you start baking.
Elevate Your Serving Experience
- The Ultimate Holiday Party Spread: Imagine these gorgeous peppermint chocolate hi-hat cupcakes as the star of your holiday dessert table! Pair them with some delicate cut out shortbread cookies, a rich red velvet cake with chocolate chips, and irresistible Christmas cookie fudge for a truly spectacular and memorable spread. If you’re hosting such a feast, please consider inviting me!
- Gifting with Style: These beautifully decorated cupcakes make exceptional homemade holiday gifts. Package them individually in clear cellophane bags tied with festive ribbons, or arrange a few in a small decorative box. They’re perfect for teachers, neighbors, or as a thoughtful hostess gift.
- Warm Beverage Pairings: For a cozy winter treat, serve these peppermint chocolate cupcakes alongside a steaming mug of hot cocoa (perhaps with an extra shot of peppermint!), a classic peppermint latte, or a simple cup of black coffee or tea. The warm beverages perfectly complement the cool mint and rich chocolate flavors.
- Simple Decorating Alternatives: If you opt out of the magic shell, there are still plenty of ways to decorate! Before your frosting sets, sprinkle with crushed candy canes, fine sparkling sugar, or a mix of red, white, and green holiday sprinkles for an equally festive look that requires less effort.
Storage & Freezing Instructions
To maintain their freshness and delicious texture, store your frosted peppermint chocolate cupcakes in an airtight container in the refrigerator for up to 4-5 days. For the best flavor and texture experience, always allow the cupcakes to come to room temperature for at least 30 minutes before enjoying them. The frosting and cake will soften beautifully, and the flavors will become more pronounced. You can also freeze unfrosted cupcakes in an airtight container for up to 3 months, then thaw and frost when ready to serve for maximum freshness.
Discover More Festive Christmas Recipes!
- Cocoa Blossom Cookies
- Danish Chocolate Dipped Butter Cookies
- German Gingerbread Cookies
- Chocolate Tiffin
If you’ve made these incredible peppermint chocolate cupcakes, make sure to leave a ⭐️ rating and review below! I absolutely love seeing your culinary creations, so don’t forget to tag me on Instagram @alpineella so I can admire what you’ve baked! You can also stay up-to-date with my latest recipes and baking adventures by following along on Pinterest, Facebook, and TikTok!
Recipe

Peppermint Chocolate Cupcakes
Ella Gilbert
Pin Recipe
Save RecipeSaved!
Equipment
-
2 12 cup cupcake pans
-
Stand Mixer
-
Handheld Mixer
-
Bowls
-
2 Medium Piping Bags
-
1 Large Piping Bag
-
1 Large Round Tip
-
Measuring Spoons
-
Kitchen Scale
Ingredients
Cupcakes
- 1 cup all-purpose flour
- ½ cup cocoa powder dutch processed
- ½ teaspoon baking powder
- ½ teaspoon baking soda
-
½
teaspoon kosher salt
- 2 large eggs room temperature
- 1 cup granulated sugar
- ½ cup vegetable oil
- 1 teaspoon vanilla extract
- ½ teaspoon peppermint extract
- ½ cup sour cream room temperature
- 1 teaspoon espresso powder
- ½ cup hot water
Frosting
- 2 sticks unsalted butter room temperature
- 1 teaspoon vanilla extract
- ½ teaspoon peppermint extract
- ¼ teaspoon kosher salt
- 3 cups confectioners’ sugar
- ¼ cup heavy cream
- red food gel
Magic Shell
- 12 oz dark chocolate chopped
- 2 tablespoons neutral oil
Instructions
Make Cupcakes
-
Preheat your oven to 350°F/175°C and place 12 cupcake liners in your muffin tray. This recipe makes about 16-18 cupcakes, so you will need to bake these in two batches for optimal results.
-
In a large mixing bowl, whisk together the flour, Dutch-processed cocoa powder, granulated sugar, baking powder, baking soda, and kosher salt. Ensure all dry ingredients are thoroughly combined and free of lumps. Set this bowl aside.1 cup all-purpose flour, ½ cup cocoa powder, ½ teaspoon baking powder, ½ teaspoon baking soda, ½ teaspoon kosher salt, 1 cup granulated sugar
-
In a large jug or medium bowl, whisk together the room temperature eggs, vegetable oil, peppermint extract, sour cream, and vanilla extract until the mixture is completely smooth and emulsified.2 large eggs, ½ cup vegetable oil, 1 teaspoon vanilla extract, ½ cup sour cream, ½ teaspoon peppermint extract
-
In a separate mug or small bowl, whisk the hot water with the espresso powder until the powder is fully dissolved, creating a strong coffee solution.1 teaspoon espresso powder, ½ cup hot water
-
Pour the whisked wet mixture into the bowl with the dry ingredients. Stir gently with a whisk or spatula until just combined. Be careful not to overmix the batter, as this can lead to tough cupcakes. Then, pour in the hot coffee mixture, stirring briefly until just incorporated. The batter will be thin, which is normal.
-
Fill each cupcake liner just over halfway with the prepared batter. Bake for 14-16 minutes, or until a wooden skewer or toothpick inserted into the center of a cupcake comes out clean.
-
Allow the baked cupcakes to cool in the muffin tray for about 15 minutes before carefully removing them to a wire cooling rack to cool completely. It’s best to bake one cupcake pan at a time for even heat distribution.
Prepare Frosting
-
In the bowl of a stand mixer fitted with the paddle attachment (or using a large bowl and a handheld mixer), beat the softened unsalted butter and confectioners’ sugar together on low speed until they are just combined and no dry pockets of sugar remain.2 sticks unsalted butter, 3 cups confectioners’ sugar
-
Increase the mixer speed to medium-high and beat for another 2 minutes until the mixture becomes very thick, light, and fluffy. Scrape down the sides of the bowl as needed.
-
Stop the mixer, then add the kosher salt, vanilla extract, and peppermint extract into the bowl. Beat again on medium-high speed for an additional 2 minutes to ensure everything is thoroughly incorporated and the flavors are evenly distributed.1 teaspoon vanilla extract, ¼ teaspoon kosher salt, ½ teaspoon peppermint extract
-
Turn the mixer to its lowest speed and gradually pour in the heavy cream. Beat until the frosting transforms into a very creamy, smooth, and easily spreadable consistency, perfect for piping.¼ cup heavy cream
-
Divide the prepared frosting evenly into two separate bowls. Take one half and transfer it into a medium piping bag. To the remaining half in the mixing bowl, add your red food gel and mix until you achieve your desired festive shade of red. Transfer this red frosting into a second medium piping bag.red food gel
-
Snip off the ends of both the white and red frosting piping bags (if using disposable plastic bags). Make sure the openings are large enough for the frosting to flow easily. Then, carefully insert BOTH smaller piping bags into one larger piping bag that has been fitted with a large round piping tip. This setup is key for achieving the beautiful candy cane swirl.
-
Pipe the festive swirled frosting onto your completely cooled cupcakes, creating a generous, appealing mound. Once all cupcakes are frosted, immediately place them in the freezer (I find it helpful to arrange them on a baking sheet or in a large container) for 20-30 minutes. This chilling step is essential if you plan to add the magic shell coating.
Craft the Magic Shell
-
In a microwave-safe jug or mug (a tall, narrow container works best for dipping), combine the chopped dark chocolate and neutral vegetable oil. Microwave in short bursts of 15 seconds, stirring thoroughly after each increment. Continue until the chocolate is completely melted and smooth, ensuring it doesn’t burn.12 oz dark chocolate, 2 tablespoons neutral oil
-
Once the chocolate is melted and smooth, set it aside for a few minutes to cool slightly. It should still be liquid but not piping hot.
-
Take the chilled cupcakes out of the freezer. Hold each cupcake by the base and gently dip the frosted top, frosting-side down, into the melted chocolate, ensuring the entire frosting is coated. Lift the cupcake out, allowing any excess chocolate to drip off. The immediate temperature contrast will cause the magic shell topping to set and harden within just a few minutes, creating a satisfying crisp coating. Serve and enjoy!
Notes
Ingredients: I make sure that all of my ingredients are at room temperature before I start the recipe, so pull out all of the ingredients (including the sour cream and eggs!) before you start baking. This ensures a smoother batter and frosting.
Butter: I often use European style butter, such as Kerrygold, in my recipes. This type of butter typically has a higher fat content, which will make your frosting incredibly creamy and rich.
Salt: If you do not have kosher salt, halve the amount of salt called for in the recipe. As a general guide, 1 teaspoon of Diamond Crystal kosher salt is equivalent to ½ teaspoon of fine salt. Please note, I’m specifically using Diamond Crystal kosher salt, not Morton salt, which is much saltier.
Cocoa Powder: I’m using Dutch-processed cocoa powder for a deep, rich chocolate flavor. If you’re unsure which type you have, check the ingredients – if it mentions ‘acidity regulator’ or ‘alkali,’ it’s Dutch-processed.
Peppermint Extract: It is crucial to use pure peppermint extract, not mint extract. Mint extract often contains spearmint, which can give your baked goods an undesirable “toothpaste” flavor.
Food Gel: My favorite brand of food coloring is Americolor, particularly their ‘Super Red’ shade, for achieving that vibrant festive red.
Storage: Store the frosted cupcakes in an airtight container in the fridge for up to 5 days. For the best enjoyment, let them sit at room temperature for 30 minutes before eating to allow the cake and frosting to soften.
Nutrition
