The Ultimate Homemade Cereal Milk Donuts: A Sweet Nostalgia Recipe Inspired by Milk Bar

Beyond the Ordinary: The Magic of Cereal Milk Flavor
Okay, let’s be honest, the phrase “cereal milk” might initially sound a little unconventional. But unless you’ve truly been disconnected from the culinary world, you’ve undoubtedly heard of the innovative pastry chef Christina Tosi, or at the very least, her celebrated bakery, Milk Bar. Nestled in the heart of New York City, Milk Bar is renowned for its ingeniously inventive yet wonderfully nostalgic treats. While some might consider its creations a bit “gimmicky,” that’s precisely where half the fun lies. It’s an experience that tantalizes your taste buds and transports you back to childhood, but with a sophisticated, chef-driven twist. It’s a place where childhood dreams meet gourmet baking, transforming humble ingredients into extraordinary desserts.
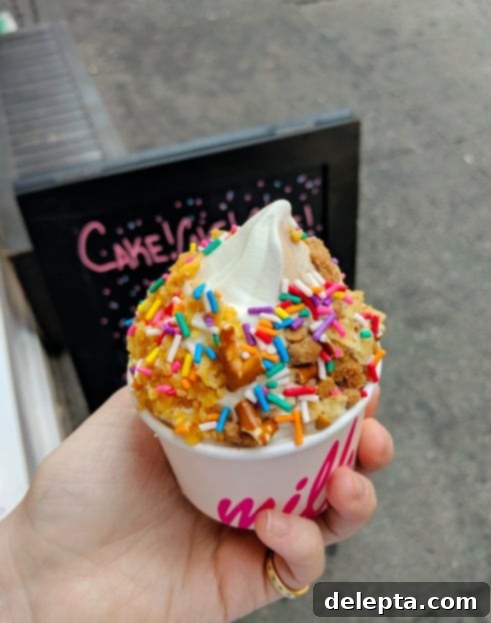
My first unforgettable encounter with the magic of cereal milk was during a trip to New York City with Will last summer – his very first visit to the Big Apple. Naturally, I meticulously planned our accommodations to ensure we were within easy reach of all the iconic bakeries I was eager for us to explore. On our inaugural full day, we embarked on a delightful trek to the vibrant West Village, our ultimate destination being Milk Bar to savor their famous cereal milk soft serve. The anticipation was palpable, a mix of excitement and curiosity for this uniquely celebrated flavor.

I opted for the soft serve with all the delectable toppings – a glorious mix that included crunchy pretzels and, if my memory serves me right, even potato chips (or crisps, for our British friends!). It was an absolute revelation, a perfect symphony of sweet and salty, creamy and crunchy. That unique flavor profile, reminiscent of the sweet milk left at the bottom of a cereal bowl, stayed with me long after the last spoonful. It was a flavor that sparked an immediate desire to recreate and infuse into other beloved desserts. Many months later, while I was honing my donut-making skills and contemplating the perfect filling, the idea struck me: cereal milk. I knew, without a shadow of a doubt, that I had to bring that distinct, comforting taste to a batch of homemade, fluffy donuts. The challenge was set: to capture the essence of that Milk Bar experience in a filled donut, creating a treat that was both inventive and deeply nostalgic.
Crafting Culinary Harmony: A Multi-Source Recipe Adventure

Creating these cereal milk donuts wasn’t about following a single recipe; it was an exciting culinary adventure, a true hodgepodge of techniques and inspirations meticulously blended into one harmonious creation. I took the best elements from several esteemed culinary sources, smashing them together to achieve the ultimate donut experience. The foundation – the incredibly light and airy donut dough – is a tribute to the genius of Erin McDowell, whose expertise in baking consistently yields perfect results. For the rich and luscious custard filling, I drew inspiration from the classic crème pâtissière techniques perfected by London’s renowned Bread Ahead Bakery, ensuring a silky smooth texture and decadent flavor. And, of course, the star of the show, the distinctive cereal milk flavor, is directly inspired by the iconic Milk Bar itself. This fusion of baking prowess ensures that every bite of these donuts is a journey through different culinary excellences.
It’s important to note that this is not a quick, single-afternoon bake. This recipe is a bit more involved and truly shines when prepared over two days. This extended timeline allows for crucial steps like proper dough fermentation and custard chilling, which are essential for achieving the optimal flavor and texture. Planning ahead is key, but the results are undoubtedly worth the patience and effort.
I typically prepare my donut dough the evening before I plan to fry. This allows it ample time to undergo a slow, cold proof in the refrigerator overnight. This extended fermentation process contributes immensely to the depth of flavor and the delightful, airy texture of the finished donuts. Similarly, I initiate the crème pâtissière process on day one, preparing the base custard and letting it chill thoroughly overnight. On the second day, I simply add the final touches and whip the cream just before filling the freshly fried donuts, ensuring a perfectly fresh and luscious filling.
Conquering the Fryer: Deep Frying Made Easy and Safe
Before embarking on this donut journey, I must confess, the idea of deep-fat frying was genuinely terrifying. The splattering oil, the risk of burns, and the general mess always seemed like too much to handle. However, with the right equipment and a mindful approach, it transforms from a daunting task into a manageable and even enjoyable part of the cooking process. For frying these donuts, I highly recommend using a large cast iron casserole pan. Its high sides are a game-changer, providing an excellent barrier against splashes and keeping the hot oil contained. This significantly reduces the intimidation factor and makes the whole process feel much safer.
Beyond the right pan, safety is paramount. Always ensure that your frying area is completely free of any water. Water and hot oil do not mix, and even a tiny drop can cause dangerous splatters. Use a reliable thermometer to monitor your oil temperature – consistency is key for evenly cooked donuts. Aim for a temperature around 350-375°F (175-190°C) for best results. Don’t overcrowd the pan; fry a few donuts at a time to maintain the oil temperature and allow them to cook properly. Have a slotted spoon or spider handy for turning and removing the donuts, and a wire rack set over paper towels for draining excess oil. With these simple precautions, you’ll find deep frying to be a rewarding and less intimidating culinary technique, opening up a world of delicious possibilities like these homemade cereal milk donuts.

Recipe: Homemade Cereal Milk Donuts

Cereal Milk Donuts
Ella Gilbert
Pin Recipe
Save RecipeSaved!
Equipment
-
Large Cast Iron Casserole Dish (or deep fryer)
-
Baking Sheet
-
Parchment Paper
-
Large Jug
-
Fine-mesh Sieve
-
Medium Saucepan
-
Whisk
-
Stand Mixer (or hand mixer)
-
Piping Bag with Sharp Tip
Ingredients
For the Cereal Milk
- 100 grams cornflakes
- 825 grams cold whole milk
- 30 grams light brown sugar
- ¼ teaspoon kosher salt or ⅛ if using fine salt
For the Cereal Milk Custard
- 500 ml prepared cereal milk
- 1 teaspoon vanilla extract
- 6 large egg yolks
- 125 grams caster sugar (plus 2 tablespoons for whipping cream)
- 80 grams all-purpose flour
- 200 ml cold double cream
Instructions
For the Donuts (Dough)
-
Prepare your donut dough following this trusted recipe: Basic Yeast Donuts with Many Variations by Erin McDowell. For best results, prepare the dough the night before and allow it to proof slowly overnight in the refrigerator. This slow fermentation enhances flavor and texture significantly.
To Make the Cereal Milk
-
Preheat your oven to 150°C (300°F). Line a baking sheet with parchment paper.
-
Spread the cornflakes evenly over the prepared baking sheet. Toast them in the preheated oven for 15 minutes, allowing them to develop a richer, nutty flavor.
-
Once toasted, let the cornflakes cool completely on the baking sheet. Transfer the cooled cornflakes to a large jug. Pour the cold milk over the cornflakes and stir gently to combine. Let this mixture steep at room temperature for approximately 20 minutes to infuse the milk with that distinctive cereal flavor.
-
Carefully strain the cereal milk mixture through a fine-mesh sieve into a medium bowl. The milk may pass slowly towards the end; use the back of a spatula to gently press on the cereal to extract as much liquid as possible. Be careful not to press too hard, as we want to avoid any cereal bits passing through the sieve and into our smooth milk.
-
Add the brown sugar and salt to the strained cereal milk. Whisk thoroughly until both are completely dissolved. Your flavorful cereal milk is now ready.
For the Cereal Milk Custard
-
Pour the prepared cereal milk into a medium-sized saucepan and stir in the vanilla extract. Heat the mixture slowly over medium heat, bringing it just to a gentle boil.
-
In a separate bowl, whisk together the egg yolks and 125g of caster sugar for a few seconds until just combined. Then, add the flour and mix again until a smooth paste forms.
-
Once the cereal milk is at a gentle boil, gradually pour about half of it over the egg yolk mixture, whisking continuously and vigorously to temper the eggs and prevent them from curdling. Return the entire mixture (tempered egg mixture and remaining milk) to the saucepan. Cook over medium heat, whisking constantly for about 5 minutes, until the mixture thickens considerably to a rich custard. Do not stop whisking to prevent scorching.
-
Pass the thick custard through a fine-mesh sieve into a clean bowl to ensure it’s perfectly smooth. Immediately press a sheet of clingfilm (plastic wrap) directly onto the surface of the custard to prevent a skin from forming. Allow it to cool completely at room temperature, then transfer to the fridge to chill thoroughly overnight. This chilling process is essential for the custard to firm up.
-
The next day, after your donut dough has been shaped, risen, and fried to golden perfection, roll the hot donuts in caster sugar. The residual heat helps the sugar adhere beautifully. Allow them to cool completely before filling.
-
In a separate bowl, using a stand mixer fitted with a whisk attachment (or a hand mixer), whip the cold double cream with the remaining 2 tablespoons of sugar until it forms medium peaks. This usually takes about 3-4 minutes.
-
Gently fold the whipped cream into the chilled cereal milk custard. At first, the mixture might appear a bit chunky, but continue folding and mixing gently until it becomes smooth, light, and perfectly homogenous.
-
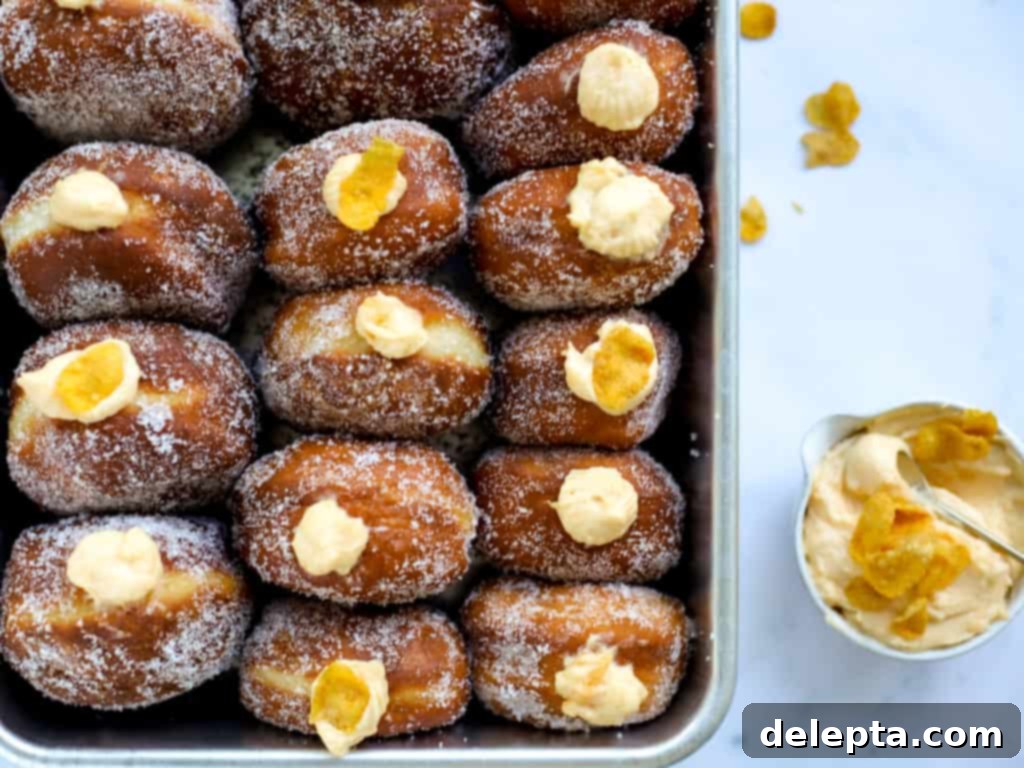
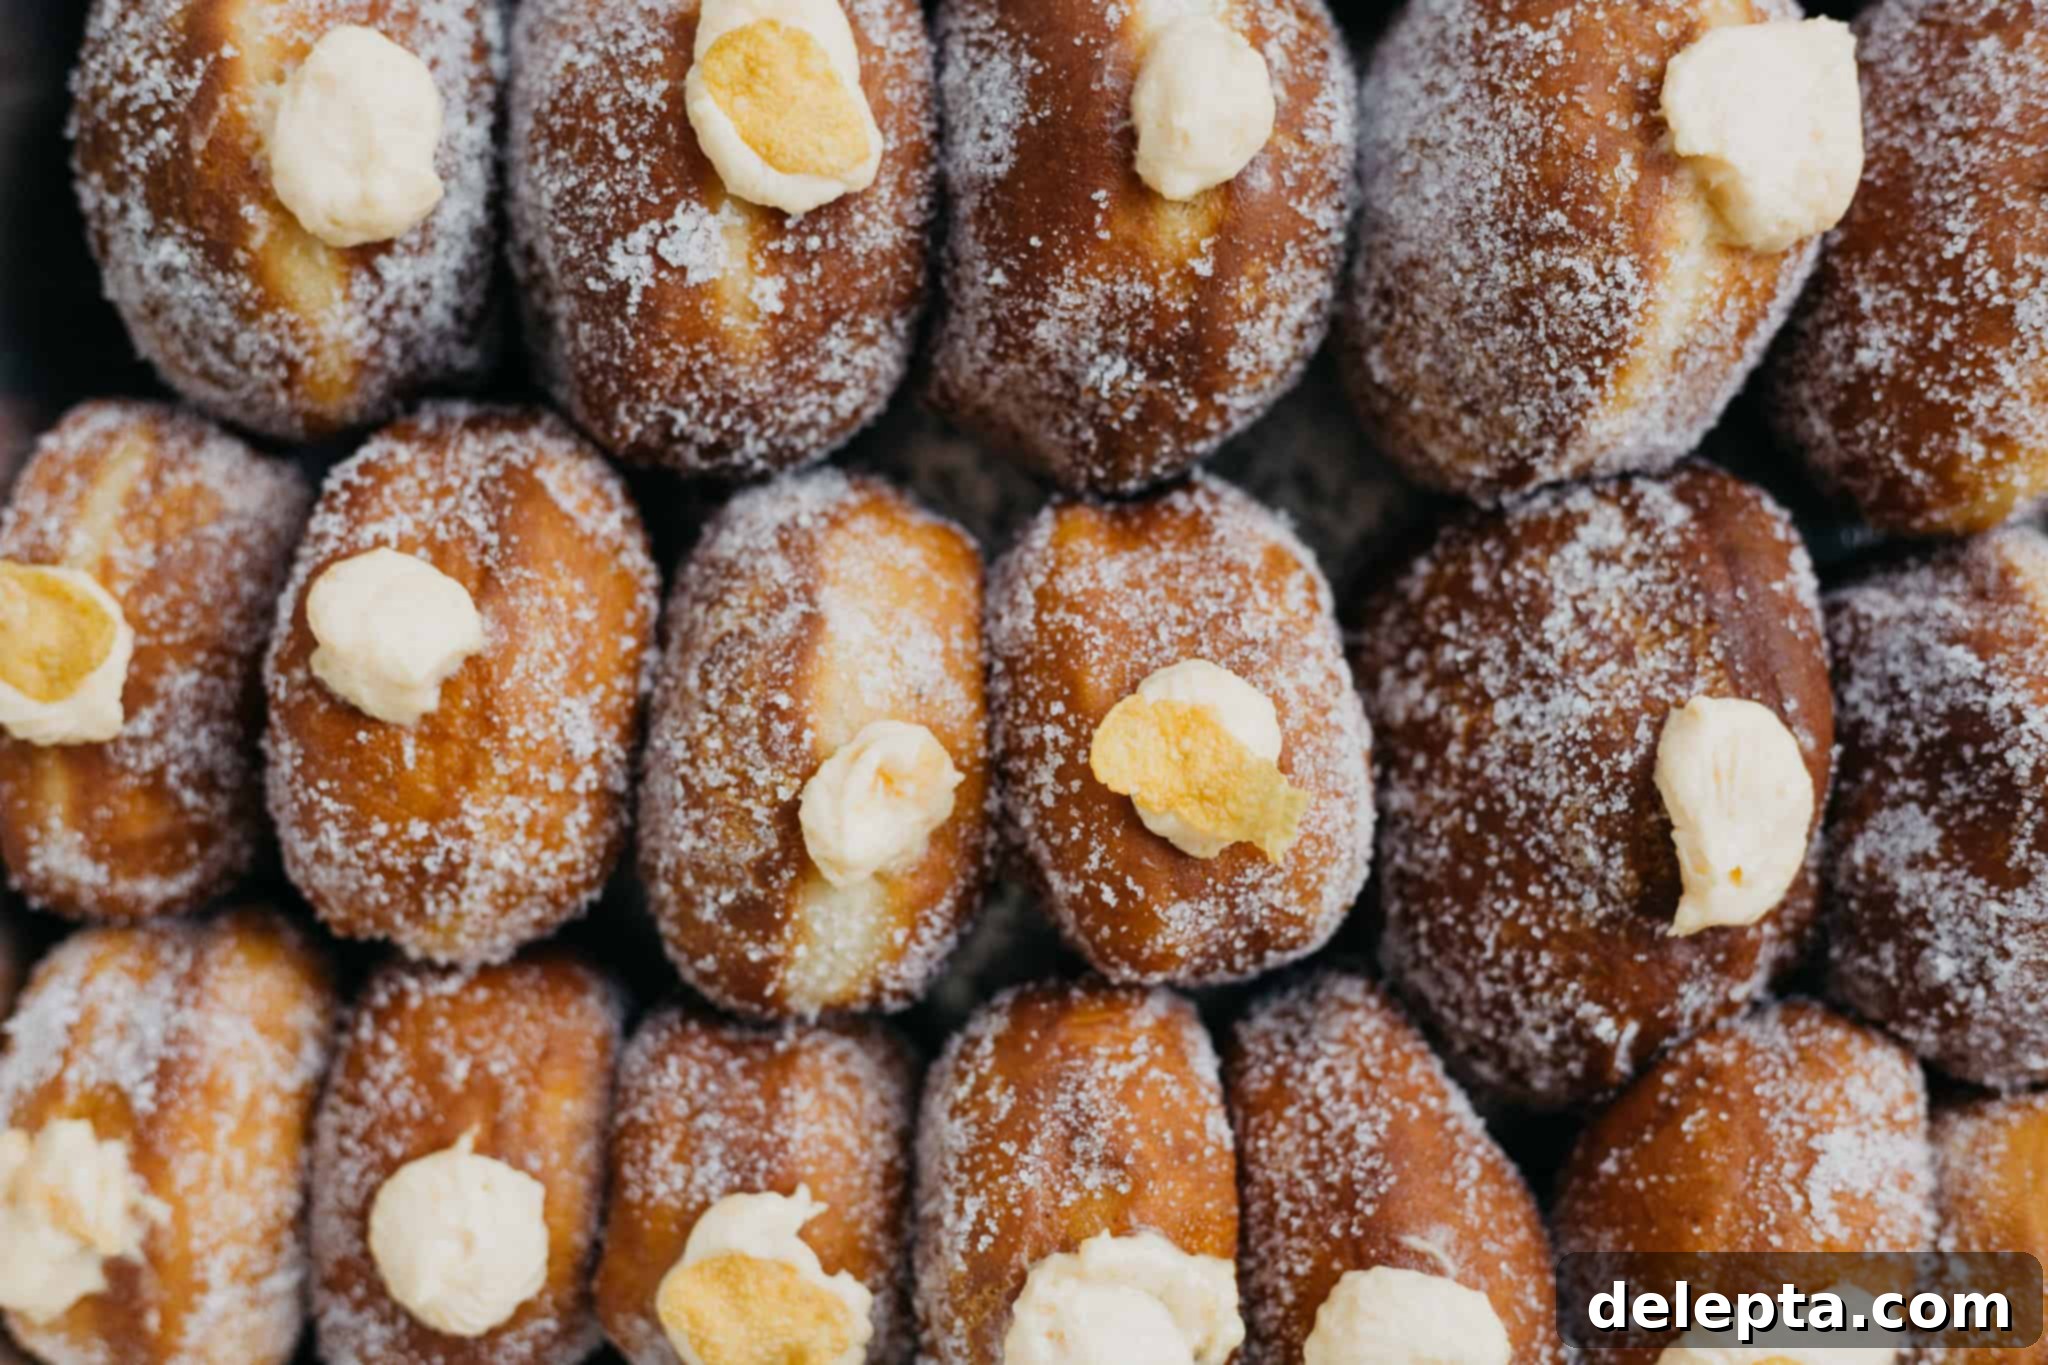
Transfer the finished cereal milk custard into a piping bag fitted with a sharp, pointed tip (a bismarck tip is ideal). Take a sharp knife or a chopstick to carefully create a small hole in the side of each cooled donut. Insert the piping tip into the hole and pipe the luscious custard into the donut. Continue piping until you feel the donut skin begin to gently stretch, indicating it’s generously filled. Repeat for all donuts.
There you have it – a recipe born from a love for inventive flavors and the joy of home baking. These Cereal Milk Donuts are more than just a dessert; they’re a journey back to childhood, elevated with refined techniques and an unforgettable taste. The combination of the fluffy, perfectly fried donut, the sweet and salty cereal milk custard, and the option for crunchy toppings creates a texture and flavor experience that is truly unique. They’re perfect for a special breakfast treat, an indulgent dessert, or simply to impress your friends and family with a truly creative bake.
While the recipe does span two days, remember that much of it involves waiting – for dough to rise and custard to chill. This hands-off time is crucial for developing the deep flavors and ideal textures that make these donuts so exceptional. Don’t be intimidated by the deep-frying step; with a good pan and careful attention to oil temperature, you’ll be confidently frying donuts in no time. The satisfaction of biting into a warm, sugar-coated donut, bursting with homemade cereal milk custard, is an unparalleled reward for your efforts.
Feel free to experiment with different cereal types for the milk, though cornflakes offer that classic Milk Bar essence. You can also add a sprinkle of toasted cornflakes or a drizzle of a simple glaze for an extra touch. Whatever you choose, these homemade Cereal Milk Donuts are sure to become a cherished recipe in your baking repertoire. Enjoy the process, savor the delicious results, and share the joy of these sweet, nostalgic treats!
