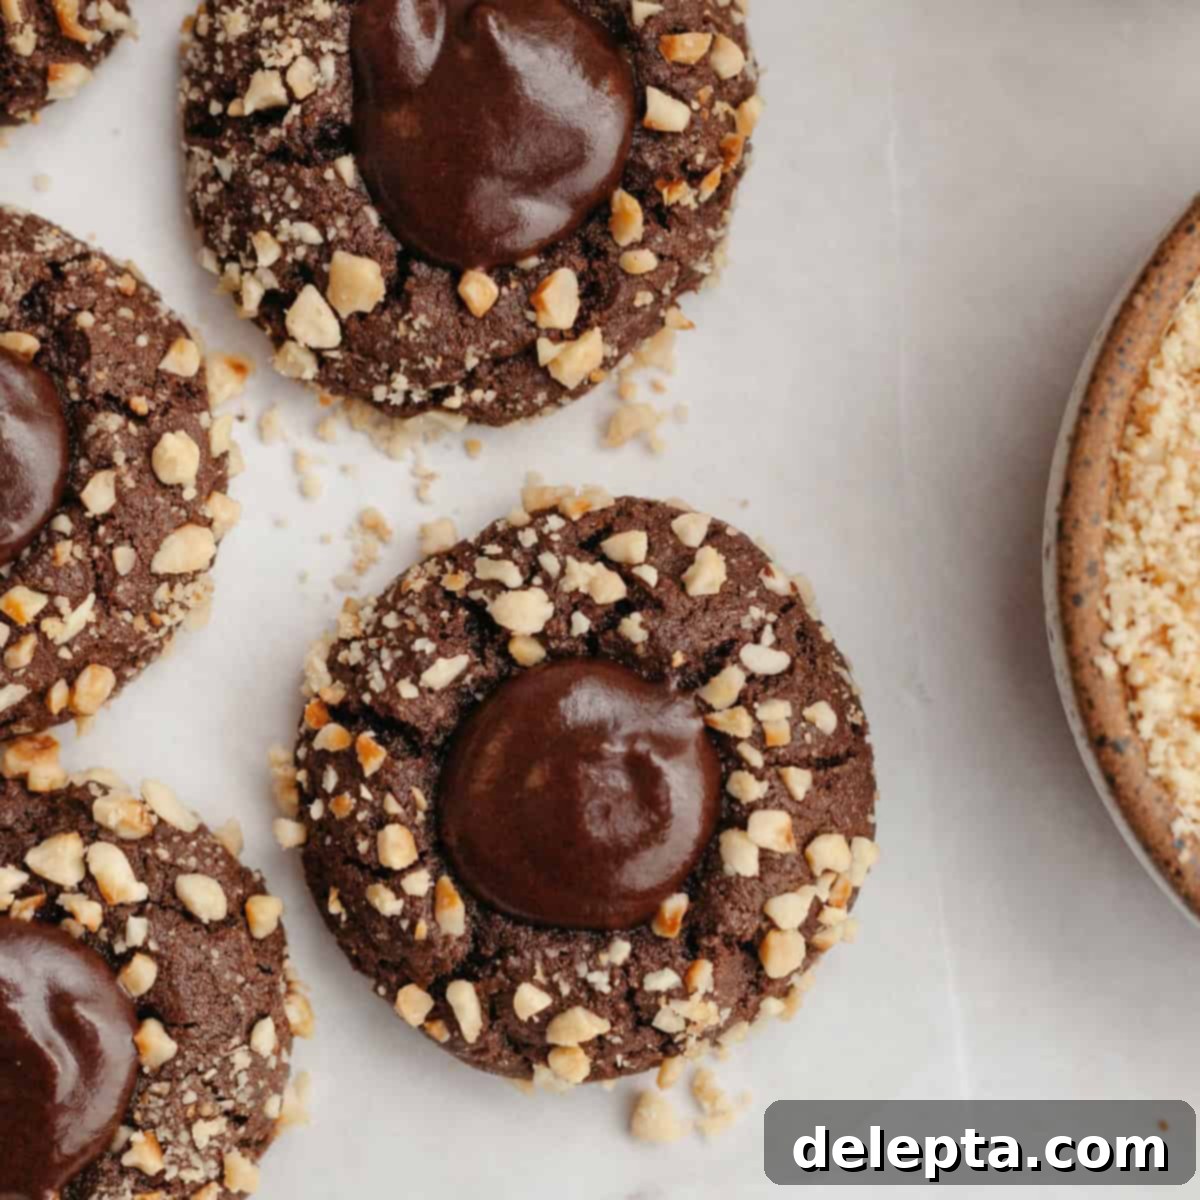
Decadent Nutella Thumbprint Cookies with Roasted Hazelnut Crunch
Prepare to fall in love with these absolutely irresistible Nutella thumbprint cookies! Each delightful bite features a rich chocolate cookie base, a satisfying coating of crunchy chopped hazelnuts, and a luscious filling of homemade Nutella ganache. These chocolate hazelnut thumbprint cookies are not only incredibly easy to bake but also boast an impressive presentation, making them a perfect addition to any dessert table. Whether you’re assembling festive cookie gift boxes for Christmas, planning a special gathering, or simply craving an indulgent treat, this recipe is a true year-round favorite. As a devoted Nutella enthusiast, I can confidently say this easy cookie recipe is a dream come true for anyone who shares a passion for that iconic chocolate hazelnut spread!
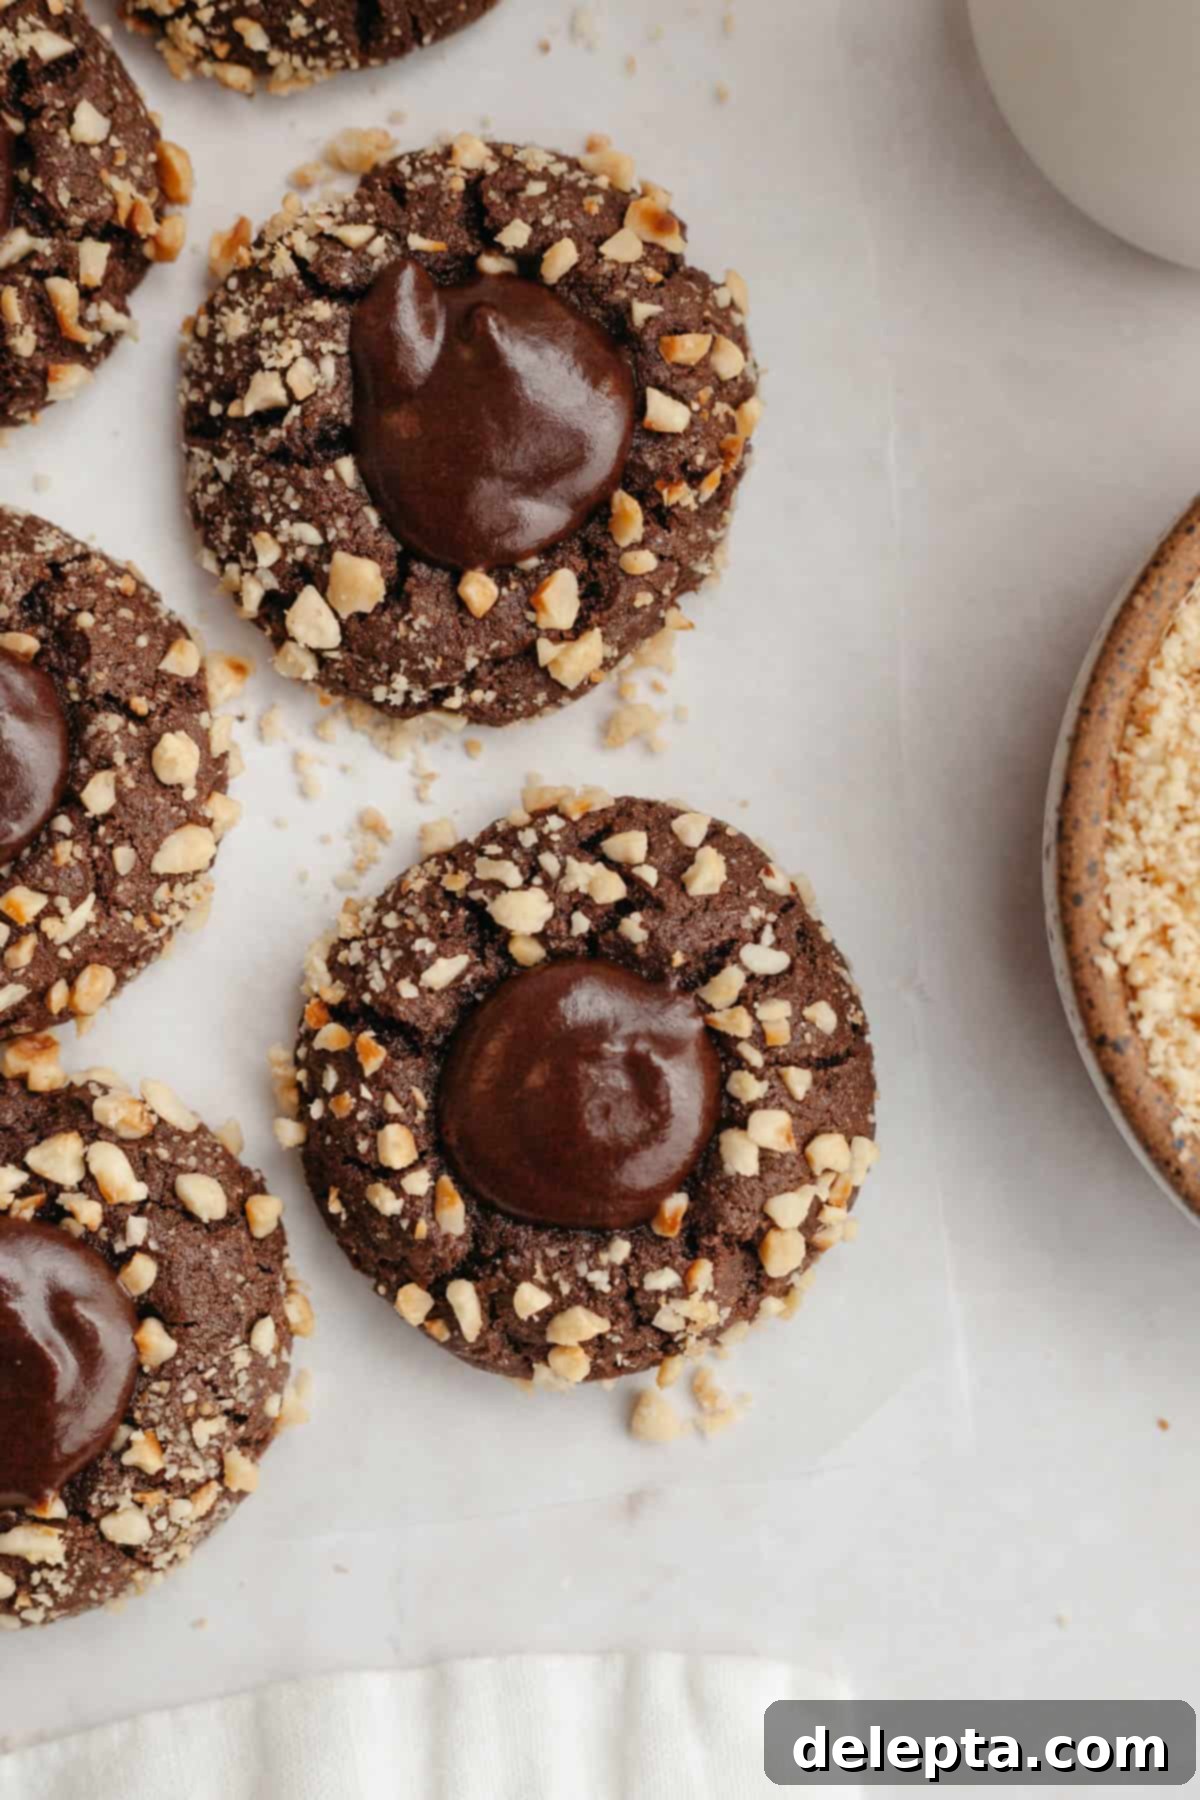
If you’ve been following my culinary adventures, you know by now that my affection for Nutella runs deep! Anything chocolate hazelnut flavored instantly captures my heart. From my incredibly moist Nutella filled cake to comforting Nutella baked oats and adorable Nutella cupcakes, I simply cannot get enough of Nutella-infused recipes. Even my classic chocolate filled cookies and popular peanut butter Nutella cookies are generously stuffed with this glorious spread. It was only a matter of time before I channeled my Nutella passion into creating the ultimate Nutella thumbprint cookie.
My vision for these thumbprint cookies was clear: a rich chocolate cookie base, complemented by a smooth Nutella ganache filling. But I wanted to elevate the hazelnut experience even further, adding an extra layer of flavor and texture. This led to the delightful idea of rolling each cookie dough ball in finely chopped roasted hazelnuts before baking! This simple yet brilliant twist introduces an incredible hazelnut crunch and aroma that truly sets these cookies apart from a traditional thumbprint cookie. It transforms a beloved classic into something truly extraordinary.
While these chocolate hazelnut thumbprint cookies might look incredibly sophisticated and gourmet, don’t let their appearance intimidate you. I promise you, they are surprisingly easy to make, even for novice bakers. The cookie base itself is adapted from my thoroughly tested and highly popular cocoa blossom cookies. By simply rolling them in crunchy chopped hazelnuts and filling them with a velvety Nutella ganache, we’ve created a new favorite that’s perfect for sharing, gifting, or enjoying all to yourself!
Why You’ll Adore These Nutella Thumbprint Cookies!
- Triple Nutella & Hazelnut Flavor: These aren’t just any chocolate cookies! You get an explosion of chocolate hazelnut flavor from three different sources: rich cocoa powder infused into the cookie dough, a generous coating of roasted chopped hazelnuts on the exterior, and a decadent, creamy homemade Nutella ganache filling. Every element works in harmony to deliver an intensely satisfying experience for true Nutella lovers.
- Effortless Elegance with Simple Ingredients: Despite their impressive, bakery-quality appearance, these Nutella thumbprint cookies are surprisingly easy to make using readily available pantry staples. No exotic ingredients are required, making this the perfect recipe to whip up whenever that Nutella jar in your cupboard is calling your name.
- Perfect Texture Combination: Enjoy the best of all worlds with a soft, chewy chocolate cookie, the delightful crunch of toasted hazelnuts on the outside, and a smooth, melt-in-your-mouth Nutella ganache center. This textural interplay keeps every bite exciting.
- Versatile for Any Occasion: Whether you’re looking for a standout cookie for holiday gift boxes, a show-stopping dessert for a party, or a comforting treat for an afternoon pick-me-up, these chocolate hazelnut cookies fit the bill perfectly. Their unique flavor profile makes them a crowd-pleaser for any event.
- Fun to Make: The process of rolling the cookie dough in hazelnuts and then filling the indents with ganache is not only simple but also incredibly enjoyable. It’s a great recipe for getting the whole family involved in the kitchen.
Gather Your Ingredients for Chocolate Hazelnut Perfection
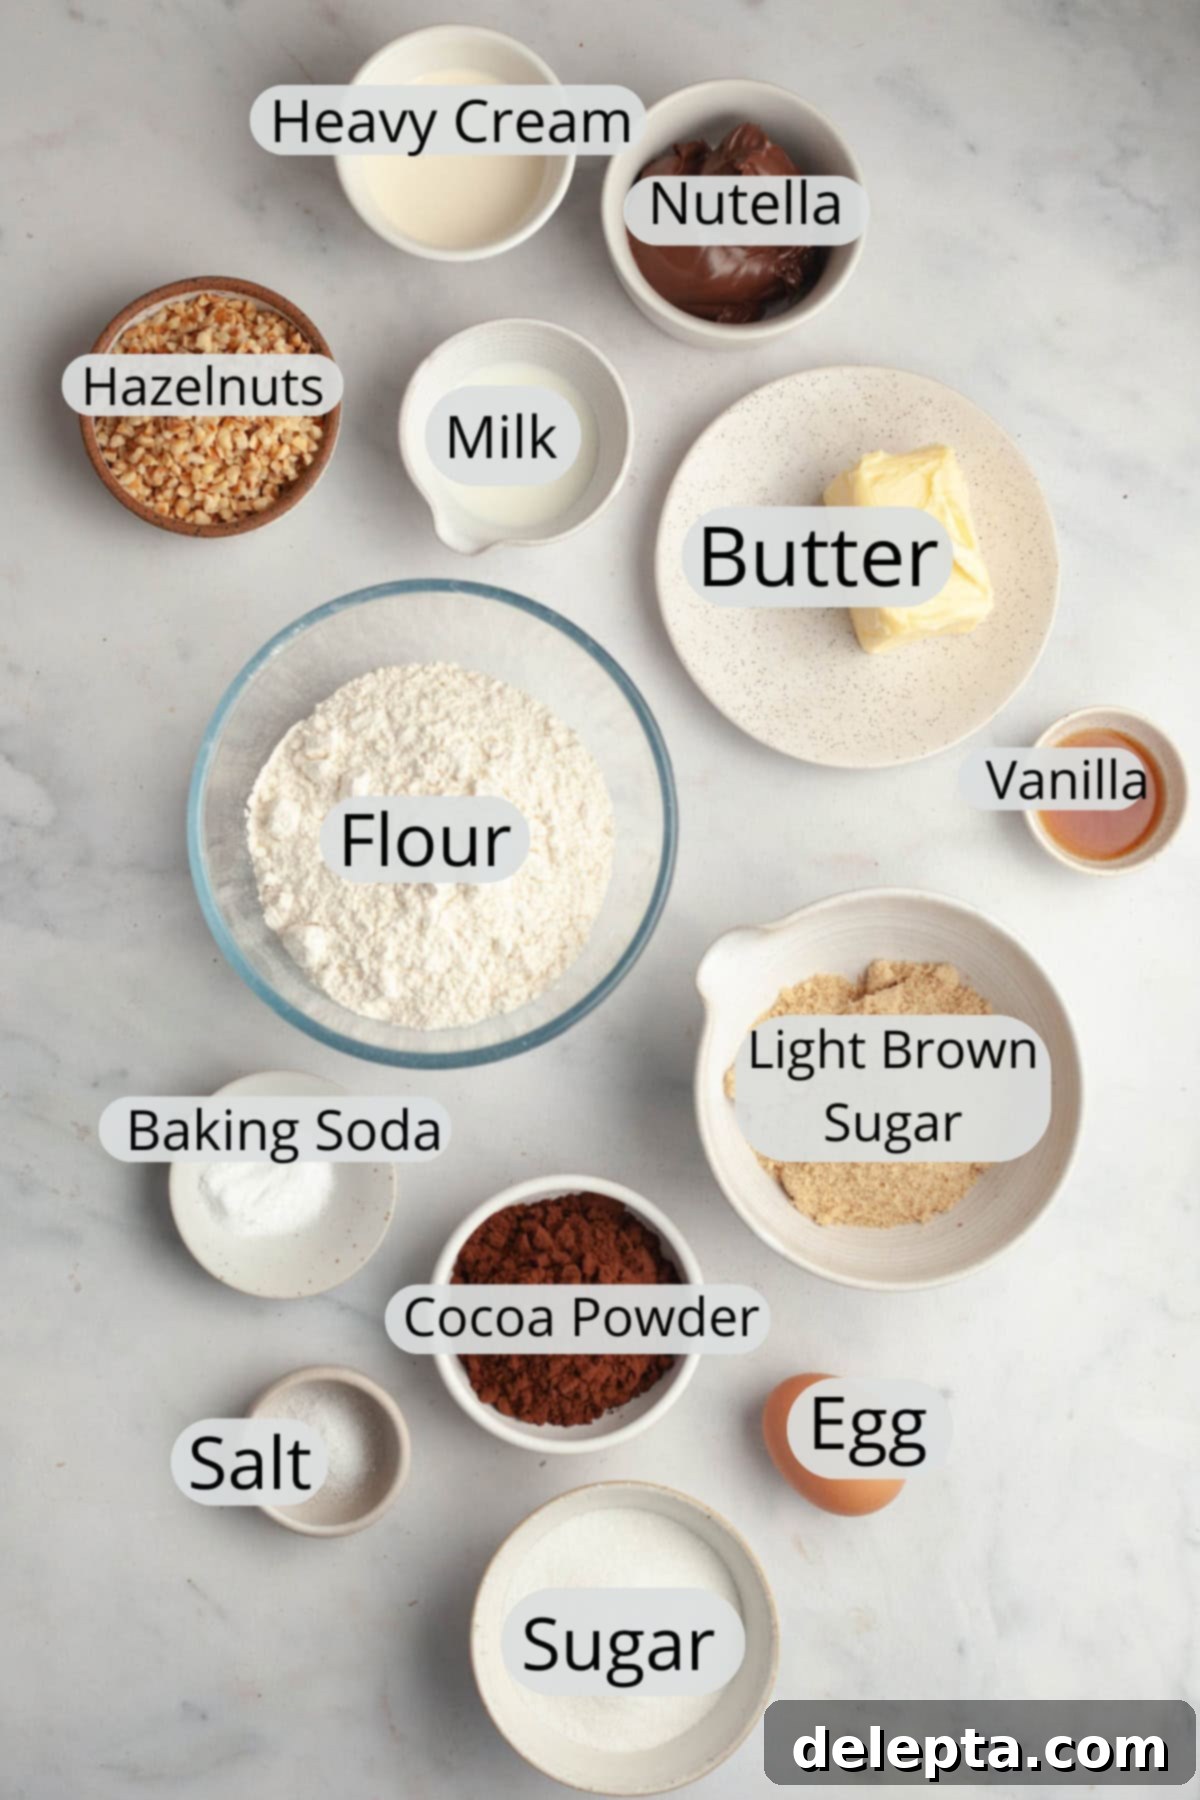
Achieving the perfect Nutella thumbprint cookie starts with quality ingredients. Here’s what you’ll need, along with some helpful tips:
- All-Purpose Flour: This is the backbone of our cookie, providing essential structure and stability. Measure it correctly (preferably by weight) to avoid dry or overly dense cookies.
- Unsweetened Natural Cocoa Powder: Crucial for that deep chocolate flavor in the cookie dough. It’s important to use *natural* unsweetened cocoa powder, not Dutch-processed. Natural cocoa powder is acidic and reacts with baking soda to give our cookies the perfect lift and tender crumb. If your cocoa powder label mentions ‘acidity regulators’ or ‘alkali,’ it’s Dutch-processed, which won’t react properly with baking soda.
- Baking Soda: Our primary leavening agent. When combined with the natural cocoa powder, it creates carbon dioxide, giving these thumbprint cookies a lovely rise and soft texture in the oven.
- Kosher Salt: A pinch of salt is vital for balancing the sweetness and enhancing all the rich chocolate and hazelnut flavors. I specifically use Diamond Crystal Kosher Salt for its consistent granulation and mild flavor. If using fine table salt, you’ll need to halve the amount.
- Unsalted Butter: Opt for high-quality unsalted butter, as it genuinely makes a difference in the overall flavor and richness of your cookies. Ensure it’s at a true room temperature (soft enough to indent with a finger but not melted) for proper creaming with the sugars.
- Granulated Sugar & Light Brown Sugar: This combination is key to our cookie’s ideal texture. Granulated sugar provides structure and contributes to a slightly crisp edge, while light brown sugar adds moisture, depth of flavor, and that wonderful chewiness we all love in a great cookie.
- Large Egg: Make sure your egg is at room temperature. A room-temperature egg incorporates more easily into the butter mixture, resulting in a smoother, more emulsified dough. It acts as a binder and adds richness.
- Vanilla Extract: A splash of good quality vanilla extract enhances the chocolate and hazelnut notes beautifully, adding a subtle warmth to the overall flavor profile.
- Whole Milk: Just a tablespoon of whole milk helps to bring the dough together, ensuring it’s pliable and easy to work with, resulting in a tender cookie.
- Roasted Hazelnuts: These are critical for the delightful crunch and intense hazelnut flavor on the outside of the cookies. I can often find ready-roasted and chopped hazelnuts at my local grocery store. However, during testing, I found that often the pre-chopped pieces weren’t fine enough. For the best result, I recommend giving them another quick chop yourself to create a mix of fine and slightly larger pieces. This allows them to adhere better to the dough balls and provides a more pleasant texture.
- Heavy Cream: You’ll need heavy cream (also known as whipping cream) to create the silky-smooth chocolate Nutella ganache filling. The high fat content is essential for the ganache’s luxurious texture.
- Nutella: The star of the show! While I’ve tested this recipe with authentic Nutella, I’ve also had great success with various high-quality store-brand chocolate hazelnut spreads. Feel free to use your favorite!
Creative Substitutions & Delicious Additions
While this Nutella thumbprint cookie recipe is perfect as is, it’s also incredibly versatile! Don’t be afraid to get creative with these delicious twists and changes:
- Heavy Cream Alternatives for Ganache: If you find yourself without heavy cream, you can still create a delightful filling. Simply use a spoonful of plain Nutella to fill the cooled cookie indents. For easier filling and a smoother texture, you might want to gently warm or melt the Nutella slightly before spooning it in. Alternatively, for a different twist, you could use a high-quality chocolate spread or even a thick caramel sauce as a filling.
- Nutella Filling Alternatives: For those who might not be huge Nutella fans (gasp!), or if you simply want to try something different, these chocolate cookies are a fantastic canvas for other fillings. You could easily make a classic chocolate ganache (I highly recommend using the rich ganache recipe from my cosmic brownie cookies for a truly decadent center). Fruit preserves like raspberry or apricot jam, or even lemon curd, would also provide a lovely contrast to the chocolate cookie.
- Hazelnut Coating Alternatives: The roasted hazelnut coating adds wonderful texture and flavor, but it’s not the only option! I’ve successfully tested these cookies by rolling the dough balls in granulated sugar instead of hazelnuts, which gives them a lovely sparkle and a slightly crisp exterior. For a festive touch, try non-pareil sprinkles. You could also experiment with other finely chopped nuts like pecans or walnuts, or even desiccated coconut for a tropical twist. And of course, if you prefer a simpler cookie, you can always leave them plain without any coating at all.
- Spice It Up: A pinch of cinnamon or a tiny bit of espresso powder added to the cookie dough will enhance the chocolate flavor and add an extra layer of warmth.
- White Chocolate Drizzle: Once the Nutella ganache has set, a drizzle of melted white chocolate across the cookies can add an elegant finish and another layer of sweetness.
Crafting Your Decadent Nutella Thumbprint Cookies: A Step-by-Step Guide
Follow these detailed instructions to create perfect, beautiful Nutella thumbprint cookies that taste as amazing as they look.
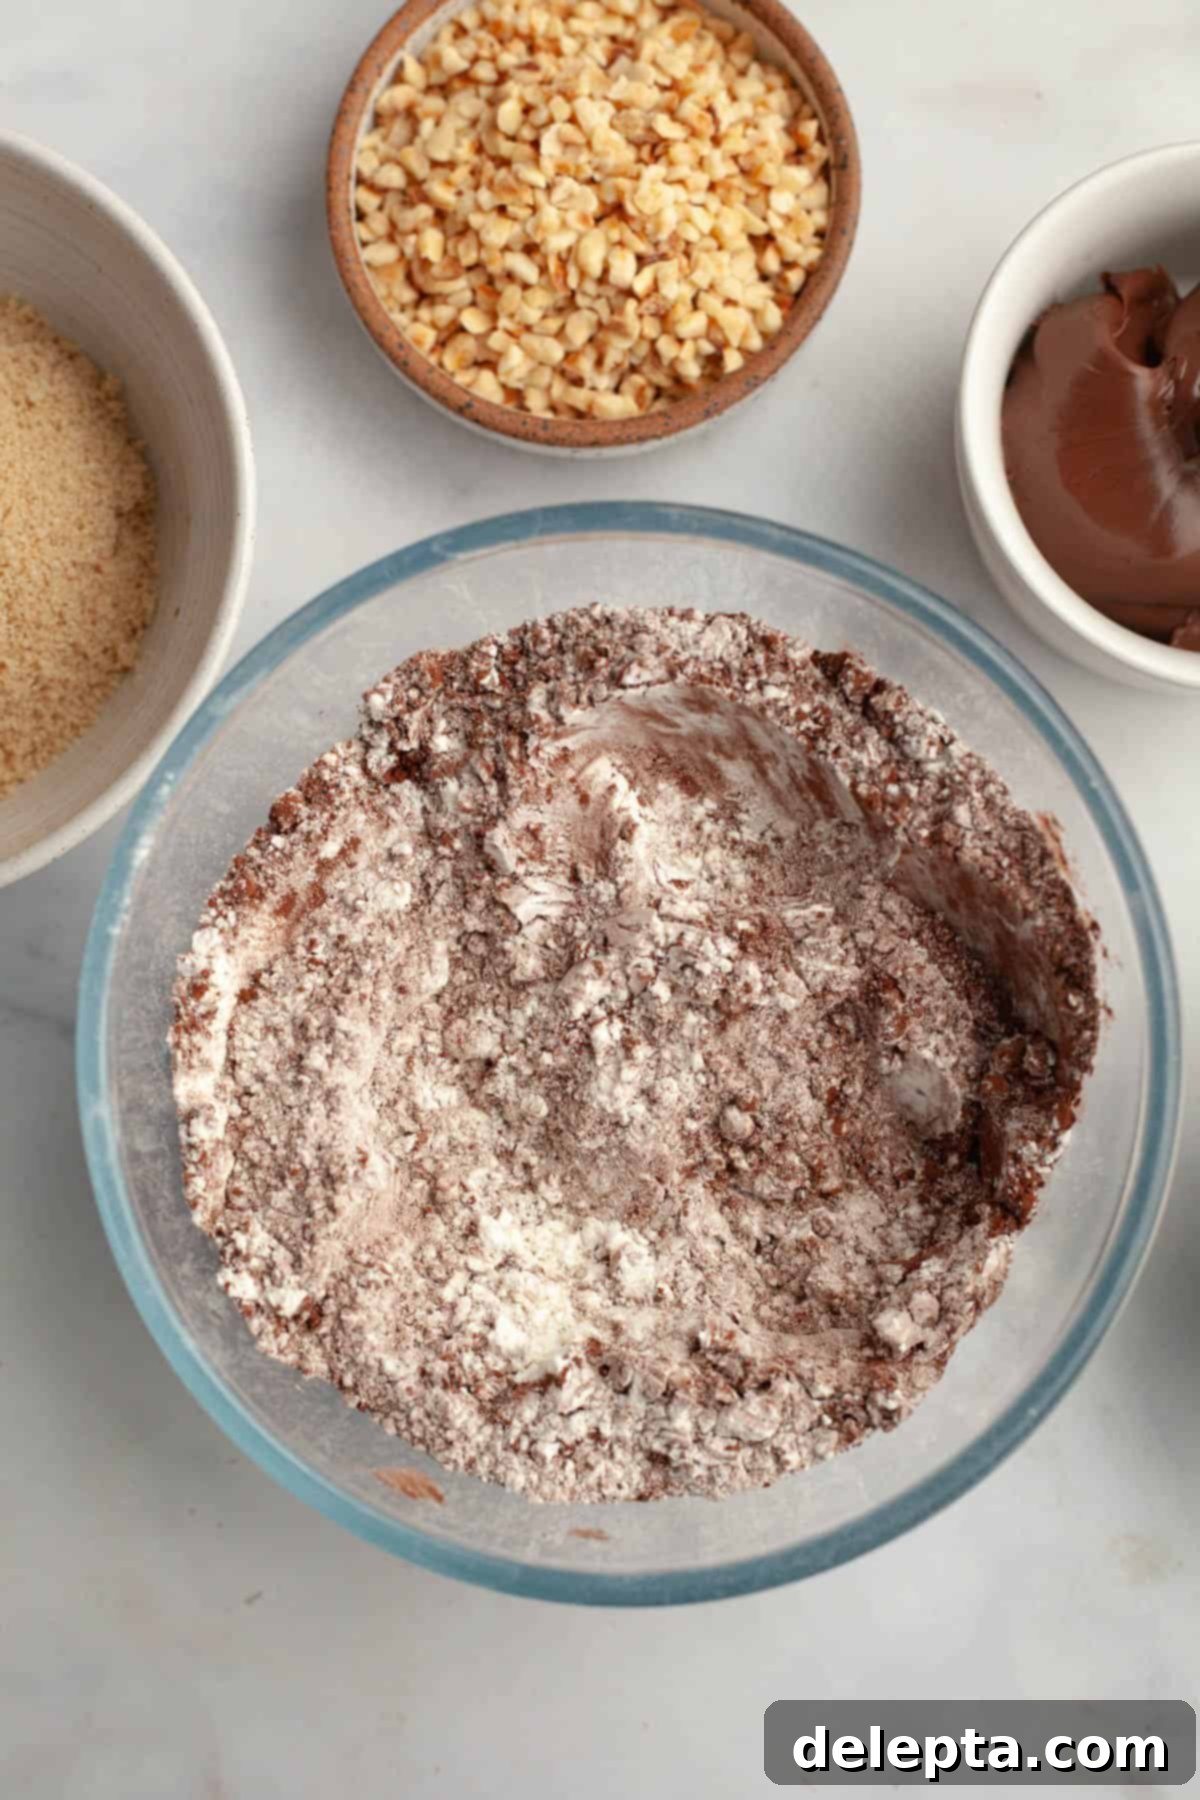
- Step 1: Whisk Dry Ingredients. In a medium-sized bowl, thoroughly whisk together the all-purpose flour, unsweetened natural cocoa powder, baking soda, and kosher salt. This step ensures all leavening and seasoning agents are evenly distributed throughout the dough. Set this bowl aside for later.
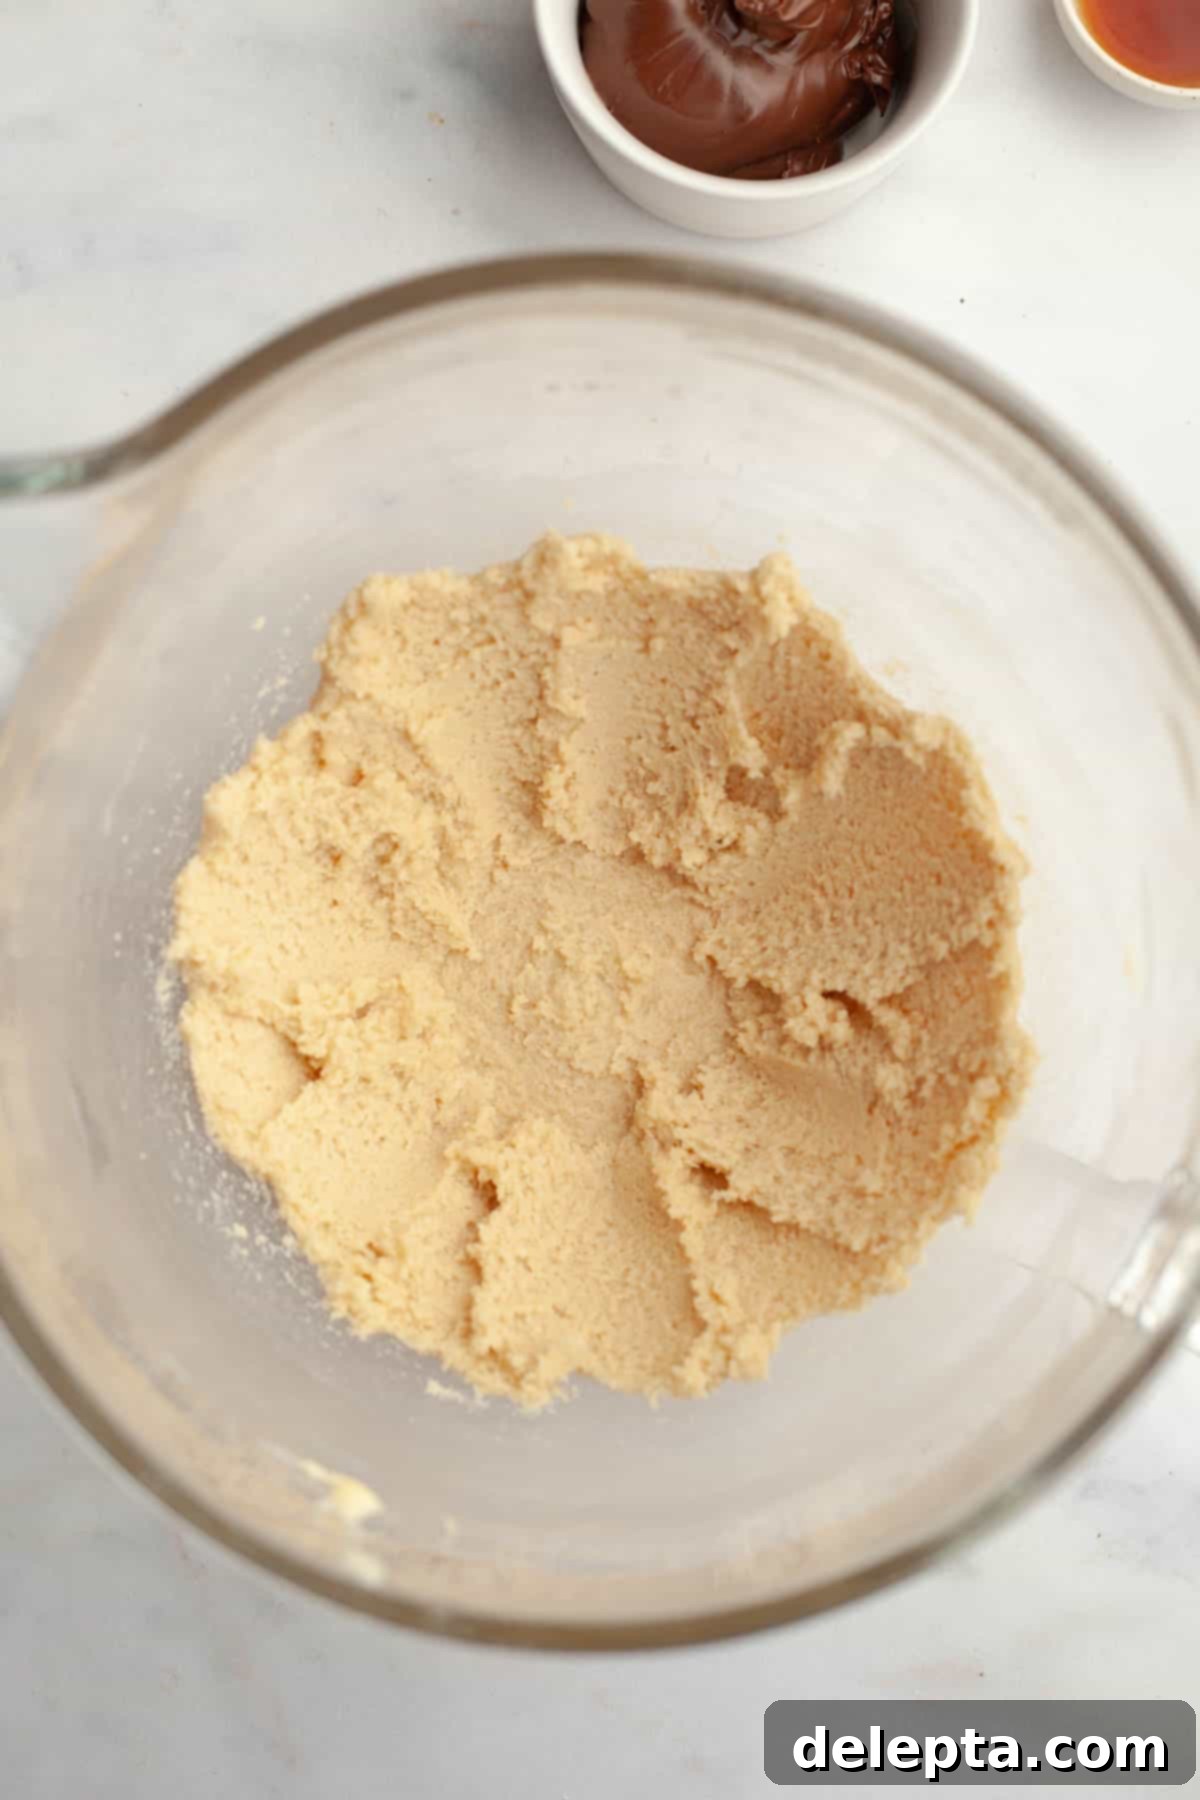
- Step 2: Cream Butter and Sugars. In the bowl of a stand mixer fitted with the paddle attachment (or using a large bowl and an electric handheld mixer), beat the softened unsalted butter with the light brown sugar and granulated sugar. Cream on medium-high speed for about 2 minutes, until the mixture is visibly lightened in color and fluffy in texture. This process incorporates air, which is vital for tender cookies.
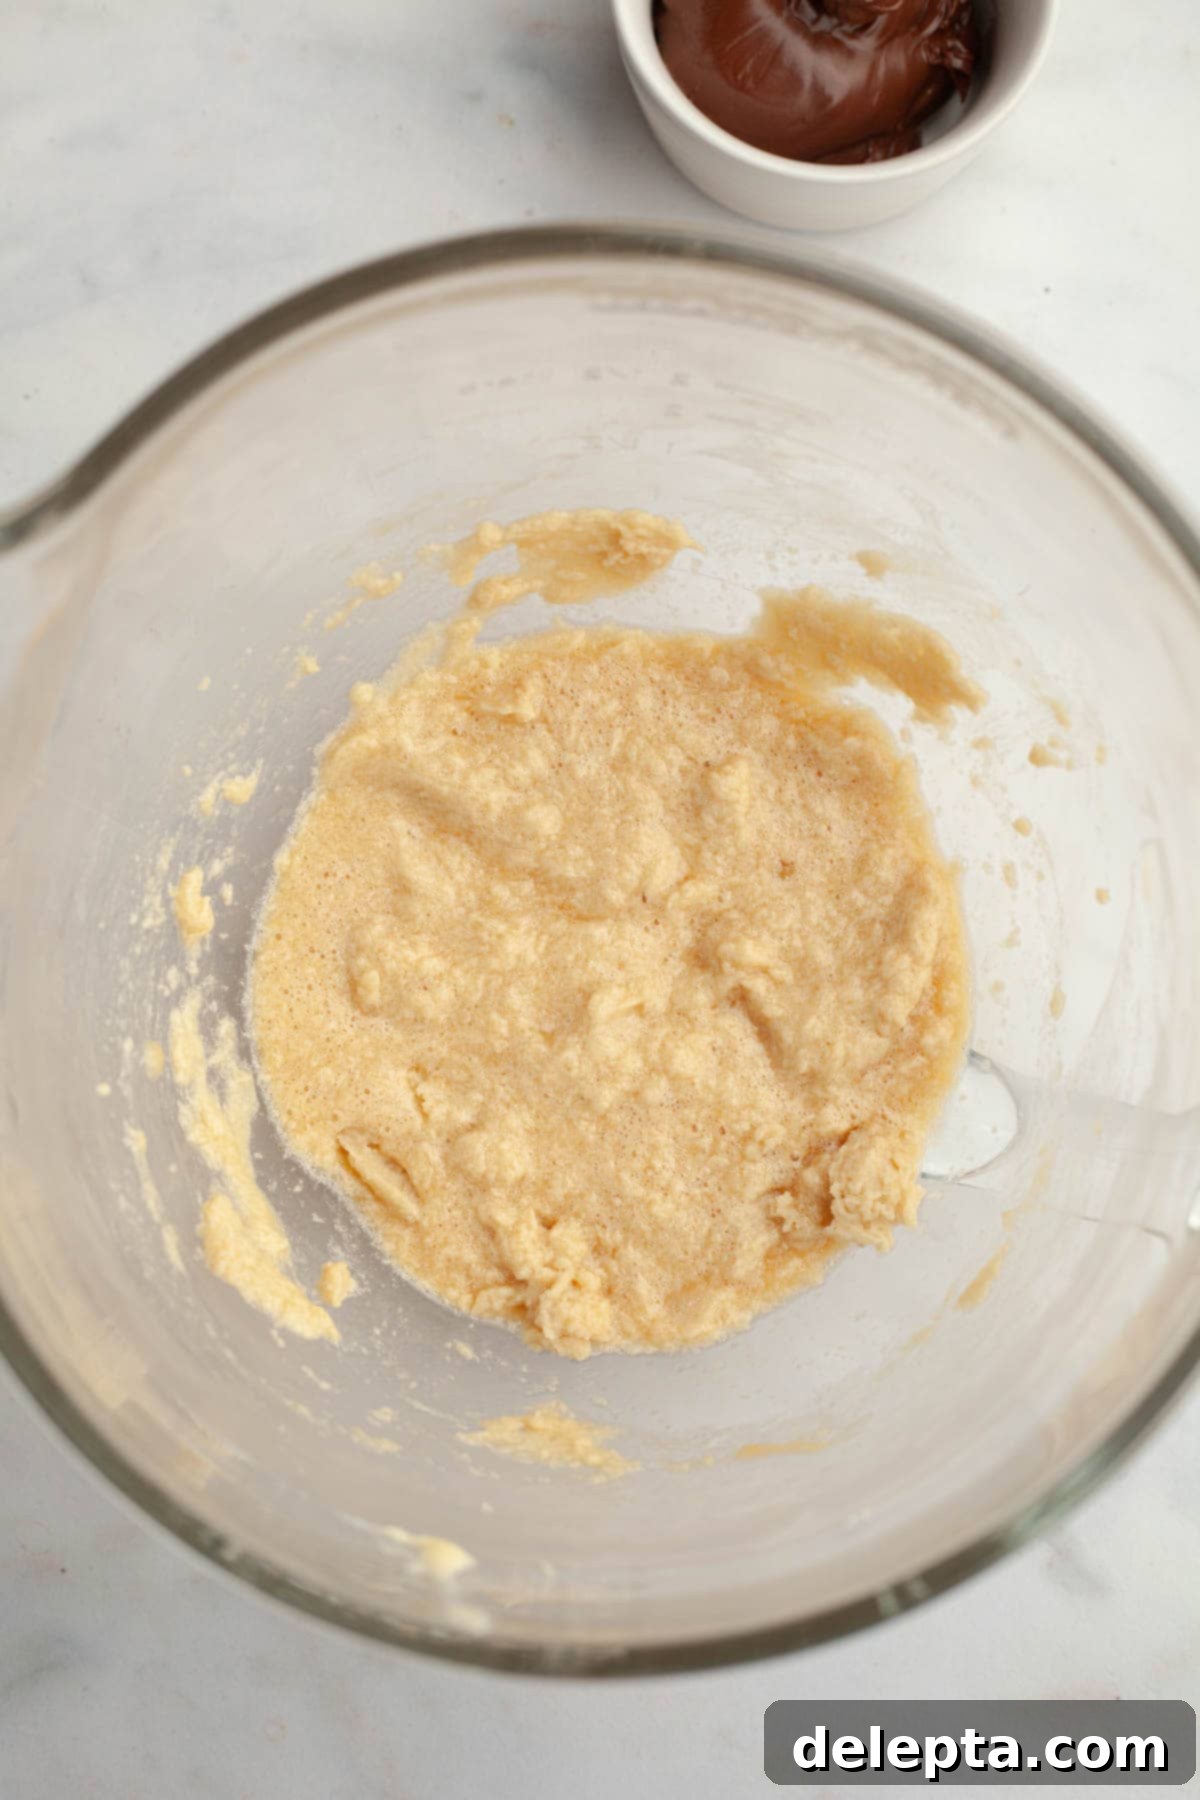
- Step 3: Add Egg and Vanilla. Stop the mixer and use a rubber spatula to scrape down the sides and bottom of the bowl, ensuring everything is well combined. Add the room-temperature large egg and vanilla extract. Beat on medium-high speed for another minute until fully incorporated and the mixture is smooth.
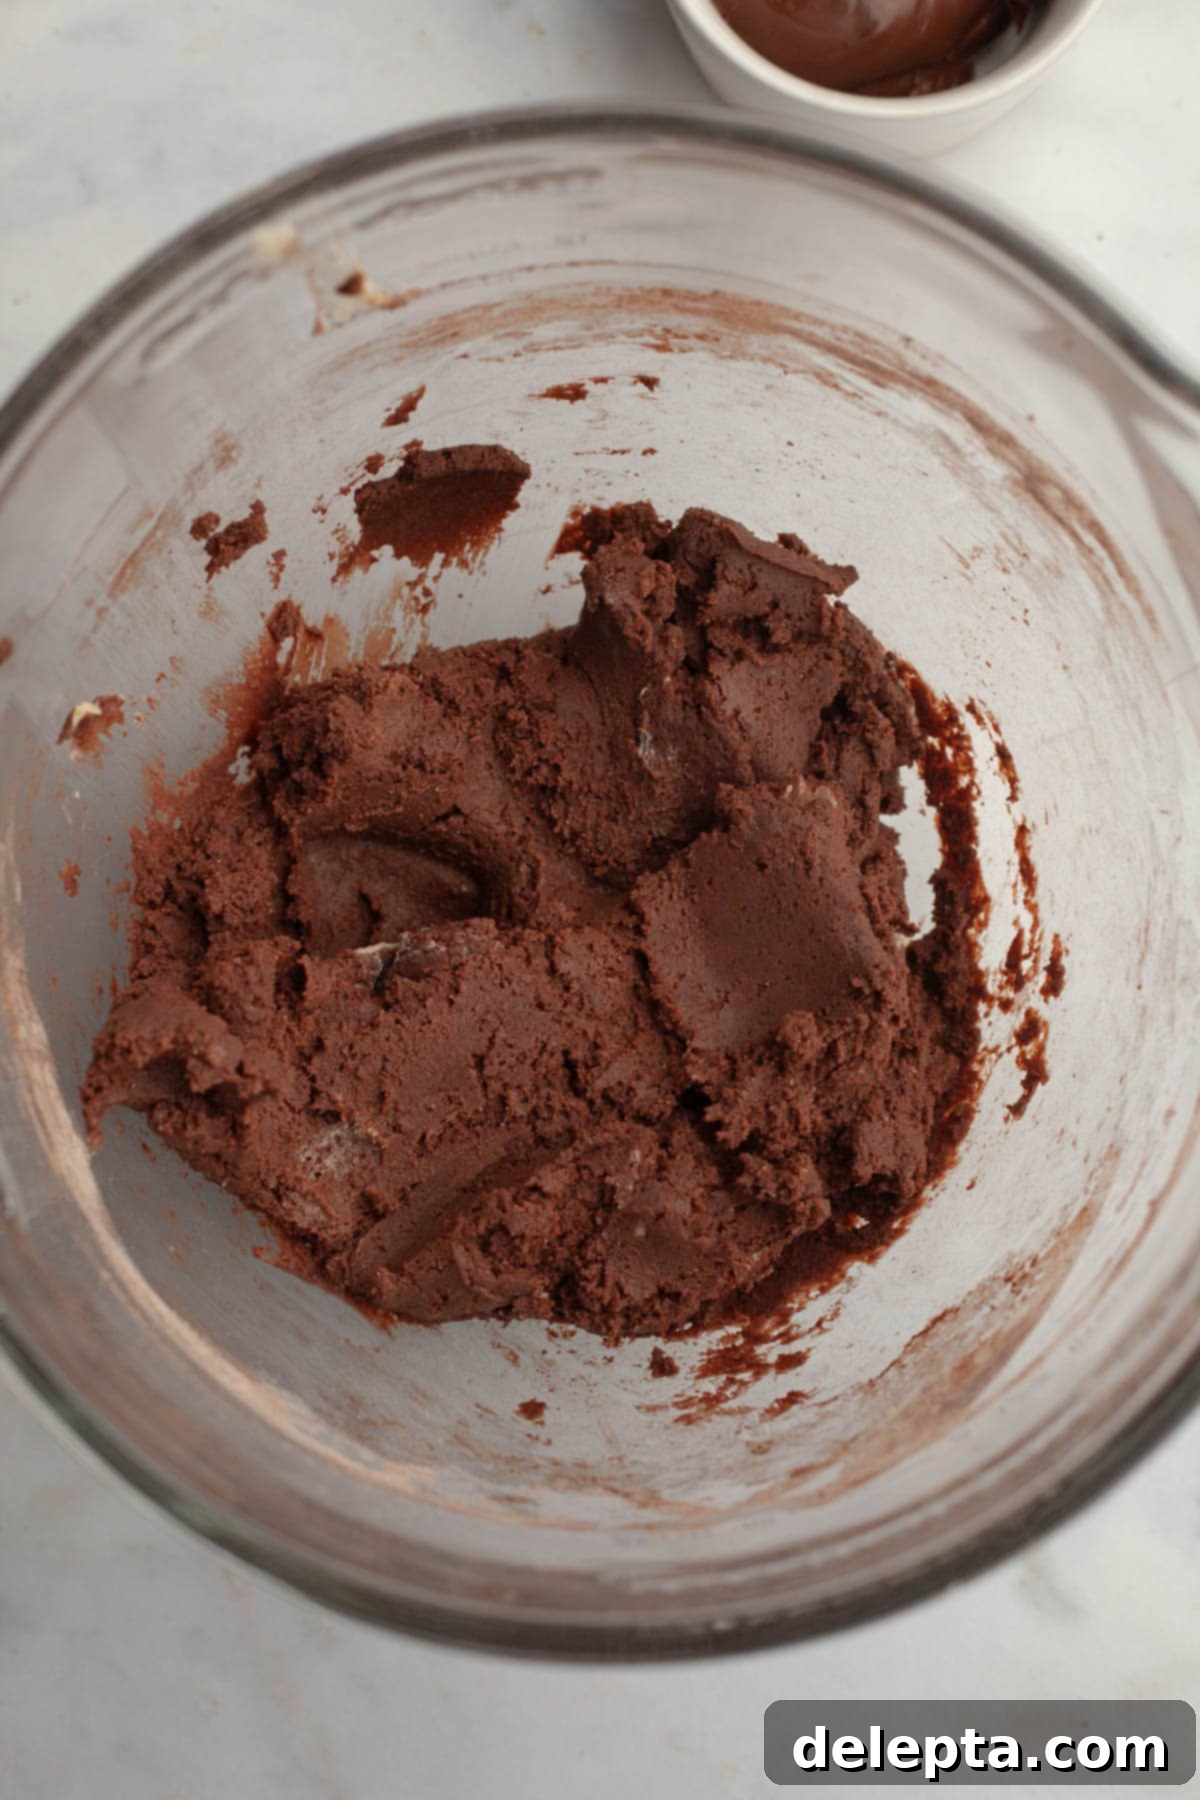
- Step 4: Combine Wet and Dry Ingredients. Reduce the mixer speed to low. Gradually add the reserved dry ingredients to the wet mixture. Mix until just combined, then add the tablespoon of whole milk. Continue mixing on low speed only until no streaks of flour remain. Be very careful not to over-mix at this stage, as over-mixing can lead to tough cookies! Stop as soon as everything is incorporated.
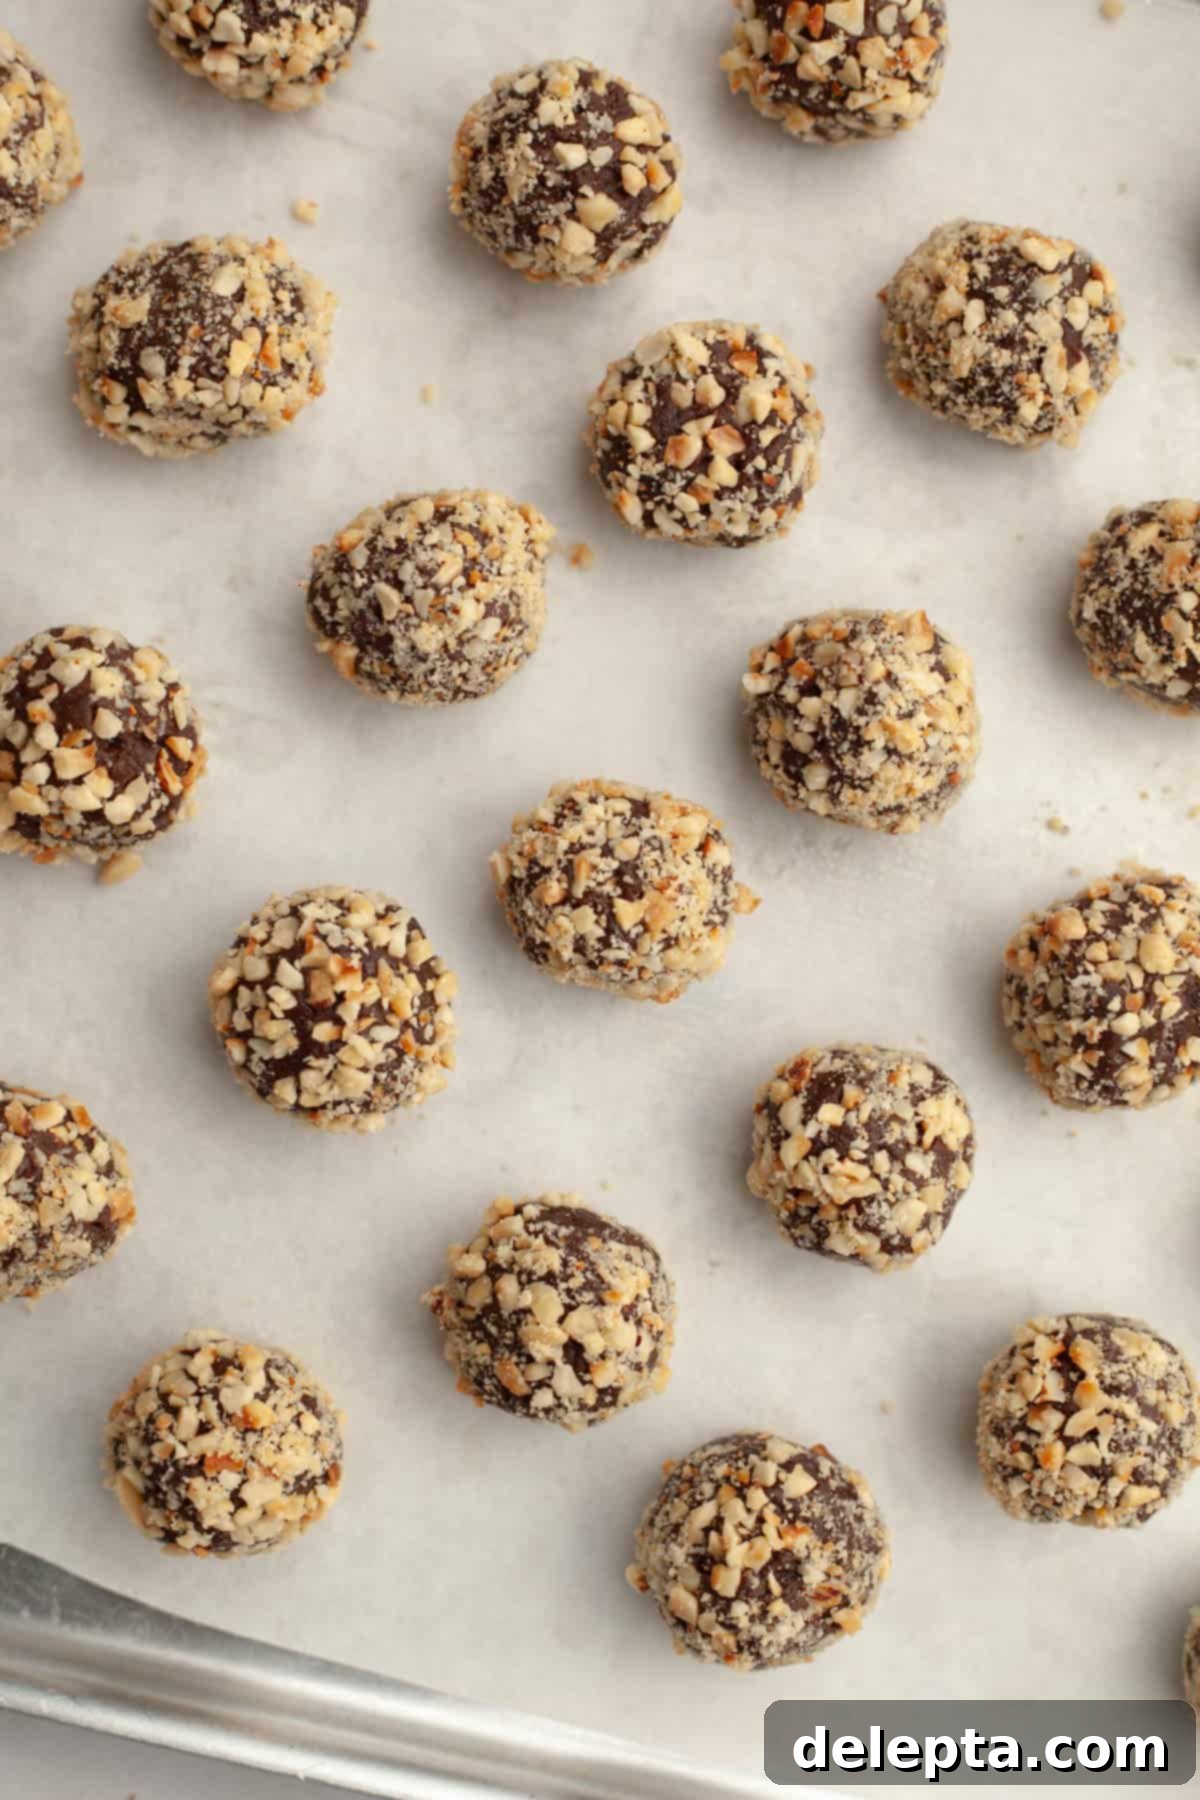
- Step 5: Roll and Coat Cookie Dough. Using a small cookie scoop (about 1 tablespoon capacity), scoop out portions of cookie dough. Roll each portion between your palms until it forms a perfectly round ball. Place the finely chopped roasted hazelnuts in a shallow bowl. Roll each cookie dough ball thoroughly in the hazelnuts, pressing gently to ensure they are evenly and generously coated. Arrange the coated dough balls on a parchment-lined baking tray or plate. Repeat this process until all the dough is used; you should yield approximately 35 cookies.
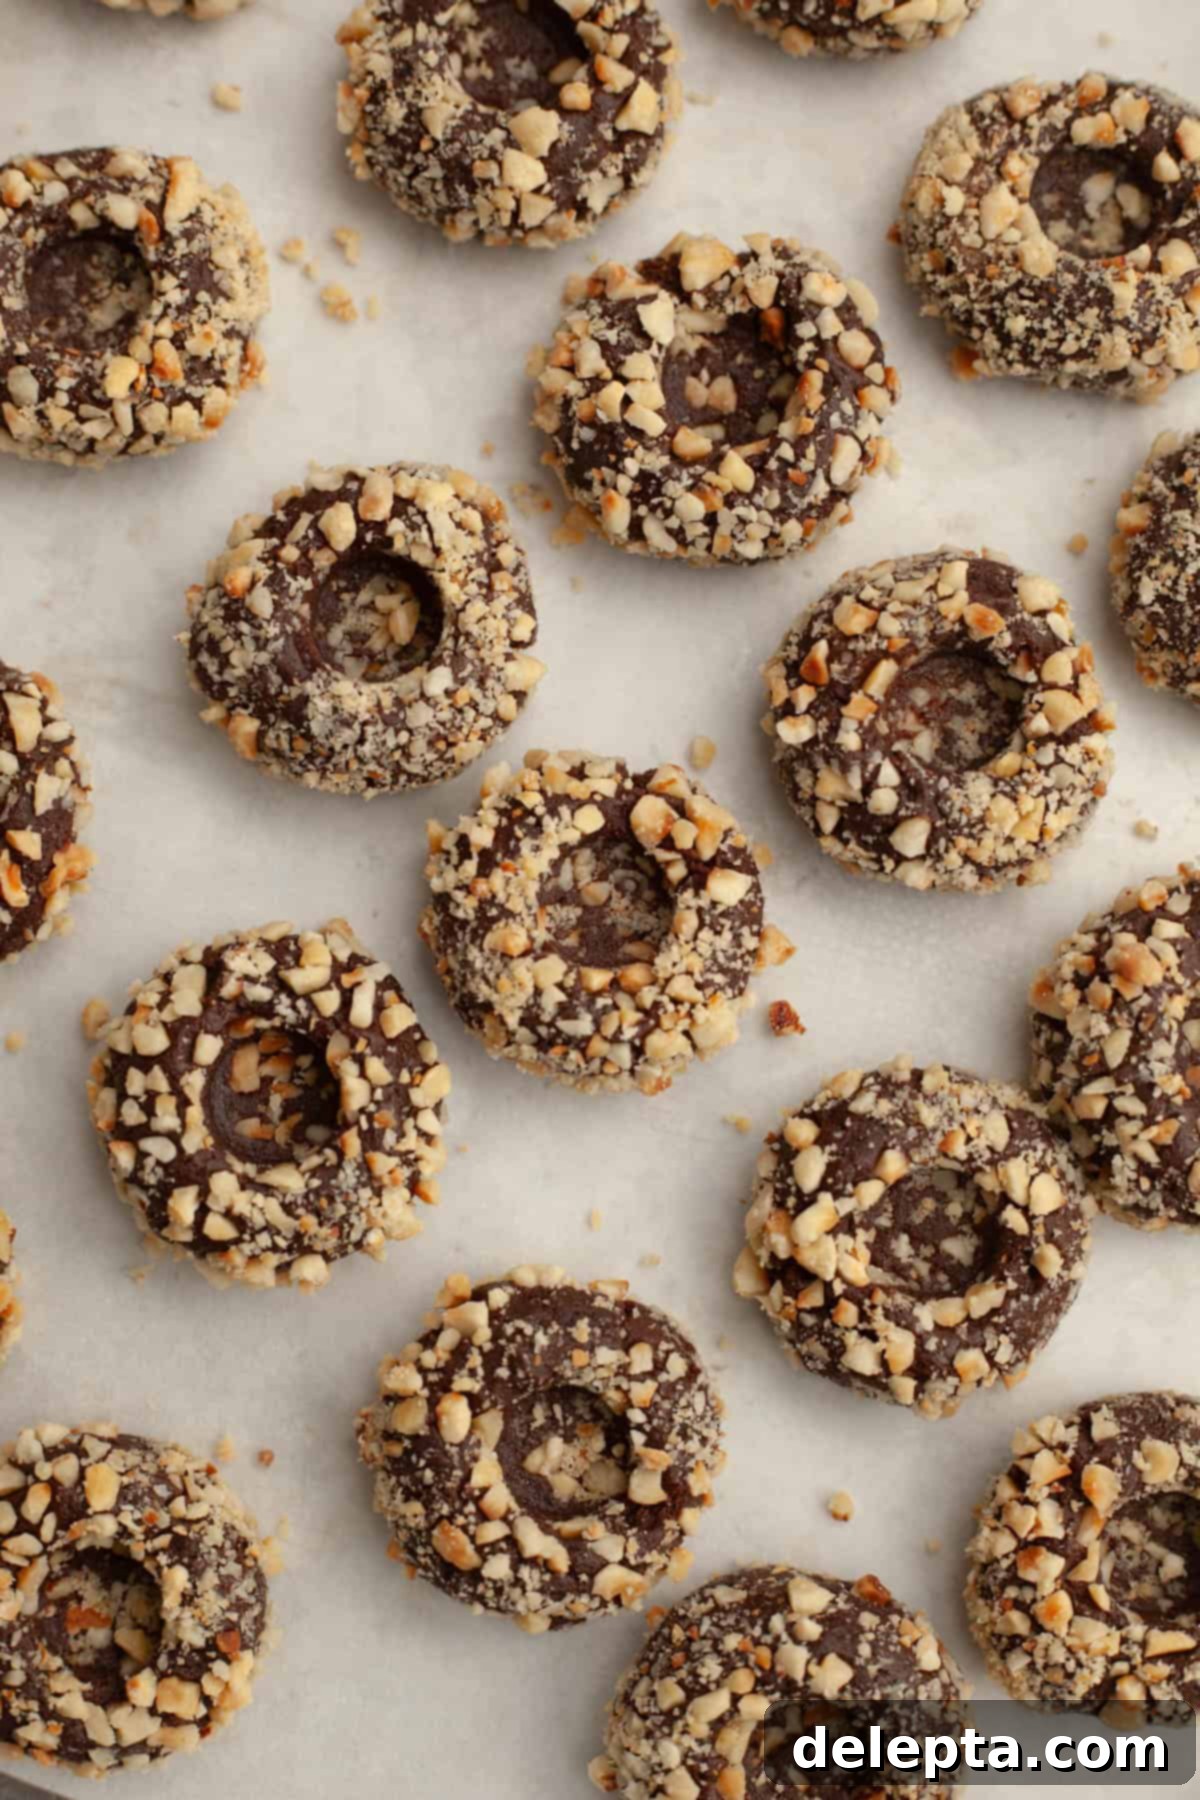
- Step 6: Create Indents & Chill. Using the rounded end of a wooden spoon, a small spatula handle, or the back of a measuring spoon, gently press an indent into the center of each cookie dough ball. You can also use your thumb, but a tool often yields a more uniform result. Once all indents are made, transfer the baking tray to the refrigerator and chill the cookies for a minimum of 1 hour. This crucial chilling step prevents the cookies from spreading too much during baking, ensuring they hold their shape beautifully. While the cookies chill, preheat your oven to 350°F (175°C) and line a second baking sheet with parchment paper if needed. Arrange the chilled cookies evenly across the two baking sheets, leaving a couple of inches of space between each cookie dough ball to allow for slight spreading. Bake for 11-13 minutes, then remove from oven and let them cool completely on a wire rack.
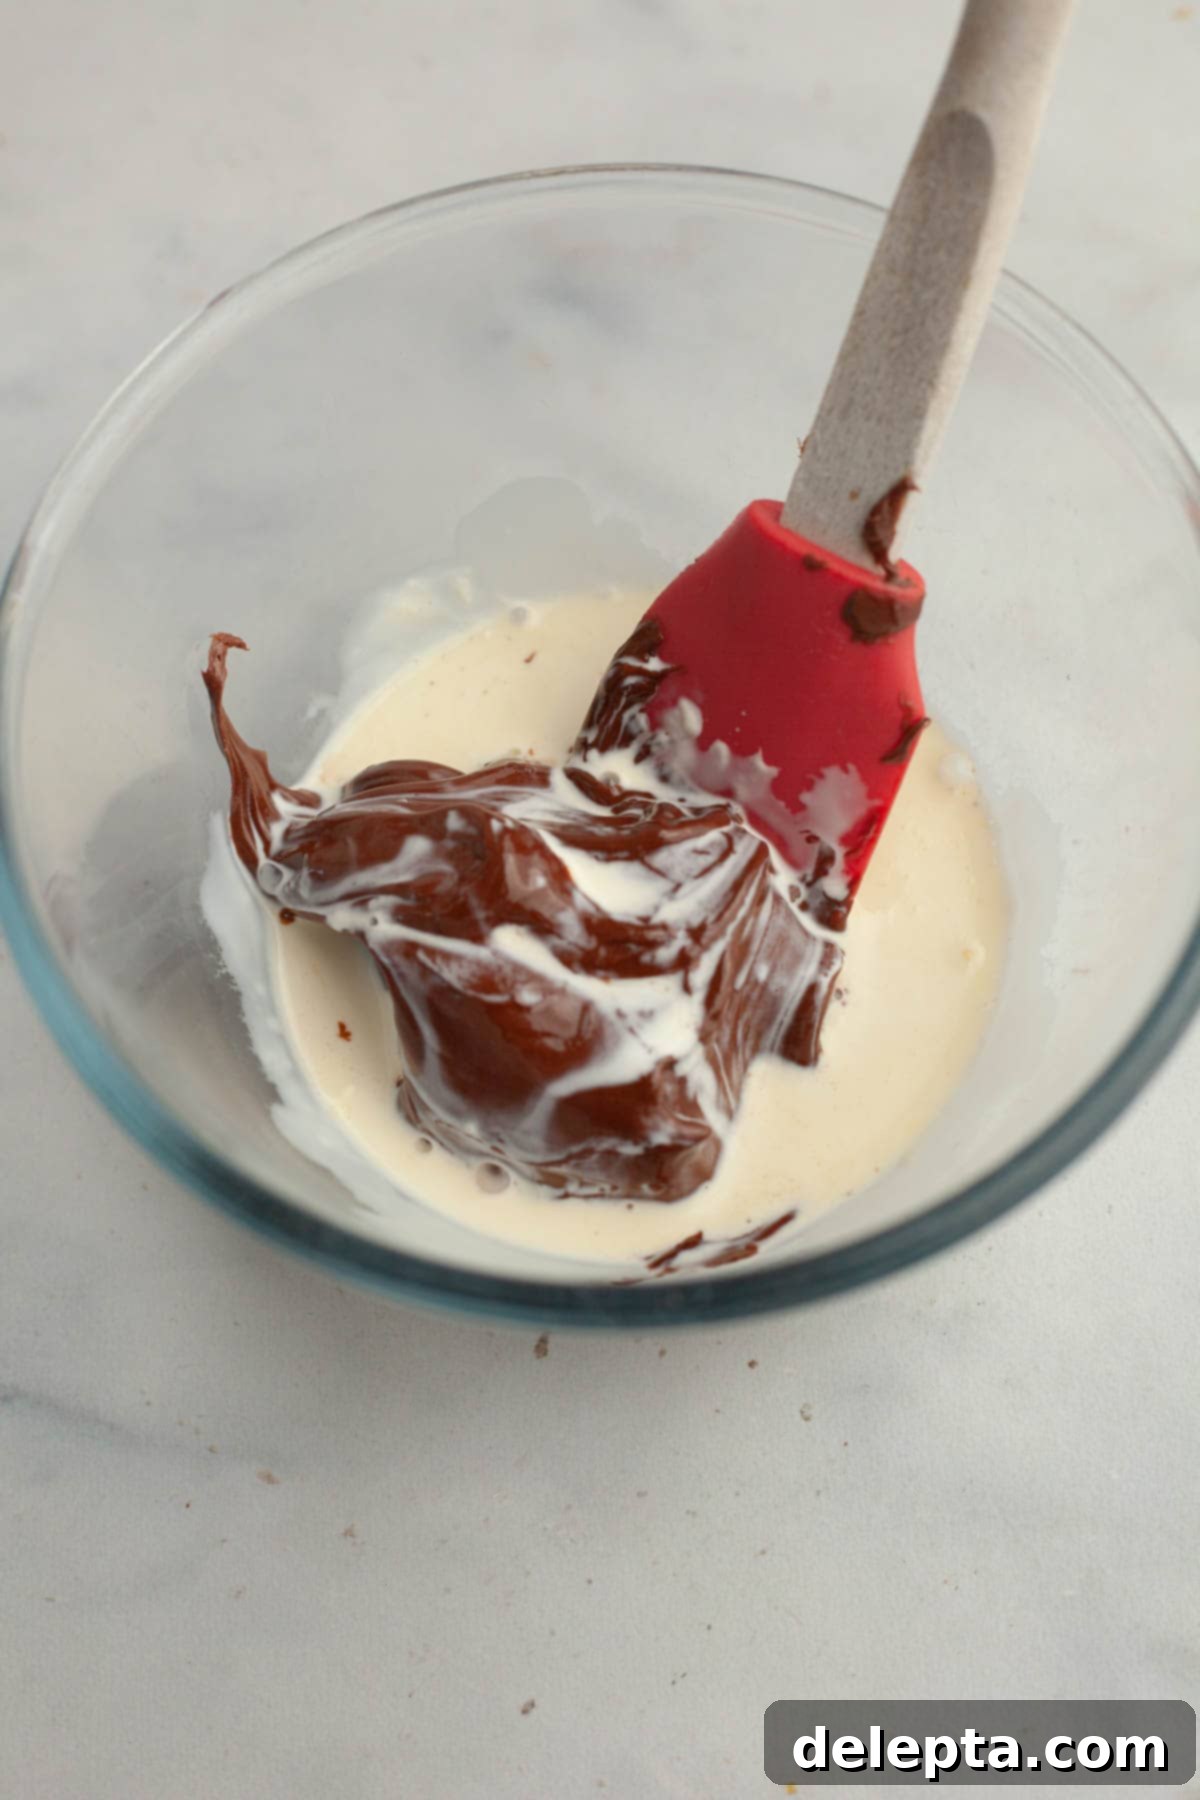
- Step 7: Prepare Nutella Ganache. While your delicious cookies are cooling, it’s time to make the rich Nutella ganache filling. Place the specified amount of Nutella into a heat-safe bowl. In a small saucepan on the stove, heat the heavy cream over medium-low heat until it just begins to simmer around the edges, but do not allow it to come to a rolling boil.
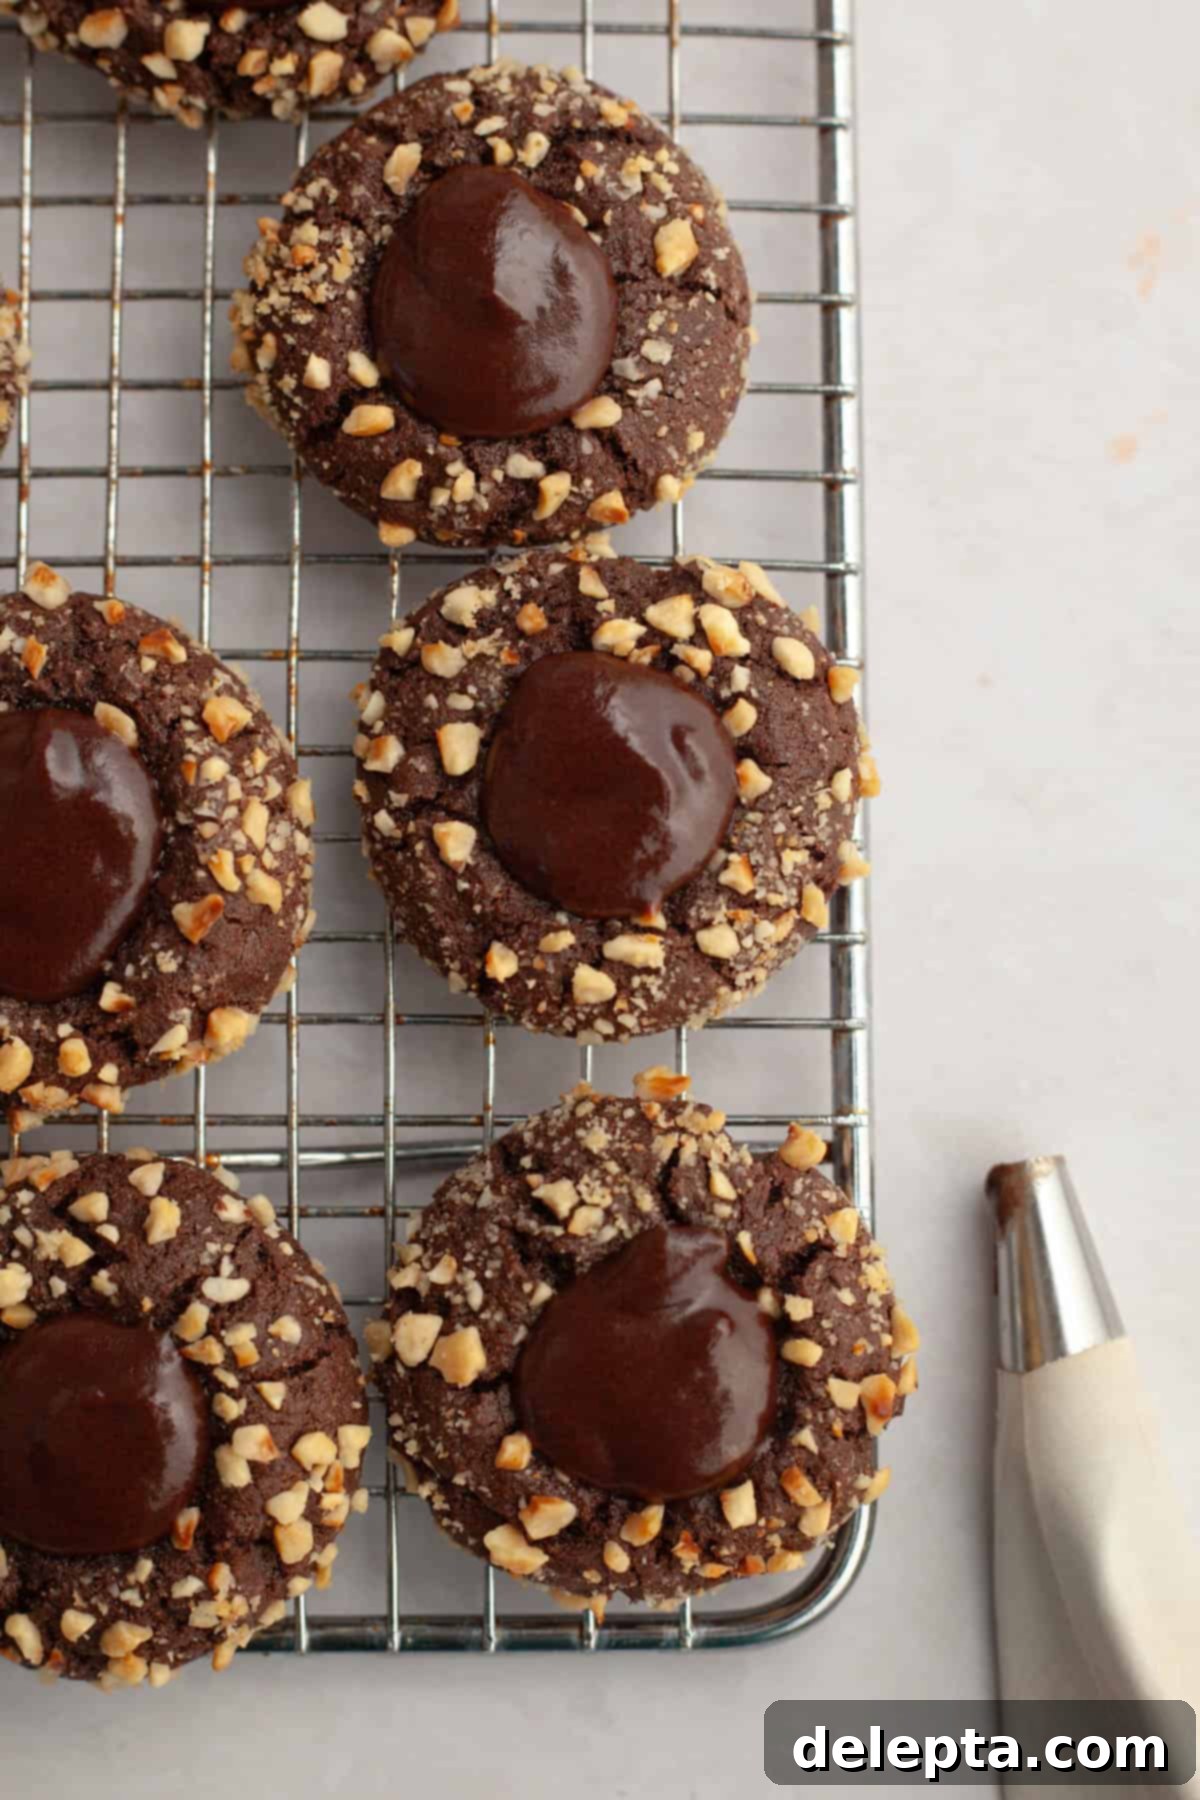
- Step 8: Mix and Fill. Carefully pour the hot heavy cream over the Nutella in the heat-safe bowl. Let it sit for a minute to melt the Nutella, then gently stir the mixture with a small whisk or spoon until it becomes completely smooth and glossy. Once the ganache is ready, you have two options for filling: either carefully spoon the ganache into the indents of the completely cooled cookies, or for a neater and more professional finish, transfer the ganache to a piping bag (with or without a round tip) and pipe the filling into each cookie. Allow the Nutella ganache to set at room temperature for about 30-60 minutes before serving. Then, sit back, relax, and savor your incredible homemade Nutella thumbprint cookies!
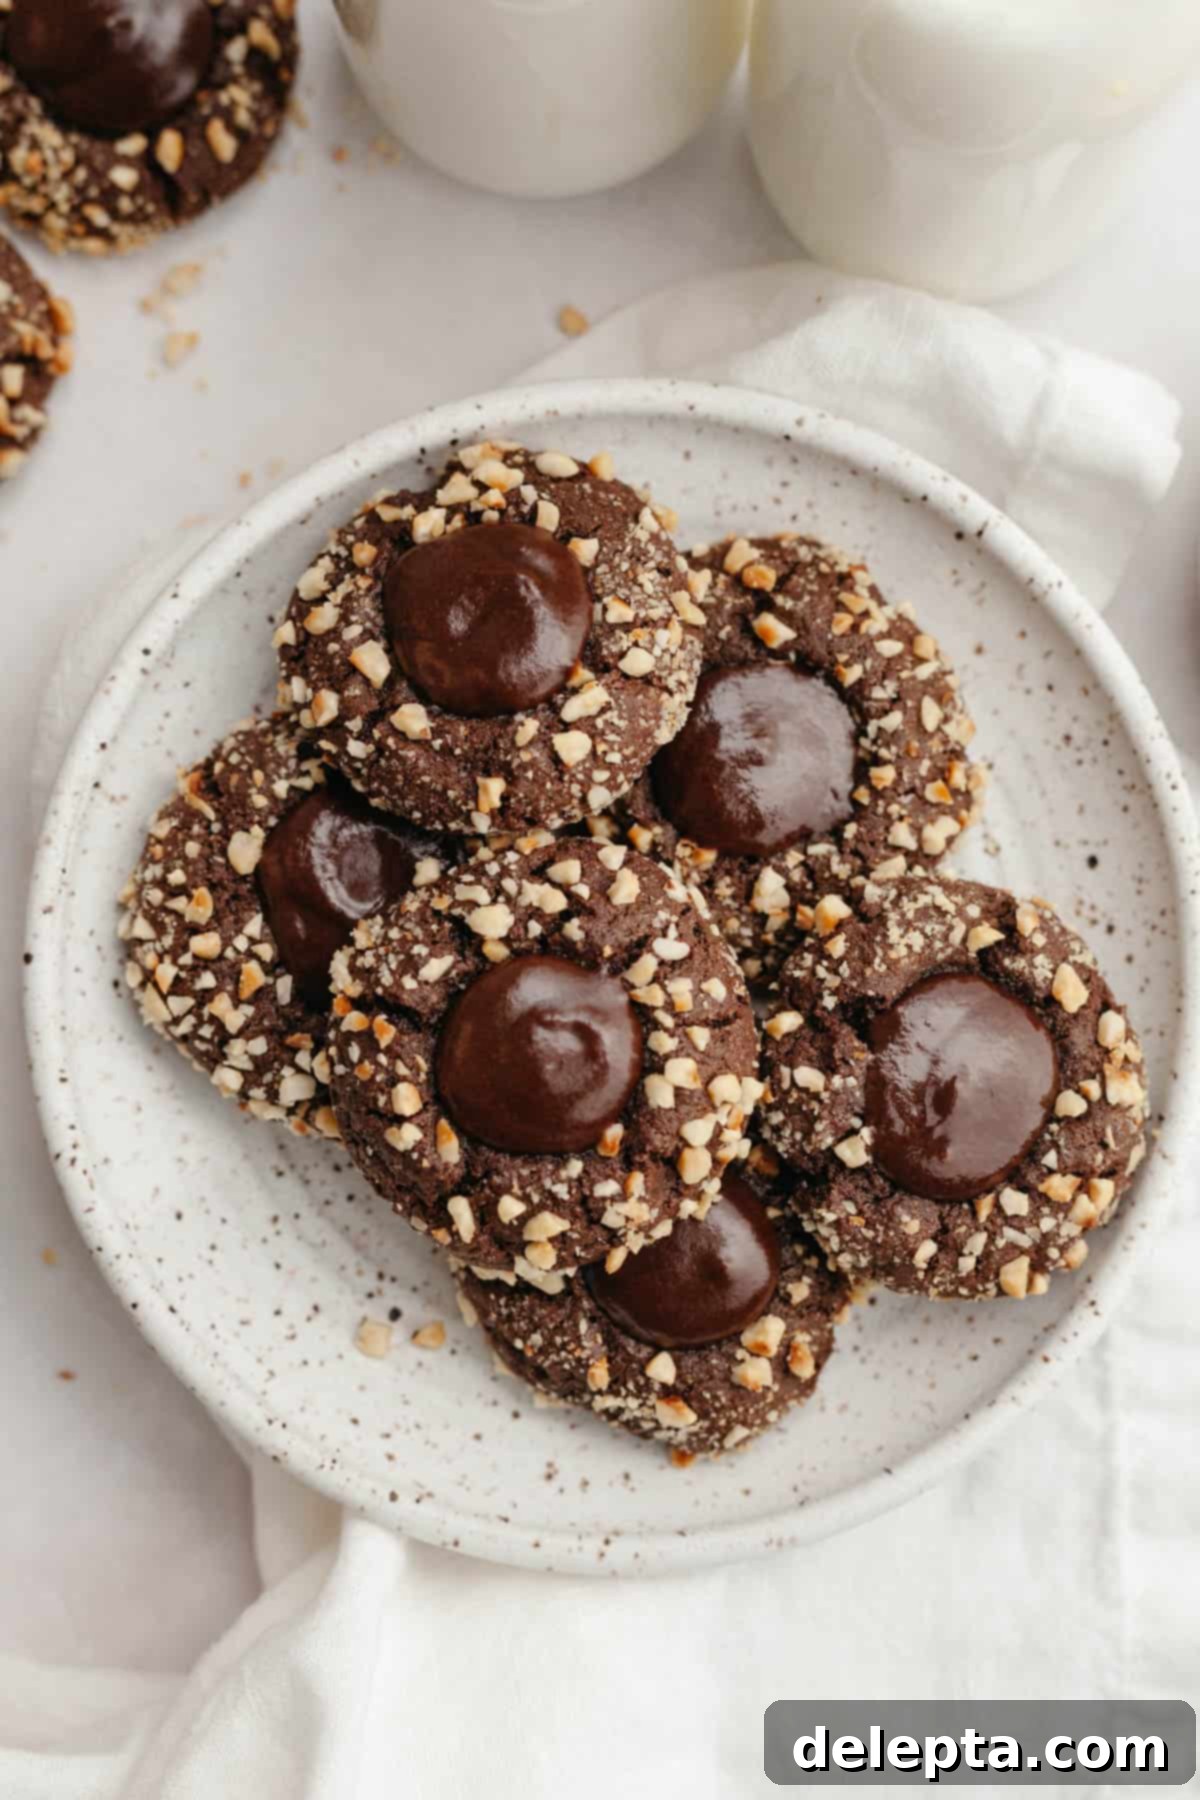
My Essential Baking Tips for Perfect Cookies
Achieving bakery-worthy Nutella thumbprint cookies is easier than you think with these expert tips:
- Uniform Indents are Key: While your thumb can work in a pinch, I highly recommend using the rounded end of a small spatula, a wooden spoon, or the back of a measuring spoon to create the indent in the cookie dough. This method consistently produces a more uniform and perfectly sized well for your delicious Nutella ganache filling. Press down gently but firmly to create a clear depression.
- Re-press After Baking: It’s common for the indents to puff up slightly during baking, appearing less defined when the cookies first come out of the oven. Immediately after removing the baking sheet from the oven, take the same tool you used to create the indents (the end of the spatula or spoon) and gently press down again on the center of each cookie. This will redefine the well and ensure a generous space for your filling.
- Optimal Chopped Hazelnuts: The key to the crunchy exterior is the chopped hazelnuts. Aim for a mix of fine hazelnut pieces and slightly larger, coarser fragments. This variety ensures better adherence to the cookie dough and a more satisfying crunch. I tested blending them for just a second in my food processor, but found those pieces became too fine, almost like a hazelnut ‘dust,’ which didn’t look or taste as good as a slightly chunkier chop.
- Filling for Neatness: For the cleanest and most professional-looking finish, the easiest way to fill your cooled cookies with Nutella ganache is by using a piping bag. You can use a simple round tip, or even just snip off a small corner of the bag. This allows for precise control, especially if the ganache is still a little warm and runny.
- Room Temperature Ingredients Matter: Ensure your butter and egg are at true room temperature. This allows them to cream together properly, creating a smooth emulsion that traps air for a lighter cookie texture. Cold ingredients can lead to a lumpy batter and a denser cookie.
- Avoid Overmixing the Dough: Once you add the dry ingredients, mix only until just combined. Overmixing develops the gluten in the flour, which can result in tough, chewy cookies instead of the desired tender crumb.
- Don’t Skip the Chill Time: The 1-hour chilling period is non-negotiable! It allows the butter in the dough to firm up, preventing the cookies from spreading excessively during baking. It also gives the flavors a chance to meld and makes the dough easier to handle.
- Cool Completely Before Filling: Be patient and let the cookies cool entirely on a wire rack before filling them with ganache. If the cookies are still warm, the ganache will melt and run, creating a messy result.
Delightful Serving Suggestions
These versatile Nutella thumbprint cookies are perfect for a wide array of occasions. Here are some ideas to inspire you:
- The Ultimate Holiday Cookie Box: These beautiful chocolate hazelnut thumbprint cookies are absolutely ideal for assembling festive gift boxes during the holiday season. Imagine them nestled alongside other homemade delights like rich browned butter snickerdoodles, delicate cream cheese spritz cookies, vibrant Christmas sprinkle sugar cookies, refreshing peppermint bark cookies, classic chocolate dipped butter cookies, or traditional German gingerbread cookies. A box filled with such an assortment makes for a truly heartfelt and delicious present!
- Coffee & Tea Companion: These rich cookies pair perfectly with a warm cup of coffee, a creamy latte, or a soothing mug of hot tea. The chocolate and hazelnut flavors are beautifully complemented by your favorite hot beverage.
- Dessert Platter Star: Arrange them on a dessert platter for parties, potlucks, or family gatherings. Their elegant appearance and irresistible flavor will make them a standout.
- After-Dinner Indulgence: Enjoy one or two as a sophisticated after-dinner treat, perhaps with a small glass of dessert wine or a scoop of vanilla bean ice cream.
- School or Work Treat: Pack a few in lunchboxes for a special surprise, or share them with colleagues for a delightful afternoon pick-me-up.
Storage & Freezing Guidelines
Proper storage ensures your delicious Nutella thumbprint cookies remain fresh and enjoyable for longer:
Room Temperature Storage: Once completely cooled and the ganache has set, store these Nutella thumbprint cookies in an airtight container at room temperature. They will maintain their best quality and flavor for 4-5 days.
Freezing Baked Cookies: These cookies freeze beautifully! Place the completely cooled and filled cookies in a single layer on a baking sheet and freeze until solid (about 1-2 hours). Once firm, transfer them to a freezer-safe airtight container or a heavy-duty freezer bag, separating layers with parchment paper to prevent sticking. They can be stored in the freezer for up to 2 months. To enjoy, simply thaw them to room temperature on your counter for a few hours.
Freezing Unbaked Cookie Dough: You can also prepare the cookie dough in advance and freeze it. Form the dough balls, roll them in hazelnuts, and make the indents as instructed. Place them on a parchment-lined baking sheet and freeze until firm. Then, transfer the frozen dough balls to a freezer-safe bag or container. When you’re ready to bake, you can bake them directly from frozen. You may need to add an extra 2-4 minutes to the baking time. Make the ganache fresh when you’re ready to fill and serve.

Explore More Delicious Cookie Recipes!
If you loved these Nutella Thumbprint Cookies, you’re in for a treat with these other fantastic cookie recipes from my kitchen. Each one is a tested favorite, perfect for any craving or occasion:
- Easy Cutout Shortbread Cookies
- Classic Thumbprint Hershey Kiss Cookies
- Buttercream Cookies
- Chocolate S’mores Cookies
If you’ve had the pleasure of making this recipe, I would absolutely love to hear from you! Please make sure to leave a ⭐️ rating and a thoughtful review below. Your feedback helps other bakers and truly brightens my day! I adore seeing your creations, so please tag me on Instagram @alpineella so I can admire what you’ve baked! You can also stay connected and discover more delicious recipes by following along on Pinterest, Facebook, and TikTok!
Recipe Card: Easy Nutella Thumbprint Cookies

Easy Nutella Thumbprint Cookies with Nutella Ganache
Ella Gilbert
Pin Recipe
Save RecipeSaved!
Equipment
-
Stand Mixer or Hand Mixer
-
Bowls
-
Kitchen Scale
-
2 Baking Sheets
-
Small Cookie Scoop
-
Spatula
-
Piping Bag (Optional, for neat filling)
Ingredients
Chocolate Cookies
- 2 cups all purpose flour
- ½ cup cocoa powder natural unsweetened
- 1 teaspoon baking soda
- ½ teaspoon kosher salt
- ½ cup unsalted butter room temperature
- ½ cup light brown sugar
- ½ cup granulated sugar
- 1 large egg room temperature
- 2 teaspoons vanilla extract
- 1 tablespoon whole milk
- ¾ cup roasted hazelnuts chopped finely
Filling
- ¼ cup heavy cream
- ½ cup nutella
Instructions
-
In a small bowl, thoroughly whisk together the flour, cocoa powder, baking soda, and kosher salt. Set aside.2 cups all purpose flour, ½ cup cocoa powder, 1 teaspoon baking soda, ½ teaspoon kosher salt
-
In a stand mixer fitted with the paddle attachment, or in a large bowl with a handheld mixer, combine the butter, light brown sugar, and granulated sugar. Cream on medium-high speed for 2 minutes until the mixture is light, fluffy, and pale in color.½ cup unsalted butter, ½ cup light brown sugar, ½ cup granulated sugar
-
Stop the mixer and scrape down the sides and bottom of the bowl with a rubber spatula to ensure all ingredients are well combined. Add the room-temperature large egg and vanilla extract. Beat on medium-high speed for 1 minute until fully incorporated and smooth.1 large egg, 2 teaspoons vanilla extract
-
With the mixer on low speed, gradually add the dry ingredients to the wet mixture. Mix until just combined, then add the tablespoon of whole milk. Continue mixing on low speed only until no streaks of flour remain and the dough comes together. Be careful not to over-mix!1 tablespoon whole milk
-
Scoop out 1 tablespoon of cookie dough using a small cookie scoop. Roll the dough between your hands to form a smooth, round ball. Place the finely chopped roasted hazelnuts in a shallow bowl. Roll each cookie dough ball generously in the hazelnuts, pressing gently to ensure an even coating. Arrange the coated dough balls on a parchment-lined baking sheet or plate. Repeat with all of the dough; this recipe should yield approximately 35 cookies. Use your thumb, the rounded end of a wooden cooking spoon, a spatula handle, or the back of a measuring spoon to create a deep indent in the center of each cookie.¾ cup roasted hazelnuts
-
Chill the prepared cookies in the refrigerator for a minimum of 1 hour. This step is crucial for preventing the cookies from spreading too much during baking.
-
After 1 hour of chilling, preheat your oven to 350°F (175°C). Line 2 baking sheets with fresh parchment paper. Carefully place the chilled cookies on the prepared baking sheets, ensuring several inches of space between each cookie to allow for proper air circulation and slight expansion. Bake one sheet at a time in the middle of the oven for 11-13 minutes.
-
Remove the cookies from the oven. They should appear set around the edges and may show some light cracking.
-
If the indents have puffed up or shrunk slightly during baking, immediately and gently re-press them using the same tool you used before (e.g., the bottom of a teaspoon or the end of a spatula). If desired, you can use a small round cookie cutter or glass slightly larger than the cookie to gently scoot around the edges of each warm cookie to refine its circular shape.
-
Allow the cookies to cool on the baking sheet for 10 minutes to firm up before carefully transferring them to a wire rack to cool completely. They must be entirely cool before filling.
-
While the cookies cool, prepare the Nutella ganache. Measure out the Nutella into a heat-safe bowl.½ cup nutella
-
In a small saucepan over medium-low heat (or in a microwave-safe bowl in the microwave), gently heat the heavy cream until it begins to simmer around the edges. Do not let it come to a rolling boil.¼ cup heavy cream
-
Pour the hot cream over the Nutella. Let it sit undisturbed for 1 minute, then stir gently with a whisk or spoon until the ganache is completely smooth, glossy, and uniform.
-
Spoon the Nutella ganache into the cooled thumbprint cookies. For a neater finish, you can transfer the ganache to a piping bag (with or without a small round tip) and pipe it into the indents. Allow the ganache to set at room temperature for about 30-60 minutes before serving. Enjoy your delicious homemade Nutella Thumbprint Cookies!
Notes
Butter: For optimal flavor and a wonderfully rich, creamy texture in your finished cookies, I use high-quality European-style butter (such as Kerrygold) in my recipes. This type of butter often has a higher fat content, contributing to a superior bake.
Salt: If you don’t have kosher salt readily available, you can substitute it with fine table salt, but remember to halve the amount called for in the recipe. As a general guideline, 1 teaspoon of kosher salt is roughly equivalent to ½ teaspoon of fine salt. Please note that I specifically use Diamond Crystal Kosher Salt, not coarse kosher salt, which has a different density.
Nutella: You are welcome to use any brand of chocolate hazelnut spread you prefer! While branded Nutella offers a distinct flavor, many high-quality store-brand alternatives work wonderfully in this recipe.
Hazelnuts: For the best results and to ensure the hazelnuts adhere well to the cookie dough balls, try to chop them as finely as possible. A mix of fine and slightly larger pieces works best for both texture and appearance. Larger, coarsely chopped pieces may not stick as effectively.
Storage: Store the baked and cooled Nutella thumbprint cookies in an airtight container at room temperature for up to 5 days. You can also freeze the baked cookies for up to 2 months. To serve frozen cookies, simply let them thaw completely to room temperature on your countertop.
Nutrition
