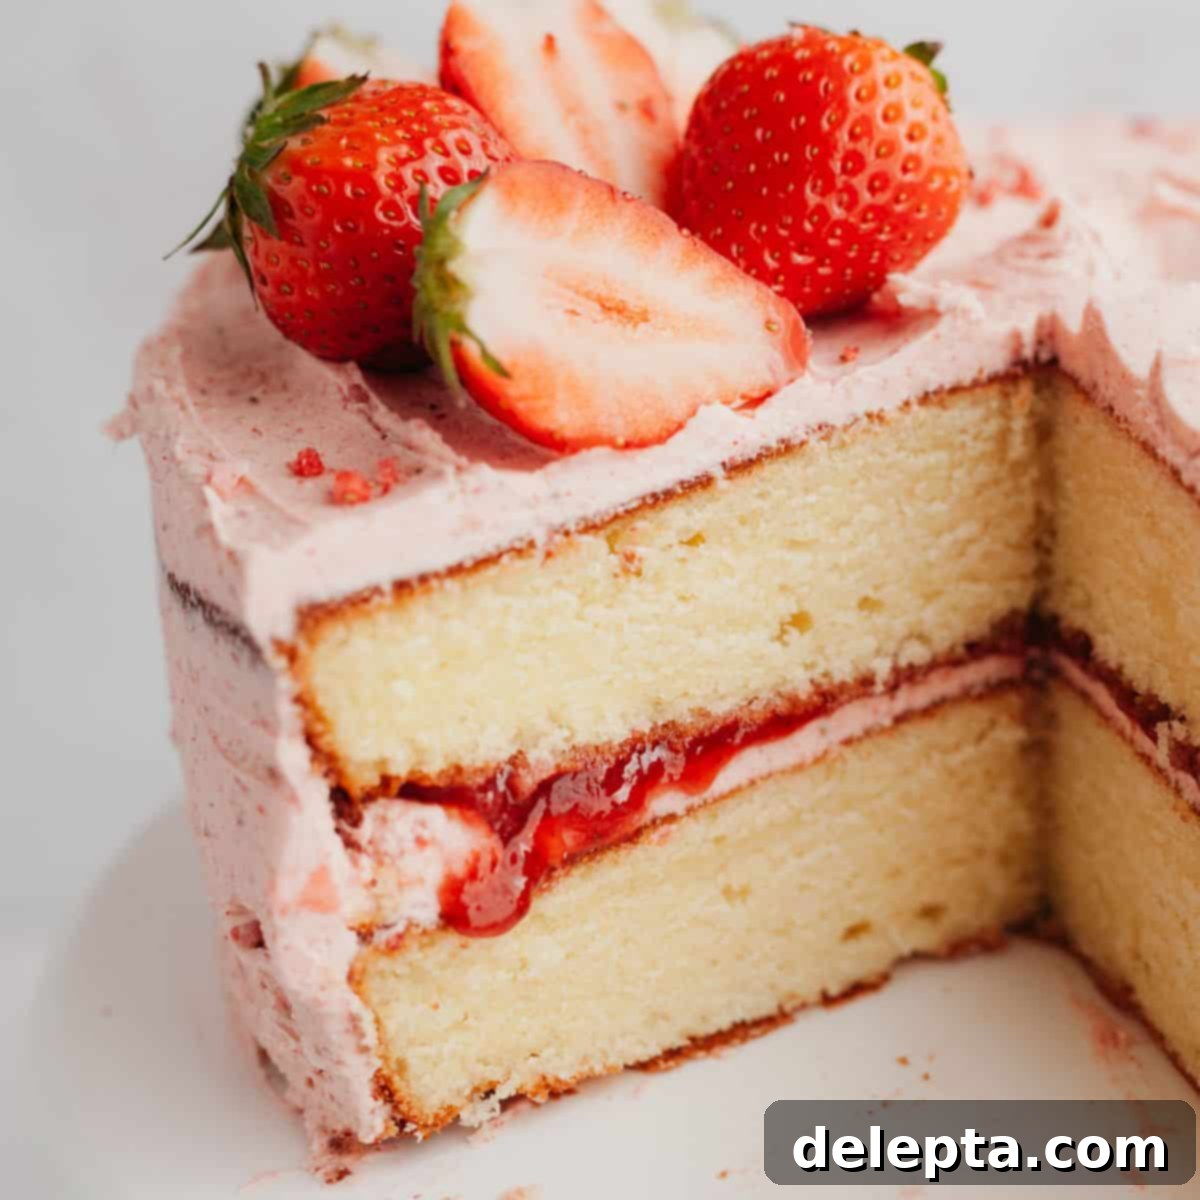
The Ultimate Homemade Vanilla Cake with Fresh Strawberry Filling and Dreamy Buttercream
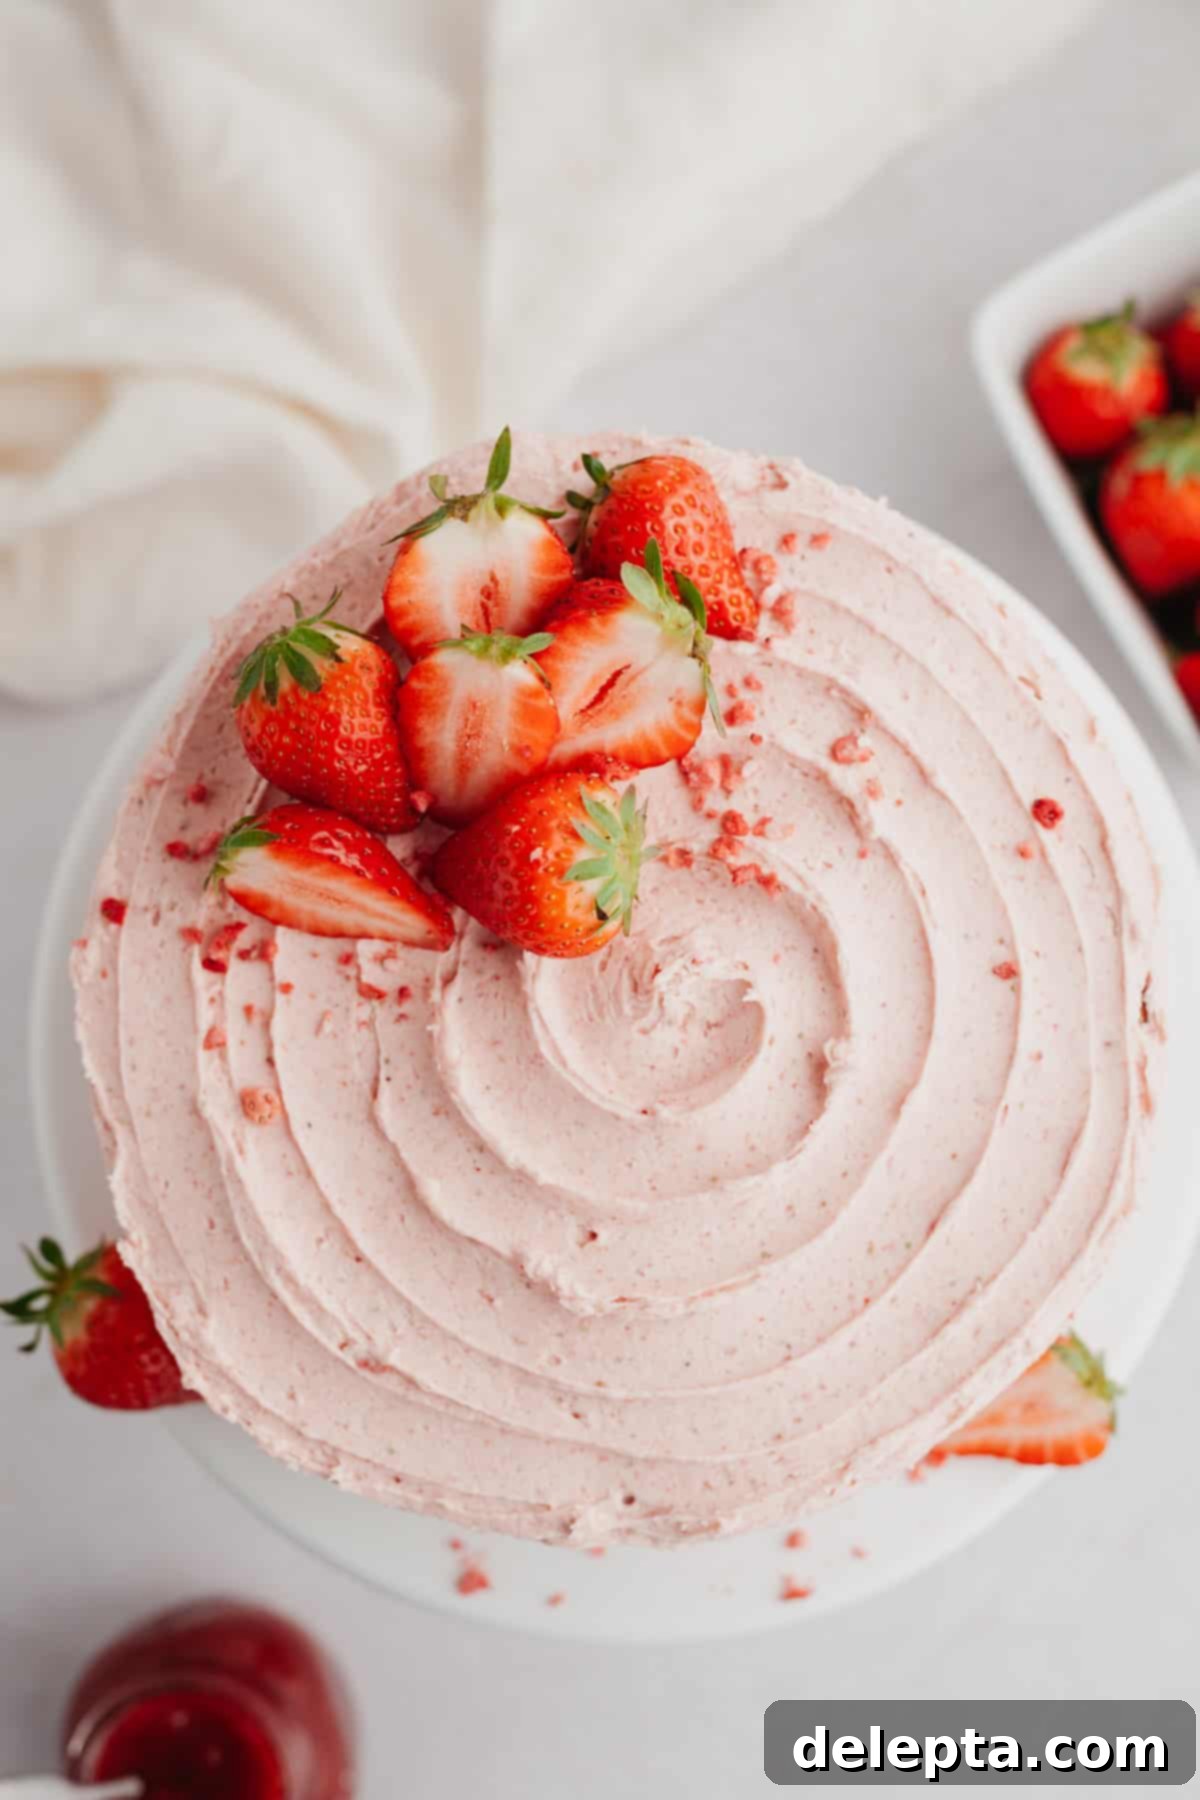
This vanilla cake with strawberry filling is truly the ultimate showstopper! Imagine a cake that perfectly balances a soft, fluffy vanilla base with the vibrant sweetness of a homemade strawberry filling, all enveloped in the creamiest strawberry buttercream frosting. This isn’t just a cake; it’s an experience designed for true strawberry aficionados and anyone who appreciates a beautifully crafted dessert. Whether you’re celebrating a birthday, an anniversary, or simply craving a taste of summer, this vanilla strawberry layer cake promises to be the centerpiece of any occasion, leaving a lasting impression with every delightful bite.
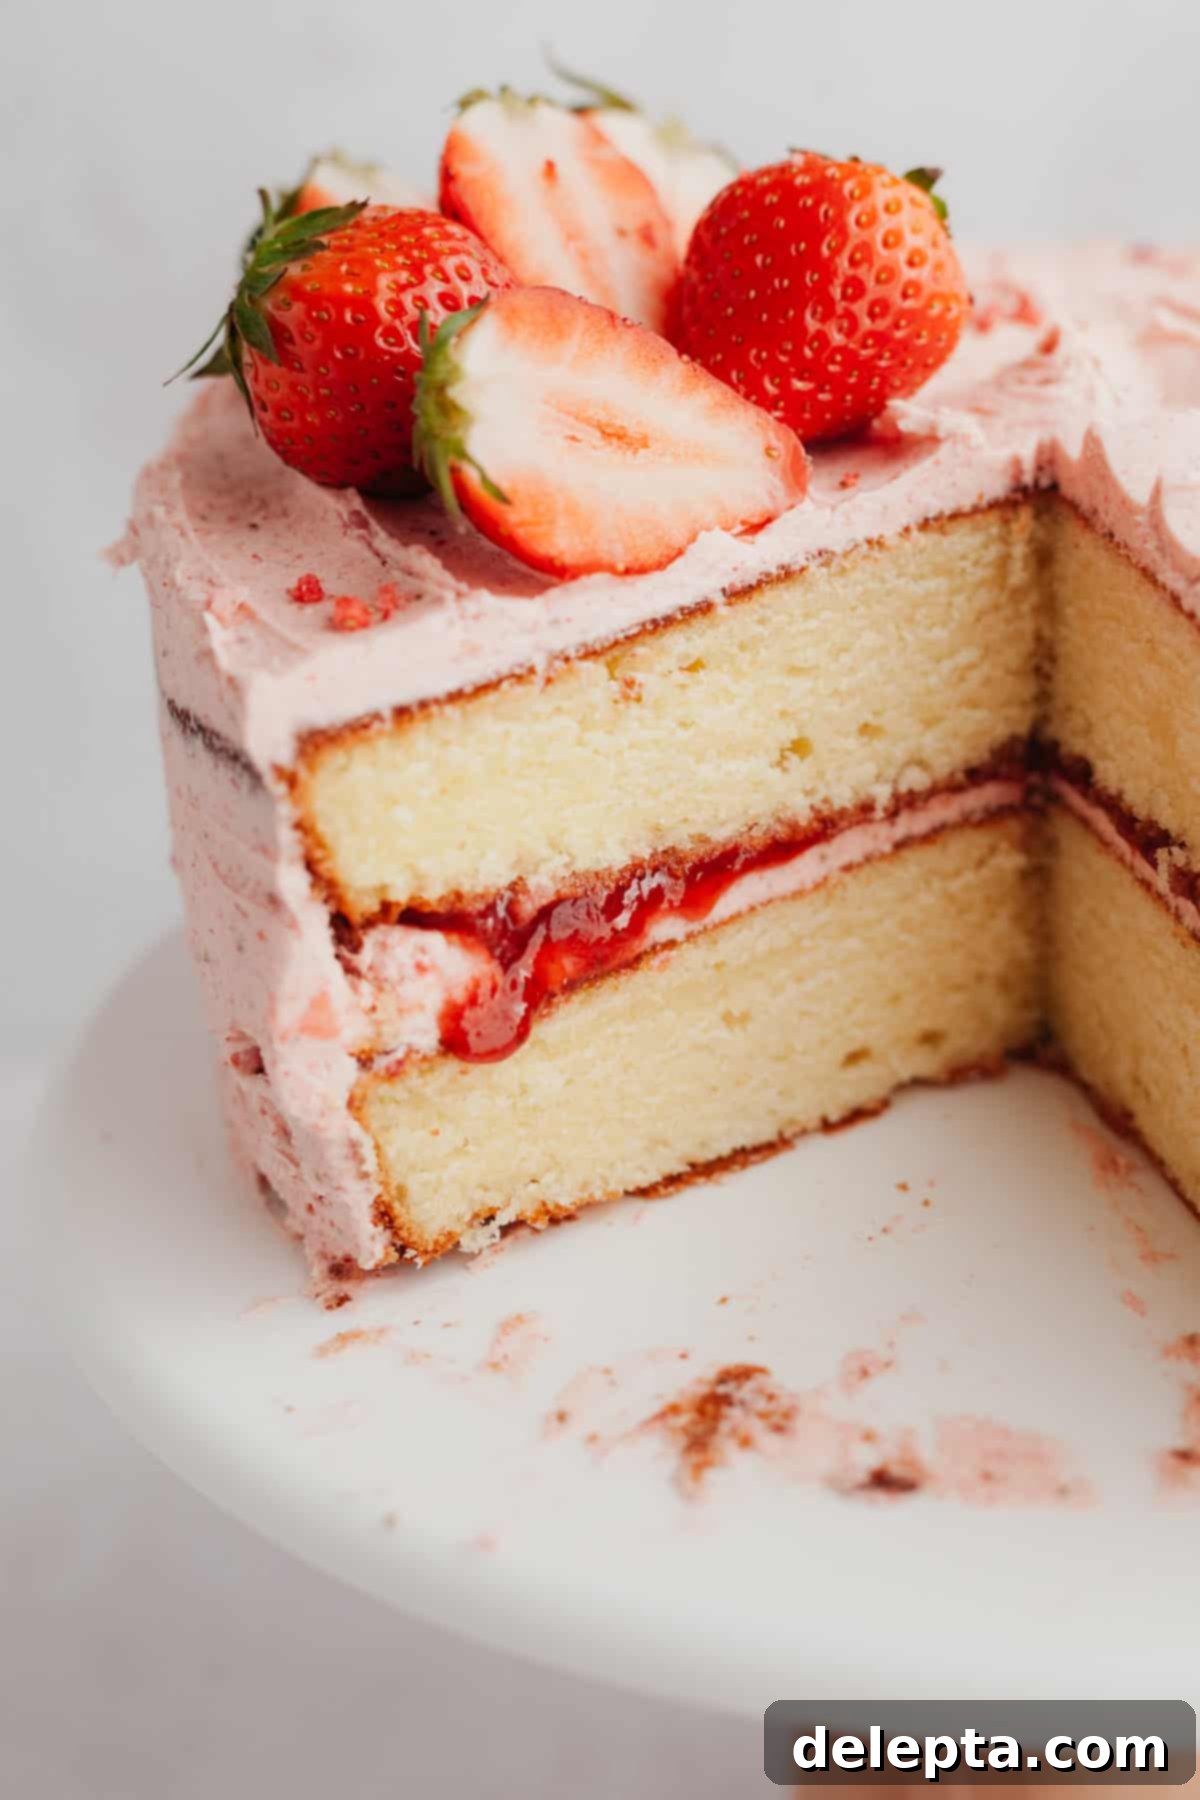
This recipe might just be the best vanilla cake I’ve ever developed. While my blog already features beloved vanilla cake recipes like the white forest cake, this particular creation stands out for its unparalleled softness and fluffiness. It achieves a delightful texture that many compare favorably to high-quality boxed cake mixes – but with all the goodness and fresh flavor of homemade ingredients! The secret lies in a unique combination of both oil and butter. Butter provides that rich, classic buttery flavor we all love, while the oil works wonders to ensure the cake remains incredibly moist and tender, crumb after crumb.
Complementing this exquisite cake base is my signature fresh strawberry filling. Crafted with just a handful of simple ingredients, this sweet and luscious filling is absolutely perfect for enhancing layer cakes. It brings a burst of authentic fruit flavor that beautifully cuts through the richness of the cake. To complete this masterpiece, the entire cake is generously covered in my celebrated strawberry buttercream frosting. I’ve previously featured this delectable frosting in my strawberry filled cupcakes, and its rave reviews made it an obvious choice for this ultimate vanilla cake with strawberry filling. The harmonious blend of these three components creates a dessert that is truly unforgettable.
I truly believe this cake is the ideal choice for any special celebration – from a memorable birthday party to an elegant gathering. Its vibrant colors and irresistible flavors are sure to impress your guests. If you find yourself craving even more delightful strawberry creations, be sure to explore some of my other favorite recipes: my comforting strawberry crumble, the indulgent chocolate cake with strawberry filling, the innovative strawberry crunch cheesecake, and the classic strawberry layered cake. For those seeking a more playful, festive vibe reminiscent of a funfetti cake, my strawberry funfetti cake offers a joyful burst of color and flavor perfect for any cheerful occasion.
Why You’ll Adore This Vanilla Strawberry Cake!
There are countless reasons to fall in love with this vanilla cake with strawberry filling. From its incredible flavor profile to its thoughtful design for ease of baking, every element has been perfected to give you an unforgettable dessert experience. Here are the top reasons why this recipe will become a cherished favorite in your baking repertoire:
- Unforgettable Fresh Strawberry Flavor: This cake delivers a double dose of glorious strawberry goodness! You’ll experience the juicy, bright taste from the homemade fresh strawberry filling, bursting with natural sweetness. Additionally, the strawberry buttercream is infused with freeze-dried strawberries, which provide an intensely concentrated and authentic strawberry flavor without adding excess moisture. For the absolute best results, I highly recommend making this cake during peak strawberry season when you can source the freshest, most flavorful berries for your filling. The difference in taste is truly remarkable.
- Convenient Make-Ahead Options: Baking a magnificent layer cake can often feel like a daunting task, but this recipe is designed to simplify your life. You can prepare the vibrant strawberry filling up to a week in advance, allowing it to cool and thicken beautifully in the refrigerator. The cake layers themselves can also be baked up to two days before assembly, and stored properly. This strategic planning means that on the day you plan to serve your cake, all you need to do is whip up the buttercream and assemble the layers. This thoughtful timing makes the entire process far less stressful and much more enjoyable, letting you savor the baking process and the delicious outcome.
- Incredibly Fluffy and Moist Vanilla Cake: Prepare to be amazed by the texture of this vanilla cake! It’s exceptionally soft, incredibly moist, and wonderfully fluffy – a texture often sought after but rarely achieved. This superior consistency is all thanks to a carefully balanced combination of both oil and butter in the batter. The butter contributes a deep, rich, and classic vanilla flavor, while the neutral oil ensures an unparalleled tenderness and moisture that lasts for days. This creates a cake that’s delightful to eat and holds its freshness beautifully, distinguishing it from many other vanilla cake recipes.
Essential Ingredients for Your Strawberry Vanilla Cake
Crafting this delightful vanilla strawberry cake requires a selection of high-quality ingredients, each playing a crucial role in achieving its perfect flavor and texture. Here’s a detailed look at what you’ll need to gather to bring this incredible recipe to life, along with some helpful tips for each:
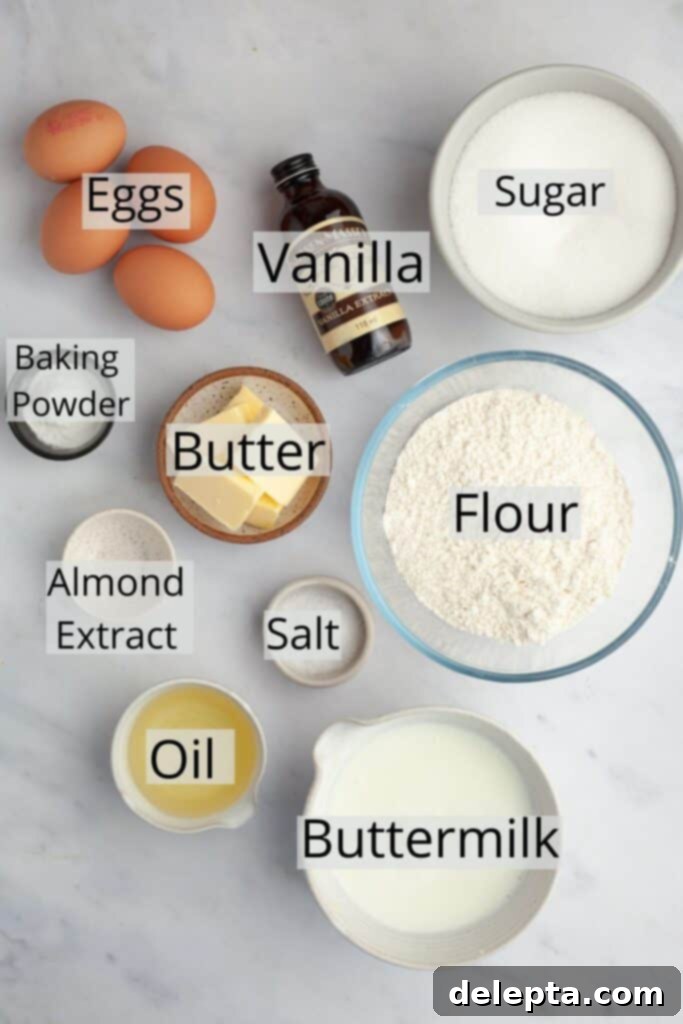
- All-Purpose Flour: For the cake base, I recommend using standard all-purpose flour. It provides the perfect structure and tenderness for a beautifully textured crumb. Ensure it’s spooned and leveled for accurate measurement, or even better, weighed in grams for precision.
- Buttermilk: This ingredient is a game-changer for moist cakes. Buttermilk adds a subtle tang and reacts with the baking powder to create a tender, exceptionally moist vanilla cake. Make sure it’s at room temperature for optimal mixing. If you don’t have buttermilk on hand, you can easily make a substitute by adding 1 tablespoon of lemon juice or white vinegar to a measuring cup, then filling the rest with regular milk (dairy or non-dairy) to the 1-cup mark. Let it sit for 5-10 minutes until it curdles slightly before using.
- Neutral Oil: The inclusion of a neutral-flavored oil is key to the cake’s extraordinary softness and moisture. Opt for oils like vegetable oil, sunflower oil, or canola oil. It’s crucial to avoid oils with strong flavors, such as olive oil, which can impact the delicate vanilla taste of the cake.
- Almond Extract: While optional, a touch of almond extract truly elevates and enhances the overall flavor profile of the vanilla cake. It complements the vanilla beautifully, adding a subtle depth. If you enjoy its unique aroma and taste, I highly recommend adding it alongside the vanilla extract.
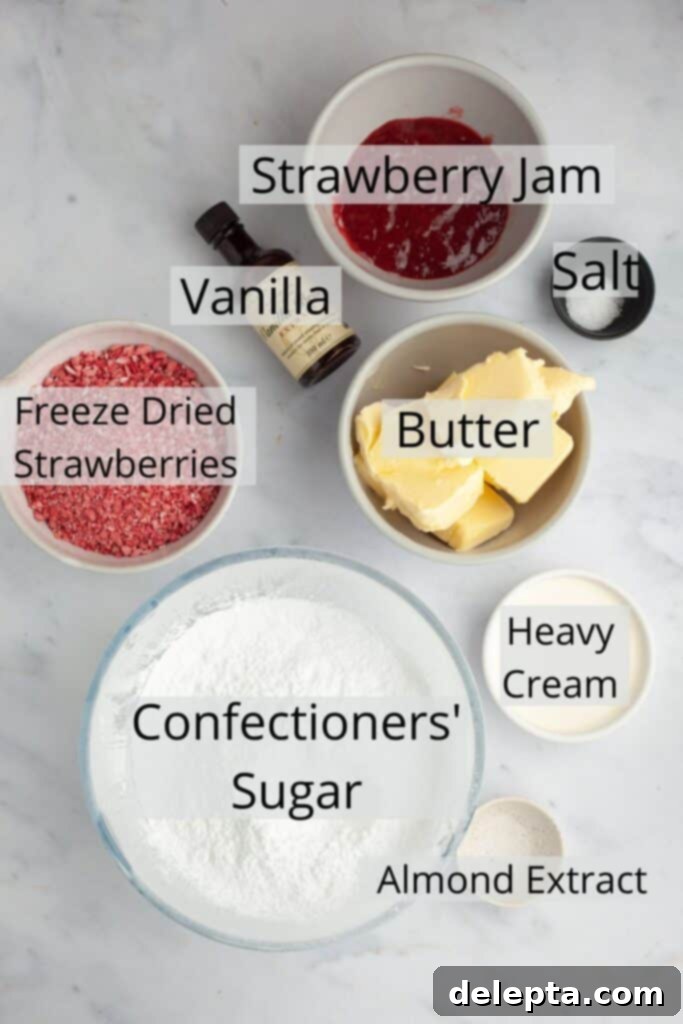
- Freeze-Dried Strawberries: These are an absolute must for achieving that vibrant, natural strawberry flavor in the buttercream without adding excess liquid. You can typically find freeze-dried strawberries at major retailers like Target, your local grocery store, on Amazon, or at specialty stores like Trader Joe’s. Be sure to select freeze-dried, not frozen, strawberries, as the latter contains too much moisture for frosting. Once measured, you’ll need to blend them into a fine powder using a food processor or a high-speed blender for the smoothest buttercream.
- Strawberry Jam (for filling): For the irresistible strawberry filling, I utilize the homemade strawberry jam from my dedicated strawberry filling recipe. This ensures a fresh, bright, and perfectly textured filling for your cake. If you’re short on time, a high-quality, thick store-bought strawberry jam can be used as a convenient substitute.
- Other Pantry Staples: Don’t forget the baking essentials! You’ll need granulated white sugar for sweetness, large eggs for structure and richness, vanilla extract for classic flavor, baking powder for lift, and kosher salt to balance and enhance all the flavors. Ensure all refrigerated ingredients like butter and eggs are at room temperature before you begin for the best emulsion and cake texture.
For precise measurements and full ingredient quantities, please refer to the detailed recipe card below.
Creative Substitutions & Delicious Variations
This vanilla cake with strawberry filling recipe is wonderfully versatile, allowing for several adjustments and creative twists to suit your preferences or what you have on hand. Don’t be afraid to experiment and make it your own! Here are some ideas for substitutions and variations:
- Buttermilk Alternatives: If buttermilk isn’t readily available, you can easily swap it out for an equal amount of full-fat sour cream or even plain Greek yogurt. Both will contribute to the cake’s moistness and tender crumb. I don’t recommend using just regular milk, as it won’t provide the necessary acidity or richness for the best texture.
- Flavor Extracts: The almond extract adds a lovely nuanced flavor, but if you’re not a fan or prefer a pure vanilla profile, feel free to omit it entirely. For an adventurous twist, consider adding a hint of citrus with fiori di sicilia extract – it imparts a beautiful floral and lemon note that pairs wonderfully with strawberries.
- Strawberry Filling Shortcuts: While the homemade strawberry filling is truly exceptional, I understand that time isn’t always on your side. In a pinch, a good quality, thick store-bought strawberry jam or preserves can be used as a convenient substitute for the homemade filling. Just ensure it’s robust enough to hold its shape in the cake layers.
- Alternate Fruit Flavors: The beauty of this recipe is its adaptability to other fruits. Instead of strawberries, consider using freeze-dried raspberries or blueberries in the buttercream, and a homemade raspberry or blueberry filling for a different, yet equally delicious, berry-infused cake experience.
- Frosting Variations: If you’re looking for a different frosting experience, you can easily adapt this cake. For a richer, tangier counterpoint to the sweet strawberries, try my strawberry cream cheese frosting. It adds another layer of indulgence!
- Chocolate Lovers’ Delight: Can’t decide between vanilla and chocolate? You don’t have to! Adapt this recipe to a chocolate base by making my chocolate cake with strawberry filling. It offers the same luscious strawberry elements with a decadent chocolate cake.
- Adding Fresh Berries to Filling: For an extra burst of freshness and texture, once you’ve spread your homemade strawberry filling, you can gently press a thin layer of freshly sliced strawberries on top before adding the next cake layer. This adds another dimension to the strawberry flavor.
Easy Step-by-Step Instructions for Baking Perfection
Baking this stunning vanilla cake with strawberry filling is a rewarding process, and I’m here to guide you through each step to ensure your success. Follow these clear instructions for a truly magnificent result:
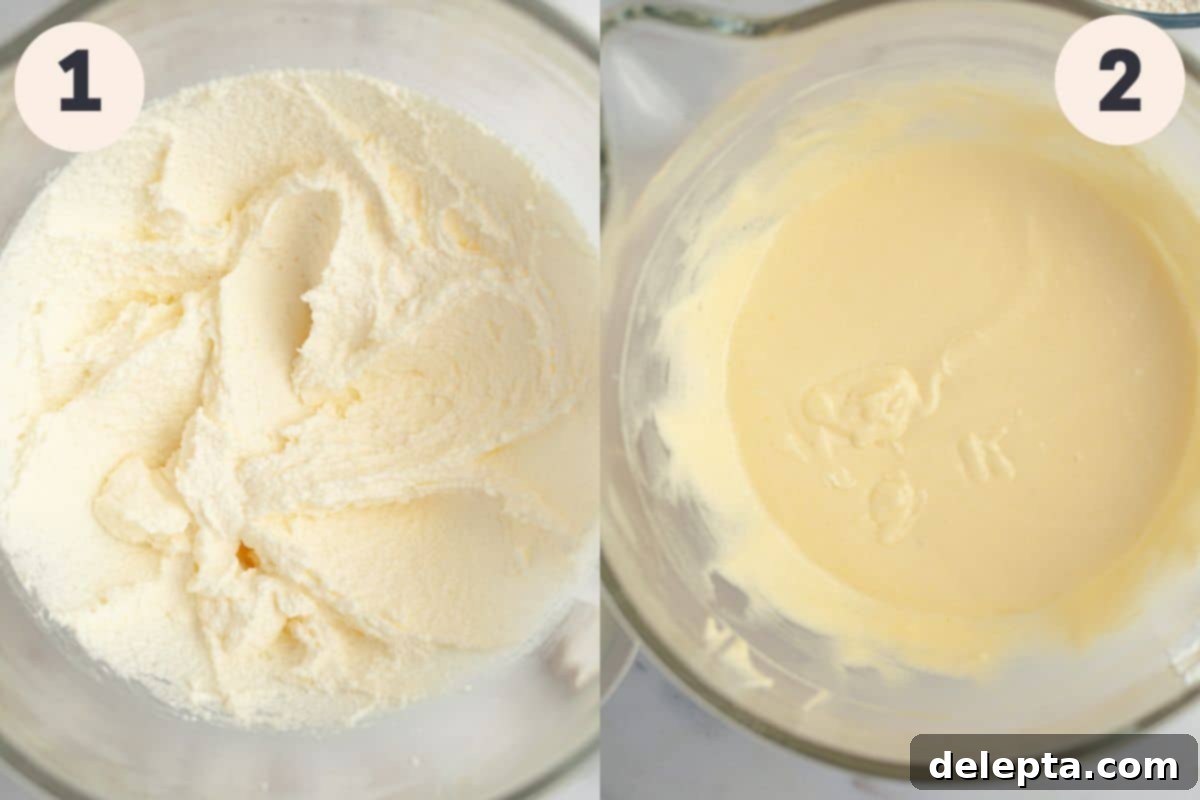
Step 1: Prepare the Wet Ingredients. In the bowl of a stand mixer fitted with the paddle attachment, combine the room temperature unsalted butter with the granulated sugar and neutral oil. Mix on medium speed for about 2-3 minutes. The mixture will become creamy but might not appear as smooth as an all-butter creamed mixture, due to the oil. This is perfectly normal and contributes to the cake’s moist texture.
Step 2: Incorporate Eggs and Extracts. Next, mix in the vanilla and almond extracts until just combined. Then, add the large eggs one at a time, ensuring each egg is fully incorporated before adding the next. It’s crucial to scrape down the sides and bottom of the bowl thoroughly after each addition to ensure your cake batter is evenly mixed and smooth, preventing any unincorporated ingredients from affecting the final texture.
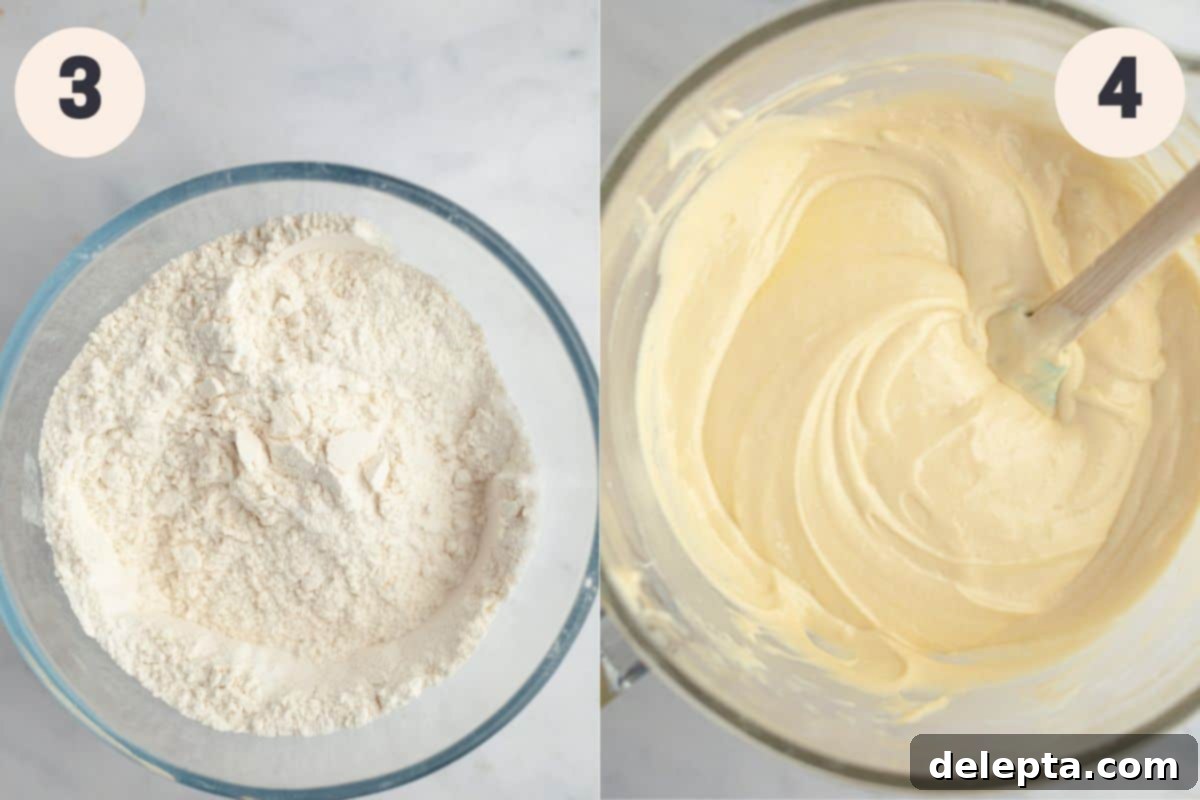
Step 3: Combine Dry Ingredients. In a separate medium or small bowl, whisk together the all-purpose flour, baking powder, and kosher salt. This step ensures that the leavening agents and salt are evenly distributed throughout the flour, which is vital for an even rise and consistent flavor in your cake.
Step 4: Alternate Wet and Dry. Gradually add the dry ingredients to the wet mixture in three additions, alternating with the buttermilk. Begin and end with the dry ingredients. Mix on low speed only until just combined after each addition. Be very careful not to overmix the batter at this stage, as overmixing can lead to a tough cake.
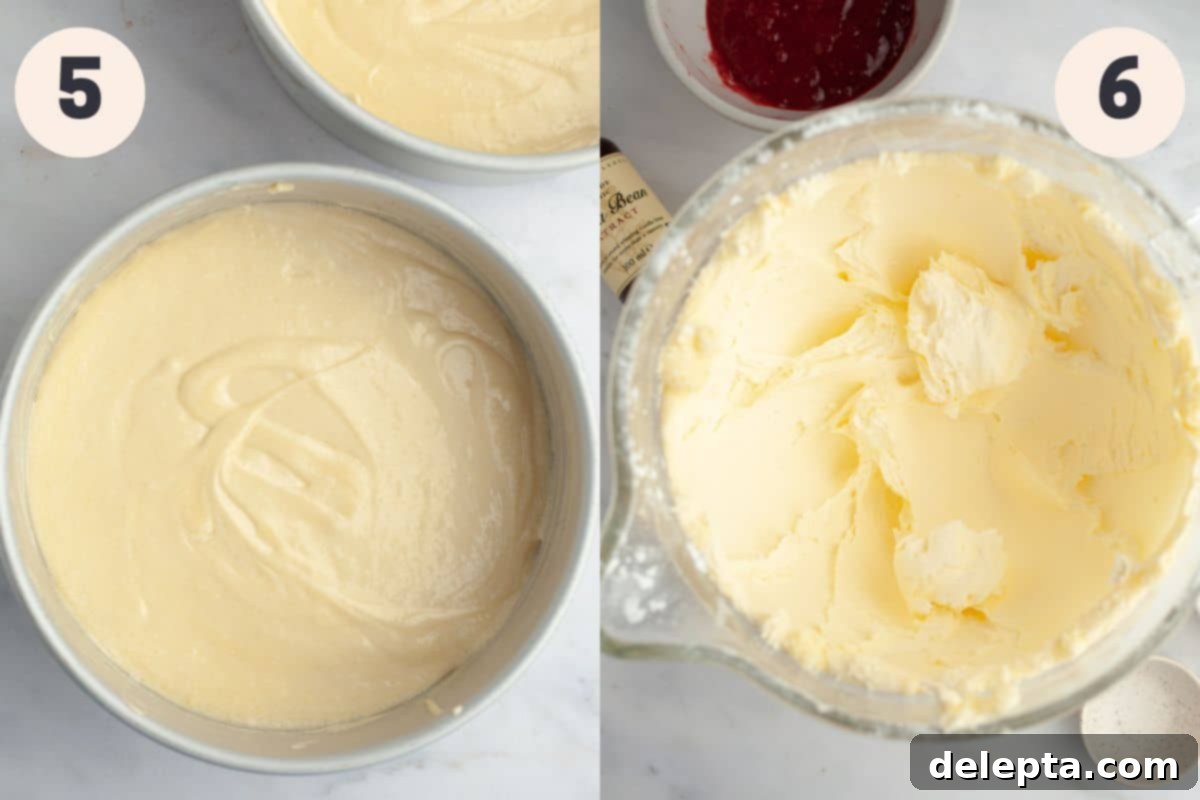
Step 5: Bake the Cake Layers. Divide the smooth cake batter evenly between two greased and parchment-lined 8-inch cake pans. Bake in a preheated oven (usually 350°F/175°C) for approximately 30-35 minutes, or until a wooden skewer or toothpick inserted into the center comes out clean with no wet batter. Allow the cake layers to cool in their pans for about 15 minutes before carefully inverting them onto a wire cooling rack to cool completely. Cooling completely is crucial before frosting.
Step 6: Begin the Buttercream. While your cake layers are cooling, you can start preparing the luscious strawberry buttercream. In a stand mixer fitted with the paddle attachment, or using a large bowl and a handheld mixer, beat the room temperature unsalted butter with the confectioners’ sugar on low speed until they are just combined and no dry sugar remains. Once combined, increase the speed to medium-high and continue beating until the mixture becomes light, fluffy, and noticeably pale in color. This process incorporates air, making your frosting truly dreamy.
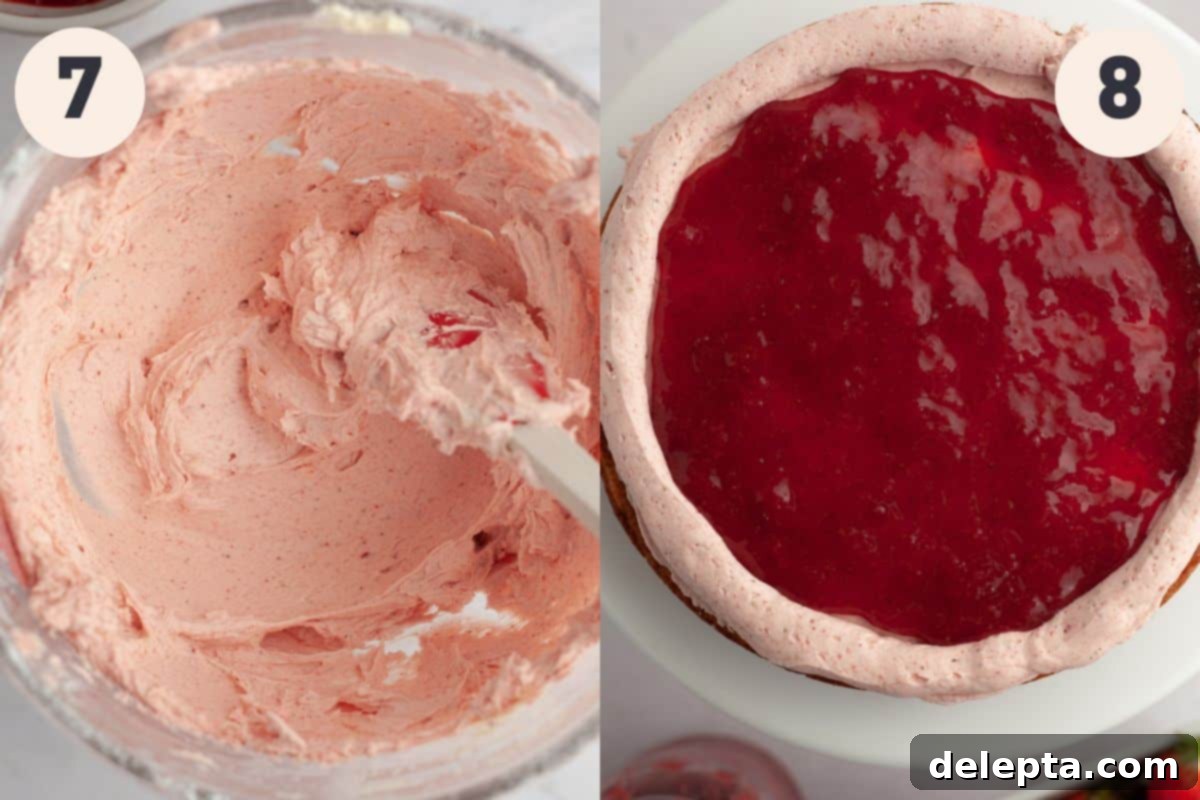
Step 7: Add Strawberry Flavor and Creaminess. To the whipped butter and sugar, add the finely powdered freeze-dried strawberries, along with the kosher salt and additional vanilla and almond extracts. Beat again on medium-high speed until the frosting is beautifully light, fluffy, and uniformly pink from the strawberry powder. Finally, with the mixer running on its lowest speed, slowly pour in the heavy cream until the frosting reaches a super creamy, spreadable consistency. You might not need all the cream, so add it gradually until you reach your desired texture.
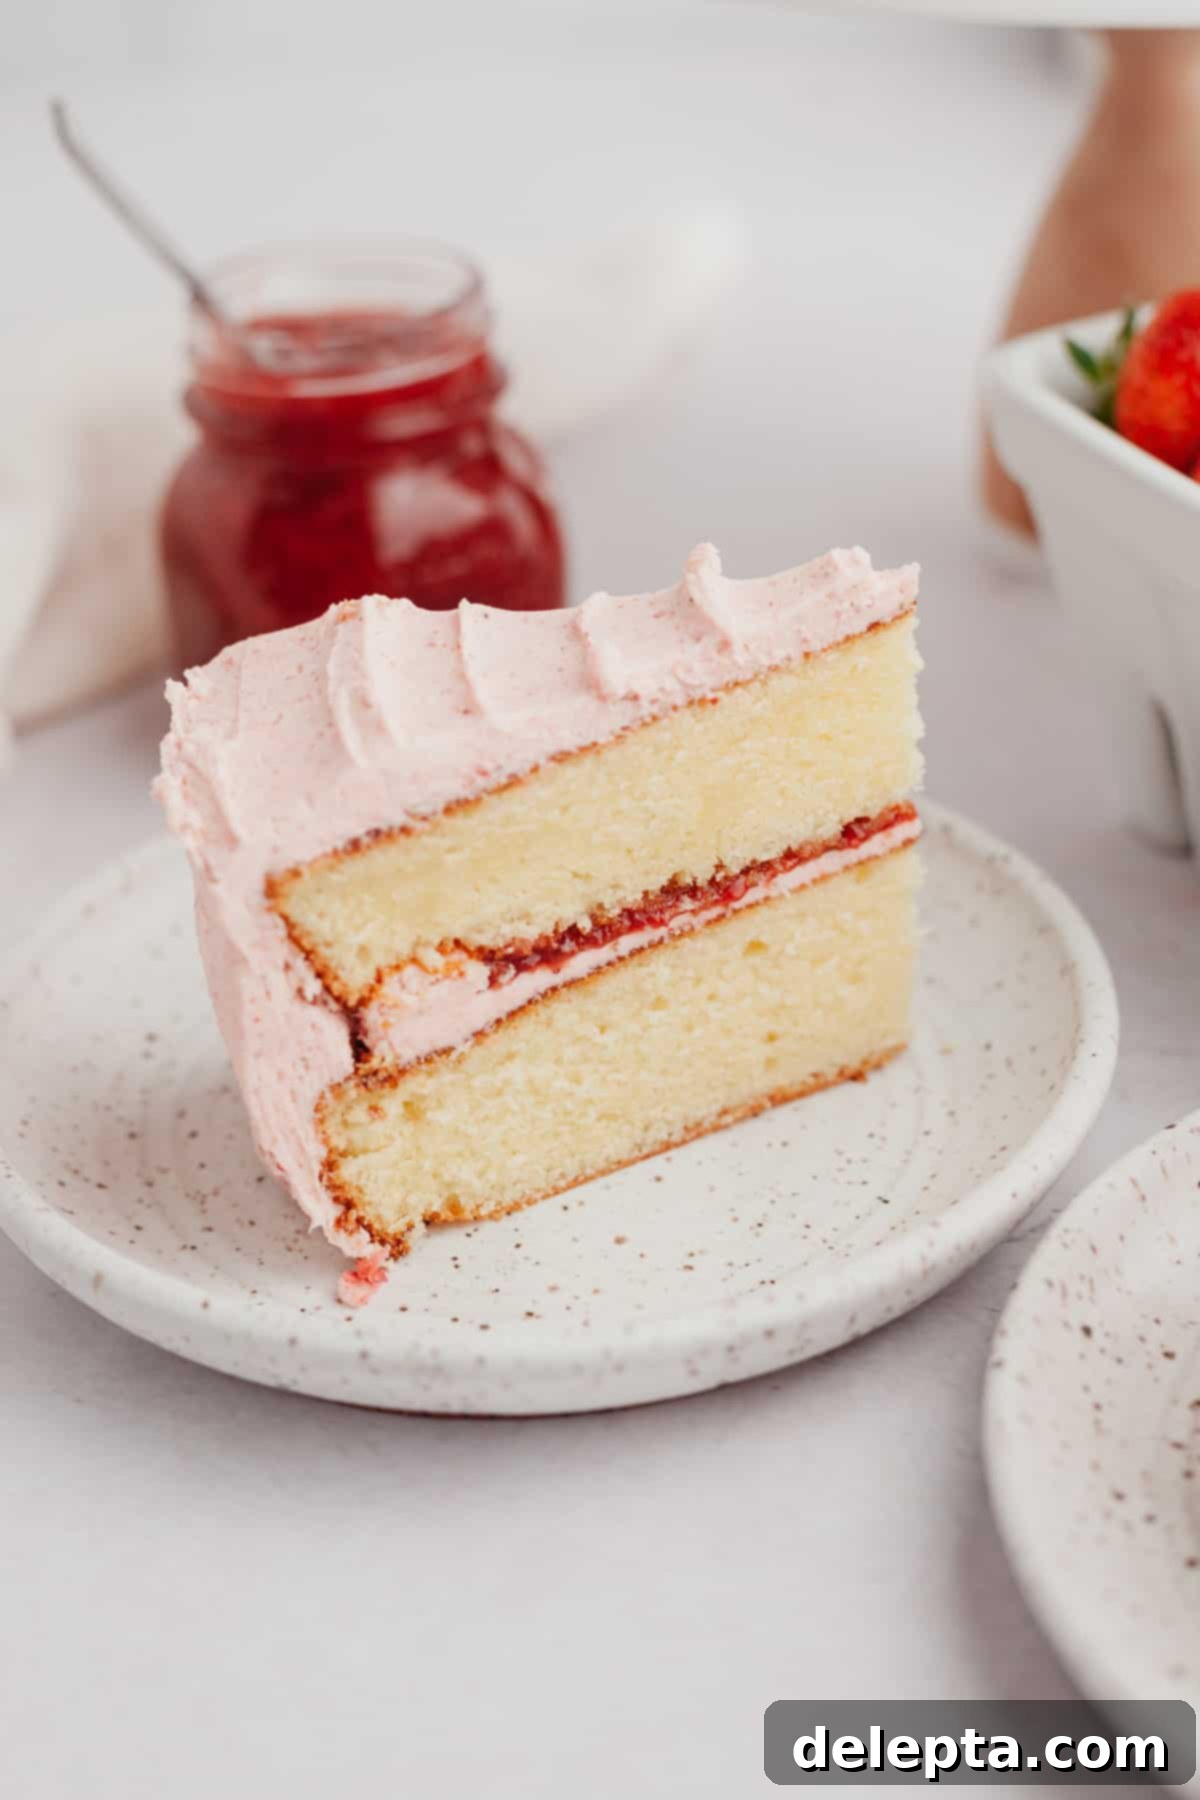
Step 8: Assemble Your Masterpiece! Now for the exciting part – assembling your cake! Place one cooled cake layer onto your chosen serving plate or cake stand. Spread a thin, even layer of strawberry frosting over the top of this cake layer. Then, using a piping bag fitted with a round tip (or simply snipping the corner off a Ziploc bag), pipe a sturdy ring of frosting around the outer edge of the cake. This creates a “dam” to prevent the strawberry filling from leaking out. Carefully fill the center space within the piped ring with your homemade strawberry jam or filling. Gently top with the second cake layer. Finally, use the remaining strawberry buttercream to generously frost the top and sides of the entire cake, smoothing it out for a beautiful finish. For decoration, arrange fresh strawberries artfully on top of the cake. Slice, serve, and enjoy your stunning creation!
Expert Tips & Tricks for the Perfect Cake
Achieving a bakery-worthy vanilla cake with strawberry filling is easier than you think with these expert tips and tricks. These pointers will help you streamline your baking process, avoid common pitfalls, and ensure your cake turns out perfectly moist, flavorful, and beautiful every time.
- Strategic Make-Ahead Planning: To significantly reduce stress on serving day, embrace the make-ahead advantage of this recipe. The homemade strawberry filling can be prepared up to a week in advance and stored in an airtight container in the fridge. Similarly, the baked cake layers can be made up to two days prior, wrapped tightly in plastic wrap, and refrigerated. This way, when it’s time to serve, you only need to focus on whipping up the fresh frosting and assembling your stunning creation, making for a much more enjoyable experience.
- Secure Your Filling: Preventing the delicious strawberry filling from oozing out of your layer cake is crucial for a clean and beautiful presentation. To do this, always spread a thin, even layer of strawberry buttercream on the bottom cake layer first. Then, use a piping bag (or a zip-top bag with the corner snipped off) to pipe a sturdy border, or “dam,” of buttercream around the outer edge of that same cake layer. This creates a secure barrier that will hold the strawberry filling perfectly in place.
- Boost That Strawberry Flavor: If you’re a true strawberry enthusiast and want to amplify the fruitiness, consider adding some very thinly sliced fresh strawberries directly on top of the strawberry filling layer before placing the next cake layer. This adds an extra burst of juicy, fresh berry taste and a delightful textural contrast that elevates the overall strawberry experience.
- Patient Cooling is Key: This might be the most important rule for successful layer cake assembly. Ensure your cake layers are *completely* cooled to room temperature before you even think about applying any frosting. If the cake is even slightly warm, the buttercream will melt, slide off, and create a messy, frustrating situation. Patience here pays off immensely.
- Room Temperature Ingredients for Success: Always make sure your butter, eggs, and buttermilk (or substitutes) are at room temperature. This isn’t just a suggestion; it’s a critical step that allows ingredients to emulsify properly, creating a smooth, cohesive batter and a beautifully even-textured cake. Cold ingredients can lead to a lumpy batter and a denser, less desirable cake texture.
- Avoid Overmixing the Batter: Once you start adding the flour to your wet ingredients, mix only until the flour streaks have just disappeared. Overmixing develops the gluten in the flour too much, which can result in a tough, chewy cake rather than the desired soft and fluffy texture. A light hand is best at this stage.
- Precise Measuring for Consistency: Baking is a science, and accurate measurements are paramount. Whenever possible, use a kitchen scale to measure your dry ingredients, especially flour, in grams. This is far more accurate than cup measurements and will ensure consistent, perfect results every time. If using cups, be sure to spoon the flour into the cup and level it off rather than scooping directly from the bag.
Common Questions About This Vanilla Strawberry Cake
I’ve gathered some frequently asked questions about this vanilla cake with strawberry filling to help you with any queries you might have during your baking journey. These answers provide further clarity and troubleshooting tips for a seamless experience.
Absolutely! While the homemade strawberry filling truly shines, you can certainly opt for a high-quality store-bought strawberry jam or preserves if you’re short on time. The key is to choose a jam that is quite thick in consistency to ensure it holds up well within the cake layers and doesn’t seep out. A runnier jam might make your cake difficult to assemble cleanly.
I haven’t personally tested this specific vanilla cake recipe as cupcakes yet, so I cannot guarantee the exact baking time or yield. However, if you’re looking for a delicious strawberry-filled cupcake recipe, I highly recommend checking out my dedicated recipe for strawberry filled cupcakes! It’s tried and tested for perfect cupcake results.
Unfortunately, no. It’s crucial to use freeze-dried strawberries for the buttercream frosting. Fresh or frozen strawberries contain a significant amount of moisture, which would thin out your buttercream and prevent it from reaching the desired thick, fluffy, and stable consistency. Freeze-dried strawberries provide concentrated flavor without the added liquid, making them essential for this specific frosting recipe.
To ensure your cake layers bake evenly and have flat tops, there are a few tricks. First, make sure your oven is accurately calibrated. Using oven thermometer can help. Second, try using cake strips around your pans. These insulated strips help the edges of the cake bake slower, allowing the center to rise more evenly. Alternatively, ensure your batter is divided equally between the two pans for consistent results.
Expand Your Berry Baking Horizon!
If this vanilla cake with strawberry filling has sparked your love for berry-infused desserts, you’re in for a treat! There’s a whole world of delicious berry recipes waiting to be explored. From comforting loaves to no-bake delights, these recipes celebrate the fresh, vibrant flavors of various berries, making them perfect additions to your baking list. Give these next berry-related recipes a try and continue your delightful baking journey:
- Easy & Moist White Chocolate Raspberry Loaf Cake
- Strawberry Crunch Cheesecake (No Bake)
- Blackberry Lemon Bread
- Soft Lemon Blueberry Cookies
If you’ve lovingly made this recipe, please make sure to leave a ⭐️ rating and review below! Your feedback is incredibly valuable and helps other home bakers discover and enjoy this delicious creation. I absolutely love seeing your beautiful baking triumphs, so don’t forget to tag me on Instagram @alpineella so I can admire your work and share your success! You can also follow along and get more delicious recipe inspiration on Pinterest, Facebook, and TikTok!
Recipe Card
Vanilla Cake with Strawberry Filling
Ella Gilbert
Pin Recipe
Save RecipeSaved!
1 hour 20 minutes
35 minutes
1 hour 55 minutes
Dessert
American
12 slices
843 kcal
Equipment
-
2 8-inch cake pans
Ingredients
Vanilla Cake
- ⅓ cup unsalted butter room temperature
- 1 ⅔ cup white sugar
- ¼ cup neutral oil
- 4 large eggs room temperature
- 3 teaspoons vanilla extract
- ⅛ teaspoon almond extract
- 2 teaspoons baking powder
- 1 ½ teaspoons kosher salt
- 2 ¼ cups all purpose flour
- 1 cup buttermilk room temperature
Strawberry Filling
- 2 cups strawberries diced
- 4 tablespoons white sugar
- 1 ½ tablespoons lemon juice
- zest lemon
Strawberry Buttercream
- 1 ½ cups unsalted butter room temperature
- 4 ¼ cups confectioner’s sugar
- 1 ½ teaspoons vanilla extract
- ½ teaspoon almond extract
- ¼ teaspoon kosher salt
- ¼ cup heavy cream
- 1 ½ cups freeze dried strawberries
Instructions
Make Cake
-
Preheat your oven to 350℉ (175℃). Prepare two 8-inch round baking pans by greasing them thoroughly and lining the bottoms with parchment paper. Set them aside while you prepare the batter.
-
In the bowl of a stand mixer fitted with the paddle attachment, combine the room temperature unsalted butter with the neutral oil and granulated white sugar. Cream these ingredients together on medium speed for about 2-3 minutes until the mixture is light, creamy, and somewhat grainy in appearance (this is due to the oil and is perfectly normal).⅓ cup unsalted butter, ¼ cup neutral oil, 1 ⅔ cup white sugar
-
Add the large eggs one at a time, beating thoroughly after each addition. Make sure to scrape down the sides and bottom of the bowl after each egg to ensure everything is well-incorporated into the cake batter.4 large eggs
-
Next, mix in the vanilla extract and, if using, the almond extract until fully combined.3 teaspoons vanilla extract, ⅛ teaspoon almond extract
-
In a separate small bowl, whisk together the all-purpose flour with the baking powder and kosher salt. This ensures even distribution of the dry ingredients.2 teaspoons baking powder, 2 ¼ cups all purpose flour, 1 ½ teaspoons kosher salt
-
Add one-third of the flour mixture to the wet ingredients, and mix on low speed until just combined. Then, add half of the buttermilk and mix again on low. Repeat this process once more, and then finish by adding the final one-third of the flour mixture. Mix until just combined, being careful not to overmix to keep the cake tender.1 cup buttermilk
-
Evenly pour the smooth vanilla cake batter into your two prepared 8-inch cake pans.
-
Bake for 30-35 minutes, or until a wooden skewer or toothpick inserted into the center of the cakes comes out clean. Let the cakes cool in their pans for 10-15 minutes before carefully removing them and transferring them to a wire cooling rack to cool completely to room temperature. This complete cooling is essential before frosting.
Make Strawberry Filling
-
For the best results and consistency, I highly recommend making this homemade strawberry filling the night before you plan to assemble the cake, or at least a few hours in advance before you even begin baking the cakes. This extended cooling time allows the filling to thicken properly and set.
-
In a medium-sized saucepan, combine the diced strawberries with the white sugar, fresh lemon juice, and lemon zest. Place the saucepan over medium-low heat and cook, stirring frequently, until the mixture begins to gently simmer and the strawberries start to soften.2 cups strawberries, 4 tablespoons white sugar, 1 ½ tablespoons lemon juice, zest lemon
-
Reduce the heat to low and continue to simmer the strawberry mixture for approximately 25-30 minutes, stirring occasionally. The filling should gradually thicken significantly. To test for readiness, dip the back of a spoon into the filling; if it coats the spoon and you can run a clean line through it with your finger, it’s ready.
-
Remove the saucepan from the heat and allow the strawberry filling to cool completely to room temperature. Once cool, transfer it to a large mason jar or an airtight container and store it in the refrigerator for up to 1 week.
Make Frosting
-
First, prepare your freeze-dried strawberries. Place the freeze-dried strawberry pieces into a food processor or a high-speed blender and process until you have a very fine, powdery crumb. This fine powder is essential for a smooth buttercream. Set the strawberry powder aside.1 ½ cups freeze dried strawberries
-
In the bowl of a stand mixer fitted with the paddle attachment (or a large bowl with a handheld mixer), beat the room temperature unsalted butter with the confectioners’ sugar on low speed until they are just combined and no dry sugar is visible.1 ½ cups unsalted butter, 4 ¼ cups confectioner’s sugar
-
Once combined, increase the mixer speed to medium-high and continue beating until the frosting mixture becomes very thick, light, and fluffy. This process incorporates air and creates a wonderfully airy texture.
-
Stop the mixer and add the vanilla extract, almond extract (if using), kosher salt, and the prepared freeze-dried strawberry powder. Beat again on medium-high speed until all the ingredients are fully incorporated, and the frosting is beautifully light, fluffy, and vibrant in color.1 ½ teaspoons vanilla extract, ½ teaspoon almond extract, ¼ teaspoon kosher salt
-
Turn your mixer to its lowest speed and slowly drizzle in the heavy cream. Continue mixing only until the frosting reaches a super creamy, smooth, and spreadable consistency. You might not need to use all of the cream; add it gradually until you achieve your desired texture.¼ cup heavy cream
Assembly
-
Place one completely cooled cake layer down on your chosen serving plate or cake stand. Spread a thin, even layer of strawberry frosting over the top. Then, using a piping bag filled with strawberry buttercream, pipe a sturdy ring (a “dam”) of frosting around the very outer edge of the cake layer. This is crucial for containing the luscious strawberry filling.
-
Retrieve the cooled and set strawberry filling from the fridge. Carefully spoon approximately ½ cup (or more, if you desire a thicker layer, as shown in the images above!) of the filling into the center of the cake layer, inside the piped frosting ring. Use a small offset spatula to gently spread the filling evenly, ensuring it reaches the piped border but does not go over it.
-
Carefully place the second cake layer on top of the filling. Gently press down to secure it. Now, use the remaining strawberry buttercream to generously frost the top and all sides of the entire cake, smoothing it out for a beautiful finish. For a final touch, decorate the top with fresh whole or sliced strawberries. Your magnificent cake is now ready to be enjoyed!
Notes
Room Temperature Ingredients: For optimal emulsification and a consistently smooth batter and fluffy cake, it is crucial that all refrigerated ingredients (such as butter, eggs, and buttermilk) are at room temperature before you begin baking. Plan ahead and pull them out of the fridge at least 30-60 minutes before you start.
Using Strawberry Jam: If you prefer not to make your own strawberry filling from scratch, you can absolutely use a high-quality store-bought strawberry jam or preserves. Aim for about ½ cup and ensure it’s a thicker variety that won’t leak from between your cake layers.
Butter Choice: I consistently use European-style butter, such as Kerry Gold, in my recipes. This type of butter typically has a higher fat content and lower water content, which contributes to a noticeably richer, creamier frosting and a more tender, flavorful baked good.
Salt Usage: The recipe calls for kosher salt. If you do not have kosher salt and are using fine table salt instead, please halve the amount specified in the recipe. This is because kosher salt crystals are larger and less dense than fine salt, meaning 1 teaspoon of kosher salt is approximately equivalent to ½ teaspoon of fine salt in terms of salinity. I specifically use Diamond Crystal kosher salt, which is less salty by volume than Morton Salt.
Leftover Frosting + Filling: Please note that this recipe yields a generous amount of frosting and filling, so you may have a bit leftover. This is intentional to ensure you have ample quantities for decorating and filling the cake to perfection. Any leftovers can be stored for future treats!
Making Ahead: You can prepare individual components of this cake in advance to spread out your baking process. Bake the cake layers, let them cool completely, then wrap them tightly in plastic wrap. They can be stored in the fridge for up to 2 days or frozen for up to 2 months. If frozen, thaw them overnight in the refrigerator before bringing to room temperature for frosting. The strawberry filling can also be made up to a week in advance and stored in a sealed jar in the fridge.
Nutrition
Carbohydrates: 122g
Protein: 6g
Fat: 37g
Saturated Fat: 21g
Polyunsaturated Fat: 4g
Monounsaturated Fat: 10g
Trans Fat: 1g
Cholesterol: 144mg
Sodium: 462mg
Potassium: 525mg
Fiber: 4g
Sugar: 96g
Vitamin A: 1066IU
Vitamin C: 376mg
Calcium: 98mg
Iron: 8mg
