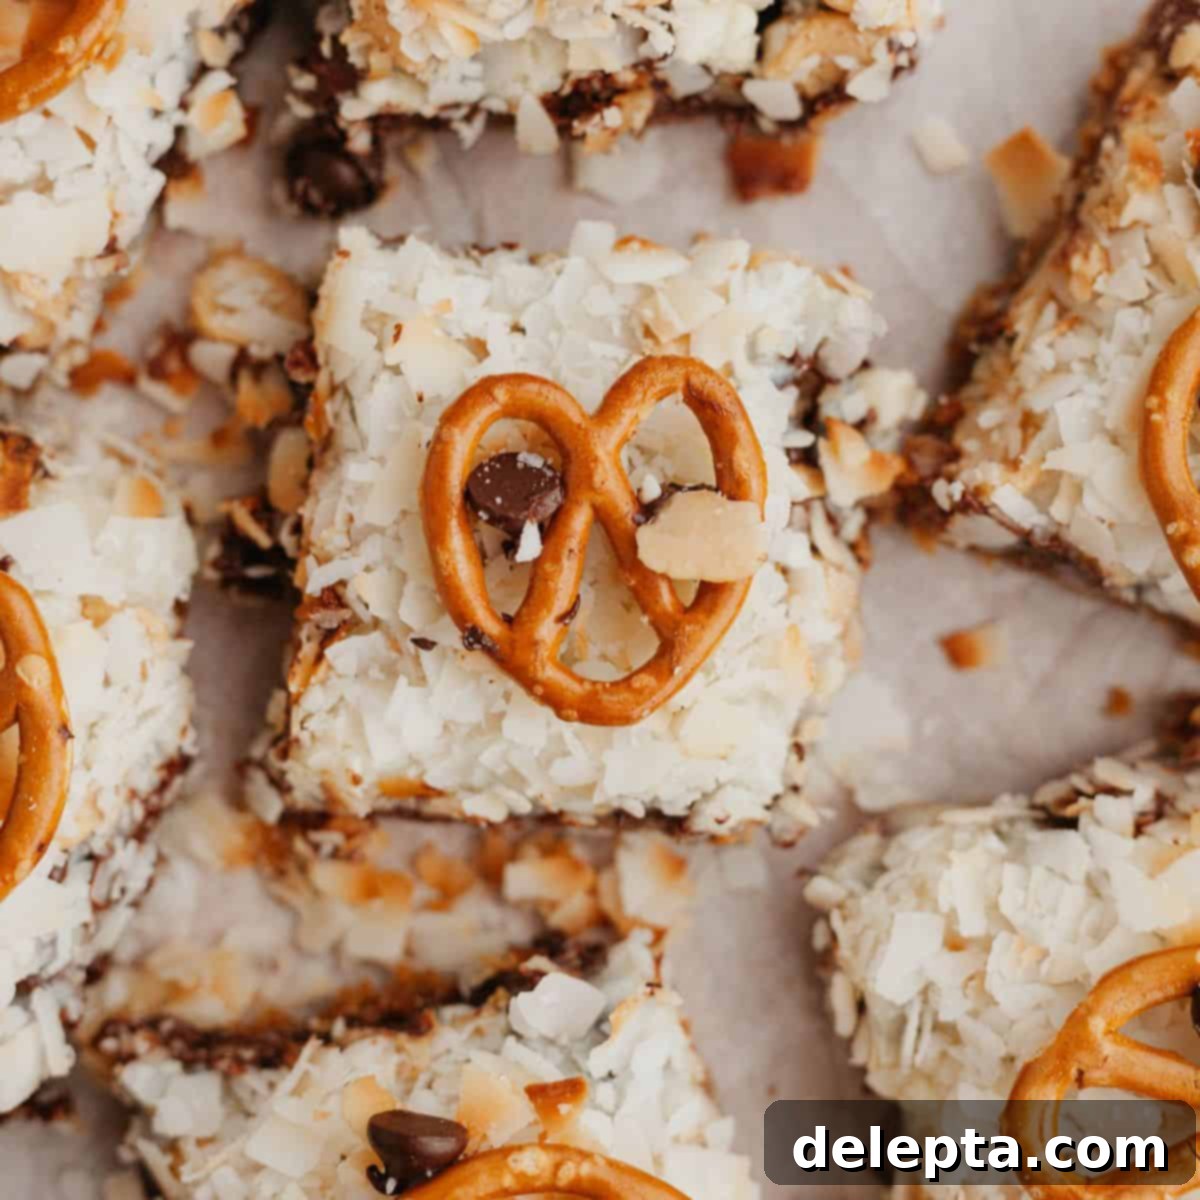
The Ultimate Gooey & Easy Seven Layer Magic Cookie Bars with Pretzels
Prepare yourself for an irresistible treat: these Seven Layer Magic Cookie Bars are incredibly gooey, delightfully sweet and salty, and astonishingly easy to make! Also famously known as Magic Cookie Bars or Hello Dolly Bars, they feature a rich, buttery graham cracker crust, generously topped with a cascade of sweetened condensed milk, crunchy pecans, creamy peanut butter chips, decadent chocolate chips, and chewy coconut flakes. The addition of salty pretzels on top creates a phenomenal balance, elevating these bars to a whole new level of perfection. The best part? They come together in just 10 minutes of active prep time!
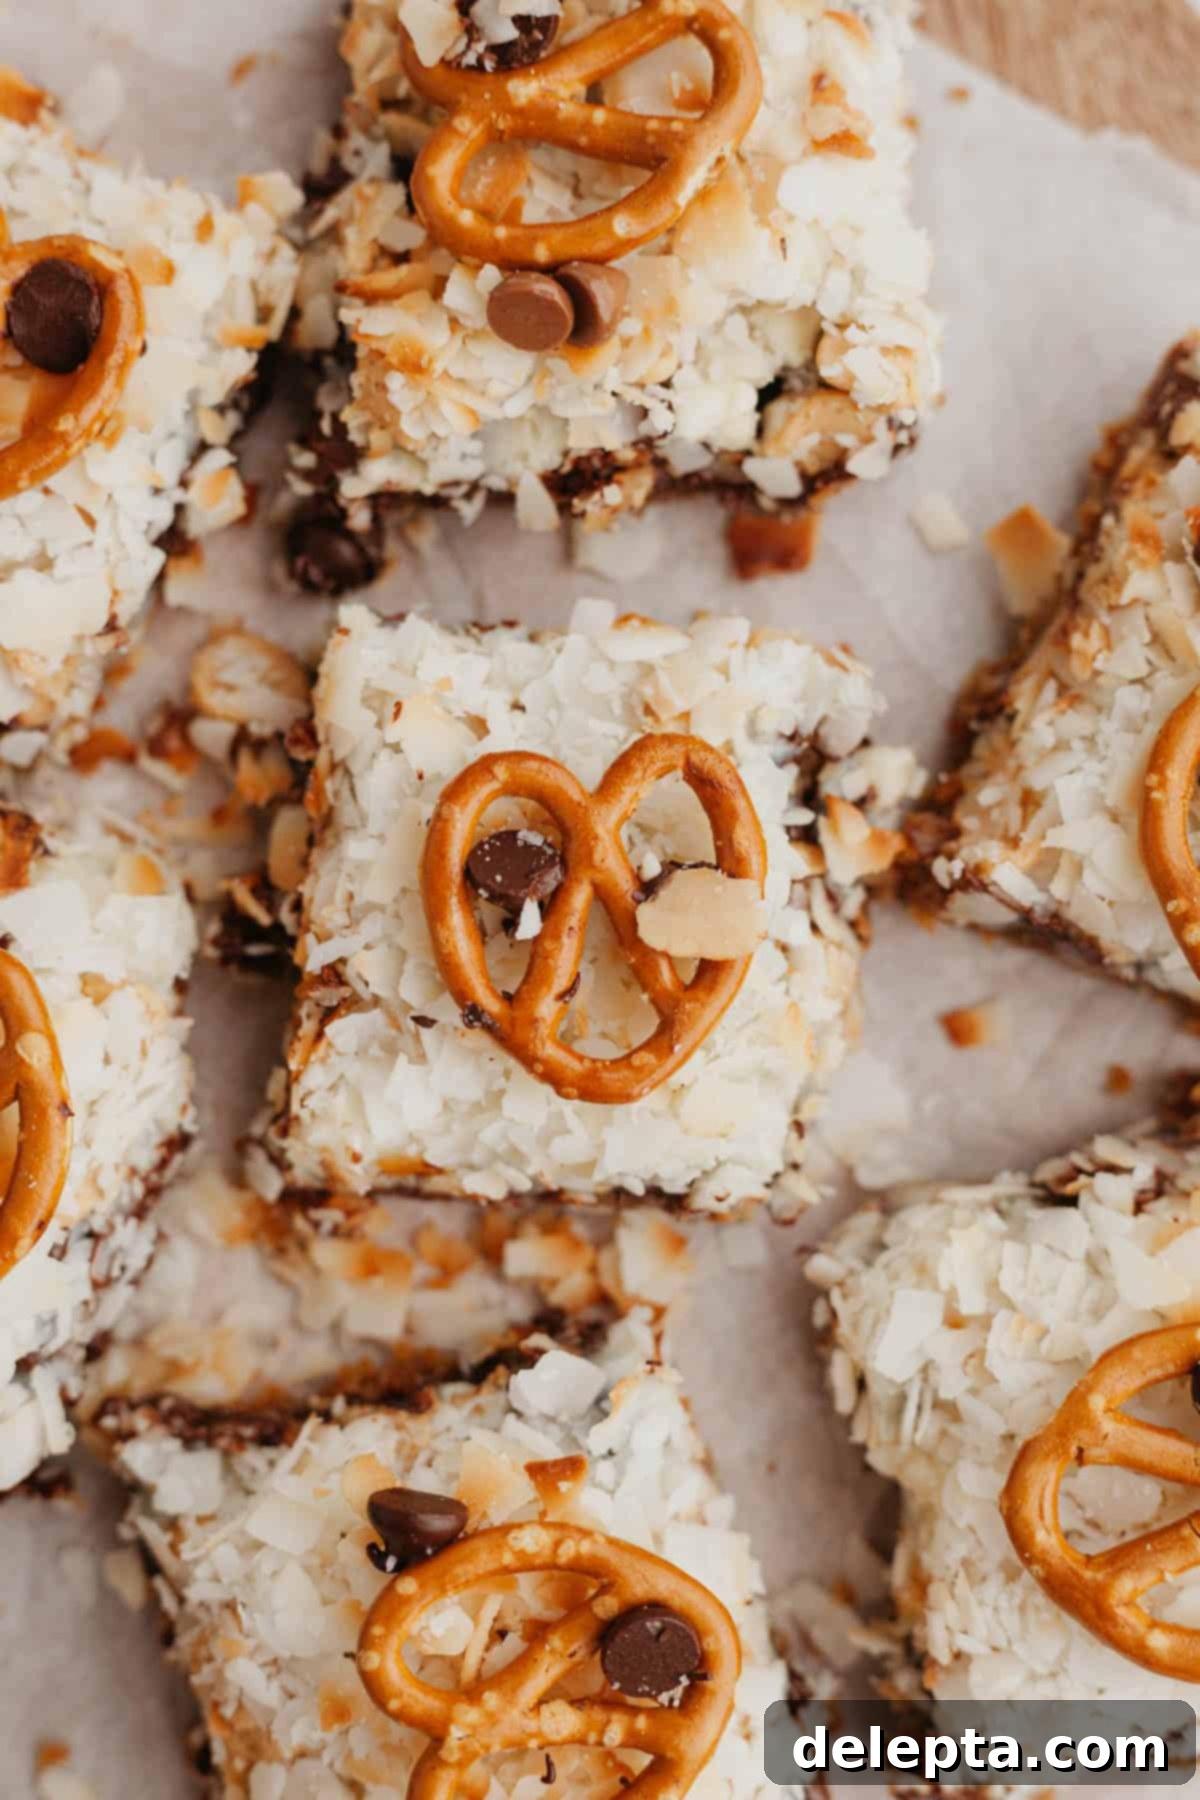
This recipe was originally published in March 2021 and has since been meticulously updated with new images, enhanced tips, and expanded details to ensure your baking success.
These classic bars, often called Hello Dolly Bars, are the quintessential dessert for any occasion. Their layered nature allows for an incredible symphony of flavors and textures in every single bite. While the traditional recipe is fantastic, I’ve put my own twist on it, swapping out butterscotch chips for the irresistible creaminess of peanut butter chips and adding a sprinkle of salty pretzels right on top. This sweet and savory combination is an absolute game-changer, transforming a beloved classic into something truly extraordinary. Whether you’re baking for the holidays, a school bake sale, a potluck, or simply craving a comforting homemade treat, these bars are guaranteed to be a crowd-pleaser any time of year.
It’s fascinating how many different names these delightful cookie bars have acquired over the years – from Magic Layer Bars, Seven Layer Bars, to the charming Hello Dolly Bars! I’ve spent some time researching their origins, hoping to uncover the story behind each name, but the exact history remains a sweet mystery. If you happen to know the fascinating backstory of these delicious cookie layer bars, please do share your insights!
Beyond their enigmatic nomenclature, these bars are celebrated for their simplicity and the sheer joy they bring. The concept is straightforward: a foundational crust, a binding layer of sweetened condensed milk, and then a generous array of toppings that bake together into a single, cohesive, and utterly delectable dessert. This “magic” quality—how so many distinct ingredients transform into one harmonious bite—is precisely what makes them so universally adored.
[feast_advanced_jump_to]
Why You’ll Fall in Love with This Magic Bar Recipe
These Seven Layer Magic Cookie Bars aren’t just easy to make; they’re a sensory experience that will captivate your taste buds. Here’s why this recipe will quickly become a cherished favorite in your baking repertoire:
- Explosive Flavor Combination: The true genius of these bars lies in their ability to deliver a complex and satisfying flavor profile with every mouthful. My recipe offers a delightful interplay of creamy, nutty, and rich chocolate notes from the pecans, peanut butter chips, white chocolate chips, and dark chocolate chips. The sweet, tropical essence of coconut flakes adds another dimension, while the salty pretzel topping cuts through the sweetness beautifully, creating an addictive sweet and savory harmony. It’s a symphony of flavors that truly makes each layer sing!
- Irresistible Texture Variety: Get ready for a textural adventure! The foundation is a wonderfully crisp and buttery graham cracker crust. Above that, the filling is exquisitely gooey, thanks to the condensed milk, providing a soft, melt-in-your-mouth experience. This is perfectly contrasted by the satisfying crunch of the pecans and the chewy bite of the coconut. Finally, the pretzel topping delivers an unexpected, delightful snap and a pleasant saltiness that elevates the entire bar.
- Effortless Preparation: This is truly an easy recipe, making it ideal for bakers of all skill levels, from beginners to seasoned pros. The assembly process is incredibly straightforward and requires minimal fuss. There’s no complex mixing, kneading, or chilling involved before baking. If you can layer ingredients, you can make these bars!
- Quick to Assemble, Quicker to Bake: You’ll be amazed at how little time these bars demand. The active preparation time is merely a few minutes – typically just 10 minutes from start to finish. Once assembled, they bake up in about 25 minutes. The only real challenge is the waiting game: you’ll need to allow the bars to cool and set completely before slicing, but trust me, it’s worth every second for perfectly structured, non-crumbly treats!
- Endless Customization & Repeat Bake Potential: Would I make these again? Absolutely, without a doubt! The fact that you can effortlessly switch up the filling ingredients with different flavors, nuts, and chips makes this an incredibly versatile and exciting recipe to keep in your back pocket. It’s a base recipe that invites creativity, ensuring you can enjoy a slightly different, yet equally delicious, version every time. This adaptability makes it a perennial favorite for holidays, potlucks, or just a spontaneous baking session.
Key Ingredient Notes for Perfect Magic Bars
Crafting the perfect Seven Layer Magic Cookie Bars starts with understanding each ingredient and its role. Here’s a breakdown to help you achieve the best results, along with some helpful substitution tips:
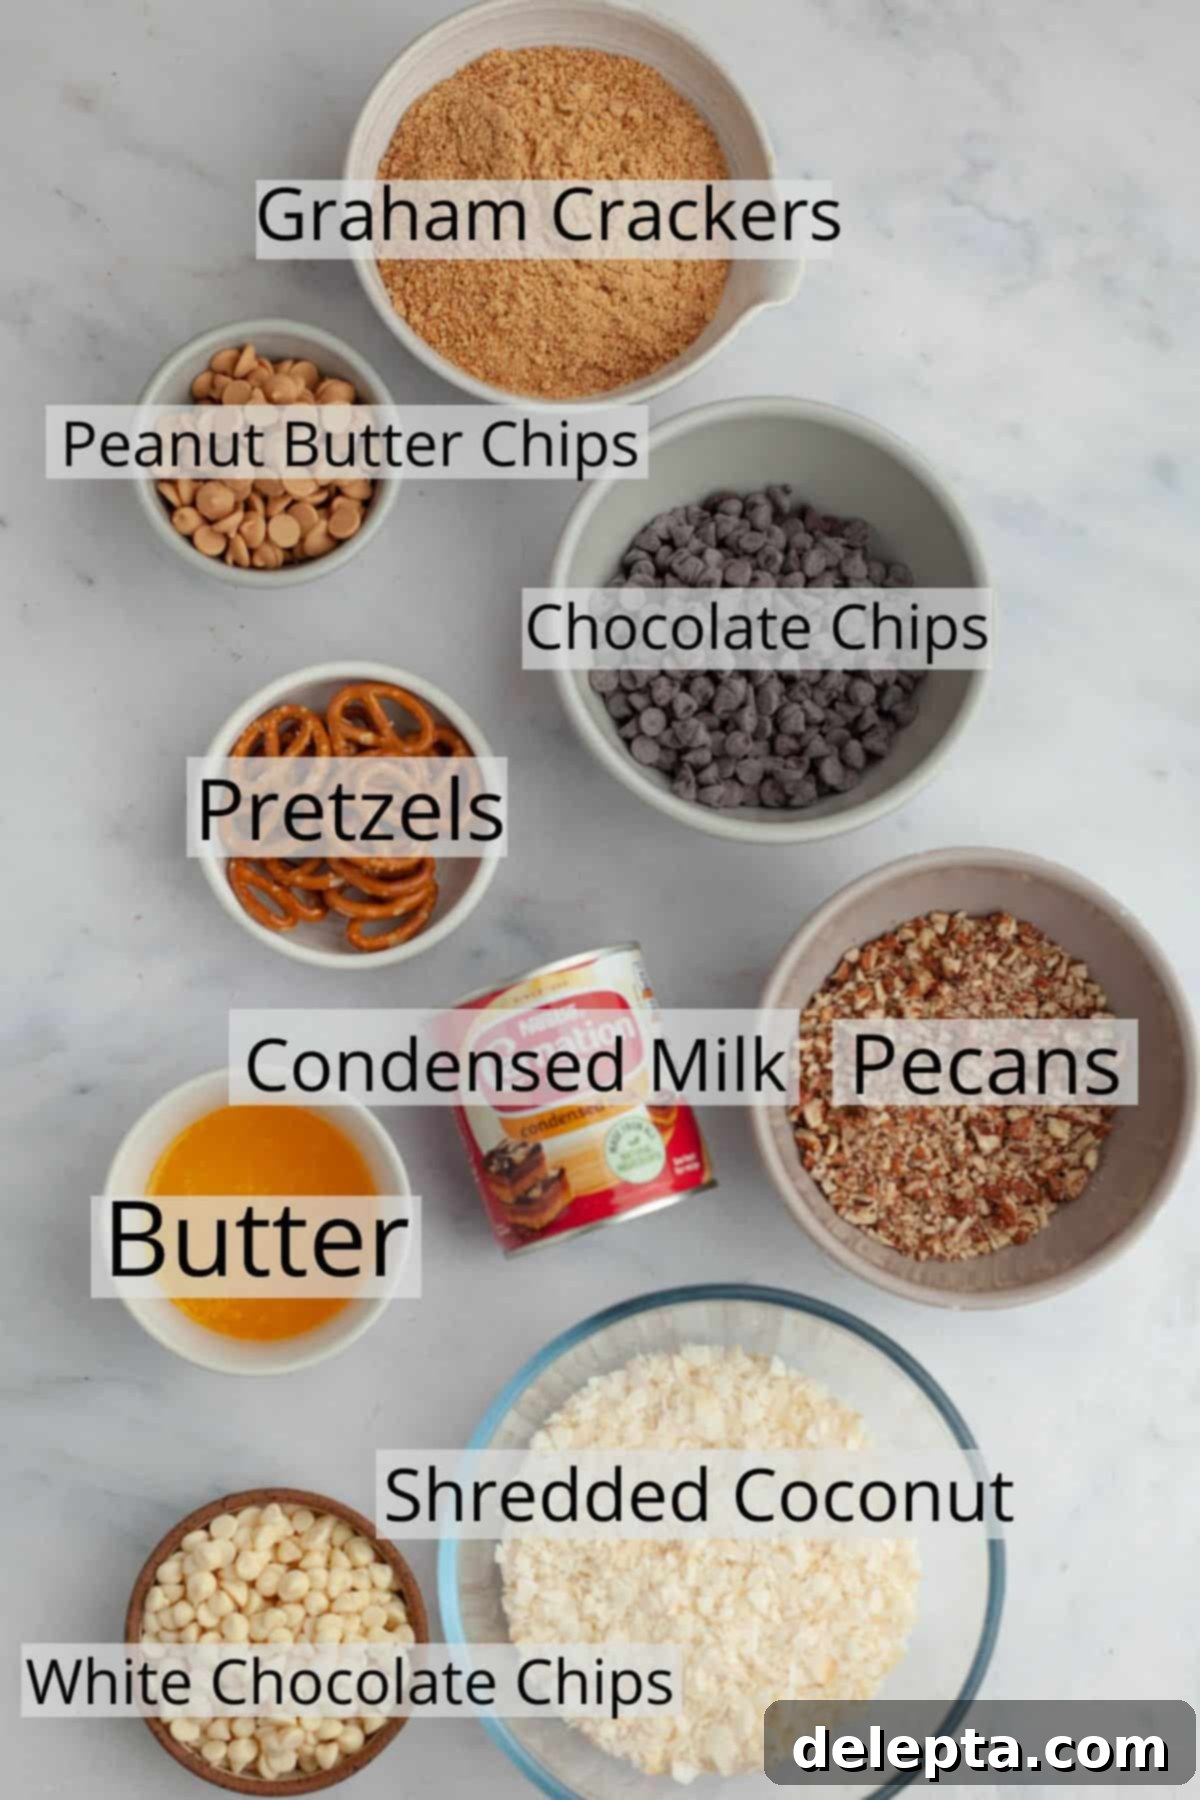
- Graham Crackers (for the Crust): These form the classic, buttery foundation of our bars. Ensure you blend them into very fine crumbs – you don’t want any large, uncrushed pieces, as this can make your crust uneven and crumbly. A food processor or blender works perfectly for this.
- Substitution Tip: If you’re in a region where graham crackers are hard to find (like the UK), digestive biscuits are an excellent and widely available alternative that provides a similar texture and flavor profile.
- Unsalted Butter (for the Crust): I always advocate for using high-quality unsalted butter, especially European-style butter, which boasts a higher butterfat content. This extra richness translates directly into a more flavorful and tender crust. By using unsalted butter, you also have complete control over the saltiness of your bars, which is particularly important when adding salty pretzels.
- Sweetened Condensed Milk: This is the “magic” in our Magic Cookie Bars! It’s not evaporated milk; sweetened condensed milk is thick, syrupy, and incredibly sweet. When baked, it caramelizes and binds all the layers together, creating that signature gooey texture. Do not substitute this ingredient; it’s essential for the structure and sweetness.
- Pecans: These add a wonderful nutty flavor and a satisfying crunch. Be sure to chop them roughly to ensure they distribute evenly and provide a good textural contrast without being too large to bite through.
- Substitution Tip: Feel free to experiment with other nuts like walnuts, almonds, or even cashews if you prefer a different flavor or texture. Ensure they are roughly chopped.
- Baking Chips (Chocolate, White Chocolate, Peanut Butter): This is where you can truly personalize your bars! I’ve opted for a delectable trio of chocolate chips (dark or semi-sweet for richness), white chocolate chips (for a creamy sweetness), and peanut butter chips (for that delightful, comforting peanut butter flavor).
- Customization Tip: Don’t hesitate to use your favorite baking chips! Butterscotch chips, toffee bits, milk chocolate chips, or even a mix of mini M&M’s can all be fantastic additions. The key is to have a good variety of flavors and textures.
- Shredded Coconut: Coconut flakes add a tropical chewiness and another layer of sweetness. I typically use thick flaked coconut as it tends to be less sweet than finely shredded or desiccated varieties, offering a better balance with the other sweet components.
- Preparation Tip: If you can only find untoasted coconut chips, you can easily shred them yourself in a food processor or blender for a similar result.
- Pretzels: My secret ingredient for elevating these bars! The salty pretzels provide an incredible contrast to the rich sweetness of the other layers. They introduce a savory note and an extra crunch that makes these bars uniquely satisfying. I recommend mini twist pretzels, but crushed pretzel sticks also work well.
Easy Step-by-Step Instructions for Magic Cookie Bars
Making these Seven Layer Magic Cookie Bars is a breeze! Follow these simple steps to create a dessert that looks impressive and tastes even better. Remember to prepare your ingredients and baking pan before you begin for a smooth process.
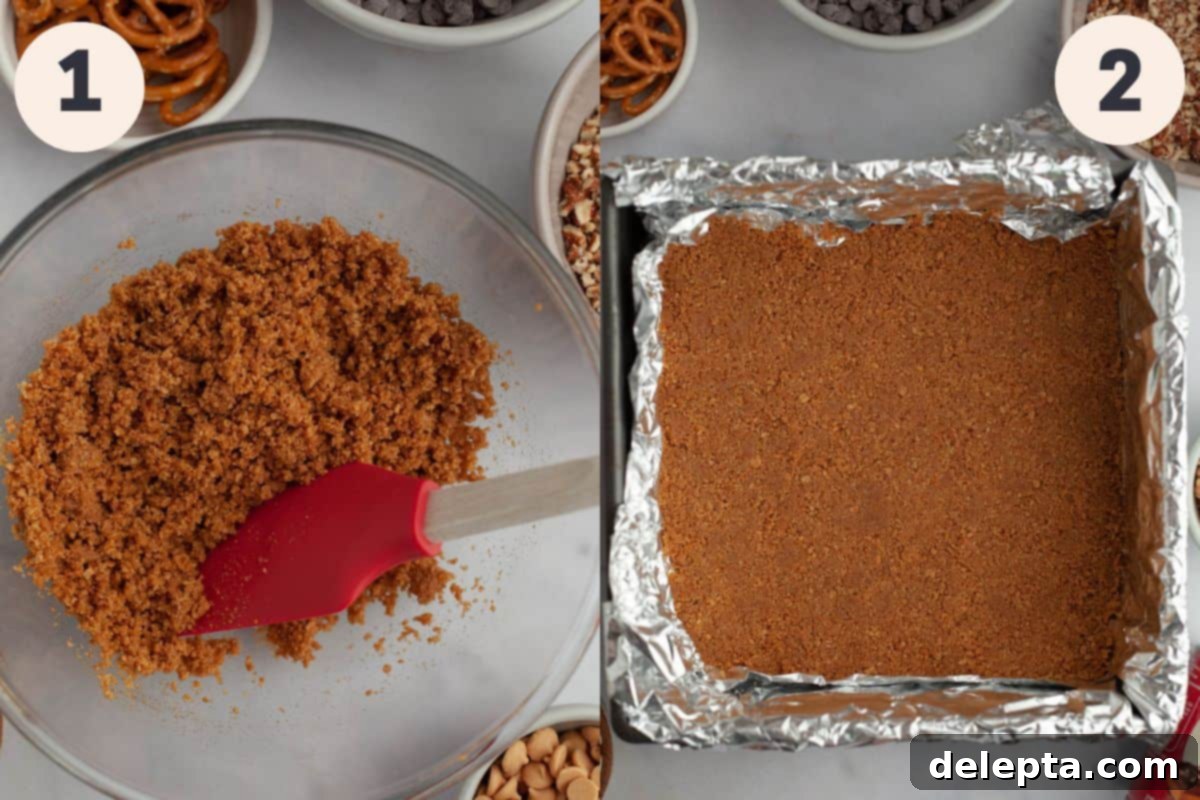
Step 1: Prepare the Graham Cracker Crust
Begin by preheating your oven to 350°F (175°C). In a large mixing bowl, combine your finely crushed graham cracker crumbs with the melted unsalted butter. Use a rubber spatula to mix thoroughly until all the crumbs are uniformly moistened and resemble wet sand. This ensures your crust will be firm and hold together well after baking. If the crumbs aren’t fully coated, your crust might be too dry and crumbly.
Step 2: Form the Base Layer
Line a 9×9 inch baking pan with aluminum foil, leaving an overhang on all sides. This foil sling will make it incredibly easy to lift the finished bars out of the pan once they’ve cooled. Evenly sprinkle the moistened graham cracker crumb mixture into the bottom of the prepared pan. Using the flat bottom of a measuring cup or a rubber spatula, press the crumb mixture down firmly and evenly across the entire base of the pan. A compact crust is key to preventing your bars from falling apart.
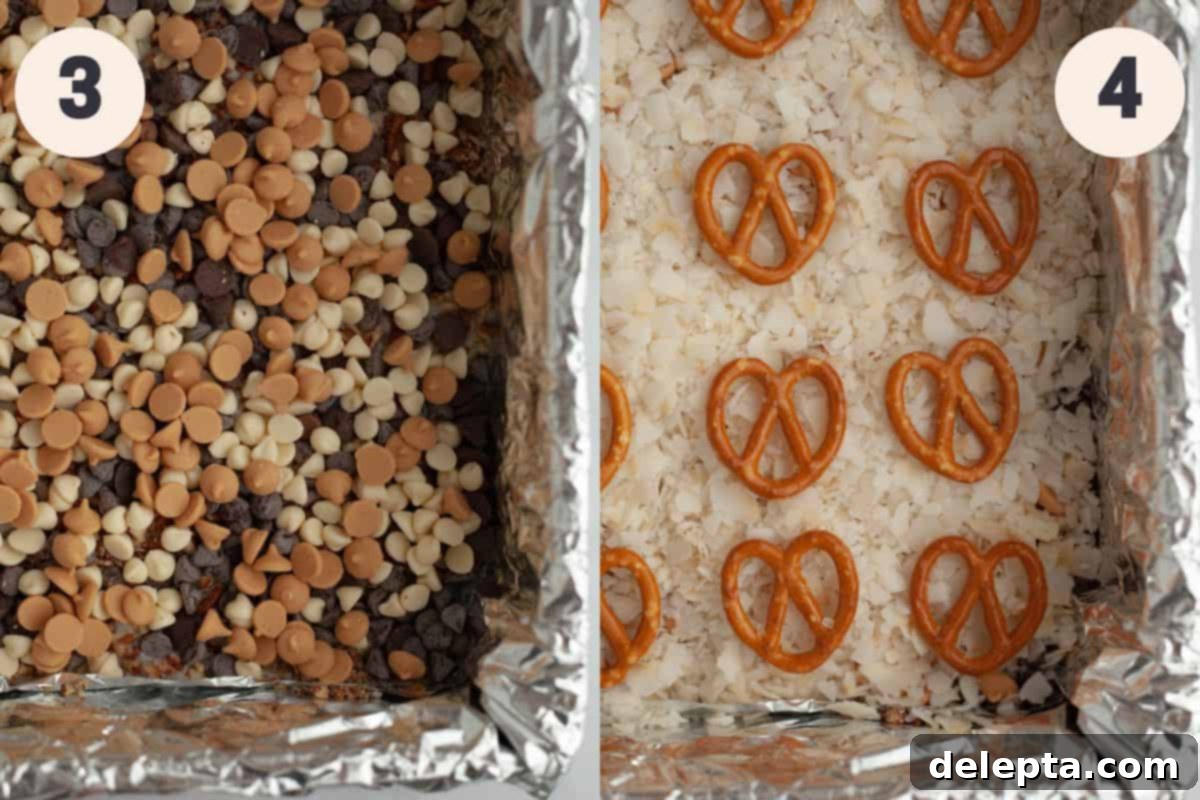
Step 3: Add the Gooey Goodness and First Toppings
Carefully pour the can of sweetened condensed milk evenly over your pressed graham cracker crust. For best coverage, you can gently tilt the pan or use an offset spatula to spread it into an even layer. Next, sprinkle your chopped pecans evenly over the condensed milk. Follow with a generous scattering of your chosen baking chips (chocolate, white chocolate, and peanut butter chips). I often reserve a small handful of chips for sprinkling after baking for an extra fresh chocolatey look!
Step 4: Layer Remaining Toppings and Bake
Evenly distribute your shredded coconut flakes over the baking chips. Gently press the coconut down with a fork or the back of your hand to ensure it adheres to the condensed milk and other layers. Finally, arrange your pretzels on top. Bake in the preheated oven at 350°F (175°C) for approximately 23-25 minutes, or until the coconut turns a beautiful golden brown and the edges are lightly set. Once out of the oven, if desired, immediately sprinkle any reserved chocolate chips or flavored chips on top; the residual heat will slightly melt them, making them stick. It’s crucial to let them cool completely before slicing; attempting to slice them while still warm will result in gooey, delicious, but crumbly bars!
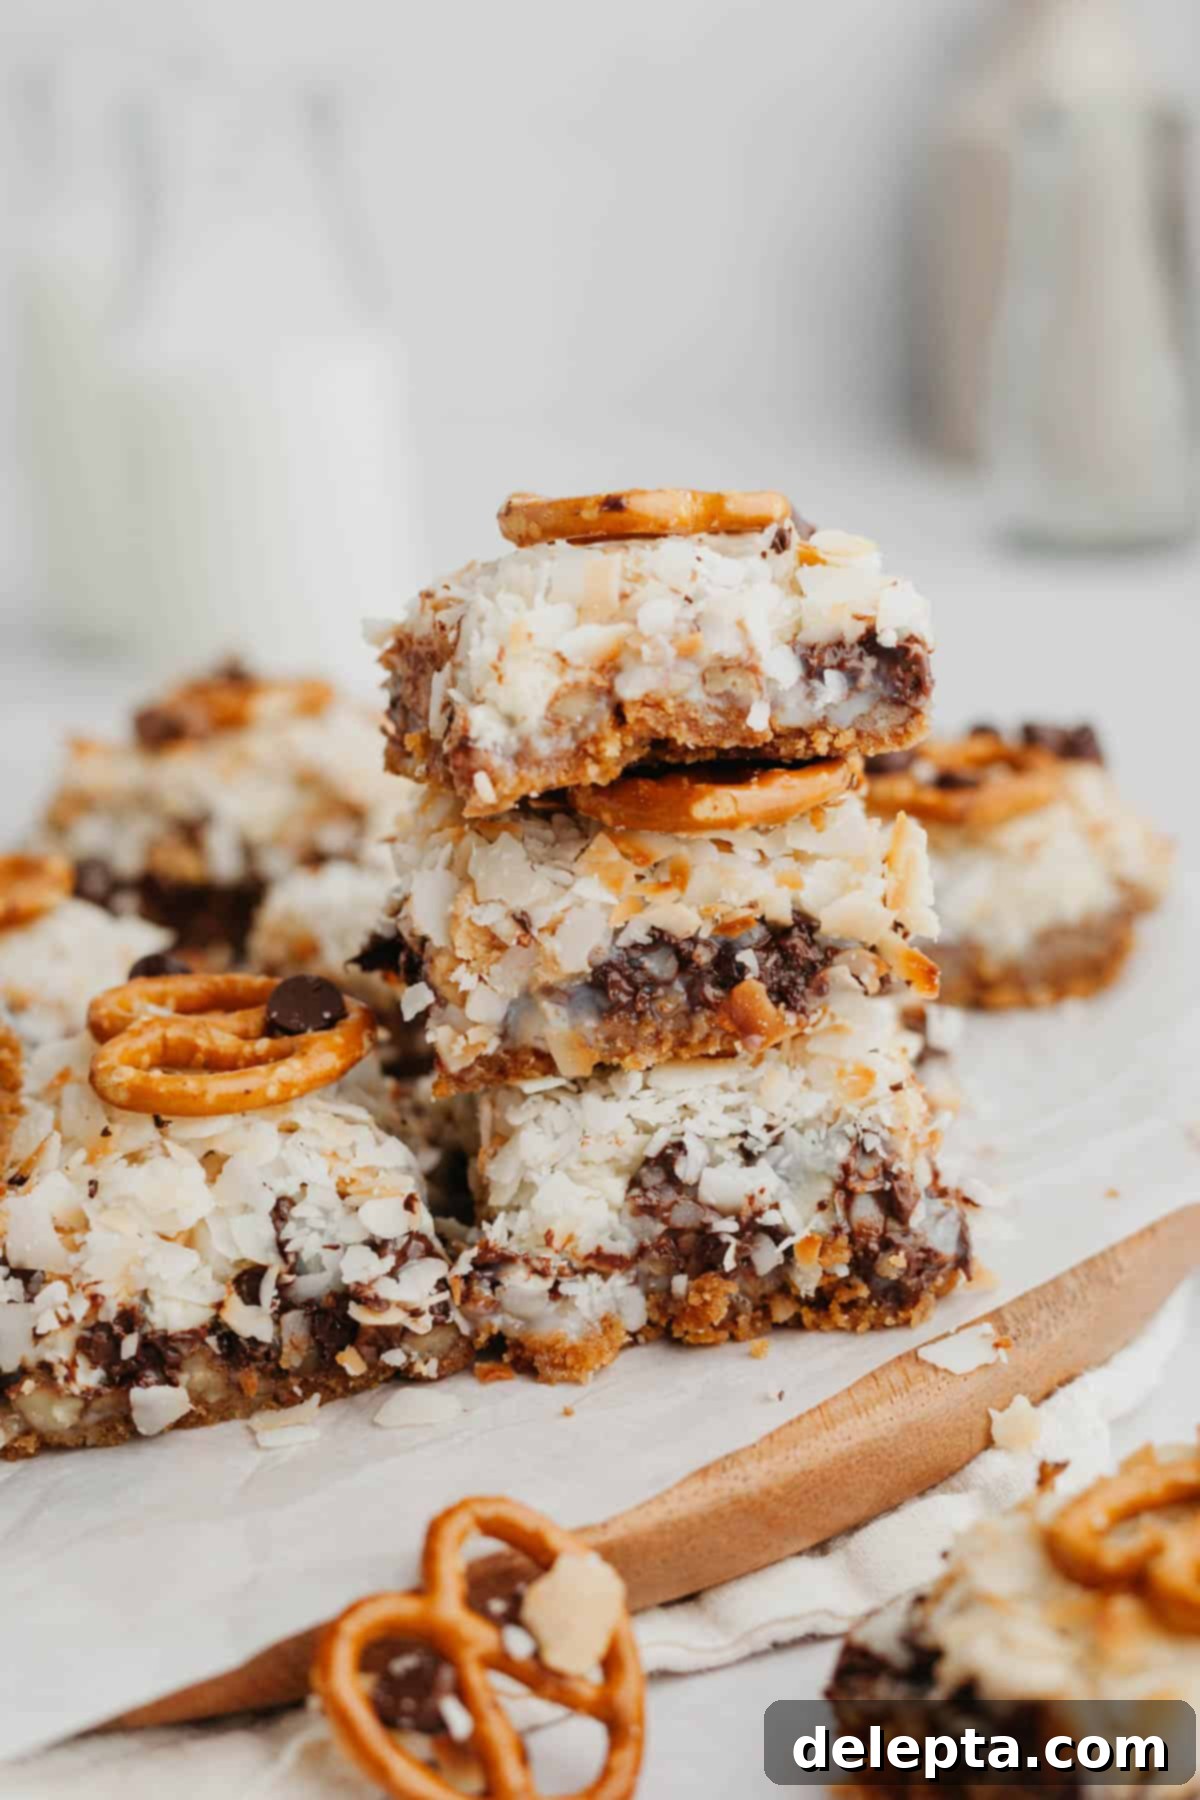
Essential Recipe Tips & Tricks for Perfect Results
Achieving bakery-quality Seven Layer Magic Cookie Bars is easy when you keep a few key tips and tricks in mind. These simple pointers will help you avoid common pitfalls and ensure your bars are as delicious and picture-perfect as possible:
- Embrace a Weighing Scale for Accuracy: For truly consistent and reliable baking results, I cannot stress enough the importance of using a weighing scale and measuring your ingredients in grams. This metric approach is far more precise than volumetric cup measurements, eliminating discrepancies caused by how ingredients are scooped or packed. It makes a huge difference in the final texture and success of your bake!
- Patience is Key: Let Bars Cool Completely: This is arguably the most critical tip! Resist the temptation to cut into your magic bars while they are still warm. The sweetened condensed milk needs ample time to cool and set firm. Attempting to slice them prematurely will result in a messy, gooey pile. For the cleanest cuts and best structure, let the bars cool completely at room temperature, then ideally chill them in the refrigerator for at least 2-3 hours (or even overnight) before slicing. This extra chilling time allows all the layers to fully meld and firm up.
- Secure Those Pretzels: Sometimes, pretzels can be a bit rebellious and not stick perfectly to the coconut layer during baking. To ensure they stay put and add that lovely salty crunch, here’s a neat trick: after the bars come out of the oven, while they are still hot, you can gently press the pretzels into the softened coconut and condensed milk mixture. For an even more secure hold and an extra touch of flavor, place a few extra chocolate chips or a tiny dab of melted chocolate underneath each pretzel to act as edible “glue” before the bars cool.
- Drizzle for Extra Indulgence: For an additional layer of chocolatey goodness and a beautiful aesthetic, consider drizzling some melted chocolate over the cooled bars. Simply melt a small amount of chocolate (milk, dark, or white) and, using a spoon or a piping bag with a very fine tip, create a decorative zig-zag pattern across the top. Let the drizzle set before slicing.
- Line Your Pan for Effortless Removal: Always line your baking pan with aluminum foil or parchment paper. Make sure to leave a generous overhang on the edges – think of it as a “sling.” Once the bars are completely cool and firm, you can simply lift them out of the pan using this overhang, making cleanup a breeze and ensuring your bars remain intact.
- Don’t Overbake: While you want the coconut to be golden brown, be careful not to overbake these bars. Overbaking can lead to a dry, crumbly texture instead of the desired gooey center. Keep an eye on them, and remove them from the oven as soon as the coconut is toasted and the edges appear set.
- Customize Your Layers: Don’t feel limited by the listed ingredients! Think of these bars as a canvas for your creativity. You can swap out pecans for walnuts, add a layer of dried cranberries, or even some toffee bits for extra chew and flavor. The possibilities are endless.
Frequently Asked Questions About Magic Cookie Bars
Here are answers to some of the most common questions about making, storing, and customizing these delightful Seven Layer Magic Cookie Bars:
To keep your magic cookie bars fresh and delicious, store them in an airtight container at room temperature for up to 3 days. If you prefer a chilled, firmer treat or want to extend their shelf life, you can store them in the refrigerator for up to a week. Just make sure they are well-sealed to prevent them from drying out.
Absolutely, these bars freeze beautifully! Once completely cooled and sliced, wrap each individual bar tightly in clingfilm (plastic wrap), then place them in a freezer-safe airtight container or bag. They can be frozen for up to 2 months. When you’re ready to enjoy them, you can either eat them frozen (they make a fantastic cold summer treat!) or let them defrost overnight in the refrigerator.
Don’t worry if graham crackers aren’t readily available where you live. In places like the UK, finding them can be a challenge. A perfect substitution for the crust is digestive biscuits. They provide a very similar texture and a lovely buttery flavor that works wonderfully as the base for these bars. Simply crush them into fine crumbs as you would graham crackers.
There are several types of coconut available: shredded, flaked, and desiccated. For these magic bars, I highly recommend using a thick flaked coconut. It offers a satisfying chewiness and is generally less sweet than the more finely shredded or desiccated varieties, which helps balance the overall sweetness of the bars. If thick flakes aren’t available, standard shredded coconut will also work.
Yes, you can! The easiest way to make these bars gluten-free is to use gluten-free graham crackers (or gluten-free digestive biscuits if you’re in the UK) for the crust. Ensure all your other ingredients, especially the pretzels, are certified gluten-free. The rest of the recipe remains the same, providing a delicious gluten-free treat.
They’re called “Magic Bars” because of how effortlessly all the diverse ingredients come together, almost magically, into one cohesive, delicious dessert. The sweetened condensed milk melts and binds everything, creating a distinct, gooey layer. “Seven Layer Bars” refers to the typical seven distinct layers: the graham cracker crust, melted butter, chocolate chips, butterscotch chips (or peanut butter chips in this recipe), coconut, nuts, and sweetened condensed milk. Each layer contributes uniquely to the final product!
Discover More Irresistible Bar Recipes!
If you’ve loved the delightful simplicity and incredible flavor of these Seven Layer Magic Cookie Bars, you’re in for a treat! Explore more of my favorite bar recipes that are just as easy to make and equally satisfying:
- Marshmallow Fluff Brownies
- Easy Raspberry White Chocolate Blondies
- Creamy Lemon Bars with Graham Cracker Crust
- Chocolate Peanut Butter Rice Krispie Treats
Have you whipped up a batch of these incredible Seven Layer Magic Cookie Bars? Please take a moment to rate the recipe below! Don’t forget to share your creations and follow me on Instagram @alpineella and Pinterest – I absolutely love seeing what you bake!
Recipe Card: Seven Layer Magic Cookie Bars with Pretzels
Seven Layer Magic Cookie Bars with Pretzels
Ella Gilbert
Pin Recipe
Save RecipeSaved!
Equipment
-
9×9 baking pan
Ingredients
- 150 grams graham cracker crumbs
- 85 grams unsalted butter melted
- 180 grams chocolate chips
- 100 grams white chocolate chips
- 100 grams peanut butter chips
- 110 grams pecans chopped
- 14 ounces condensed milk
- 171 grams coconut flakes
- 16 pretzels
Instructions
-
Preheat oven to 350°F/180°C. Line a 9×9 pan with aluminium foil.
-
In a medium bowl combine the graham cracker crumbs with melted butter until it looks like wet sand. Pour into your pan and use a metal measuring cup to press the crust down evenly.
-
Pour the condensed milk over the crust. Use an offset spatula to evenly cover the crust.
-
Sprinkle over the pecans, then the baking chips and finally the coconut. Press it gently down. Add 16 pretzels.
-
Bake in your oven until golden brown, about 23-25 minutes.
-
Allow the bars to cool completely before cutting.
Notes
Butter: I use European style butter, like Kerry Gold, in my recipes. This will make your cookies much creamier and richer.
Baking Chips: feel free to use whatever flavors you like for the baking chips!
Graham Crackers: if you’re in the UK you can use digestive biscuits.
Storage: Keep in an airtight container for up to 3 days at room temperature or a week in the fridge. You can freeze the bars for up to 2 months, just defrost overnight in the fridge.
Nutrition
