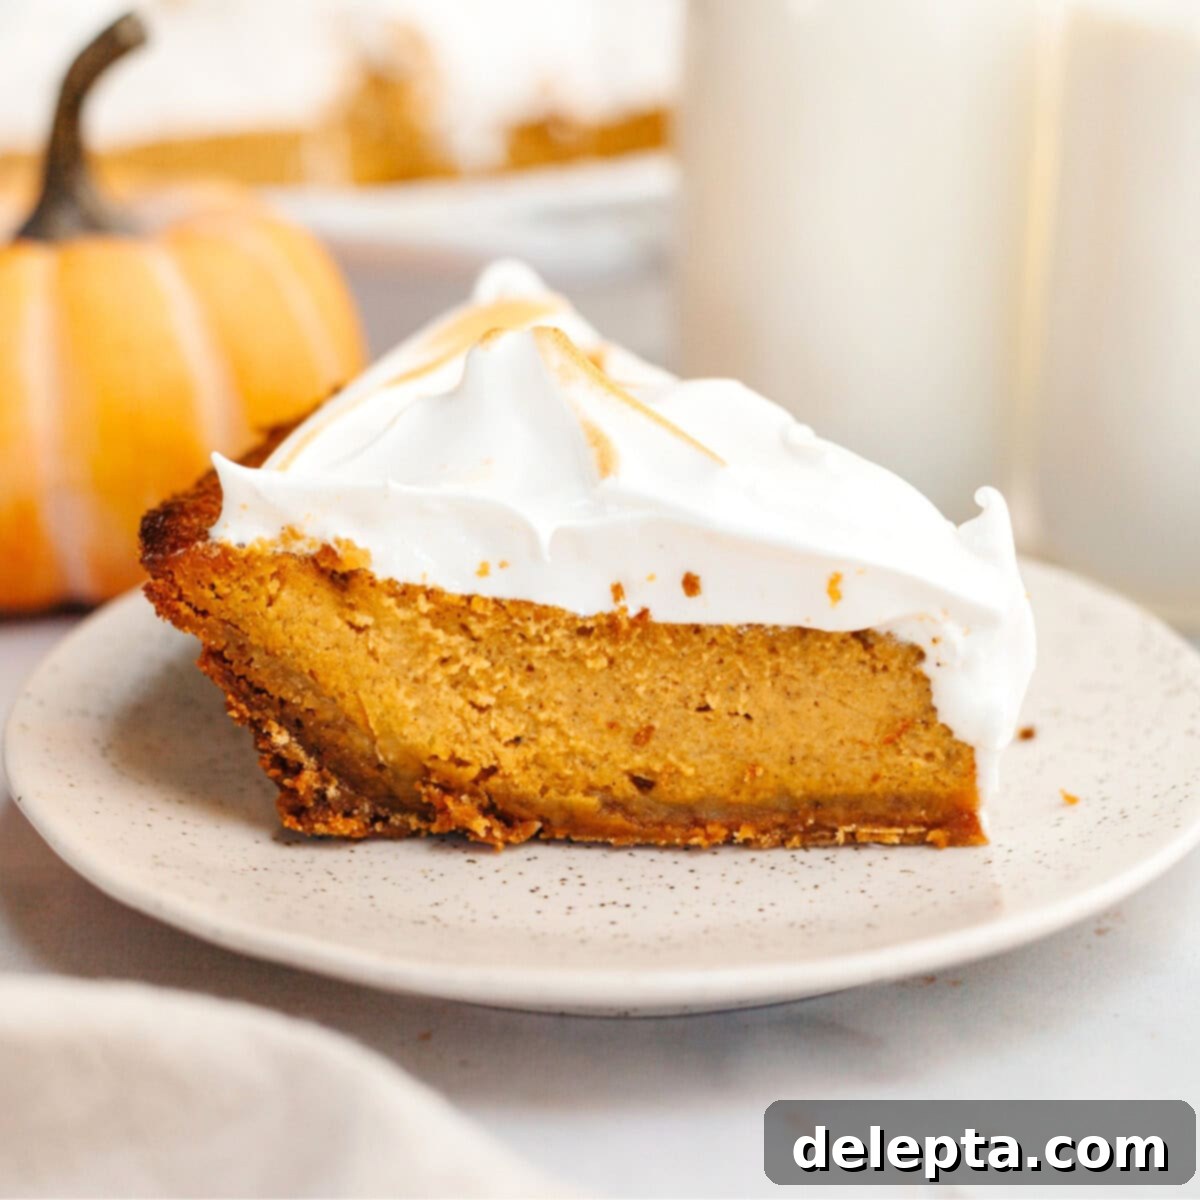
Irresistible Brown Butter Pumpkin Pie with Spiced Gingersnap Crust & Toasted Marshmallow Meringue
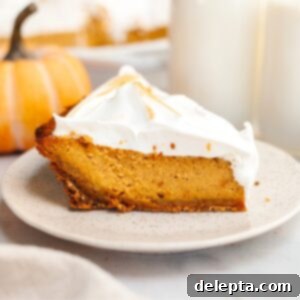
Prepare for a truly spectacular dessert this holiday season with our Brown Butter Pumpkin Pie. This recipe takes the classic fall favorite and elevates it with layers of irresistible flavor and texture. Imagine a buttery, spiced gingersnap cookie crust, a rich and creamy pumpkin filling infused with nutty brown butter, and crowned with a luscious, perfectly toasted marshmallow meringue. This isn’t just a pie; it’s a showstopper, ideal for your Thanksgiving table or any festive gathering.
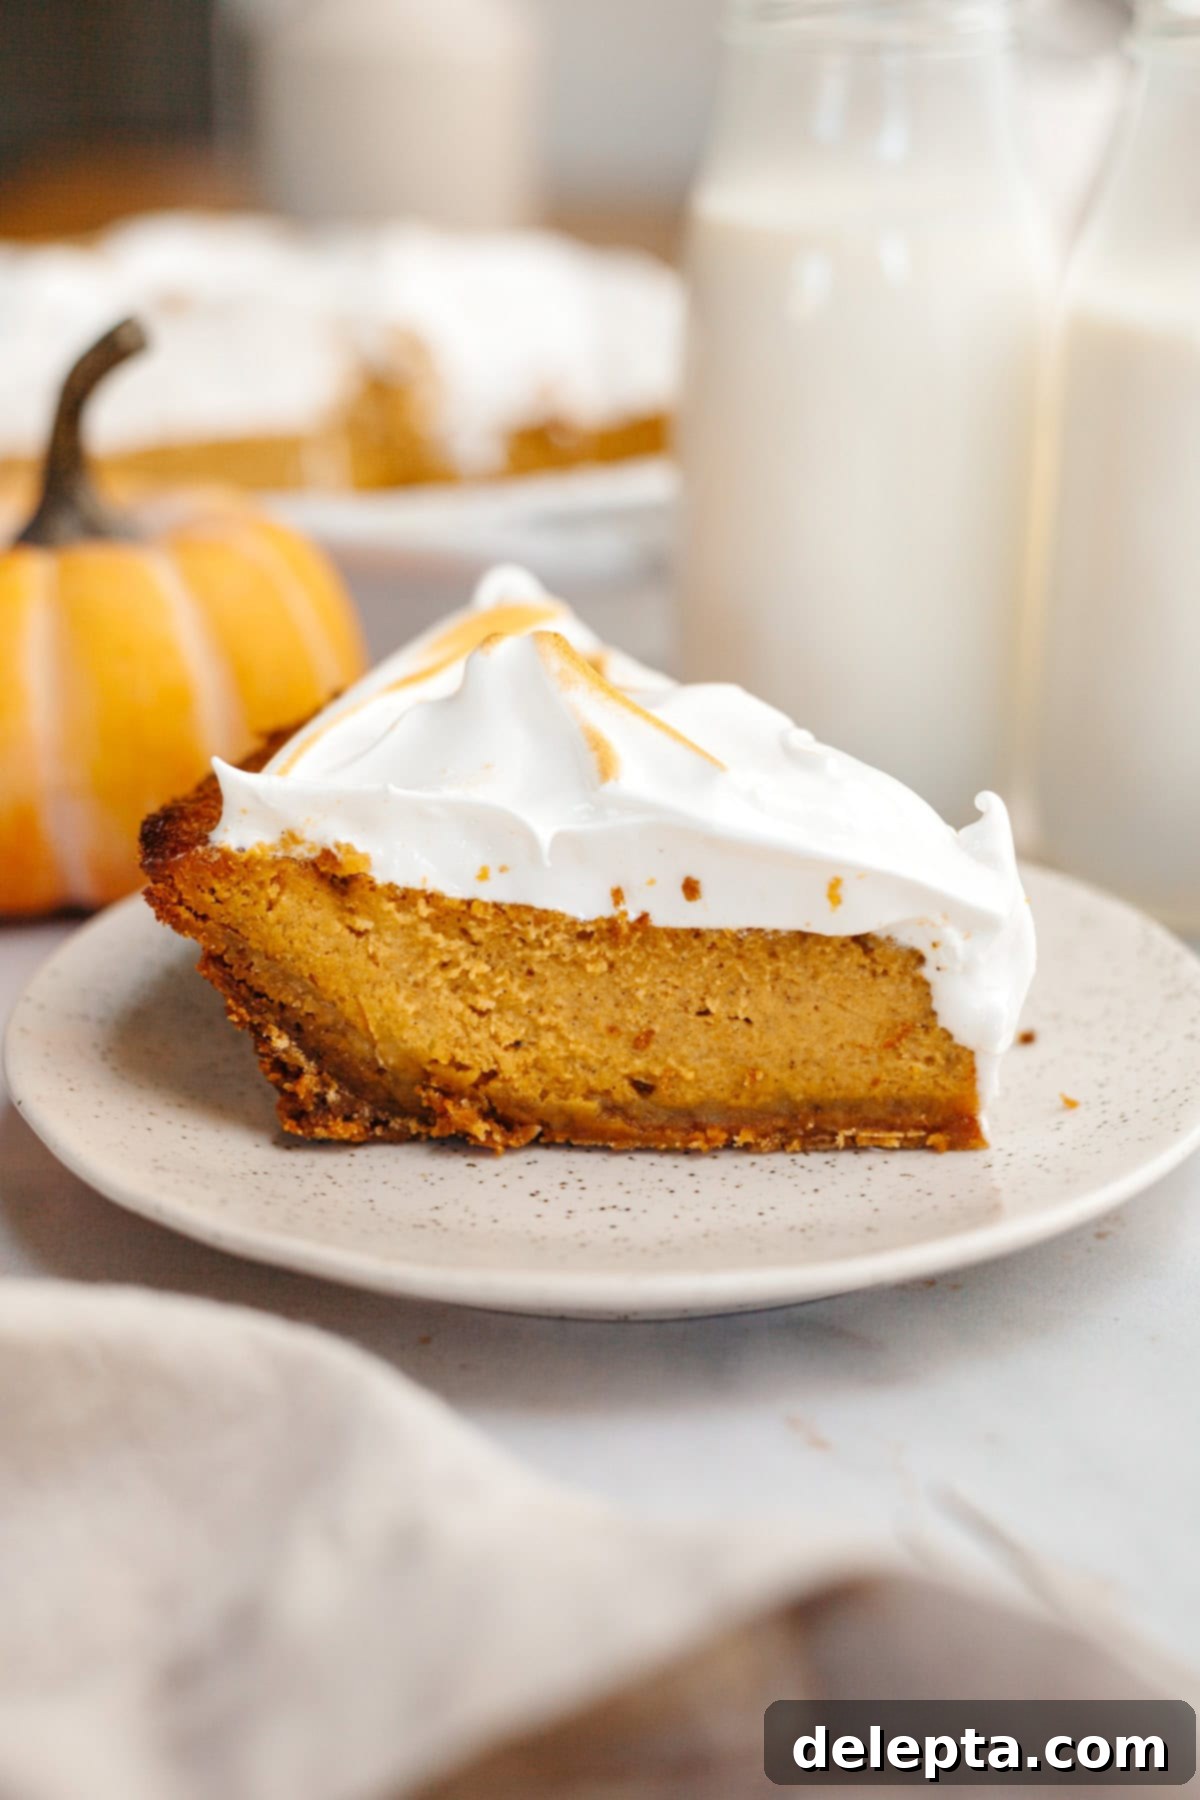
Fall heralds the return of all things pumpkin, and while a classic pumpkin pie holds a special place in our hearts, I couldn’t resist a little experimentation this year. My goal was to infuse even more depth and warmth into this beloved dessert. The secret? Incorporating brown butter into the pumpkin pie filling. This simple step transforms the flavor profile, adding a delightful nutty and caramelized note that complements the pumpkin and spices perfectly.
I initially considered a brown butter pie dough for the crust, but after some testing (and a lot of effort!), I realized the impact wasn’t quite worth the extra work. Instead, I leaned into cozy, autumnal flavors, opting for a spiced gingersnap cookie crust – a decision heartily endorsed by my Instagram poll voters! This gingersnap crust is just as easy to make as a traditional graham cracker crust but contributes a fantastic depth of spice that truly enhances the pie. To complete this autumnal masterpiece, a cloud-like marshmallow meringue frosting is piped on top and delicately toasted to a golden-brown perfection, adding a beautiful visual appeal and a delightful texture.
Looking for more dessert inspiration to fill your holiday table? Be sure to explore my no-bake pumpkin cheesecake bars or the comforting apple crisp cheesecake. These treats, along with this brown butter pumpkin pie, promise to make your Thanksgiving celebration truly unforgettable.
Gather Your Essential Ingredients for the Best Brown Butter Pumpkin Pie
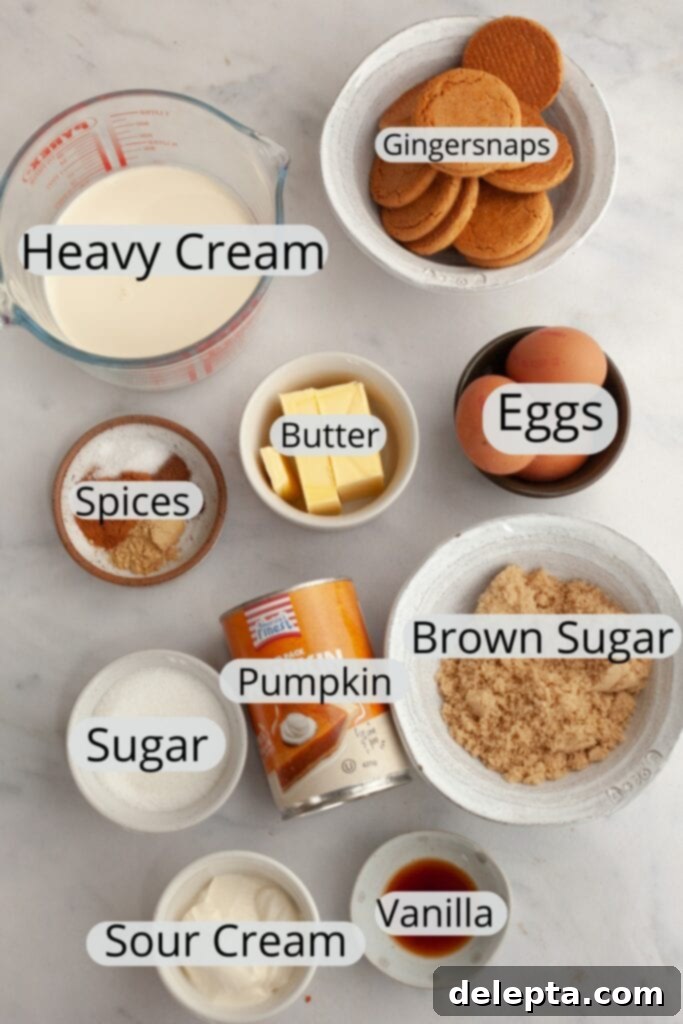
Crafting the perfect brown butter pumpkin pie begins with selecting the right ingredients. Each component plays a vital role in achieving that rich, creamy texture and unforgettable spiced flavor. Here’s a closer look at the key elements you’ll need:
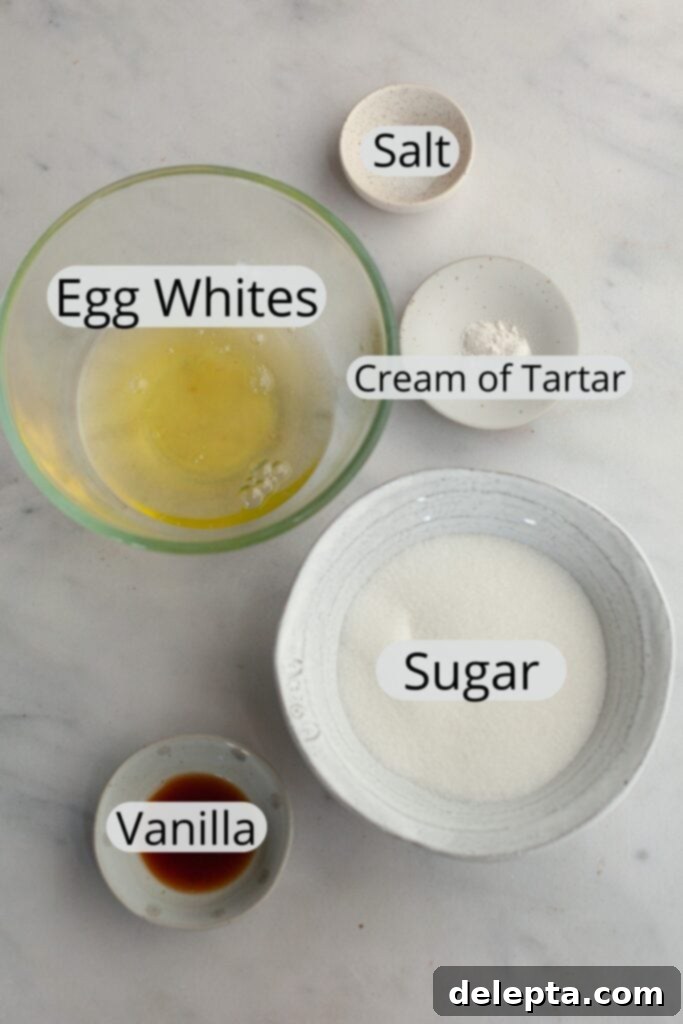
- Cream of Tartar: This essential ingredient is used in the marshmallow topping. It acts as a stabilizing agent for the egg whites, helping them whip up into a strong, voluminous, and glossy meringue that holds its shape beautifully. While some recipes suggest lemon juice, I haven’t tested it as a substitute in this specific recipe. For the best results, stick with cream of tartar.
- Pumpkin Puree: The heart of any pumpkin pie! It is crucial to use 100% pure pumpkin puree, not pumpkin pie filling. Pumpkin pie filling comes pre-sweetened and pre-spiced, which will throw off the delicate balance of flavors in this recipe. Always check the label to ensure you’re getting pure pumpkin.
- Sour Cream: A secret weapon for an incredibly rich and creamy pie filling! Adding sour cream contributes a lovely tang and velvety texture, preventing the pie from being overly sweet and adding a luxurious mouthfeel that truly elevates the overall experience.
- Gingersnap Cookies: These spicy, crunchy cookies form the base of our unique crust. They bring a fantastic depth of flavor that complements the pumpkin filling beautifully. If gingersnaps aren’t your preference, you can easily substitute them with an equal amount of graham cracker crumbs for a more classic approach, or even a traditional flaky pie crust if you prefer a different texture.
- Unsalted Butter: The star ingredient for our brown butter infusion. Using high-quality unsalted butter is important, as its flavor will shine through in the final pie. If you’re new to browning butter, don’t fret! It’s a simple process that adds unparalleled nutty, caramel notes to the filling. I even have a dedicated blog post on how to brown butter that you might find incredibly helpful.
- Eggs (Room Temperature): Essential for binding the pie filling and creating its smooth custard-like texture. Using room temperature eggs helps them incorporate more evenly into the other ingredients, leading to a more consistent and perfectly baked pie.
- Sugars (Light Brown & White): A combination of both light brown and white sugar ensures a balanced sweetness and contributes to the pie’s deep, caramelized flavor notes. Brown sugar adds moisture and a subtle molasses undertone, while white sugar provides clean sweetness.
- Spices (Cinnamon, Ginger, Nutmeg, Cloves, Black Pepper): A carefully selected blend of warming spices that perfectly harmonizes with the pumpkin and brown butter. Don’t skip the pinch of black pepper – it might seem unusual, but it subtly enhances the other spices, adding an intriguing complexity to the flavor profile.
- Vanilla Extract: A splash of vanilla enhances all the other flavors, adding a comforting aroma and taste to both the filling and the meringue.
- Heavy Cream: Contributes to the luscious, silky texture of the pumpkin pie filling, making it incredibly rich and decadent.
Let’s Bake This Masterpiece: Your Step-by-Step Guide to Brown Butter Pumpkin Pie
Creating this stunning brown butter pumpkin pie is a rewarding baking experience. Follow these detailed steps to achieve a perfectly spiced, beautifully textured, and irresistibly delicious holiday dessert.
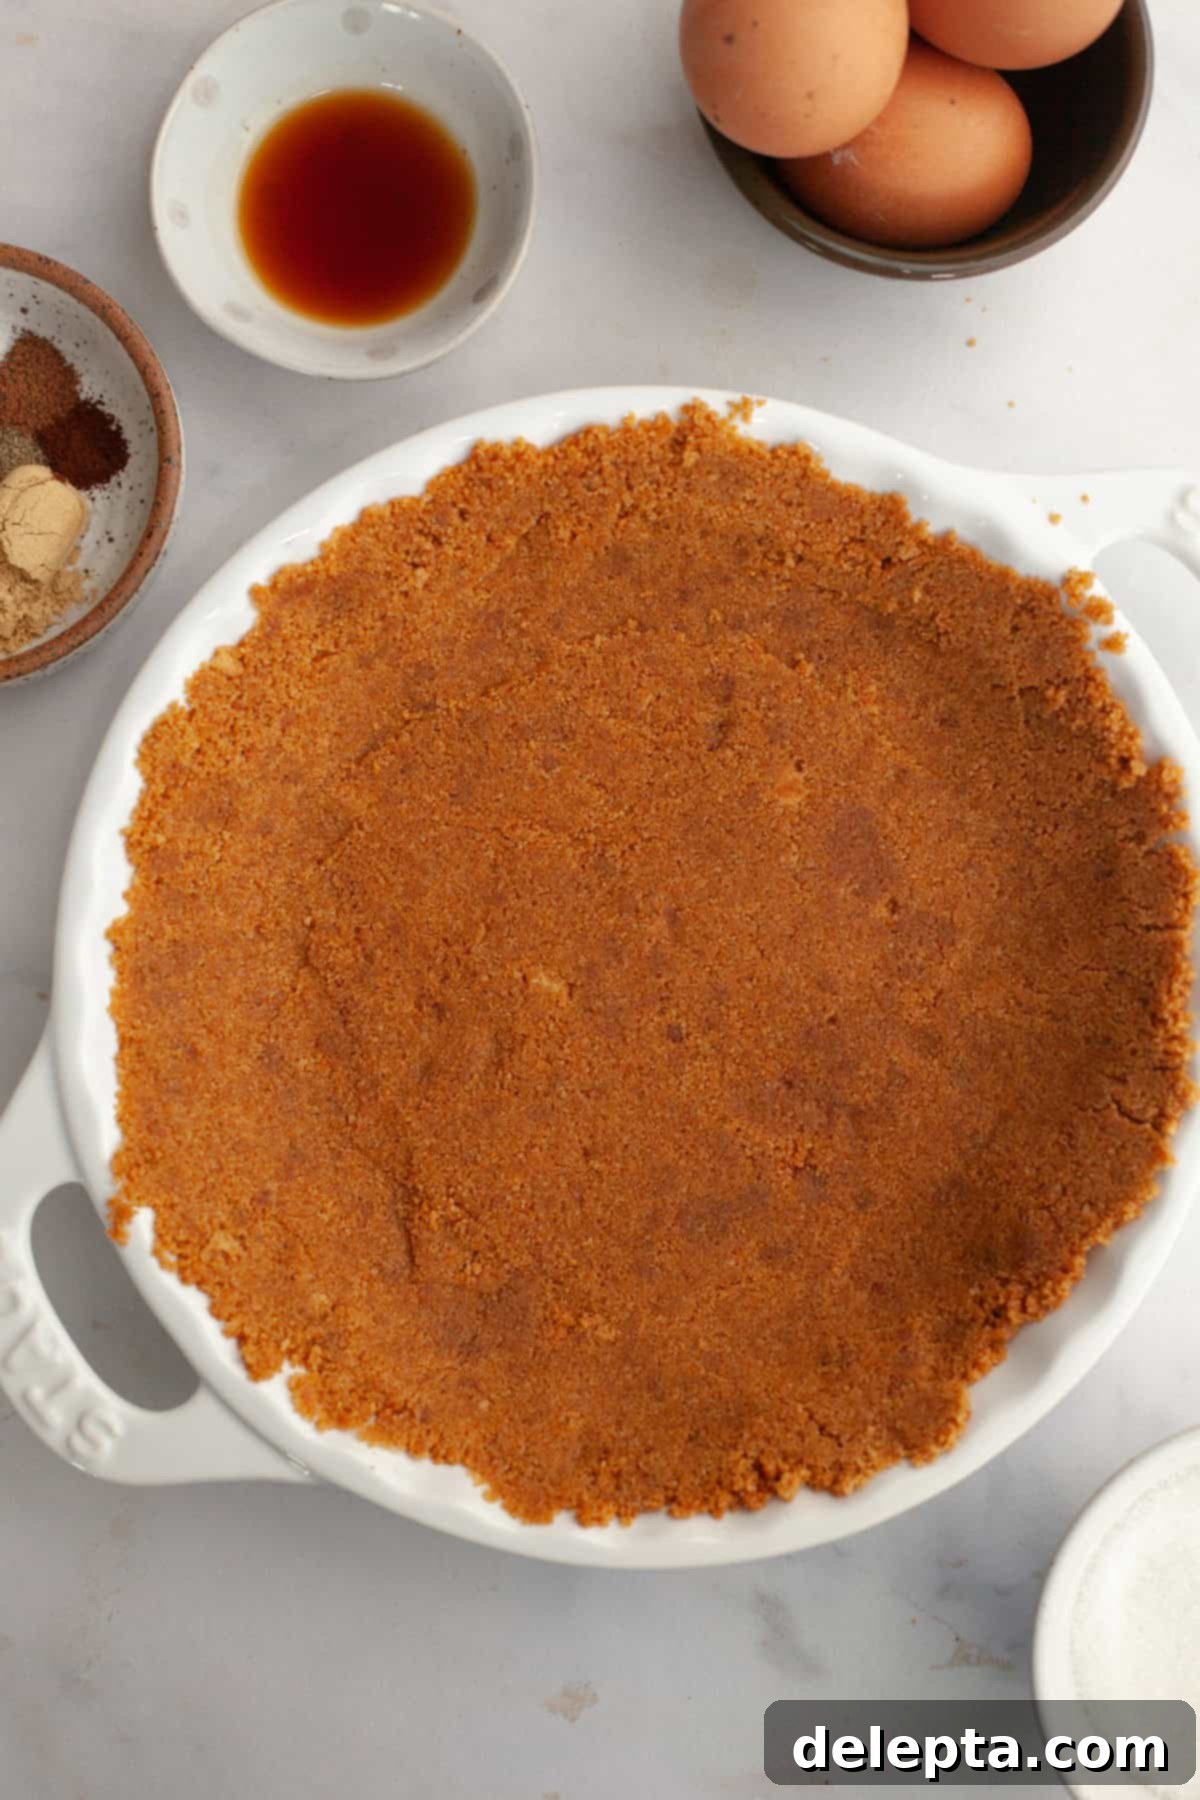
- Step 1: Prepare the Gingersnap Crust. Begin by preheating your oven to 350°F (175°C). In a food processor, pulse the gingersnap cookies until they form fine, even crumbs. Transfer the crumbs to a medium bowl and combine them thoroughly with the melted unsalted butter, a pinch of salt, light brown sugar, ground cinnamon, and ground ginger. Mix until all the crumbs are uniformly moist and resemble wet sand. Press this mixture firmly into a 9-inch pie dish, using the bottom of a measuring cup or your knuckles to create a compact base and sides. Pay extra attention to pressing a neat corner where the base and sides meet; this helps create a rounded edge that is easier to slice later. Bake the crust for 8-9 minutes until fragrant and lightly golden. Remove from the oven and set aside to cool slightly while you prepare the filling.
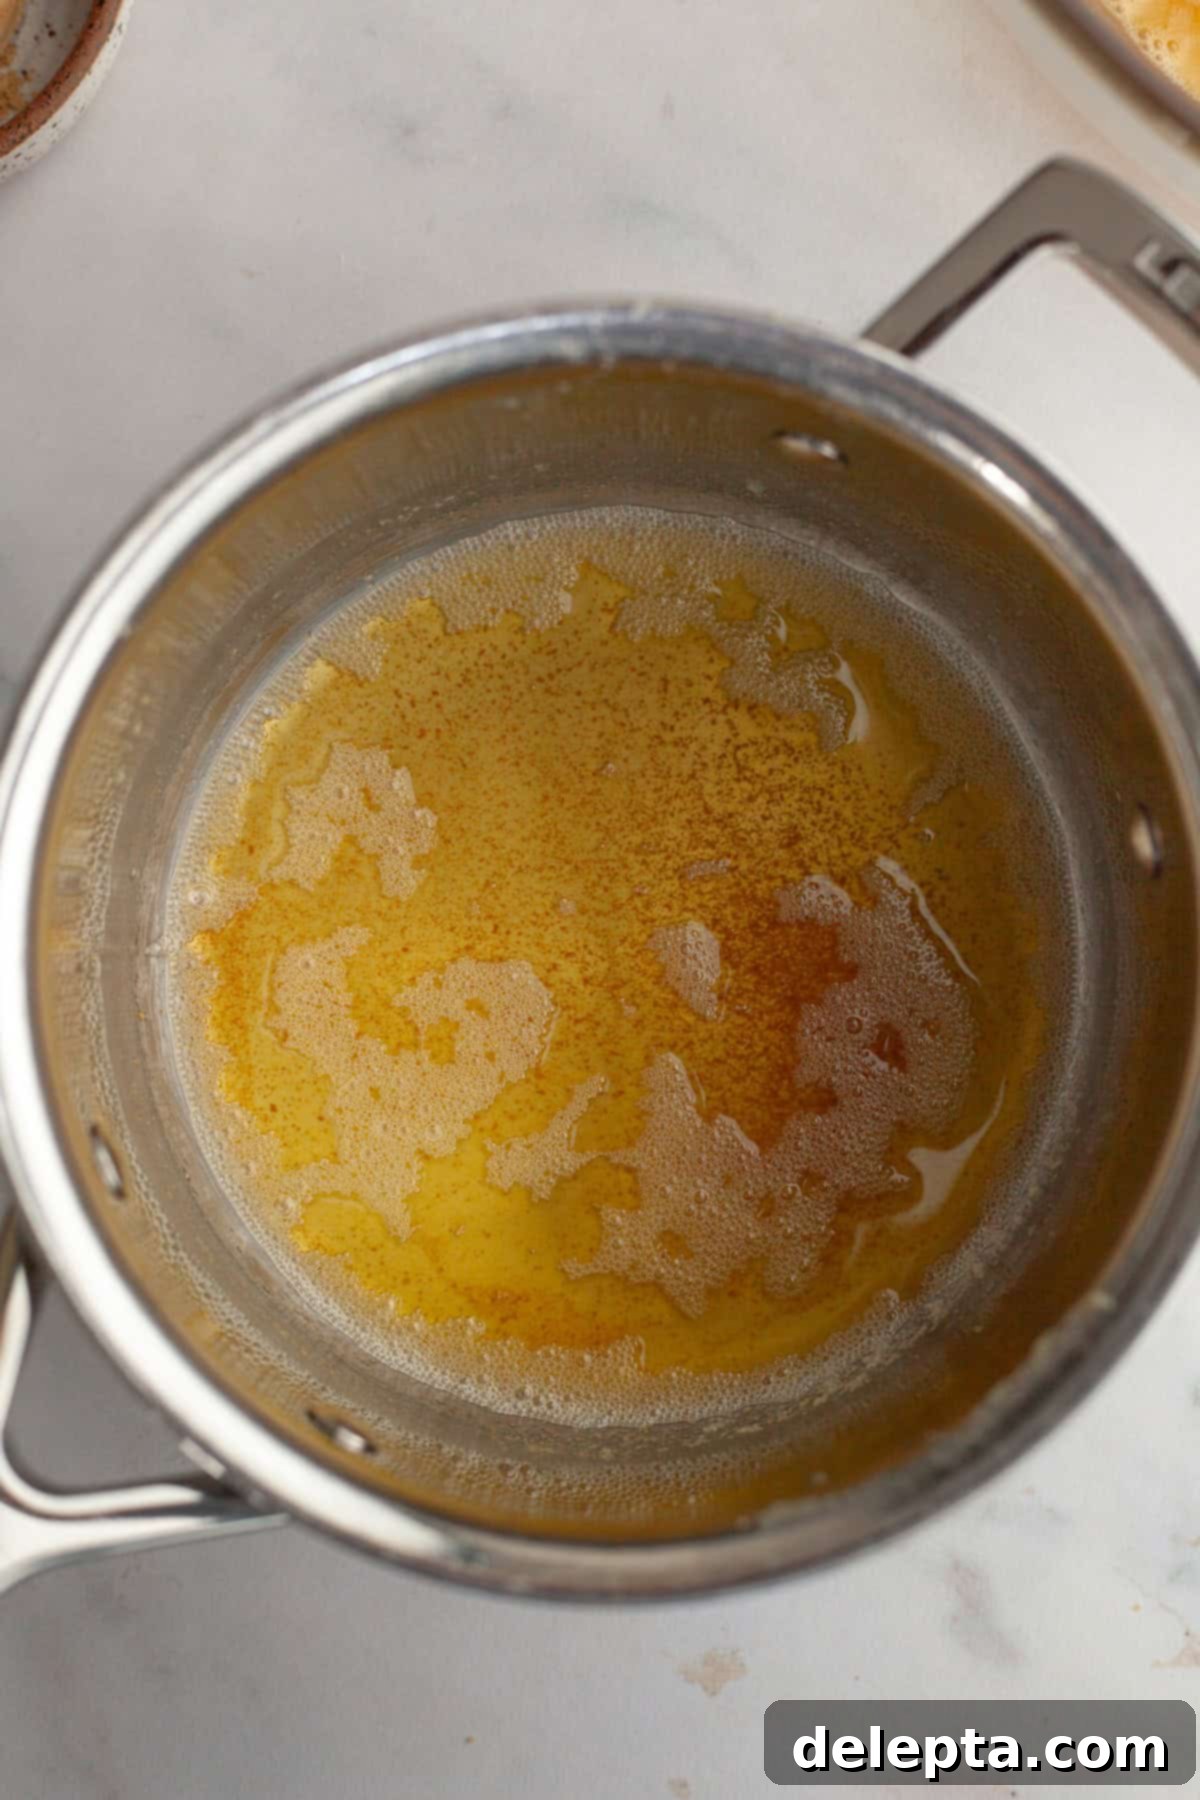
- Step 2: Brown the Butter. In a small, light-colored saucepan, melt the unsalted butter over medium-low heat. Continue to cook, stirring frequently, until the butter melts completely and begins to foam and sputter. As it cooks, milk solids will separate and sink to the bottom of the pan. Keep stirring until these milk solids turn a beautiful golden-brown color and the butter develops a rich, nutty aroma. This process usually takes about 5-7 minutes. Immediately remove the pan from the heat and carefully pour the browned butter into a separate heatproof bowl, making sure to scrape out all those delicious brown bits at the bottom of the pan – they are packed with flavor! Allow the brown butter to cool slightly before incorporating it into the pie filling.
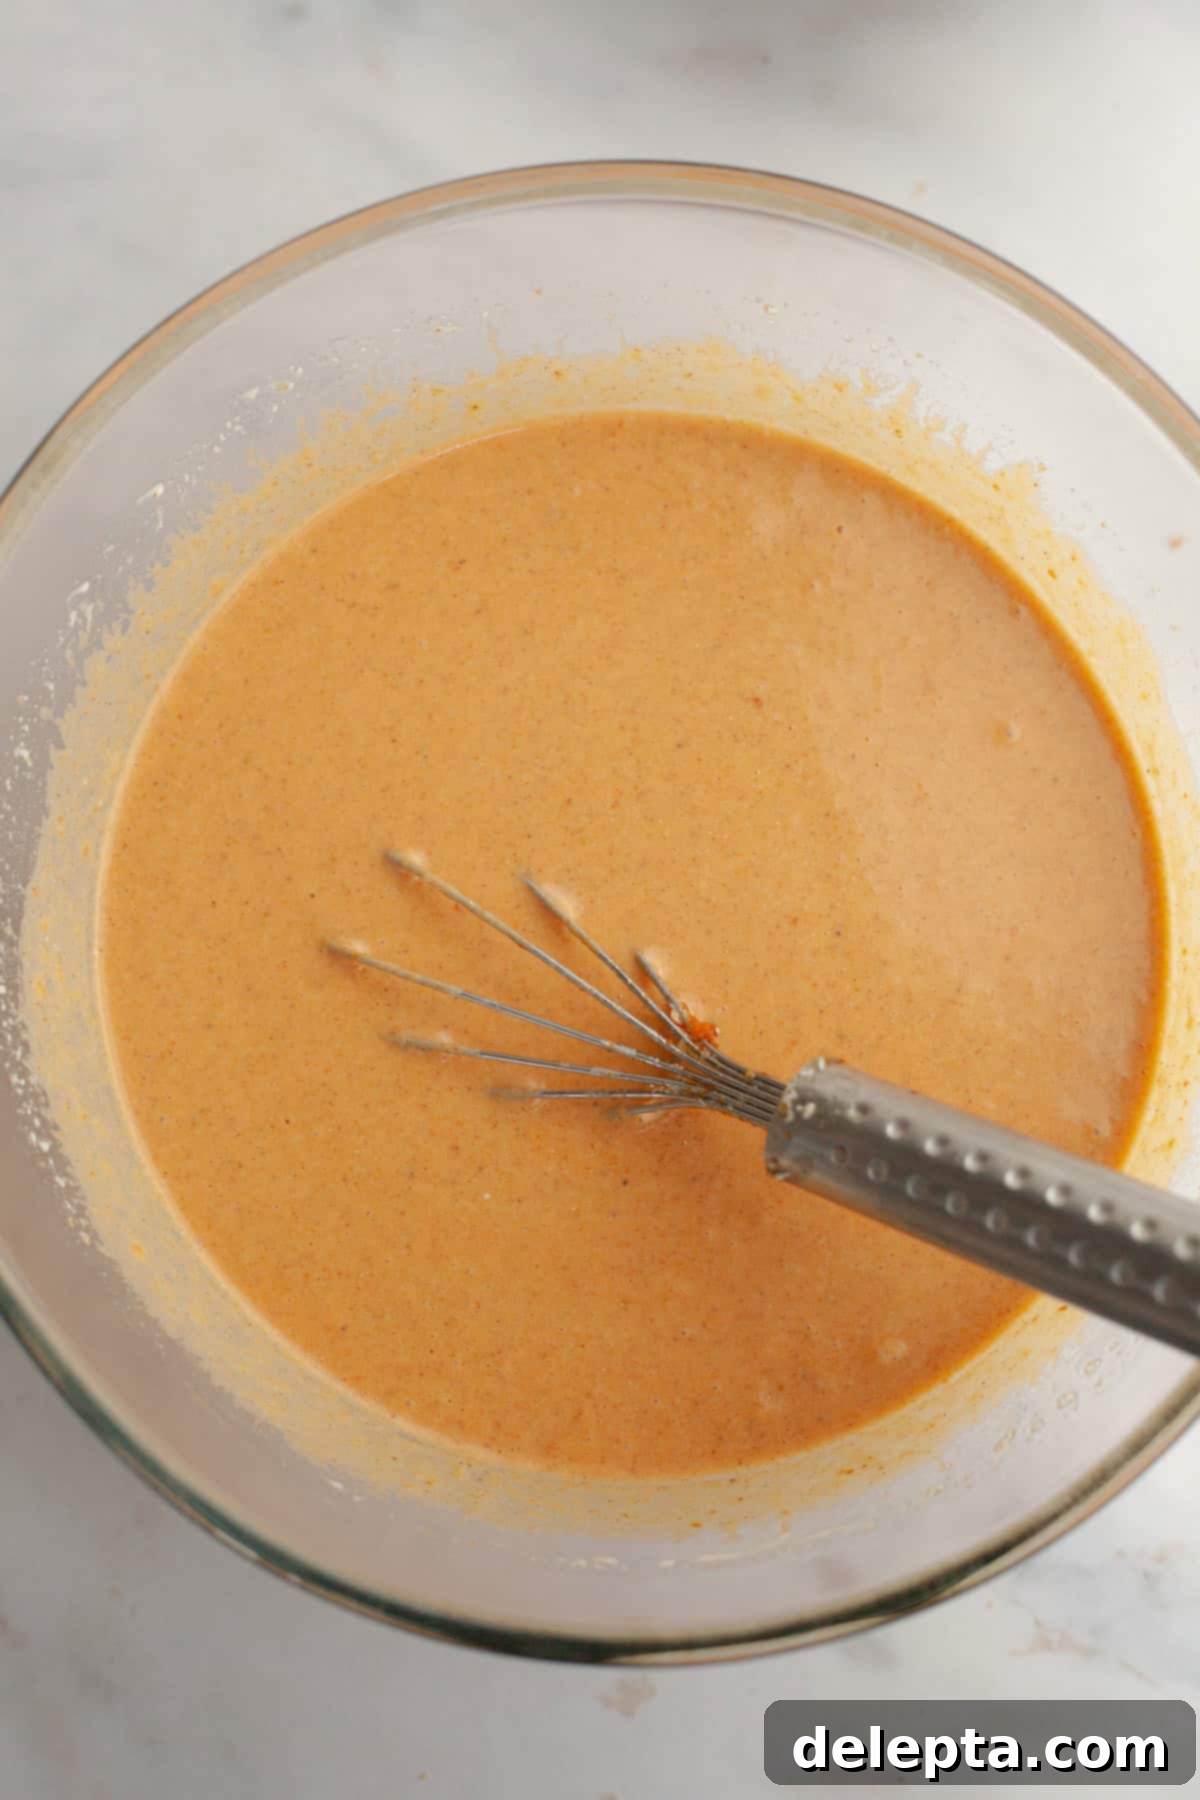
- Step 3: Prepare the Pumpkin Pie Filling. In a large mixing bowl, whisk together the room temperature eggs, light brown sugar, white sugar, and vanilla extract until well combined. Add the pure pumpkin puree, ground cinnamon, ground ginger, ground nutmeg, ground cloves, a pinch of ground black pepper, and kosher salt. Whisk vigorously until the spices are fully incorporated. Next, gently whisk in the heavy cream and sour cream until the mixture is smooth and uniform. Finally, pour in the slightly cooled brown butter, stirring it in thoroughly until it’s completely combined with the pumpkin mixture. This one-bowl method makes cleanup a breeze!
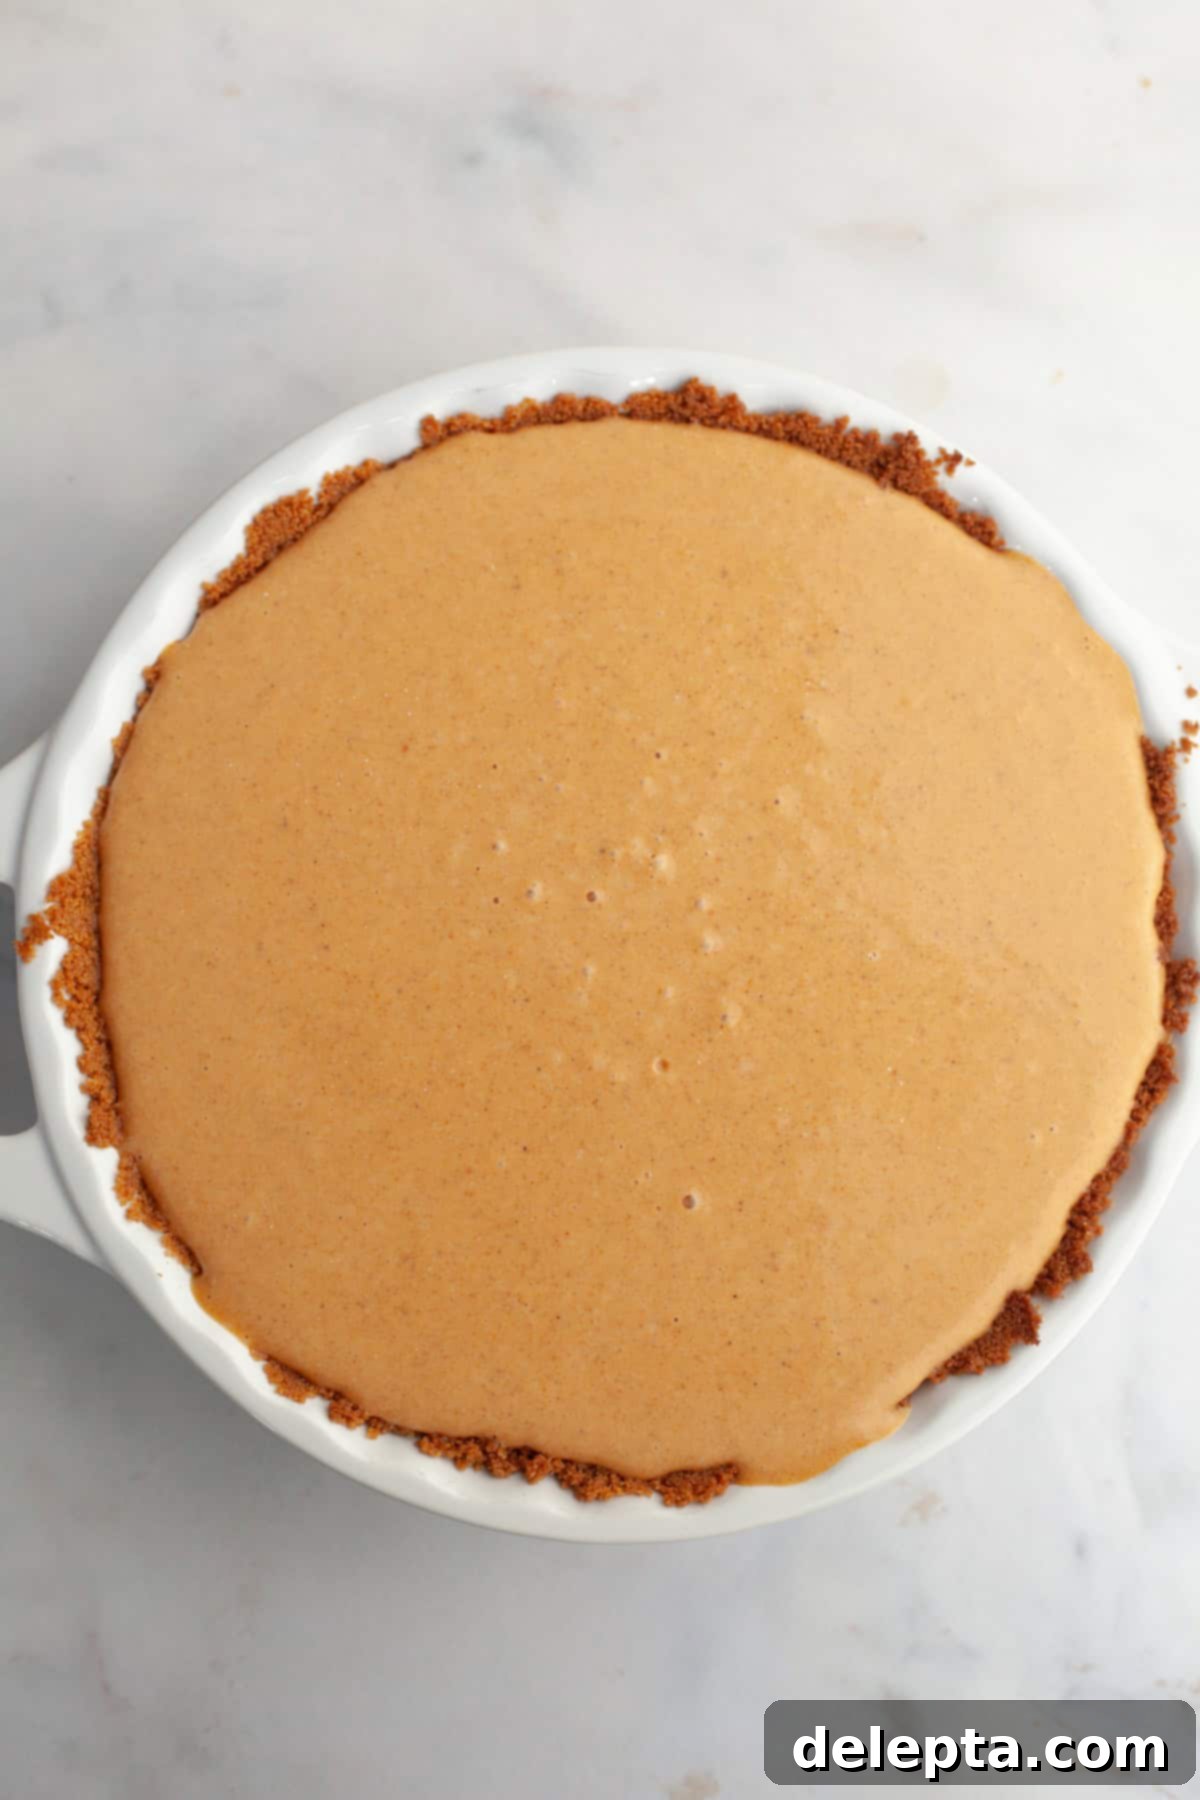
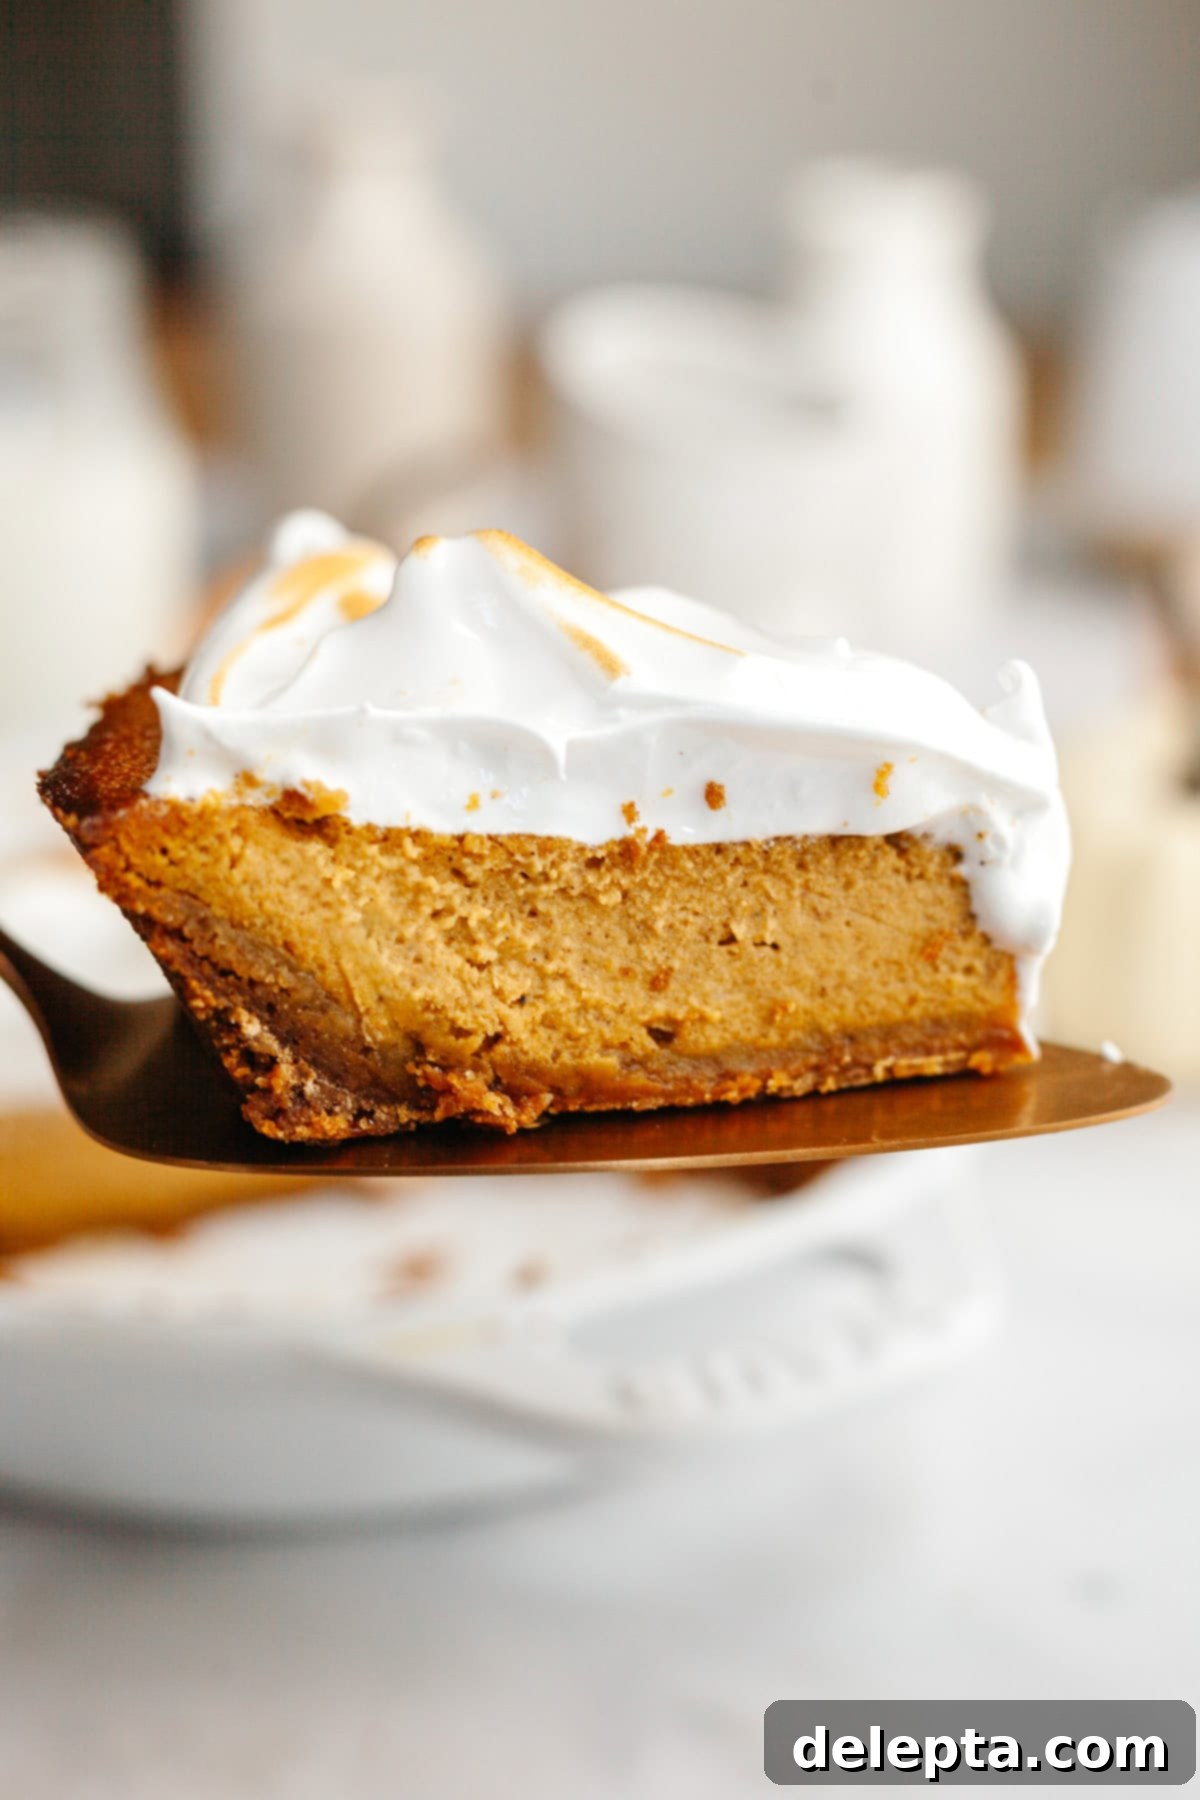
- Step 4: Bake and Chill the Pie. Carefully pour the pumpkin pie filling into your prepared gingersnap crust. Gently tap the pie dish on your counter a few times to release any trapped air bubbles, ensuring a smooth, even top. Place the pie in the preheated oven. Bake for an initial 25-30 minutes, then check the edges of the crust. If they are browning too quickly, loosely cover the edges with aluminum foil or a pie crust shield to prevent over-browning. Continue baking for an additional 20-30 minutes, or until the edges of the filling are set but the center still has a slight jiggle. The total baking time is typically 45-60 minutes, but ovens vary, so keep a close eye on it. Once baked, turn off the oven, prop the door open slightly with a wooden spoon, and allow the pie to cool slowly inside the oven for at least 1-2 hours. This gradual cooling helps prevent cracks. Once completely cooled to room temperature, transfer the pie to the refrigerator and chill for at least 2 hours (or preferably overnight) before serving. This chilling time is crucial for the pie to fully set and achieve its perfect custard-like consistency.
- Step 5: Create the Marshmallow Meringue Topping. While the pie chills, prepare your stunning marshmallow meringue. In a heatproof bowl (preferably metal), combine the egg whites, granulated sugar, cream of tartar, and a pinch of kosher salt. Create a double boiler by placing the bowl over a saucepan with an inch or two of simmering water, ensuring the bottom of the bowl does not touch the water. Whisk continuously until the sugar has completely dissolved and the mixture is warm to the touch and frothy. You can test this by rubbing a small amount between your fingers – it should feel completely smooth, with no grittiness from the sugar.
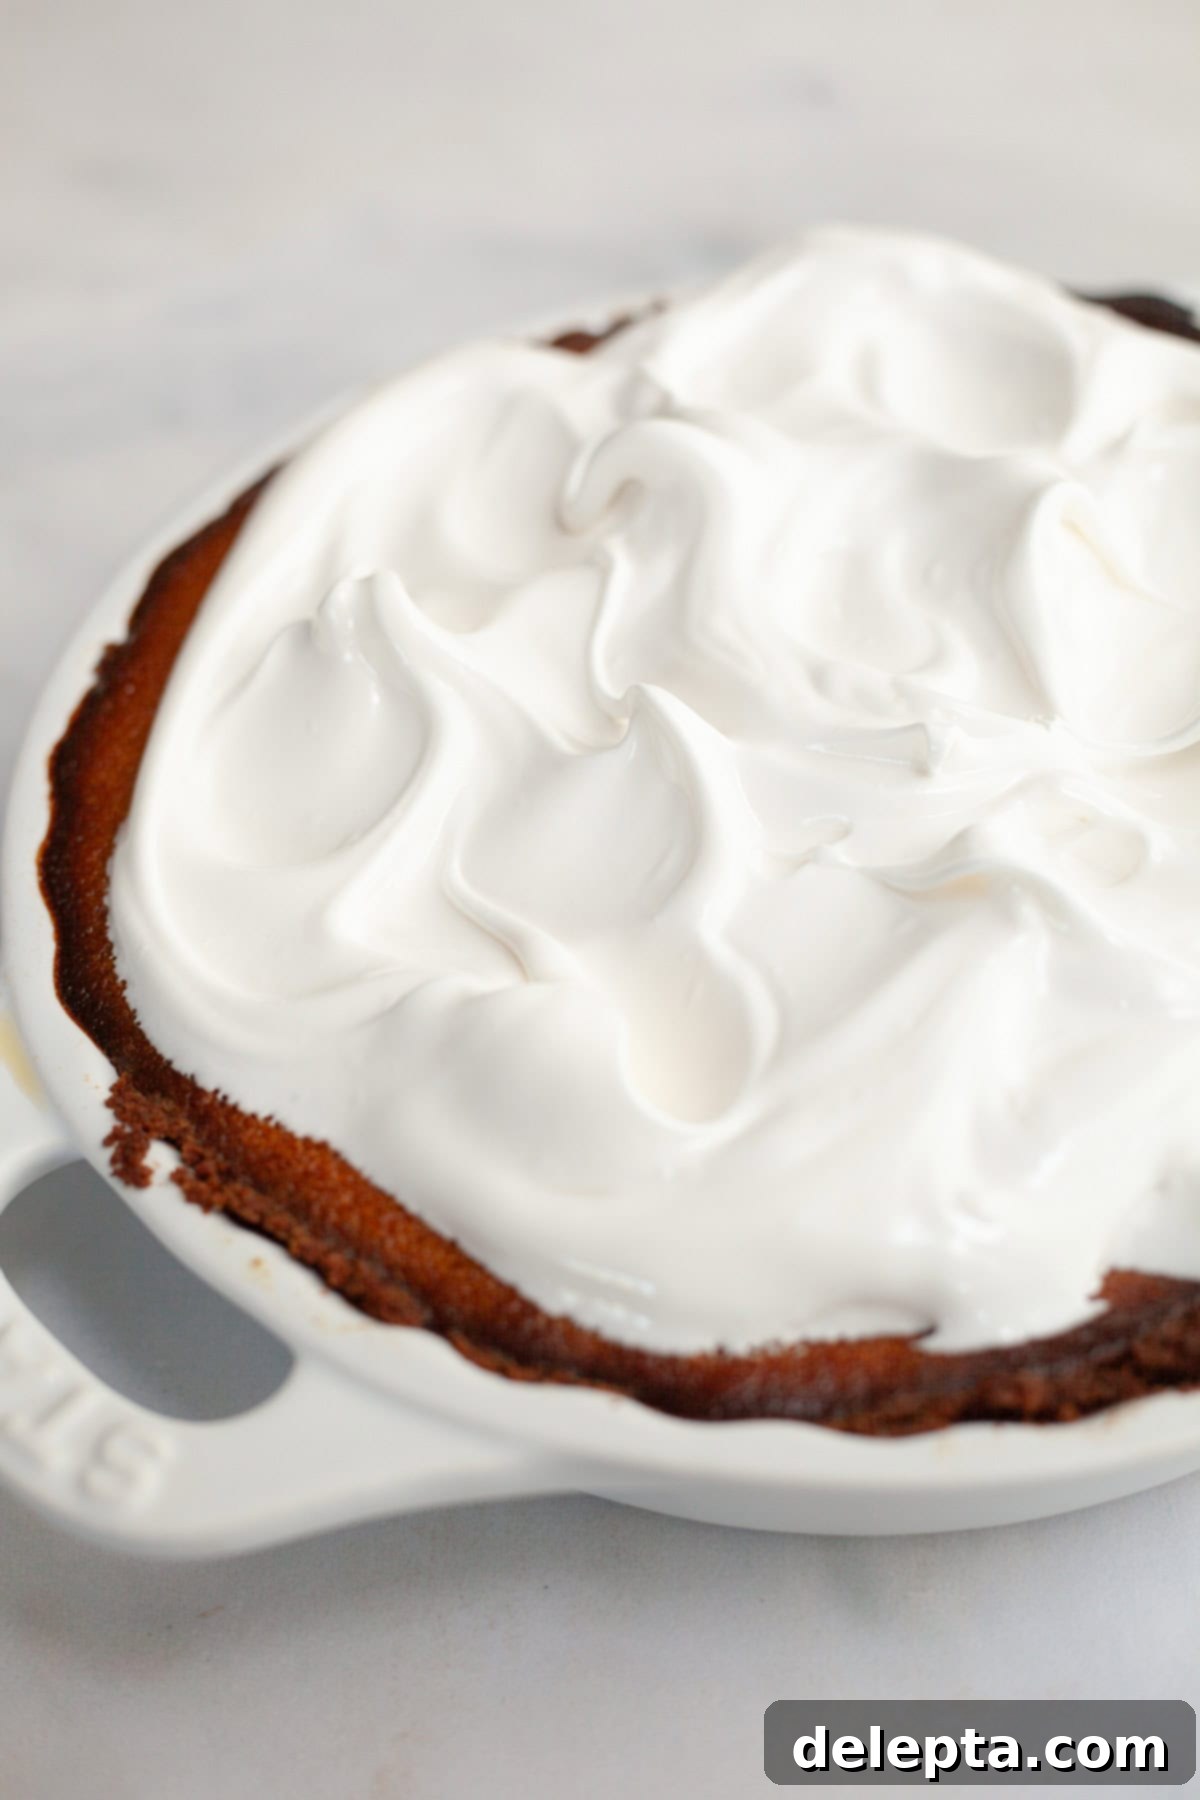
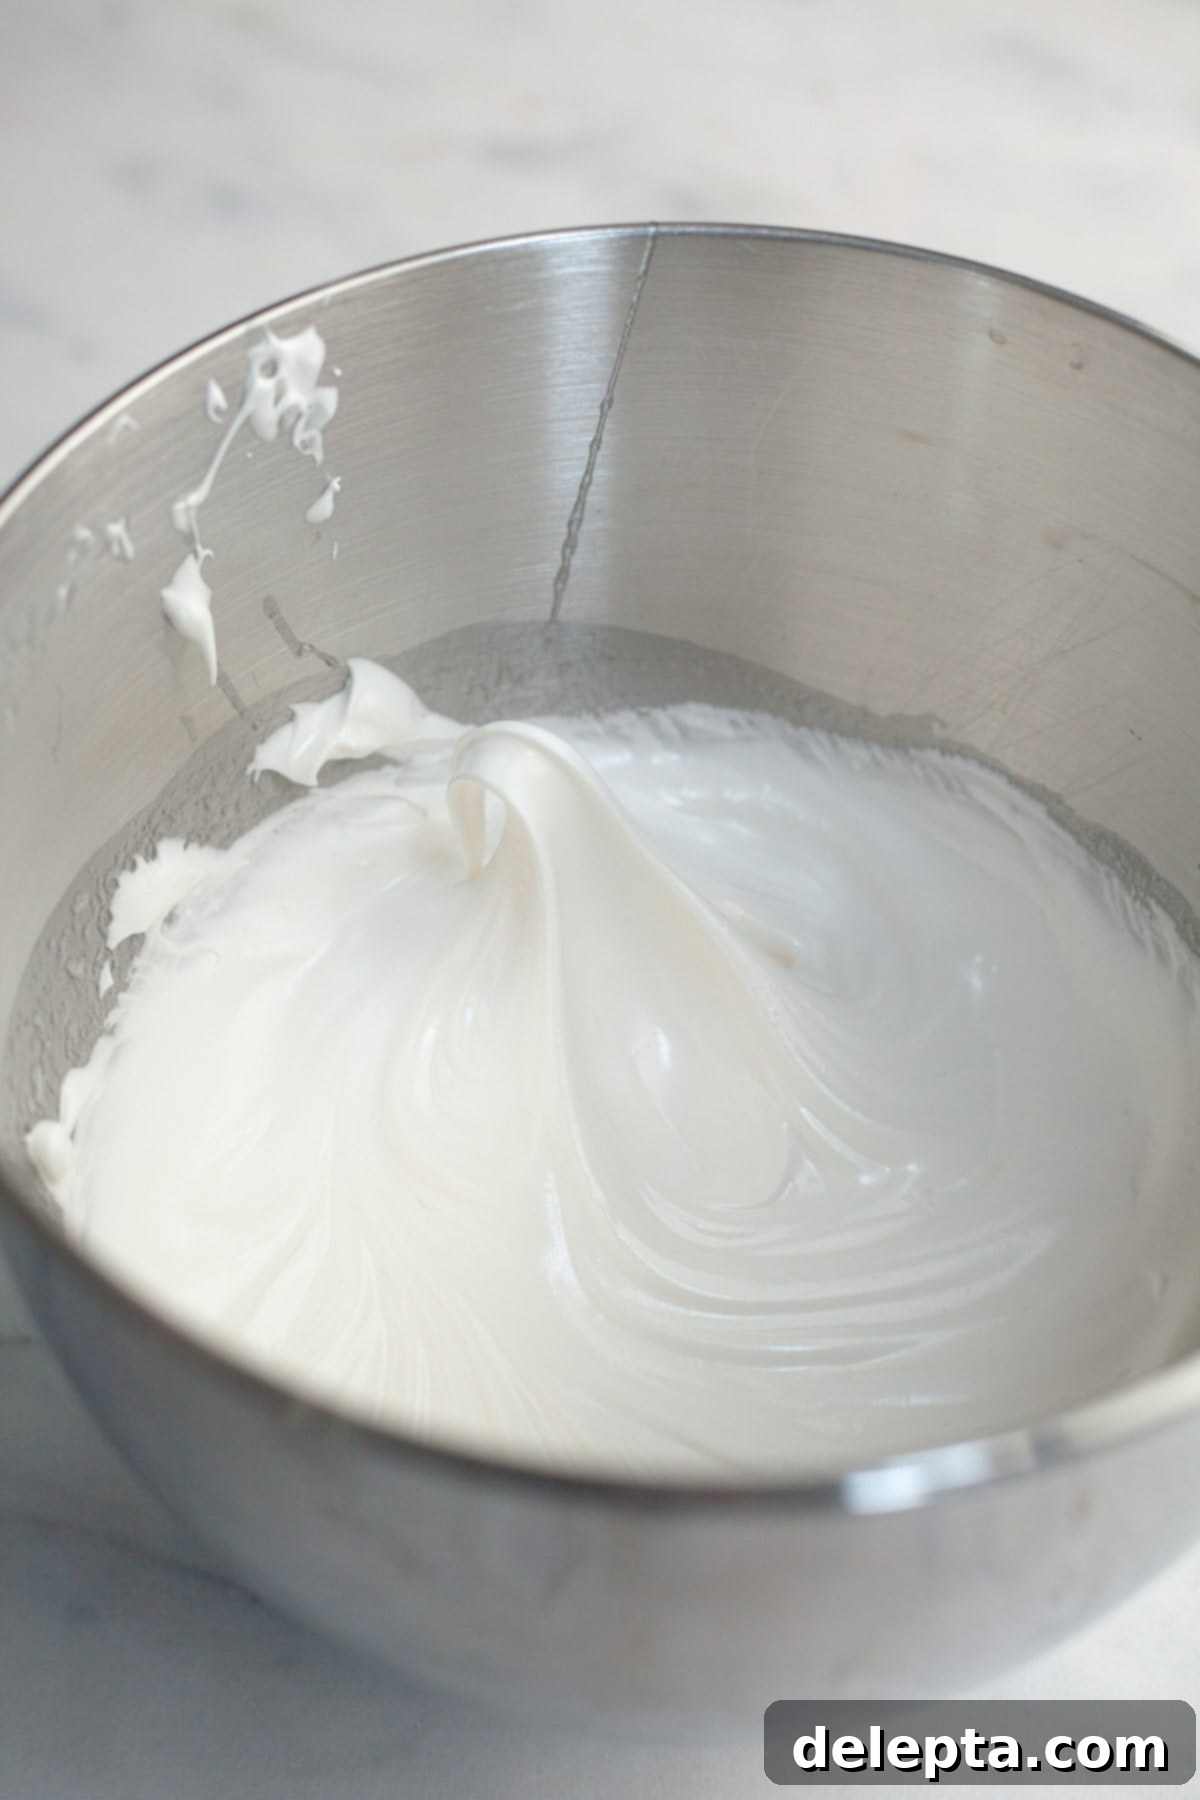
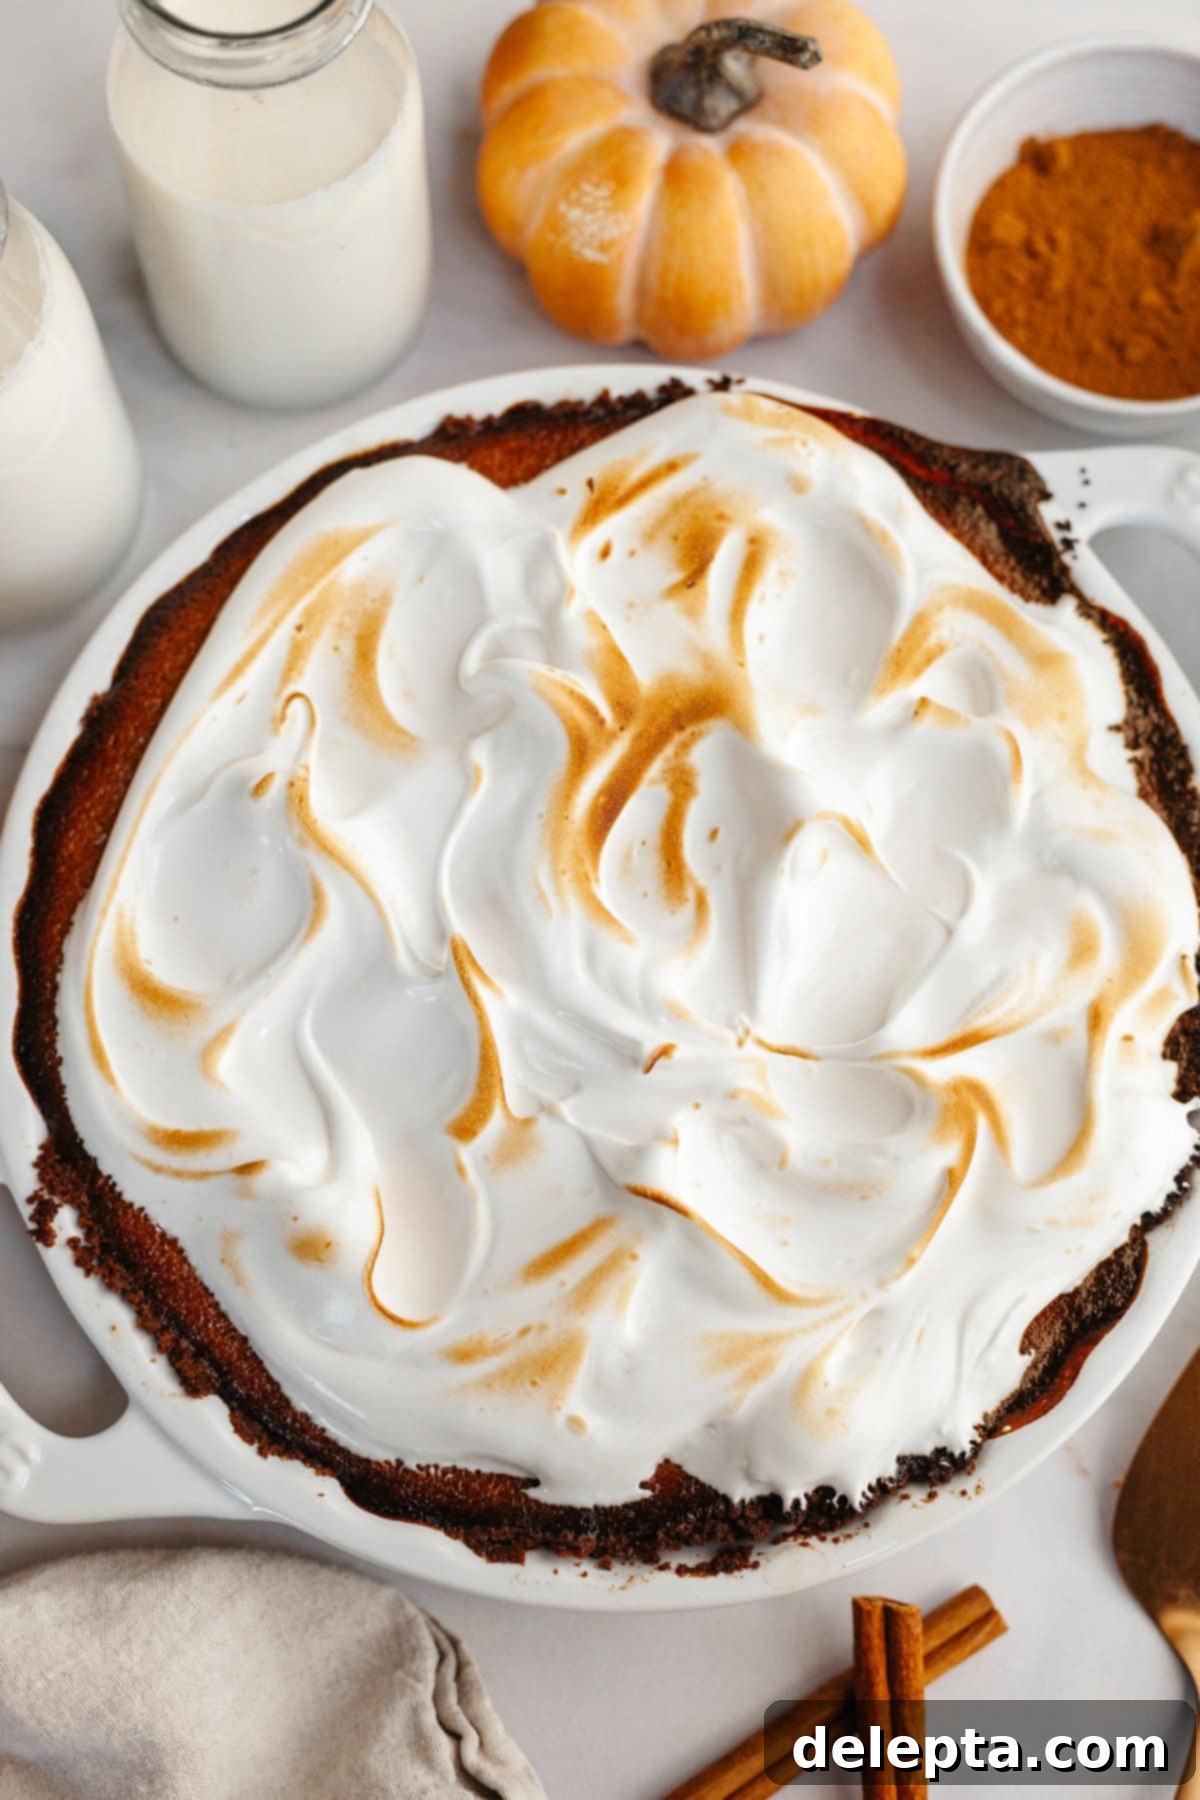
- Step 6: Top and Toast the Pie. Remove the bowl from the double boiler and transfer the mixture to a stand mixer fitted with the whisk attachment (or use a handheld mixer). Add the vanilla extract. Beat on high speed for about 5-7 minutes, or until the meringue forms stiff, glossy peaks. The meringue should be thick and hold its shape. Once the pumpkin pie is thoroughly chilled, spread or pipe the marshmallow meringue topping over the entire surface of the pie. For that signature golden finish, use a kitchen blowtorch to lightly toast the meringue until it achieves beautiful golden-brown peaks. Serve immediately and enjoy the delightful combination of flavors and textures!
Choosing the Right Pie Dish: Regular vs. Deep Dish
The type of pie dish you use can slightly affect the amount of filling needed. For this specific brown butter pumpkin pie recipe, I typically use a standard 9-inch pie dish. This often leaves me with about a quarter cup of pumpkin pie filling leftover, which can be baked in a small ramekin for a delightful mini treat! If you prefer to use all the filling and achieve a taller, more substantial pie slice, I recommend opting for a deep-dish pie plate. This will accommodate the entire batch of filling, ensuring no delicious pumpkin goes to waste and giving you a truly impressive presentation.
My Essential Pie Tips, Tricks, & More for a Perfect Pumpkin Pie 🎃
- Preventing Browning Edges: The delicate gingersnap crust can brown more quickly than the filling. To ensure a perfectly golden crust without burnt edges, I highly recommend covering the edges of your pie with a pie crust shield or loosely tenting them with aluminum foil once they reach your desired level of golden brown. This usually happens around 25-30 minutes into baking, so keep an eye on your pie!
- Conquering Pie Cracks: Ah, the dreaded cracks in a beautiful pumpkin pie! These usually occur for two main reasons: overbaking or a rapid temperature change. To avoid cracks, ensure you don’t overbake the pie. It’s done when the edges are set but the center still has a slight wobble. Once baked, resist the urge to pull it directly into a cold environment. Instead, turn off your oven, crack the door open (a wooden spoon handle works perfectly to keep it slightly ajar), and let the pie cool gradually inside the oven. Even if a small crack appears, don’t despair! Your gorgeous marshmallow meringue topping will elegantly conceal any imperfections.
- No Kitchen Blowtorch? No Problem! 🔥 If you don’t own a trusty kitchen blowtorch for toasting the marshmallow meringue, fear not! When I was first developing this recipe (along with my pumpkin spice cupcakes, which feature the same delightful marshmallow fluff topping), I successfully toasted the meringue under the broiler. Here’s how: place your pie on the top rack, about 6-8 inches away from the broiler element. Keep an eagle eye on it – this step requires your undivided attention, as meringue can go from beautifully toasted to completely burnt in a matter of seconds. Rotate the pie for even browning. While effective, I’ve found that a blowtorch often yields a more even and aesthetically pleasing golden-brown color.
- Customizing Your Pie Crust 🥧: Not a fan of gingersnap? This recipe is wonderfully versatile! You can easily swap out the gingersnap cookie crumbs for an equal amount of graham cracker crumbs if you prefer a different flavor profile. If you opt for graham cracker crumbs, increase the melted butter in the crust recipe to 6 tablespoons (85 grams) to ensure it holds together well. Alternatively, for a truly homemade touch, you can use a classic flaky pie crust for a more traditional texture, adjusting baking times as needed for a raw crust.
- Make-Ahead & Storage Tips: This brown butter pumpkin pie is an excellent make-ahead dessert, perfect for busy holiday preparations. You can bake the pie up to 2-3 days in advance and store it, covered tightly, in the refrigerator. Prepare the marshmallow meringue topping closer to serving time for the freshest, fluffiest results. If you need to make the meringue ahead, it holds well in the fridge for a few hours, but is best when freshly made and toasted. Leftovers should be covered and refrigerated for up to 5 days.
Explore More Delicious Pie Recipes!
If this brown butter pumpkin pie has ignited your passion for baking, you’re in luck! I have a wide array of delightful pie recipes perfect for any occasion. Whether you’re craving something classic, chocolatey, or fruity, there’s a pie waiting to be discovered and baked in your kitchen. Dive into my collection for more inspiration:
- Pumpkin Pie with Graham Cracker Crust
- Oreo Peanut Butter Pie (no bake)
- Easy Apple Oat Crumble Pie (Dutch Apple Pie)
- Easy Chocolate Pudding Pie with Graham Cracker Crust
If you’ve had the pleasure of making this amazing brown butter pumpkin pie, I would absolutely love to hear from you! Please make sure to leave a ⭐️ rating and review below to share your experience and help other bakers. Seeing your creations truly brightens my day, so don’t forget to tag me on Instagram @alpineella when you post your pictures! You can also stay connected and find more delicious recipes by following along on Pinterest, Facebook, and TikTok! Happy baking!
Recipe
Brown Butter Pumpkin Pie with Gingersnap Crust
Ella Gilbert
Pin Recipe
Save RecipeSaved!
Equipment
-
1 9″ pie plate
Ingredients
Gingersnap Crust
- 1 ½ cups gingersnap cookie crumbs
- 4 tablespoons unsalted butter melted
- pinch salt
- 4 tablespoons light brown sugar
- ½ teaspoon ground cinnamon
- ½ teaspoon ground ginger
Pumpkin Pie Filling
- 4 tablespoons unsalted butter
- 3 large eggs room temperature
- ½ cup light brown sugar
- ½ cup white sugar
- 15 oz pumpkin puree
- 2 teaspoons vanilla extract
- 2 teaspoons ground cinnamon
- 1 teaspoon ground ginger
- ¼ teaspoon ground nutmeg
- ⅛ teaspoon ground cloves
- pinch ground black pepper
- 1 teaspoon kosher salt
- 1 cup heavy cream
- ⅓ cup sour cream
Marshmallow Fluff Topping
- 2 large egg whites room temperature
- 7 tablespoons granulated sugar
- ¼ teaspoon cream of tartar
- pinch kosher salt
- ½ teaspoon vanilla extract
Instructions
Make Gingersnap Crust
-
Preheat your oven to 350℉/175℃. Pulse the gingersnap cookies in a food processor until you have fine, even crumbs.1 ½ cups gingersnap cookie crumbs
-
In a medium bowl, mix the cookie crumbs thoroughly with the melted butter, pinch of salt, light brown sugar, ground ginger, and ground cinnamon. Stir until the crumbs are evenly moist and resemble wet sand.4 tablespoons unsalted butter, pinch salt, 4 tablespoons light brown sugar, ½ teaspoon ground cinnamon, ½ teaspoon ground ginger
-
Pour the crumb mixture into a 9-inch pie dish (either a regular or deep dish will work). Use the bottom of a measuring cup or your knuckles to firmly press the crumbs into the bottom and up the sides of the dish. Use the back of a small spoon to help create a neat, rounded corner where the edge and bottom of the dish meet, which will make for easier slicing.
-
Bake the crust in the preheated oven for 8-9 minutes until it is fragrant and lightly golden. Remove it from the oven and let it cool slightly on a wire rack while you prepare the filling.
Make Pie Filling
-
Brown your butter: Place the 4 tablespoons of unsalted butter in a small, light-colored saucepan over medium-low heat. Stir continuously as the butter melts, then foams and sputters. Continue stirring until the milk solids at the bottom turn a rich golden-brown and the butter smells distinctly nutty and caramelized. This usually takes 5-7 minutes. Immediately remove the pan from the heat and pour the browned butter (including all those flavorful brown bits!) into a separate bowl to cool slightly.4 tablespoons unsalted butter
-
Maintain your oven temperature at 350℉/175℃ with an oven rack positioned in the center.
-
In a large mixing bowl, whisk together the room temperature eggs, light brown sugar, white sugar, and vanilla extract until well combined. Stir in the pumpkin puree, ground cinnamon, ground ginger, ground nutmeg, ground cloves, a pinch of ground black pepper, and kosher salt. Continue whisking until the mixture is smooth. Next, incorporate the sour cream and heavy cream. Finally, add the slightly cooled brown butter, stirring until it’s fully integrated into the pie filling.3 large eggs, ½ cup light brown sugar, ½ cup white sugar, 15 oz pumpkin puree, 2 teaspoons vanilla extract, 2 teaspoons ground cinnamon, 1 teaspoon ground ginger, ¼ teaspoon ground nutmeg, ⅛ teaspoon ground cloves, pinch ground black pepper, 1 teaspoon kosher salt, 1 cup heavy cream, ⅓ cup sour cream
-
Carefully pour the rich pumpkin filling into your prepared gingersnap crust. Gently tap the pie dish on your counter a few times to release any air bubbles, ensuring a perfectly smooth surface. Depending on the size of your pie dish (especially if using a regular vs. deep dish), you might have a small amount of leftover filling; keep this in mind as you pour. Place the pie in the oven.
-
After 25-30 minutes of baking, check on your pie. If the edges of the gingersnap crust are beginning to look too brown, I highly recommend covering them loosely with aluminum foil or a pie crust shield to prevent them from burning.
-
Continue to bake the pie for another 45 minutes, then check for doneness. The filling should be puffed around the edges and set, but the center should still have a slight jiggle. Depending on your oven, you may need an additional 5 to 10 minutes. Always keep a close eye on your pie to prevent overbaking.
-
Once the pie is baked, turn off the oven. Open the oven door a crack, propping it open with the handle of a wooden spoon. Allow the pie to cool slowly inside the oven for 1-2 hours. This gradual cooling process is key to preventing those unsightly cracks on the surface of your pie.
-
After the pie has completely cooled to room temperature in the oven, remove it and transfer it to the refrigerator. Chill for at least 2 hours (preferably overnight) before serving. This chilling time is essential for the pie filling to fully set and for the flavors to meld beautifully.
Marshmallow Topping
-
To prepare the marshmallow meringue, place the egg whites (ensuring they are at room temperature), granulated sugar, cream of tartar, and a pinch of kosher salt into a clean, heatproof bowl. I find a metal bowl works best for this.2 large egg whites, 7 tablespoons granulated sugar, ¼ teaspoon cream of tartar, pinch kosher salt
-
Set up a double boiler: Fill a small saucepan with about an inch or two of water and place it on the stove over medium-low heat until it begins to simmer. Place your heatproof bowl containing the egg white mixture directly on top of the saucepan, making absolutely sure that the bottom of the bowl does not touch the simmering water.
-
Whisk the mixture constantly over the simmering water until the sugar has completely dissolved. The mixture will transition from thick to frothy. To check for dissolved sugar, carefully lift the whisk and rub a tiny bit of the mixture between your fingers – it should feel perfectly smooth, with no gritty sugar crystals. Be cautious, as the mixture will be hot.
-
Once the sugar is dissolved, remove the bowl from the double boiler and immediately transfer the mixture to your stand mixer fitted with the whisk attachment (or use a powerful handheld mixer). Add the vanilla extract.½ teaspoon vanilla extract
-
Beat the meringue on high speed for about 5-7 minutes, or until it forms stiff, glossy peaks that hold their shape beautifully. The meringue should be thick, voluminous, and wonderfully shiny. Once the pumpkin pie is thoroughly chilled, generously spread or pipe the marshmallow meringue topping over the entire surface. Finally, use a kitchen blowtorch to lightly toast the meringue until it achieves beautiful golden-brown peaks, enhancing both flavor and visual appeal. Serve immediately and savor every bite!
Video
Notes
Salt: If you don’t have kosher salt on hand, which has a larger flake and less sodium by volume, you can use fine table salt. Just remember to halve the amount of salt called for in the recipe to avoid over-salting. As a general rule, 1 teaspoon of kosher salt is approximately equivalent to ½ teaspoon of fine salt.
Amount of Marshmallow Topping: The recipe as written provides a generous layer of marshmallow meringue topping. However, if you’re a true marshmallow lover and desire an even taller, more dramatic marshmallow crown on your pie, simply double the marshmallow fluff topping recipe ingredients and follow the instructions precisely. This will create an impressive, cloud-like topping!
Crust Customization: While the gingersnap crust offers a unique and flavorful twist, you have several options if you prefer an alternative. If you don’t want a gingersnap crust, you can easily swap out the gingersnap cookie crumbs for an equal amount of graham cracker crumbs. If using graham crackers, increase the melted butter in the crust recipe to 6 tablespoons (85 grams) to ensure the crust holds together well. For a more traditional, homemade feel, you can also substitute it with a regular flaky pie crust. Adjust baking times accordingly for a raw pie crust.
Broiler Method for Toasted Meringue: As detailed in the tips section, if you don’t possess a kitchen blowtorch, you can still achieve a beautifully toasted marshmallow meringue under your oven’s broiler. To do this, place the pie on the top rack of your oven, approximately 6-8 inches from the broiler element. It is absolutely crucial to keep a very close and constant eye on the meringue, as it can go from a perfect golden toast to burnt in mere seconds. Rotate the pie frequently for even browning.
Pie Dish Considerations: This recipe is designed for a standard 9-inch pie dish. If you happen to have a deep-dish pie plate, you can certainly use that as well! Just be aware that if you’re using a standard dish, you may find yourself with a small amount of leftover pumpkin pie filling. Don’t worry, this can be baked separately in a small ramekin for a mini treat. Be mindful when pouring the filling into the pie crust to avoid overfilling, especially with a shallower dish.
Storage for Leftovers: Any leftover slices of this delicious pie should be covered tightly with plastic wrap or placed in an airtight container. Store them in the refrigerator for up to 5 days to maintain freshness and flavor.
Nutrition
