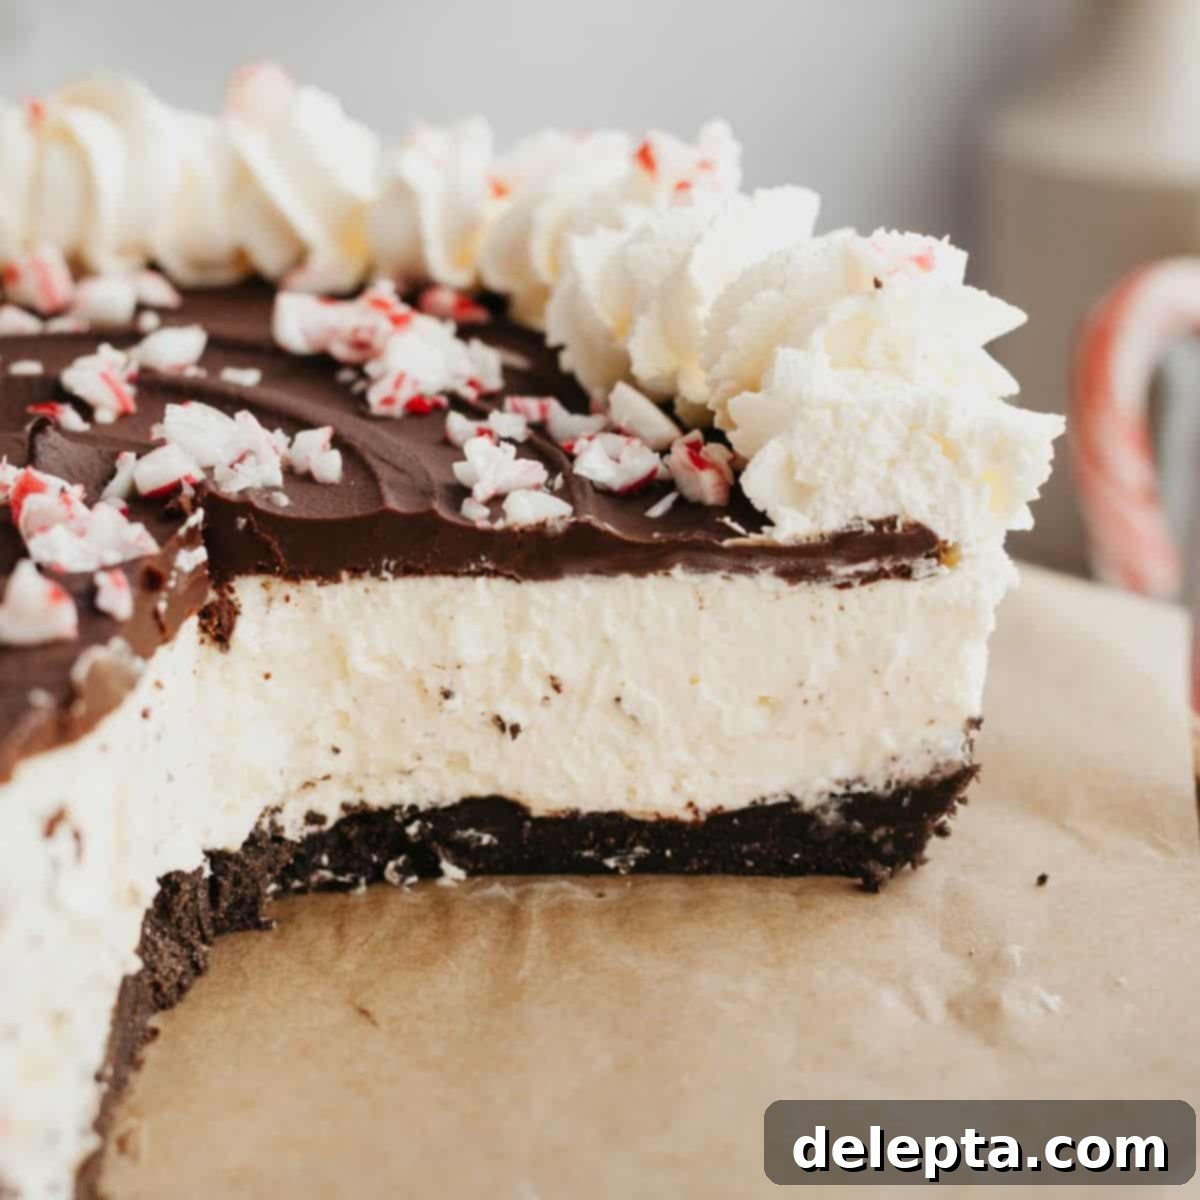
Indulge in the Ultimate No-Bake Peppermint Bark Cheesecake: Your Festive Dessert Dream
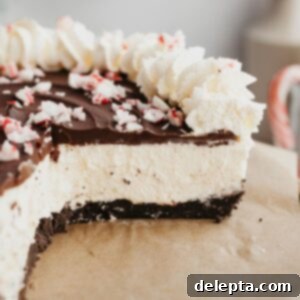
This festive and utterly delicious peppermint bark cheesecake is a show-stopping dessert that requires absolutely no baking, making it perfect for stress-free holiday entertaining! It features a rich, chocolatey Oreo cookie crust, a luxuriously creamy peppermint white chocolate filling, and is crowned with a vibrant, crunchy candy cane chocolate bark. Simple to create and delightfully impressive, this recipe frees up your oven for other holiday dishes and eliminates the fuss of a traditional water bath.
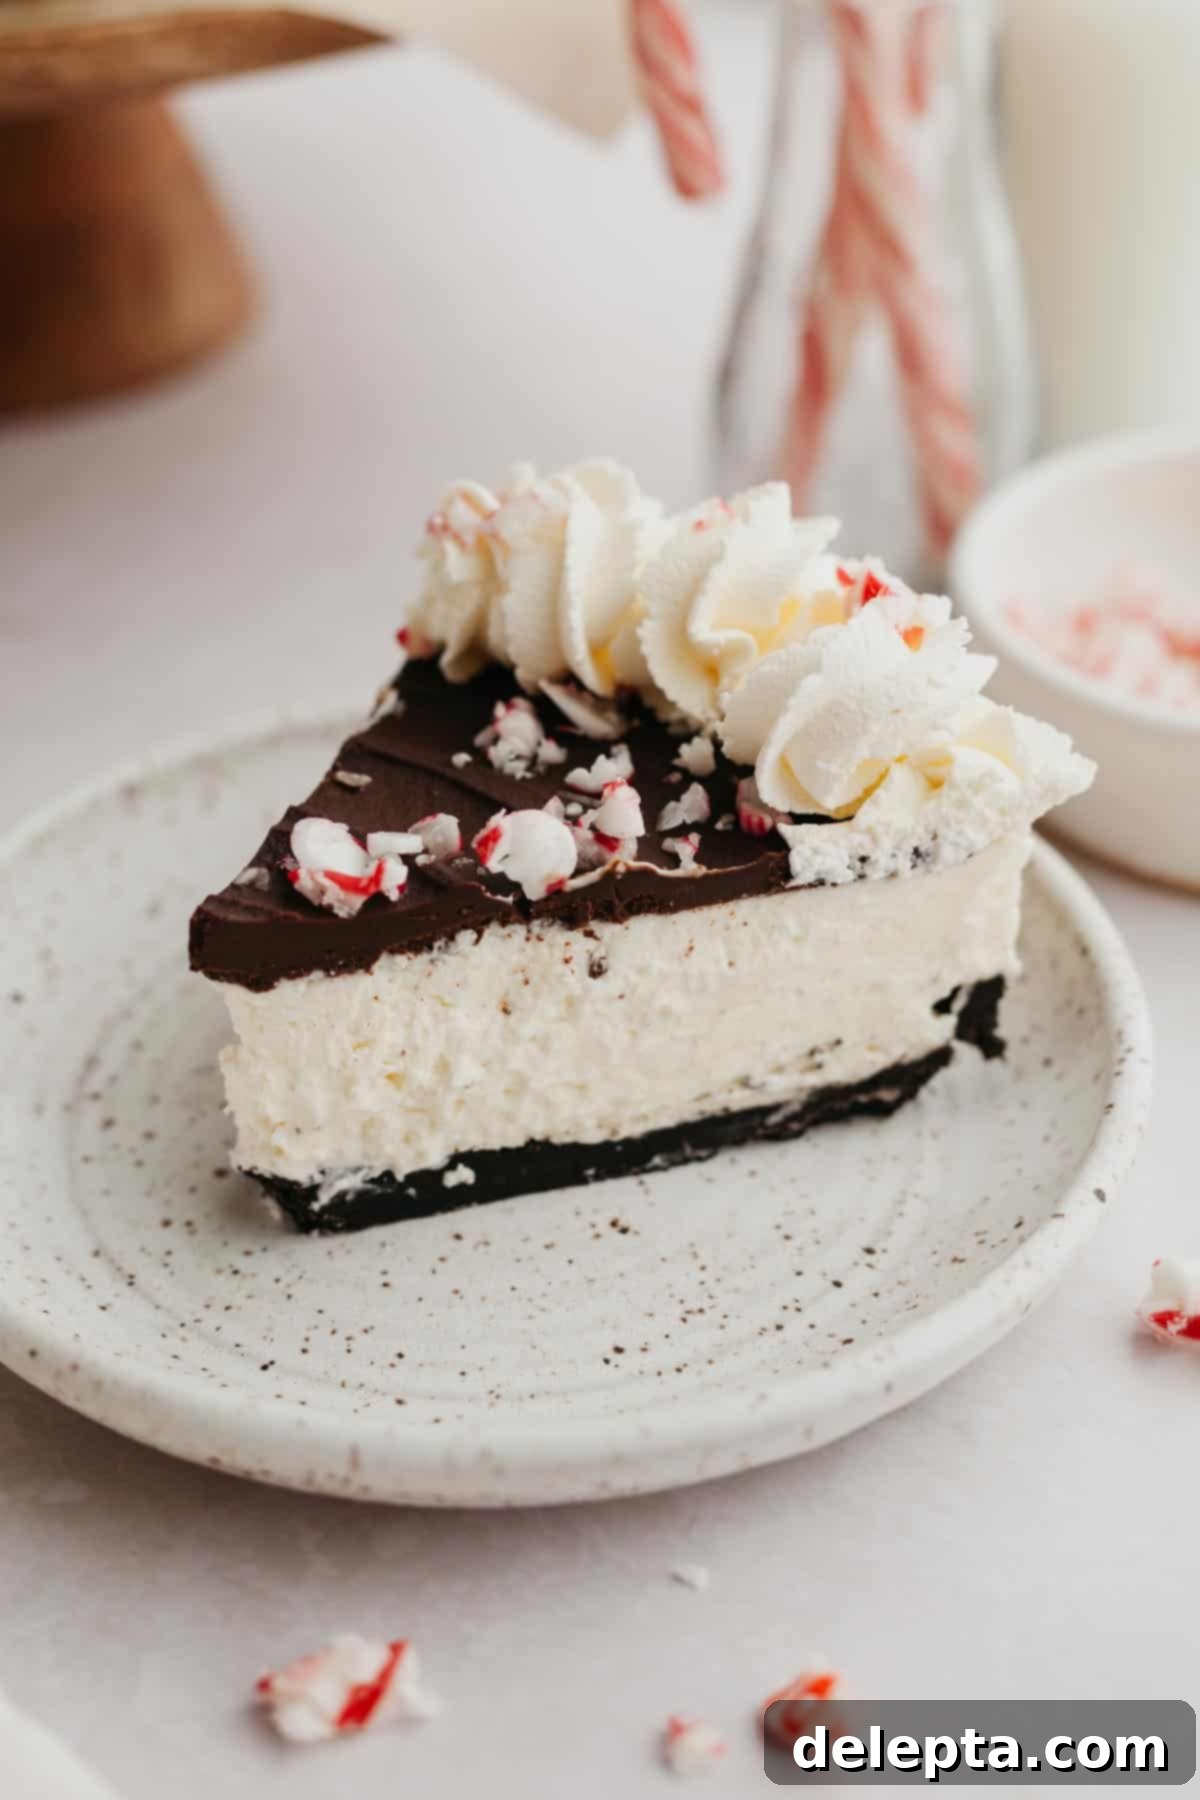
No-bake desserts are an absolute lifesaver, especially during busy holiday seasons like Thanksgiving and Christmas. The ability to prepare them in advance completely eliminates the stress of coordinating oven time, allowing you to focus on other culinary delights or simply enjoy more time with loved ones. Just like our popular red velvet Oreo cheesecake and vanilla bean cheesecake, this no-bake peppermint bark cheesecake boasts minimal hands-on time and can be effortlessly assembled the day before your event, ensuring a perfectly chilled and set dessert ready to impress.
This exquisite candy cane cheesecake captures all the beloved flavors and textures of your favorite peppermint bark, transformed into a decadent, creamy cheesecake. It’s a delightful fusion of classic holiday treats, offering a refreshing and rich experience that will undoubtedly become a new festive tradition.
Craving more peppermint chocolate goodness? Be sure to explore our other delightful recipes such as peppermint bark cookies, peppermint chocolate cupcakes, or rich peppermint bark brownies! Each offers a unique way to savor the iconic holiday combination of mint and chocolate.
Why You’ll Adore This No-Bake Peppermint Bark Cheesecake!
Prepare to fall in love with this festive creation. Every aspect of this peppermint bark cheesecake is designed for maximum flavor and minimal effort, making it the ideal holiday dessert.
- Effortless Oreo Crust: The foundation of this incredible dessert is a simple yet incredibly satisfying 2-ingredient crust, crafted from perfectly crushed Oreo cookies and melted butter. It provides a rich, chocolatey crunch that contrasts beautifully with the smooth filling.
- Creamy Peppermint White Chocolate Filling: Inspired by our beloved red velvet Oreo cheesecake, the filling is a harmonious blend of tangy cream cheese, a touch of sour cream for moisture, rich melted white chocolate, and just the right amount of vibrant peppermint extract. It’s a velvety smooth, melt-in-your-mouth experience.
- Stunning Candy Cane Bark Topping: Once the cheesecake is chilled to perfection, it’s generously draped in a glossy peppermint chocolate ganache, then lavishly sprinkled with festive crushed candy canes. This creates a dazzling visual appeal and adds an irresistible crunch and burst of minty flavor.
- No Oven Required: The true magic of this recipe lies in its “no-bake” nature. Zero baking means no need for a hot oven, no complicated water baths, and less stress during your busy holiday meal preparations. It’s a truly fuss-free dessert from start to finish.
- Perfect for Planning Ahead: This cheesecake is an absolute dream for entertaining, as it can be fully prepared a day or two in advance. This allows the flavors to meld beautifully and the cheesecake to set perfectly, making your holiday hosting duties considerably easier.
Essential Ingredients for Your Peppermint Bark Cheesecake
Crafting this sensational no-bake cheesecake starts with selecting the right ingredients. Here’s a closer look at what you’ll need and why each component is important for the best results:
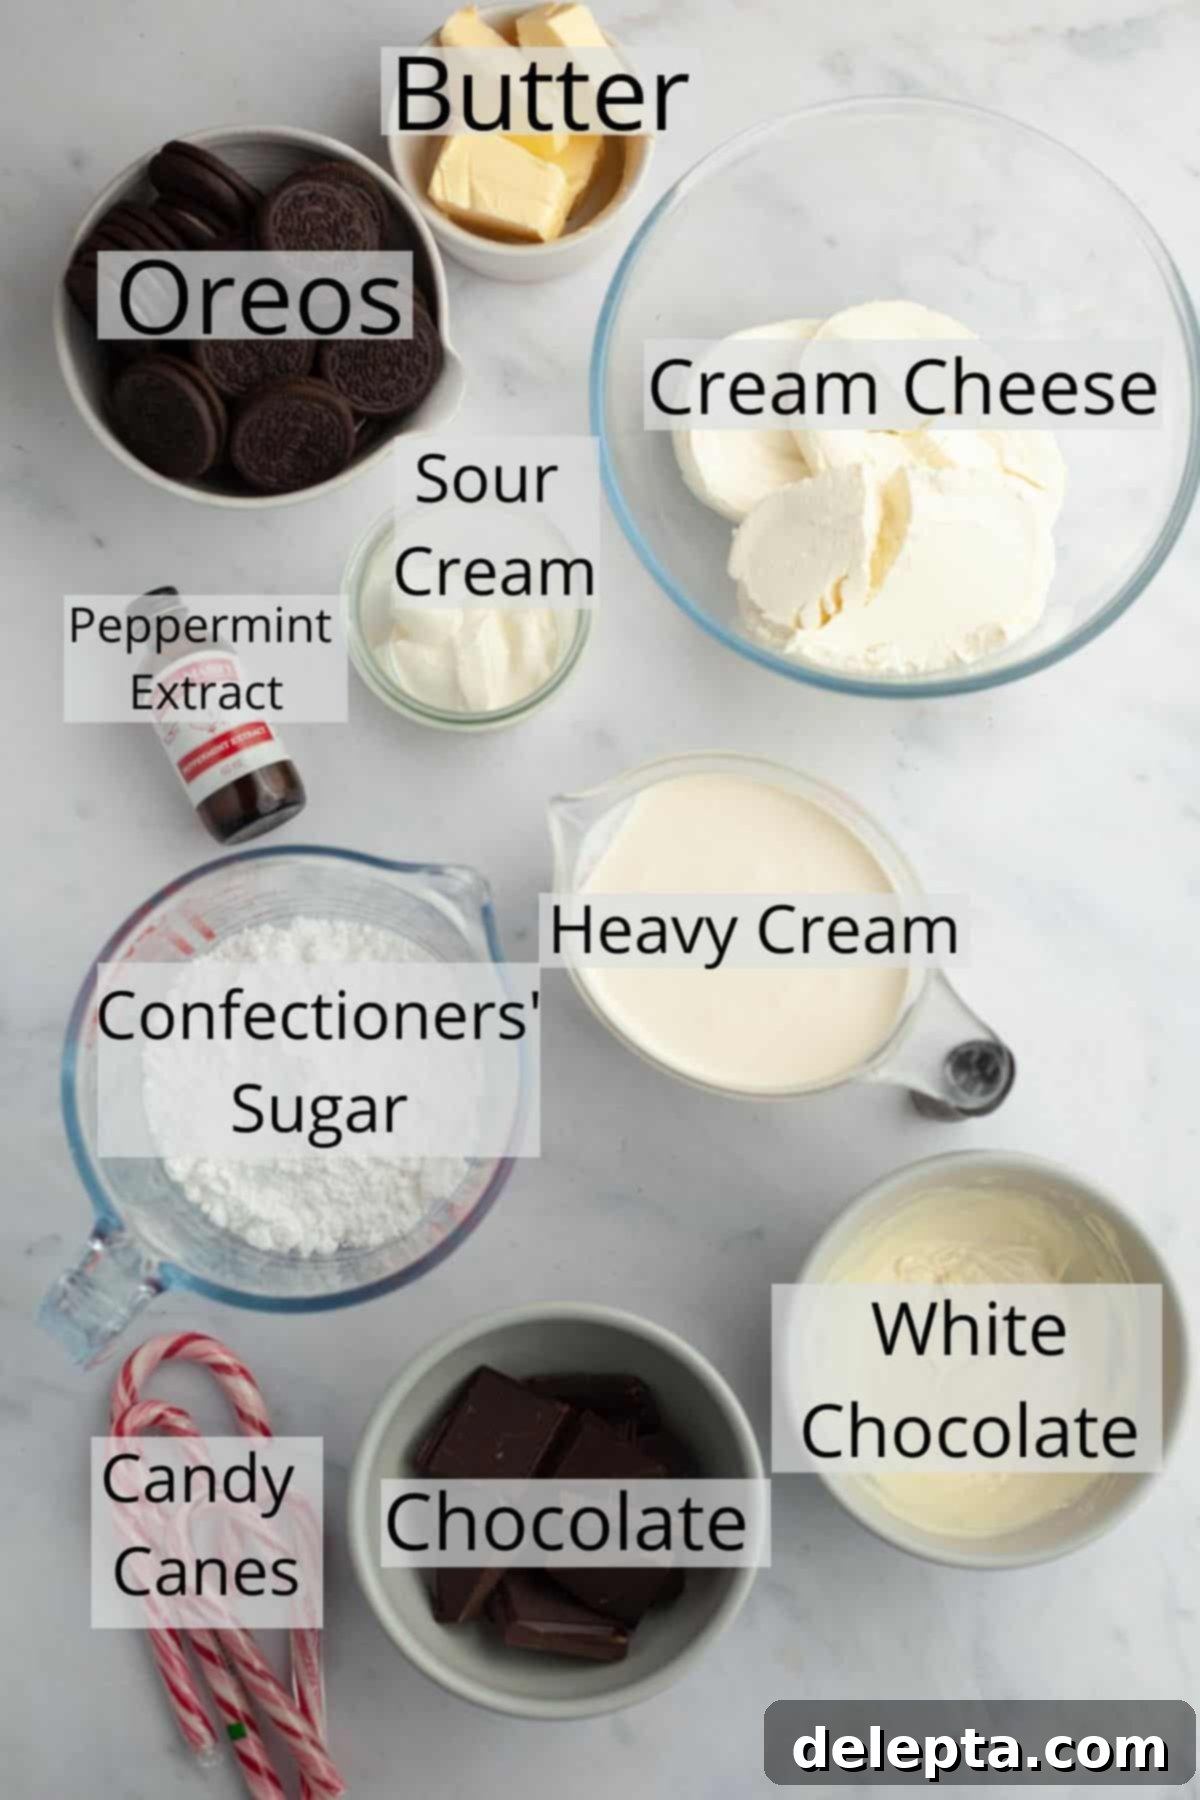
- Oreos: For the ultimate cheesecake base, we use classic, regular Oreos. There’s no need for the tedious step of scraping out the cream filling; the whole cookie is crushed to create a rich, chocolatey, and perfectly crumbly foundation that perfectly complements the peppermint flavors.
- White Chocolate: The quality of your white chocolate directly influences the richness and smooth texture of the cheesecake filling. Opt for a good quality white chocolate bar or baking chips that melt smoothly. It’s crucial to let the melted white chocolate cool slightly to room temperature before incorporating it into the cream cheese mixture, preventing any curdling or clumping.
- Chocolate for Bark: For the festive peppermint bark topping, a semi-sweet chocolate is highly recommended. If you’re in the UK, this would be akin to a dark chocolate. Its slightly bitter notes provide a delightful balance against the sweetness of the white chocolate filling and the candy canes, creating a complex and satisfying flavor profile.
- Cream Cheese: To achieve that signature creamy, rich, and firm cheesecake texture, full-fat Philadelphia cream cheese is essential. Its higher fat content and dense consistency are crucial for a no-bake cheesecake to set properly. If you are using cream cheese from a tub (common in Europe), which typically has higher moisture, gently pat it down with a paper towel just before adding it to your mixing bowl to remove any excess liquid. This prevents a runny filling.
- Confectioners’ Sugar: Also widely known as icing sugar or powdered sugar, this ingredient ensures a silky-smooth cheesecake filling. Its fine consistency dissolves easily, preventing any grainy texture and contributing to the cheesecake’s delicate sweetness.
- Peppermint Extract: This is where the magic happens for that distinct holiday flavor. Make sure to use pure peppermint extract, not generic “mint” extract, which can sometimes have an unpleasant, toothpaste-like flavor. Peppermint extract is potent, so add it cautiously – a little goes a long way to achieve that perfect refreshing taste without overpowering the other elements.
- Heavy Cream: Essential for both the light and airy cheesecake filling and the rich chocolate ganache. Ensure it is very cold when whipping for the filling to achieve stiff peaks, which are critical for the cheesecake’s structure.
- Sour Cream: A small amount of full-fat sour cream adds a subtle tang and extra moisture to the cheesecake filling, balancing the sweetness and enhancing the overall creamy texture. Make sure it’s at room temperature for smooth incorporation.
- Unsalted Butter: Used for the cookie crust, unsalted butter allows you to control the overall saltiness of the dessert. Melting it and combining it with the Oreo crumbs forms a stable and delicious base.
- Candy Canes: The quintessential topping for our peppermint bark. Crushed candy canes provide both a festive visual and a delightful crunchy, minty texture that ties the entire dessert together.
Easy Step-by-Step Instructions for the Perfect No-Bake Peppermint Bark Cheesecake
Creating this stunning dessert is a breeze with these clear, easy-to-follow steps. Precision and patience, especially with chilling, are key to a flawless result.
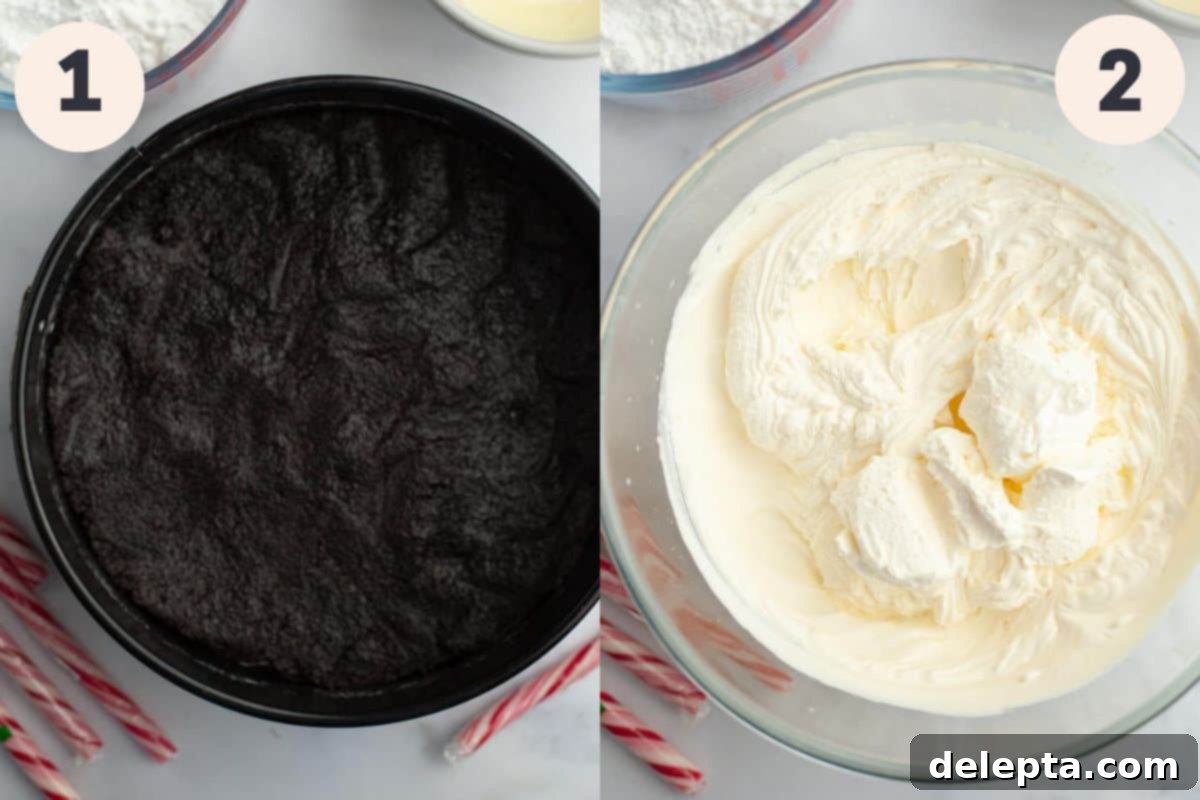
Step 1: Prepare the Oreo Crust. Begin by finely crushing your regular Oreo cookies in a food processor or blender until you have fine, even crumbs. The finer the crumbs, the more uniform your crust will be. Add the melted unsalted butter to the crumbs and either pulse again briefly or use a rubber spatula to thoroughly mix until all crumbs are moist and resemble wet sand. This ensures the crust will hold together. Gently press this mixture firmly and evenly into the bottom of a 9-inch springform pan, extending slightly up the sides to form a neat edge. A flat-bottomed glass or measuring cup can help achieve an even layer. Place the pan in the freezer for at least 20 minutes to firm up the crust, preventing it from crumbling.
Step 2: Whip the Heavy Cream. In the bowl of a stand mixer fitted with the whisk attachment, or using a large bowl and a handheld electric mixer, whip the very cold heavy cream on medium-high speed. Continue beating until stiff peaks form. This means when you lift the whisk, the cream holds its shape firmly and doesn’t droop. Properly whipped cream is crucial for the light and airy texture of the cheesecake filling. Set the whipped cream aside gently in the refrigerator while you prepare the rest of the filling.
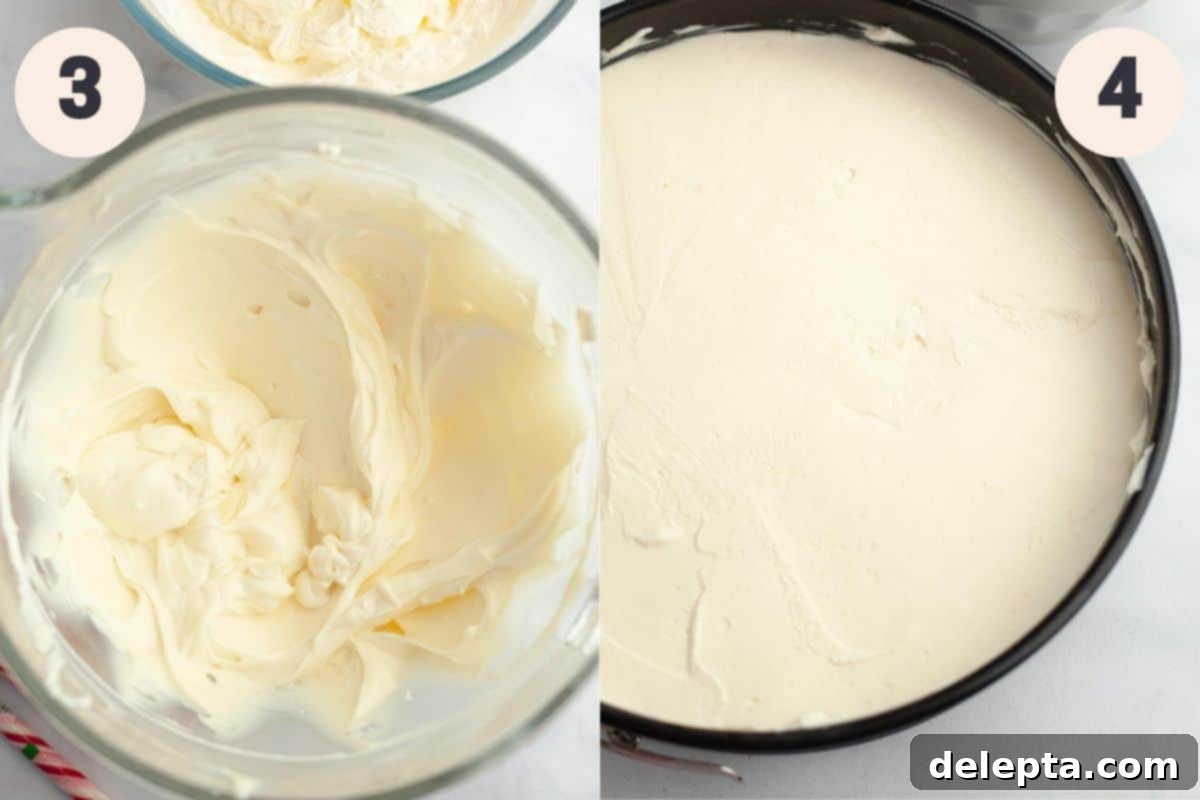
Step 3: Create the Peppermint White Chocolate Filling. In the bowl of a stand mixer fitted with the paddle attachment, beat the room temperature full-fat cream cheese on medium speed until it is perfectly smooth and completely free of any lumps. This step is essential for a velvety filling. Stop the mixer and add the room temperature sour cream, the slightly cooled melted white chocolate, sifted powdered sugar (confectioners’ sugar), and the peppermint extract. Beat on medium-high speed until all ingredients are well combined and the mixture is silky smooth. Finally, using a rubber spatula, very gently fold in the reserved whipped cream until it is just combined. Be careful not to overmix, as this can deflate the whipped cream and result in a denser filling.
Step 4: Chill the Cheesecake. Retrieve the springform pan with the firm crust from the freezer. Carefully pour the creamy cheesecake filling on top of the crust. Use a rubber spatula or a small offset spatula to gently spread and even out the filling, creating a smooth top surface. Cover the cheesecake tightly with plastic wrap, ensuring the plastic directly touches the top of the cheesecake. This direct contact prevents condensation from forming, which can make the top watery. Chill the cheesecake in the refrigerator overnight. For the best results and cleanest slices, a minimum of 12 hours of chilling is highly recommended.
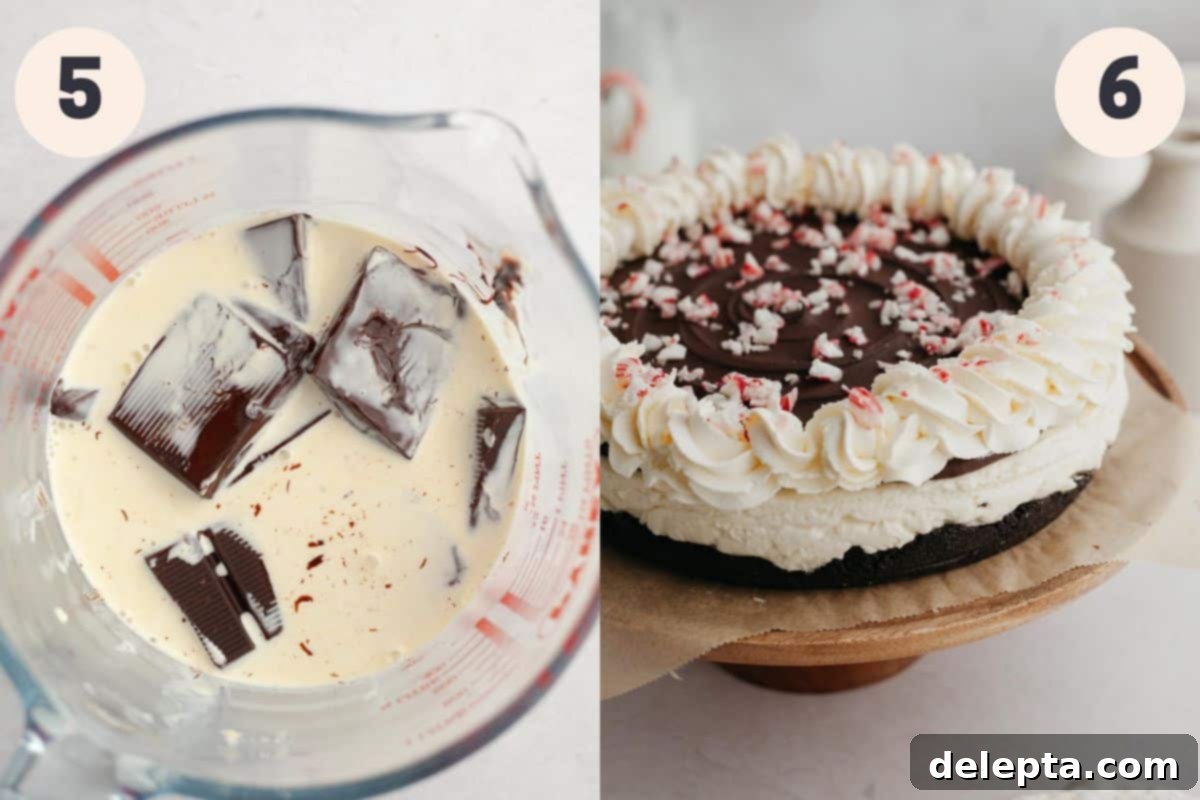
Step 5: Prepare the Peppermint Bark Ganache. For the stunning topping, place your chopped semi-sweet chocolate in a heatproof jug or a medium bowl. In a small saucepan, bring the heavy cream to a gentle simmer over medium-low heat. As soon as you see small bubbles forming around the edges, remove the cream from the heat and immediately pour it over the chopped chocolate. Let it sit undisturbed for a few minutes (about 2-3 minutes) to allow the chocolate to melt. Then, stir gently with a rubber spatula until the mixture is completely smooth, glossy, and emulsified into a rich ganache. Stir in the final touch of peppermint extract.
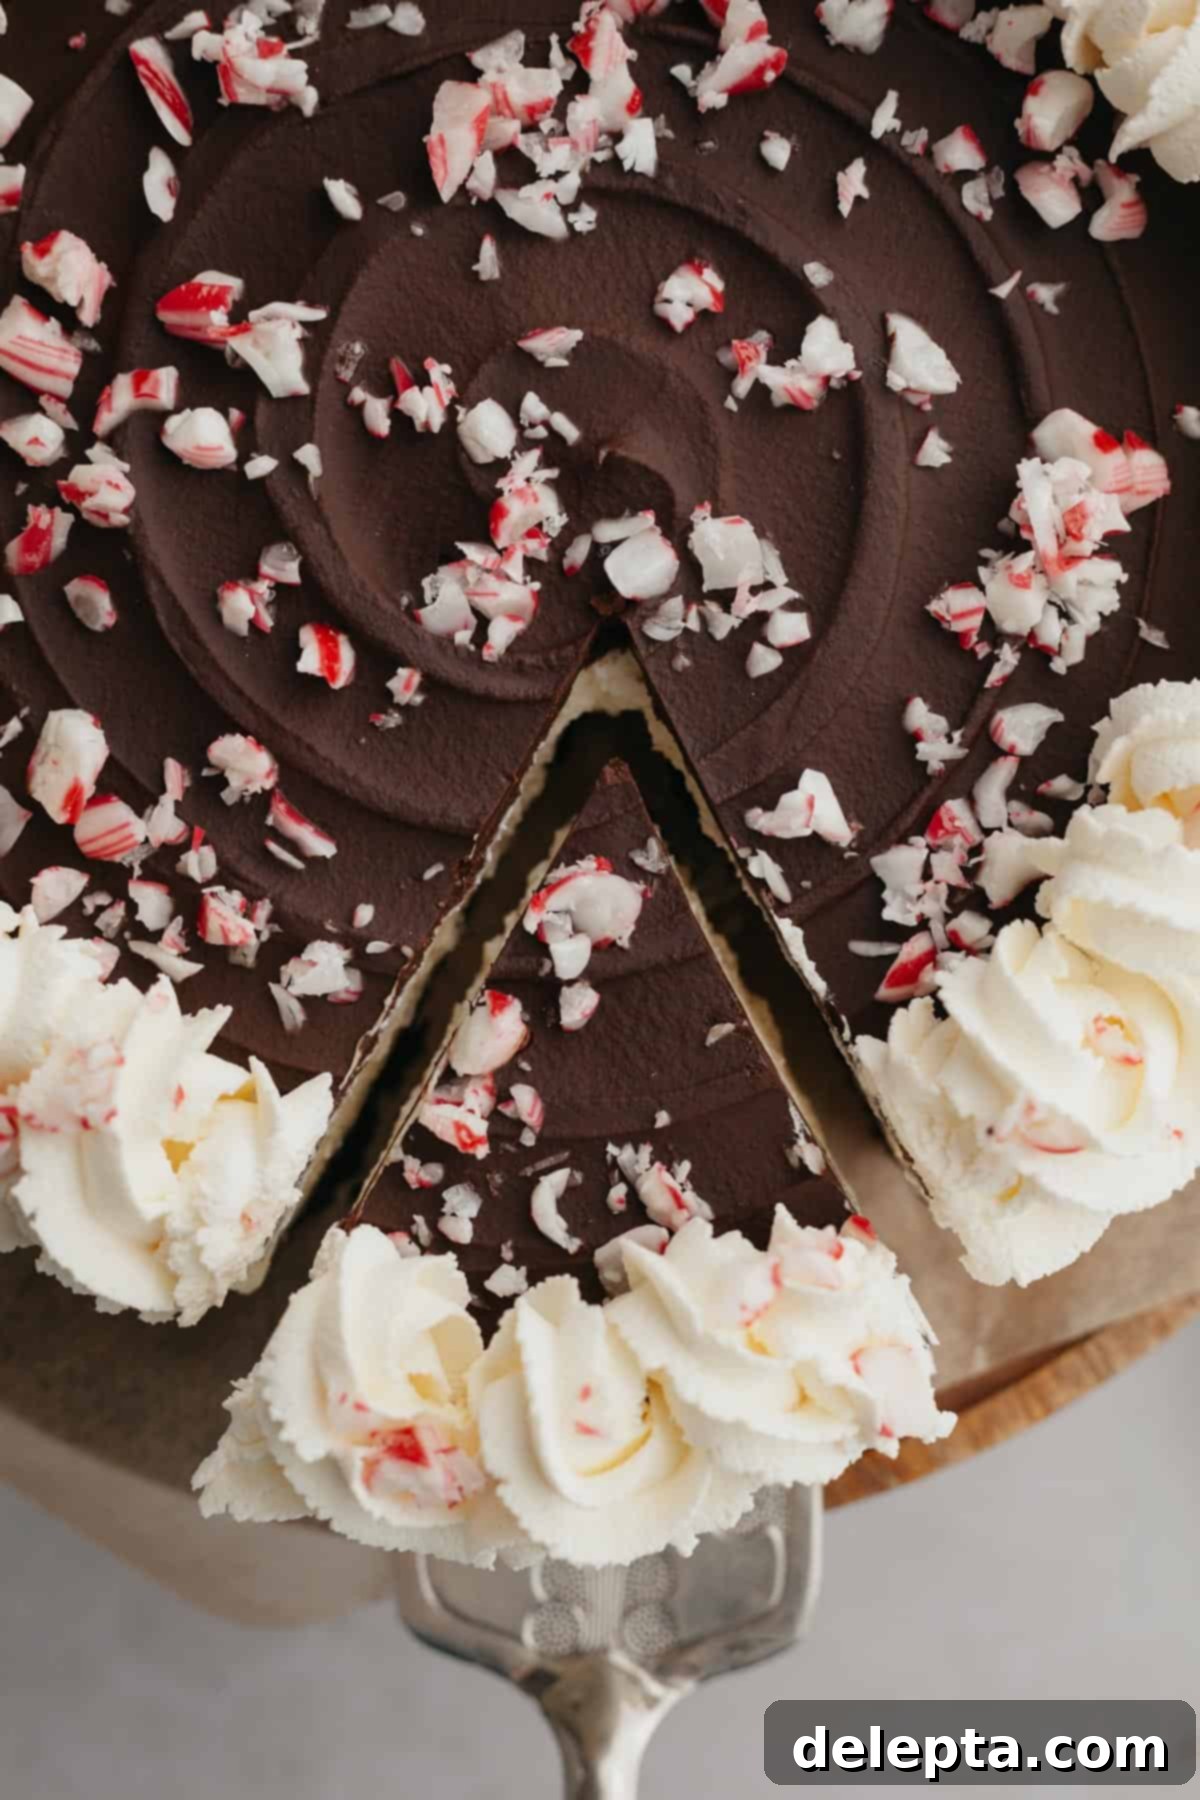
Step 6: Finish and Decorate. Once your cheesecake has thoroughly chilled overnight and is firm, carefully remove the sides of the springform pan. Position the cheesecake on your desired serving plate. Pour the warm (but not hot) chocolate ganache over the top of the cheesecake. Use a small offset spatula to gently spread the ganache evenly, covering the entire surface. While the ganache is still wet and before it sets, generously sprinkle the crushed candy canes over the top. For an extra festive touch, you can optionally whip a separate cup of heavy cream to stiff peaks and pipe a decorative border around the edge of the cheesecake using a piping bag fitted with a Wilton 1M tip. Serve your beautifully crafted peppermint bark cheesecake and enjoy!
Expert Tips & Tricks for a Perfect Peppermint Bark Cheesecake
Achieving a flawless no-bake cheesecake is easy when you keep these crucial tips in mind. They’ll help ensure your dessert is a triumph every time.
- Accurate Measuring is Key: For consistent and professional-level baking results, I cannot emphasize enough the importance of using a digital kitchen scale. Measuring your ingredients, especially flour and sugar, the metric way (by weight) is significantly more accurate than using volumetric cups. This precision makes a huge difference in the final texture and consistency of your cheesecake.
- Embrace the Chilling Time: Patience is truly a virtue with no-bake cheesecakes. While it might be tempting to slice into your masterpiece sooner, I’ve rigorously tested this recipe, and a minimum of 12 hours (preferably overnight) of chilling time is absolutely essential. Cheesecakes chilled for only 6 hours tend to be less set and won’t yield those beautifully clean, firm slices. The longer chill allows all the ingredients to fully firm up and flavors to meld perfectly.
- Room Temperature for Most Ingredients: For the smoothest, lump-free cheesecake filling, ensure all your dairy ingredients (cream cheese and sour cream) are at room temperature before you begin mixing. Cold cream cheese can result in a lumpy texture that’s hard to rectify. Plan ahead and pull these ingredients from the fridge an hour or two before you start the recipe. The only exception is heavy cream, which should be kept very cold for optimal whipping.
- Achieving Clean Slices: For presentation-perfect slices, always use a sharp, thin-bladed knife. Here’s the trick: dip the knife in hot water and wipe it clean with a paper towel between every single slice. This prevents the cheesecake from sticking to the blade and ensures each piece is pristine and beautifully defined.
- Piping for a Professional Finish: If you wish to add a decorative touch, piping fresh whipped cream along the sides of the cheesecake can elevate its appearance dramatically. I typically use a Wilton 1M star piping tip and a sturdy piping bag. The contrast of the light, airy cream with the rich cheesecake is both visually appealing and texturally delightful.
- Efficiently Crushing Candy Canes: To get perfectly crushed candy canes for your topping, you have a couple of easy options. You can either place them in a food processor and pulse until they reach your desired consistency (avoid over-processing into a fine powder) or, for a more hands-on method, place them in a sturdy Ziploc bag, seal it, and crush them with a rolling pin or the flat side of a meat mallet. This method allows for varying sizes, adding interesting texture.
Frequently Asked Questions About This No-Bake Peppermint Bark Cheesecake
Yes, absolutely! You can adjust the pan size if needed. If you opt for an 8-inch springform pan, your cheesecake will be noticeably taller and thicker, offering a more substantial slice. Conversely, if you use a 10-inch pan, the cheesecake will be slightly thinner. Keep in mind that a thinner cheesecake might set a little faster, while a thicker one will require the full recommended chilling time (or even a bit longer) to ensure it’s perfectly firm throughout.
Yes, and it’s highly recommended! This no-bake peppermint bark cheesecake is an ideal make-ahead dessert, perfect for holiday entertaining. I suggest preparing the cheesecake base and filling at least one to two days in advance. This extended chilling time allows the flavors to deepen and the cheesecake to set beautifully, ensuring firm, clean slices. The chocolate ganache topping can be added a few hours before serving, as it will need about an hour to fully set on the chilled cheesecake. This flexibility makes holiday meal planning much smoother.
Proper storage is key to keeping your cheesecake fresh and delicious. Store the no-bake peppermint bark cheesecake in an airtight container or tightly wrapped with plastic wrap in the refrigerator. It will stay fresh and delightful for up to 5 days. Unfortunately, this cheesecake does not freeze well due to its creamy, no-bake filling, as freezing and thawing can significantly alter its texture.
The Perfect Holiday Flavor Profile
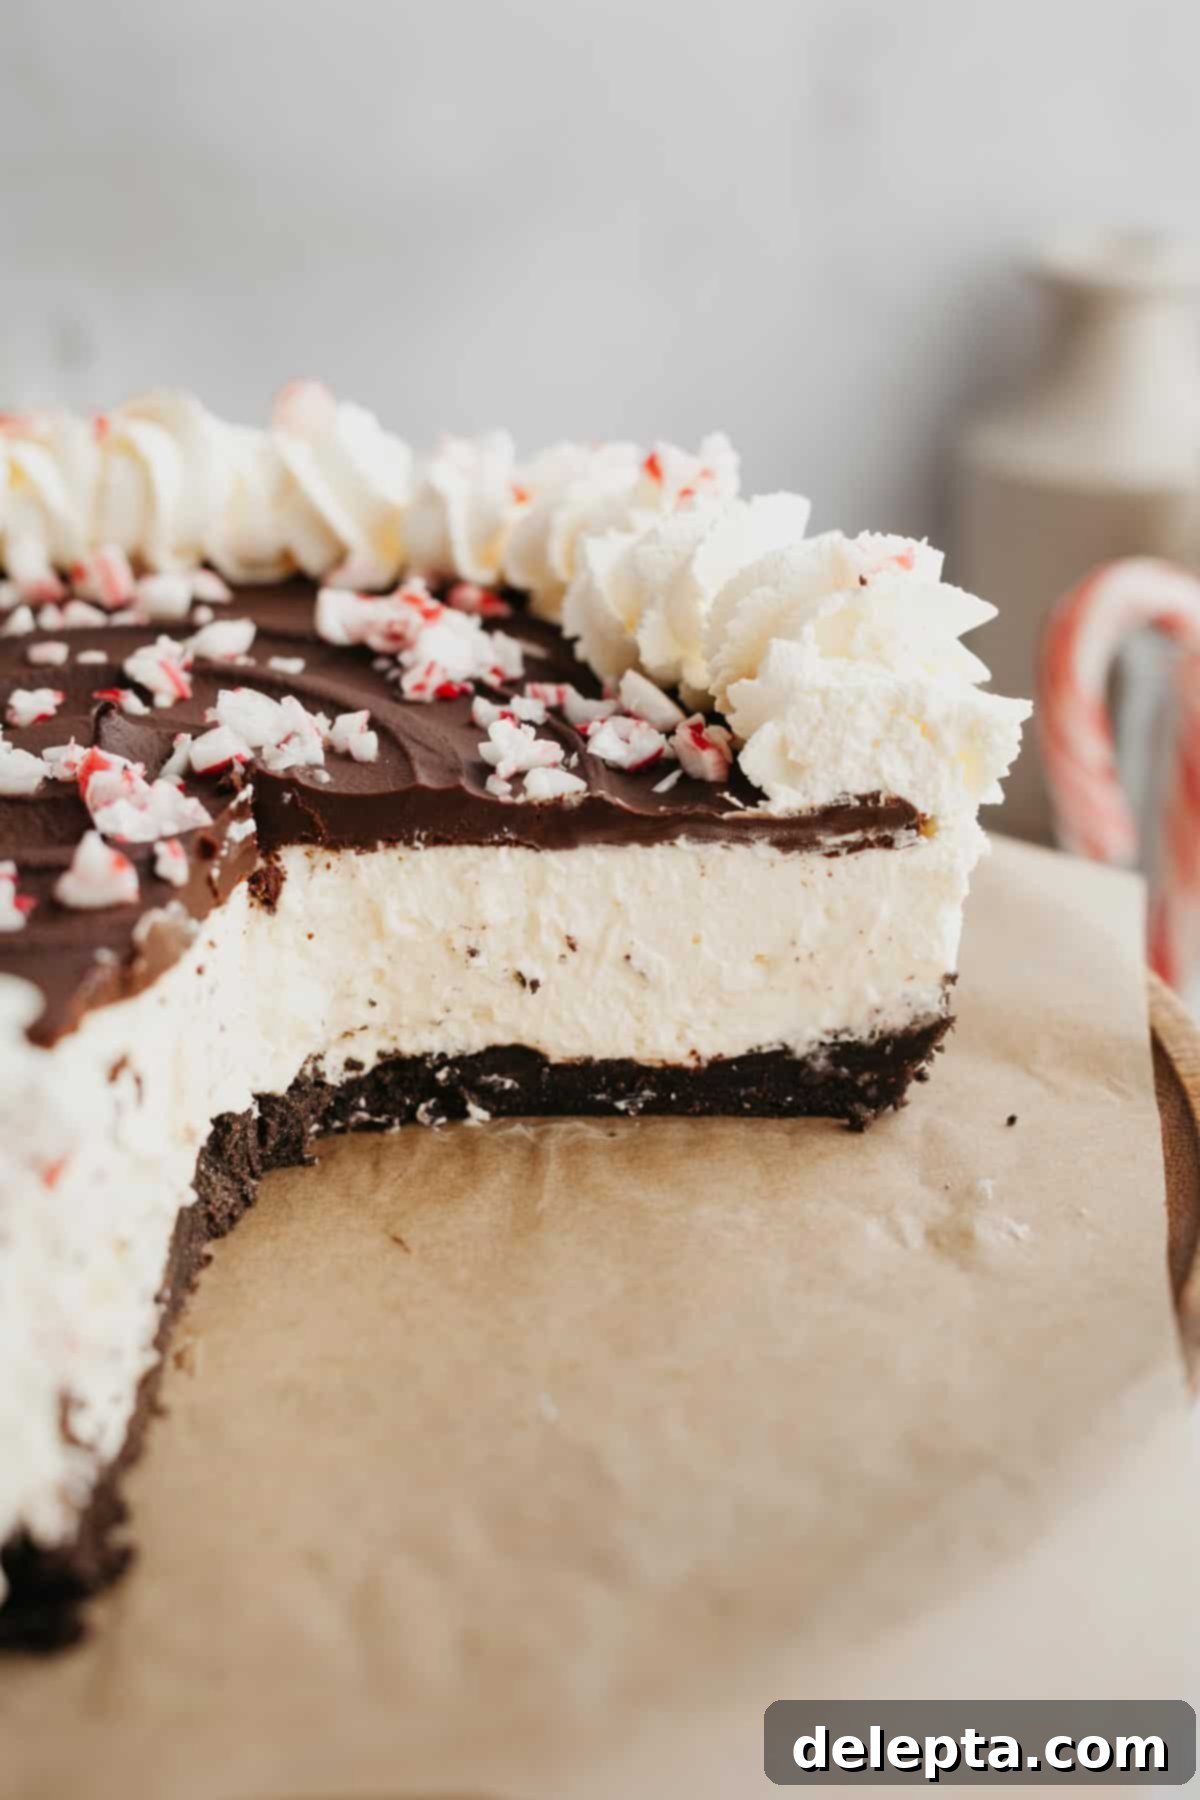
Every bite of this peppermint bark cheesecake is a celebration of classic holiday flavors, meticulously layered to create a truly unforgettable dessert experience. The journey begins with the rich, chocolatey crunch of the Oreo crust, offering an irresistible textural and flavor base. This gives way to the velvety, smooth white chocolate filling, a sweet and creamy canvas infused with a refreshing burst of peppermint. It’s a harmonious blend where the cool essence of mint perfectly complements the luxurious sweetness of white chocolate, balanced by the subtle tang of cream cheese that cuts through the richness. The grand finale is the semi-sweet chocolate ganache topping, which adds a deeper, more intense chocolate note, perfectly contrasted by the sweet and crunchy crushed candy canes. This dessert is designed to delight all your senses and evoke the festive spirit of the holiday season with every delicious mouthful.
Customization and Creative Variations
While this recipe for no-bake peppermint bark cheesecake is exquisite as is, it’s also wonderfully adaptable, allowing you to easily customize it to your personal taste or creative vision. Don’t hesitate to experiment and make it uniquely yours!
- Explore Different Chocolates: For the top ganache layer, consider swapping the semi-sweet chocolate for milk chocolate if you prefer a sweeter, creamier topping. Alternatively, a very dark chocolate (70% cocoa or higher) will provide a more intense, less sweet contrast that beautifully highlights the peppermint. You could even use white chocolate for the bark, creating a strikingly elegant, all-white and red aesthetic that’s incredibly festive.
- Alternative Crusts: If Oreos aren’t your favorite, this cheesecake is equally delicious with other crust options. A classic graham cracker crust offers a buttery, slightly nutty base, while a digestive biscuit crust (popular in the UK) provides a similar effect. Simply ensure you maintain the same ratio of crushed crumbs to melted butter for a sturdy foundation.
- Amp Up the Chocolate Inside: For the ultimate chocolate-peppermint fusion, consider folding a generous handful of mini chocolate chips or finely chopped chocolate into the peppermint white chocolate cheesecake filling before you chill it. This adds delightful pockets of extra chocolate intensity throughout each slice.
- Diverse Topping Ideas: Beyond the traditional crushed candy canes, you can get creative with additional garnishes. Chocolate curls made from a bar of chocolate, a delicate drizzle of complementary chocolate sauce, or even a sprinkle of edible glitter can add extra sparkle and sophistication, perfect for holiday gatherings.
- Artistic Peppermint Swirls: For a truly striking visual effect on your topping, try this trick: after pouring the ganache over the chilled cheesecake, place the cheesecake on a cake turntable. Using a small offset spatula or even a thin skewer, gently turn the turntable while lightly dragging the spatula or skewer in a spiral motion across the ganache before it sets. This creates beautiful, mesmerizing swirls that mimic traditional peppermint bark patterns.
Discover More Festive Holiday Recipes!
If you’re in the mood for more delicious holiday treats that are sure to delight, here are some other fantastic recipes to add to your festive baking repertoire:
- Christmas Cookie Fudge
- Peppermint Bark Brownies
- No Spread Sugar Cookies
- Cream Cheese Spritz Cookies
Have you made this delightful No-Bake Peppermint Bark Cheesecake? Please take a moment to rate the recipe below! We love seeing your culinary creations. Don’t forget to follow me on Instagram @alpineella and Pinterest to share your masterpieces and stay updated with more delicious recipes!
Recipe
Decadent No-Bake Peppermint Bark Cheesecake
Ella Gilbert
Pin Recipe
Save RecipeSaved!
Equipment
-
9″ springform pan
-
Food Processor or Blender
-
Stand Mixer or Handheld Mixer
-
Rubber Spatula
-
Small Saucepan
-
Offset Spatula (optional for ganache)
-
Piping Bag & Wilton 1M Tip (optional for whipped cream)
Ingredients
For the Oreo Cheesecake Crust
- 2 cups Oreo cookies finely crushed
- 1 stick unsalted butter melted
For the Peppermint White Chocolate Filling
- 2 cups heavy cream very cold
- 16 oz cream cheese full-fat, room temperature
- ¼ cup sour cream full-fat, room temperature
- 1 cup confectioners’ sugar sifted
- 4 oz white chocolate melted and slightly cooled
- ¾ teaspoon peppermint extract
For the Peppermint Bark Topping
- 6 oz semi-sweet chocolate finely chopped
- ½ cup heavy cream
- ¼ teaspoon peppermint extract
- 3 candy canes crushed, for sprinkling
For Optional Whipped Cream Garnish
- 1 cup heavy cream cold, for whipping
Instructions
Prepare the Oreo Crust
-
In a large mixing bowl, combine your finely crushed Oreo crumbs with the melted butter. Stir thoroughly until all the crumbs are uniformly moist, ensuring there are no dry patches remaining. This creates a cohesive crust.2 cups Oreo cookies, 1 stick unsalted butter
-
Pour the buttered crumbs into a 9-inch springform pan. Use a rubber spatula or the bottom of a measuring cup to firmly press the crumbs down into an even, compact layer. Extend the crumbs slightly up the sides of the pan to create a defined edge. Place the pan in the freezer for at least 20 minutes to allow the crust to firm up.
Make the Cheesecake Filling
-
In the bowl of a stand mixer fitted with the whisk attachment (or using a handheld electric mixer), whisk the very cold heavy cream on medium-high speed for about 5 minutes, or until stiff peaks form. Set the whipped cream aside in the refrigerator.2 cups heavy cream
-
Switch to the paddle attachment on your stand mixer. Beat the room temperature cream cheese on medium speed until it is completely smooth and fluffy, with no lumps at all.16 oz cream cheese
-
To the smooth cream cheese, add the sifted confectioners’ sugar, the slightly cooled melted white chocolate, room temperature sour cream, and peppermint extract. Beat on medium-high speed until all ingredients are fully incorporated and the mixture is smooth and creamy.¼ cup sour cream, 1 cup confectioners’ sugar, 4 oz white chocolate, ¾ teaspoon peppermint extract
-
Using a rubber spatula, very gently fold the reserved whipped cream into the cream cheese mixture until it is just combined. Be careful not to deflate the whipped cream, as this maintains the light and airy texture of the cheesecake.
-
Pour the cheesecake filling into your chilled Oreo crust in the springform pan. Use a small offset spatula to smooth out the top evenly. Cover the cheesecake tightly with plastic wrap, ensuring the plastic film touches the surface of the cheesecake to prevent condensation. Chill in the fridge overnight (12 hours is ideal) to allow it to set completely. Once fully chilled, carefully remove the sides of the springform pan.
Assemble the Peppermint Bark Topping
-
Place the finely chopped semi-sweet chocolate in a medium, heatproof bowl.6 oz semi-sweet chocolate
-
In a small saucepan, gently bring the heavy cream to a simmer over medium-low heat. As soon as tiny bubbles appear around the edges, remove it from the heat and pour it directly over the chopped chocolate.½ cup heavy cream
-
Allow the cream and chocolate to sit undisturbed for 2 minutes to melt. Then, use a rubber spatula to gently stir the mixture until it is completely smooth and glossy, forming a rich ganache. Stir in the peppermint extract.¼ teaspoon peppermint extract
-
Once the cheesecake is removed from the springform pan, pour the warm (but not hot) chocolate ganache over the top. Use an offset spatula to spread the ganache evenly, covering the entire surface of the cheesecake. While the ganache is still wet, generously sprinkle your crushed candy canes over the top.3 candy canes
Optional Whipped Cream Garnish
-
Just before serving, pour your cold heavy cream into a medium mixing bowl. Use a handheld electric mixer or a stand mixer with the whisk attachment to whisk the cream until stiff peaks form.1 cup heavy cream
-
Carefully transfer the whipped cream into a piping bag fitted with your desired tip (a Wilton 1M star tip works wonderfully for this). Pipe decorative rosettes or a continuous border all along the sides of the cheesecake. For an extra festive touch, you can sprinkle over a few more crushed candy canes if desired. Serve immediately and enjoy!
Notes
Heavy Cream (UK equivalent): If you are based in the United Kingdom, please use double cream as the equivalent to heavy cream for whipping and ganache.
Achieving Room Temperature: It’s crucial for the cream cheese and sour cream to be at true room temperature before you begin assembling the cheesecake filling. This ensures a perfectly smooth, lump-free mixture that will set beautifully. Remember to pull these ingredients out of the fridge at least an hour or two before you plan to start the recipe.
Cream Cheese Moisture (for UK/European tubs): If you are located in the UK, Europe, or any region where cream cheese is typically sold in tubs, it often has a higher moisture content than the block cream cheese commonly found in North America. To compensate, just before you start the recipe, place your cream cheese in a bowl and gently press a piece of kitchen roll or paper towel on top to absorb any excess moisture. This vital step helps prevent a runny cheesecake filling.
Efficiently Crushing Candy Canes: For the ideal crushed candy cane topping, you have a couple of options. You can easily crush them in a food processor for speed and uniformity, or for a more traditional approach, place them in a sturdy ziploc bag and use a rolling pin to crush them to your desired consistency. Aim for a mix of fine and slightly chunkier pieces for the best texture and visual appeal.
Creating Peppermint Bark Swirls (Optional): To achieve those beautiful, artistic swirls on your cheesecake topping, a cake turntable can be very helpful. Once you’ve poured the chocolate ganache over the chilled cheesecake, place the cheesecake on the turntable. Use a small offset spatula or even a thin skewer to gently touch the surface of the ganache and slowly turn the cheesecake, creating a mesmerizing spiral effect before the ganache fully sets.
Peppermint vs. Mint Extract: It’s important to use genuine peppermint extract for this recipe, not just generic mint extract. Peppermint extract provides that distinct, refreshing, and sweet holiday flavor, whereas mint extract can sometimes impart a taste reminiscent of toothpaste, which is not what we want in our delicious cheesecake!
Storage Guidelines: Always keep your no-bake peppermint bark cheesecake in an airtight container or tightly wrapped with plastic wrap in the refrigerator. It will maintain its freshness and delightful flavor for up to 5 days. Please note that this particular cheesecake recipe does not freeze well, as the texture can become compromised upon thawing.
Nutrition
