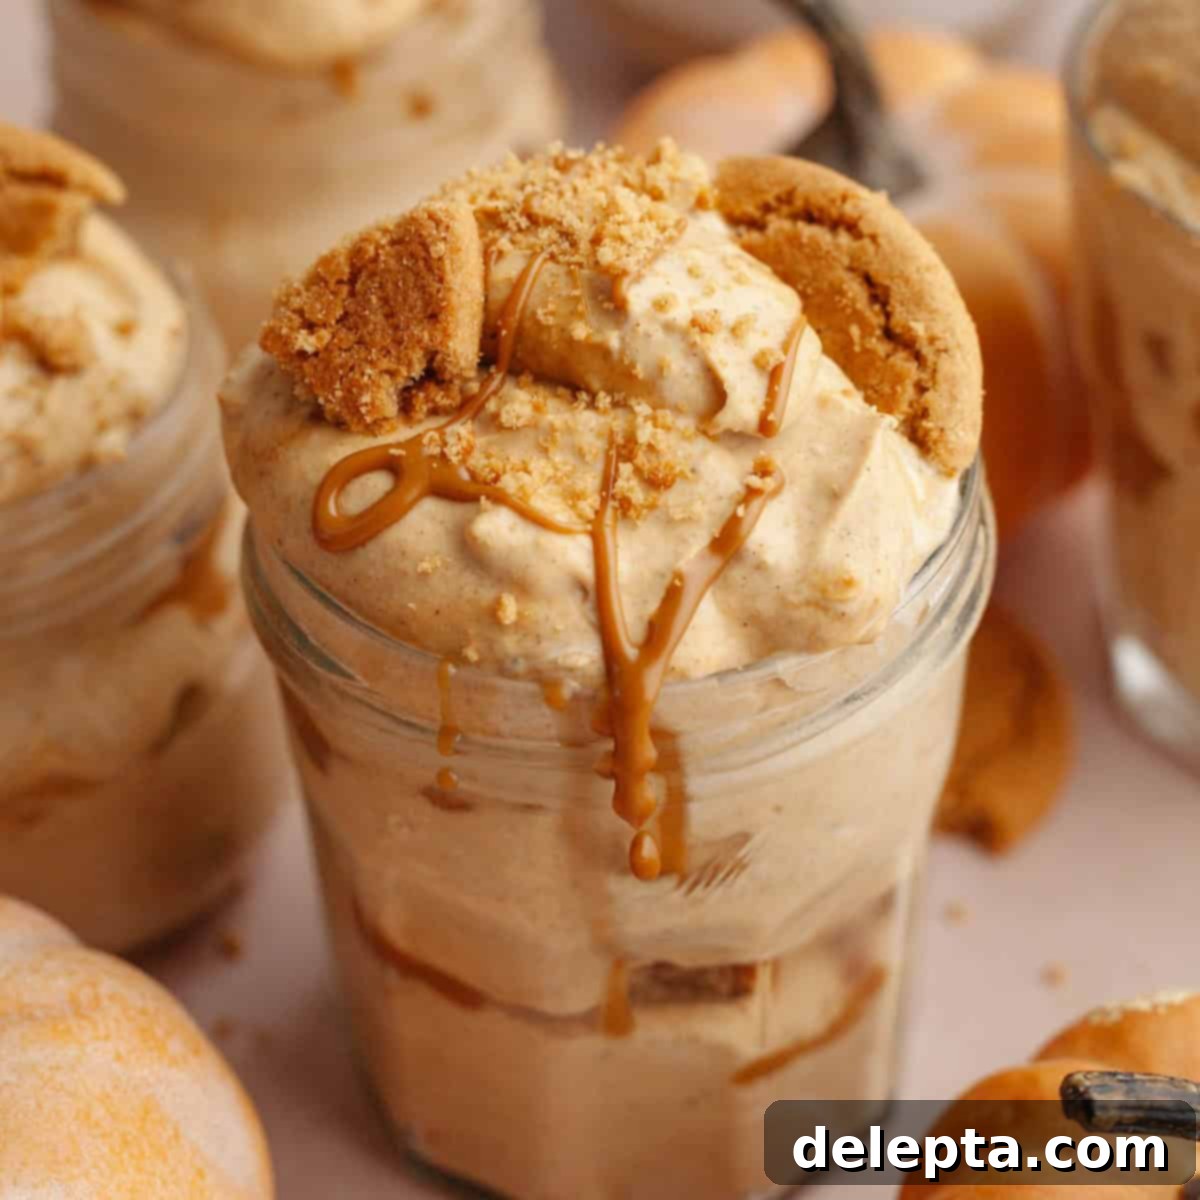
Easy No-Bake Pumpkin Pie Cups with Gingersnap & Cookie Butter
Get ready to indulge in the most delightful fall treat: these homemade, no-bake pumpkin pie cups! Imagine all the rich, spiced flavors of a classic pumpkin pie, but presented in charming, individual cups – perfect for easy serving and impressive presentation. Our recipe features a creamy, luxurious pumpkin pudding base, generously layered with crisp gingersnap cookies and decadent, melted cookie butter. This is not just any pumpkin dessert; it’s a tribute to the famous pumpkin spice pudding from Magnolia Bakery, elevated with our unique touch. Best of all, it’s a simple, no-bake creation, meaning you can enjoy a sophisticated dessert without ever turning on your oven. Ideal for a cozy fall dinner party, a festive Halloween gathering, or as a fresh and fun twist on traditional Thanksgiving desserts!
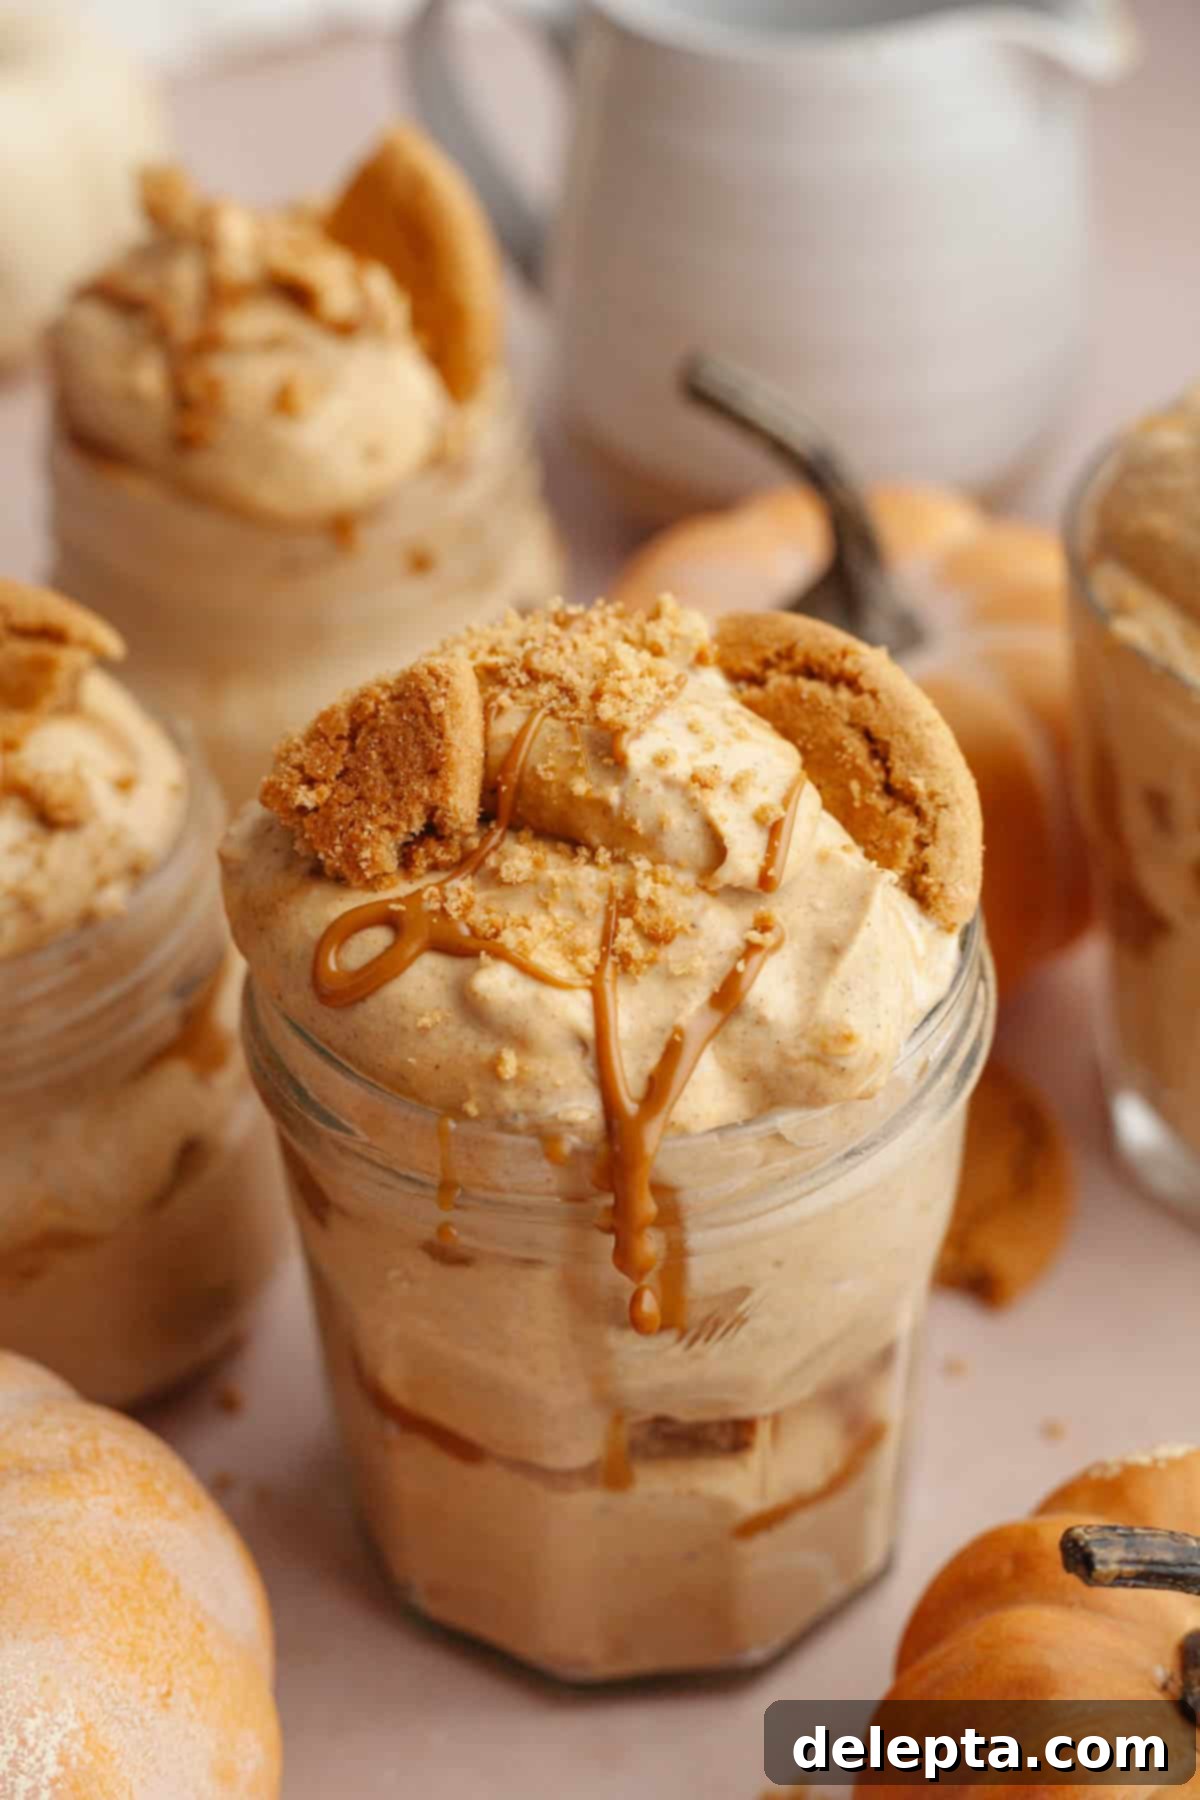
A couple of years ago, I embarked on a culinary pilgrimage to the iconic Magnolia Bakery in New York City. Among their array of tempting treats, one stood out and captivated my senses: their legendary pumpkin spice pudding. It was an unforgettable experience, much like their famous banana pudding, but ingeniously crafted with a luscious pumpkin pudding, swirled with Biscoff cookie butter, and layered with delicate cookies. The moment I tasted it, I was completely obsessed and knew instantly that I had to recreate that magical flavor combination in my own kitchen.
This recipe is my loving recreation, inspired by that unforgettable experience. Drawing on the foundational vanilla pudding from my popular banana pudding in a jar recipe, I infused it with rich pumpkin, added a generous amount of warm-spiced gingersnap cookies, and drizzled in plenty of velvety melted cookie butter. The result exceeded my expectations! Even my father-in-law, who is famously hesitant about pumpkin-flavored desserts, couldn’t stop raving about these pumpkin pie cups. His enthusiastic approval truly sealed the deal – this recipe is a winner and sure to become a new family favorite!
If your heart still yearns for the comforting tradition of a classic pumpkin pie, don’t worry! I have you covered with my beloved pumpkin custard pie or my pumpkin pie with a graham cracker crust. For those who appreciate the convenience of no-bake desserts as much as I do, my no-bake pumpkin cheesecake bars offer another fantastic, oven-free pumpkin treat that’s perfect for any occasion.
Why You’ll Fall in Love with These No-Bake Pumpkin Pie Cups!
- Effortless No-Bake Delight: One of the biggest advantages of this recipe is that it requires absolutely no oven time! This is a game-changer, especially during busy holiday seasons like Thanksgiving, when oven space is often at a premium. You’ll only need a pot and your stove to create the incredibly creamy pumpkin pudding filling. This makes it a fantastic, stress-free dessert option, perfect for novice bakers and seasoned pros alike. Enjoy a decadent pumpkin treat without the fuss of baking a crust or worrying about cracking pies!
- Perfect for Making Ahead: This is an ideal dessert for entertaining because it requires significant chilling time to set properly. You can easily prepare these pumpkin pie cups a day or even two days in advance, allowing the flavors to meld beautifully and intensify. This makes your dinner party or holiday gathering much more relaxed, as you can focus on other preparations knowing your show-stopping dessert is already chilling to perfection. The make-ahead nature also makes them fantastic for gifting or potlucks.
- Irresistibly Homemade Goodness: Unlike many store-bought or shortcut puddings that rely on mixes, Cool Whip, or sweetened condensed milk, our recipe celebrates the rich flavor of homemade pumpkin pudding. By making the pudding from scratch, you gain complete control over the quality of ingredients and the depth of flavor. This results in a superior, more authentic taste and a wonderfully silky texture that simply can’t be replicated with pre-made components. You’ll be proud to serve this truly homemade masterpiece!
- Portion Control and Easy Serving: Serving individual dessert cups eliminates the need for slicing and struggling with a whole pie. Each guest receives their perfectly portioned, beautifully layered treat, making cleanup and distribution a breeze. They’re also incredibly portable, perfect for picnics, lunchboxes, or bringing to a friend’s house.
- A Fun & Unique Twist on Tradition: While classic pumpkin pie will always hold a special place in our hearts, these pumpkin pie cups offer an exciting, modern, and delightful alternative. They capture all the beloved flavors of fall in an innovative, engaging format that’s sure to impress and surprise your guests. It’s a nostalgic taste with a fresh presentation!
Gather Your Essential Ingredients for Pumpkin Pie Perfection
Creating these sensational no-bake pumpkin pie cups starts with a selection of fresh, high-quality ingredients. Here’s a detailed look at what you’ll need and why each component is crucial for achieving that irresistible flavor and texture:
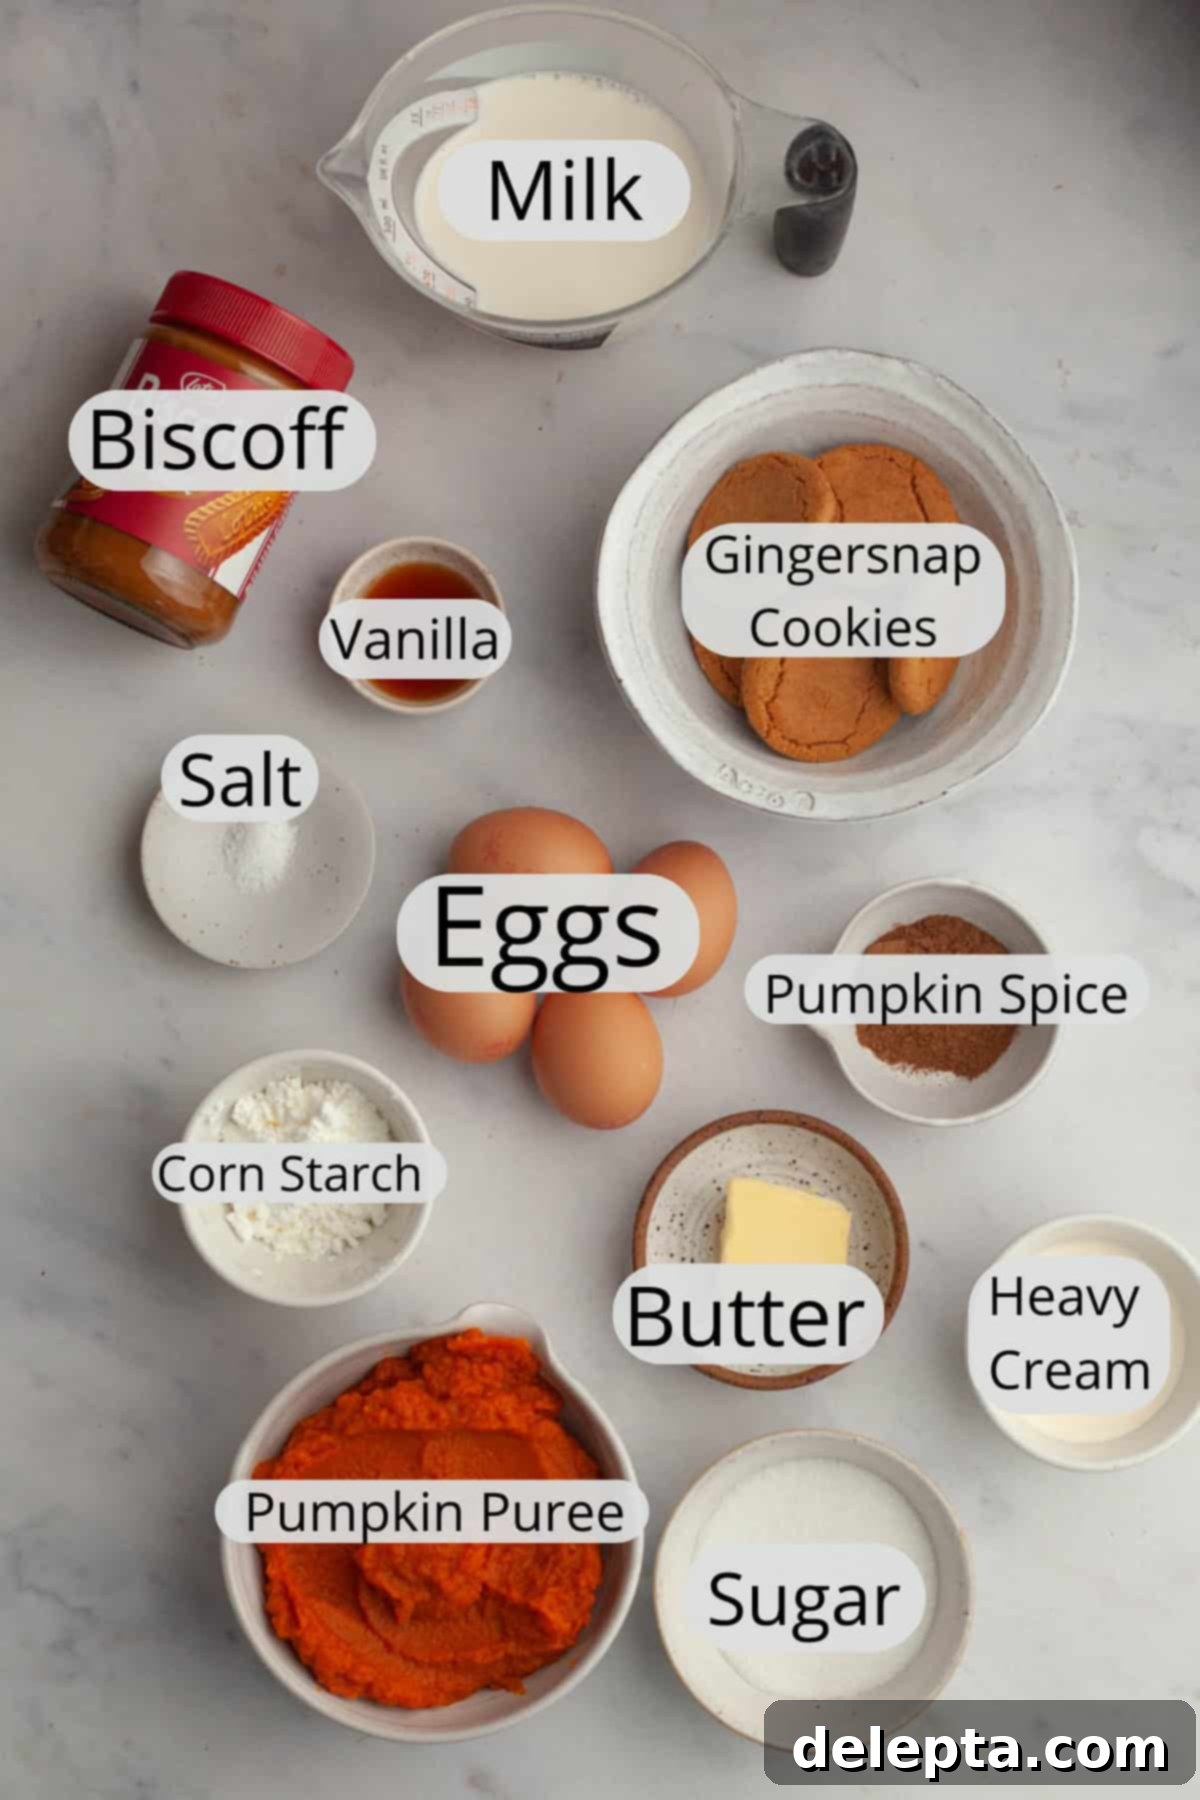
- Canned Pumpkin Puree: Naturally, you can’t have delicious pumpkin pie in a cup without the star ingredient! It’s crucial to use 100% pure pumpkin puree. Double-check the label to ensure you’re not accidentally grabbing pumpkin pie filling, which already contains added sugars and spices that would throw off the balance of this recipe. Pumpkin puree allows us to control the exact amount of sweetness and spice. While I prefer canned for consistency, I haven’t specifically tested this recipe with homemade pumpkin puree, so results may vary.
- Large Egg Yolks: These are vital for our homemade pudding. The egg yolks act as a primary thickening agent, contributing to the pudding’s rich, smooth, and custardy texture. They also enhance the overall flavor and add a beautiful golden hue. For best results, ensure your egg yolks are at room temperature before mixing to prevent curdling and ensure even incorporation.
- Granulated Sugar: This provides the perfect level of sweetness, balancing the earthy pumpkin and warm spices. Granulated sugar dissolves easily, creating a smooth pudding. Feel free to adjust the amount slightly to suit your personal sweetness preference.
- Cornstarch: Working in conjunction with the egg yolks, cornstarch provides additional thickening power, ensuring your pudding achieves that desirable firm yet creamy consistency. In some regions, you might find this labeled as corn flour. Make sure to whisk it well to avoid any lumps!
- Kosher Salt: Just a small amount of kosher salt is essential. It doesn’t make the dessert salty; rather, it brightens and intensifies all the other flavors, making the pumpkin and spices truly sing. If using fine table salt, remember to halve the amount.
- Heavy Cream & Whole Milk: This dynamic duo forms the rich, liquid base of our pudding. Heavy cream adds luxurious richness and a silky mouthfeel, while whole milk helps to achieve the perfect consistency. You’ll also use a separate portion of heavy cream to whip up a batch of fresh, airy whipped cream for topping, adding another layer of creamy texture. Using whole milk is recommended for the best flavor and texture.
- Vanilla Extract: A touch of pure vanilla extract elevates all the other flavors, adding a subtle warmth and aromatic depth to the pumpkin pudding. Use a good quality extract for the best results.
- Pumpkin Pie Spice: This is where the magic happens! A blend of cinnamon, nutmeg, ginger, and cloves, pumpkin pie spice is what truly gives the pudding its signature fall flavor profile. You can readily find it at most grocery stores, especially during autumn. Alternatively, if you’re feeling ambitious, you can easily make your own homemade version. I often turn to this pumpkin pie spice recipe for a reliable blend.
- Unsalted Butter: A small amount of unsalted butter is whisked in at the end, adding a touch of richness, gloss, and a silky finish to the pudding. It also contributes to the overall indulgent flavor.
- Gingersnap Cookies: These spicy, crunchy cookies are a star component. I specifically chose gingersnap cookies because that’s what Magnolia Bakery used when I visited, and their robust, warm spices perfectly complement the pumpkin pie spice in the pudding. The contrast between the creamy pudding and the crunchy cookie layers is absolutely divine and truly one of the best parts of this dessert!
- Cookie Butter: Whether it’s Biscoff or another brand, melted cookie butter adds a unique, caramelized, and slightly spicy sweetness that pairs incredibly well with pumpkin. Its smooth, rich texture and distinct flavor create a ribbon of deliciousness throughout the cups.
Creative Substitutions & Delicious Additions
While this recipe is perfect as is, feel free to get creative and customize your no-bake pumpkin pie cups to suit your preferences or what you have on hand!
- Cookie Alternatives: Not a fan of gingersnaps, or just looking for a different crunch? No problem! You can easily swap them out for other delicious cookies like classic Nilla wafers, buttery shortbread cookies, spiced Biscoff cookies (which would bring it even closer to the Magnolia Bakery original), or even traditional graham crackers for a more classic pie crust flavor. For a gluten-free option, use your favorite gluten-free crunchy cookies.
- Cookie Butter Swaps: If cookie butter isn’t your favorite, or if you simply don’t have it on hand, you can certainly leave it out. However, if you’re looking for an alternative drizzle, consider warm caramel sauce, a melted drizzle of white chocolate, or even a simple sprinkle of cinnamon sugar or ground nutmeg for added spice. A spoonful of maple syrup can also add a lovely autumnal sweetness.
- Nutty Additions: For an extra layer of texture and flavor, try sprinkling finely chopped and toasted pecans, walnuts, or even candied almonds between the layers or on top. The nuttiness pairs beautifully with pumpkin.
- Chocolate Lover’s Twist: A sprinkle of mini chocolate chips or finely shaved dark chocolate could add a wonderful richness and a slight bitterness to balance the sweetness.
- Extra Spice: If you love a bolder spice profile, consider adding a pinch of ground ginger or cinnamon directly into the whipped cream for an extra kick.
- Citrus Zest: A tiny bit of orange or lemon zest folded into the pudding could add a bright, fresh note that cuts through the richness.
Crafting Your No-Bake Pumpkin Pie Cups: A Step-by-Step Guide
Making these delicious no-bake pumpkin pie cups is surprisingly simple, primarily involving cooking a rich, creamy pudding on the stovetop and then assembling the layers. Follow these detailed steps to achieve perfect results every time:
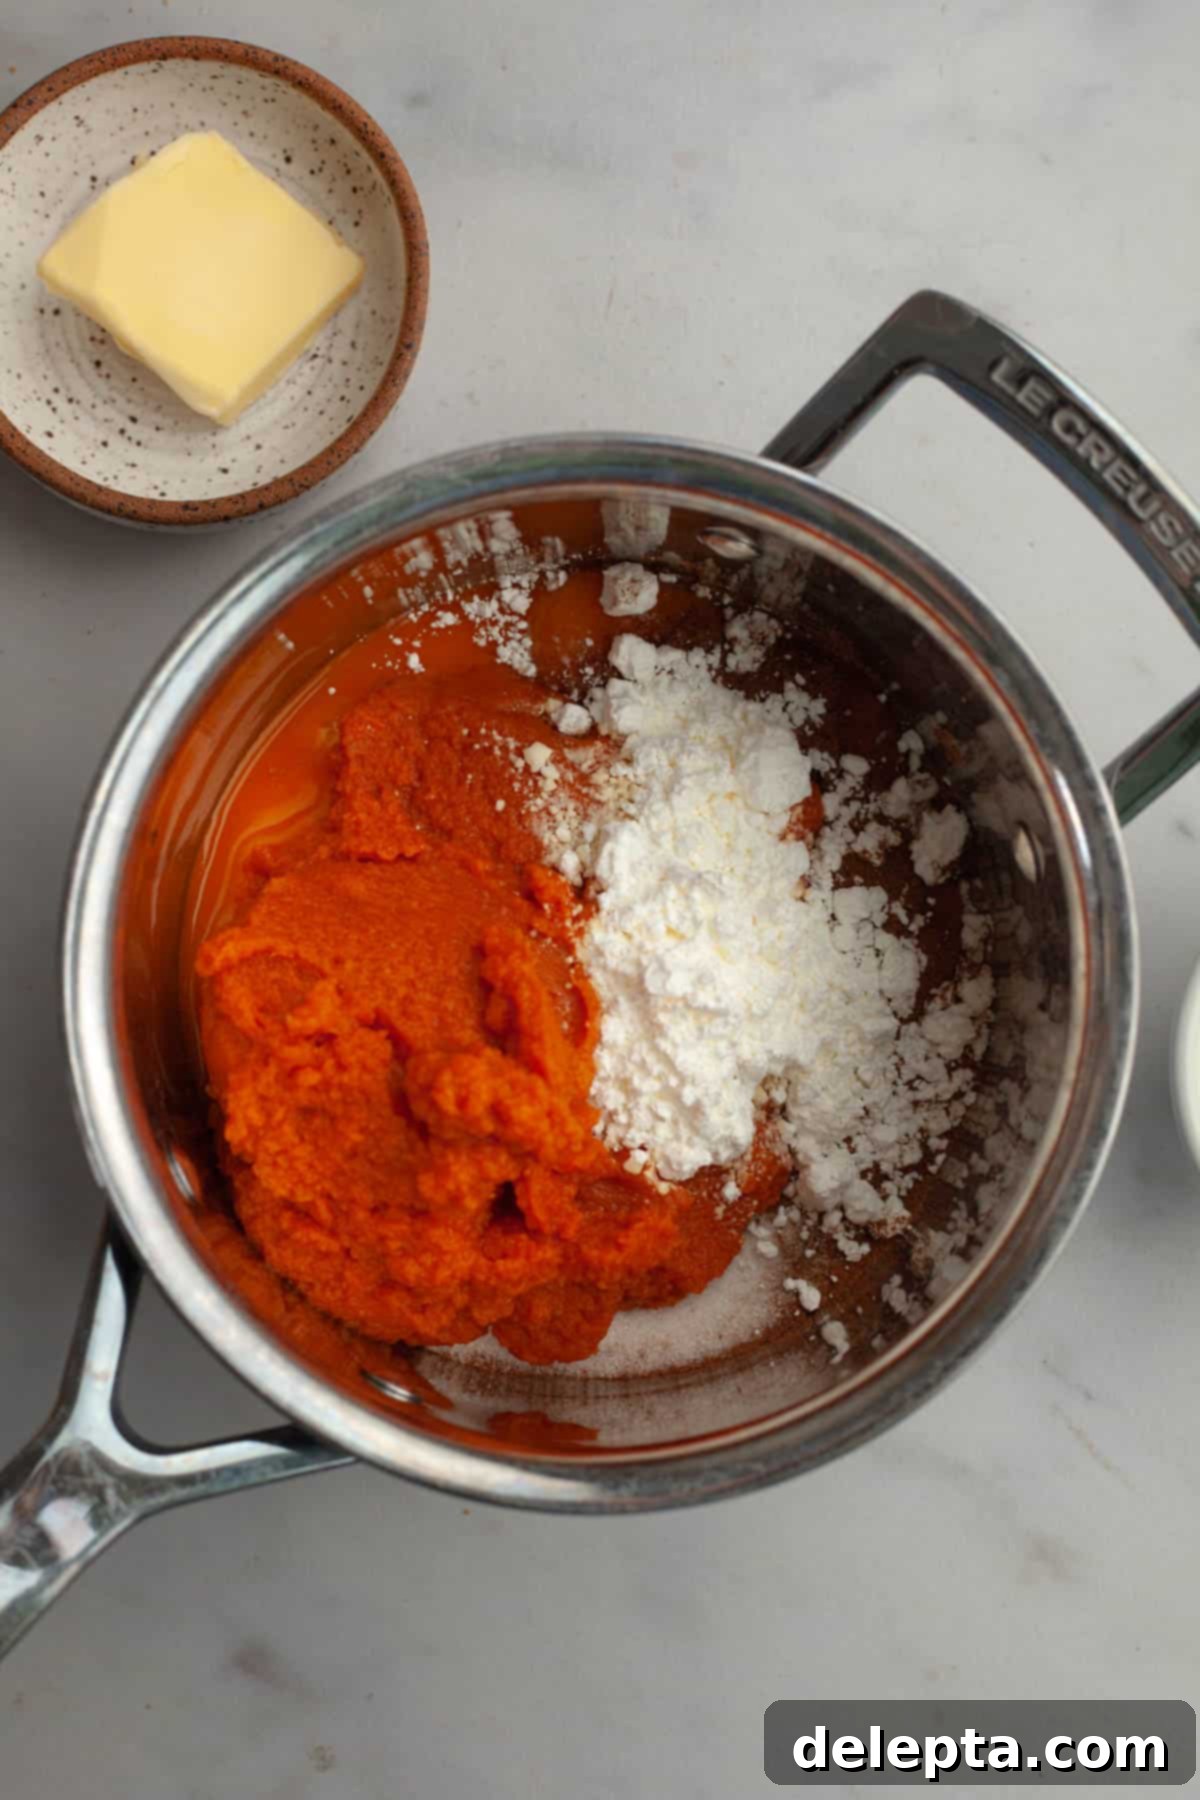
- Step 1: Prepare the Base Mixture. In a medium-sized, heavy-bottomed saucepan (this helps prevent scorching), combine your granulated sugar, kosher salt, room temperature egg yolks, 100% pumpkin puree, pumpkin pie spice, and cornstarch. Whisk these ingredients vigorously until the mixture is completely smooth and free of any lumps. This initial whisking is key to ensuring a silky-smooth pudding later on.
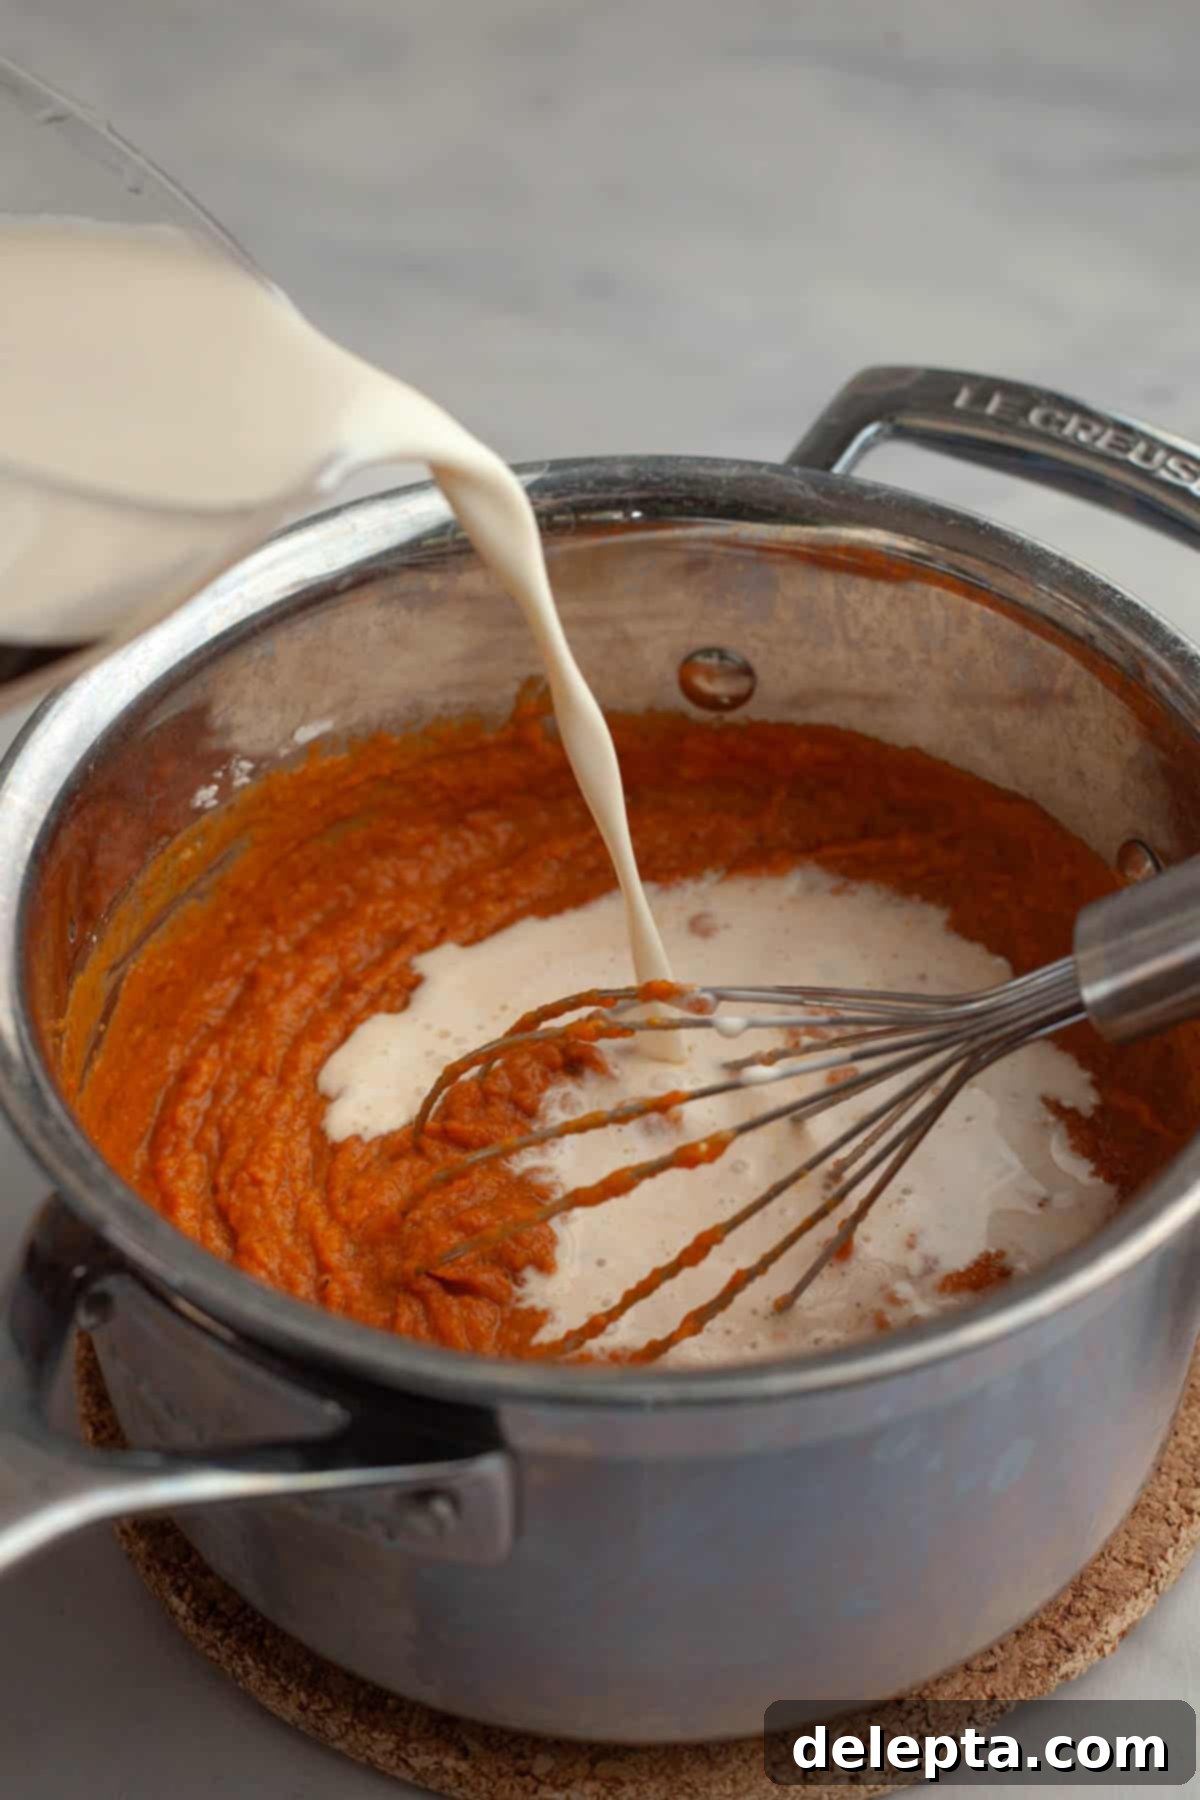
- Step 2: Incorporate Liquids. Gradually drizzle in the heavy cream and whole milk into the pumpkin mixture in the saucepan. Continue whisking constantly as you add the liquids to ensure everything is fully incorporated and smooth. This prevents lumps and ensures an even consistency.
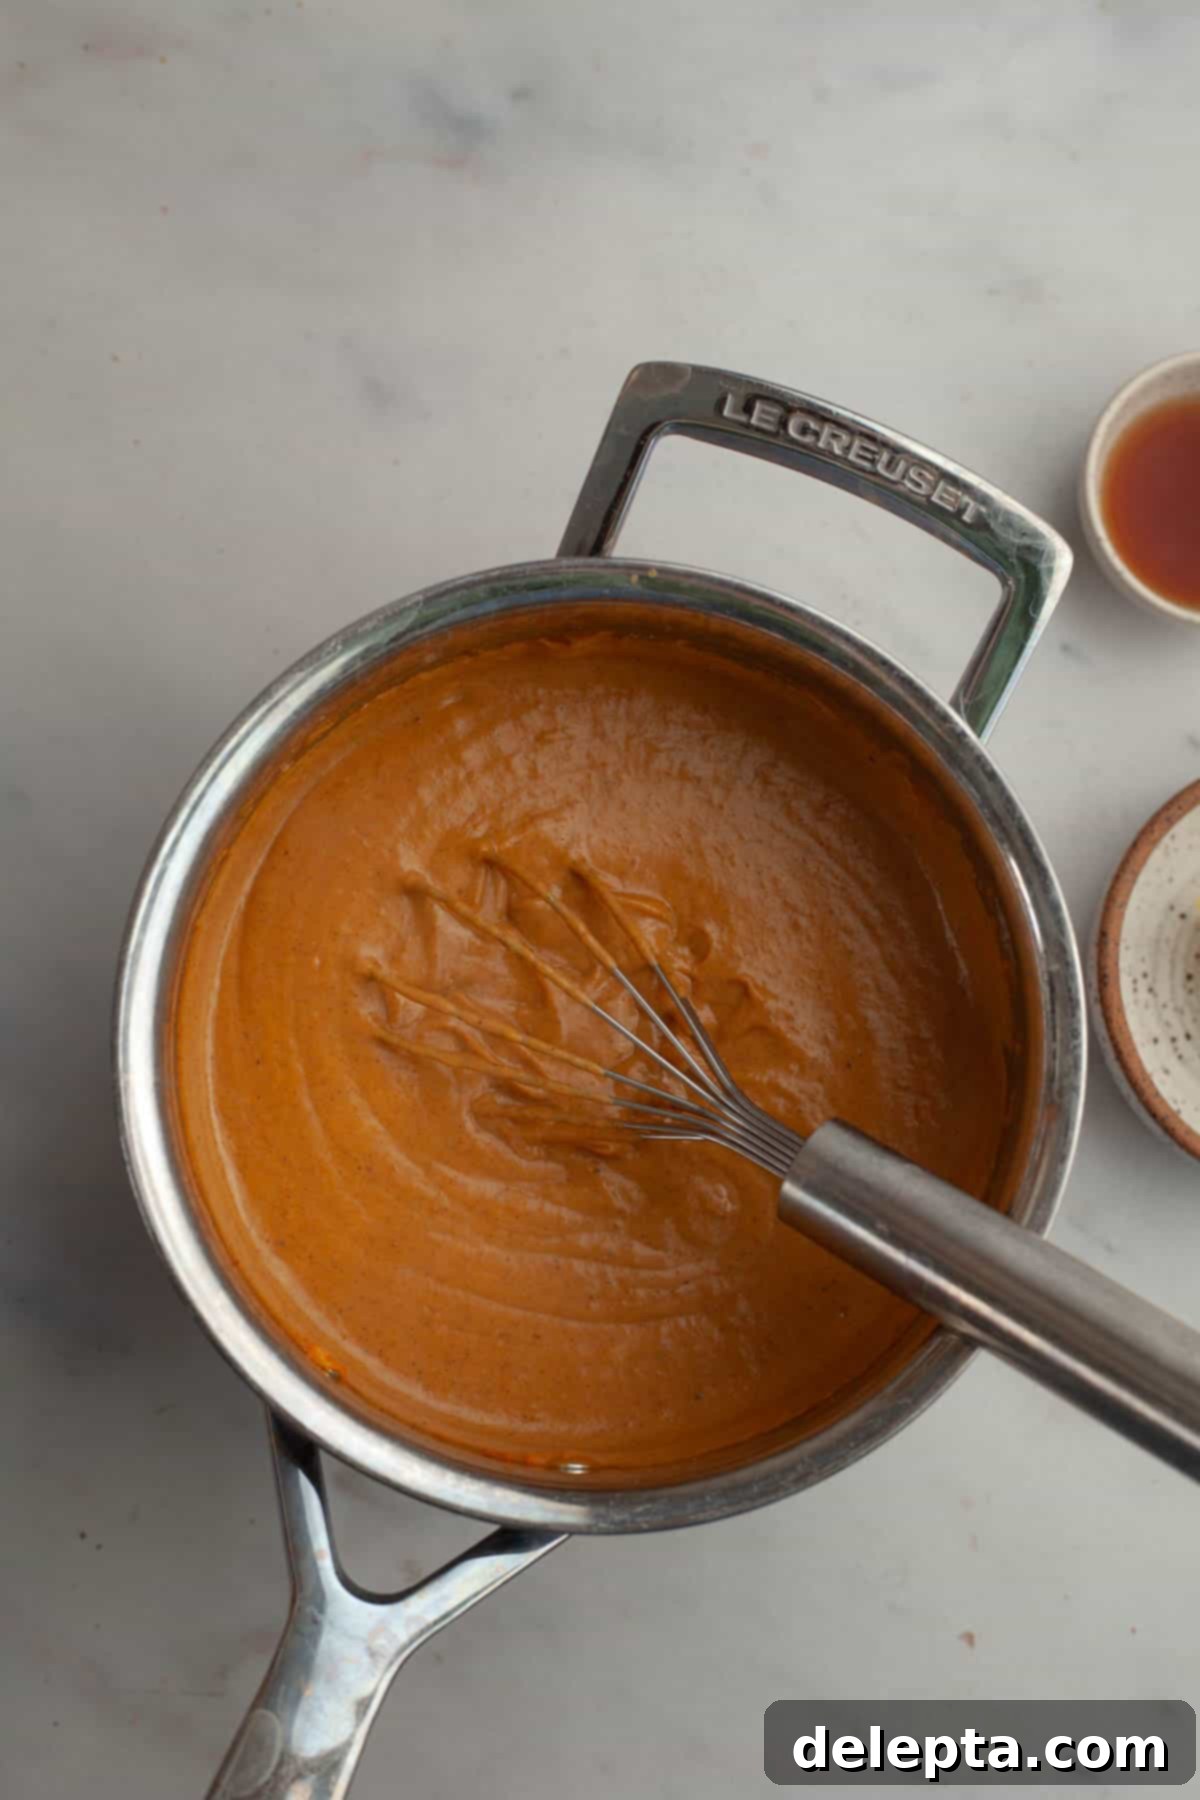
- Step 3: Cook to Thicken. Place the saucepan over medium heat. Bring the mixture to a gentle simmer, stirring *constantly* with your whisk or a rubber spatula. This constant stirring is vital to prevent the pudding from sticking to the bottom and burning, as well as to ensure even cooking and thickening. Once it begins to simmer (you’ll see small bubbles breaking the surface), it should start to visibly thicken, which typically takes about 2-4 minutes. Do not allow the mixture to come to a full rolling boil, as this can cause the eggs to curdle and ruin the texture. You’re looking for a consistency similar to a thick gravy or thin custard.
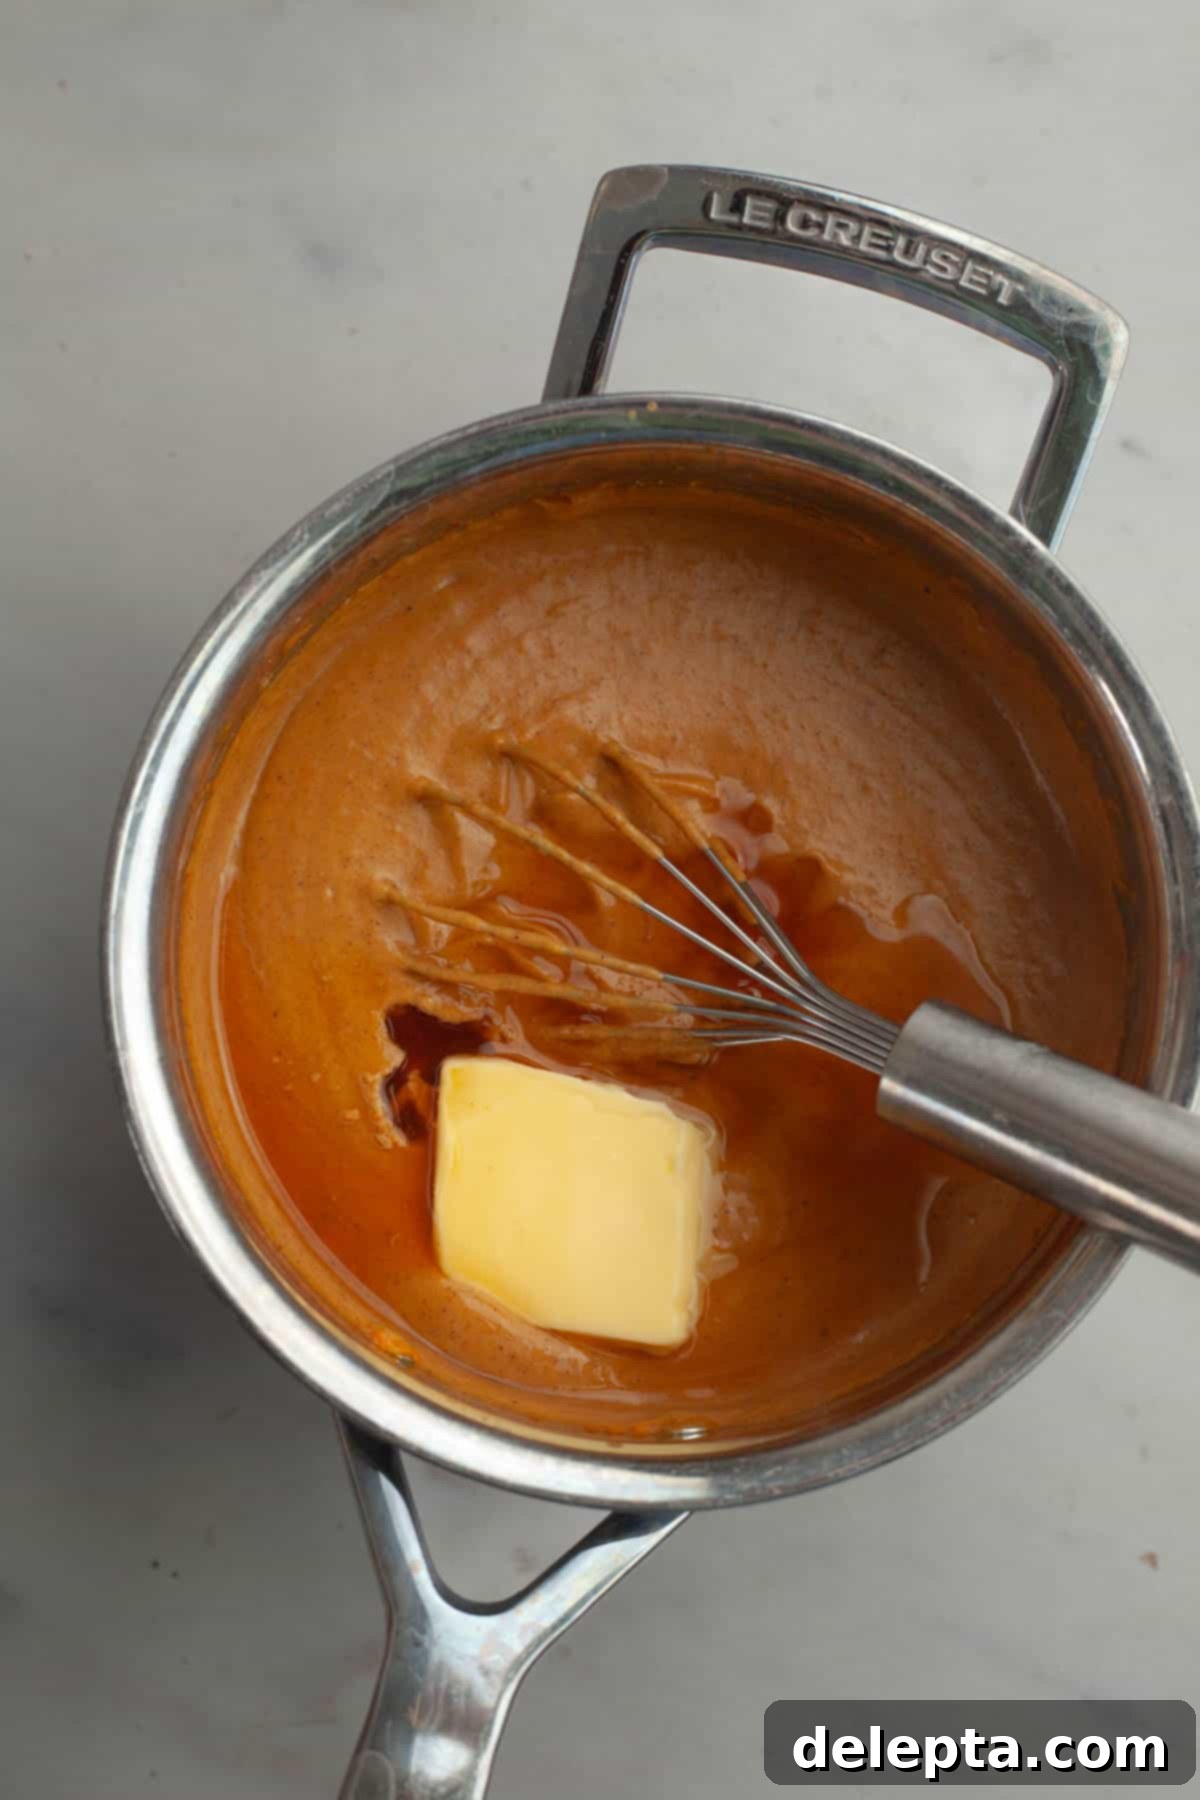
- Step 4: Finish with Flavor. Immediately remove the saucepan from the heat. Add the unsalted butter and vanilla extract. Whisk them in until the butter is completely melted and fully incorporated, and the pudding is smooth and glossy. The butter adds richness and a beautiful sheen, while the vanilla enhances the overall aroma and taste.
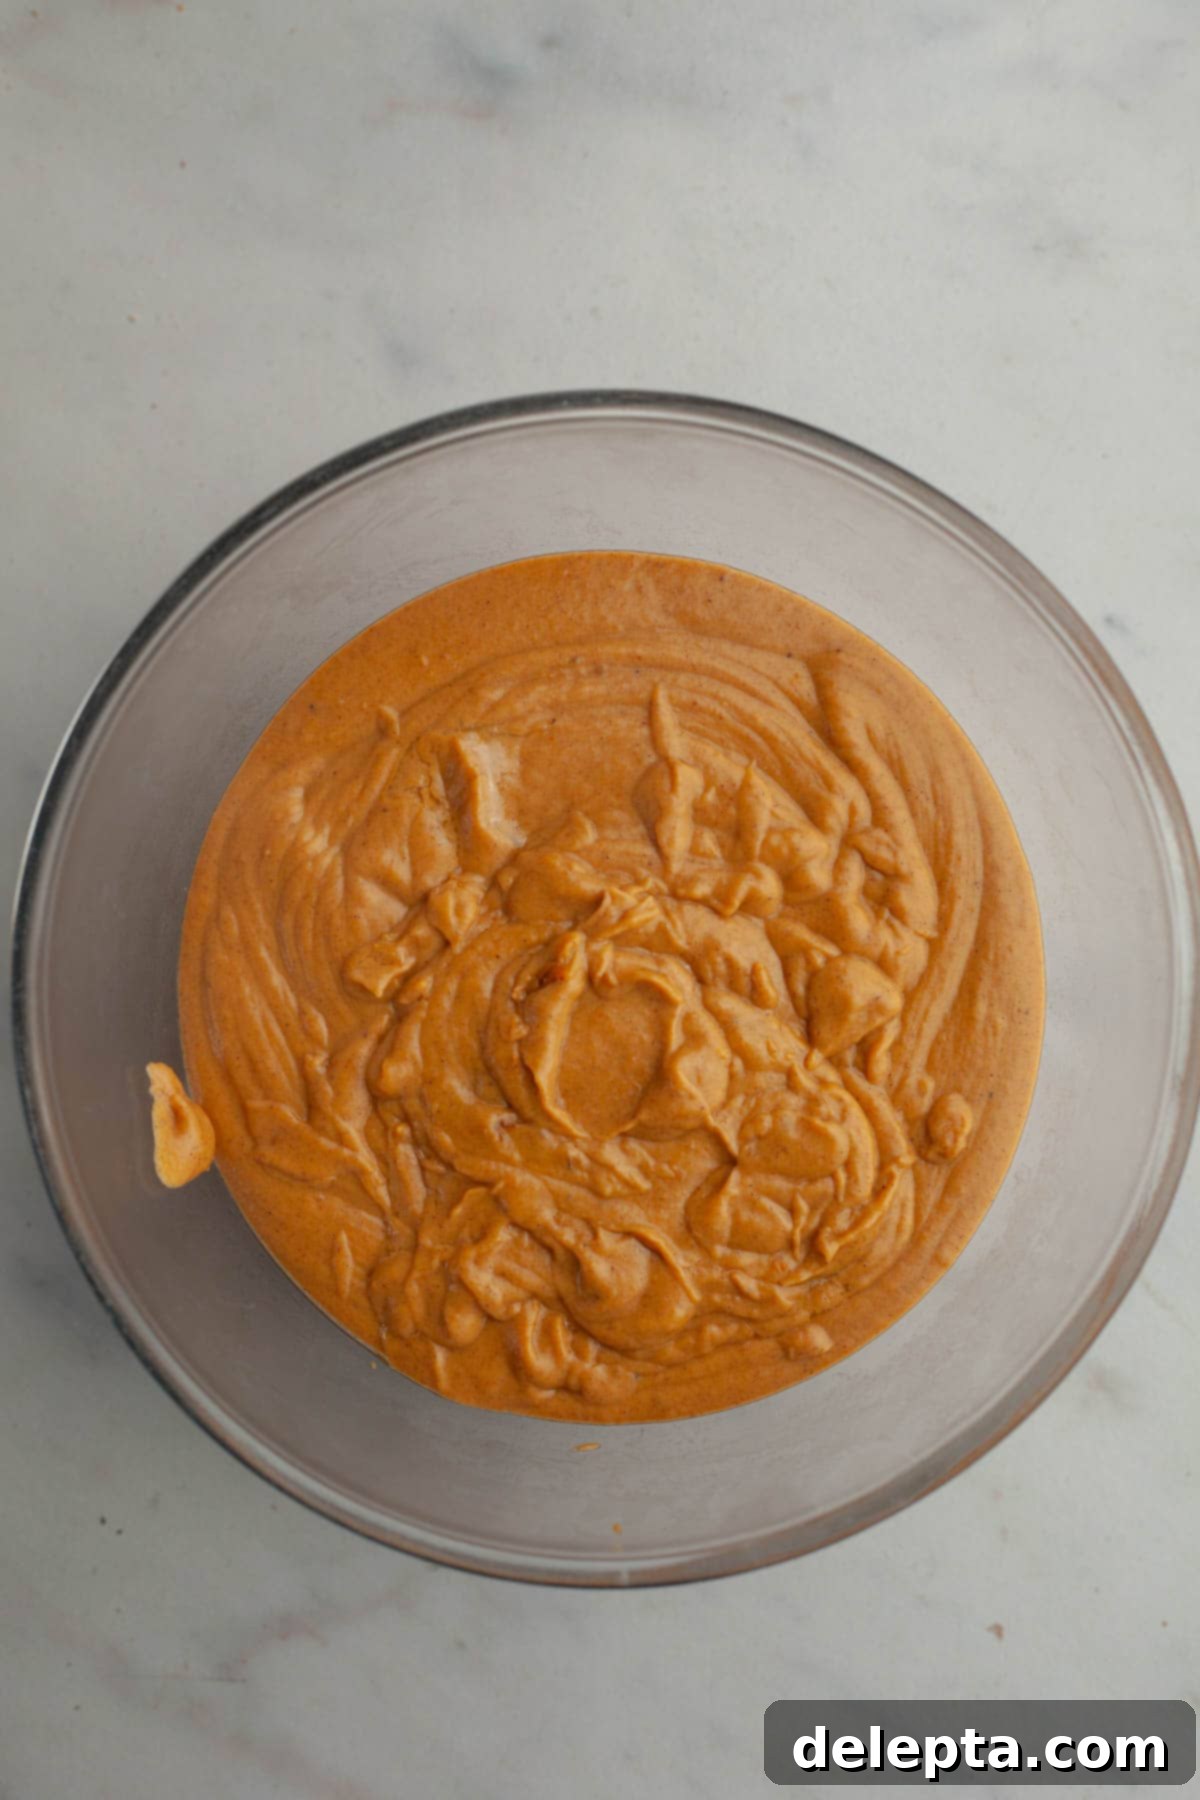
- Step 5: Chill the Pudding. Pour the hot pumpkin pudding into a large, clean bowl. Immediately press a piece of plastic wrap directly onto the surface of the pudding. This crucial step prevents a “skin” from forming as it cools, ensuring a perfectly smooth texture. Place the bowl in the refrigerator and allow it to chill for a minimum of 4 hours, or ideally, overnight. This chilling time is essential for the pudding to fully set and for the flavors to deepen. This recipe yields approximately 2 cups of delicious pumpkin pudding.
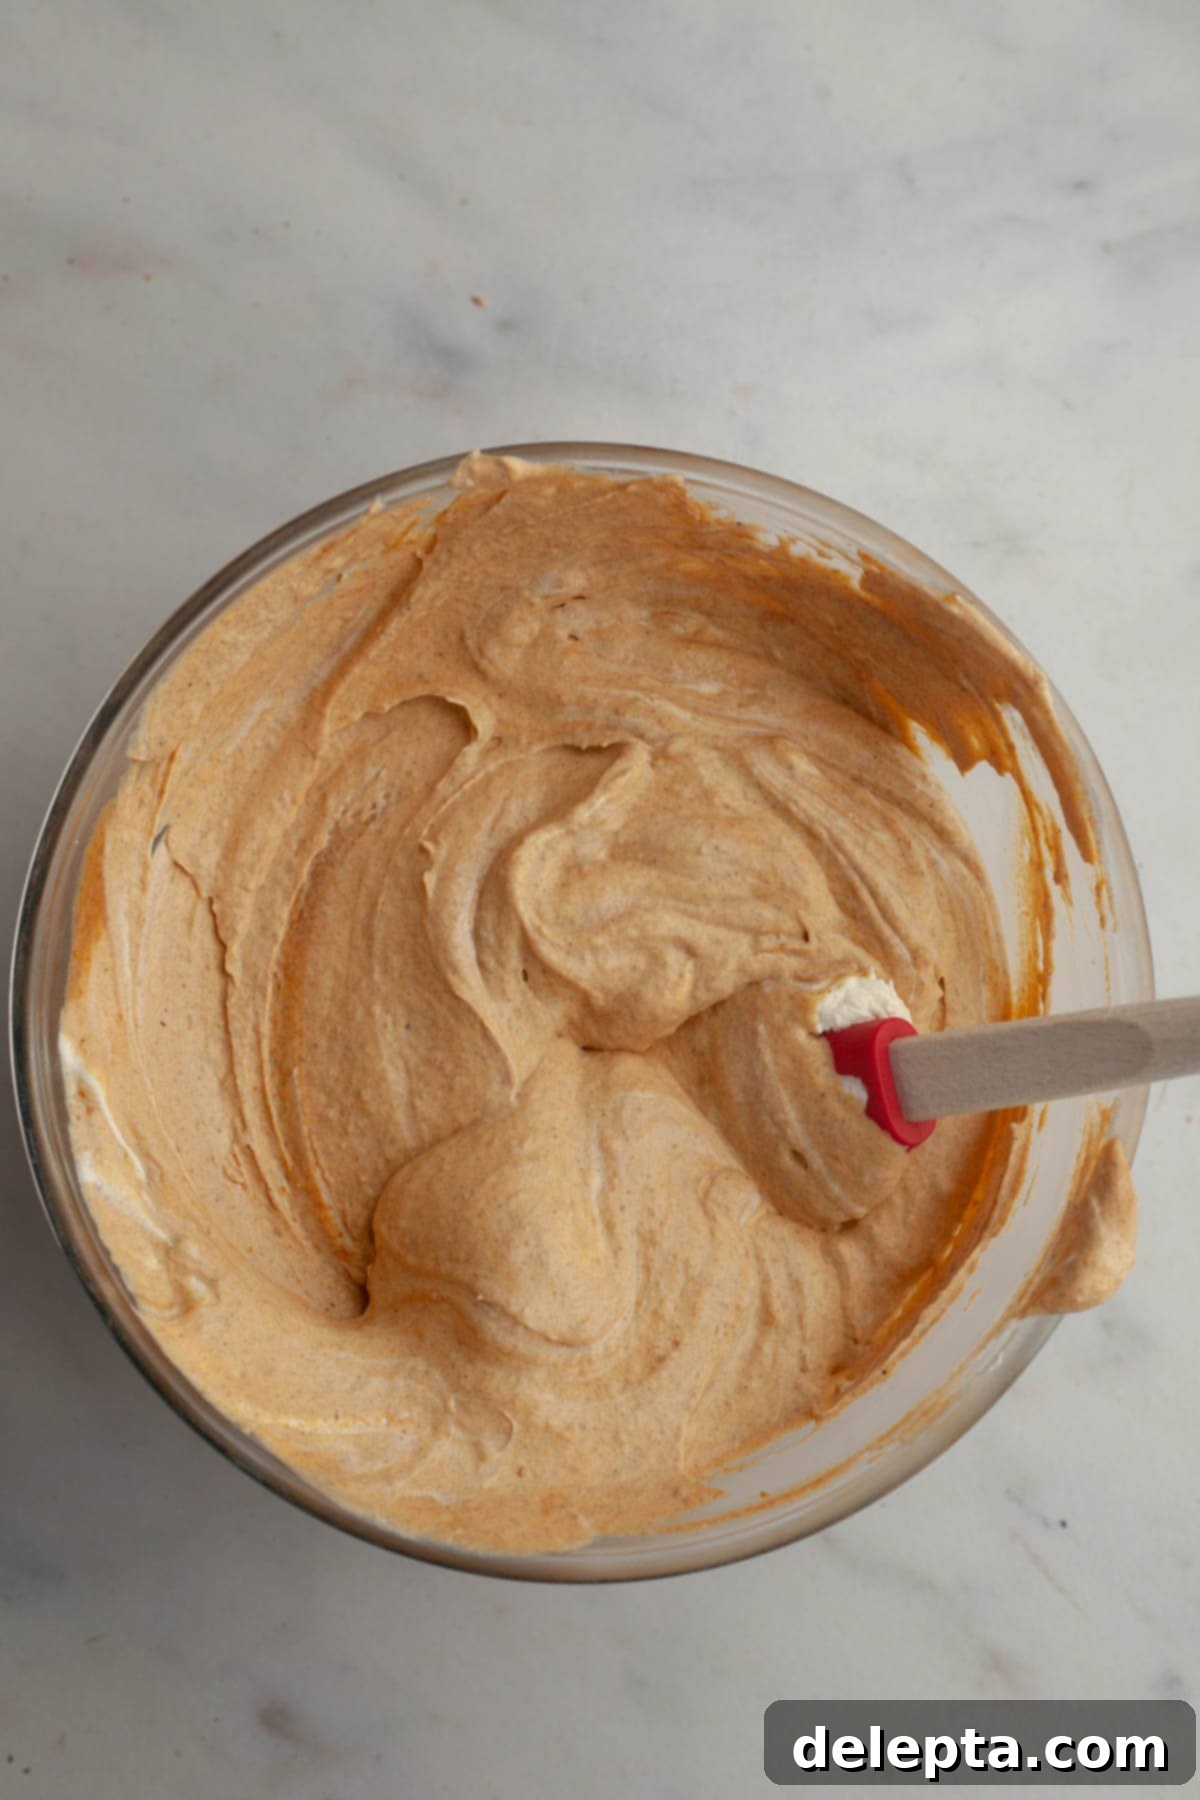
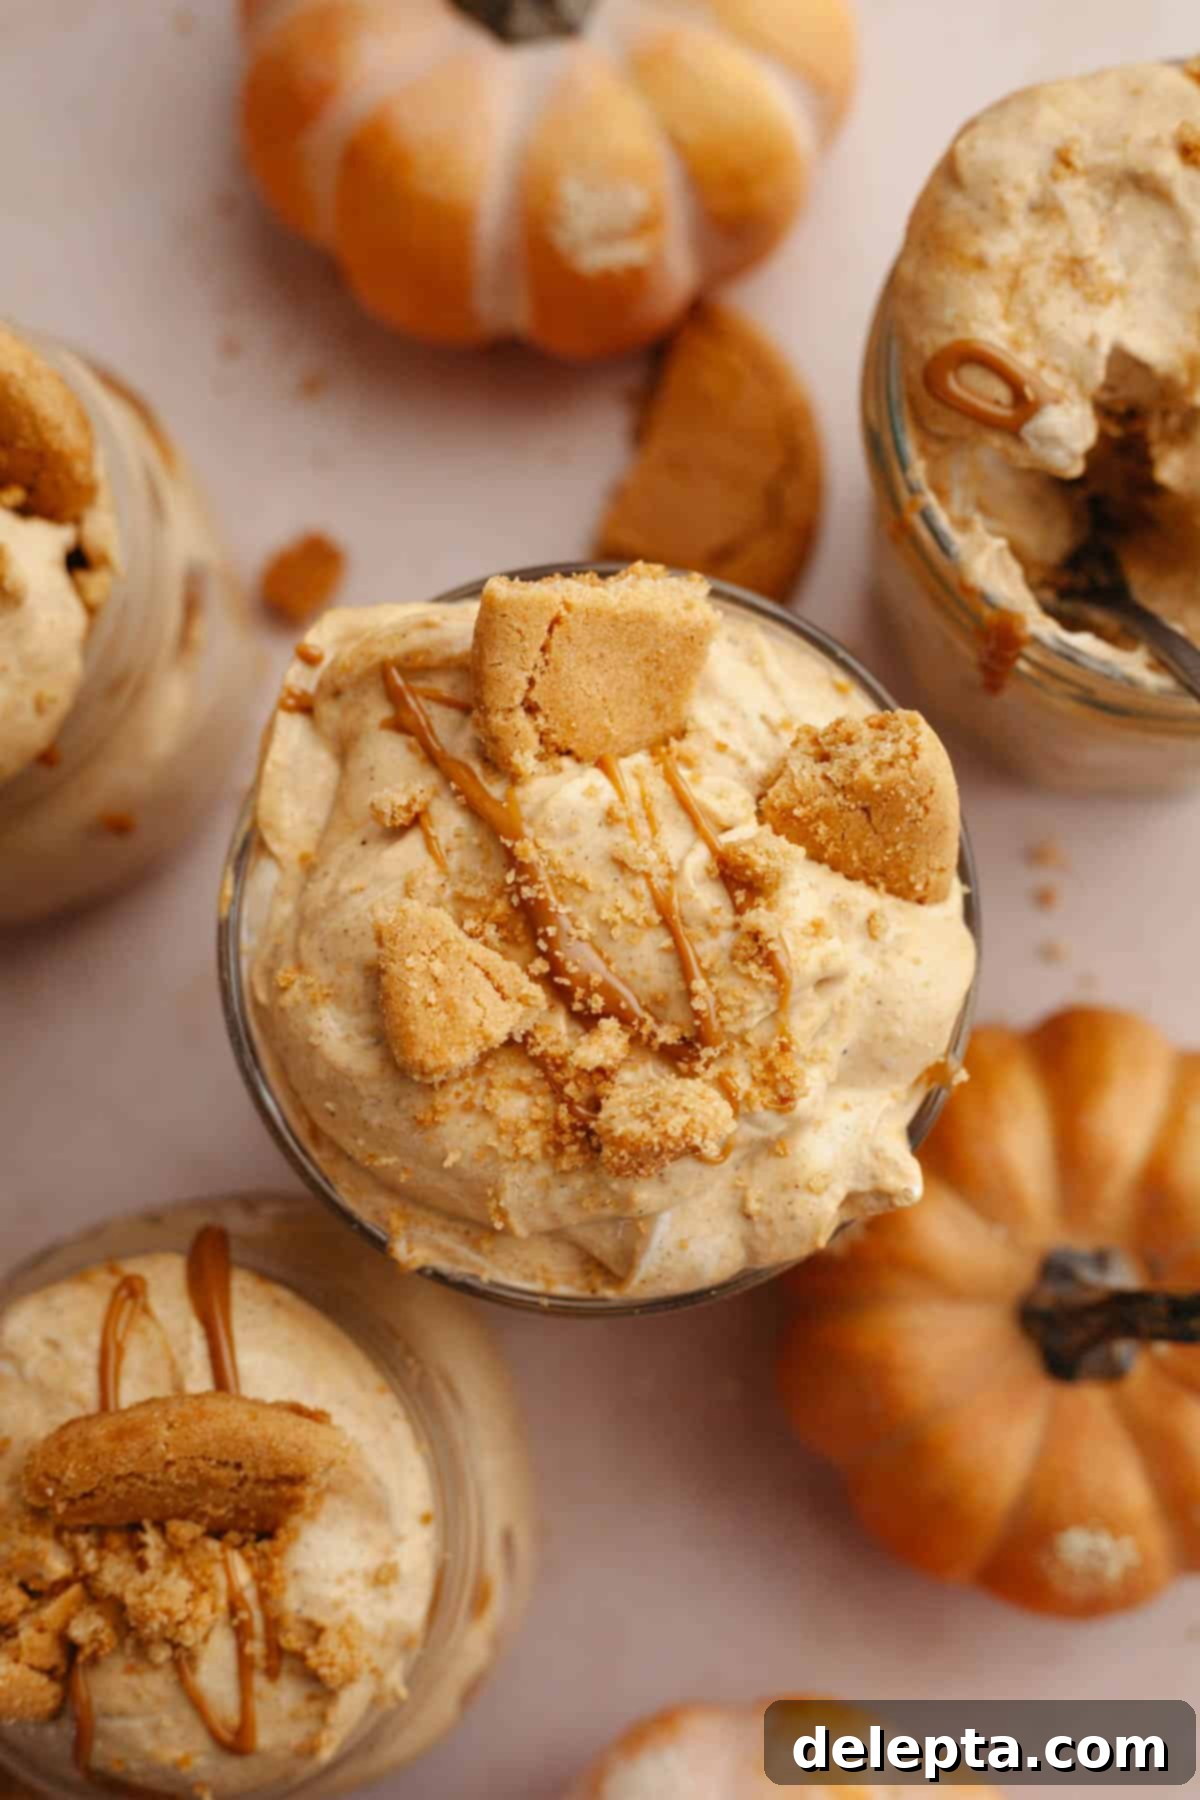
- Step 6: Assemble the Cups. In a separate medium bowl, beat your remaining heavy cream with the sugar using a handheld mixer or a stand mixer fitted with the whisk attachment until soft peaks form. Be careful not to over-whip into stiff peaks. Once the pumpkin pudding is thoroughly chilled and set, gently fold the prepared whipped cream into it using a rubber spatula. This lightens the pudding and adds an airy texture. To assemble your cups, alternate layers of the pumpkin whipped cream mixture with crushed gingersnap cookies and generous drizzles of melted cookie butter in your chosen serving jars or glasses. Repeat layers until the jars are full, finishing with a festive topping.
My Top Tips for Perfect Pumpkin Pie Cups
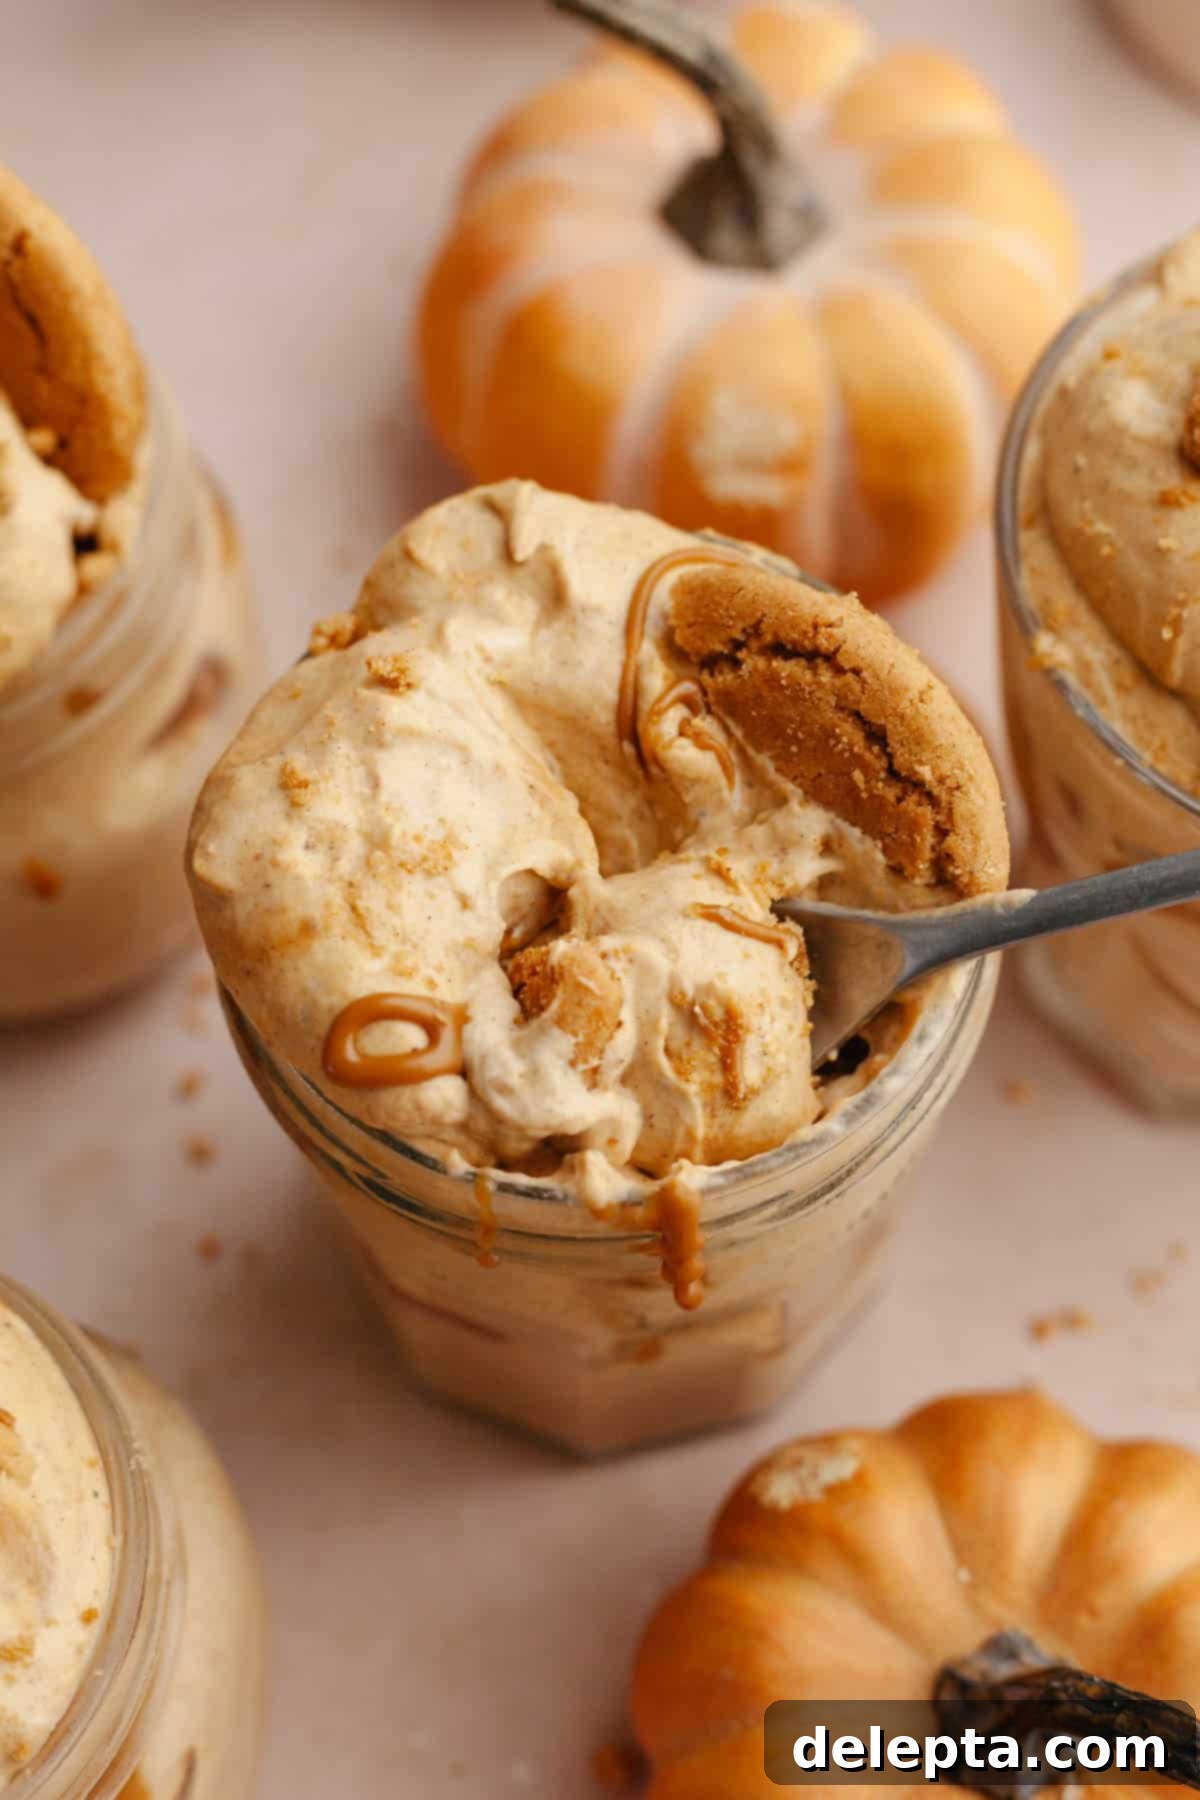
- Choose Your Serving Style: While I adore serving these in individual mason jars for charming mini desserts (they’re fantastic for portability and gifts!), you have options. For a family-style presentation, you can use a loaf pan, an 8×8 baking pan, or a clear trifle dish. Simply alternate layers of the pumpkin pudding with layers of crushed gingersnap cookies. Allow it to chill thoroughly, then scoop it out of the pan and serve it like a deconstructed pie.
- Patience is Key for Pudding Thickness: Don’t rush the thickening process on the stove. It’s crucial to let the pumpkin pudding come to a gentle simmer and stir constantly until it visibly thickens to a gravy-like consistency. If you remove it from the heat too soon, your pudding will be runny and won’t set properly, leading to a disappointing result. Trust the process and keep stirring!
- Layering for Visual Appeal & Texture: I love folding the whipped cream directly into the pumpkin pudding to create a light, airy, and uniform texture throughout. However, for more distinct visual layers and an even creamier mouthfeel, you can reserve half of the whipped cream. Layer the pumpkin pudding first, then a layer of plain whipped cream, followed by the cookies. This creates beautiful, defined strata of flavor and texture.
- Preventing a Pudding “Skin”: This is a non-negotiable step! Immediately after pouring the hot pudding into its chilling bowl, press a piece of plastic wrap directly onto the surface of the pudding, ensuring no air is trapped between the plastic and the pudding. This prevents a rubbery “skin” from forming as it cools, which can detract from the smooth texture.
- Room Temperature Ingredients Matter: For the smoothest pudding and best results, ensure your egg yolks and butter are at room temperature. This helps them incorporate evenly into the mixture without creating lumps or causing the pudding to seize. Pull them out of the fridge about 30 minutes to an hour before you plan to start cooking.
- Optimal Chilling Time: While 4 hours is the minimum, an overnight chill truly allows the pudding to set completely and the flavors to deepen and meld beautifully. Plan accordingly, especially if you’re making this for a special occasion.
Delightful Serving Suggestions
These no-bake pumpkin pie cups are already a showstopper, but a few thoughtful garnishes can elevate them even further!
- Classic Toppings: My favorite way to finish these is with an extra sprinkle of gingersnap cookie crumbles and a luscious drizzle of melted cookie butter. The cookie butter hardens slightly as it chills, providing a delightful textural contrast.
- Nutty Accents: For a different crunch and earthy flavor, sprinkle over some finely chopped toasted pecans, walnuts, or even candied almonds. The warmth of toasted nuts complements the pumpkin beautifully.
- Sweet & Spicy Touches: A dash of extra pumpkin pie spice, a sprinkle of brown sugar, or a delicate drizzle of maple syrup can add an extra layer of sweetness and aromatic appeal.
- Creamy Indulgences: If you reserved some plain whipped cream (as suggested in our tips), add a dollop on top right before serving. A dusting of cinnamon or cocoa powder can add a professional finish.
- Perfect Pairings for the Holidays: These pumpkin pie cups are a fantastic addition to any fall or holiday dessert spread. Serve them alongside other beloved Thanksgiving classics like pumpkin custard pie, a comforting apple oat crumble pie, charming mini apple pies, or a rich pecan pie cheesecake. They also pair wonderfully with a warm cup of coffee, spiced tea, or mulled cider.
Storage & Freezing Instructions
To keep your pumpkin pudding pie cups tasting fresh and delicious, store them in an airtight container in your refrigerator for up to 3 days. This ensures the pudding remains creamy and the cookie layers retain some of their texture. I highly recommend enjoying them within this timeframe for the best quality.
I do not recommend freezing this dessert. The creamy pudding base, being egg-thickened, can undergo significant textural changes when frozen and thawed. It tends to become watery or grainy, losing its desirable smooth consistency. For that perfect, luxurious mouthfeel, it’s best to enjoy these fresh from the fridge.
Discover Your Next Favorite Fall Dessert!
- Fluffy Marshmallow Meringue FrostingPerfect for topping cupcakes or pies, this light and airy frosting adds a sweet, toasted finish!
- Brown Butter Pumpkin Pie with Gingersnap CrustA sophisticated twist on classic pumpkin pie, featuring nutty brown butter and a spicy gingersnap crust.
- Pumpkin Spice Cupcakes with Marshmallow FrostingMoist and flavorful pumpkin cupcakes crowned with a luscious, torched marshmallow frosting.
- Maple Espresso Glaze IcingA sweet and robust glaze, perfect for adding a sophisticated finish to cakes, cookies, or scones.
If you’ve whipped up these delicious no-bake pumpkin pie cups, I’d absolutely love to hear about it! Please take a moment to leave a ⭐️ rating and review below – your feedback helps others discover and enjoy this recipe too. I get so much joy from seeing your culinary creations, so don’t forget to tag me on Instagram @alpineella so I can admire what you made! You can also stay updated with my latest recipes and kitchen adventures by following along on Pinterest, Facebook, and TikTok!
Recipe
Easy No-Bake Pumpkin Pie Cups
Ella Gilbert
Pin Recipe
Save Recipe
Saved!
Equipment
-
Heavy-bottomed Saucepan
-
Whisk
-
2 Large Bowls (for pudding & whipped cream)
-
Handheld Mixer or Stand Mixer
-
Rubber Spatula
Ingredients
For the Pumpkin Pudding
- 4 large egg yolks at room temperature
- 6 tablespoons granulated sugar
- ¼ cup cornstarch
- ¼ teaspoon kosher salt
- ¼ cup heavy cream
- 1 ¼ cups whole milk
- 2 teaspoons vanilla extract
- 15 oz 100% pumpkin puree
- 3 teaspoons pumpkin pie spice
- 1 ½ tablespoons unsalted butter at room temperature
For Whipped Cream & Assembly
- 2 teaspoons granulated sugar
- 1 cup heavy cream
- gingersnap cookies crushed, for layering
- cookie butter melted, for drizzling
Instructions
-
In a medium-sized, heavy-bottomed saucepan, whisk together your granulated sugar, kosher salt, room temperature egg yolks, 100% pumpkin puree, pumpkin pie spice, and cornstarch until the mixture is completely smooth and free of any lumps.4 large egg yolks, 6 tablespoons granulated sugar, ¼ cup cornstarch, ¼ teaspoon kosher salt, 3 teaspoons pumpkin pie spice, 15 oz pumpkin puree
-
Slowly drizzle in your heavy cream and whole milk, whisking constantly to ensure complete incorporation and smoothness. Place the saucepan over medium heat and allow it to come to a gentle simmer, stirring continuously with a whisk or rubber spatula. Once it begins to simmer (small bubbles breaking the surface), it should start to visibly thicken. This usually takes 2-4 minutes. Do not allow it to come to a rolling boil, as this can cause the mixture to curdle.¼ cup heavy cream, 1 ¼ cups whole milk
-
Remove the thickened pumpkin pudding from the heat. Whisk in your room temperature unsalted butter and vanilla extract until the butter is fully melted and incorporated, and the pudding is smooth and glossy.2 teaspoons vanilla extract, 1 ½ tablespoons unsalted butter
-
Pour the pudding into a clean bowl. Immediately place a piece of plastic wrap directly on top of the pudding’s surface, pressing it down to ensure no air is trapped; this prevents a skin from forming as it cools. Let it chill in the refrigerator for at least 4 hours, or ideally, overnight, until fully set. This recipe yields approximately 2 cups of pudding.
-
In a separate bowl, beat the remaining heavy cream with the additional granulated sugar using a handheld or stand mixer until soft peaks form. Be careful not to over-whip.2 teaspoons granulated sugar, 1 cup heavy cream
-
Gently fold the prepared whipped cream into the chilled and set pumpkin pudding using a rubber spatula until just combined. This creates a lighter, airier pumpkin cream.
-
To assemble, spoon a layer of the pumpkin cream into mason jars (or your chosen serving containers). Top with a layer of crushed gingersnap cookies, followed by a drizzle of melted cookie butter. Repeat these layers until the jars are full, finishing with gingersnap crumbles and a final cookie butter drizzle. Chill until ready to serve.
Notes
Layering Versatility: For a different presentation, you can layer this dessert in a small pan, such as an 8×8 inch baking dish or a loaf pan. Alternate the pumpkin cream and cookie layers, then refrigerate until firm. You can then scoop it into individual cups or serve directly from the pan, much like how Magnolia Bakery often presents its puddings.
Room Temperature for Success: For the smoothest pudding texture and best incorporation, ensure all cold ingredients (like egg yolks and butter) are at room temperature before you begin. Plan to pull them out of the fridge approximately 30-60 minutes before starting the recipe.
Salt Adjustments: If you don’t have kosher salt on hand, you can use fine table salt, but remember to halve the amount called for in the recipe. As a general rule, 1 teaspoon of kosher salt is equivalent to ½ teaspoon of fine salt.
Serving Size & Container Options: I typically use 0.25-liter Kilner jam jars or Bonne Maman jam jars for serving, which yield about 4 individual cups. However, feel free to use any dessert container, glass, or jar you have available. The total number of servings you get will naturally depend on the size of the containers you choose.
Storage Best Practices: Keep the assembled pumpkin pie cups covered tightly in their jars or an airtight container in the fridge for up to 3 days. This maintains their freshness and prevents them from drying out.
Make Ahead Convenience: The pumpkin pudding base can be prepared the night before you plan to assemble and serve. This allows ample chilling time and makes assembly on the day of serving quick and easy.
Nutrition
Tried this recipe?Leave a comment below! You can also tag me on Instagram @alpineella so I can see what you made!
