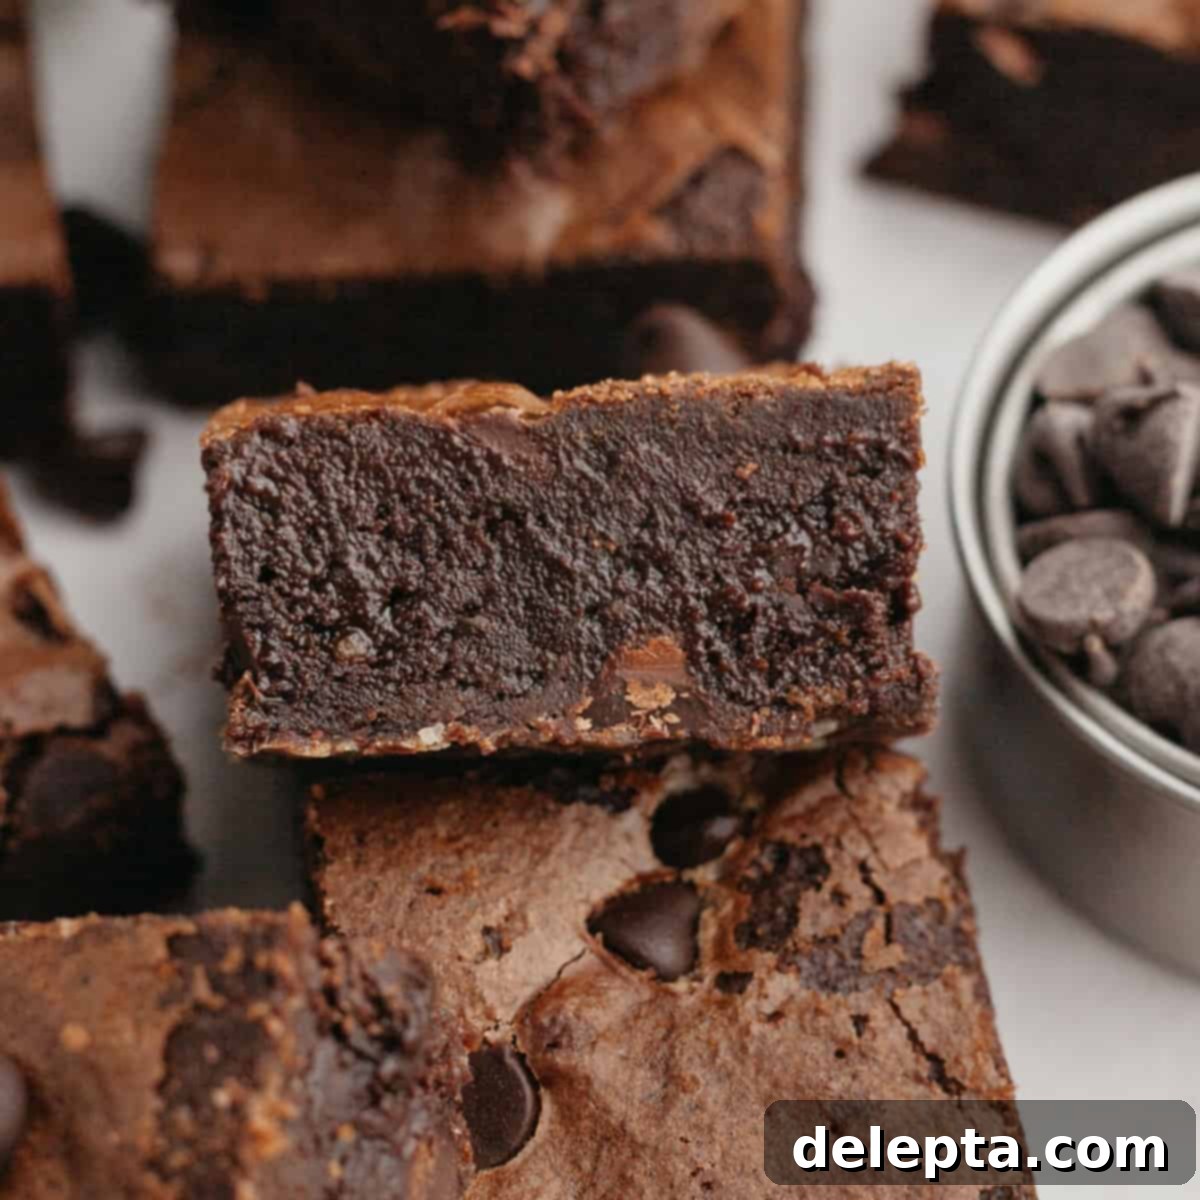
The Ultimate Fudgy Triple Chocolate Brownies: An Easy, No-Mixer Recipe for Decadent Bliss
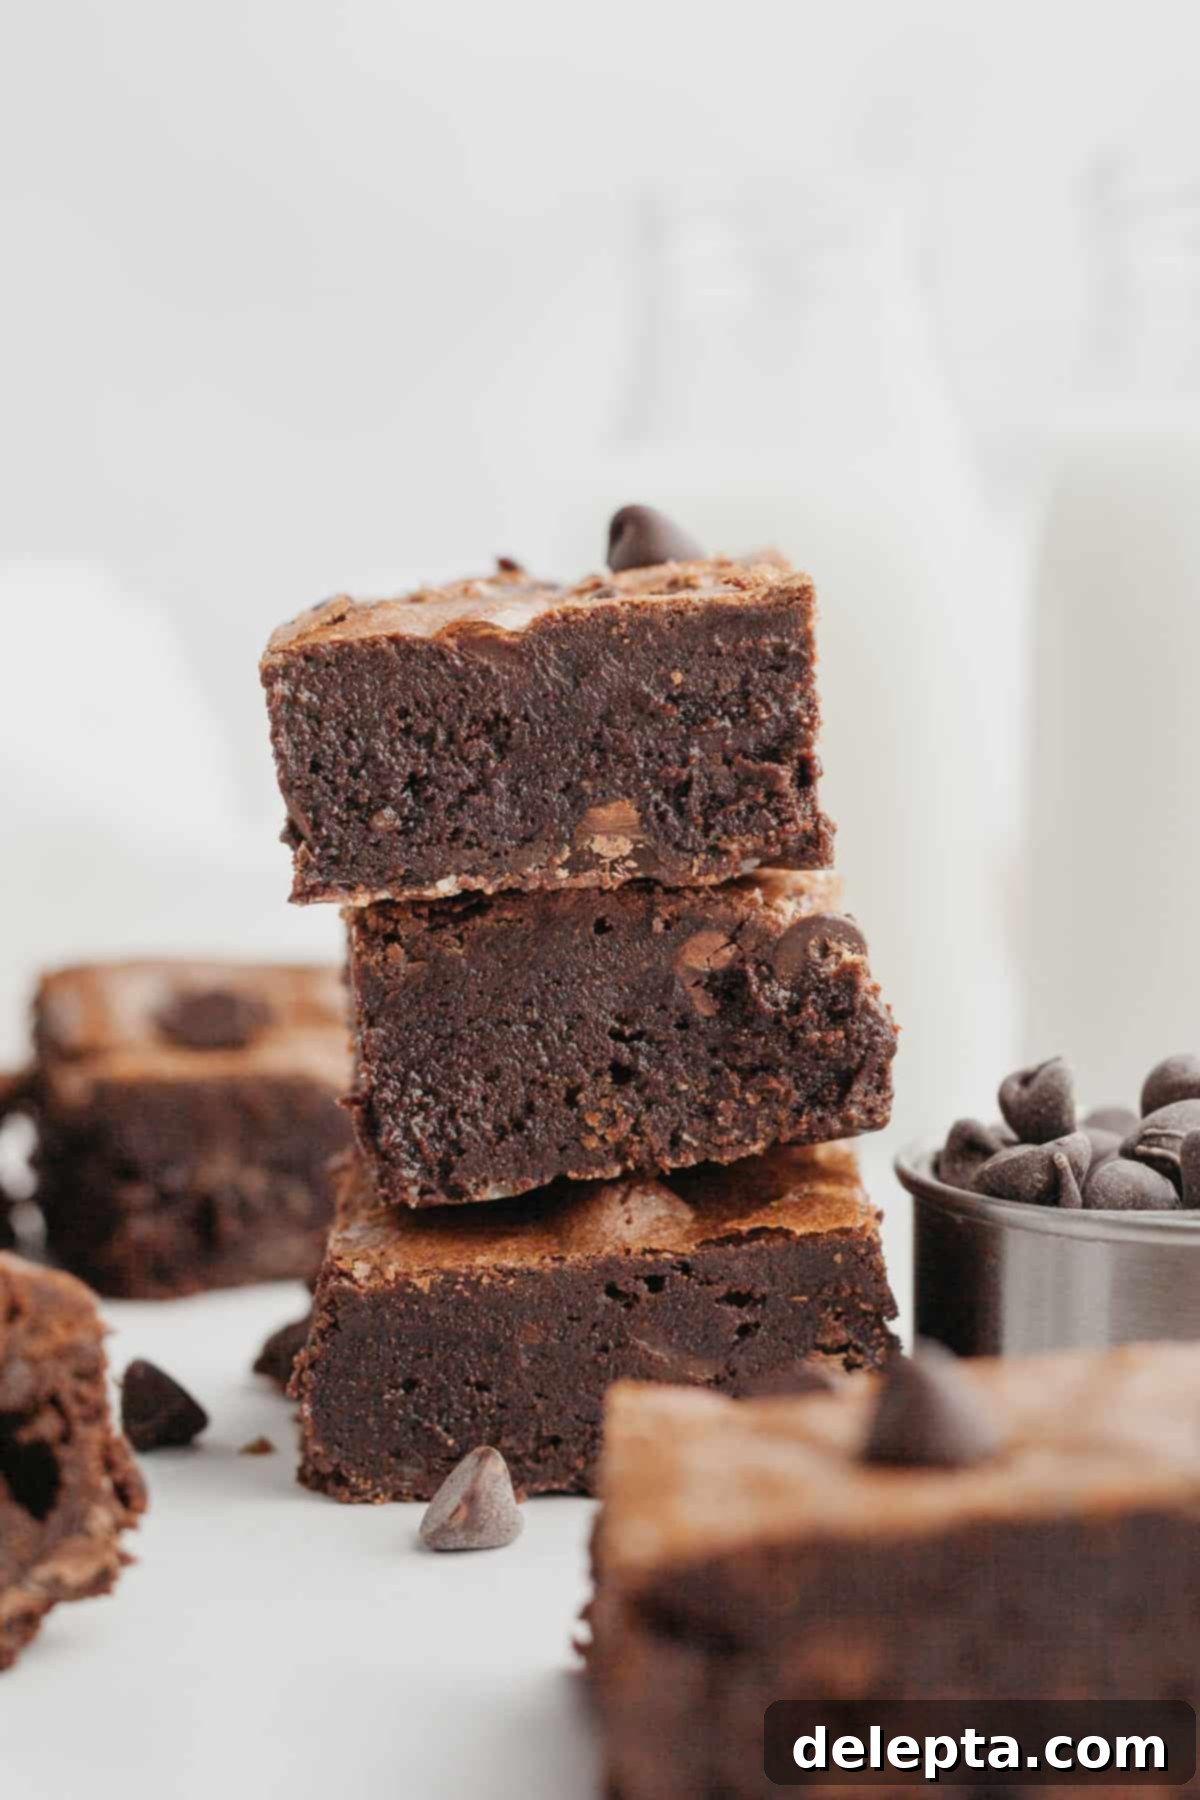
Prepare yourself for the absolute best triple chocolate brownies you will ever taste! These brownies are the epitome of chocolate indulgence, crafted with a glorious trio of rich cocoa powder, luxurious melted dark chocolate, and an abundance of luscious chocolate chips. What makes this recipe truly outstanding is its simplicity: you only need 11 staple ingredients from your pantry and, remarkably, no mixer is required! This recipe is a dream come true for any ardent chocolate lover, promising a deeply rich, intensely fudgy, and irresistibly crackle-topped brownie experience.
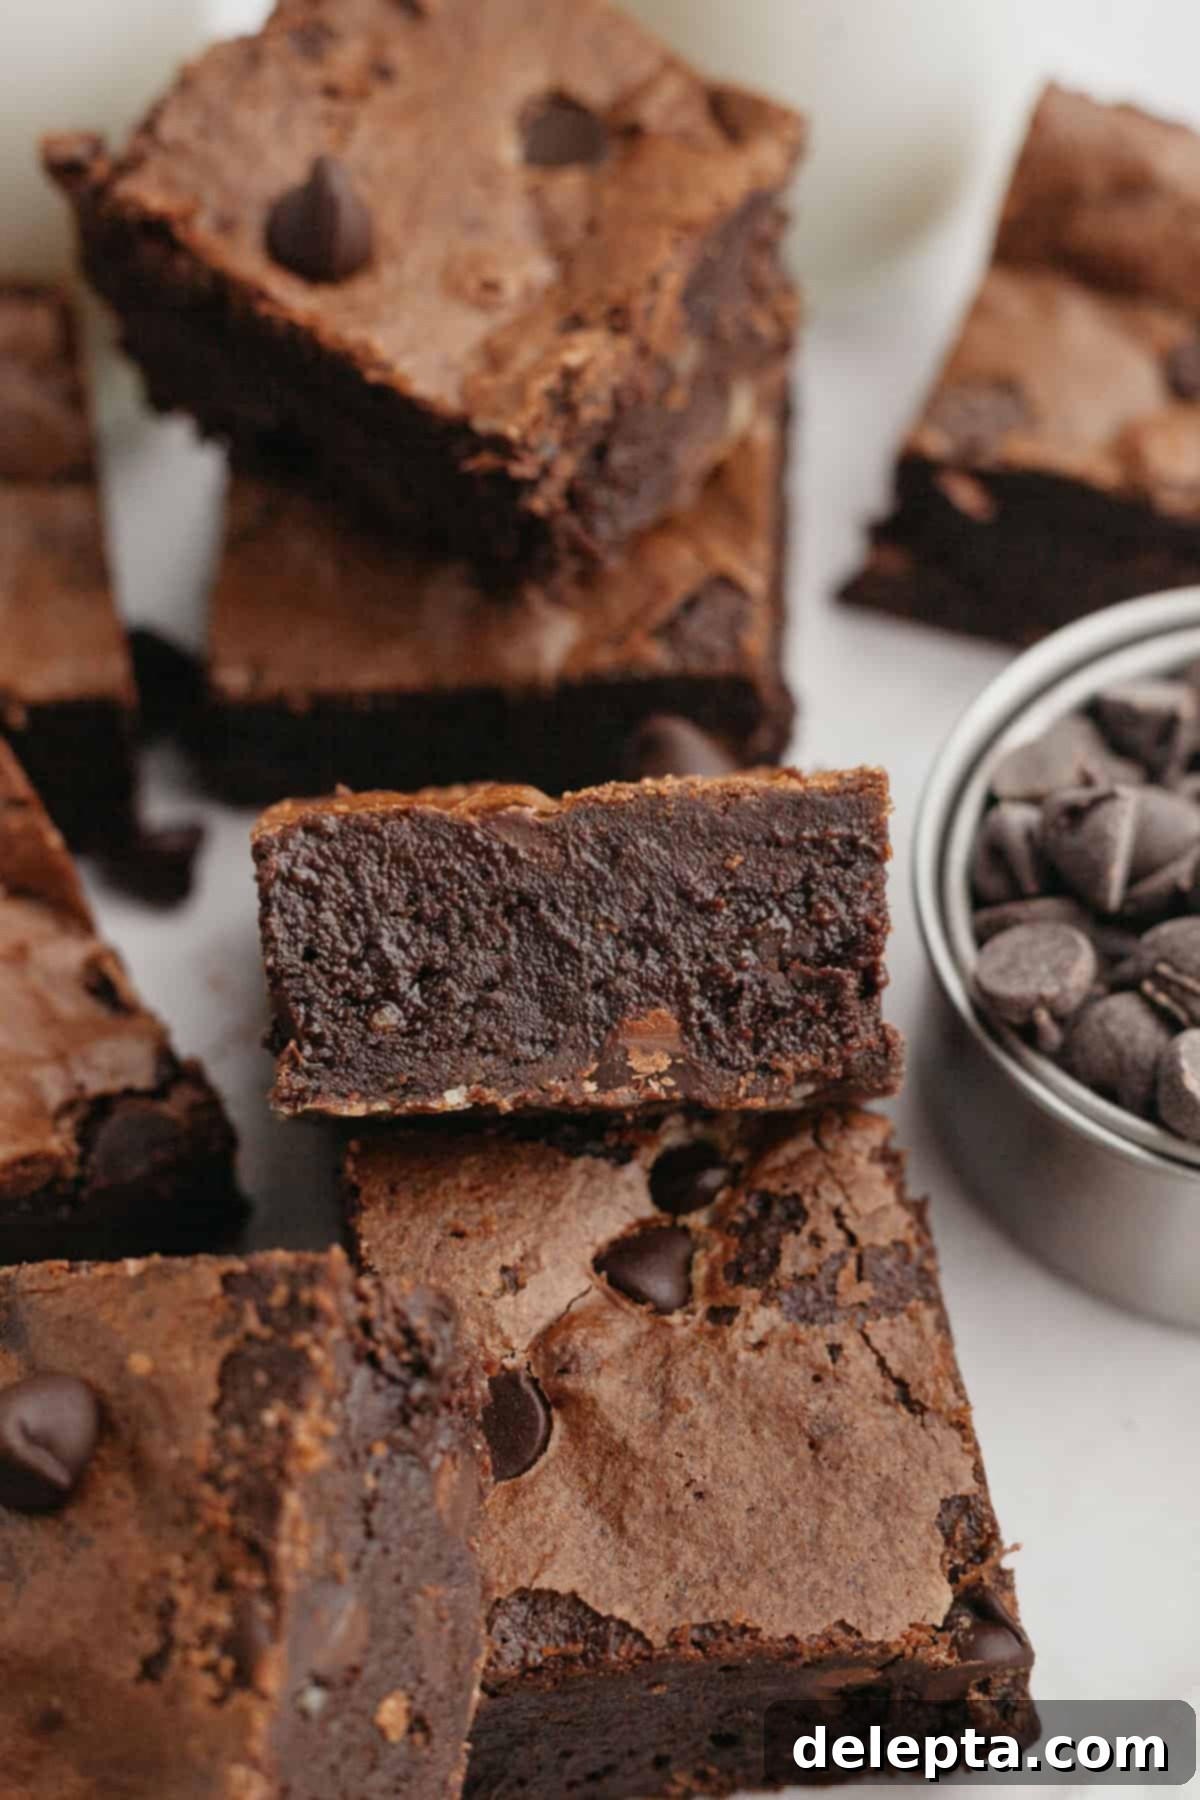
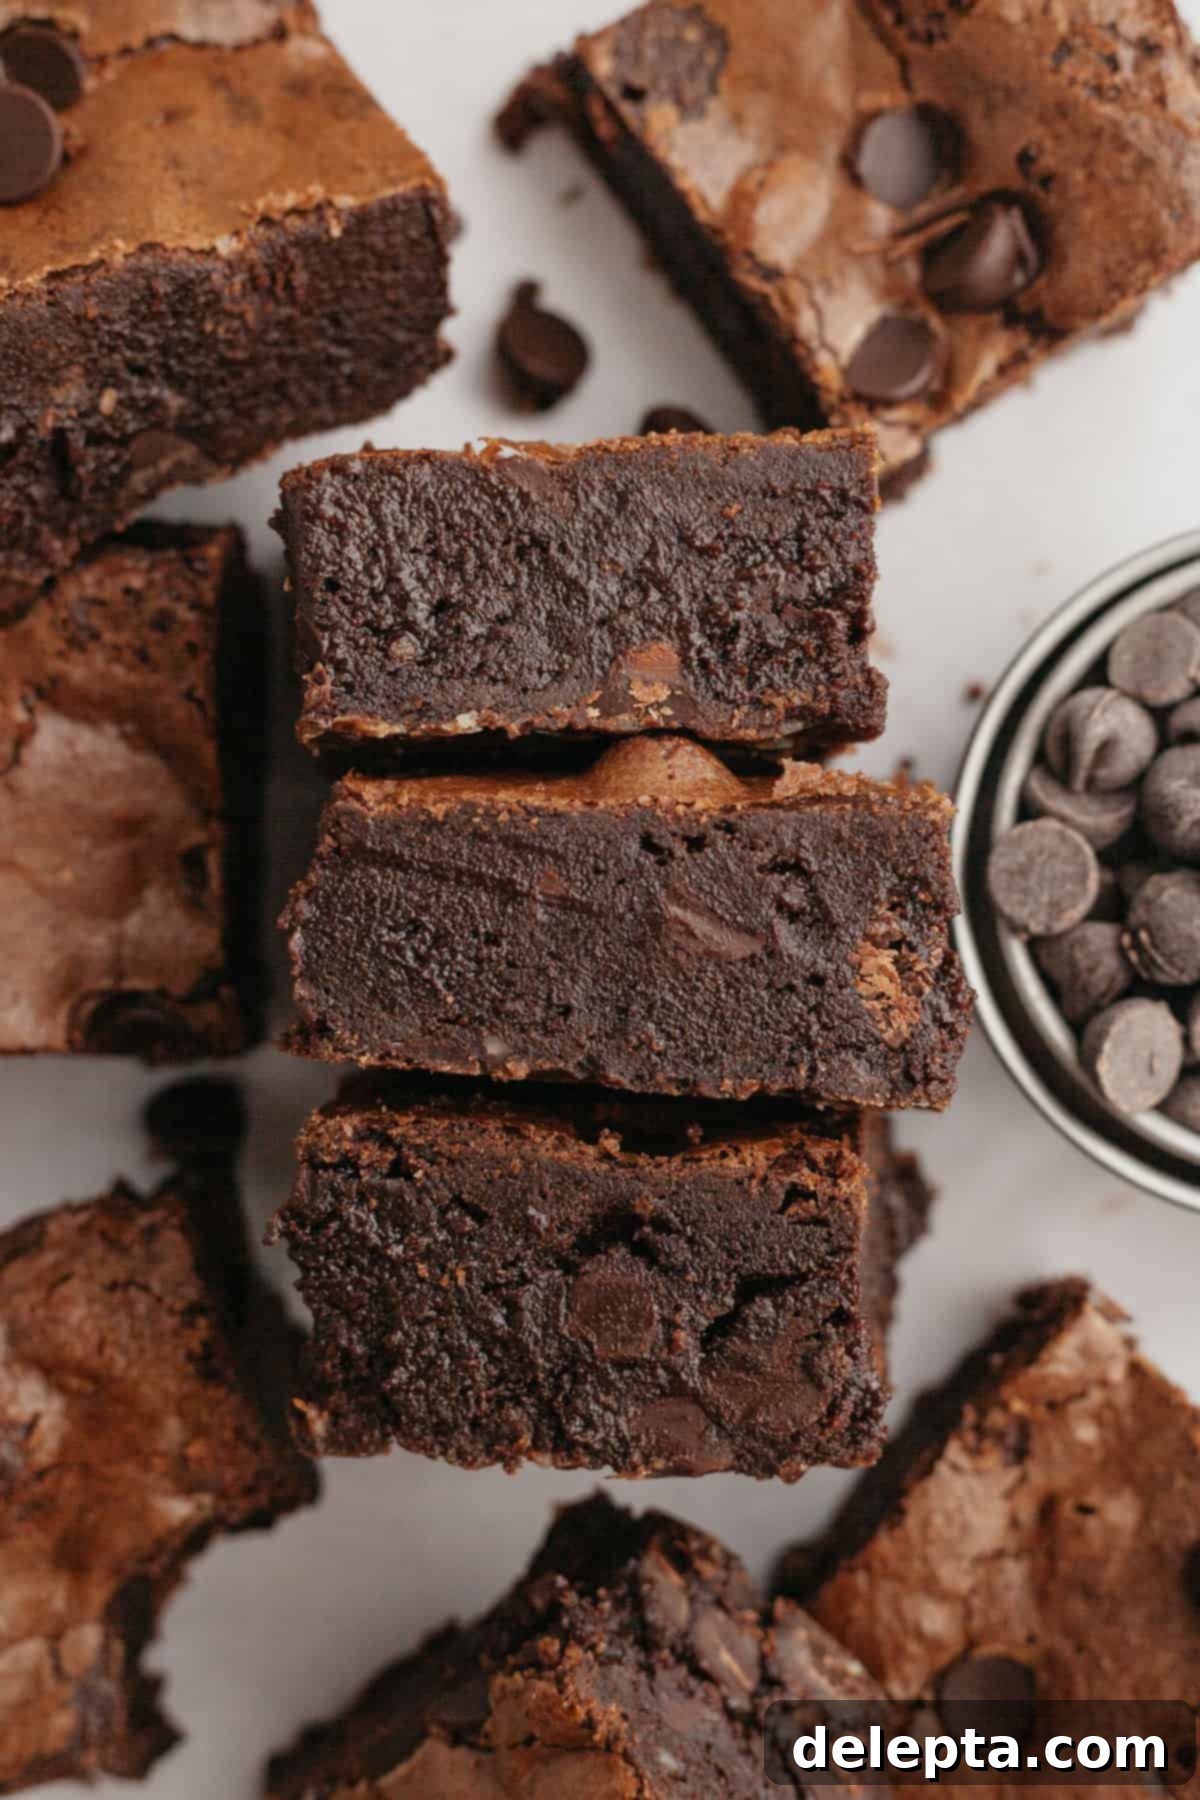
These triple chocolate brownies boast a fudginess that is truly unparalleled! I dedicated countless hours to meticulously testing and perfecting this brownie recipe, driven by a vision to create an easy-to-follow method that requires no special equipment like a stand mixer, yet delivers an incredibly rich, super fudgy texture with that coveted, delicate crackle top. The result is a foundational recipe so robust and delicious that it serves as the base for many of my other popular creations, including my mini egg brownies, elegant brownies with chocolate ganache, and festive birthday cake brownies!
That distinctive, desirable crackly crust on top of these homemade brownies is a magical result of whisking sugar and eggs together for a specific duration. This process emulsifies the mixture and incorporates air, forming an almost meringue-like layer that gently floats to the surface of the brownies as they bake. This layer then sets, creating the signature thin, crisp, and beautifully crackled top that hints at the fudgy goodness beneath.
The secret to the extraordinary fudginess of these chocolate fudge brownies lies in a carefully balanced combination of both cocoa powder and rich melted chocolate. Relying solely on one or the other can lead to brownies that are either too dry or too cakey. By using both, we achieve an ideal depth of chocolate flavor and a wonderfully dense, moist, and gooey texture. Furthermore, the cocoa powder is ‘bloomed’ by being mixed with hot melted butter. This simple yet crucial step intensifies the chocolate flavor, unlocking its full aromatic potential and making these brownies exceptionally rich and deeply chocolatey. It’s a culinary trick that elevates standard brownies to a truly gourmet experience.
If you’re intrigued by the depth of flavor that browned butter can add, I encourage you to explore my super simple brown butter espresso brownies, which offer a delightful twist on this classic dessert.
For those who crave even more intensely chocolatey delights, be sure to try some of my other favorite recipes, such as the moist chocolate sour cream pound cake, the delightful chocolate caramel cupcakes, and the iconic Matilda’s chocolate cake!
Why You’ll Fall in Love with This Triple Chocolate Brownie Recipe!
- Effortlessly Easy Recipe: You don’t need to be a seasoned baker to master these incredible triple chocolate brownies. The process is streamlined and remarkably straightforward. Forget about hauling out heavy stand mixers or even handheld ones! All you’ll need are a couple of mixing bowls, a simple whisk, and a reliable rubber spatula to whip up a batch of these fudgy delights. This makes it a perfect recipe for spontaneous baking or for involving younger helpers in the kitchen.
- Unbelievably Super Chocolatey: Prepare for a sensory overload of chocolate! These brownies live up to their “triple chocolate” name by incorporating three distinct forms of chocolate: robust cocoa powder for deep color and flavor, luxurious melted dark chocolate for a rich, smooth base, and an generous scattering of chocolate chips throughout, ensuring a burst of molten chocolate in every bite. This combination creates an unparalleled depth of flavor that true chocoholics will adore.
- Intensely Rich Brownies: The secret to their incredible richness lies in a technique called ‘blooming’ the cocoa powder. By whisking the cocoa into hot melted butter, you activate and intensify its chocolatey compounds, resulting in a significantly more profound flavor profile. To further elevate the decadence, a touch of espresso powder is added. Don’t worry, it won’t make your brownies taste like coffee! Instead, it subtly enhances and amplifies the existing chocolate notes, pushing them into a realm of truly indulgent flavor without overpowering the star ingredient.
- That Irresistible Crackle Top: Achieving that sought-after, thin, glossy, and beautifully crackled crust on your chocolate fudge brownies is simpler than you might think. It all comes down to one key step: vigorously whisking the granulated and brown sugars with the eggs. This crucial action creates a delicate, airy layer that bakes up into a perfect, crisp surface, offering a delightful textural contrast to the soft, fudgy interior.
Essential Ingredients for Your Fudgy Brownies
Crafting the perfect batch of triple chocolate brownies begins with selecting the right ingredients. Here’s a closer look at what you’ll need and some tips for each:
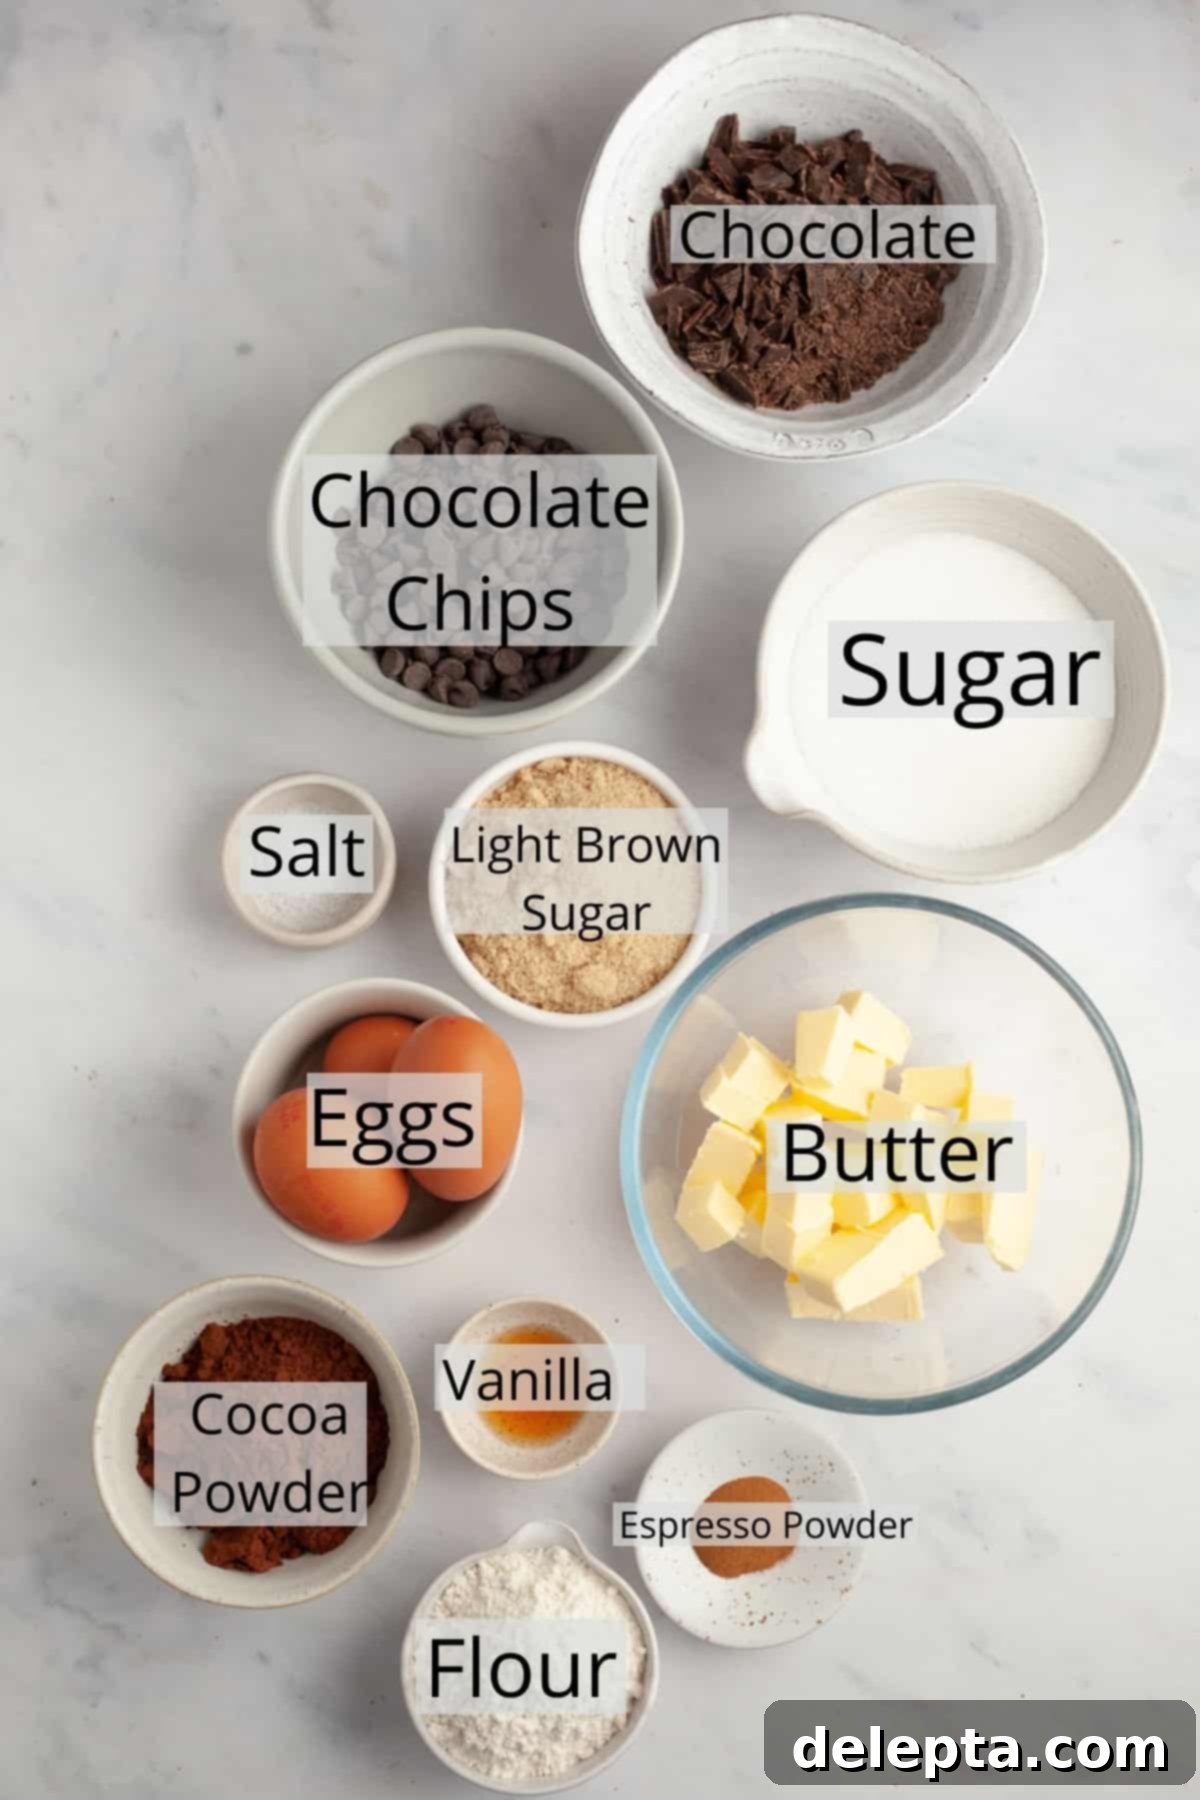
- Cocoa Powder: For this recipe, I primarily use Dutch-processed cocoa powder. This type of cocoa has been alkalized, giving it a darker color and a milder, less acidic chocolate flavor. However, if unsweetened natural cocoa powder is all you have on hand, you can certainly use it. Just be aware that swapping cocoa types might result in a slightly less rich color and a subtly different flavor profile in your finished brownies. Using a kitchen scale to measure cocoa powder is highly recommended for accuracy.
- Espresso Powder: While entirely optional, adding a small amount of espresso powder is a game-changer for enhancing the chocolate flavor. It acts as a flavor enhancer, deepening the chocolate notes without imparting any discernible coffee taste to the brownies. It’s a secret weapon for an extra rich chocolate experience.
- Chocolate (Melted): For the best results, I highly recommend using high-quality dark chocolate bars. Look for chocolate with a cocoa content of around 60-70% for a balanced richness. It’s crucial to chop the chocolate finely before adding it to the hot butter. This ensures it melts smoothly and evenly, integrating perfectly into the brownie batter. Avoid using chocolate chips for melting, as they contain stabilizers that prevent smooth melting.
- Chocolate Chips (for Stirring In): I typically opt for semi-sweet chocolate chips for a classic flavor that complements the richness of the cocoa and dark chocolate. However, feel free to personalize your brownies by swapping them out for your favorite baking chips. Milk chocolate chips will add extra sweetness, white chocolate chips offer a creamy contrast, and even peanut butter chips could create a delightful flavor combination.
- Butter: Use unsalted butter for better control over the salt content in the recipe. Make sure it’s melted and hot when combined with the cocoa powder to achieve that crucial “blooming” effect.
- Eggs: Large eggs are essential for the structure and fudgy texture of these brownies. The eggs, particularly when whisked with the sugars, also contribute to that beautiful crackle top.
- Granulated Sugar & Light Brown Sugar: The combination of both sugars plays a vital role. Granulated sugar contributes to the crackle top and overall sweetness, while light brown sugar adds moisture, chewiness, and a subtle caramel-like depth of flavor. Whisking them well with the eggs is key.
- Vanilla Extract: A good quality vanilla extract always enhances chocolate flavors, adding a warm, aromatic depth that rounds out the overall taste profile.
- All-Purpose Flour: Use all-purpose flour sparingly. The goal is to bind the ingredients without making the brownies cakey. Accurate measurement, preferably by weight, is crucial to avoid dry brownies.
- Kosher Salt: Salt is indispensable in baking, especially with chocolate. It balances the sweetness and brings out the chocolate’s natural flavors. If using table salt, reduce the quantity by half as it’s finer and more potent.
Refer to the comprehensive recipe card below for precise measurements and quantities of all ingredients.
The Journey to the Perfect Fudgy Brownie: Recipe Testing Insights
Creating a truly exceptional brownie recipe is an art form that requires extensive testing and meticulous adjustments. My goal was clear: to develop a super fudgy brownie with that irresistible crackly top, all while eliminating the need for a mixer. As a baking blogger, I confess a strong preference for recipes that minimize equipment, making delicious treats more accessible to everyone. The less cleanup, the better!
While I adore my original brownie base recipe—which you can find in my brownies with cream cheese frosting recipe—I embarked on a new testing journey. My primary focus was to enhance the fudginess and flavor. This involved several key modifications: I significantly increased the amount of cocoa powder for a deeper chocolate intensity and adjusted the granulated sugar for a better crackle. Crucially, I decided to remove the oil from the recipe, relying solely on butter for richness and moisture. I also experimented with different sugar types, testing both powdered sugar and granulated sugar, thinking powdered sugar might dissolve faster and contribute to a smoother batter. Interestingly, I found that the type of sugar didn’t dramatically alter the final texture, proving granulated sugar to be perfectly effective.
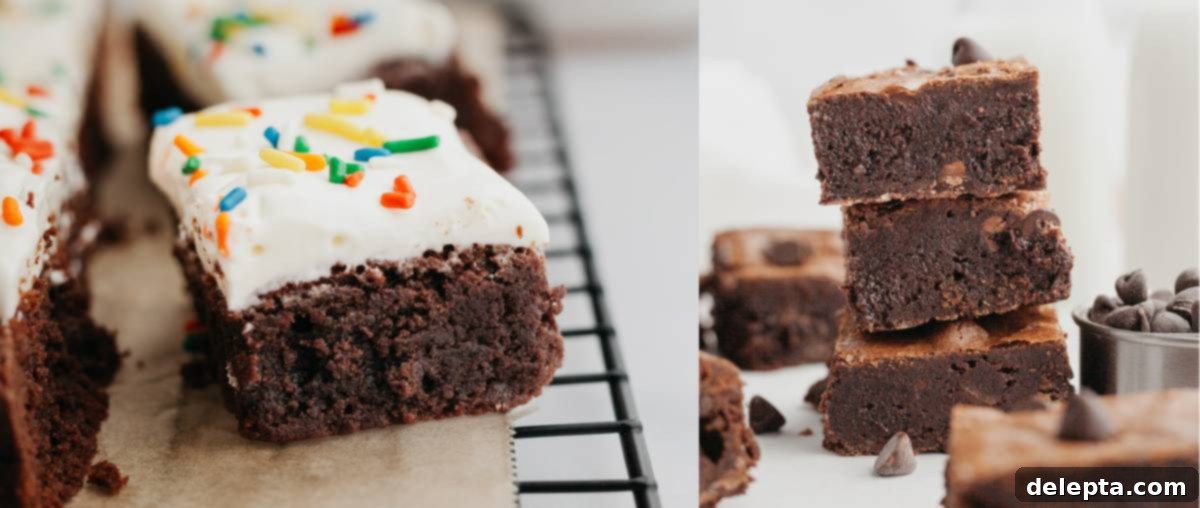
One of the most impactful changes was modifying the egg ratio. My initial recipes often used 2 whole eggs and 1 egg yolk. Through numerous trials, I discovered that using 3 whole large eggs consistently yielded a far superior, much fudgier texture for the brownie. This slight adjustment in egg whites contributes to both the structure and the moist, dense interior that defines a truly fudgy brownie. You can observe the noticeable difference in texture and density in the comparison below:
Another revelation came from exploring post-baking techniques. Inspired by insights from Cloudy Kitchen’s excellent blog, I tested the impact of chilling brownies once they had cooled. And she was absolutely right! Chilling the brownies in the refrigerator for a few hours after they’ve come to room temperature dramatically improves their density and intensifies their fudgy, gooey texture. This step, while requiring a little patience, is highly recommended for achieving the ultimate fudgy brownie experience. Every step of this testing process was about pushing the boundaries to create an accessible yet incredibly indulgent brownie that truly stands out.
Step-by-Step Guide: Crafting Your Triple Chocolate Brownies
Follow these detailed steps to create a batch of incredibly fudgy and decadent triple chocolate brownies. The process is designed to be straightforward, ensuring a perfect result every time.
Step One: Prepare Your Baking Environment
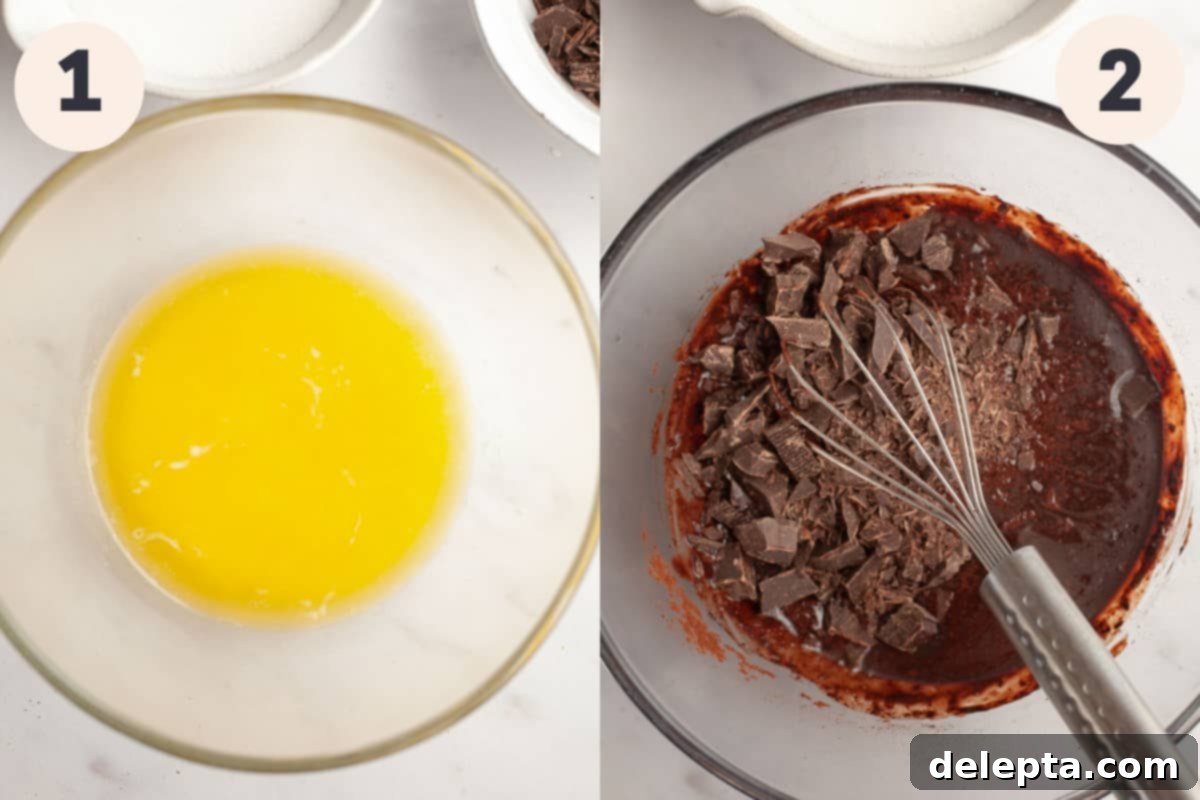
Begin by preheating your oven to 350 Fahrenheit (180 Celsius). Next, take an 8×8 inch baking pan and line it completely with aluminum foil, ensuring there’s an overhang on two sides to create “handles.” This makes it incredibly easy to lift the cooled brownies out of the pan for clean slicing. Set this prepared pan aside. In a medium microwave-safe bowl, melt your unsalted butter in the microwave until it is fully liquid and hot. The heat of the butter is important for the next step.
Step Two: Bloom the Cocoa and Melt the Chocolate
Immediately add the Dutch-processed cocoa powder to the hot melted butter. Whisk vigorously until the mixture is completely smooth and free of lumps. This is the crucial ‘blooming’ process, where the hot butter activates the cocoa, deepening its flavor and color significantly. Once bloomed, add your finely chopped dark chocolate to this warm mixture. Let it sit undisturbed for a minute or two; the residual heat will begin to melt the chocolate. Then, whisk again until the chocolate is fully melted and the mixture is silky smooth and glossy. Allow this chocolate mixture to cool slightly while you prepare the egg and sugar mixture.
Step Three: Create the Crackle Top Base
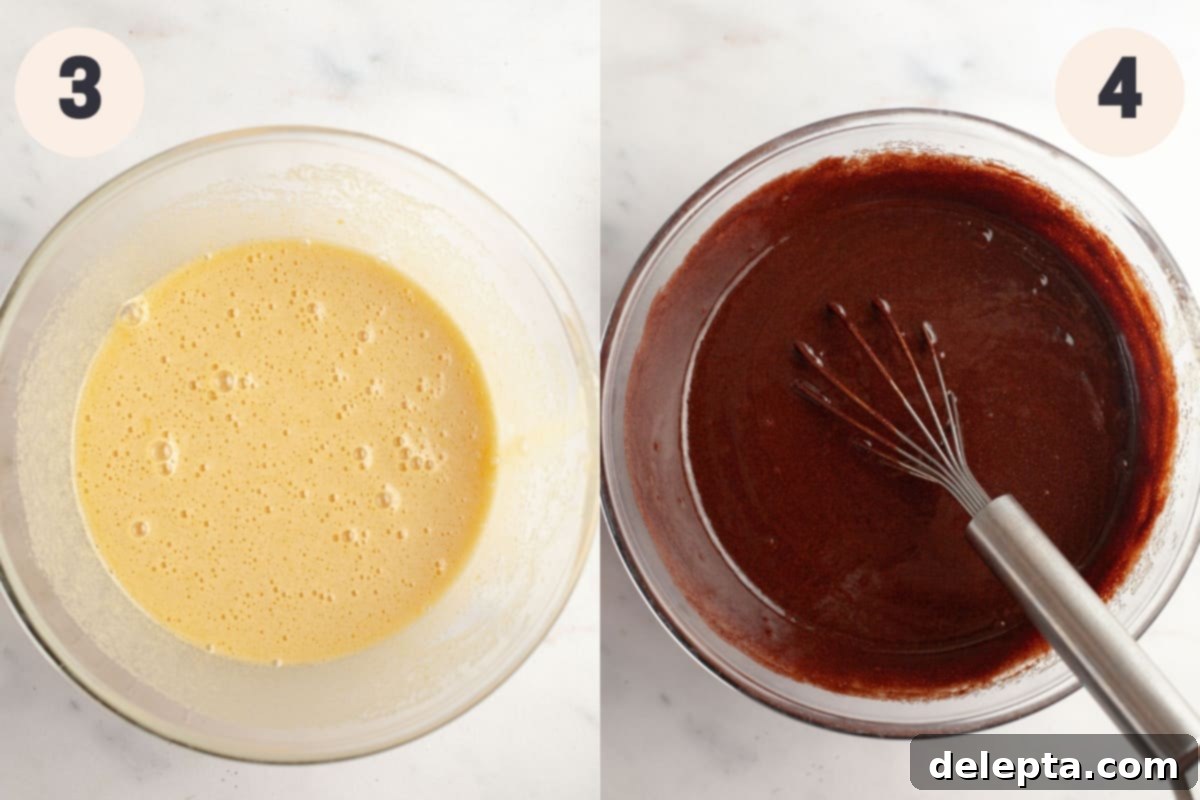
In a separate, large mixing bowl, combine the large eggs with both the light brown sugar and granulated sugar. Whisk this mixture enthusiastically for a full minute and a half to two minutes. This vigorous whisking is vital for incorporating air and dissolving the sugar, which is the secret to achieving that beautiful, thin, and glossy crackle top on your brownies. You’ll know the mixture is ready when it turns a noticeably lighter, pale beige color and, more importantly, when small, consistent bubbles form and remain on the surface after you stop whisking. This creates the ‘meringue-like’ layer.
Step Four: Combine Wet Ingredients
Ensure your melted chocolate and cocoa mixture has cooled slightly—it should be warm to the touch, not piping hot, to avoid scrambling the eggs. Gently pour the whisked egg and sugar mixture into the cooled chocolate mixture. Whisk everything together until it’s completely smooth and homogenous. Finally, stir in the vanilla extract, ensuring its aromatic notes are evenly distributed throughout the luscious chocolate base.
Step Five: Incorporate Dry Ingredients Carefully
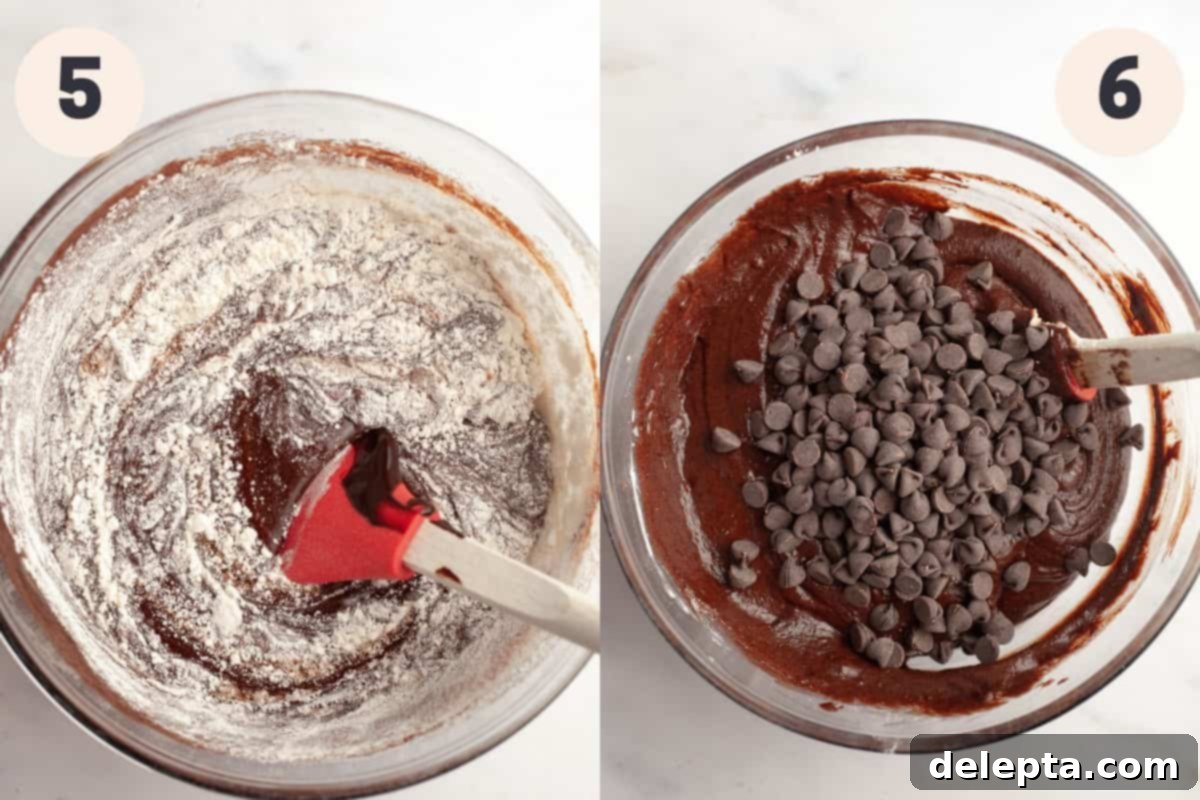
With a rubber spatula, gently fold the all-purpose flour, kosher salt, and espresso powder (if using) into the wet chocolate mixture. The key here is to mix until just combined. Overmixing the flour can develop the gluten, leading to tougher, more cake-like brownies rather than the desired fudgy texture. Stop mixing as soon as no dry streaks of flour are visible.
Step Six: Add the Final Chocolate Burst
Now, gently stir in the semi-sweet chocolate chips (or your preferred baking chips). Distribute them evenly throughout the batter, ensuring every bite will be packed with extra pockets of molten chocolate. This is the “triple” in triple chocolate, adding another layer of texture and flavor.
Step Seven: Bake to Perfection
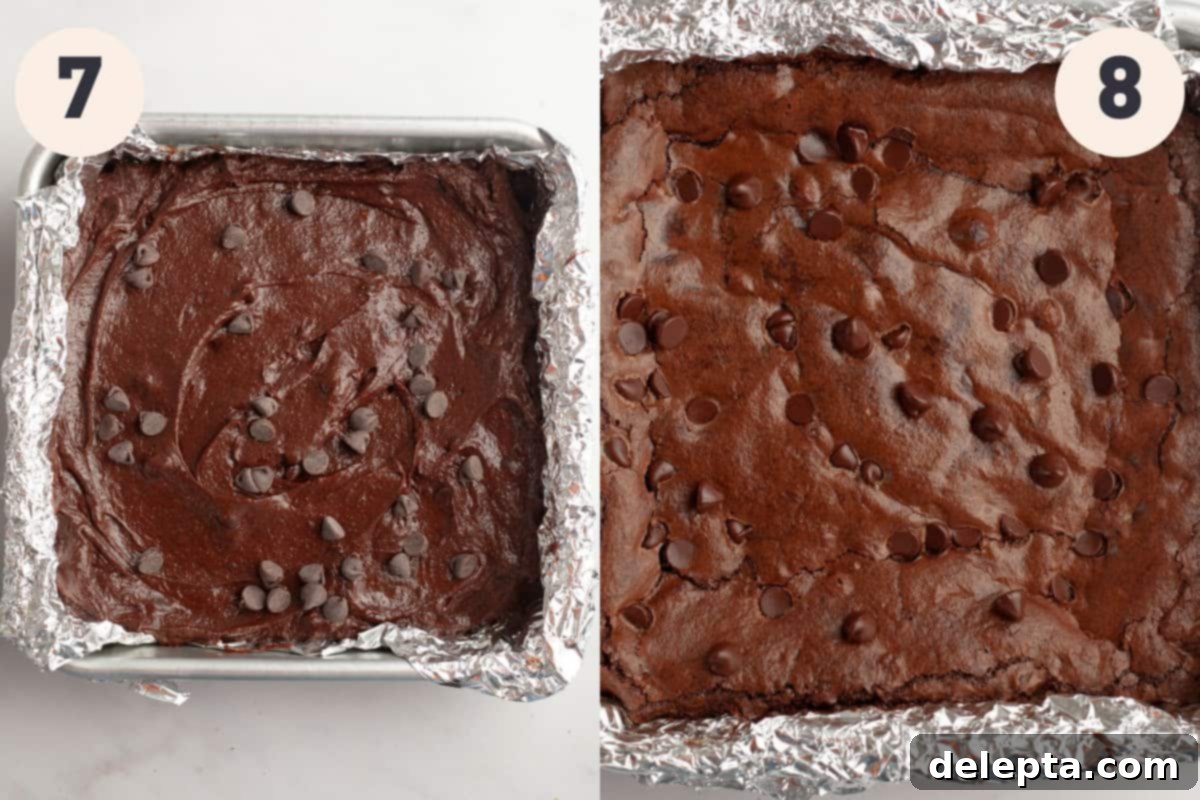
Pour the luscious chocolate brownie batter into your previously prepared 8×8 inch baking pan. Spread it evenly using your spatula. Bake for approximately 26-30 minutes. Baking times can vary depending on your oven, so keep a close eye. The brownies are perfectly done when a toothpick inserted into the center comes out with moist crumbs attached, but not wet batter. Avoid overbaking, as this can lead to dry, cakey brownies.
Step Eight: Cool and Enjoy (with a Chill for Extra Fudginess!)
Once baked, remove the pan from the oven and let the brownies cool completely in the pan on a wire rack. Patience is key here; slicing warm brownies will result in a messy, crumbling texture. For the absolute fudgiest, chewiest brownies, I highly recommend placing the completely cooled brownie pan into the refrigerator for a few hours (or even overnight) before removing the brownies by lifting the foil handles and slicing them into perfect bars. This chilling step firms them up and concentrates their rich, gooey texture. Slice, serve, and savor!
Expert Tips & Tricks for Perfect Triple Chocolate Brownies
- Embrace Your Kitchen Scale: For consistent and truly perfect brownies, a kitchen scale is your best friend, especially when measuring dry ingredients like flour and cocoa powder. Volume measurements (cups) can be notoriously inaccurate due to varying compaction. Too much flour or cocoa can quickly transform your desired fudgy brownie into a dry, disappointingly cakey square. Weighing ensures you get the exact proportions for optimal texture.
- The Magic of Chilling Brownies: If your ultimate goal is to achieve an exceptionally dense, gooey, and super fudgy brownie texture, don’t skip the chilling step! Once your brownies have completely cooled down to room temperature in the pan, transfer the pan to the refrigerator for a few hours, or ideally, overnight. Chilling allows the flavors to meld, the fats to solidify, and the texture to set into that wonderfully chewy, almost truffle-like consistency. It’s a small step that makes a huge difference.
- Mastering the Art of Not Overbaking: Every oven is a little different, and precise timing can be critical when baking brownies. Keep a vigilant eye on these brownies as they approach the end of their baking time. Overbaking is the quickest way to ruin the fudgy texture, turning them dry and crumbly. Begin checking for doneness a few minutes before the minimum bake time suggested. A toothpick inserted into the center should come out with moist crumbs attached, not wet batter, and certainly not clean.
- Elevate with Frosting for Ultimate Decadence: While these triple chocolate brownies are utterly sublime on their own, you can take their decadence to an entirely new level by adding a frosting layer. Once the brownies are completely cooled (and ideally chilled for extra fudginess), spread a generous layer of rich whipped ganache frosting over them. The creamy, smooth ganache perfectly complements the intense chocolate base, creating a truly unforgettable dessert experience for special occasions or just because!
Common Questions About Triple Chocolate Brownies
To keep these delightful brownies fresh and maintain their optimal fudgy texture, store them in an airtight container. They will last wonderfully in the refrigerator for up to 5 days. In fact, I highly recommend storing them in the fridge, as the cool temperature enhances their dense, chewy, and gooey fudgy quality, making them even more enjoyable when served slightly chilled.
Absolutely! This recipe scales beautifully. To make a larger batch, you can simply double all the ingredients listed in the recipe card. When doubling, I recommend baking the brownies in a larger 9×13 inch pan. The baking time might need a slight adjustment, typically an additional 5-10 minutes, but always check for doneness by inserting a toothpick into the center (it should come out with moist crumbs, not wet batter).
The crackly top is a hallmark of truly great brownies, and it primarily comes from sufficiently whisking the eggs and sugars together. If your brownies lacked this distinct crust, it’s most likely that you didn’t whisk this mixture long enough. The key is to vigorously whisk them for at least 1.5 to 2 minutes, until the mixture lightens in color and forms small, stable bubbles on the surface when you stop. This aeration creates an almost meringue-like film, which rises and sets during baking to form that desirable crinkle top. Don’t underestimate this simple step!
Discover More Decadent Brownie Recipes!
- Marbled Cheesecake Brownies
- Oreo Cheesecake Brownies
- Chocolate Brownies with Cream Cheese Frosting
- Brownies with Peanut Butter Cups
If you’ve made these incredible triple chocolate brownies, make sure to leave a ⭐️ rating and review below! Your feedback is invaluable, and I absolutely love seeing your culinary creations. Please tag me on Instagram @alpineella so I can admire what you’ve baked! You can also stay connected and discover more delicious recipes by following along on Pinterest, Facebook, and TikTok!
Recipe
Triple Chocolate Brownies
Ella Gilbert
Pin Recipe
Save Recipe
Saved!
15
minutes
30
minutes
45
minutes
Dessert
American
16
brownies
276
kcal
Equipment
-
8×8 baking pan
Ingredients
-
¾
cup
unsalted butter -
½
cup
dutch process cocoa powder -
4
oz
dark chocolate
chopped -
3
large
eggs -
1
cup
granulated sugar -
½
cup
light brown sugar -
1
teaspoon
vanilla extract -
½
cup
all purpose flour -
1
teaspoon
kosher salt -
1
teaspoon
espresso powder -
¾
cup
semisweet chocolate chips
Instructions
-
Preheat your oven to 350℉/180℃. Line an 8×8 inch baking pan with aluminum foil, making sure there’s an overhang on two sides to easily lift the brownies out later. Set aside.
-
In a medium, microwave-safe bowl, melt the unsalted butter in the microwave until it is hot and fully liquid.¾ cup unsalted butter
-
Add the dutch process cocoa powder to the hot butter and whisk vigorously until smooth. This essential step, known as blooming the cocoa powder, significantly enhances the chocolate’s richness and depth of flavor!½ cup dutch process cocoa powder
-
Pour in the finely chopped dark chocolate and allow it to sit in the warm mixture for a minute or two to soften. Then, whisk until the chocolate is fully melted and the mixture is completely smooth and glossy.4 oz dark chocolate
-
In a separate, large bowl, whisk the large eggs with the granulated sugar and light brown sugar. Whisk continuously for 1 minute 30 seconds to 2 minutes. The mixture should lighten in color, become slightly thicker, and develop small, stable bubbles on the surface when you stop whisking. This creates the crackle top!3 large eggs,
1 cup granulated sugar,
½ cup light brown sugar -
Once the melted chocolate mixture has cooled down slightly (to warm, not hot), pour the whisked sugar-egg mixture into the chocolate. Whisk until perfectly smooth, then stir in the vanilla extract.1 teaspoon vanilla extract
-
Using a rubber spatula, gently fold in the all-purpose flour, kosher salt, and espresso powder. Mix only until just combined and no dry streaks of flour remain to ensure fudgy brownies.½ cup all purpose flour,
1 teaspoon kosher salt,
1 teaspoon espresso powder -
Carefully stir in the semisweet chocolate chips, distributing them evenly throughout the rich batter.¾ cup semisweet chocolate chips
-
Pour the thick brownie batter into your prepared 8×8 inch pan, spreading it evenly. Bake for 26-30 minutes. The brownies are done when a toothpick inserted into the center comes out with moist crumbs attached (not wet batter). Avoid overbaking!
-
Allow the brownies to cool completely in the pan on a wire rack. For an even more intensely fudgy and dense texture, place the cooled brownie pan in the refrigerator for a few hours before removing and slicing into bars. Enjoy!
Video
Notes
My recipes have been developed and tested primarily using metric grams for precision. For the most accurate and consistent results, I highly recommend using a digital kitchen scale to weigh your ingredients. While I’ve included conversions to US cups, please note that I haven’t extensively tested the recipe using cup measurements. You can easily switch to metric measurements by clicking the ‘Metric’ button above the ingredients list in the recipe card.
Butter: For optimal flavor and texture, I always use European-style unsalted butter in this triple chocolate brownie recipe. Its higher fat content contributes to a richer, more tender crumb.
Kosher Salt: If you don’t have kosher salt on hand, you can substitute it with fine table salt. However, since table salt is denser and saltier, you should halve the amount. For example, 1 teaspoon of Diamond Crystal Kosher Salt (which I typically use) is equivalent to ½ teaspoon of fine table salt. Be aware that Morton Salt is a different type of kosher salt and is also saltier than Diamond Crystal, so adjust accordingly.
Cocoa Powder: This recipe calls for Dutch-processed cocoa powder, which provides a darker color and a smoother, less bitter chocolate flavor. While you can substitute it with natural unsweetened cocoa powder, please note that the resulting brownies might not be quite as dark or intensely rich in flavor.
Chocolate Chips: I use semi-sweet chocolate chips for a balanced sweetness. Feel free to customize your brownies by swapping them out for your favorite baking chips. Milk chocolate chips will add more sweetness and creaminess, white chocolate chips provide a lovely contrast, or you could even try peanut butter chips for a different flavor dimension.
Espresso Powder: Don’t be shy about adding the espresso powder! Its purpose is not to make your brownies taste like coffee, but rather to enhance and deepen the rich, complex flavors of the chocolate, making them taste even more intensely chocolatey. It’s a subtle but powerful flavor booster.
Storage: To ensure your brownies remain wonderfully fudgy and fresh, store them in an airtight container in the refrigerator. They will keep beautifully for up to 5 days. Storing them in the fridge actually contributes to an even denser, more satisfyingly fudgy texture, making them a delightful chilled treat!
Nutrition
Calories:
276
kcal
Carbohydrates:
32
g
Protein:
3
g
Fat:
16
g
Saturated Fat:
10
g
Polyunsaturated Fat:
1
g
Monounsaturated Fat:
5
g
Trans Fat:
0.4
g
Cholesterol:
58
mg
Sodium:
165
mg
Potassium:
171
mg
Fiber:
3
g
Sugar:
24
g
Vitamin A:
324
IU
Calcium:
28
mg
Iron:
2
mg
Tried this recipe?
Leave a comment below! You can also tag me on Instagram @alpineella so I can see what you made!
