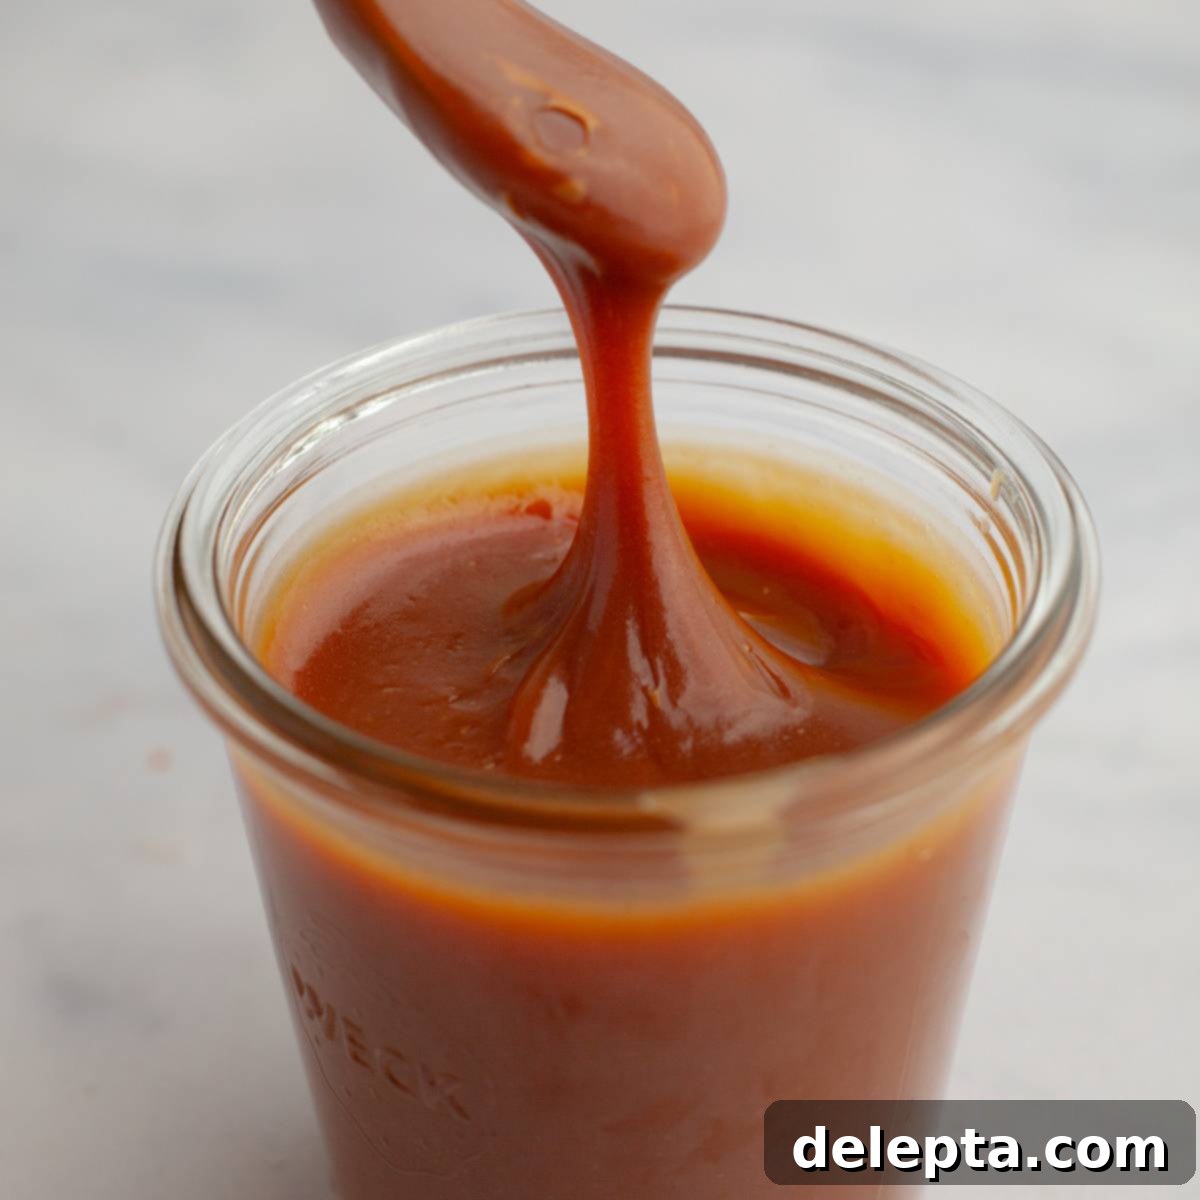
Ultimate Guide to Easy Homemade Salted Caramel Sauce: Your New Favorite Dessert Game-Changer
Learning how to make your own luxurious homemade salted caramel sauce is an absolute game-changer in the kitchen! Imagine a rich, buttery, sweet, and perfectly salty topping that can elevate almost any dessert. With just 5 simple ingredients readily available in your pantry, you can whip up this divine caramel sauce at home in mere minutes. Forget about bland, store-bought versions – once you taste the profound difference of homemade, there’s no going back.
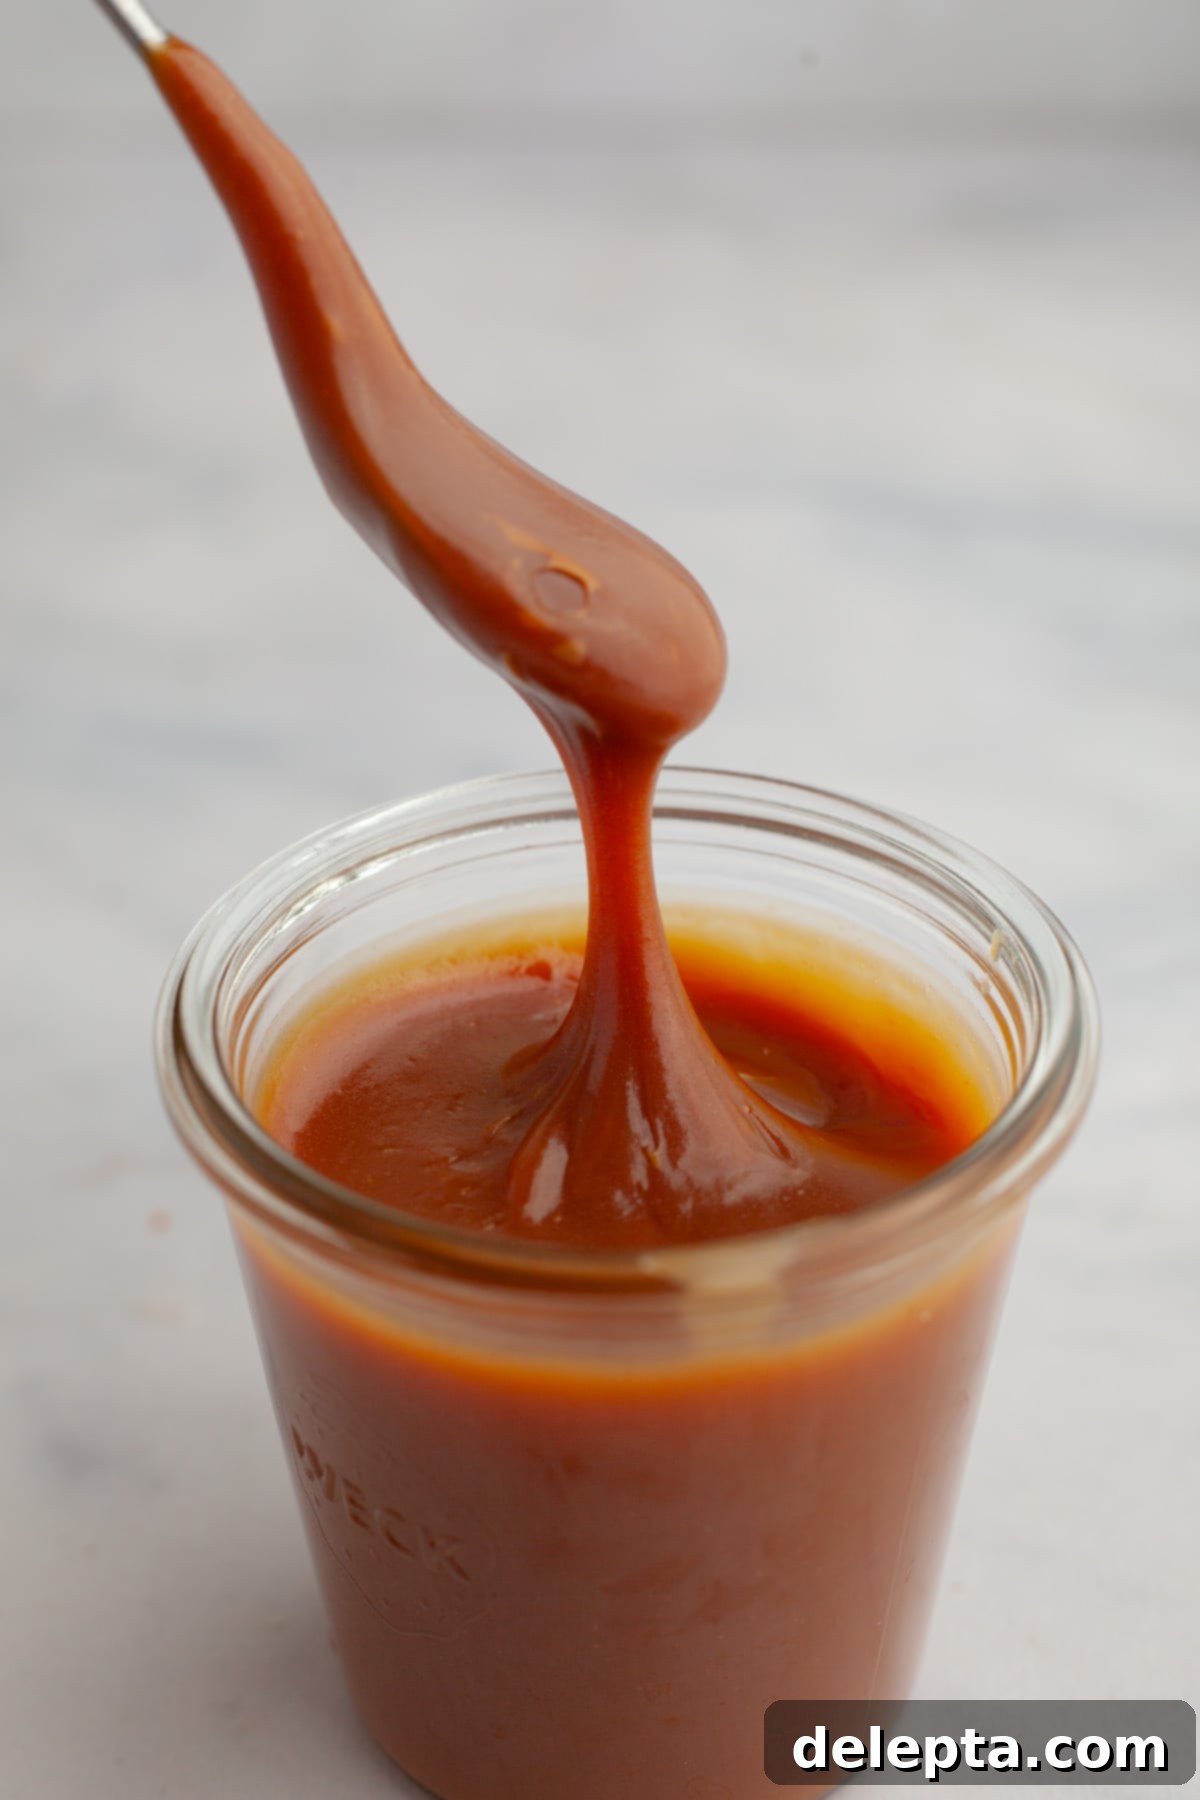
Salted caramel has soared in popularity over the years, becoming a beloved flavor in everything from lattes to ice cream, and for very good reason! The tantalizing combination of sweet and savory notes creates an irresistible depth that is truly unique. I’ve personally been crafting this homemade salted caramel for years, and while it might appear intimidating to first-timers, I promise you, it’s incredibly easy to master right in your own kitchen.
While convenience might tempt you to reach for a bottle of store-bought caramel, dedicating just a few extra minutes to make this homemade version will reward you with an unparalleled flavor and silky smooth texture that mass-produced options simply can’t match. The fresh ingredients and careful caramelization process yield a sauce that tastes wonderfully rich and complex, making all the difference in your culinary creations.
This luscious caramel sauce isn’t just a standalone treat; it’s a versatile building block for countless desserts. It’s the very same recipe I use as the star ingredient for my indulgent no-bake turtle pie, and a slightly adapted variation fills the centers of my delectable caramel-filled cupcakes. Get ready to elevate your baking and dessert game with this simple yet sensational recipe!
Why You’ll Fall in Love with This Easy Salted Caramel Recipe!
Preparing homemade salted caramel sauce might seem like a task reserved for professional pastry chefs, but this recipe is designed for everyone, from beginners to seasoned bakers. Here’s why you’ll absolutely adore making and using this incredible sauce:
- Effortless with Just 5 Pantry Staples: You won’t need to hunt for obscure ingredients! This easy salted caramel sauce comes together with only five common items you likely already have on hand: sugar, butter, heavy cream, salt, and vanilla extract. Simple ingredients, extraordinary results.
- Beginner-Friendly Dry Caramel Method: This recipe utilizes the “dry caramel” method, which I find significantly simpler and less prone to crystallization compared to the “wet caramel” method (where water is added to the sugar). This makes it a fantastic, stress-free recipe for your first foray into homemade caramel, ensuring a smooth and successful outcome every time.
- Incredibly Versatile for Endless Dessert Creations: The possibilities with this salted caramel sauce are truly endless! Use it as a decadent drizzle over ice cream, an irresistible filling for cookies or cupcakes, a luscious swirl in frosting for cakes, or as a dip for fresh fruit and pretzels. It’s also perfect for flavoring coffee, hot chocolate, or even as a base for caramel candies. You can even gift a jar to friends and family – they’ll be amazed it’s homemade!
- No Candy Thermometer Required: Say goodbye to special equipment! This straightforward recipe relies on visual cues for perfect caramelization, eliminating the need for a precise candy thermometer. This simplifies the process and makes it accessible for any home cook, allowing you to achieve that ideal amber color and rich flavor without extra fuss.
Essential Ingredients for Your Perfect Homemade Caramel
Crafting the perfect salted caramel sauce starts with understanding the role of each key ingredient. While the list is short, quality matters for the best flavor and texture. Here’s a detailed look at what you’ll need:
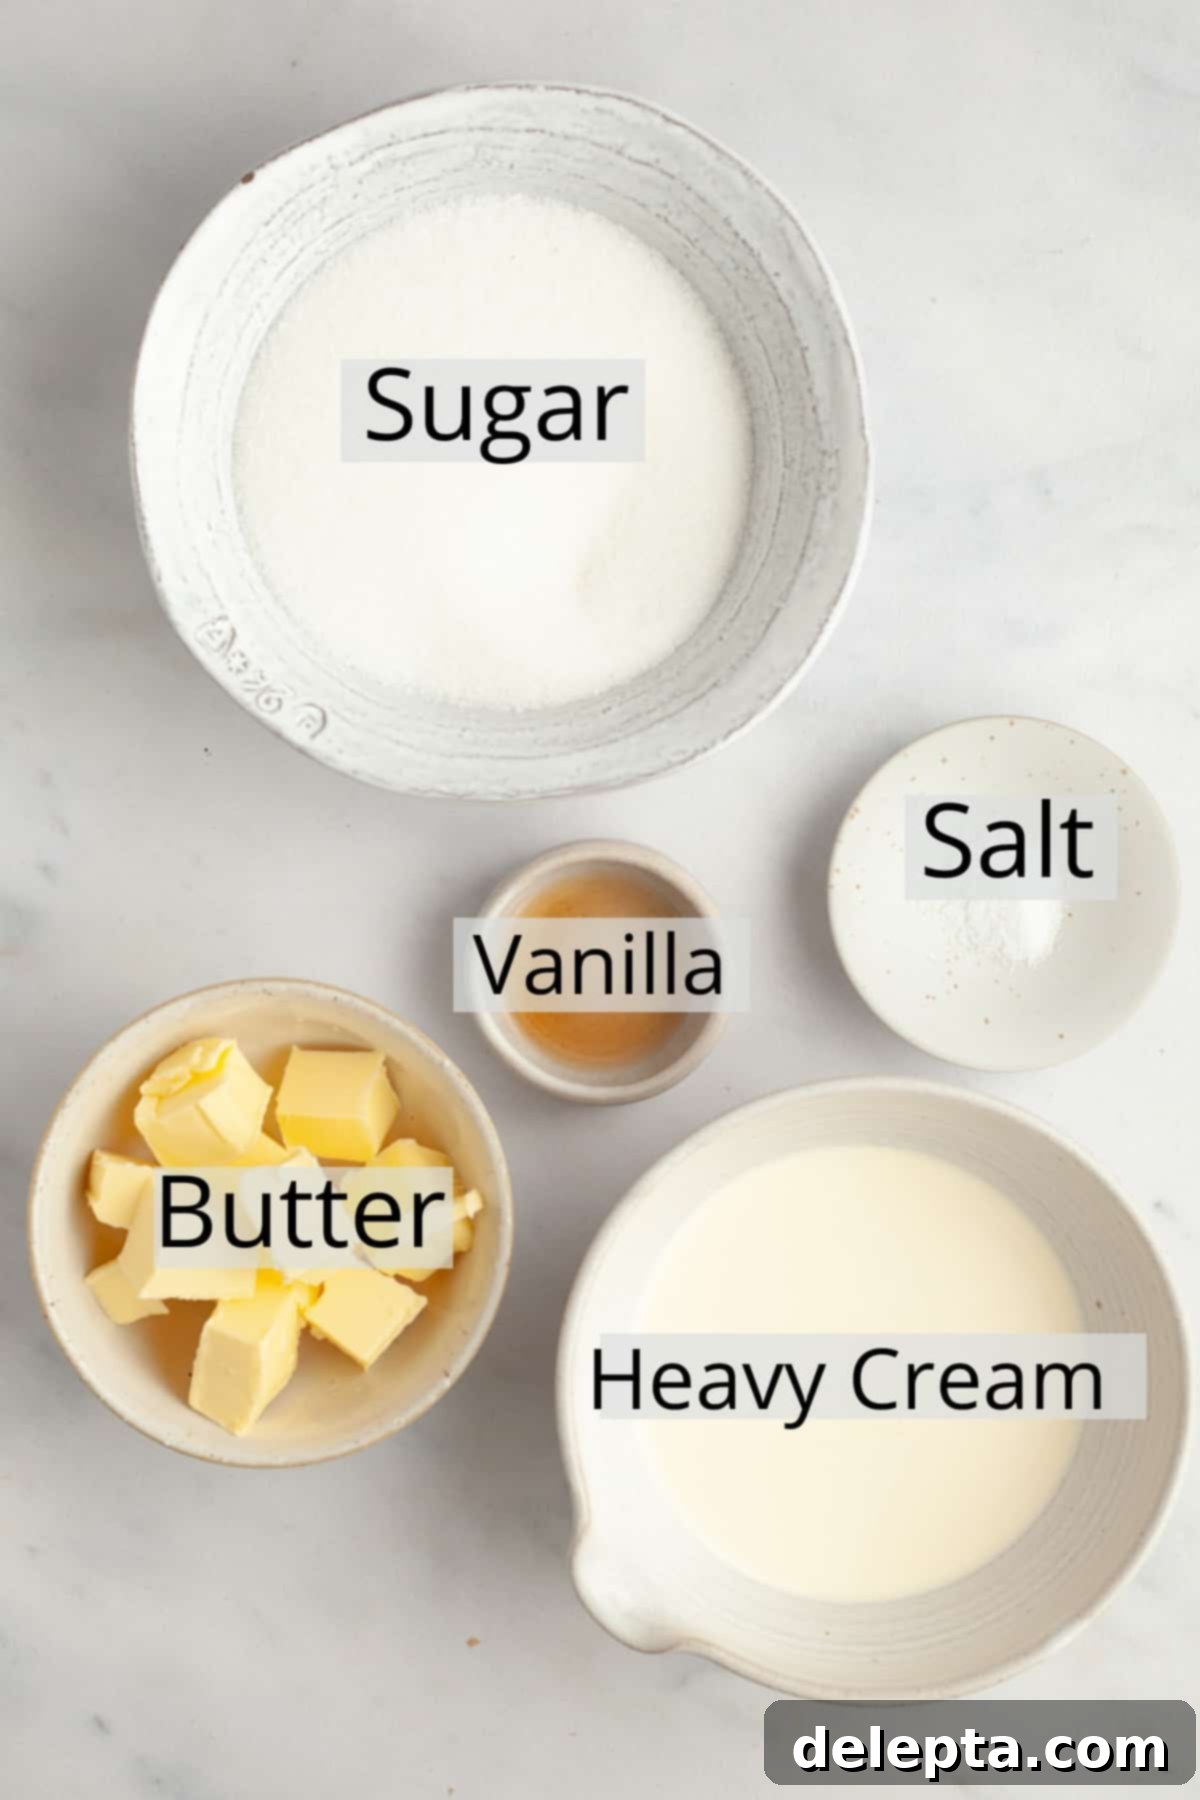
- Granulated Sugar: This is the foundation of our caramel. We’re specifically using regular white granulated sugar because it caramelizes cleanly and develops that classic caramel flavor and color. It’s crucial not to swap this out for light brown sugar, as brown sugar contains molasses, which would result in a butterscotch sauce, not true caramel. The dry caramel method works best with pure granulated sugar.
- Unsalted Butter: Using unsalted butter gives you precise control over the overall saltiness of your caramel. We recommend cubing it and letting it come to room temperature. This ensures it melts more smoothly into the hot sugar, reducing the risk of the caramel seizing or cooling down too quickly. If you only have salted butter, you can use it, but be sure to significantly decrease or even omit the additional salt called for in the recipe to avoid an overly salty outcome.
- Heavy Cream: Also known as double cream in the UK, heavy cream is vital for stopping the caramelization process and creating that wonderfully smooth, luscious texture. It adds richness and body to the sauce. For best results and to minimize sputtering, it’s best to have your heavy cream at room temperature or even slightly warmed before adding it to the hot caramel. Cold cream can cause the caramel to seize up more aggressively.
- Salt: This is what transforms a sweet caramel into a tantalizing salted caramel. The type of salt you use can subtly change the flavor and texture.
- Table Salt: Fine-grained and dissolves quickly. Use slightly less than kosher or flaky salt.
- Kosher Salt: Coarser crystals, which means you might need a bit more by volume than table salt. It offers a cleaner salt flavor.
- Flaky Sea Salt: This is my personal favorite for its delightful texture and burst of briny flavor. It doesn’t dissolve completely, providing a pleasant crunch. If using flaky salt, you might want to add a bit more, or sprinkle some on top of your finished desserts for an extra flourish. Adjust the amount to your personal preference!
- Vanilla Extract: A dash of good quality vanilla extract (or vanilla bean paste) adds an extra layer of warmth and complexity to the caramel. It enhances the overall flavor profile, complementing the richness of the butter and cream. While optional, it’s highly recommended for a truly gourmet taste.
Crafting Your Perfect Salted Caramel: Step-by-Step Instructions
Making caramel requires a bit of attention, but it’s not nearly as difficult as you might think. Follow these detailed steps to achieve a perfectly smooth, rich, and delicious salted caramel sauce.
Preparation is Key (Mise en Place)
Before you even turn on the stove, ensure all your ingredients are measured out and ready. Cube your butter and bring it to room temperature. Have your heavy cream, salt, and vanilla extract measured and within arm’s reach. This process moves quickly, and you don’t want to be scrambling for ingredients while the sugar is caramelizing.
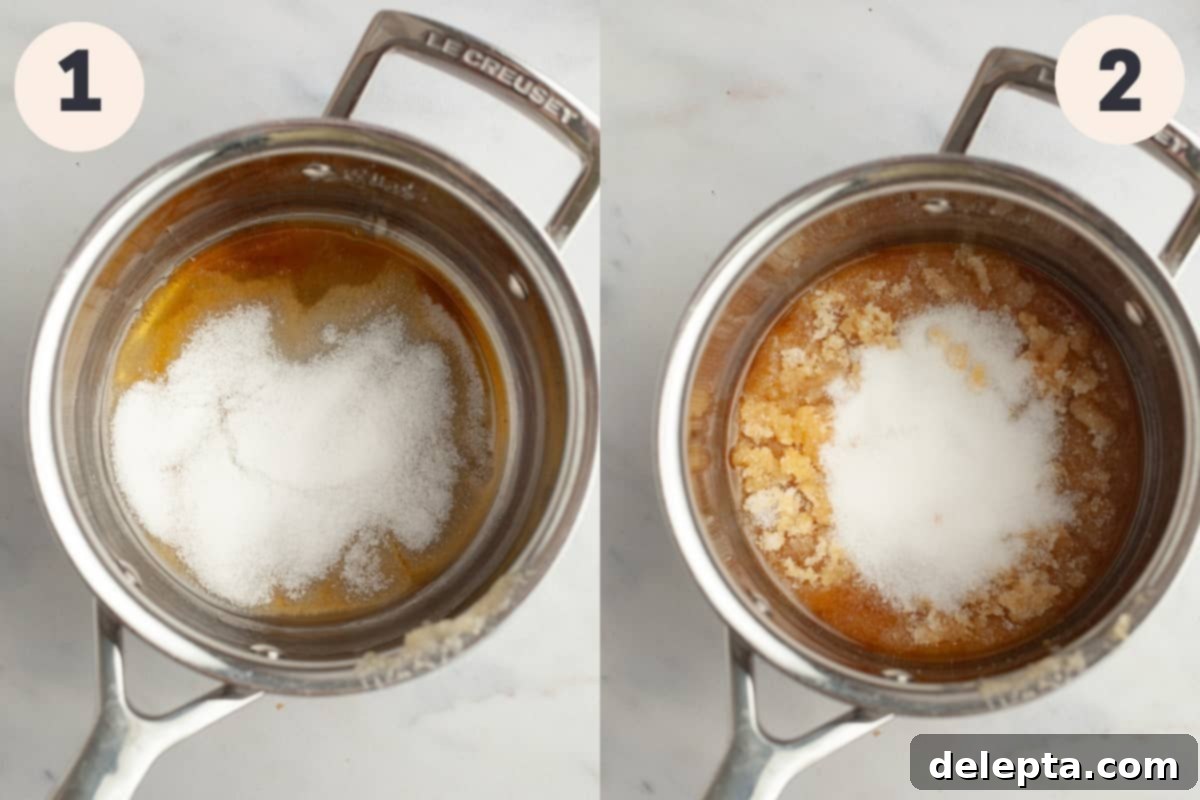
Step 1: Gradually Melt the Sugar. In a small or medium-sized heavy-bottomed saucepan, add just ¼ cup of the granulated sugar. Place the saucepan over medium-low heat. The key to successful dry caramel is patience and gradual melting. Allow this first batch of sugar to dissolve completely, turning into a clear liquid. You can gently swirl the pan if needed, but avoid stirring with a utensil at this stage, as it can cause crystallization. If you see any sugar crystals sticking to the sides of the pan, use a clean, damp rubber spatula or pastry brush to gently wipe them down into the melting sugar – this prevents further crystallization.
Step 2: Continue Adding and Melting Sugar. Once the first ¼ cup of sugar has completely dissolved and is liquid, add the next ¼ cup. Continue this process, adding the sugar a quarter cup at a time, allowing each addition to fully dissolve before adding more. You can use a heat-proof rubber spatula or wooden spoon to gently stir and help the melting process along, ensuring no clumps remain. As the sugar melts, it will begin to turn a light amber color, deepening as it cooks. Keep a close eye on it, as caramel can go from perfect to burnt very quickly.
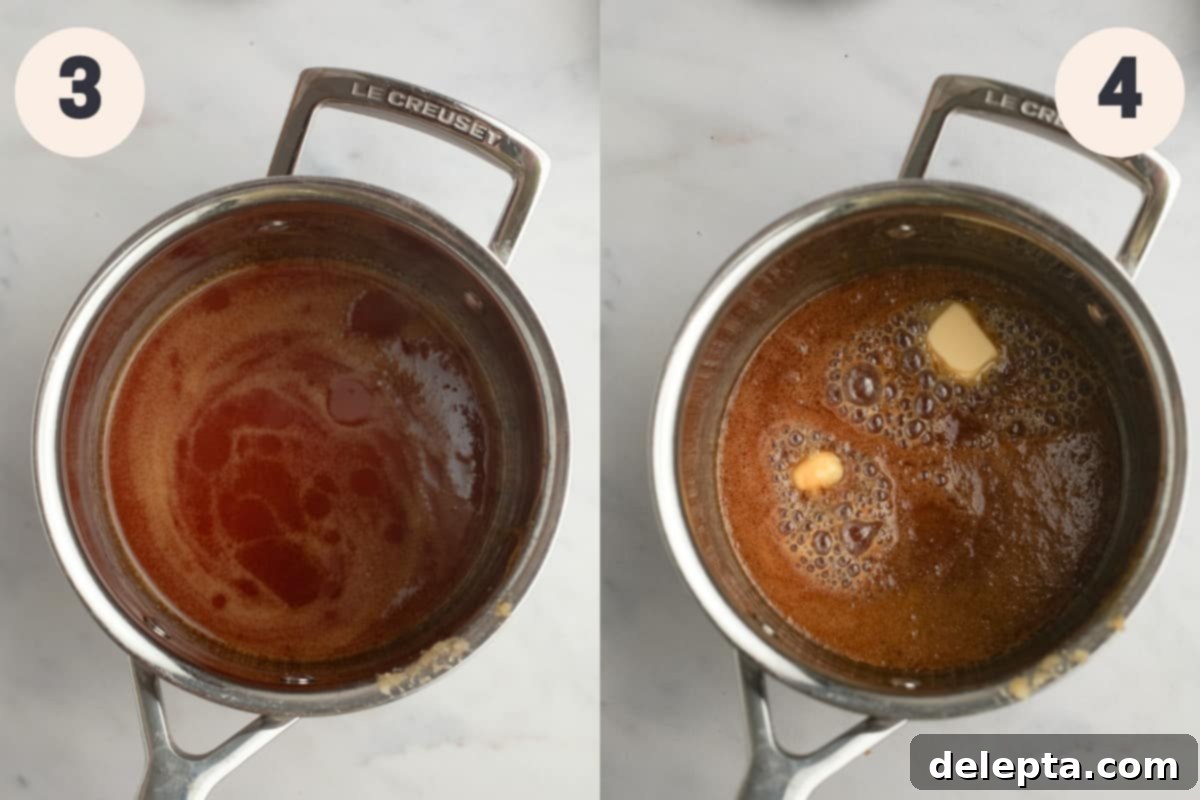
Step 3: Achieve the Perfect Amber Color. Once all the sugar has been added and dissolved, let it continue to cook without stirring, swirling the pan occasionally, until it reaches a beautiful dark amber color. This is the crucial stage for flavor development. It should look like a dark honey or copper penny. As soon as it reaches this rich, deep amber hue, immediately remove the saucepan from the heat. Don’t wait too long, as it will continue to cook off the heat, and a darker color can quickly become bitter and burnt.
Step 4: Incorporate the Butter. Now, carefully add the cubed, room-temperature unsalted butter, one piece at a time, to the hot caramel. Be extremely cautious here, as the caramel will sputter and bubble aggressively due to the temperature difference. Stir constantly and vigorously with your heat-proof rubber spatula or wooden spoon until all the butter is fully melted and smoothly incorporated into the caramel. It will transform into a rich, thick, and glossy mixture.
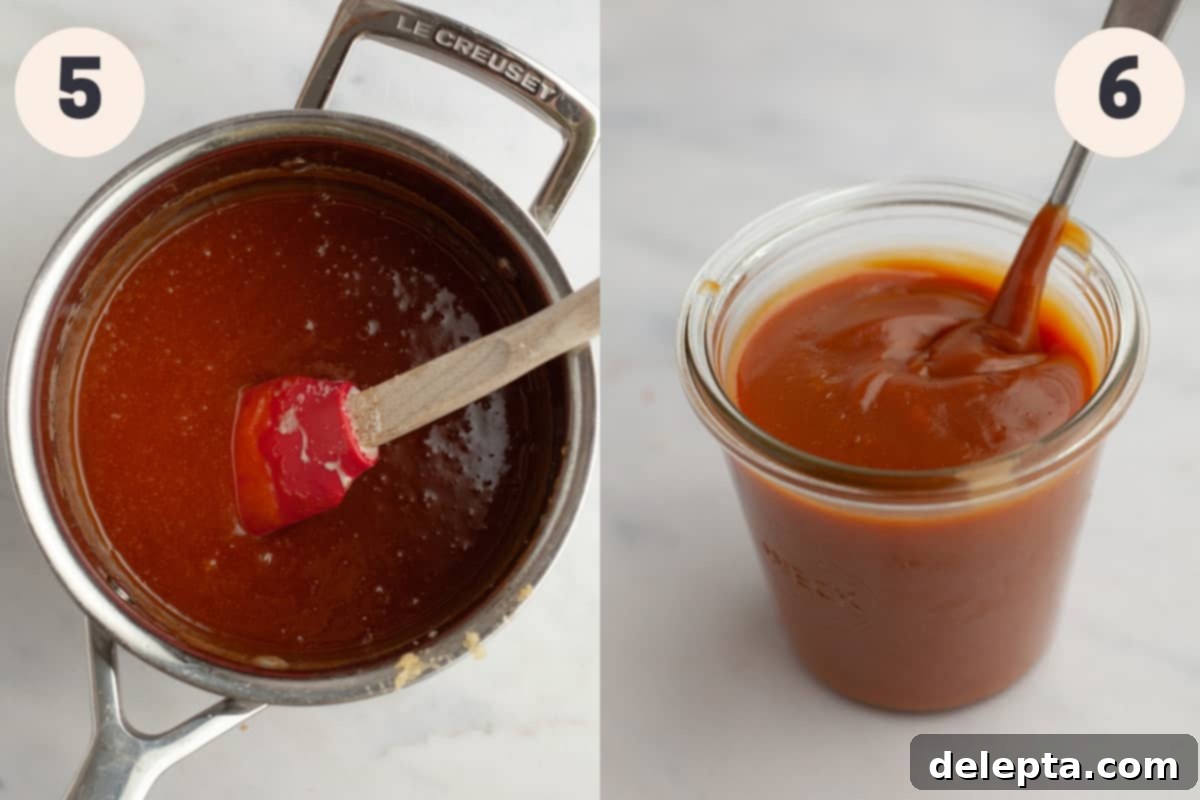
Step 5: Add Cream, Salt, and Vanilla. With the butter fully incorporated, slowly pour in the heavy cream (preferably warmed or room temperature), along with the salt and vanilla extract. Again, the mixture will bubble and sputter, so maintain caution and stir continuously. Continue stirring until everything is smoothly combined and the sauce is uniform. The cream helps to cool the caramel and create its characteristic creamy consistency.
Step 6: Cool and Store Your Caramel. Once the sauce is silky smooth, pour the hot salted caramel into a large, clean mason jar or an airtight, heat-proof container. Allow it to cool completely at room temperature before using or transferring to the refrigerator. As it cools, the caramel will thicken significantly to a wonderfully pourable and spoonable consistency. If you need it thicker for a specific recipe (like filling cupcakes), chilling it further will help.

Expert Tips & Tricks for Perfect Salted Caramel
Achieving perfect homemade salted caramel is easy with a few insider tips. Here’s how to ensure success every time:
- Safety First: Handle with Extreme Care. Hot sugar can cause severe burns. Always exercise caution when adding butter and heavy cream, as the caramel will sputter and steam intensely. Stand back, wear oven mitts if you prefer, and use a long-handled, heat-proof spatula or wooden spoon for stirring.
- Control Thickness with Temperature: When freshly made and warm, the caramel will be relatively thin. For a thicker caramel sauce suitable for fillings or firmer toppings, simply refrigerate it until it reaches your desired consistency. If it becomes too firm, gently warm it in the microwave or a double boiler until it’s pourable again.
- Mise en Place is Your Best Friend: “Prep everything before you get started” cannot be stressed enough. Caramel making moves quickly, and you need to be ready to add ingredients immediately. Having your butter cubed and at room temperature, and your cream, salt, and vanilla measured and within arm’s reach will make the entire process smoother and prevent mishaps.
- Never Leave Your Caramel Unattended: Keep a constant eye on the caramel as the sugar melts and darkens. It can go from perfectly amber to burnt in a matter of seconds. If you feel it’s bubbling too aggressively or cooking too fast, immediately lower the heat. Remember, a heavy-bottomed saucepan helps with even heat distribution.
- Not a Kid-Friendly Activity: Due to the extreme heat and potential for sputtering, this is not a recipe to make with children around. Keep little ones safely away from the stovetop during the caramel-making process.
- Prevent Crystallization: To minimize the risk of sugar crystals forming (which can make your caramel grainy), avoid stirring the sugar extensively when it first starts to melt. If crystals appear on the sides of the pan, use a clean pastry brush dipped in a little water to gently brush them back into the melting sugar.
- Troubleshooting Burnt Caramel: If your sugar turns very dark brown or black and smells burnt, there’s no saving it. The bitter taste will persist. Discard it and start fresh. It’s better to waste a bit of sugar than to ruin a whole batch and your dessert.
- Cleaning the Pan: Don’t despair over the hardened caramel left in your saucepan. Simply fill the pan with water and bring it to a simmer on the stove. The residual caramel will dissolve into the water, making cleanup effortless.
Frequently Asked Questions About Homemade Salted Caramel
When you first finish making the caramel, it will be hot and quite thin. This is completely normal! Caramel thickens significantly as it cools. Once it reaches room temperature, it will have a lovely pourable consistency, and if you refrigerate it, it will become even thicker and more solid. Don’t worry, just give it time to cool and set.
Unfortunately, this recipe relies heavily on the specific fat and protein content of dairy butter and heavy cream for its texture and emulsification. I haven’t personally tested this recipe with dairy-free substitutes, so I cannot guarantee the same results. Dairy-free alternatives may behave differently under high heat and might not achieve the same creamy consistency.
No, you certainly don’t have to add the salt if you prefer a classic, sweet caramel sauce! The salt simply balances the sweetness and enhances the overall flavor, creating that popular “salted caramel” profile. If you omit the salt, you’ll have a delicious traditional caramel perfect for many uses.
Grainy caramel is usually caused by sugar crystals that didn’t fully dissolve during the melting process. To prevent this, ensure you melt the sugar gradually (in batches as instructed) and avoid stirring excessively when the sugar is initially melting. If you see crystals on the side of the pan, gently brush them down with a damp pastry brush. If your caramel becomes grainy, sometimes gently reheating it over low heat with a tiny bit more cream can help dissolve the crystals, but often it’s best to discard and restart for the smoothest result.
If your caramel hardens completely like candy, it likely means it was cooked to too high a temperature. Caramel becomes increasingly firm the hotter it gets during cooking. Next time, be sure to remove it from the heat as soon as it reaches the desired dark amber color and incorporate the butter and cream quickly. If it’s already hardened, you can often gently reheat it with a splash of cream or water over low heat until it softens and becomes saucy again.
Storing Your Delicious Homemade Salted Caramel Sauce
Once your homemade salted caramel sauce has been made, proper storage ensures it stays fresh and delightful for future indulgence.
Allow the caramel to cool completely in its jar or airtight container at room temperature before placing it in the refrigerator. Stored in the fridge, your caramel sauce will remain fresh for up to 2 weeks. The cool temperature will make the caramel thicken significantly, becoming quite firm.
When you’re ready to use it, and you need a thinner, pourable consistency, simply warm the caramel up. The easiest way is in the microwave: heat it in 15-20 second intervals, stirring well after each, until it reaches your desired fluidity. Alternatively, you can gently warm it in a saucepan over very low heat on the stovetop, stirring constantly.
You can also freeze homemade caramel sauce for longer storage, up to 3 months. Pour cooled caramel into freezer-safe jars or containers, leaving a little headspace. Thaw in the refrigerator overnight and reheat gently before serving.
Elevate Your Desserts: More Recipes Featuring Caramel
Now that you’ve mastered the art of homemade salted caramel, it’s time to put your delicious creation to good use! This versatile sauce can transform ordinary treats into extraordinary delights. Here are some of my favorite recipes where this salted caramel truly shines:
- Chocolate Salted Caramel Cupcakes
- Turtle Pie (No Bake)
- Easy Apple Oat Crumble Pie (Dutch Apple Pie)
- Caramel Filled Cupcakes
Have you made this incredible homemade salted caramel sauce? Please take a moment to rate the recipe below! Don’t forget to share your creations and follow me on Instagram @alpineella and Pinterest! I love seeing what you bake!
Recipe
Homemade Salted Caramel Sauce
Ella Gilbert
Pin Recipe
Save RecipeSaved!
Ingredients
Salted Caramel
- 1 cups granulated sugar
- 6 tablespoons unsalted butter cubed, room temperature
- ½ cups heavy cream
- ½ teaspoon vanilla extract
- ½ teaspoon kosher salt
Instructions
Salted Caramel
-
Take a small, heavy-bottomed saucepan and place it on your stove over medium-low heat. Add the sugar ¼ cup at a time, allowing each addition to dissolve completely and turn into a clear liquid before adding the next ¼ cup. Do not stir initially; gently swirl the pan if needed. Use a damp rubber spatula to wipe down any sugar crystals from the sides of the pan.1 cups granulated sugar
-
Stir occasionally with a heat-proof spatula until all the sugar has completely dissolved and the liquid sugar turns a rich, dark amber color. This is the crucial stage for flavor. As soon as it reaches this deep golden-brown, immediately turn off the heat to prevent burning.
-
Carefully add the cubed, room-temperature butter, one piece at a time. Be extremely cautious as the caramel will sputter and bubble aggressively. Stir continuously and vigorously with your heatproof spatula until all the butter is fully melted and smoothly incorporated into the caramel, creating a glossy mixture.6 tablespoons unsalted butter
-
Slowly pour in the heavy cream (preferably at room temperature), followed by the salt and vanilla extract. Again, the mixture will react and bubble. Stir constantly until all ingredients are thoroughly combined and the sauce is smooth and uniform. Let cool slightly in the pan, then pour into a large mason jar or airtight container. Let it cool completely at room temperature until it is very thick before using or placing it in the fridge. To re-warm and thin the caramel for use, heat for 15-20 seconds in the microwave, stirring well, until pourable.½ cups heavy cream, ½ teaspoon vanilla extract, ½ teaspoon kosher salt
Video
Notes
Heavy Cream: If you’re in the UK, the equivalent product is double cream. Ensure it’s at room temperature or slightly warmed before adding to the caramel to minimize seizing.
Storage: Once the caramel has completely cooled to room temperature, transfer the jar or container to the fridge, where it will keep fresh for up to 2 weeks. For longer storage, it can be frozen for up to 3 months.
Nutrition
