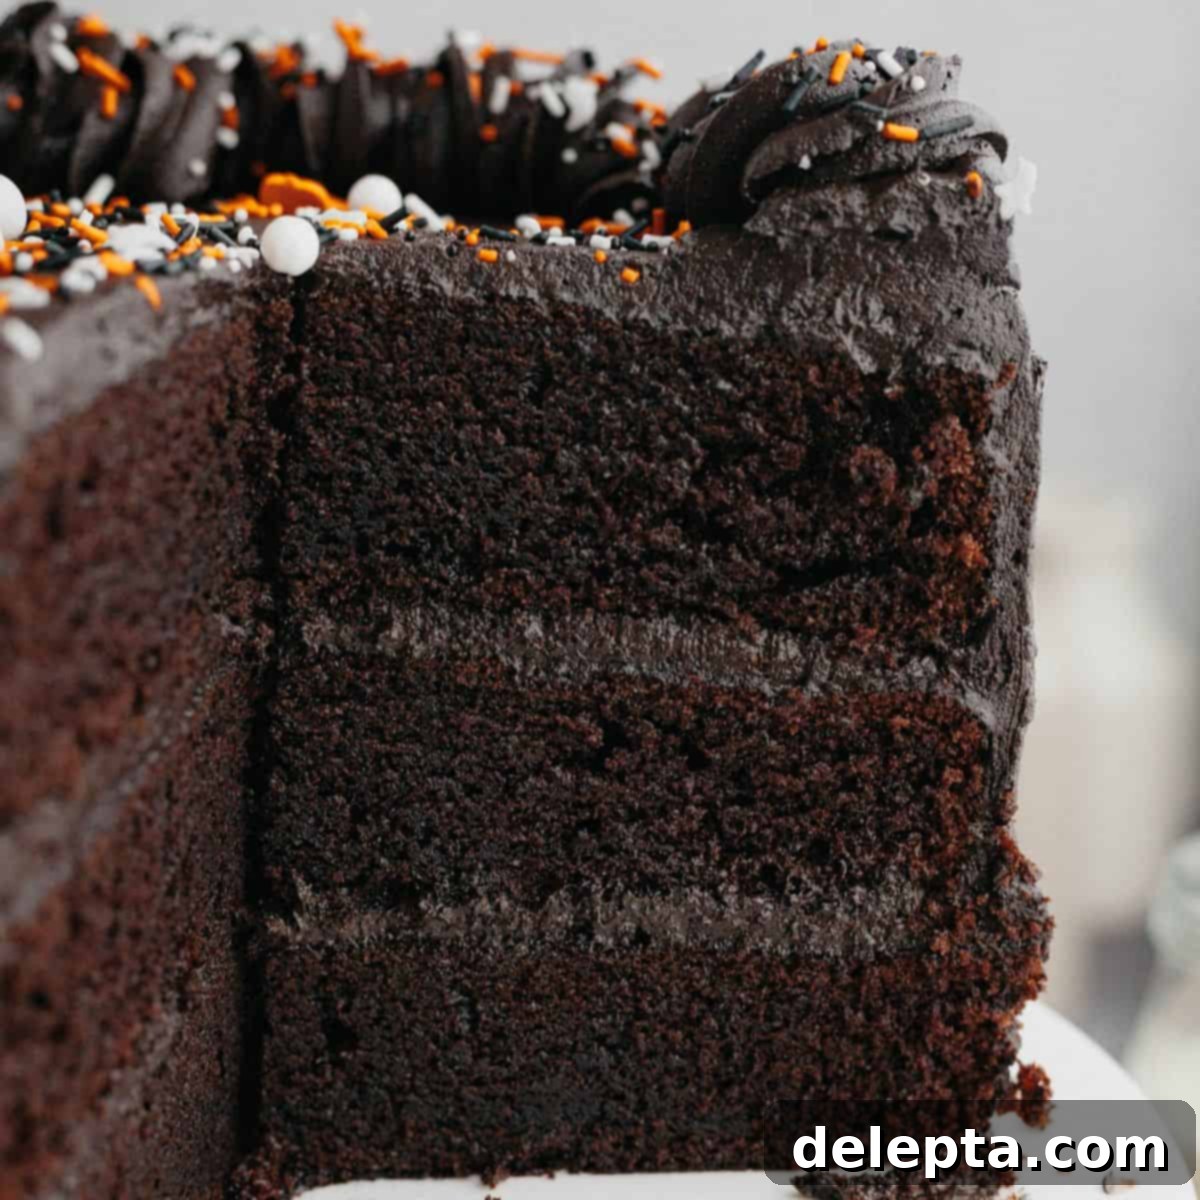
Decadent Black Velvet Cake: The Ultimate Naturally Dyed Halloween Showstopper
Get ready to enchant your taste buds and impress your guests with this stunning three-layer black velvet cake! This isn’t just any chocolate cake; it’s a wonderfully moist and rich masterpiece, crowned with a luxuriously creamy, naturally black buttercream. Perfect for spooky season celebrations, Halloween parties, or any occasion where a dramatic, show-stopping dessert is desired, this recipe is designed to be both delicious and visually captivating.
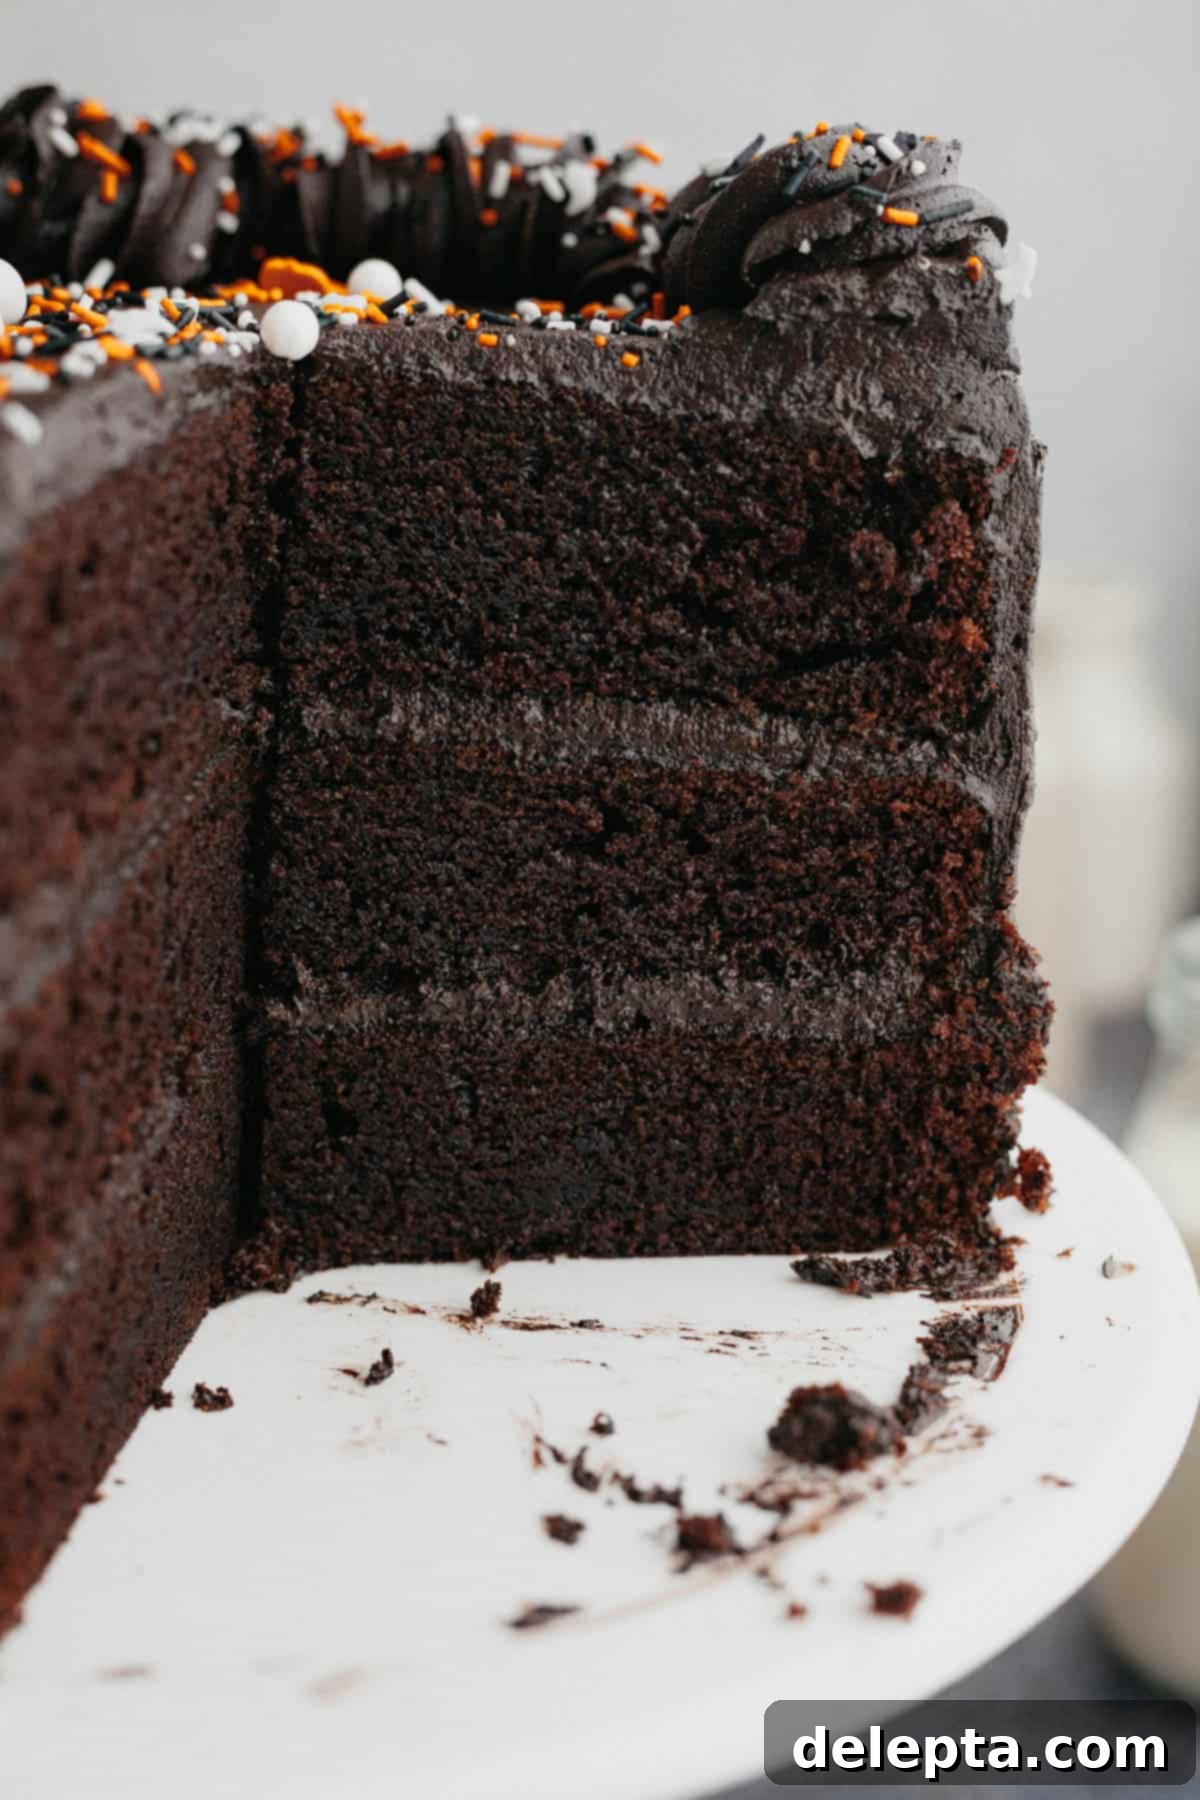
This black velvet cake builds on the incredible success of my popular black velvet cupcakes, a Halloween favorite from last year. I envisioned an even grander, more dramatic dessert for the spooky season, and a towering three-layer cake was the perfect answer. While you certainly could make this a two-layer cake for a slightly simpler affair, the three-layer version truly makes a statement at any Halloween gathering. Imagine serving this alongside my whimsical Halloween dirt cups for an unforgettable dessert spread! If you’re looking for a more traditional treat, don’t miss my classic red velvet cake with chocolate chips for a delightful twist.
[feast_advanced_jump_to]
Why This Black Velvet Cake Recipe Stands Out
Crafted for both visual impact and incredible flavor, this black velvet cake is more than just a dessert; it’s an experience. Here’s what makes this recipe truly special:
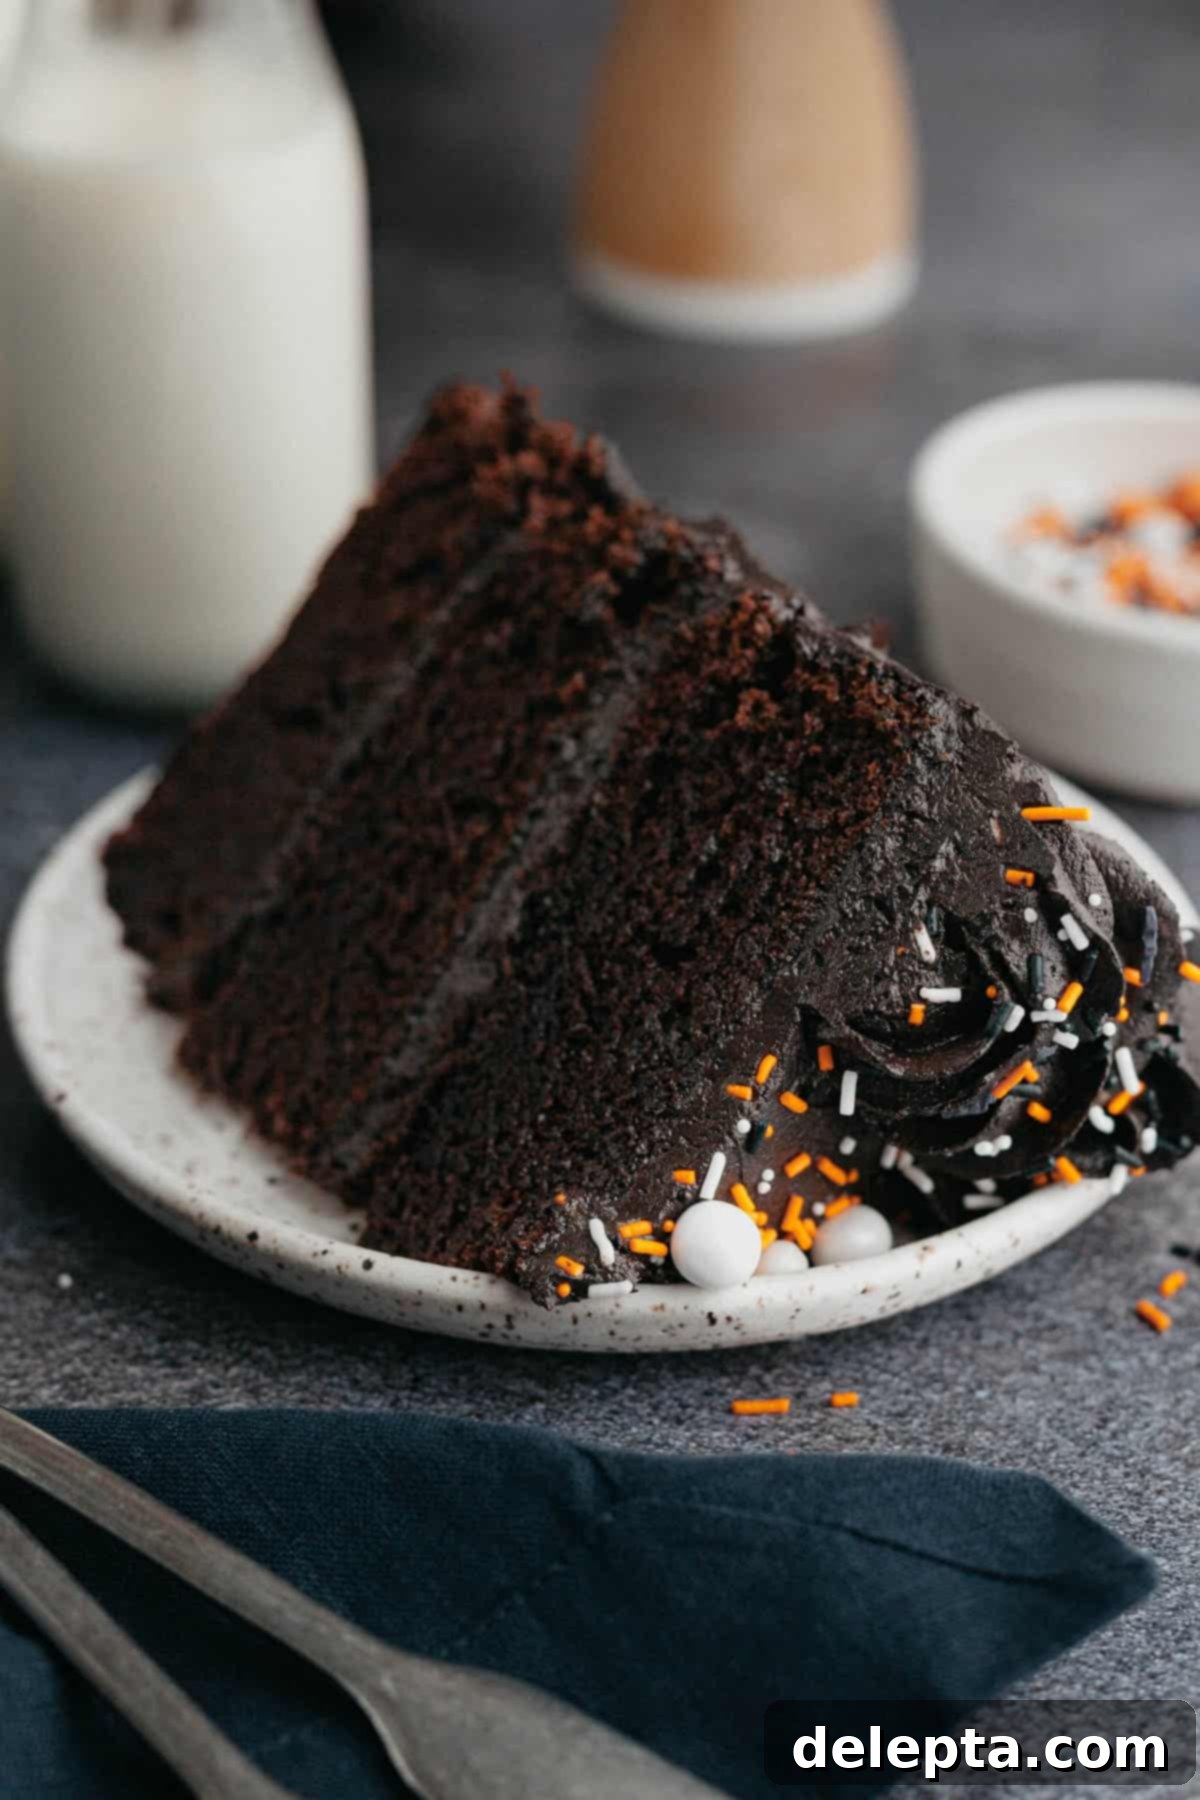
- Naturally Dyed Perfection – Say goodbye to artificial food coloring! The cake’s striking dark hue comes from the magical combination of hot water “blooming” regular cocoa powder to an intensely deep brown, and the frosting achieves a rich, midnight black shade thanks to premium black cocoa powder. This means a vibrant color without any metallic aftertaste.
- Unbelievably Moist Chocolate Cake – At the heart of this showstopper is my tried-and-true chocolate cake recipe. Made with a blend of oil for supreme moisture and buttermilk for a delicate tang and tender crumb, it results in an extra soft and fluffy texture that melts in your mouth with every bite.
- True Black Velvet Experience – While the cake in the featured images uses Dutch-processed cocoa for a very dark brown, you can achieve an even deeper, truly black cake by substituting black cocoa powder for the regular Dutch-process cocoa. This transforms it into an authentic black velvet masterpiece, reminiscent of my popular cupcakes.
- Dreamy American Buttercream – This cake is generously frosted with a luxurious and airy American buttercream. It’s a straightforward recipe featuring softened butter, confectioners’ sugar, and the star ingredient – black cocoa powder – creating a perfectly sweet, rich, and naturally dark topping that complements the cake’s flavor beautifully.
- Perfect for Halloween & Special Occasions – The dramatic black color and decadent flavor make this cake an ideal centerpiece for Halloween parties, gothic-themed events, or any celebration where you want to add a touch of mysterious elegance. It’s a conversation starter that tastes as good as it looks.
Ingredient Notes for Your Perfect Black Velvet Cake
Understanding your ingredients is key to baking success. Here’s a detailed look at what you’ll need and why each component is important for achieving the perfect black velvet cake and frosting:
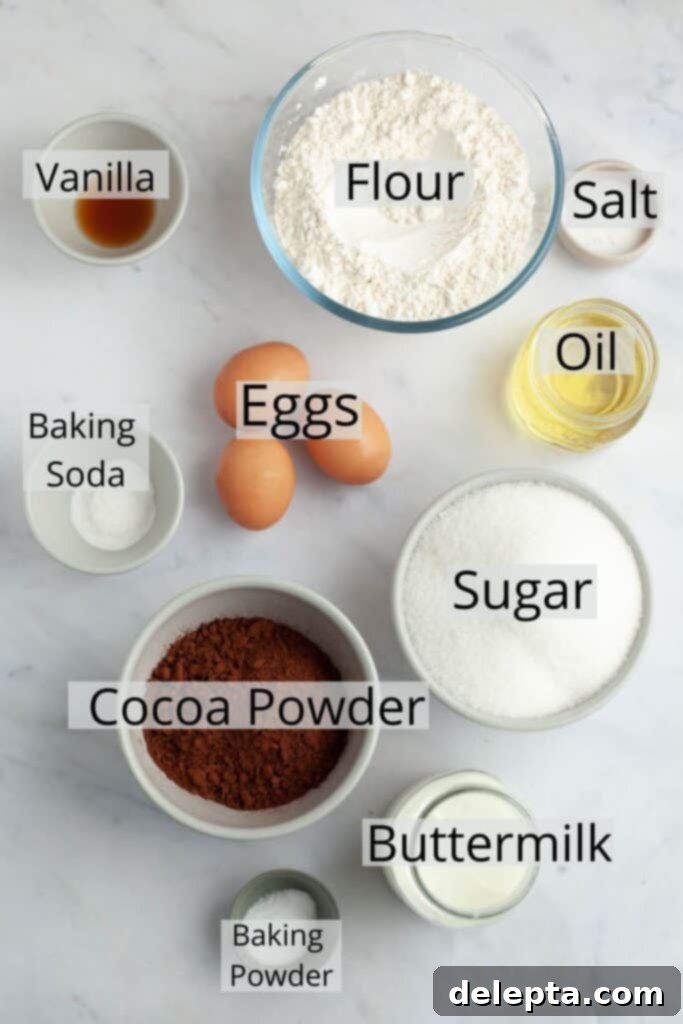
Flour: This recipe has been meticulously tested using standard all-purpose flour, which provides the ideal structure and tenderness. While I haven’t experimented with gluten-free alternatives for this particular recipe, using a reliable 1:1 gluten-free baking blend designed for cakes might yield acceptable results, though I cannot guarantee the exact same texture. For best results, always measure your flour using a kitchen scale for accuracy, or employ the “fluff and sprinkle” method (spoon flour into the measuring cup and level off) rather than scooping directly from the bag to avoid over-measuring.
Oil: A neutral-flavored oil, such as sunflower oil or vegetable oil, is crucial for this cake. Unlike butter, oil remains liquid at room temperature, contributing to an incredibly moist crumb that stays soft and tender for longer. It also allows the rich chocolate flavor to shine without any competing tastes.
Buttermilk: Buttermilk is a superstar ingredient, adding a subtle tang and reacting with the baking soda to create a light, airy texture. No buttermilk on hand? No problem! You can easily make your own by mixing one cup of whole milk with 1 tablespoon of white vinegar or lemon juice. Let this mixture sit for 5 minutes until it visibly curdles slightly. For this recipe, you’ll need 1 ½ cups of homemade buttermilk, so adjust accordingly.
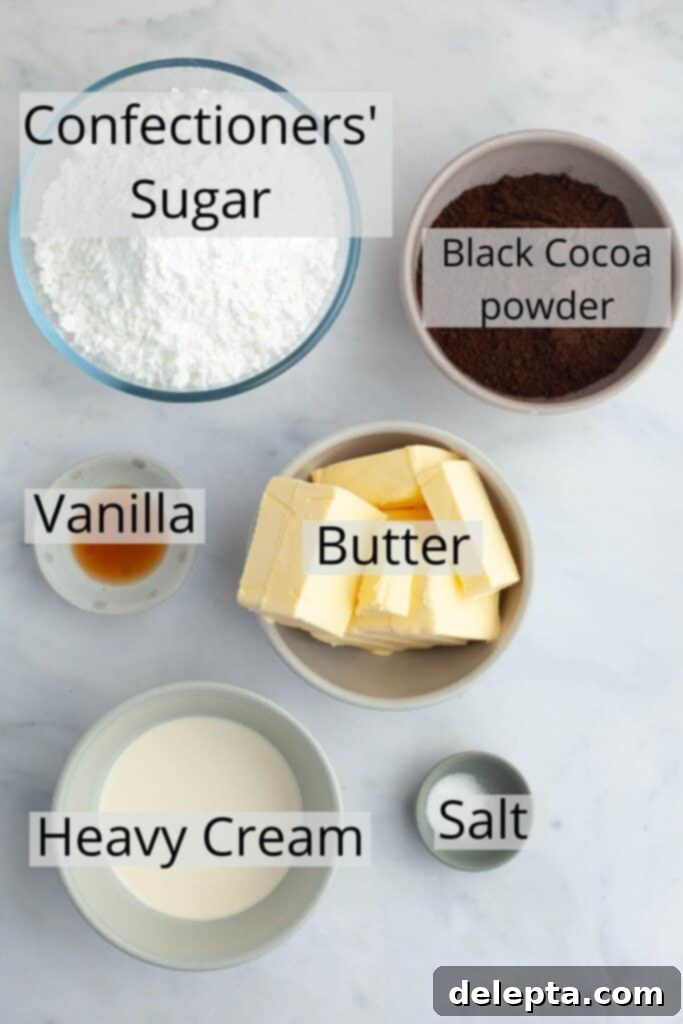
Black Cocoa Powder: This is the secret to the cake’s dramatic color and unique flavor. Black cocoa powder is ultra-Dutch processed, meaning it has been treated with an alkali to reduce its acidity, resulting in a significantly darker color and a milder, less bitter chocolate flavor. Many compare its taste to that of Oreo cookies – a smooth, deep chocolate without being overly sweet. It’s the key to achieving that striking midnight black frosting without any artificial food coloring. If you cannot find black cocoa powder, you can substitute it with regular Dutch-process cocoa powder and add a few drops of black food gel to achieve a similar dark color, though the flavor profile will be slightly different.
Butter: For the buttercream, I always recommend using high-quality European-style butter, such as Kerrygold. European butter typically has a higher fat content and a richer flavor compared to regular butter, which translates into a much creamier, more luscious, and flavorful frosting. Ensure your butter is at true room temperature (softened but not melted) for the smoothest, most whip-able buttercream.
Eggs: Large eggs, brought to room temperature, are essential for proper emulsification and a consistent cake batter. Room temperature eggs combine more easily with other ingredients, creating a homogeneous mixture and a finer, more even crumb in your cake.
Sugar: Granulated sugar not only provides sweetness but also contributes to the cake’s moisture and tender texture. In the frosting, confectioners’ sugar (powdered sugar) is used for its fine texture, which dissolves smoothly to create a silky buttercream.
Vanilla Extract: A good quality vanilla extract enhances the overall flavor of both the cake and the frosting, complementing the deep chocolate notes beautifully.
Baking Powder & Baking Soda: These leavening agents work in tandem to give the cake its lift and airy texture. Baking soda reacts with the acidic buttermilk and cocoa powder, while baking powder provides additional leavening.
Kosher Salt: Salt balances the sweetness and enhances all the other flavors in both the cake and frosting. If using fine table salt, halve the amount specified in the recipe (1 teaspoon kosher salt = ½ teaspoon fine salt).
Boiling Water (or Coffee): This is a crucial ingredient for blooming the cocoa powder in the cake batter. The hot liquid intensifies the chocolate flavor and helps achieve a darker color. You can use boiling water for a pure chocolate taste or boiling coffee to deepen the chocolate notes even further without imparting a coffee flavor.
Heavy Cream (for frosting): Heavy cream is used to adjust the consistency of the buttercream, making it light, fluffy, and easily spreadable. Add it slowly until you reach your desired texture.
Step by Step Instructions for Baking Your Black Velvet Cake
Follow these detailed steps carefully to create a magnificent black velvet cake that will surely impress:
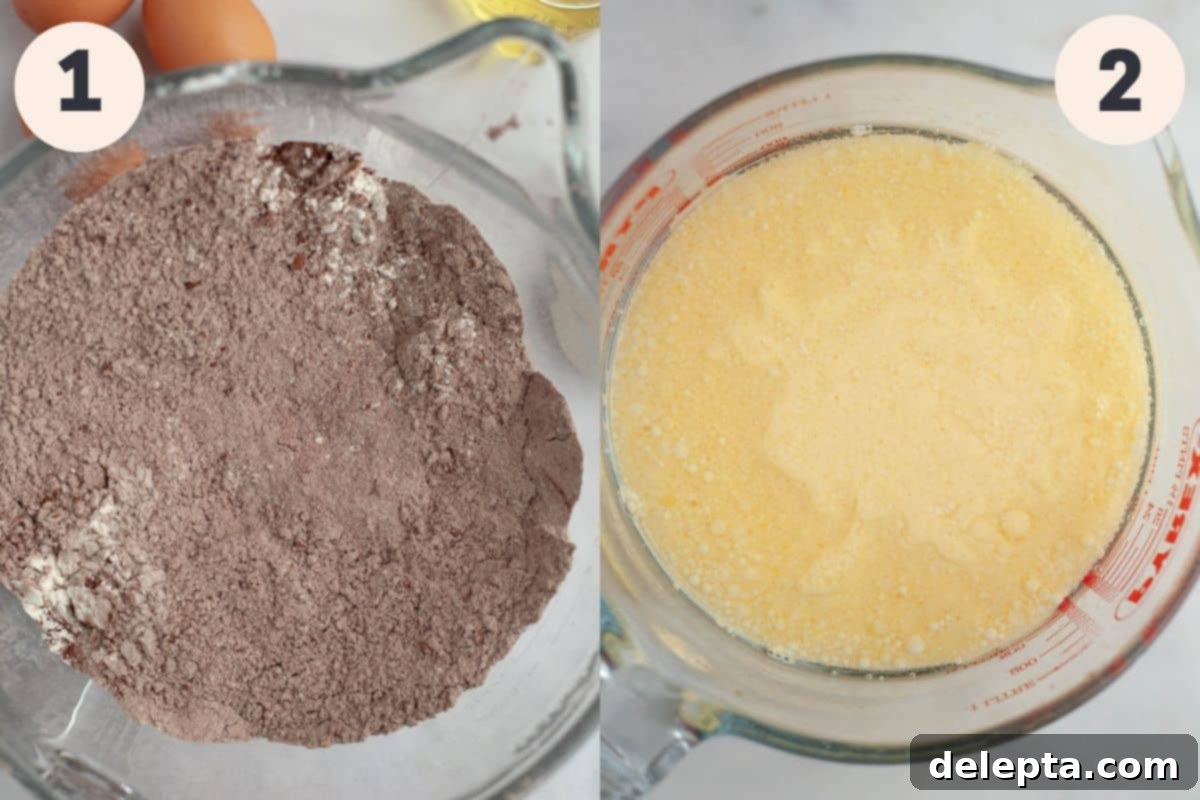
Step 1: Prepare Your Dry Ingredients and Pans. Begin by preheating your oven to 350°F (175°C). Prepare three 8-inch round cake pans by greasing them thoroughly with butter or non-stick spray, then lining the bottoms with parchment paper. This prevents sticking and ensures easy removal. If you only have two pans, you can bake two layers first, allow them to cool slightly, then remove one cake, regrease and reline the pan, and bake the third layer. In the large bowl of a stand mixer fitted with the paddle attachment, combine all your dry cake ingredients: all-purpose flour, black cocoa powder (or Dutch-process cocoa), granulated sugar, baking powder, baking soda, and kosher salt. Mix briefly on low speed until everything is just combined. Be warned, with a recipe this size, flour and cocoa dust can fly! An apron is highly recommended.
Step 2: Whisk the Wet Ingredients. In a separate medium bowl or a large liquid measuring jug, whisk together the room temperature eggs, vegetable oil, buttermilk, and vanilla extract until the mixture is completely smooth and well combined. Ensuring these ingredients are at room temperature is crucial for proper emulsification and a smooth, consistent batter.
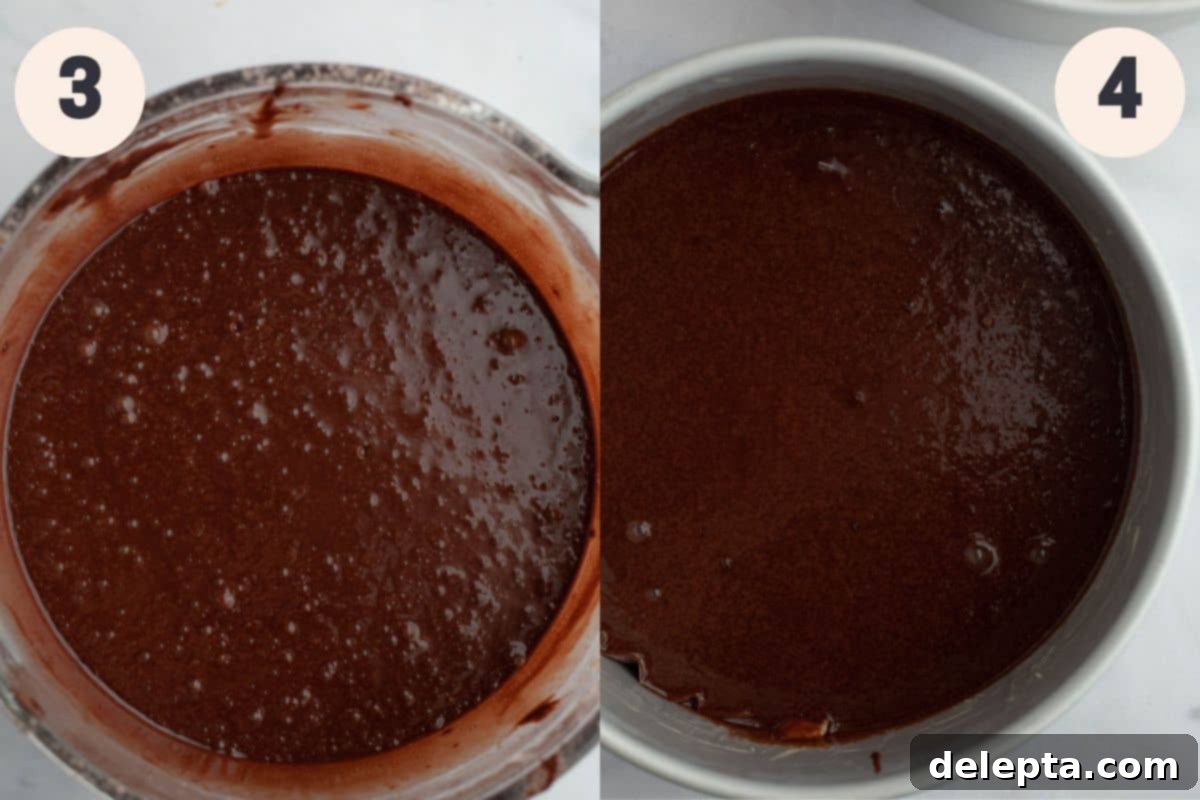
Step 3: Combine Wet and Dry, then Bloom the Cocoa. With your stand mixer running on its lowest speed, slowly pour the whisked wet ingredients into the dry ingredients. Take care during this step, as the volume of batter is substantial and might slosh out if poured too quickly. Once the wet ingredients are incorporated, stop the mixer and use a rubber spatula to scrape down the sides and bottom of the bowl, ensuring no pockets of dry ingredients remain. Resume mixing on the lowest speed and carefully pour in the boiling hot water (or coffee). The hot water is vital as it “blooms” the cocoa powder, intensifying its flavor and significantly darkening the batter. If you use genuinely boiling hot water, you’ll notice the chocolate batter turn a very dark brown, almost black, even if you’re using regular Dutch-process cocoa. (Note: The image here shows a slightly lighter batter, which resulted from using warm, rather than boiling, water.)
Step 4: Bake Your Cake Layers. Divide the cake batter evenly among your three greased and lined 8-inch baking pans. For precision, aim for approximately 680 grams of batter per pan. Place the pans in your preheated oven and bake for 35-40 minutes. The cakes are done when a wooden skewer or toothpick inserted into the center comes out with only a few moist crumbs attached, or mostly clean. Avoid overbaking, as this can lead to a dry cake. Once baked, remove the pans from the oven and let the cakes cool in their pans for about 15 minutes. This allows them to firm up slightly before you attempt to remove them. After 15 minutes, carefully invert the cakes onto a wire cooling rack to cool completely. Ensure they are entirely cool before moving on to frosting, as warm cakes will melt your buttercream.
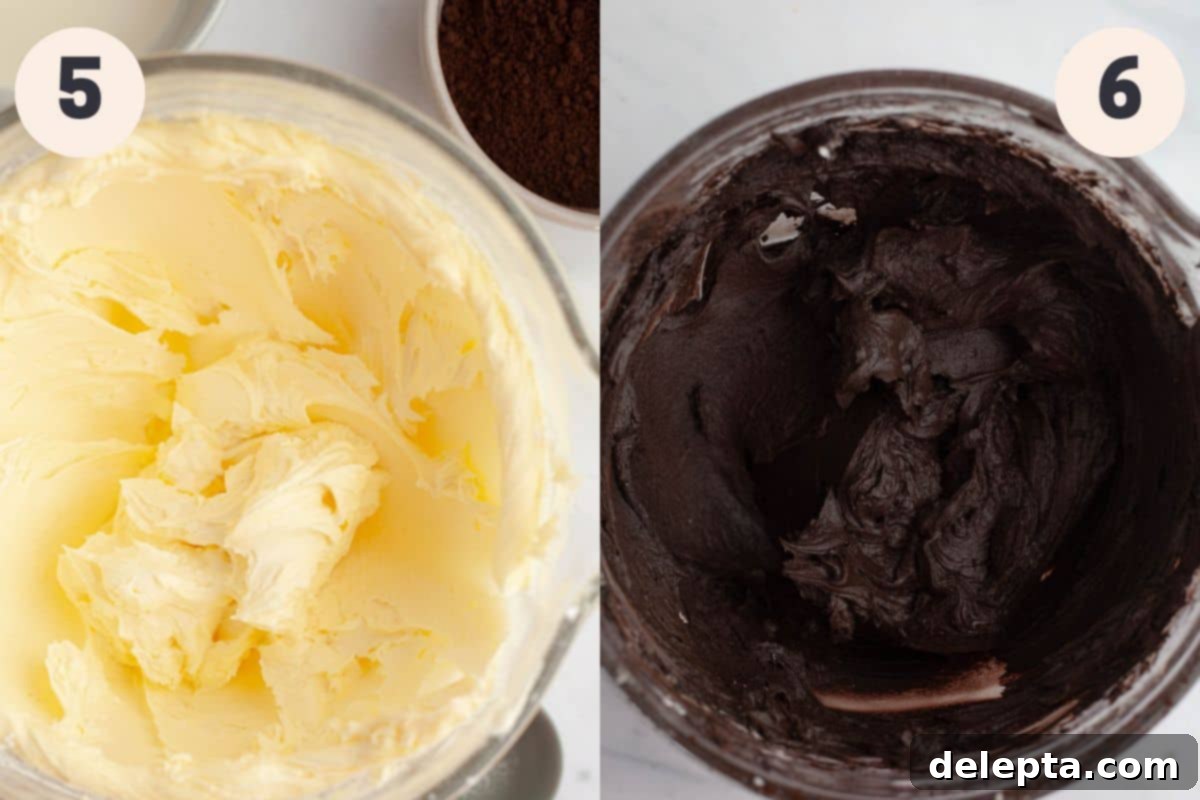
Step 5: Begin the Buttercream. While your cake layers are cooling, start preparing the black velvet buttercream. In the bowl of a stand mixer fitted with the paddle attachment, combine the room temperature unsalted butter with the confectioners’ sugar. Beat on low speed initially until the sugar is fully incorporated into the butter and no dry powder remains. This prevents a sugar cloud in your kitchen!
Step 6: Whip the Buttercream. Once combined, increase the mixer speed to medium-high and beat for at least 2 minutes. This step is crucial for incorporating air into the butter and sugar mixture, making the buttercream light, fluffy, and voluminous. Scrape down the sides of the bowl periodically to ensure even mixing.
Step 7: Add Flavor and Color to Frosting. Stop the mixer and add the vanilla extract, kosher salt, and the black cocoa powder. Start by beating on a very low speed again to prevent the cocoa powder from flying everywhere. Once the cocoa is mostly incorporated, increase the speed to medium-high and beat for another 2 minutes. This ensures the cocoa is fully distributed and contributes to the dark color and flavor. Finally, turn the mixer to its lowest speed and slowly pour in the heavy cream, a tablespoon at a time, until the frosting reaches your desired creamy, spreadable consistency. Avoid adding too much liquid at once; you might not need all of it. Continue beating on low until the frosting is smooth and luscious.
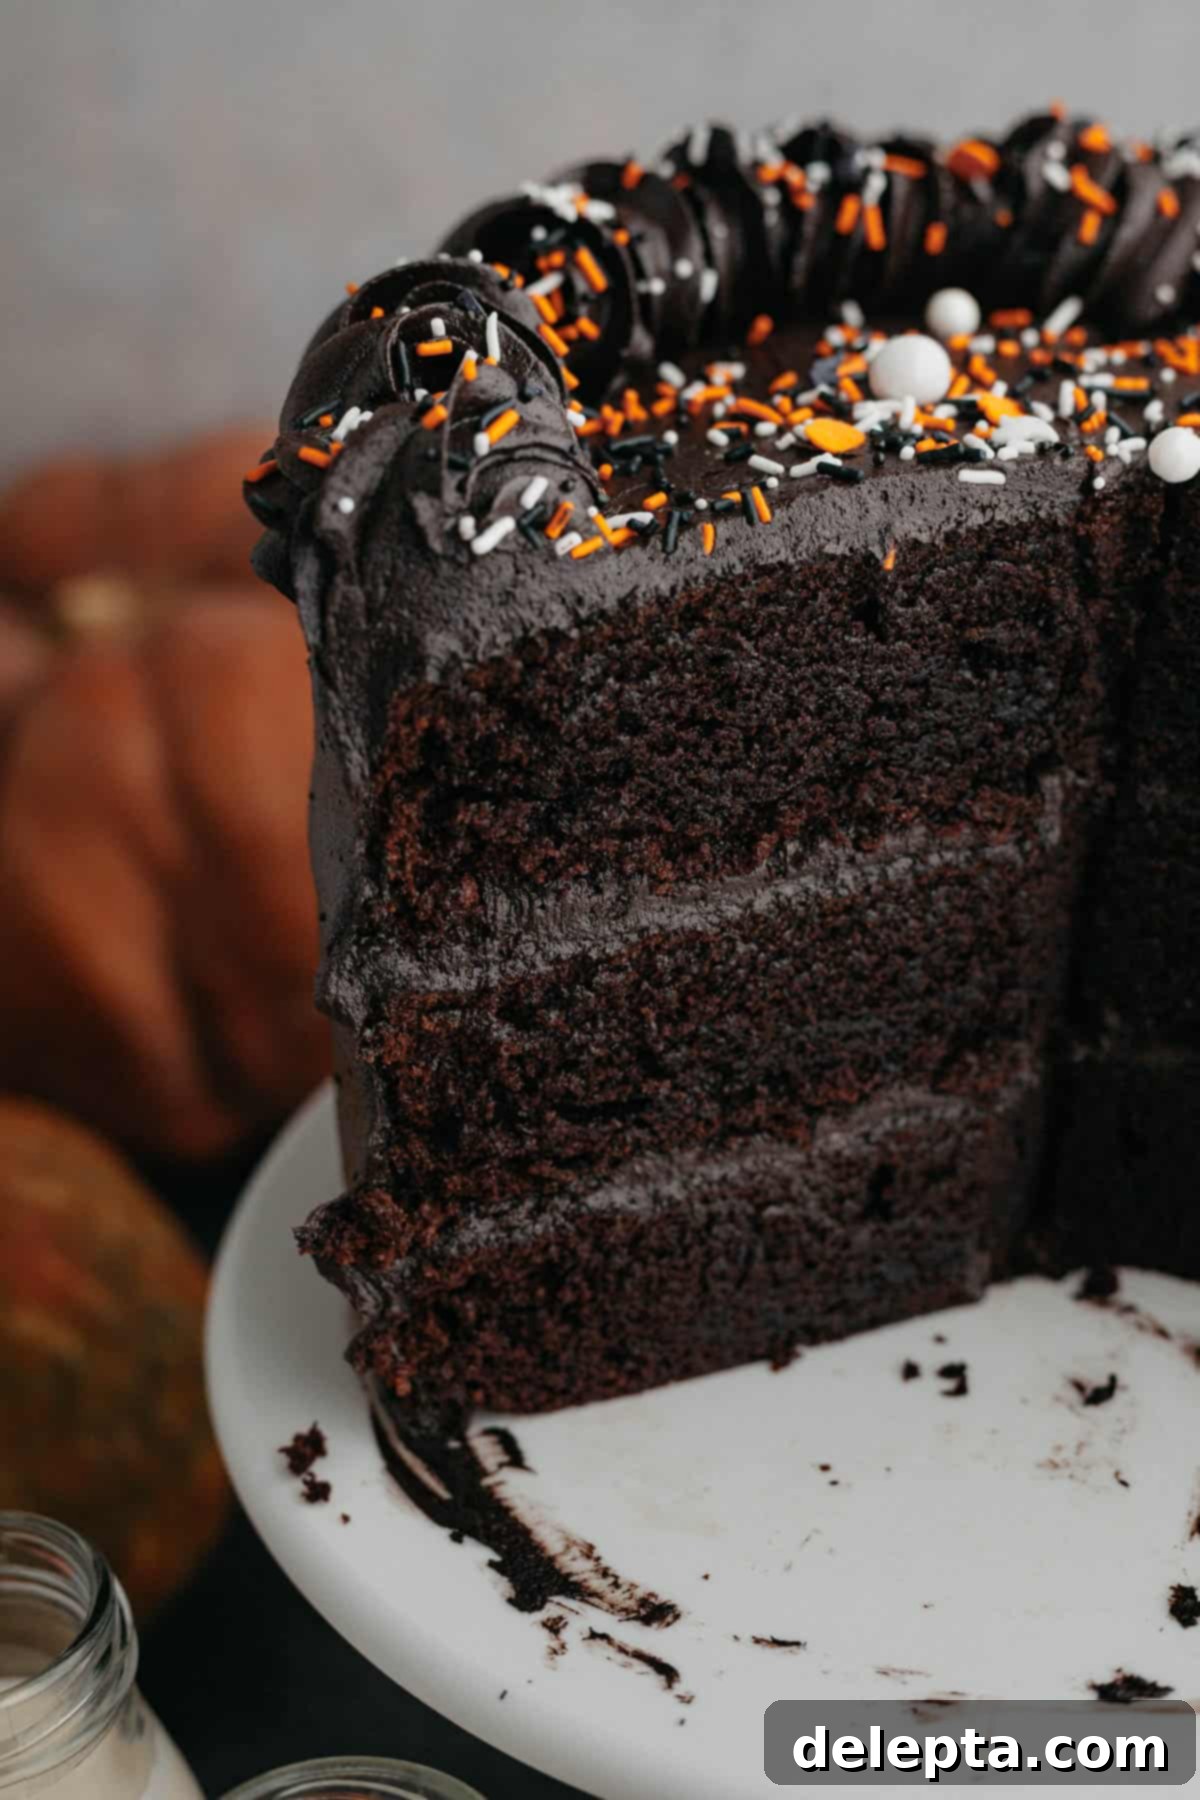
Step 8: Assemble and Decorate Your Cake. Once your cake layers are completely cool, it’s time for assembly. If your cake layers have domed tops, you can level them with a serrated knife for a neater stack. Place one cake layer on your serving plate or cake stand. Spread a generous layer of black velvet buttercream evenly over the top. Repeat with the second and third layers. Apply a thin “crumb coat” of frosting all over the cake to trap any loose crumbs, then chill the cake in the refrigerator for about 15-20 minutes. Once chilled, apply the final, thicker layer of buttercream. I used a Wilton 1M piping tip to create elegant swirls on top of my cake, and then added some festive Sweetapolita sprinkles for a touch of sparkle. Feel free to decorate as desired, perhaps with edible glitter, Halloween-themed candies, or simple smooth sides.
Black Velvet Cake Recipe Tips & Tricks for Baking Success
Achieving a bakery-quality black velvet cake is easier with these expert tips and tricks:
- Embrace a Weighing Scale – For consistent, professional-level baking results, I cannot stress enough the importance of using a digital kitchen scale. Measuring ingredients, especially flour and cocoa powder, the metric way (in grams) is the most accurate method and drastically reduces the chances of errors caused by imprecise volume measurements.
- Master the Flour Measurement – If you absolutely must use measuring cups instead of a scale, make sure you employ the “fluff and sprinkle method” for flour. First, gently fluff the flour in its container with a spoon. Then, spoon the flour into your measuring cup until it overflows, and level it off with a straight edge (like the back of a knife). Never scoop directly from the bag, as this compacts the flour and can add up to 25% more than intended, leading to a dense, dry cake.
- The Importance of Room Temperature Ingredients – This is a game-changer! Ensure all your cold ingredients, such as eggs, buttermilk, and butter, are at true room temperature before you begin mixing. This allows them to emulsify properly, creating a smoother, more uniform batter and a finer crumb structure in your cake, as well as a light and fluffy buttercream.
- Super Hot Water is Key – For the cake batter, use water that is truly boiling hot. The heat actively “blooms” the cocoa powder, meaning it helps to dissolve and intensify the chocolate flavor and, critically, deepen its color significantly. This is how you get a rich, dark brown, almost black cake without relying on food coloring. For an even truer black cake, substitute an equal amount of black cocoa powder for the regular Dutch-process cocoa in the cake batter.
- Cool Cakes Completely for Perfect Frosting – Patience is a virtue when it comes to frosting! Ensure your cake layers are completely and utterly cool before you attempt to frost them. Even slightly warm cakes will cause your beautiful buttercream to melt and slide off, resulting in a crumbly, messy disaster. If time allows, you can bake the cake layers a day in advance, let them cool, wrap them tightly in plastic wrap, and store them at room temperature overnight.
- Level Your Cake Layers – For a clean, professional-looking cake with even layers, it’s beneficial to level any domed tops off your cooled cake layers using a serrated knife. This creates flat surfaces that stack neatly and prevents your cake from leaning.
- Don’t Forget the Crumb Coat – Before applying your final layer of frosting, spread a very thin layer of buttercream all over the cake. This “crumb coat” traps any loose crumbs, preventing them from mixing into your final frosting layer and giving you a smooth, pristine finish. Chill the cake for 15-20 minutes after the crumb coat before applying the final frosting.
- Get Creative with Piping and Decorating – I used a Wilton 1M piping tip to create beautiful swirls on top of my cake, and then adorned it with some vibrant Sweetapolita sprinkles for a festive touch. Feel free to experiment with different piping tips, edible glitter, Halloween-themed sugar decorations, or even fresh berries to make your cake uniquely yours.
- Proper Storage for Lasting Freshness – This black velvet cake will stay fresh and delicious when stored properly. Keep any leftover cake, covered loosely or in an airtight container, in the refrigerator for up to 5 days. For the best flavor and texture, allow slices to come to room temperature for about 30 minutes before serving.
Frequently Asked Questions About Black Velvet Cake
While both black velvet and red velvet cakes share a similar moist and tender texture, their key differences lie in their color and cocoa. Red velvet typically gets its signature crimson hue from a combination of regular cocoa powder (which can react with acidic ingredients to create a reddish tint) and a significant amount of red food dye. Black velvet, on the other hand, achieves its deep, dramatic black color primarily through the use of ultra-Dutch processed black cocoa powder, often combined with hot liquid to intensify the natural darkness, thus minimizing or eliminating the need for artificial food coloring. Traditionally, red velvet is paired with a tangy cream cheese frosting, but this black velvet cake is frosted with a rich, naturally black American buttercream. However, you can absolutely use a cream cheese frosting if that’s your preference!
Black velvet cake boasts a unique and delightful flavor profile that sets it apart. The black cocoa powder, being ultra-Dutch processed, has a much milder, less bitter chocolate taste than natural cocoa. Many describe its flavor as reminiscent of Oreo cookies – a smooth, deep, and not overly sweet chocolate note. The cake itself is incredibly moist and tender, and when paired with the creamy black cocoa buttercream, it creates a rich, indulgent, and satisfying dessert experience that is full of chocolatey goodness.
Black cocoa powder, while not as common as regular cocoa, is becoming increasingly accessible. You can often find it at specialty baking stores, health food stores like Whole Foods, or readily available online through retailers like Amazon. Popular and reliable brands to look for include DeZaan and Van Houten. Some larger grocery stores with extensive baking sections might also carry it. If you’re having trouble locating it, don’t hesitate to ask a store associate in the baking aisle.
Absolutely! This cake is excellent for making in advance, which can save you a lot of time on the day of your event. You can bake the cake layers up to 2-3 days ahead. Once completely cooled, wrap each layer tightly in plastic wrap and store them at room temperature. For longer storage, the wrapped cake layers can be frozen for up to 1-2 months. Thaw them overnight in the refrigerator before frosting. The buttercream can also be made 2-3 days in advance and stored in an airtight container in the refrigerator; just let it come to room temperature and re-whip it with a stand mixer or hand mixer until fluffy before using. An assembled and frosted cake can be stored in the refrigerator for up to 5 days.
To keep your black velvet cake fresh, store any leftovers in an airtight cake dome or container in the refrigerator. It will stay wonderfully moist and delicious for up to 5 days. For the best taste and texture, allow individual slices to sit at room temperature for about 30 minutes before serving. This brings the cake and frosting to their optimal creamy consistency and enhances their flavors.
Try These Fall Favorites Next!
- Black Velvet Cupcakes
- Apple Crisp Cheesecake
- Pumpkin Bread with Cream Cheese Frosting
- Cinnamon Cupcakes with Brown Sugar Cinnamon Buttercream
Have you made this recipe? Please rate the recipe below! Don’t forget to follow me on Instagram @alpineella and Pinterest!
Recipe
Moist Black Velvet Cake
Ella Gilbert
Pin Recipe
Save RecipeSaved!
Equipment
-
3 8″ round cake pans
Ingredients
Cake
- 3 cups all purpose flour
- 1 cup black cocoa powder
- 1 ½ teaspoon baking powder
- 3 teaspoon baking soda
- 2 teaspoon kosher salt
- 3 large eggs room temperature
- 3 cups sugar
- ¾ cup vegetable oil
- 1 teaspoon vanilla extract
- 1 ½ cups buttermilk room temperature
- 1 ½ cups boiling water or coffee
Frosting
- 4 sticks unsalted butter room temperature
- 2 teaspoon vanilla extract
- ½ teaspoon kosher salt
- 5 cups confectioners’ sugar
- ½ cup heavy cream
- 1 ½ cups black cocoa powder
Instructions
Make Cake
-
Preheat your oven to 350°F/175°C. Grease and line three 8″ round cake pans with parchment paper. If you only have 2 pans, line those and once they’re out of the oven and slightly cool, regrease and reline one of the pans to bake the third layer.
-
In the bowl of a stand mixer fitted with the paddle attachment, combine the flour, black cocoa powder, sugar, baking powder, baking soda and salt.3 cups all purpose flour, 1 cup black cocoa powder, 1 ½ teaspoon baking powder, 3 teaspoon baking soda, 3 cups sugar, 2 teaspoon kosher salt
-
In a large jug, whisk the eggs, oil, buttermilk and vanilla until smooth.3 large eggs, ¾ cup vegetable oil, 1 ½ cups buttermilk, 1 teaspoon vanilla extract
-
With the mixer running on low, slowly pour in the wet ingredients. Note, this is a lot of batter so it might get messy! Once all the wet ingredients are in, stop the mixer and scrape down the sides and bottom of the bowl to make sure there are no dry spots left. Start the mixer again on the lowest speed and pour in the hot water.1 ½ cups boiling water
-
Pour the cake batter into the prepared pans, it should be about 680 grams of batter per pan.
-
Bake for 35-40 minutes. A toothpick inserted should come out mainly clean, there might be a few crumbs. Let the cakes cool for 15 minutes in the pan, then invert the pans on a wire rack and let the cakes cool completely on a wire cooling rack.
Make Frosting
-
In a stand mixer fitted with the paddle attachment, beat the butter and confectioners’ sugar together on low speed until well combined.4 sticks unsalted butter, 5 cups confectioners’ sugar
-
Increase the speed to medium-high and beat for a 2 minutes until it becomes very thick.
-
Stop the mixer and add the salt, vanilla, and cocoa powder into the bowl. Begin by beating slowly, then increase to medium-high speed for another 2 minutes2 teaspoon vanilla extract, ½ teaspoon kosher salt, 1 ½ cups black cocoa powder
-
Turn the mixer to your lowest speed and pour in the heavy cream. Beat until it becomes very creamy and spreadable.½ cup heavy cream
-
I used a Wilton 1M piping tip to frost the top of the cake!
Notes
Room Temperature: I make sure that all of my ingredients are at room temperature before I start the recipe, so pull out all of the ingredients before you start baking.
Butter: I use European style butter, like Kerry Gold, in my recipes. This will make your frosting much creamier and richer.
Salt: If you don’t have kosher salt, halve the amount of salt called for in the recipe. 1 teaspoon kosher salt = ½ teaspoon fine salt.
Cocoa Powder: In the images here, I’ve used black cocoa powder in the frosting and regular dutch process cocoa powder in the cake. If you want your cake to be truly black, then use an equal amount of black cocoa powder in the cake. I recommend the brands De Zaan or Van Houten. If you don’t have black cocoa powder then you can substitute an equal amount of dutch-process cocoa powder, but please note that it won’t be as dark so you might want to add a bit of black food coloring to the frosting.
Storage: Store the cake in the fridge for up to 5 days. Let them sit at room temperature for 30 minutes before eating.
Nutrition
