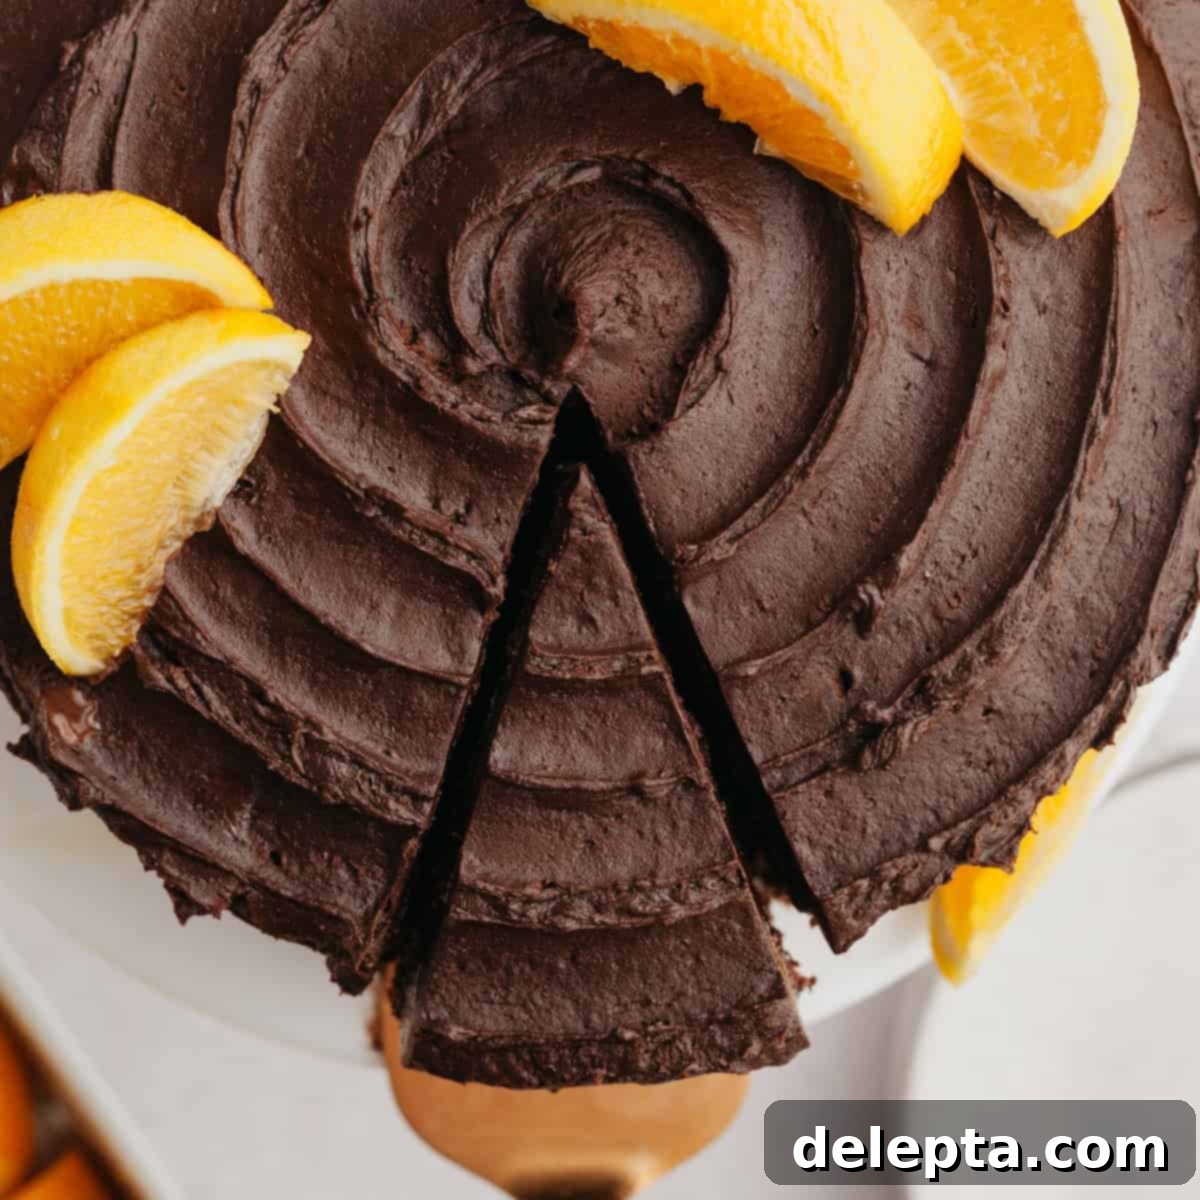
The Ultimate Chocolate Orange Cake: A Zesty, Fudgy Delight for Any Occasion
Prepare to fall in love with what might just be the best chocolate & orange cake you’ll ever bake! This isn’t just any cake; it’s a celebration of two classic flavors — rich, deep chocolate perfectly complemented by the bright, refreshing zest of fresh oranges. Every bite of this naturally flavored, decadent chocolate cake is packed with an invigorating citrus punch, thanks to generous amounts of orange zest and fresh orange juice infused directly into both the cake layers and the luscious frosting. What makes it even better? It’s surprisingly simple to create, promising a show-stopping dessert without complicated techniques or exotic ingredients.
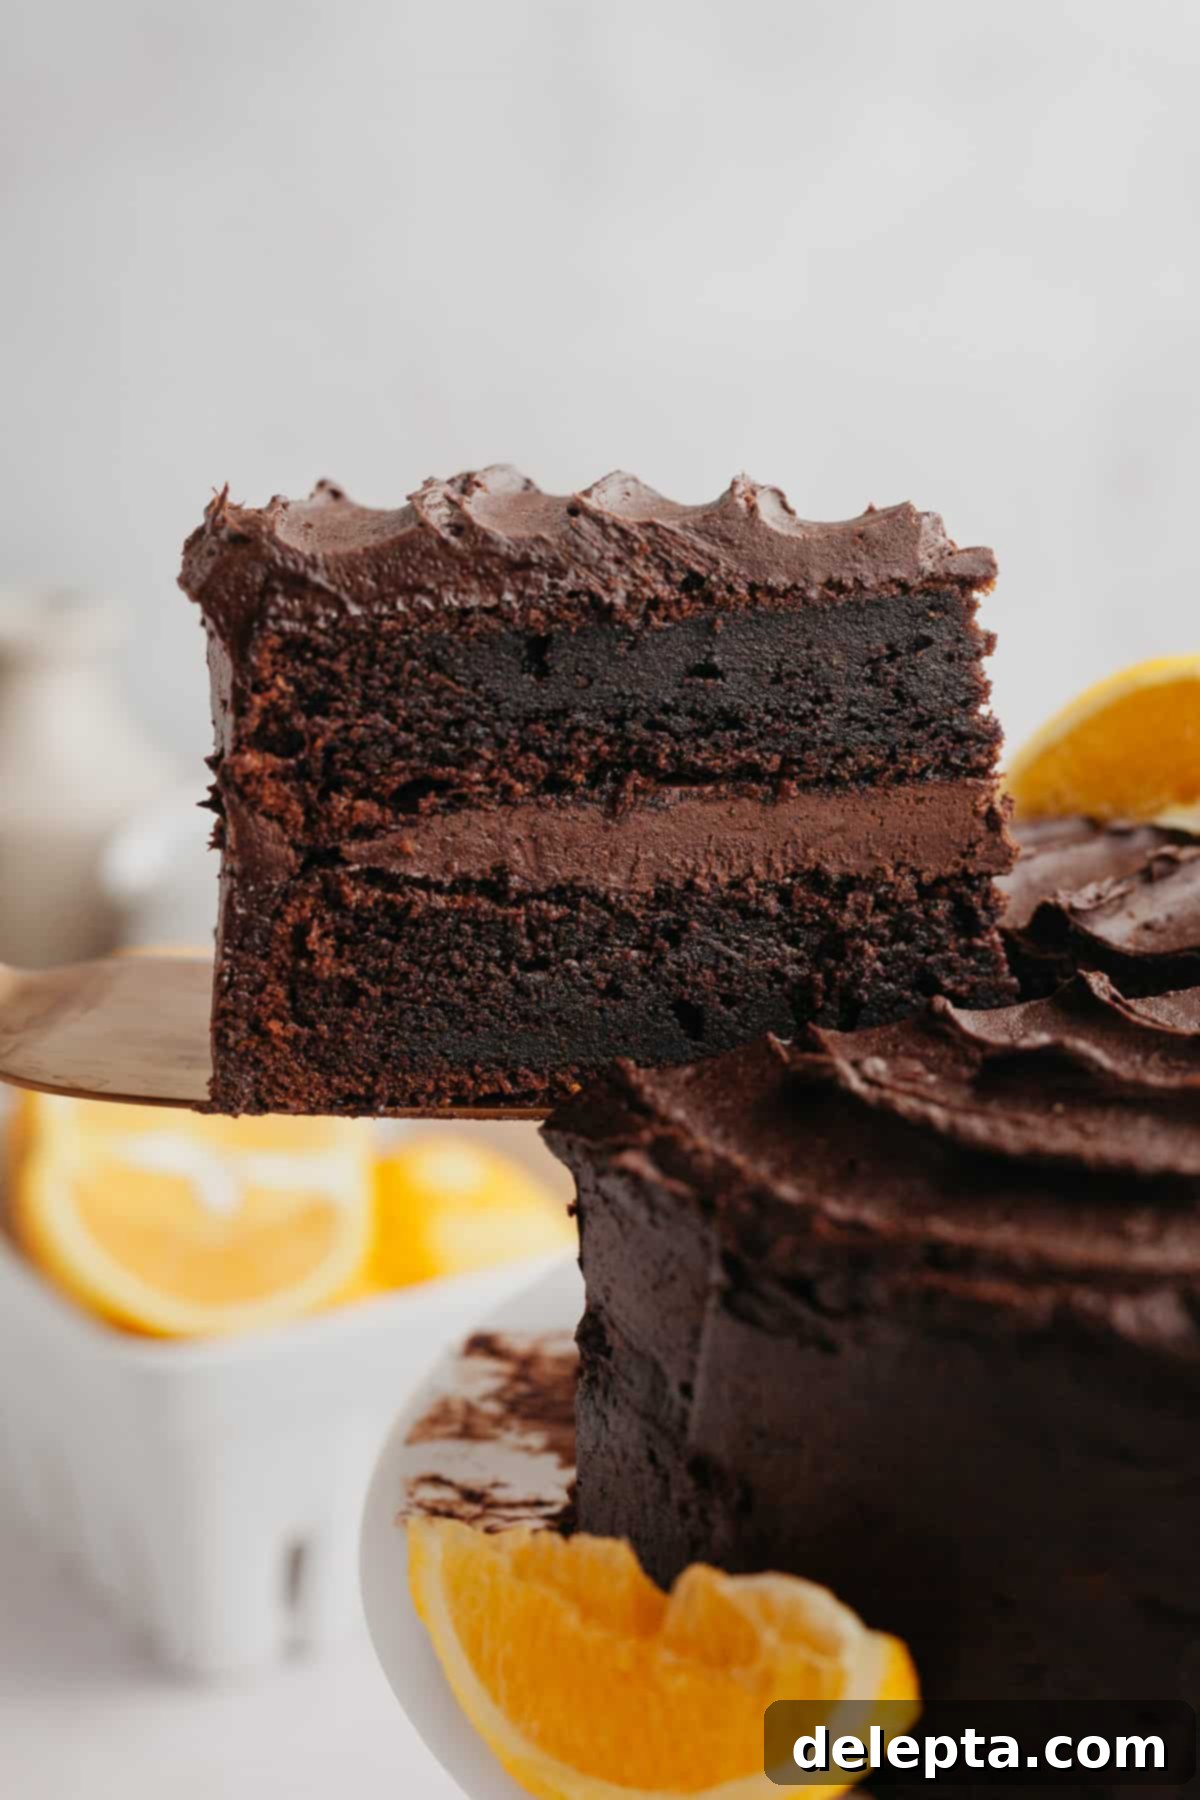
This beloved recipe, originally shared in July 2021, has been meticulously refined and updated. We’ve enhanced it with brand new, mouth-watering images and an even more exquisite frosting recipe to elevate your baking experience. If you’re someone who adores the iconic combination of chocolate and orange, especially around festive times like Christmas, then this cake is your dream come true – it’s like enjoying that famous chocolate orange treat, but in an utterly irresistible cake form!
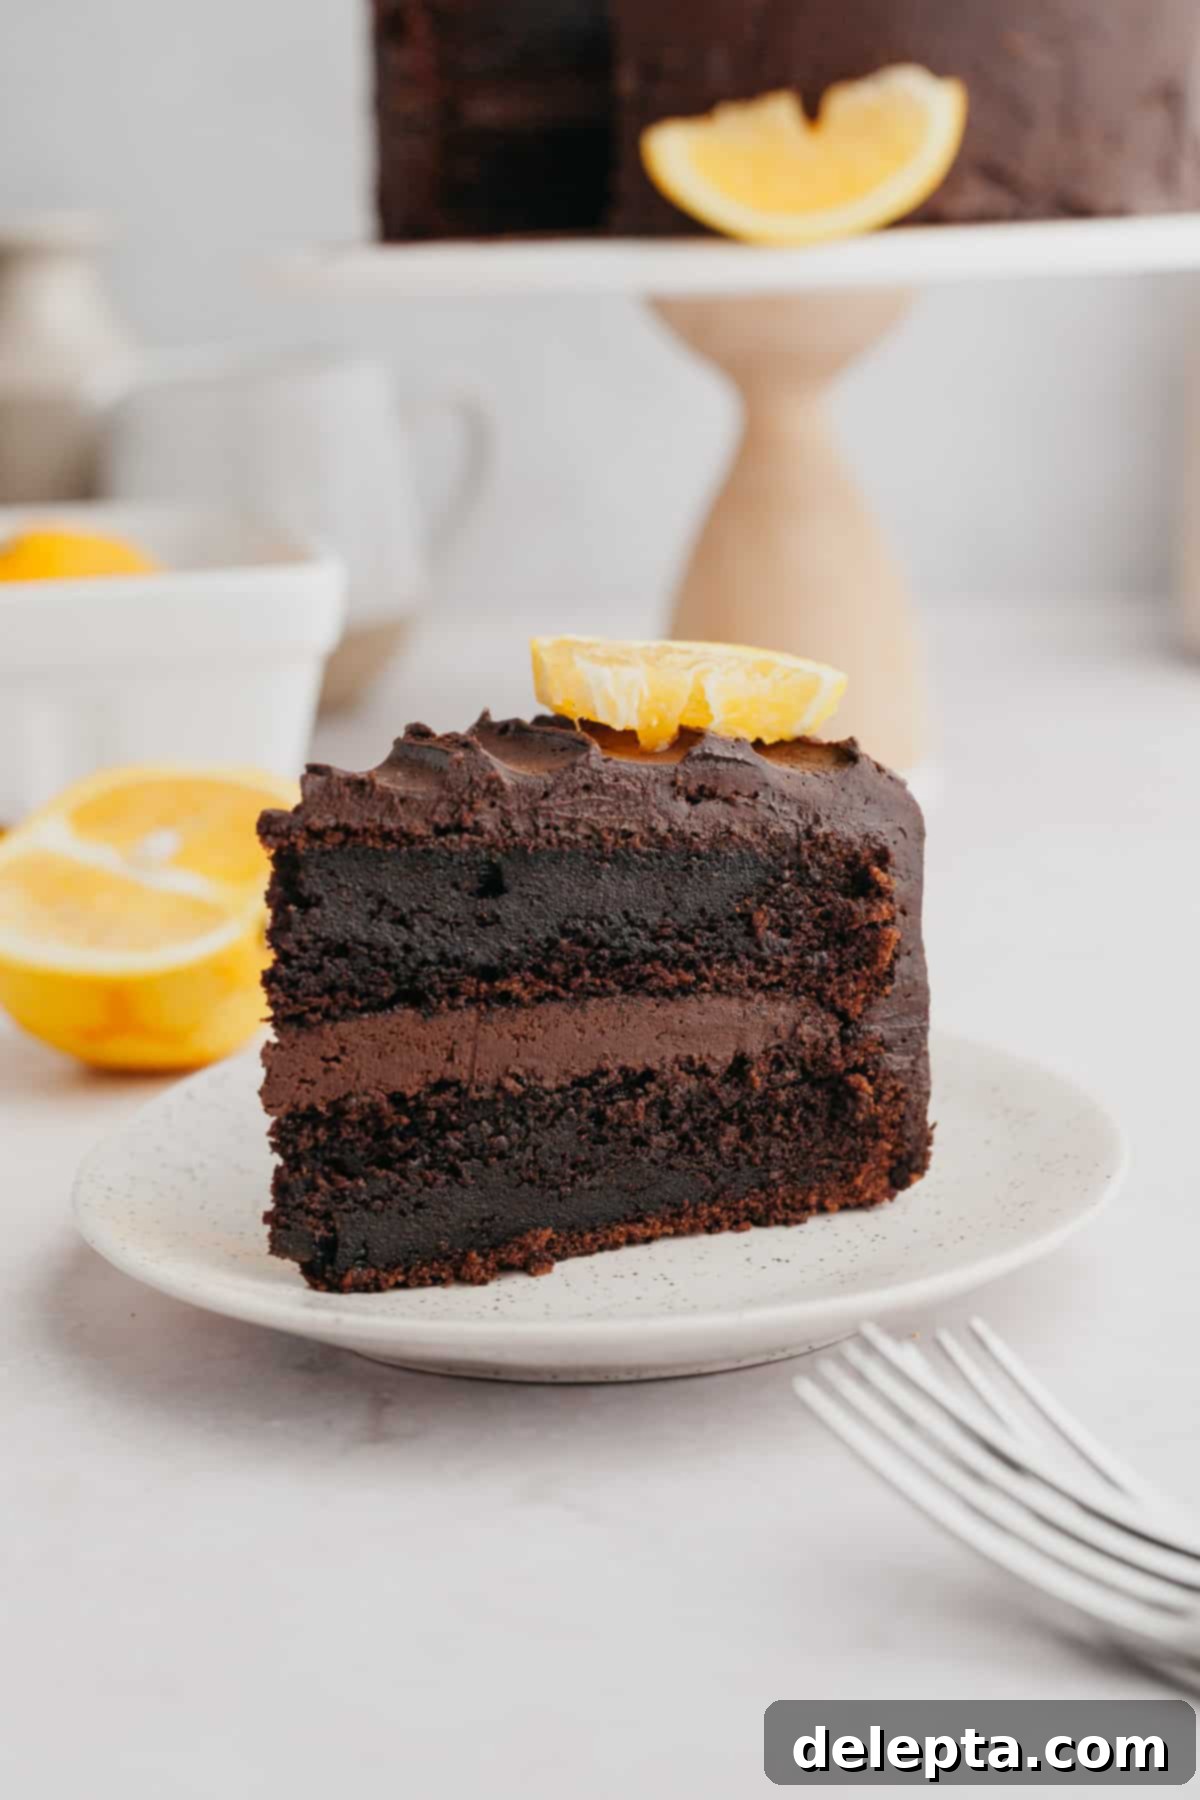
Crafted using our favorite super soft and incredibly moist chocolate cake recipe, each tender layer is then generously crowned with the fudgiest chocolate sour cream frosting. This frosting, inspired by the fresh oranges, provides a tangy counterpoint to the deep chocolate. The magic truly happens with the natural flavoring, as both the cake and the frosting are brilliantly infused with fresh orange juice and fragrant orange zest. This thoughtful inclusion ensures a perfect harmony, where the rich intensity of chocolate is beautifully balanced by the vibrant sweetness and subtle tartness of fresh oranges. This chocolate orange cake isn’t just a dessert; it’s a versatile masterpiece perfect for grand birthday parties, festive holiday gatherings, elegant dinner parties, or simply whenever you crave a magnificent, flavor-packed chocolate indulgence. Its captivating aroma and delightful taste will surely make it the star of any table.
Why You’ll Adore This Chocolate Orange Cake Recipe!
There are countless reasons why this chocolate orange cake stands out as a true baking triumph. From its effortless preparation to its sensational taste and texture, here’s what makes this recipe an absolute must-try for home bakers and dessert lovers alike:
- Effortlessly Simple – Don’t let the impressive appearance fool you; this is a remarkably easy recipe to master. You won’t need any specialized equipment or hard-to-find ingredients, making it accessible for bakers of all skill levels. The steps are straightforward, ensuring a smooth and enjoyable baking process from start to finish. Our goal is to provide a stress-free baking experience that yields professional-looking results.
- Luxuriously Rich Frosting – Our absolute favorite chocolate fudge frosting is at the heart of this cake’s irresistible charm. Made with a special ingredient – sour cream – and generously flavored with fresh oranges, this frosting is incredibly fudgy, smooth, and perfectly balances the sweetness with a delightful tang. It’s the ideal creamy counterpart to the moist chocolate cake layers, adding a layer of sophisticated flavor and texture.
- Unbelievably Fluffy & Moist Cake – The secret to this chocolate cake’s incredible texture lies in its oil-based foundation. Unlike butter-based cakes that can sometimes dry out quickly, using oil ensures that these cake layers remain wonderfully soft, moist, and tender for days, retaining their fresh-baked quality. This method guarantees a consistently delightful eating experience, even days after baking.
- Naturally Infused Flavor – Both the cake and the frosting are authentically flavored using fresh oranges. This means you get a genuine, bright citrus note that beautifully enhances the deep chocolate without any artificial aftertaste. The orange zest and juice contribute a natural vibrancy that truly makes the flavors pop, offering a fresh and invigorating contrast to the rich chocolate.
Essential Ingredients for Your Chocolate Orange Masterpiece
Gathering your ingredients is the first exciting step towards creating this magnificent chocolate orange cake. Each component plays a crucial role in achieving the perfect flavor and texture. Here’s a visual guide to what you’ll need, followed by some important notes on key ingredients:
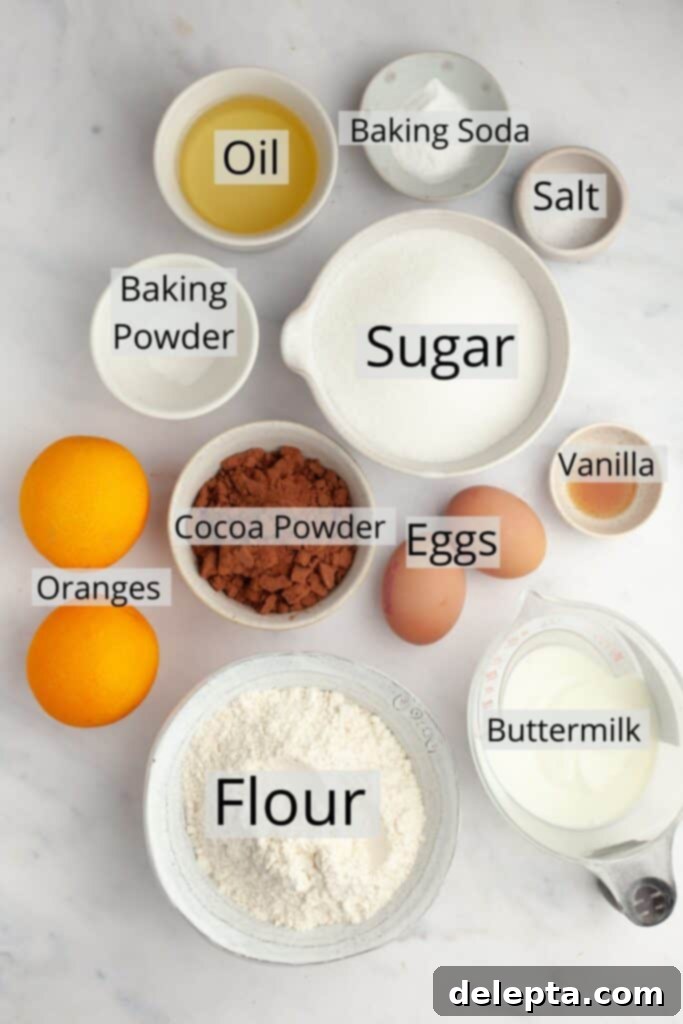
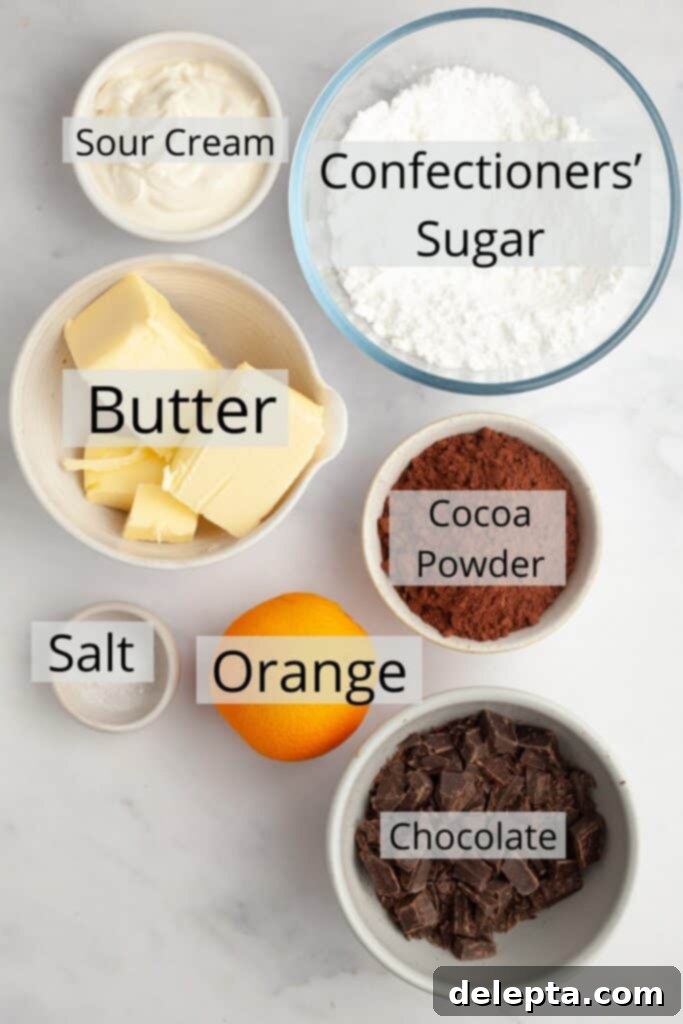
Ingredient Notes and Tips:
- Buttermilk: This ingredient is a game-changer for cake recipes, lending an unparalleled moistness and tenderness. Its acidity reacts with the baking soda, promoting a light and airy crumb structure. We strongly advise against skipping the buttermilk; it’s essential for the cake’s signature texture and helps to create that distinctive soft mouthfeel. If you don’t have store-bought buttermilk, you can easily make your own by adding 1 tablespoon of lemon juice or white vinegar to 1 cup of regular milk (dairy or non-dairy works), letting it sit for 5-10 minutes until it slightly curdles.
- Orange Juice & Zest: For the most vibrant and authentic citrus flavor, we highly recommend using fresh oranges. Since you’ll already be zesting oranges for their aromatic oils (which contain the most intense flavor), squeezing them for fresh juice is a natural next step that significantly enhances the cake’s overall taste. The fresh juice adds a brighter, more complex flavor than concentrate. However, if convenience is a priority, high-quality store-bought orange juice can be used. Remember, the zest holds most of the orange’s essential oils, so don’t skimp on this fragrant component!
- Oil (Vegetable, Sunflower, or Canola): Our chocolate cake is an oil-based recipe, deliberately chosen over butter for its superior ability to create an extra moist and tender cake. Oil remains liquid at room temperature, contributing to a consistently soft texture that lasts for days, preventing the cake from drying out. Ensure you use a neutral-flavored oil, such as vegetable oil, sunflower oil, or canola oil, that won’t impart any unwanted taste or color to your delicate chocolate layers, ensuring the chocolate and orange flavors shine.
- Dutch-Processed Cocoa Powder: For a deep, rich chocolate color and a smoother, less bitter flavor, Dutch-processed cocoa powder is our preferred choice for both the cake batter and the frosting. This type of cocoa powder has been treated to reduce its acidity, resulting in a darker hue and a more mellow chocolate taste that pairs beautifully with the bright orange notes without any harshness.
- High-Quality Chocolate (for Frosting): Elevate your chocolate orange frosting to a truly luxurious level by chopping up a good quality dark chocolate bar. Melting this into the frosting mixture adds an incredible depth of flavor, a pronounced chocolate presence, and a wonderfully fudgy, melt-in-your-mouth texture that truly sets this frosting apart. Choose a chocolate with at least 60-70% cocoa solids that you genuinely enjoy eating on its own.
How to Bake Your Perfect Chocolate Orange Cake: Step-by-Step Guide
Baking this cake is a rewarding process, and following these steps carefully will ensure a delicious outcome. Let’s walk through it together to create a magnificent chocolate orange masterpiece:
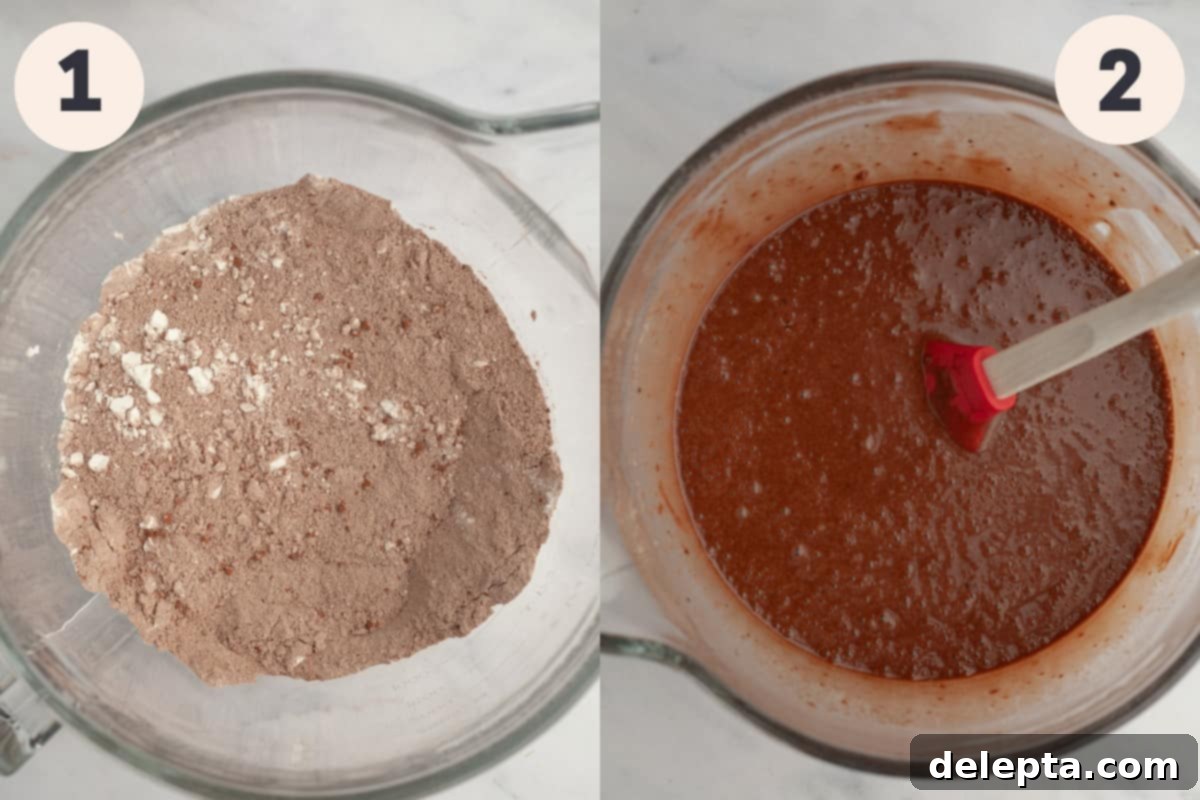
Step One: Prepare Dry Ingredients & Pans. Begin by preheating your oven to 350 degrees Fahrenheit (175°C). This ensures the oven is at the correct temperature when your batter is ready. Next, prepare two 8-inch round baking pans by greasing them thoroughly with butter or baking spray, and then lining the bottoms with parchment paper. This crucial step prevents sticking and ensures easy removal of your delicate cake layers after baking. In the bowl of a stand mixer fitted with the paddle attachment (or a large bowl if using a handheld mixer), combine all your dry ingredients: the all-purpose flour, Dutch-processed cocoa powder, granulated sugar, baking powder, baking soda, and kosher salt. Whisk them together on low speed for about 30 seconds, or manually, until they are thoroughly combined and no lumps remain. This ensures even distribution of the leavening agents and flavorings.
Step Two: Combine Wet & Dry Ingredients. In a separate large jug or bowl, whisk together all your wet ingredients: the room-temperature buttermilk, neutral-flavored oil, large eggs (also at room temperature), pure vanilla extract, the bright orange zest, and fresh orange juice. Whisk until well blended. With the stand mixer running on low speed, slowly pour the combined wet ingredients into the dry mixture in the stand mixer bowl. Continue mixing on low until just combined, being careful not to overmix. Then, carefully pour in your hot water (which blooms the cocoa powder, intensifying the chocolate flavor) and mix on the lowest speed until the batter is smooth and well-incorporated. The batter will be quite thin, which is perfectly normal for this moist cake recipe. Be cautious, as there’s a generous amount of batter, and mixing too fast can cause splashes!
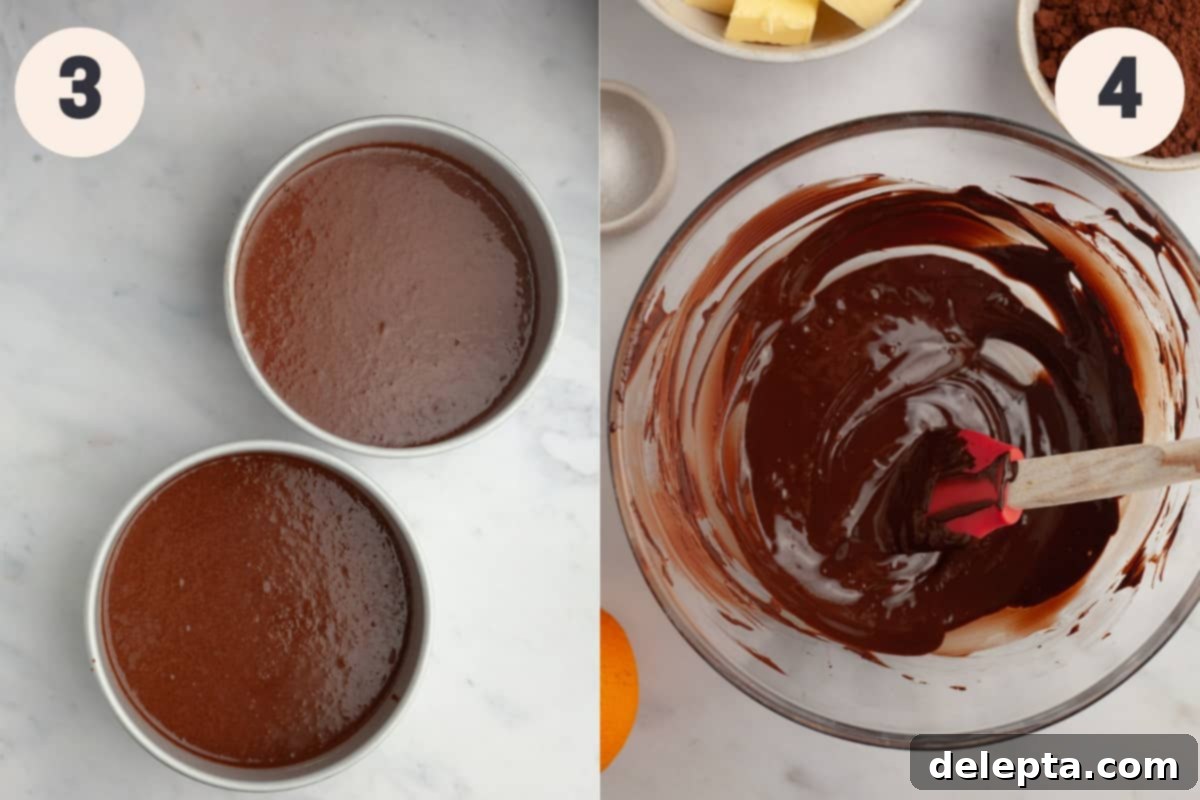
Step Three: Bake the Cake Layers. Carefully divide the thin chocolate orange cake batter evenly between your two prepared cake pans. For the most precise results and perfectly level cakes, we recommend using a kitchen scale to weigh the batter in each pan to ensure equal amounts. Bake for 35-40 minutes in your preheated oven, or until a wooden toothpick inserted into the very center of a cake layer comes out clean or with only a few moist crumbs attached. Once baked, remove the cakes from the oven and let them cool in their pans on a wire rack for about 10-15 minutes. This allows them to firm up slightly before you gently invert them onto the wire rack to cool completely. This cooling step is paramount before frosting; attempting to frost a still-warm cake will inevitably result in the frosting melting and becoming a runny, soupy mess.
Step Four: Prepare Melted Chocolate for Frosting. While your cake layers are cooling, begin preparing your luscious chocolate orange fudge frosting. Start by melting your chopped dark chocolate in a microwave-safe bowl. Heat it in short bursts (15-20 seconds at a time), stirring well with a rubber spatula after each burst, until it is smooth and fully melted. Be careful not to overheat the chocolate, as this can cause it to seize. Once melted, set the chocolate aside to cool slightly to room temperature. It should still be liquid but not hot, as adding hot chocolate to butter can melt the butter and ruin the frosting’s consistency.
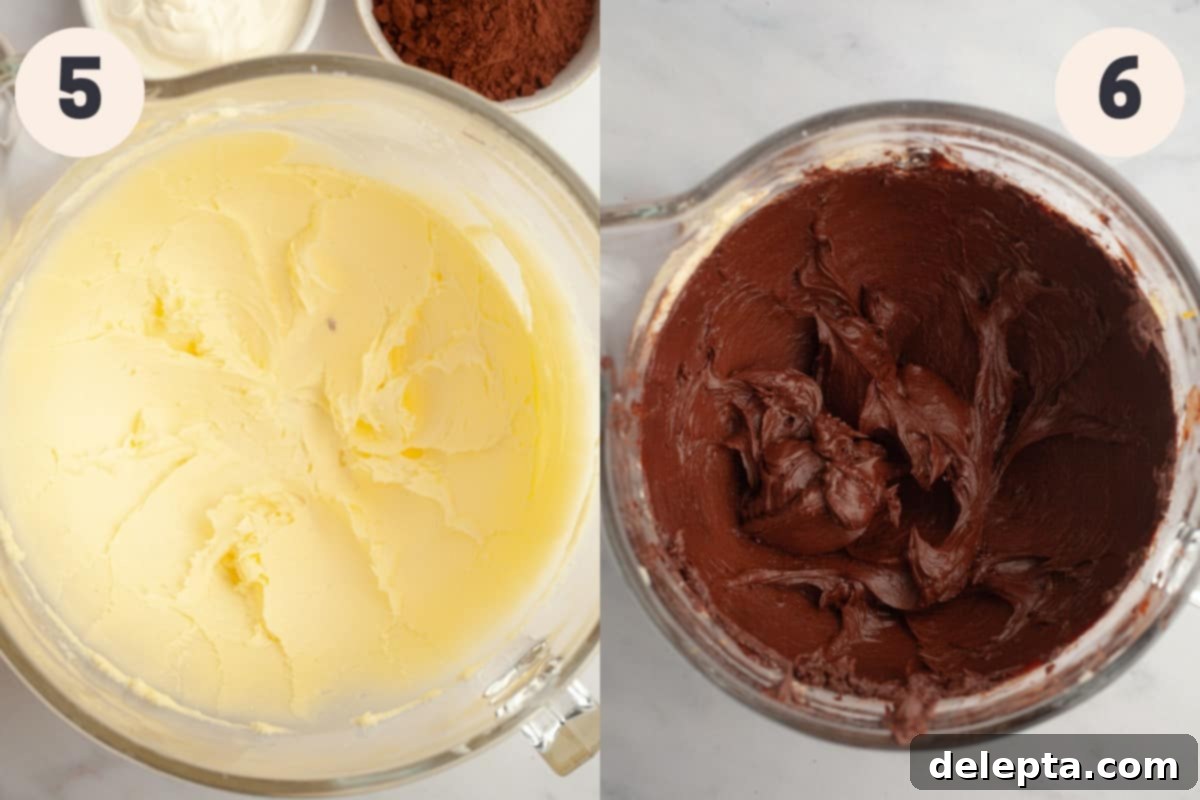
Step Five: Cream Butter and Sugar. In the bowl of a stand mixer (or a large bowl with a handheld mixer) fitted with the paddle attachment, combine your room-temperature unsalted butter with the confectioners’ sugar. Begin beating on low speed initially to incorporate the sugar without creating a cloud of powdered sugar, then gradually increase the speed to medium-high. Beat for a full 2-3 minutes until the mixture is light, fluffy, and notably pale in color. This creaming process is essential as it incorporates air, resulting in a lighter, more airy frosting texture.
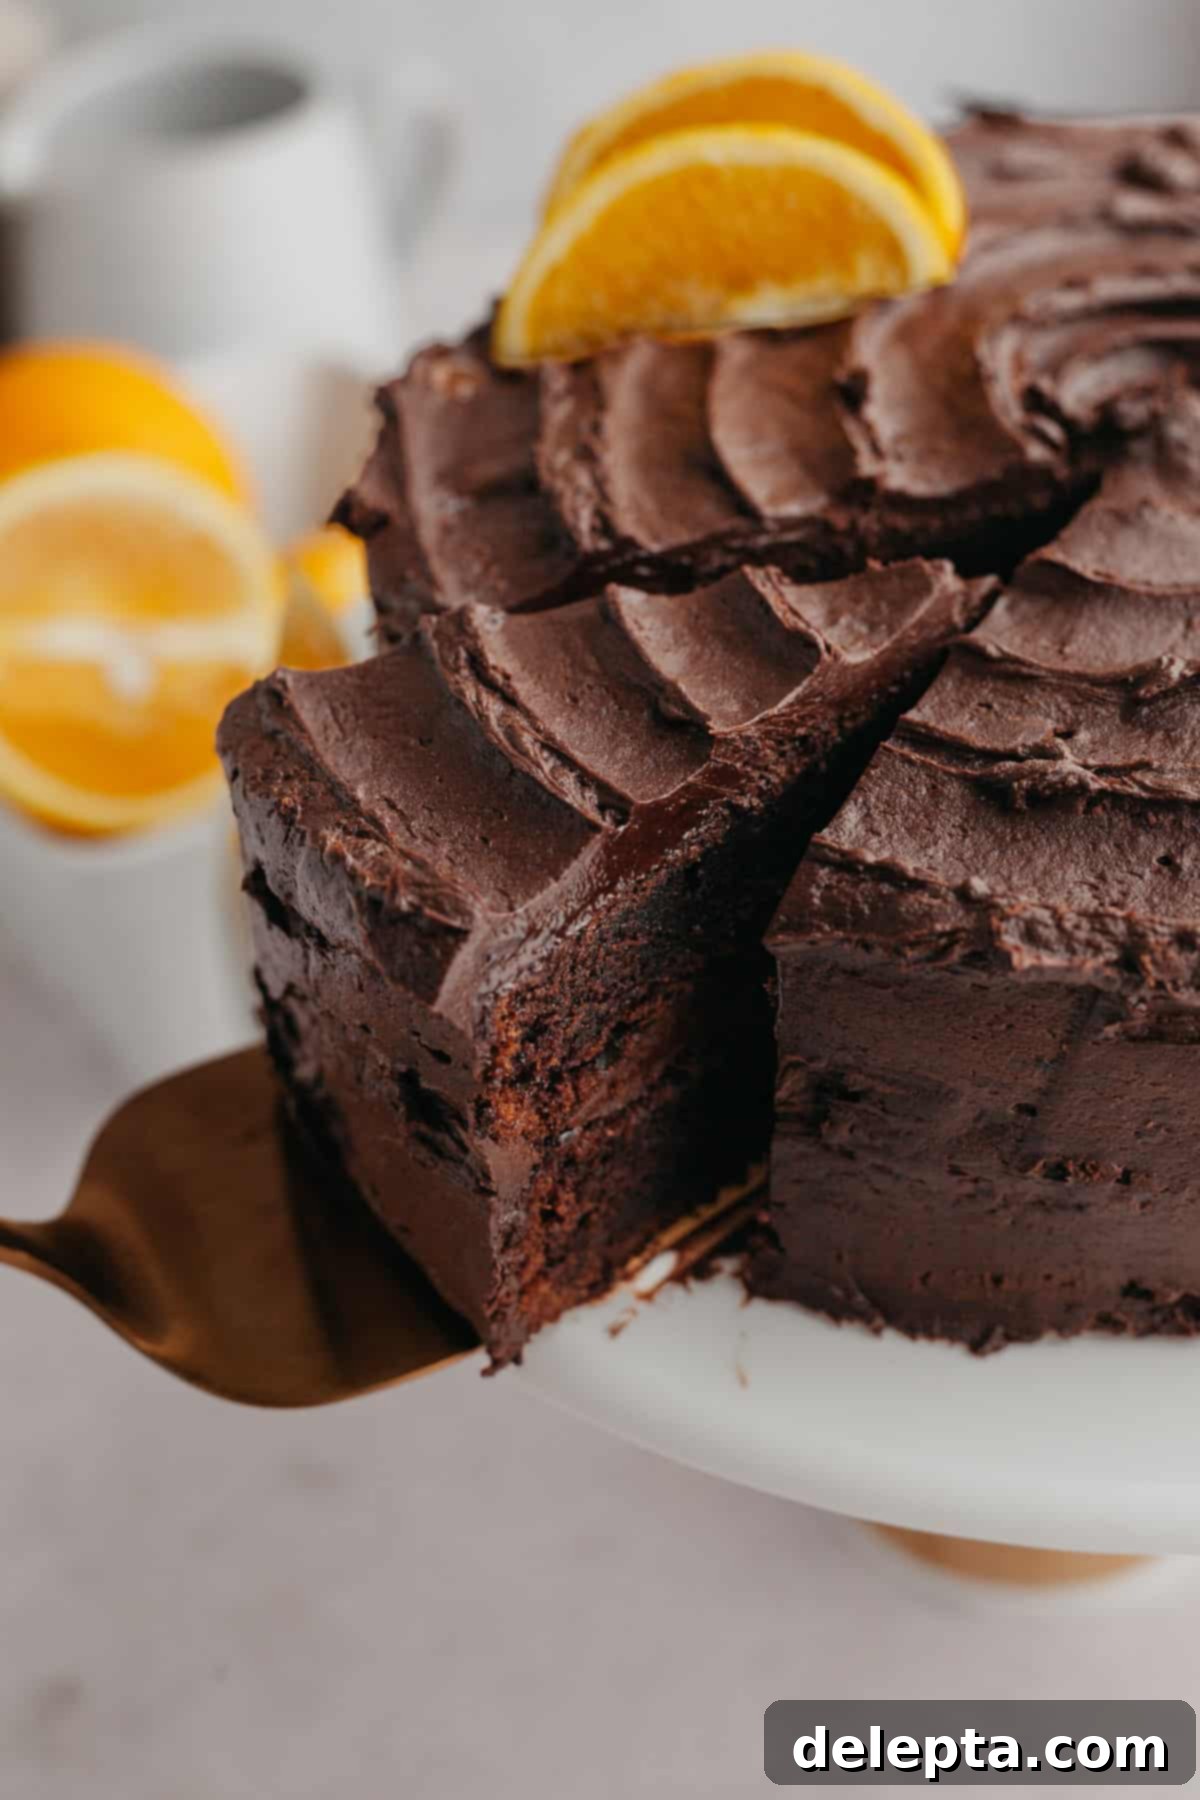
Step Six: Finish the Frosting. Reduce the mixer speed to low and add the Dutch-processed cocoa powder. Beat until just combined, scraping down the sides of the bowl as needed, then increase to medium speed and beat for another 1-2 minutes to ensure it’s fully incorporated and smooth. Finally, add the room-temperature sour cream, the cooled melted chocolate, the fresh orange zest, and 2 teaspoons of orange juice. Beat on medium speed until the frosting is perfectly smooth, creamy, and uniform in color and texture. Avoid over-beating at this stage, as it can introduce too much air and change the fudgy consistency. Your rich chocolate orange fudge frosting is now ready for assembly!
Assembling Your Stunning Chocolate & Orange Layer Cake
Once your cake layers are completely cool and your frosting is ready, it’s time for the artistic part – assembly! Proper assembly ensures a beautiful and stable cake that will impress everyone:
- Ensure Cake Layers are Fully Cooled: This is a non-negotiable step for a perfect cake. Warm cake layers will immediately melt the frosting upon contact, leading to a runny, messy cake. If you’re in a hurry, you can place the cooled layers in the fridge for 15-20 minutes to firm up slightly, which can also make them easier to handle.
- First Layer & Frosting: Carefully place one completely cooled cake layer onto your chosen serving plate or cake stand. Use an offset spatula or the back of a spoon to spread a generous, even layer of the creamy chocolate orange frosting over the top of this first cake layer. Aim for about ½ to ¾ inch thickness, ensuring a delicious frosting-to-cake ratio in every slice.
- Second Layer & Crumb Coat: Gently place the second cake layer directly on top of the frosted first layer, aligning it perfectly to create an even stack. Now, apply a very thin layer of frosting all around the sides and top of the entire cake. This initial “crumb coat” is essential as it traps any loose crumbs, preventing them from mixing into your final decorative layer of frosting. It creates a clean, smooth canvas for your masterpiece.
- Chill for Setting: Once the crumb coat is applied, transfer the cake to your fridge or freezer for 15-20 minutes. This chilling period allows the crumb coat to firm up and solidify, making the subsequent final frosting application much easier, cleaner, and less prone to smudging or crumb-pulling.
- Final Frosting Layer: Remove the chilled cake from the fridge or freezer. Apply the remaining frosting generously and evenly over the entire cake. For a smooth, polished, and professional finish, use a long bench scraper or a small offset spatula to smooth out the sides and top. For a charming, more rustic look with texture, use the back of a spoon or a small spatula to create delightful swoops and swirls in the frosting.
- Decorate and Serve: The final, beautiful touch! Garnish your magnificent chocolate orange cake to make it truly spectacular. You can sprinkle fresh orange zest over the top for an aromatic finish, arrange elegant chocolate orange slices, or adorn it with vibrant fresh orange segments for a stunning visual appeal. Slice, serve, and savor every indulgent, zesty, and fudgy bite!
Expert Baking Tips for a Flawless Chocolate Orange Cake
Achieving baking perfection often comes down to a few key details that can elevate your results from good to absolutely outstanding. Keep these valuable tips in mind to ensure your chocolate orange cake turns out perfectly moist, flavorful, and beautifully presented every single time:
- Precision with a Weighing Scale: For the most accurate and consistent baking results, we wholeheartedly recommend using a digital kitchen weighing scale and measuring your ingredients in grams (the metric way). Baking by weight, rather than by volume (cups), is significantly more precise and can make a substantial difference in the texture, rise, and overall success of your bakes. It minimizes variability and ensures your cake is consistent with the tested recipe.
- Room Temperature is Key: Ensure all your perishable ingredients, especially eggs, buttermilk, and butter for the frosting, are at room temperature before you begin mixing. Room temperature ingredients emulsify and blend more effectively, creating a smoother, more uniform batter and frosting. This leads to a more consistent crumb structure in the cake and a perfectly smooth, creamy frosting. Plan ahead and pull them out of the fridge at least an hour (or even two) before you start your baking process.
- Allow Ample Cooling Time: Patience is a virtue in baking, especially when it comes to cooling your cake layers. It is absolutely crucial that your cake layers are completely cool – to the touch, throughout – before you even think about applying frosting. Attempting to frost a still-warm cake will inevitably result in the frosting melting, sliding off, and becoming thin and soupy. If time is a concern, you can bake the cake layers a day in advance, let them cool completely, then wrap them tightly in plastic wrap and store them at room temperature until ready to frost.
- Customizing Orange Flavor Intensity: This recipe is designed for a beautifully balanced, subtle orange flavor that complements the chocolate without overpowering it. However, if you’re a true citrus enthusiast and prefer a bolder orange presence, feel free to increase the amount of orange zest in both the cake and frosting. Zest contains the most concentrated orange oils, so adding more will amplify the aroma and taste. You could also carefully add a few drops of high-quality orange extract to boost the flavor; start with a small amount (like ¼ teaspoon) and add more to taste, as extracts can be potent.
Frequently Asked Questions About Chocolate Orange Cake
Absolutely! Chocolate and oranges are not just a good combination, they’re a classic pairing that creates a truly amazing flavor profile. The richness and slight bitterness of dark chocolate provide a perfect, indulgent canvas for the bright, sweet, and slightly tart notes of fresh orange. They complement each other beautifully, creating a balanced and harmonious taste experience that many people adore, reminiscent of beloved festive chocolate treats.
Yes, you can certainly prepare parts of this cake in advance to save time! The cake layers can be baked up to two days before you plan to assemble and frost the cake. Once the layers have cooled completely, wrap each layer tightly in plastic wrap to prevent them from drying out, and store them at room temperature. For the freshest and best texture, we highly recommend making the frosting closer to the assembly time, as its creamy, fudgy texture is best shortly after preparation. Alternatively, you can store unfrosted cake layers in the freezer for up to a month, wrapped well.
To maintain its freshness, moistness, and delightful texture, store the assembled and frosted chocolate orange cake in an airtight cake carrier or covered tightly with plastic wrap. Place it in the refrigerator, where it will keep beautifully for up to 5 days. For the best eating experience and to allow the flavors to fully develop and the frosting to soften to its ideal consistency, always allow the cake to come to room temperature for about 30-60 minutes before serving.
Yes, this chocolate orange cake freezes wonderfully, making it a great option for meal prep or saving leftovers! To freeze, ensure the cake is fully assembled and frosted. You can freeze individual slices for convenience or the entire cake. Wrap it tightly in several layers of plastic wrap, and then add an additional layer of heavy-duty aluminum foil to prevent freezer burn and protect against odors. It can be frozen for up to 3 months. When you’re ready to enjoy, let it defrost overnight in the refrigerator, and then allow it to come to room temperature for an hour or so before serving to ensure optimal flavor and texture.
No buttermilk on hand? No problem at all! You can easily make a homemade substitute that works perfectly in this recipe. Simply add 1 tablespoon of lemon juice or white wine vinegar to 1 cup of regular milk (whole milk or a good quality dairy-free alternative works best). Stir it gently and let it sit for about 5-10 minutes at room temperature. The milk will curdle slightly and thicken, mimicking the acidity and texture of store-bought buttermilk. This homemade version will contribute to a beautifully moist and tender cake, just as the original recipe intends.
Explore More Irresistible Chocolate Cakes You’ll Love
If you’ve enjoyed the rich flavors and incredibly moist texture of this chocolate orange cake, you’re in for a treat! We have a delightful collection of other exquisite chocolate cake recipes that are sure to tantalize your taste buds and become new favorites in your baking repertoire. From classic combinations to unique twists, there’s a chocolate cake for every craving and occasion waiting to be discovered:
- Chocolate Cake with Strawberry Filling
- Chocolate Cake with Cream Cheese Frosting
- Matilda’s Chocolate Cake (Ready in 20 minutes)
- The Best Triple Chocolate Layer Cake
Have you created this delicious recipe? We would love to hear from you! Please take a moment to rate the recipe below! Don’t forget to share your beautiful bakes with us by following and tagging me on Instagram @alpineella and Pinterest! Your creations inspire us!
Recipe

Chocolate & Orange Cake
Ella Gilbert
Pin Recipe
Save RecipeSaved!
Equipment
-
2x 8″ cake pans
Ingredients
Cake
- 1 cup hot water
- ¾ cup cocoa powder
- 1 ¾ cup granulated sugar
- ¾ teaspoon vanilla extract
- ¾ teaspoon kosher salt
- 2 eggs room temperature
- 1 ¾ cup all purpose flour
- 2 teaspoon baking soda
- 1 teaspoon baking powder
- 1 cup buttermilk room temperature
- 0.5 cups vegetable oil
- oranges
- 2 tablespoon orange juice
Frosting
- 6 oz dark chocolate chopped
- 1 cup unsalted butter room temperature
- ½ teaspoon kosher salt
- 2 cups confectioners’ sugar
- 1 cup cocoa powder dutch processed
- ½ cup sour cream room temperature
- zest of an orange
- 2 teaspoons orange juice
Instructions
Cake
-
Preheat oven to 350°F/175°C. Grease 2x 8-inch cake pans with butter, then line the bottoms with parchment paper.
-
Combine the flour, cocoa powder, sugar, baking powder, baking soda, and salt in the bowl of a stand mixer, using the paddle attachment. Set aside.¾ cup cocoa powder, 1 ¾ cup granulated sugar, ¾ teaspoon kosher salt, 1 ¾ cup all purpose flour, 1 teaspoon baking powder, 2 teaspoon baking soda
-
In a large jug, combine the buttermilk, oil, eggs, orange zest and orange juice and vanilla¾ teaspoon vanilla extract, 2 eggs, 1 cup buttermilk, 0.5 cups vegetable oil, 2 tablespoon orange juice, oranges
-
While the mixer is on low speed, slowly pour in the ingredients in the large jug
-
While the mixer is still running, slowly add the hot water and mix. Your batter will be very thin. Make sure the mixer is on your lowest speed so it doesn’t splash everywhere1 cup hot water
-
Pour the batter into the prepared pans. Bake for 35-40 minutes, until a toothpick comes out clean when inserted
-
Allow the cakes to cool completely before removing from pans.
Frosting
-
Melt your chocolate in a microwave, stirring every 10 seconds so it doesn’t burn.6 oz dark chocolate
-
In your stand mixer with the paddle attachment, beat the butter and confectioners’ sugar on low speed until well combined.1 cup unsalted butter, 2 cups confectioners’ sugar
-
Turn the speed to high for 2-3 minutes until light and fluffy.
-
Add in your cocoa powder and beat on low, then increase the speed to medium for 1-2 minutes.1 cup cocoa powder
-
Add your sour cream, melted chocolate, orange juic, orange zest and salt and mix once more.½ teaspoon kosher salt, ½ cup sour cream, zest of an orange, 2 teaspoons orange juice
Assembly
-
Once the cakes are both completely cool, you can assemble the layer cake. Place one cake layer on your cake plate or cake stand. Add a large scoop of the chocolate orange frosting on top and spread over the top. Add the second cake layer on top. Apply a thin layer of frosting around the sides and the top of the cake. Place in the fridge or freezer for 15 minutes to set the crumb coat.
-
Frost the cake with the remaining frosting and enjoy!
Video
Notes
Butter: I use European style butter in my recipes. This will make your cake much creamier and richer.
Salt: If you don’t have kosher salt, halve the amount of salt called for in the recipe. 1 teaspoon kosher salt = ½ teaspoon fine salt.
Storage: Cover the cake tightly and keep in the fridge for up to 5 days.
Oranges: if you want a stronger orange flavor you can add more orange zest to both the cake and the frosting.
Freezing: Freeze for up to 3 months, let the cake defrost overnight in the fridge and then come to room temperature when you’re ready to eat it.
Buttermilk: No buttermilk on hand? Mix one tablespoon of lemon juice or white wine vinegar with 1 cup of milk, then let it sit for 5 minutes so it can curdle.
