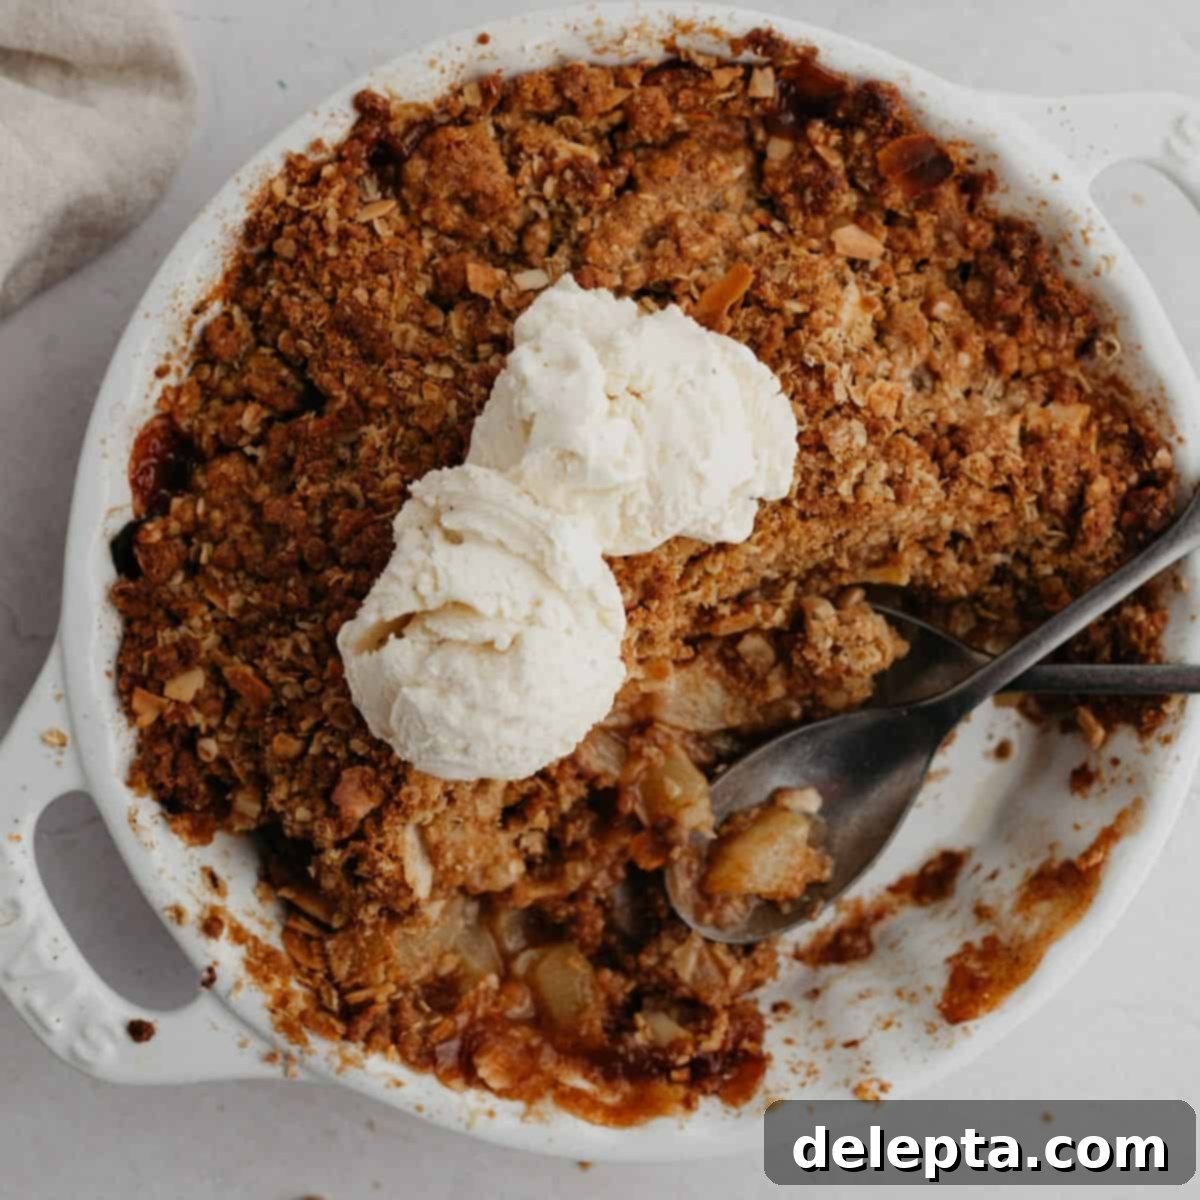
Irresistible Pear and Apple Crisp: Your Ultimate Fall Dessert Guide
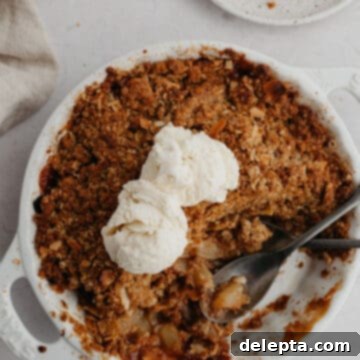
Get ready to embrace the cozy flavors of autumn with this ultimate pear and apple crisp recipe! Featuring a delightful balance of sweet, tender fruit and a golden, crunchy oat topping, this dessert is designed to be the star of any fall gathering. Best served warm with a scoop of vanilla ice cream, it offers a comforting aroma that will fill your home and instantly transport you to a crisp autumn day. What’s even better? This mouthwatering crisp comes together with just 15 minutes of active preparation time, making it an incredibly easy and rewarding baking project for any home cook.
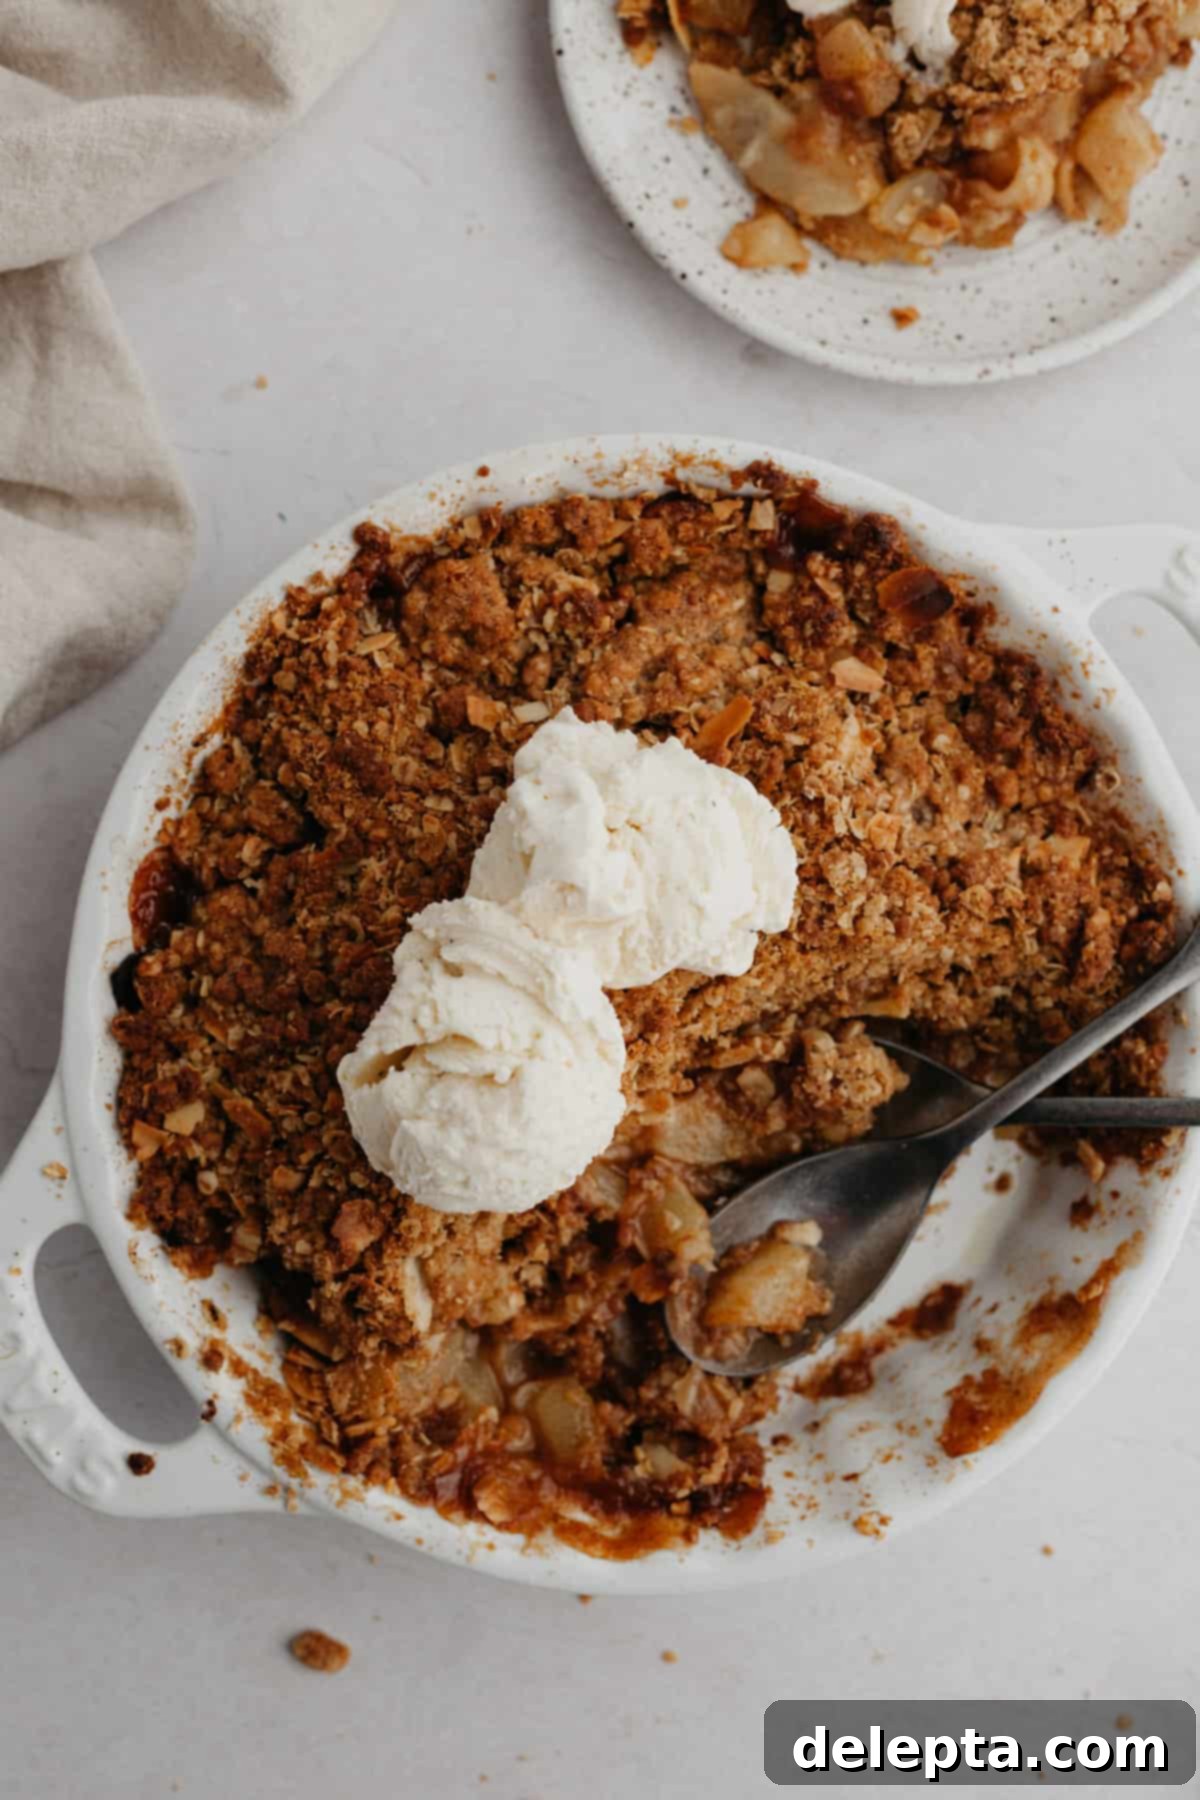
This pear and apple crisp isn’t just a dessert; it’s an experience. As it bakes, your kitchen will be enveloped in the enchanting scent of cinnamon, ginger, and caramelized fruit, truly making your home smell just like fall. The magic happens when you combine sweet, chopped pears and crisp apples with a medley of aromatic spices, a touch of flour, and a hint of sugar. This delectable fruit base is then generously crowned with an irresistible ginger oat topping, creating a symphony of textures and flavors in every bite. Whether you’re a seasoned baker or new to the kitchen, this recipe is straightforward and yields impressive results. If you’re specifically craving an apple-only version, be sure to check out my classic apple crumble with homemade custard for another fantastic fall treat.
Why You’ll Adore This Pear and Apple Crisp Recipe
There are countless reasons why this pear and apple crisp deserves a permanent spot in your fall baking repertoire. It’s not just a dessert; it’s a celebration of seasonal produce and comforting flavors, designed to bring joy and warmth to your table. Here’s what makes this recipe truly special:
- Effortlessly Quick Preparation: Despite its impressive taste, this pear and apple crisp requires minimal effort. The fruit filling and oat topping come together in mere minutes, making it ideal for busy weeknights or impromptu gatherings. You simply toss the sliced apples and chopped pears with a blend of warming spices, then sprinkle over the rich, crumbly oat topping.
- Unforgettable Crispy Topping: The ginger oat topping is truly the star of the show, providing a perfect contrast to the soft fruit. Made with brown sugar, fragrant cinnamon, and a kick of ginger, it bakes up into a golden-brown, buttery, and utterly crispy streusel that adds an essential textural element to every spoonful. This isn’t just any topping; it’s designed for maximum crunch and flavor.
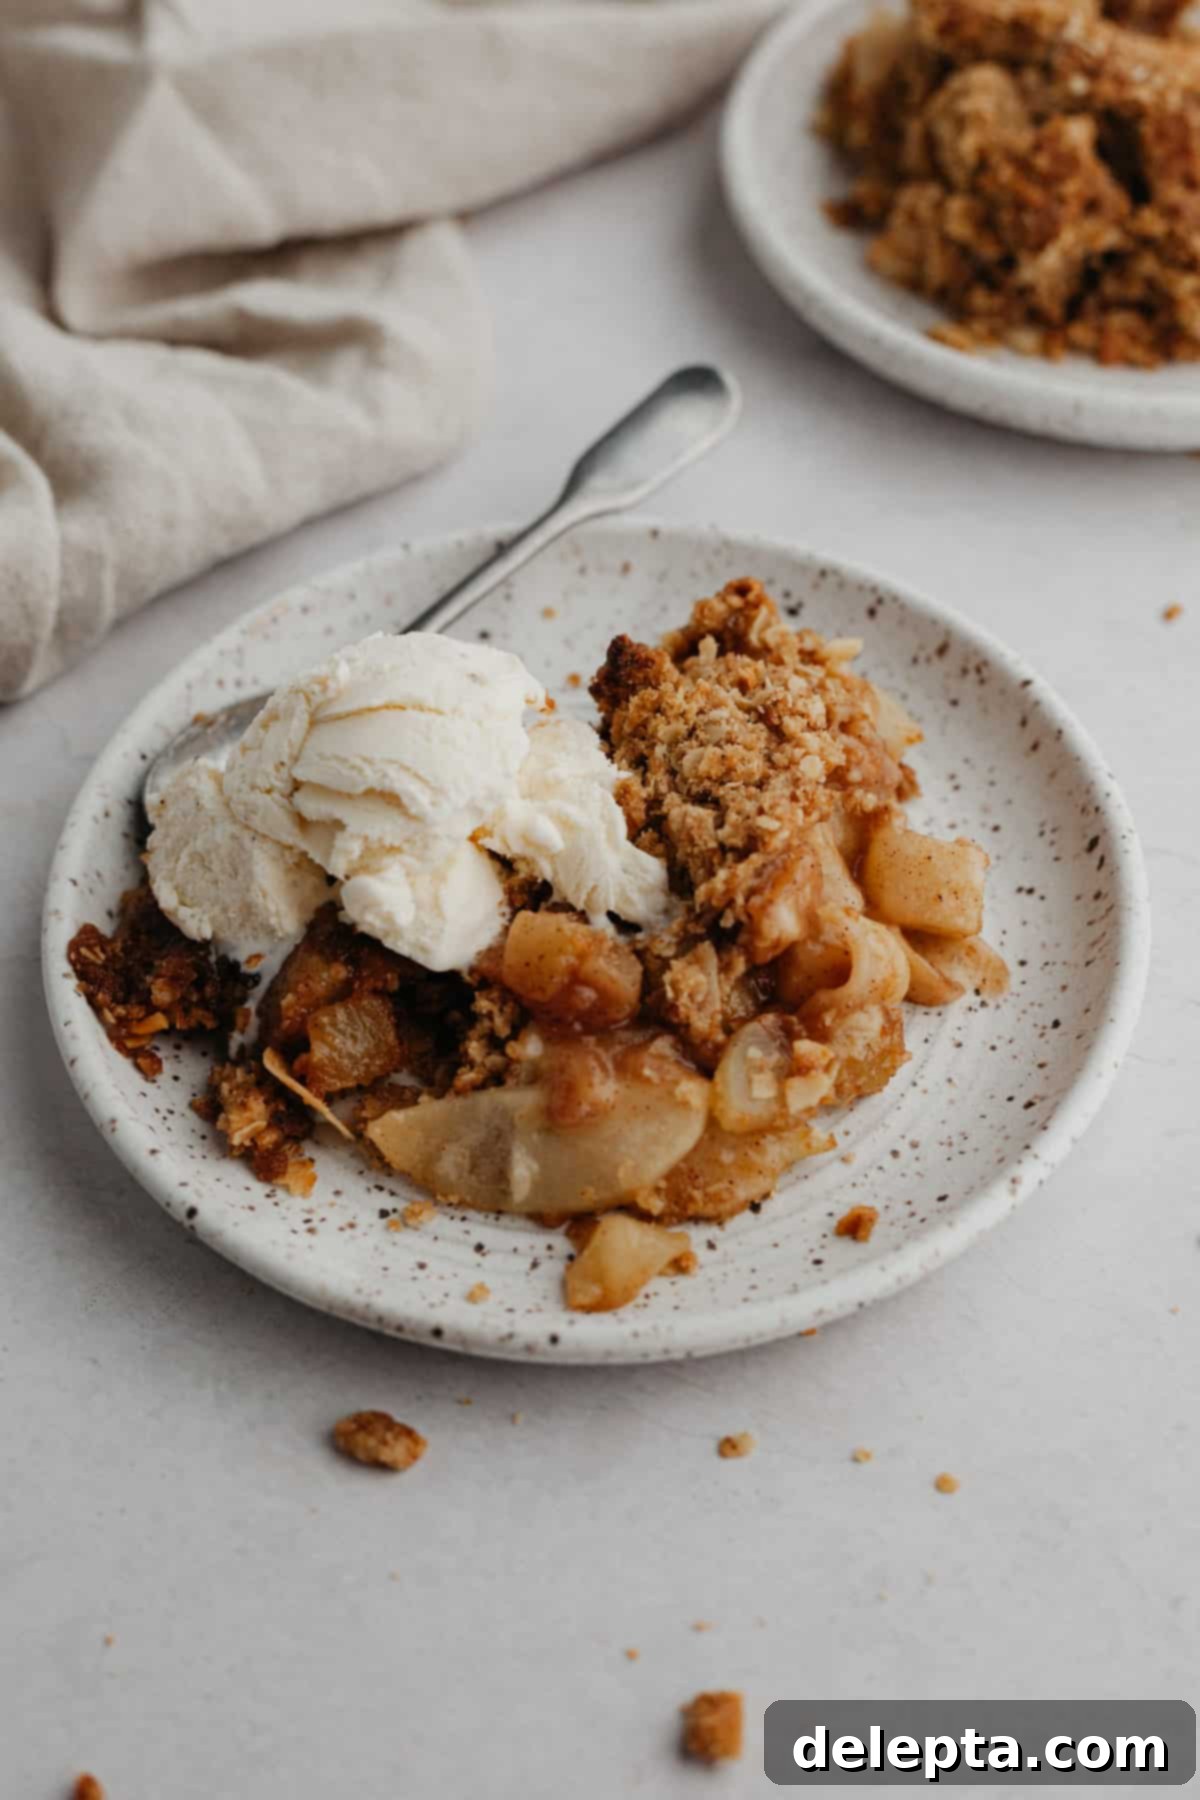
- The Ultimate Comfort Food: Served warm, this crisp is the epitome of comfort. The tender, spiced fruit filling perfectly complements the crunchy topping, especially when paired with a generous scoop of cold vanilla bean ice cream or a dollop of fresh whipped cream. It’s the kind of dessert that makes you want to curl up by the fire on a chilly evening.
- Seasonal Perfection: Pears and apples are at their peak during the fall season, offering the freshest, most flavorful ingredients for this crisp. This recipe highlights the natural sweetness and slight tartness of these fruits, enhanced by spices that evoke the essence of autumn.
- Crowd-Pleasing and Versatile: Whether it’s for a holiday meal, a family dinner, or a potluck with friends, this pear and apple crisp is always a hit. It’s universally loved and can be easily scaled up or down to suit your needs. Plus, it’s a fantastic way to use up an abundance of fresh fall fruit!
Essential Ingredients for Your Pear and Apple Crisp
Crafting the perfect pear and apple crisp begins with selecting high-quality ingredients. While the full list with precise measurements is conveniently located in the printable recipe card at the bottom of this post, here’s a closer look at some key components and why they matter, along with helpful substitution ideas to ensure your baking success.
-

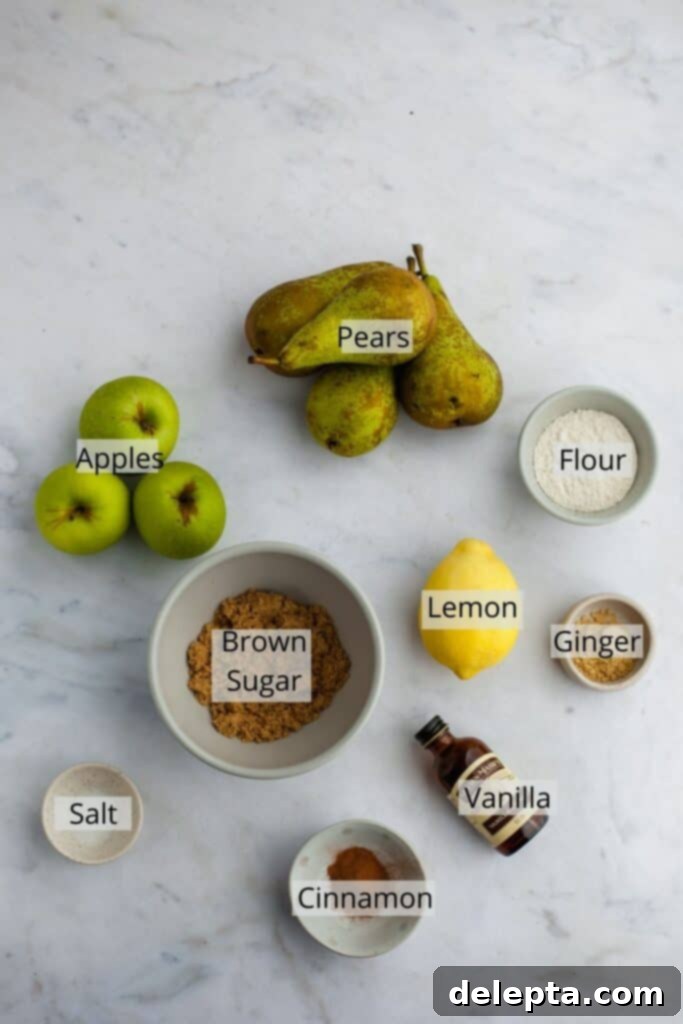
Ingredients for the juicy Pear and Apple Crisp filling. -

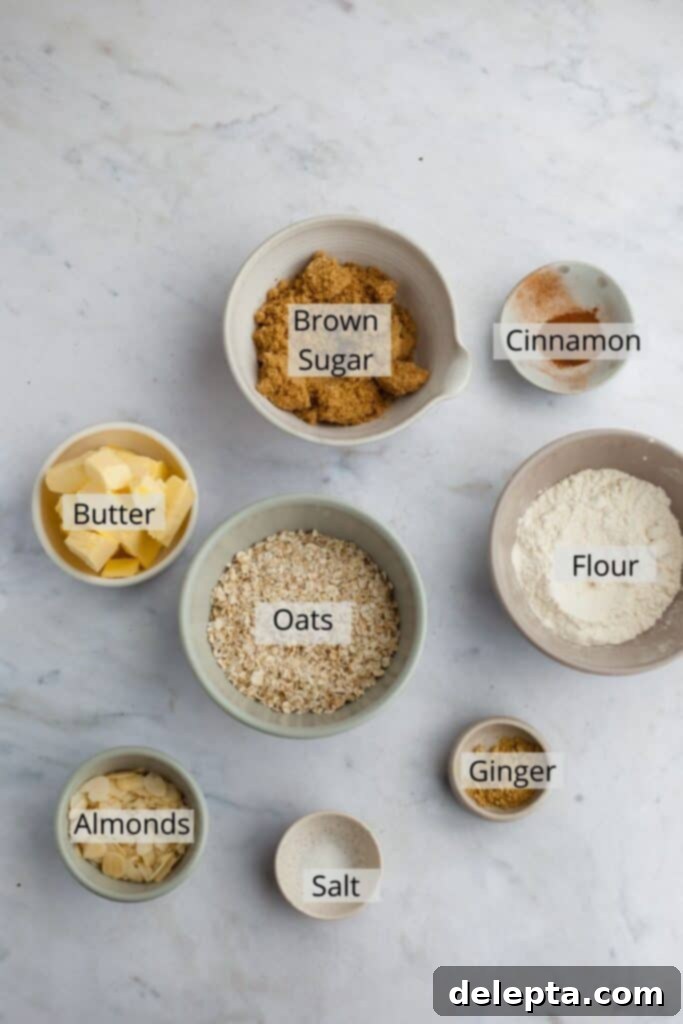
Components for the crunchy Oat Ginger Topping.
For your convenience, the complete printable recipe card with a detailed list of ingredients and step-by-step instructions can be found at the very bottom of this post.
- Pears: Choose pears that are ripe but still firm, as they will hold their shape better during baking. Good varieties include Bosc, Anjou, or Bartlett. Make sure to peel, core, and chop them into bite-sized pieces for even cooking and distribution throughout the crisp.
- Apples: Similar to pears, select firm baking apples that won’t turn to mush. Granny Smith provides a nice tart contrast to the sweet pears, while Honeycrisp or Fuji offer a sweeter, crisper texture. Peel, core, and thinly slice your apples. The thinner slices allow them to soften beautifully alongside the pears.
- Light Brown Sugar: Used in both the fruit filling and the oat topping, light brown sugar adds moisture, depth of flavor, and a lovely caramel note. It also contributes to the golden-brown color of the topping.
- All-Purpose Flour: A small amount of flour in the fruit filling helps to thicken the juices released by the fruit, preventing a watery crisp. In the topping, flour is essential for creating the crumbly texture.
- Warming Spices (Cinnamon & Ground Ginger): These are the heart of the fall flavor! Ground cinnamon offers warmth and sweetness, while ground ginger adds a delightful spicy kick that perfectly complements the fruit. Don’t be shy with these spices, as they define the aromatic profile of the crisp.
- Vanilla Extract: A touch of vanilla enhances all the other flavors, adding a subtle richness to the fruit filling.
- Lemon Juice: Fresh lemon juice is crucial for two reasons: it prevents the apples and pears from browning, and its acidity brightens the flavors of the fruit, cutting through the sweetness and adding a pleasant tang.
- Kosher Salt: A pinch of salt is vital in both the filling and the topping to balance the sweetness and enhance the overall flavor profile. It brings out the best in the fruit and spices.
- Rolled Oats: For the streusel topping, rolled oats (old-fashioned oats) are key. They provide that classic chewy, hearty texture and crispness that defines a perfect fruit crisp. Be sure not to use steel-cut oats or instant oats, as they will not yield the desired texture for the topping.
- Unsalted Butter (Cubed and Cold): Cold butter is essential for creating a crumbly, tender topping. When rubbed into the dry ingredients, the cold butter forms small pockets, which steam during baking and result in a wonderfully flaky and crispy streusel.
- Sliced Almonds: I used sliced almonds to add some extra crunch and a subtle nutty flavor to the oat ginger topping. They toast beautifully in the oven, enhancing the overall texture. However, you have options:
- Substitution: You could substitute an equal amount of chopped walnuts or pecans for a different nutty profile.
- Omission: If you prefer to keep it nut-free or simply don’t have nuts on hand, you can leave them out entirely without significantly impacting the crisp’s deliciousness.
How to Bake the Perfect Pear and Apple Crisp
Creating this delightful pear and apple crisp is a straightforward process, broken down into simple, manageable steps. Follow these instructions carefully to achieve a wonderfully tender fruit filling and an irresistibly crunchy topping.
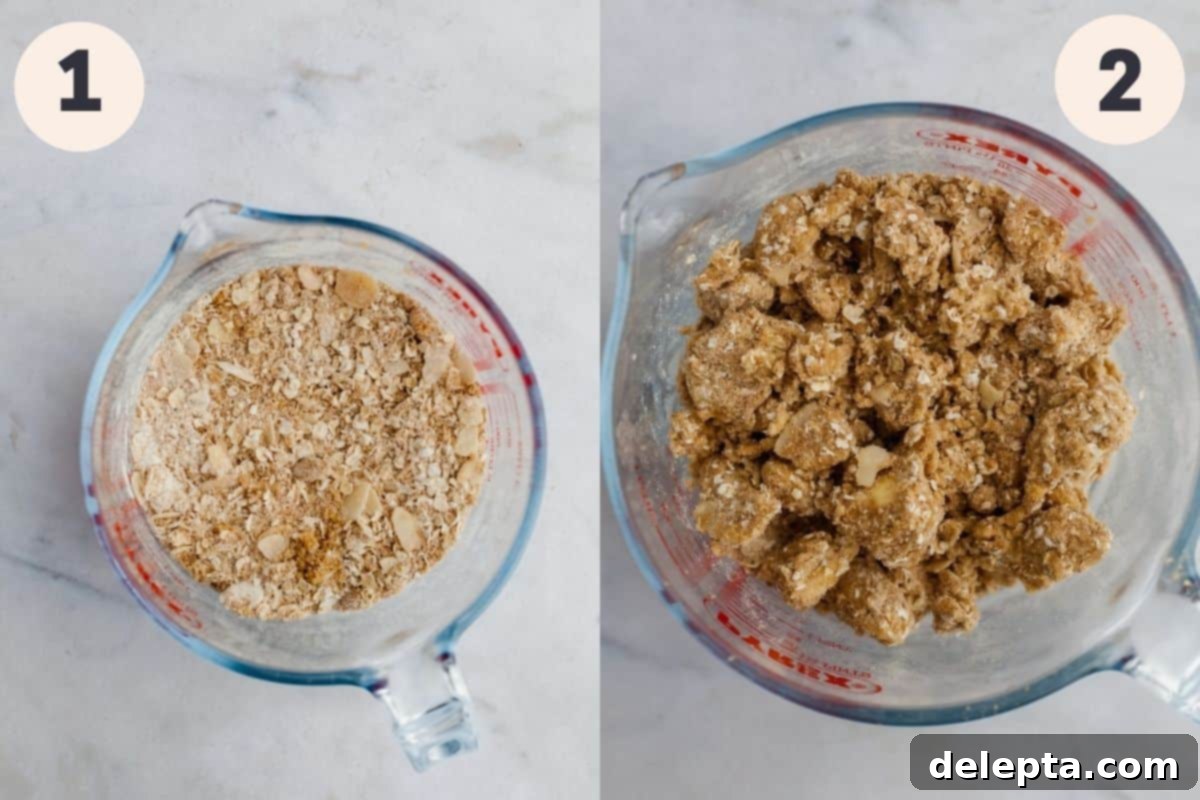
Step 1: Craft the Irresistible Topping. In a large mixing bowl or a deep jug, combine your rolled oats, all-purpose flour, light brown sugar, ground cinnamon, ground ginger, kosher salt, and slivered almonds. Whisk these dry ingredients together thoroughly until they are well distributed. This ensures all the flavors are evenly mixed.
Step 2: Incorporate the Butter. Add the cold, cubed unsalted butter directly into the dry topping mixture. Using your fingertips or a pastry cutter, work the butter into the dry ingredients. Continue until the mixture resembles coarse crumbs, with some pieces of butter still visible, ranging from pea-sized to small lentil-sized. The key is to ensure all the dry ingredients are moistened by the butter, creating that perfect crumbly texture. Once mixed, place the bowl in the refrigerator to keep the butter cold while you prepare the fruit filling. This helps the topping stay crisp during baking.
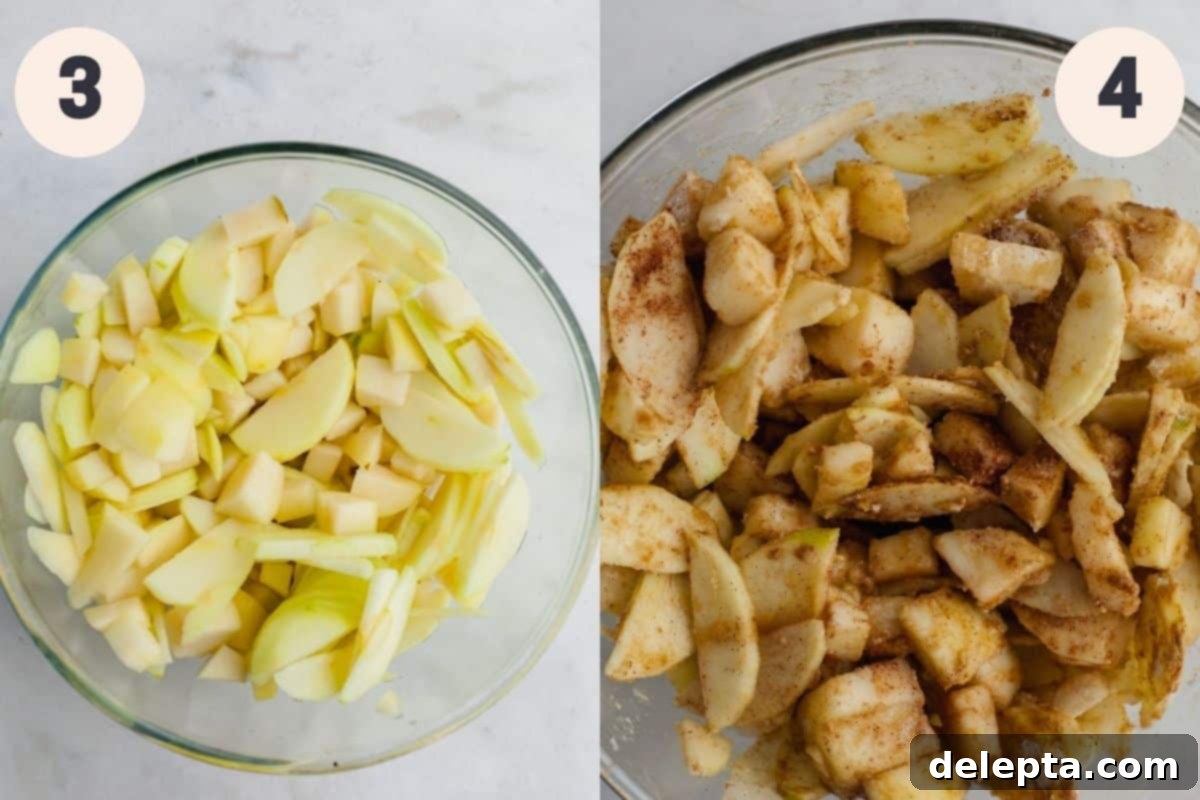
Step 3: Prepare Your Fruit. Begin by peeling and coring your apples and pears. For the apples, slice them thinly – about ⅛ to ¼ inch thick – to ensure they cook evenly and become tender. For the pears, chop them into roughly 1-inch pieces. Combine both the sliced apples and chopped pears in a large glass bowl, making sure there’s enough room for tossing.
Step 4: Season the Fruit Filling. To the bowl of prepared fruit, add the fresh lemon juice, a small amount of all-purpose flour, light brown sugar, vanilla extract, ground ginger, ground cinnamon, and kosher salt. Gently toss the fruit until every piece is thoroughly coated with the spice and sugar mixture. This ensures each bite of your crisp is bursting with flavor and the flour helps to absorb excess moisture.
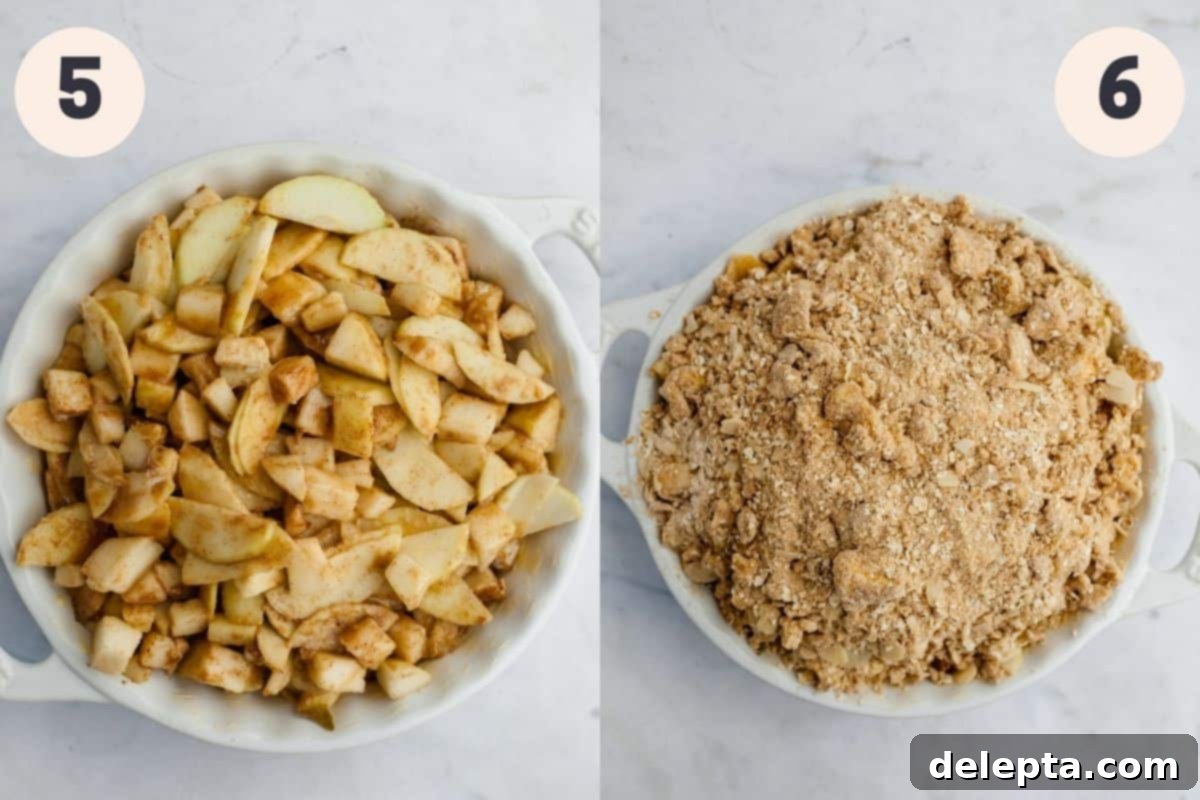
Step 5: Assemble the Crisp. Butter a 9-inch ceramic baking dish generously. This not only prevents sticking but also adds another layer of flavor and helps create a beautifully golden crust on the bottom. Carefully transfer the seasoned fruit filling into the prepared baking dish. Spread the fruit out into an even layer, ensuring there are no large gaps. This promotes uniform baking and ensures every serving gets a good mix of fruit.
Step 6: Top and Bake. Retrieve your chilled oat streusel topping from the refrigerator. Evenly sprinkle the entire topping mixture over the fruit filling in the baking dish, covering it completely. Place the dish into your preheated oven at 350°F (175°C) and bake for 50-55 minutes. You’ll know it’s ready when the topping is golden brown and delightfully crisp, and the fruit filling is bubbling around the edges, indicating it’s tender and cooked through. If the topping starts to brown too quickly, lightly cover it with aluminum foil.
Pro Baking Tips for a Perfect Crisp
Achieving a consistently delicious pear and apple crisp every time relies on a few key techniques. These tips will help you elevate your baking and ensure your crisp turns out perfectly golden, bubbly, and full of flavor.
- Thoroughly Mix Your Topping Ingredients: This is crucial for the perfect streusel. When rubbing the cold butter into the dry ingredients (flour, oats, sugar, spices, nuts), make sure to mix until all the dry ingredients are moistened and form coarse crumbs. If the mixture is too dry or still has large clumps of un-mixed butter, the topping won’t become as golden or crispy and may even taste floury after baking. Take your time to really work the butter in, ensuring an even distribution for optimal texture.
- Prevent Over-Browning: Keep an eye on your pear and apple crisp as it bakes, especially during the last 15-20 minutes. Ovens can vary, and sometimes the topping can brown faster than the fruit cooks through. If you notice the topping getting too dark too quickly, simply cover the top of the baking dish loosely with aluminum foil. This will protect the topping from burning while allowing the fruit underneath to continue softening and bubbling to perfection.
- Measure Ingredients Accurately with a Scale: For the most consistent and professional baking results, I highly recommend using a weighing scale and measuring out your ingredients the metric way. Baking is a science, and precise measurements make a huge difference, especially with flour and sugar. Metric measurements are more accurate than volume measurements (cups) as they eliminate variables like how tightly flour is packed. This ensures your crisp’s texture and sweetness are exactly as intended.
- Choose the Right Fruit: For apples, a mix of sweet (like Honeycrisp or Fuji) and tart (like Granny Smith) works beautifully to create a balanced flavor. For pears, opt for firm varieties such as Bosc or Anjou, which hold their shape well when baked. Avoid overly ripe or soft fruit, as it can turn mushy during cooking.
- Don’t Skip the Lemon Juice: The lemon juice isn’t just for preventing browning; it also brightens the flavor of the fruit and balances the sweetness of the sugar and spices. It’s a small but mighty ingredient!
- Allow for Proper Cooling: While it’s tempting to dig in right away, allowing the crisp to cool for at least 10-15 minutes after baking is important. This time allows the fruit filling to set slightly and thickens the juices, preventing a watery mess. It will still be wonderfully warm and ready for ice cream.
Frequently Asked Questions About Pear and Apple Crisp
Here are answers to some common questions you might have about making and enjoying this delicious pear and apple crisp:
This is a tricky question with nuances depending on who you ask and regional culinary traditions! Generally, both crumbles and crisps are baked fruit desserts topped with a streusel-like mixture. However, one common distinction is that crisps typically contain oats in their topping, which helps them bake to a particularly “crispy” texture, often with a slightly more rustic appearance. Crumbles, on the other hand, usually feature a topping made primarily from flour, sugar, and butter, creating a more uniform, cakey, or “crumbly” texture without oats. Richard Sax’s ‘Classic Home Desserts’ supports this, stating a crisp is topped with butter, sugar, flour, and sometimes nuts, while a crumble is the English version of a crisp with a topping that specifically includes oats. So, by this definition, our recipe, with its ginger oat topping, leans firmly into the “crisp” category!
Once your pear and apple crisp has completely cooled down to room temperature, cover it tightly with plastic wrap or aluminum foil. You can then store it in the refrigerator for up to 5 days. For reheating, simply scoop out a portion and warm it in the microwave for 30-60 seconds, or place the entire dish (covered loosely with foil) in a preheated oven at 300°F (150°C) for 15-20 minutes, until warmed through. The topping may lose some of its crispness upon refrigeration, but reheating will help restore some of its crunch.
Yes, absolutely! You can prepare the fruit filling and the oat topping separately and assemble just before baking. Store the chopped and spiced fruit in an airtight container in the refrigerator for up to 24 hours. Keep the prepared oat topping in a separate airtight container in the refrigerator for up to 2-3 days. When ready to bake, simply assemble and follow the baking instructions. Alternatively, you can fully bake the crisp, let it cool, and then cover and refrigerate. Reheat as per the storage instructions above.
While fresh pears and apples are recommended for the best texture and flavor, you can use frozen fruit in a pinch. If using frozen fruit, do not thaw it before mixing with the spices and sugar. Toss the frozen fruit directly with the other filling ingredients. Be aware that frozen fruit will release more liquid during baking, so you might need to bake the crisp for an additional 10-15 minutes, or until the filling is bubbly and thickened. The overall texture might be slightly softer than with fresh fruit.
Other Fall Desserts to Try
If you’re loving the warmth and comfort of this pear and apple crisp, you’ll surely enjoy these other delightful fall-inspired desserts from my kitchen:
- Cheesecake Swirl Pumpkin Bread
- Gooey Caramel Cinnamon Rolls with Pecans
- Baked Maple Glazed Donuts
- Simple Moist Chocolate Walnut Cake
Have you tried this wonderfully aromatic pear and apple crisp recipe? I’d love to hear your thoughts! Make sure to tag me on Instagram @alpineella and leave a review below if you have! Your feedback helps other bakers. If you’re looking for more delicious baking ideas and inspiration, you can also follow me on Pinterest for a constant stream of sweet treats.
Recipe
Harvest Pear and Apple Crisp with Ginger Oat Topping
Ella Gilbert
Pin Recipe
Save RecipeSaved!
Equipment
-
9-inch baking pan
Ingredients
Pear and Apple Crisp
- 555 grams pears peeled, cored and chopped
- 555 grams apples peeled, cored and thinly sliced
- 50 grams light brown sugar
- 30 grams all purpose flour
- 1 teaspoon vanilla extract
- 1 teaspoon ground ginger
- 1 teaspoon ground cinnamon
- ½ teaspoon kosher salt
- 1 tablespoon lemon juice
Ginger Oat Topping
- 68 grams all purpose flour
- 110 grams light brown sugar
- ½ teaspoon ground cinnamon
- 1 teaspoon ground ginger
- 113 grams unsalted butter cubed and cold
- 80 grams rolled oats
- ½ teaspoon kosher salt
- 28 grams slivered almonds
Instructions
Pear Crisp
-
Preheat your oven to 350°F/175°C. Butter a round 9 inch baking dish.
-
Whisk together the flour, cinnamon, ginger,, salt, oats and brown sugar together in a large jug or medium bowl. Add in your cubed butter and use your fingers or a pastry cutter to rub the butter until it is very crumbly and everything is moistened. Place in the fridge while you prepare the filling.
-
In a large bowl, mix all of your filling ingredients together and toss. Make sure the pear and apples are evenly coated.
-
Spread the filling out into an even layer of your dish. Make sure there are no gaps! Sprinkle over your topping mixture evenly
-
Bake for 50-55 minutes. If it gets too brown, place some foil on top
-
Allow it to cool for at least 5 minutes before serving
Notes
Butter: I use European style butter, like Kerry Gold, in my recipes.
Salt: If you don’t have kosher salt, halve the amount of salt called for in the recipe. 1 teaspoon kosher salt = ½ teaspoon fine salt.
Storage: Keep the pear crisp covered and in the fridge for up to 5 days.
Nutrition
Tried this recipe?Leave a comment below! You can also tag me on Instagram @alpineella so I can see what you made!
