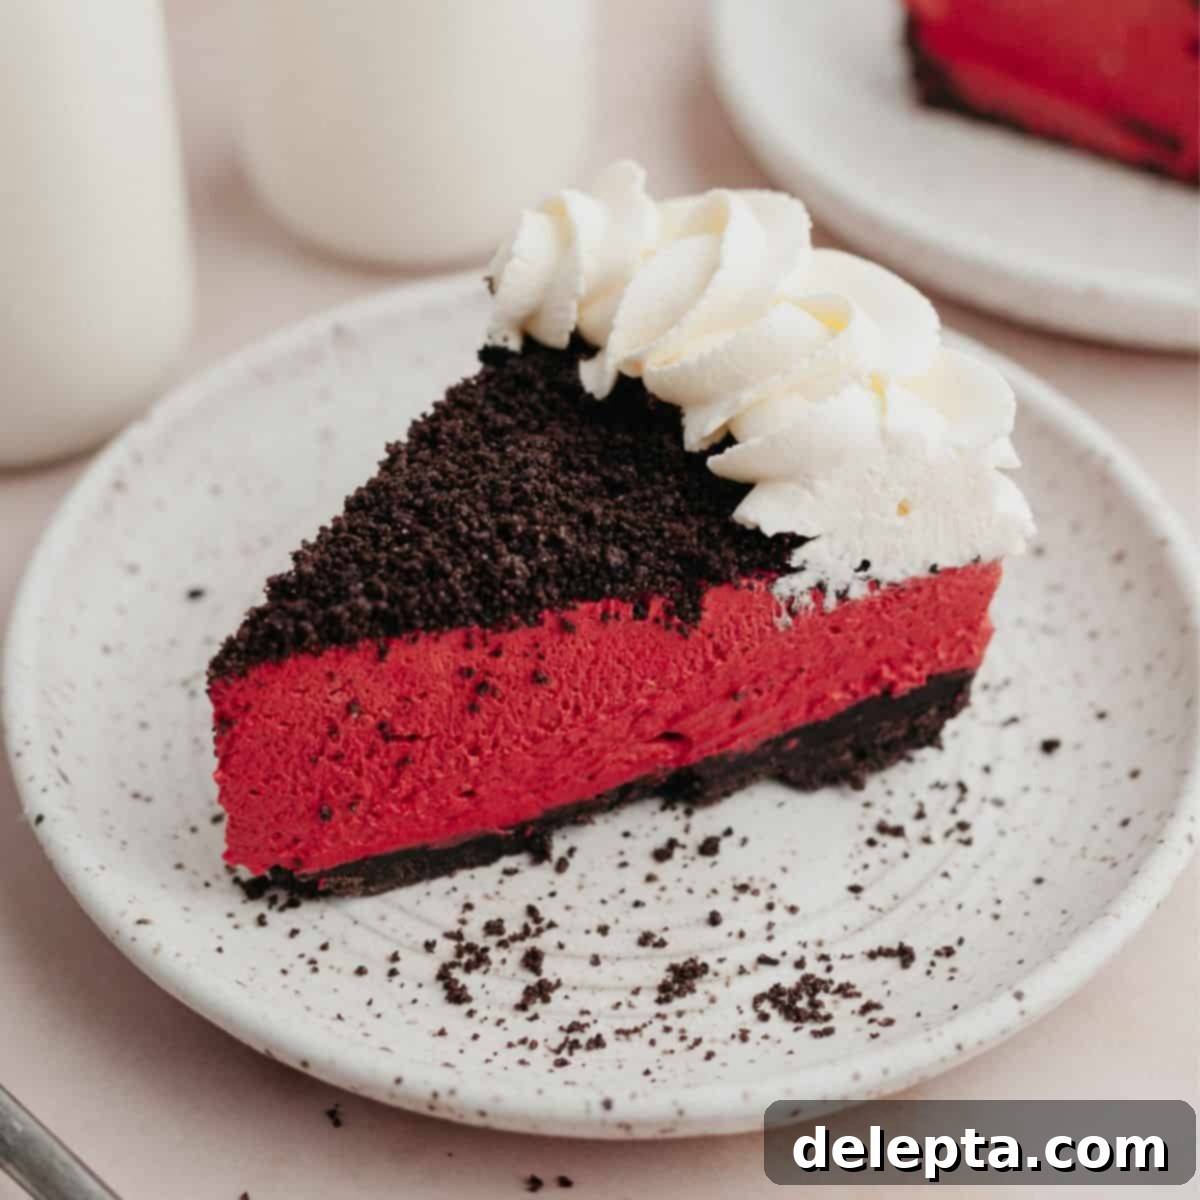
Irresistibly Creamy No-Bake Red Velvet Oreo Cheesecake: Your Easiest Dessert Yet!
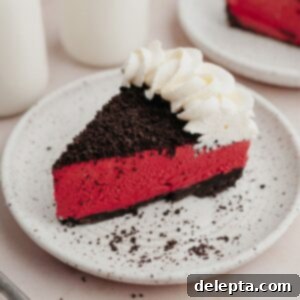
Prepare to fall in love with this unbelievably creamy and decadent Red Velvet Oreo Cheesecake! This delightful dessert is a true showstopper, offering the rich, distinctive flavor of red velvet combined with the beloved crunch of Oreo cookies, all without ever needing to turn on your oven. Perfect for any celebration or simply as a luxurious treat, this no-bake cheesecake is designed for ease and maximum enjoyment. Featuring a robust Oreo crust, a vibrant and tangy red velvet cheesecake filling, and crowned with a generous topping of crushed Oreos and fluffy whipped cream, it’s a symphony of textures and flavors that will impress everyone. Say goodbye to complicated water baths and lengthy baking times – this recipe streamlines the cheesecake-making process, making it accessible for even novice bakers.
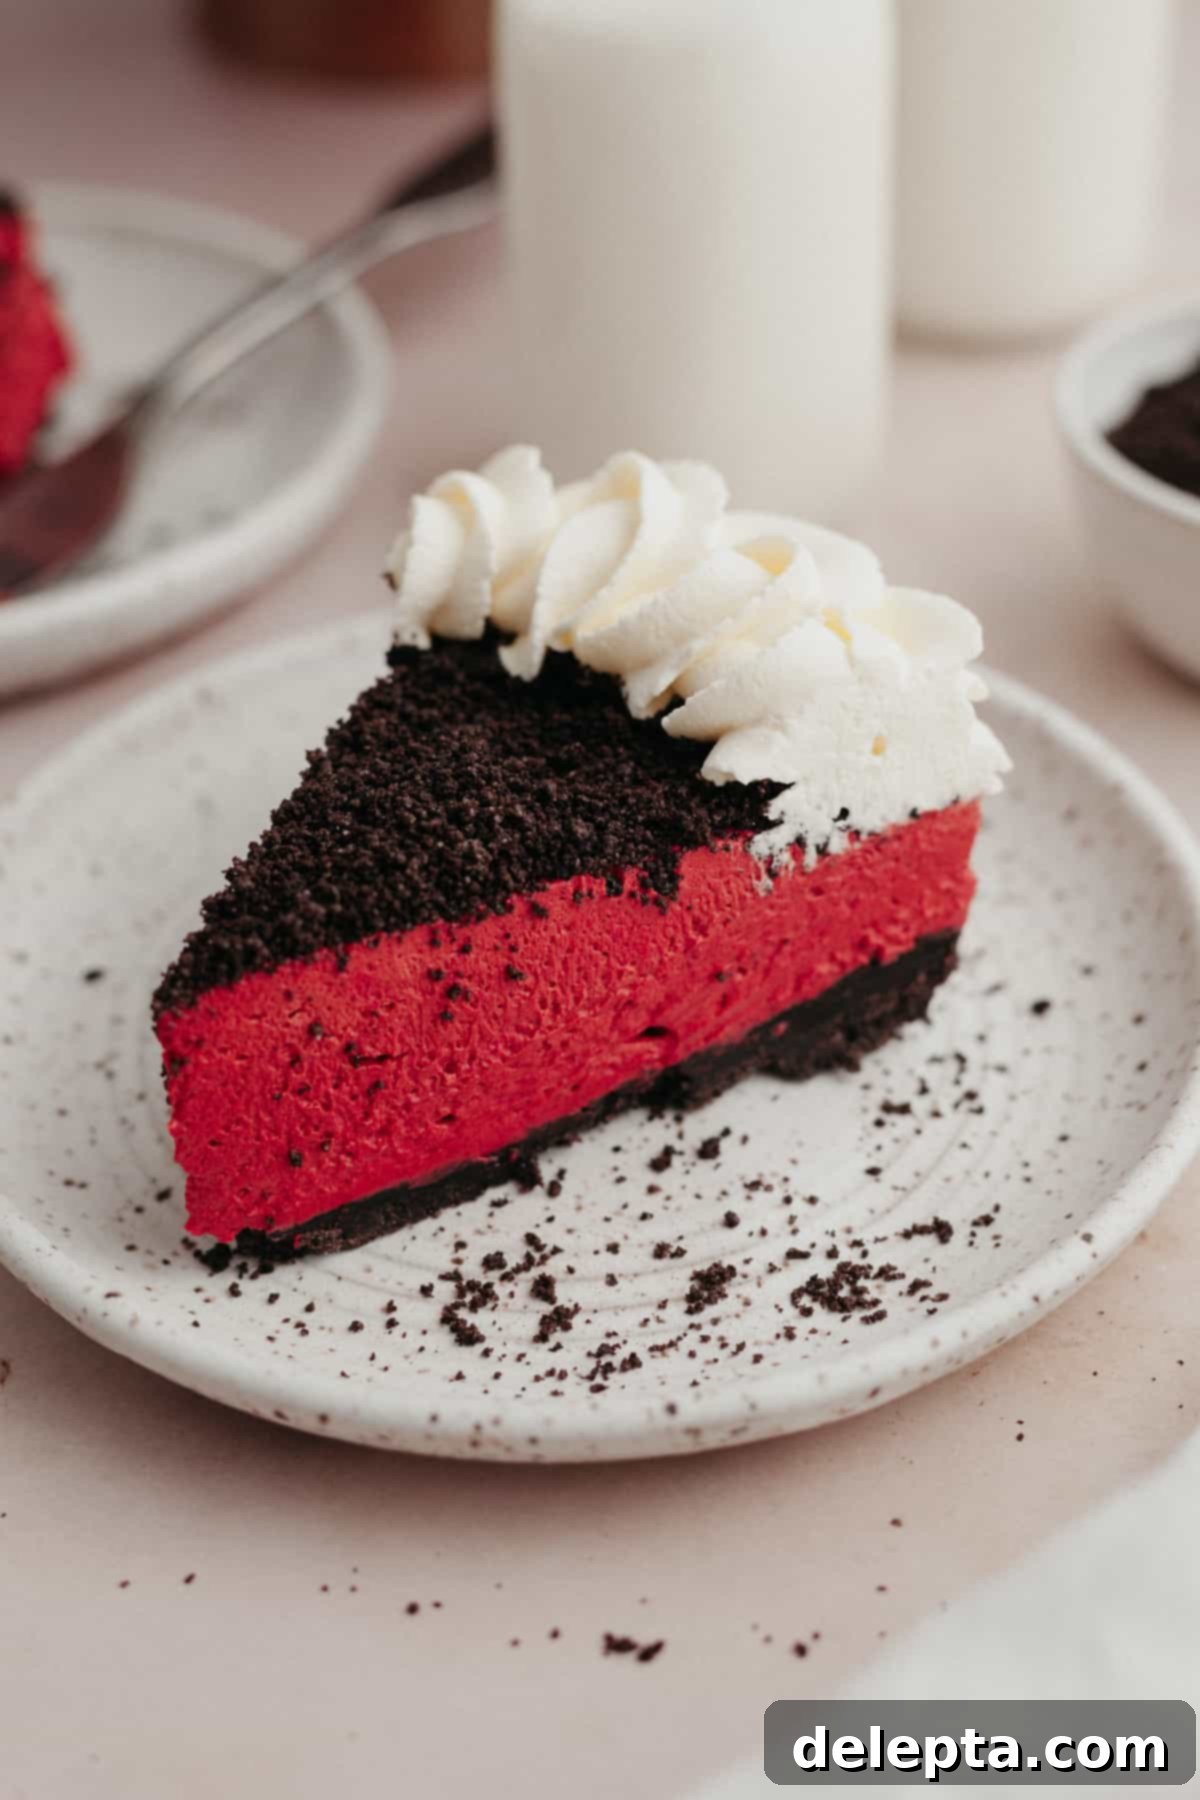
My passion for no-bake recipes runs deep, largely because of their incredible simplicity and the convenience of preparing them in advance. This means less stress on the day of a special occasion, allowing you more time to enjoy with your guests. Much like my popular mascarpone cheesecake and refreshing strawberry crunch cheesecake, the foundation of this recipe begins with a quick freeze of the Oreo cookie crust before it’s generously filled with the smooth, velvety cheesecake batter. The luscious red velvet cheesecake filling itself is a masterpiece of tangy, sweet, and subtly chocolatey notes, perfectly complemented by the crunchy Oreo crumbs folded within and sprinkled on top. Every bite delivers a harmonious blend of classic red velvet flavor and irresistible Oreo goodness.
If you’re an enthusiastic Oreo aficionado, your culinary journey doesn’t have to stop here! You absolutely must explore other delightful creations like this indulgent Oreo peanut butter pie, the delightful Oreo chocolate chip cookies, and the show-stopping Oreo drip cake. For those who crave the timeless elegance of a traditional red velvet cake, I recommend trying my exquisite red velvet cake with chocolate chips or the impressive Oreo red velvet layer cake. Each recipe promises to satisfy your sweet tooth with rich flavors and textures, proving that red velvet and Oreo are truly a match made in dessert heaven.
Why You’ll Adore This No-Bake Red Velvet Oreo Cheesecake!
- Effortless Preparation: This no-bake Red Velvet Oreo Cheesecake truly lives up to its “simple” promise. The crust, the foundation of this incredible dessert, requires minimal effort: simply blend crushed Oreo cookies with melted butter until perfectly moistened. This mixture is then pressed into a pan and briefly chilled in the freezer. There’s no complex baking involved, making it ideal for busy schedules or those new to cheesecake making. The entire preparation process is designed to be straightforward, allowing you to create a professional-looking dessert with ease.
- Velvety Red Velvet Filling: The heart of this cheesecake is its lusciously smooth and tangy red velvet filling. Crafted from a blend of rich full-fat cream cheese, a touch of sour cream for that classic cheesecake tang, a hint of cocoa powder to deepen the red velvet flavor, and powdered sugar for perfect sweetness, this filling is truly exquisite. The vibrant red hue, achieved with a good quality food dye, makes it visually stunning, while the creamy texture melts in your mouth, delivering a balanced and unforgettable taste experience.
- Abundant Oreo Flavor: Every component of this dessert is infused with irresistible Oreo goodness. The crunchy base is made entirely from crushed Oreos, providing a delightful contrast to the smooth filling. For the grand finale, I generously top this delicious cheesecake with even more crushed Oreo cookie crumbs and a cloud of freshly whipped cream. For an extra layer of decadence, imagine it topped with a rich chocolate ganache – an amazing alternative for serious chocolate lovers. The presence of Oreos in every layer ensures a consistent and satisfying flavor profile that cookie enthusiasts will adore.
- Remarkably Quick Assembly: One of the greatest advantages of this recipe is its incredibly short active preparation time. You can have this entire dessert assembled and ready for chilling in just about 15 minutes! This speed makes it a fantastic choice for impromptu gatherings, last-minute dessert needs, or when you simply want a gourmet treat without spending hours in the kitchen. The efficiency of this recipe means you can enjoy the creative process without feeling overwhelmed.
- Perfect for Make-Ahead: Planning a special event? This red velvet cheesecake is your ideal companion! Because it’s a no-bake recipe, it requires a significant chilling period to firm up beautifully, typically at least 12 hours in the refrigerator. This extensive chilling time makes it an excellent candidate for preparing a day or even two in advance. Not only does this save you precious time on the day of your event, but the flavors also meld and deepen during this rest period, resulting in an even more delicious and stable dessert.
Essential Ingredient Insights
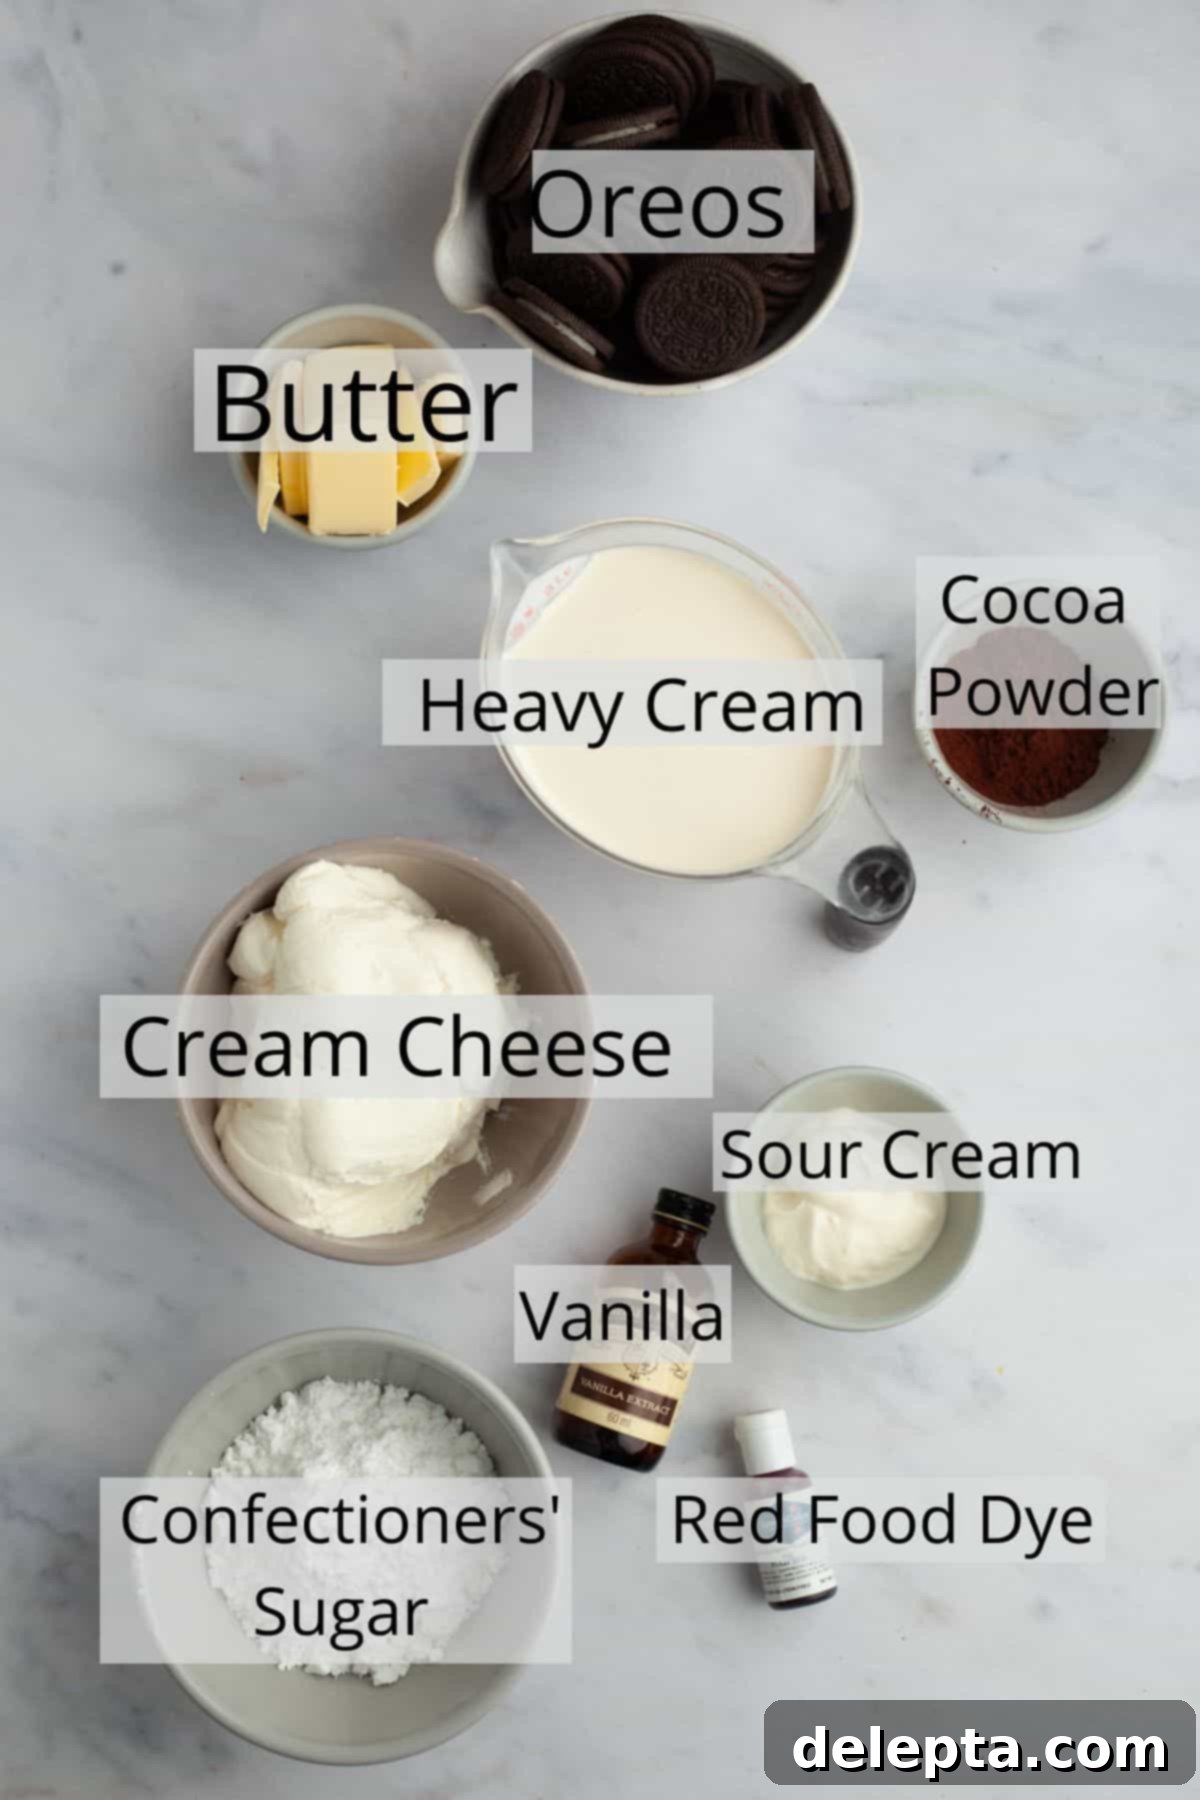
Understanding each ingredient’s role is key to creating a perfect dessert. Here’s a closer look at what you’ll need for this delicious Red Velvet Oreo Cheesecake:
Oreos: These iconic sandwich cookies are the star of the show! We use them generously both for the crunchy base of our cheesecake and as a delightful topping. There’s no need to meticulously scrape out the creamy white filling; simply crush the entire cookies. The creme center adds to the richness and binds the crust beautifully, enhancing that unmistakable Oreo flavor throughout the dessert.
Cocoa Powder: To achieve that classic red velvet taste, which is subtly chocolatey and deep, a few tablespoons of unsweetened cocoa powder are essential. While red velvet isn’t meant to be overpoweringly chocolatey like a brownie, the cocoa powder provides a crucial depth of flavor that balances the sweetness and complements the red hue. Make sure to use a good quality cocoa powder for the best results.
Cream Cheese: For the smoothest, richest, and most stable cheesecake filling, always opt for full-fat block cream cheese. My personal preference is the Philadelphia brand, known for its consistent quality and firm texture. It’s crucial that your cream cheese is at room temperature before you begin mixing. Cold cream cheese will result in a lumpy batter that won’t fully incorporate, affecting the overall texture of your cheesecake. If you’re in the UK or Europe, where cream cheese often has a higher moisture content and comes in tubs, a vital step is to gently squeeze out any excess moisture using a paper towel before using it. This will prevent your cheesecake from being too soft or runny.
Sour Cream: A small but mighty addition, sour cream introduces a wonderful tang to the cheesecake filling. This acidity is what cuts through the sweetness and richness of the cream cheese, giving the red velvet flavor its characteristic bright and slightly tart edge. Like the cream cheese, ensuring your sour cream is at room temperature will help it blend seamlessly into the filling, creating a uniformly smooth texture.
Red Food Dye: Achieving that signature vibrant red hue is vital for a true Red Velvet Oreo Cheesecake. Using a high-quality gel or liquid red food dye is highly recommended for concentrated color without adding too much liquid to your batter. I consistently rely on Americolor for its intense pigmentation and reliable results. Feel free to adjust the amount to reach your desired shade of red, remembering that a little goes a long way with good quality dyes.
For a complete list of precise quantities and detailed measurements, please refer to the comprehensive recipe card provided below.
Crafting Your No-Bake Red Velvet Oreo Cheesecake: A Step-by-Step Guide
Creating this stunning no-bake Red Velvet Oreo Cheesecake is surprisingly straightforward. Follow these steps for a perfectly structured and delicious dessert:
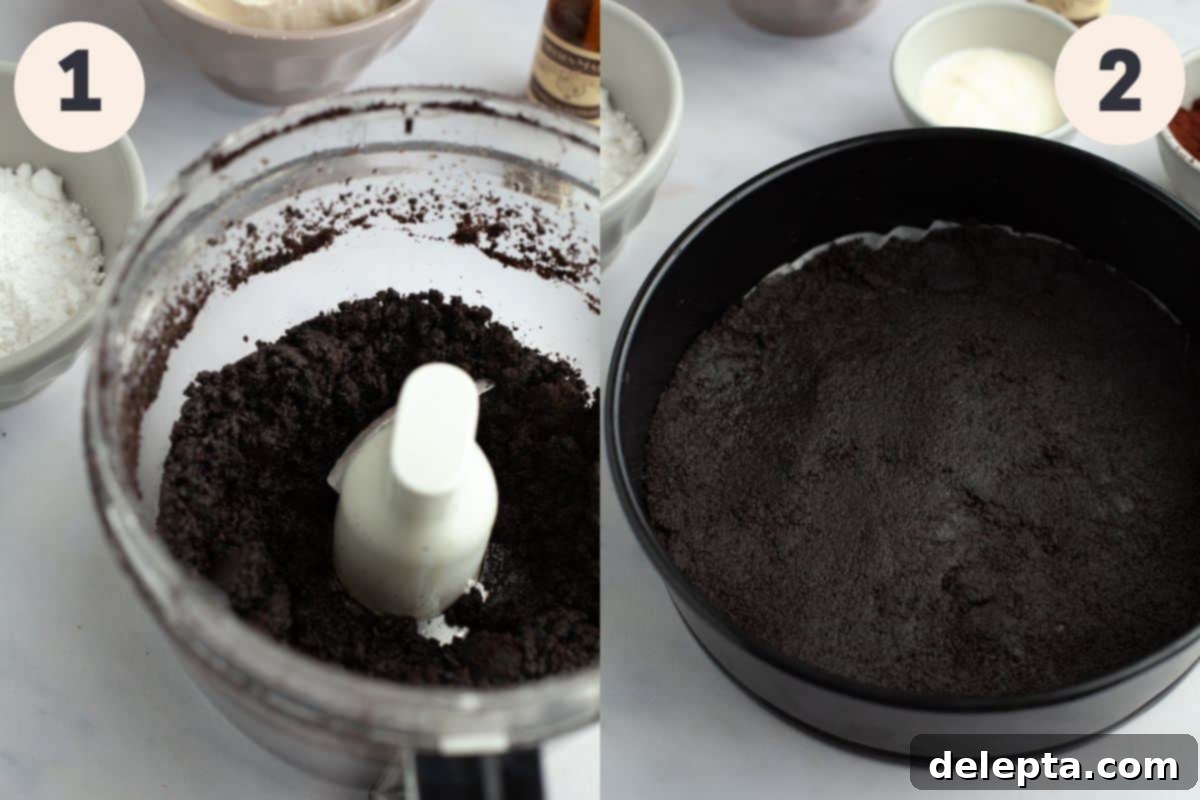
Step 1: Preparing the Oreo Crust. Begin by crushing your Oreo cookies into fine crumbs. The easiest way to achieve this is by pulsing them in a food processor or a high-speed blender until there are no large chunks remaining. Uniform crumbs are essential for a cohesive crust. Once finely crushed, transfer the crumbs to a mixing bowl and add your melted butter. Mix thoroughly, either by pulsing briefly in the food processor or using a rubber spatula to ensure every crumb is evenly moistened. This wet sand consistency is what will hold your crust together.
Step 2: Forming and Chilling the Crust. Carefully transfer the buttered Oreo crumbs into a 9-inch springform pan. Use the back of a measuring cup or a rubber spatula to gently and firmly press the crumbs into an even layer across the bottom of the pan. Extend the crust slightly up the sides of the pan, creating a neat edge. This provides a lovely border and helps contain the filling. Once pressed, place the pan in the freezer for 20 minutes. This brief chilling period is crucial as it allows the butter to solidify, creating a firm, stable base that won’t crumble when you add the filling.
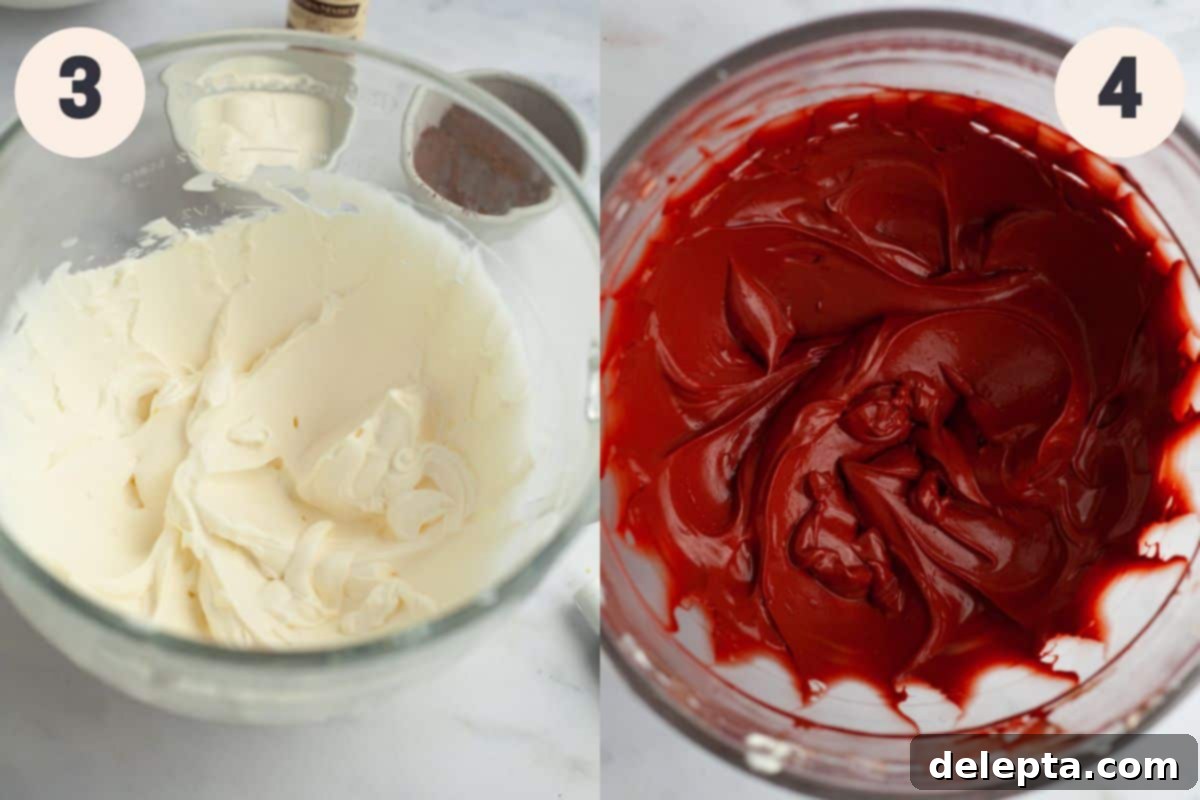
Step 3: Whipping Cream and Cream Cheese. In a large mixing bowl, using either a hand mixer or a stand mixer fitted with the whisk attachment, beat your very cold heavy cream on medium-high speed. Continue to whisk for about 4-5 minutes, or until the cream forms stiff peaks – meaning it holds its shape when the whisk is lifted. Set this whipped cream aside. In a separate stand mixer bowl, fitted with the paddle attachment, beat your room-temperature full-fat cream cheese until it is incredibly smooth and lump-free. This ensures a silky cheesecake texture.
Step 4: Creating the Red Velvet Filling. To your smooth cream cheese mixture, add the confectioners’ sugar (sifted to prevent lumps), sour cream, vanilla extract, cocoa powder, and your chosen red food dye. Mix on medium speed until all ingredients are thoroughly combined and the batter is beautifully smooth and uniformly colored. It’s important to stop and scrape down the sides and bottom of the bowl frequently with a spatula to ensure every bit of the cheesecake mixture is fully incorporated, leaving no unmixed pockets.
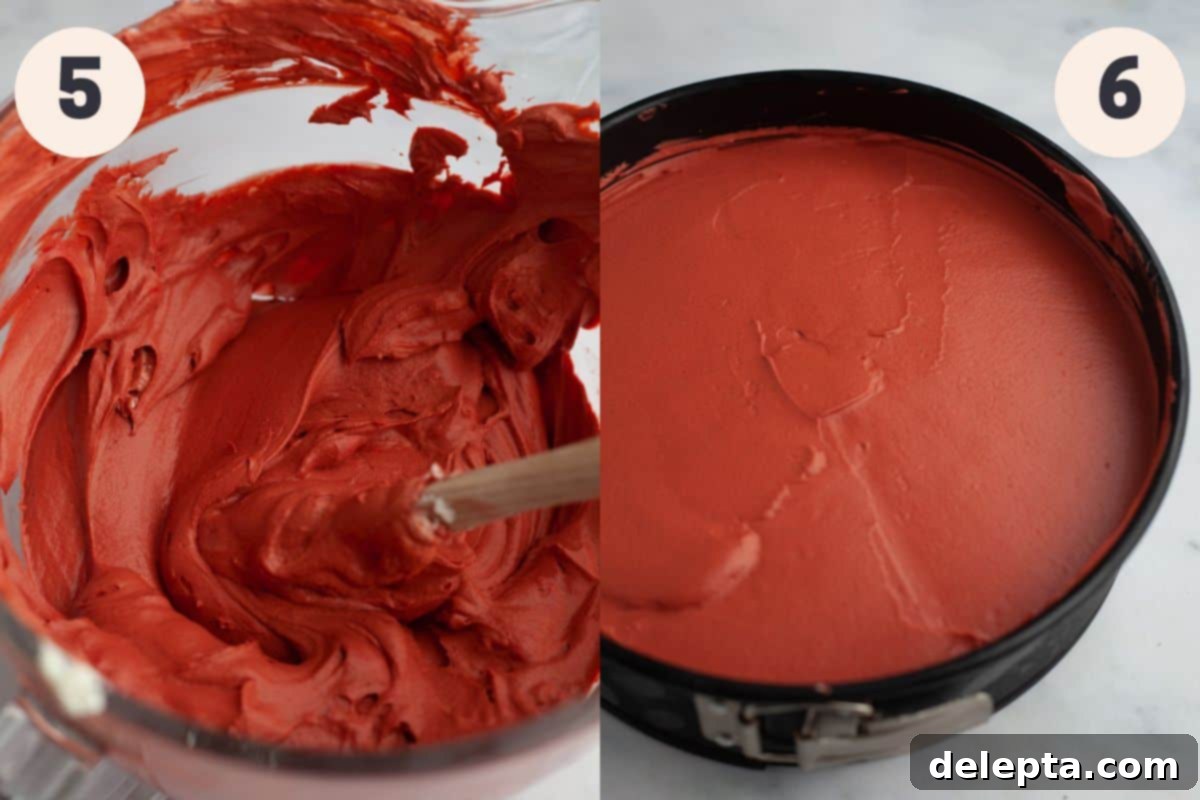
Step 5: Folding in Whipped Cream. Now, gently fold the reserved whipped cream into your red velvet cream cheese mixture. This step requires a delicate hand; you want to maintain as much of the air and volume as possible that you painstakingly created in the whipped cream. Use a rubber spatula and a gentle lifting motion to combine, ensuring no streaks remain. The addition of whipped cream lightens the batter, making the cheesecake airy and smooth. If, after folding, the red color appears a bit too light, you can carefully add a few more drops of food coloring and gently fold again to intensify the vibrant red hue.
Step 6: Chilling for Perfection. Retrieve your firm Oreo crust from the freezer. Carefully pour the magnificent red velvet cheesecake batter into the prepared springform pan. Use a small offset spatula or the back of a spoon to gently spread and even out the batter, creating a perfectly smooth top surface. Once smooth, cover the top of the cheesecake pan tightly with plastic wrap to prevent any odors from the fridge from being absorbed and to maintain moisture. Place the cheesecake in the refrigerator for at least 12 hours. While 6 hours might seem sufficient, a full 12-hour chill is absolutely essential for the cheesecake to properly firm up and achieve that ideal, sliceable consistency. Patience is key for this delectable dessert!
Expert Tips & Tricks for a Flawless Red Velvet Oreo Cheesecake
- Embrace a Weighing Scale: While cup measurements are provided, I cannot stress enough the transformative power of a digital kitchen scale. Precision in baking, especially with ingredients like flour, sugar, and butter, makes a monumental difference in the final texture and consistency of your cheesecake. Even small discrepancies can impact the structure of a no-bake dessert. Investing in a good scale will elevate all your baking endeavors!
- Mind Your Ingredient Temperatures: Temperature is paramount for successful no-bake cheesecakes. Ensure your cream cheese and sour cream are at proper room temperature before you even begin mixing. If they are too cold, they won’t whip into that smooth, lump-free consistency essential for a silky filling. Conversely, your heavy cream must be chilled. Cold heavy cream is critical for achieving those stiff peaks necessary to stabilize and lighten your cheesecake batter. Always keep heavy cream in the fridge until you’re ready to whisk it.
- Respect the Chilling Time: This is arguably the most important tip for any no-bake cheesecake. While it’s tempting to cut corners, a minimum of 12 hours of chilling in the refrigerator is highly recommended. I’ve tested this recipe with shorter chilling times, and the results were noticeably less set, leading to messier slices and a less enjoyable texture. For a perfectly firm, clean-cut slice that holds its shape, patience truly is a virtue. Plan ahead to give your cheesecake ample time to set.
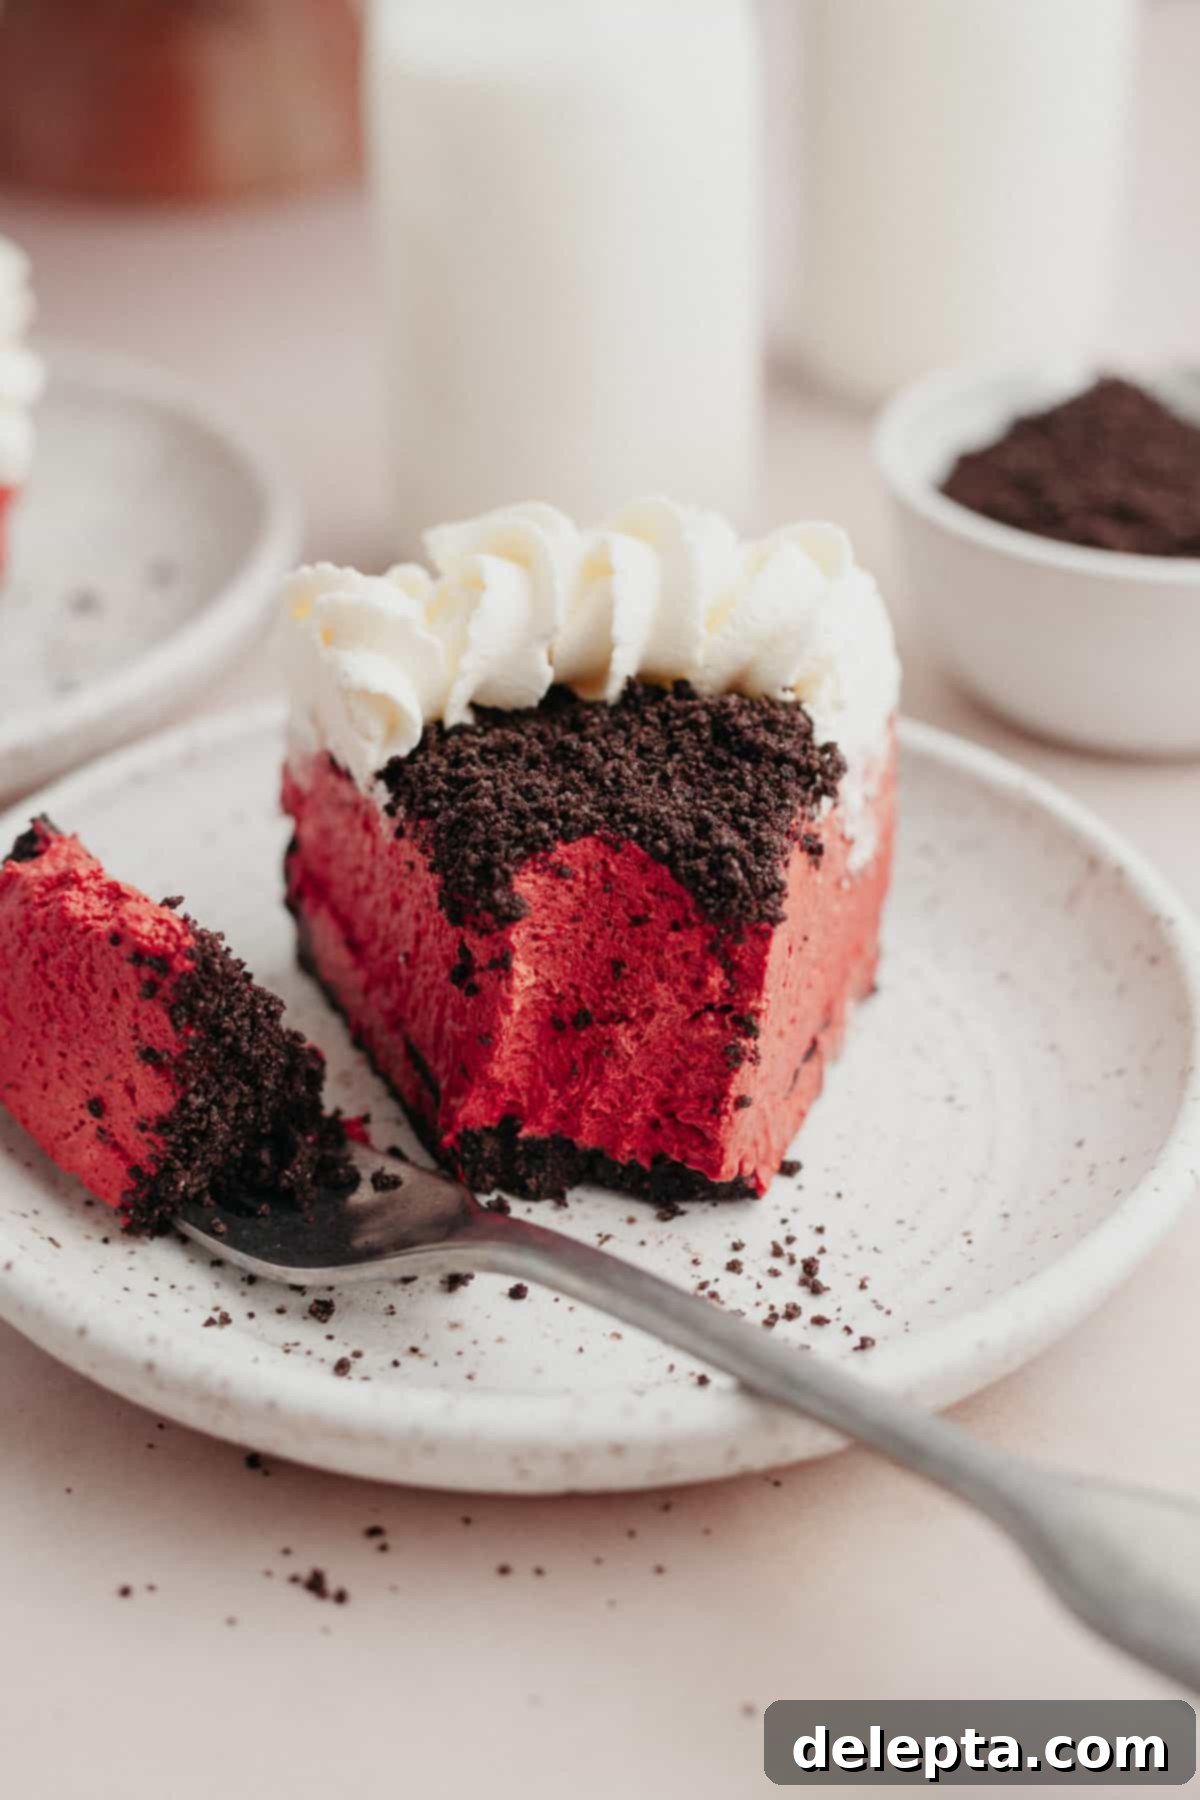
- Achieving Pristine Slices: To get those beautiful, clean slices that look like they came straight from a gourmet bakery, use a sharp, thin knife. After each cut, wipe the knife blade clean with a warm, damp paper towel before making the next slice. This prevents the cheesecake from sticking and dragging, ensuring every portion is picture-perfect.
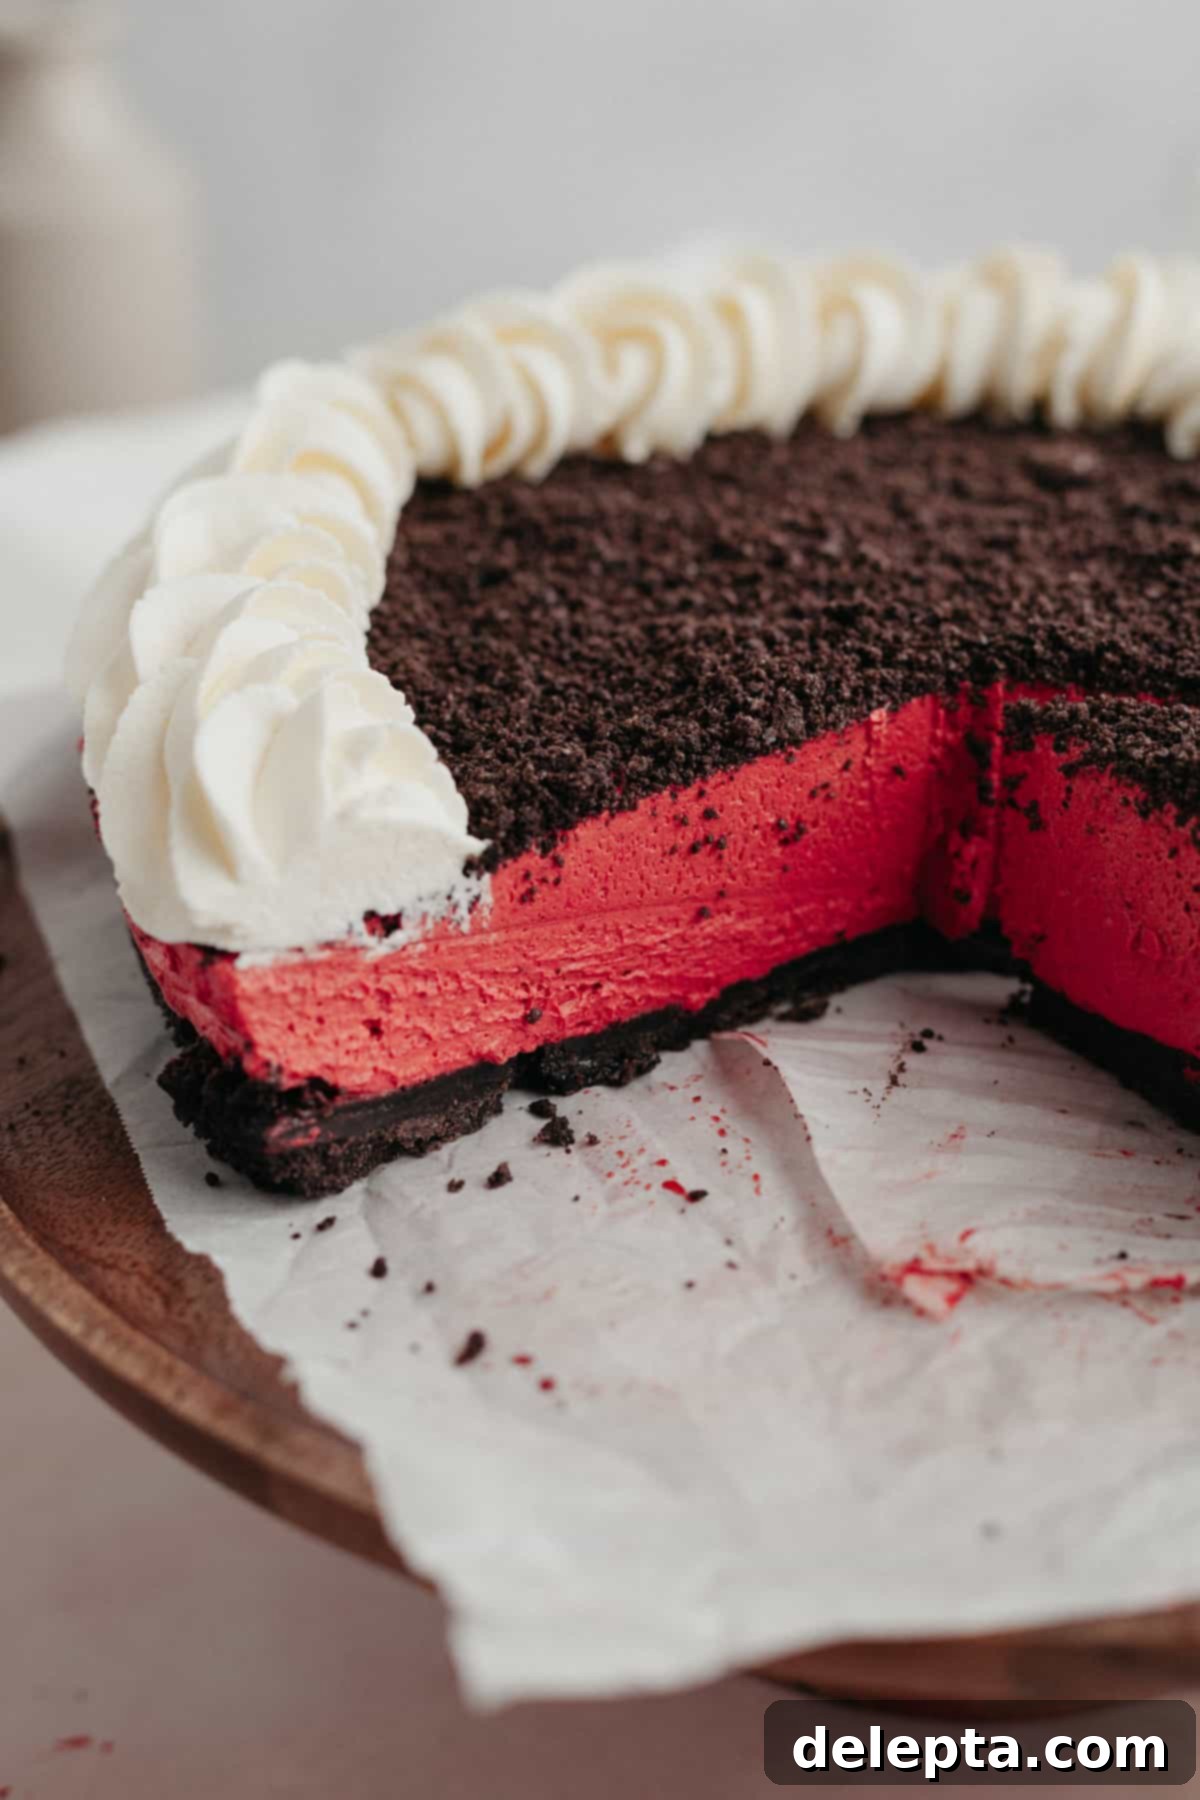
- Creative Topping Ideas: For this recipe, I used a Wilton 1M piping tip and a piping bag to create elegant swirls of fresh whipped cream around the edges, then finished with crushed Oreos. However, don’t be afraid to get creative! You could drizzle a homemade chocolate ganache (like the one from my chocolate chip loaf cake recipe) over the top for an extra layer of richness, completely cover it with roughly chopped Oreos for a rustic look, or simply leave it plain and let the vibrant red velvet filling speak for itself.
- Optimal Storage: To maintain its freshness and delightful texture, store your Red Velvet Oreo Cheesecake in an airtight container or tightly wrapped with plastic wrap in the refrigerator. It will keep beautifully for up to 4 to 5 days. Unfortunately, no-bake cheesecakes, especially those with a whipped cream base, generally do not freeze well as the texture can become grainy upon thawing. Enjoy it fresh for the best experience!
Expand Your Dessert Repertoire: Try These Cheesecake Recipes Next!
If you’ve loved the simplicity and deliciousness of this Red Velvet Oreo Cheesecake, you’re in for a treat! Here are more fantastic cheesecake recipes that are sure to become new favorites:
- Easy Lotus Biscoff Cheesecake (No Bake)
- Golden Oreo Cheesecake
- Strawberry Crunch Cheesecake (No Bake)
- Strawberry Cheesecake Brownies from Scratch
Have you tried making this irresistible Red Velvet Oreo Cheesecake? I would absolutely love to see your creations! Make sure to tag me on Instagram @alpineella, and please take a moment to leave a review below to share your experience. Your feedback is incredibly valuable! For more delightful baking ideas and inspiration, you can also follow me on Pinterest. Happy baking!
Recipe
Red Velvet Oreo Cheesecake
Ella Gilbert
5 from 3 votes
Pin Recipe
Save Recipe
15 mins
12 hrs
12 hrs 15 mins
Dessert
American
12 slices
584 kcal
Equipment
-
9″ springform pan
Ingredients
Cheesecake Crust
- 2 cups Oreo cookies crushed
- 1 stick unsalted butter melted
Cheesecake Filling
- 2 cups heavy cream cold
- 16 oz cream cheese room temperature
- ¼ cup sour cream room temperature
- 2 teaspoons vanilla extract
- 1 cup confectioners’ sugar sifted
- 3 tablespoons cocoa powder
- red food dye
Topping
- 6 Oreos crushed
- 1 cup heavy cream cold
- ¼ cup sugar
Instructions
Crust
-
In a large mixing bowl, combine your finely crushed Oreo crumbs with the melted unsalted butter. Stir well with a rubber spatula until all the cookie crumbs are thoroughly moistened and there are no dry patches remaining. This ensures a firm, cohesive crust.
-
Pour the buttered crumbs into a 9-inch springform pan. Use the bottom of a flat measuring cup or a sturdy rubber spatula to firmly press the crumbs into an even layer across the bottom of the pan. Gently push some of the crumbs slightly up the sides of the pan to form a small border. Place the pan in the freezer for 20 minutes to allow the crust to set.
Cheesecake Filling
-
In a stand mixer fitted with the whisk attachment, or using a hand-held electric mixer, whisk the cold heavy cream for approximately 5 minutes on medium-high speed until firm, stiff peaks form. Be careful not to over-whip into butter. Set aside.
-
In the bowl of a stand mixer fitted with the paddle attachment, beat the room-temperature cream cheese on medium speed until it is entirely smooth and free of any lumps. This is crucial for a silky cheesecake texture.
-
To the smooth cream cheese, add your sifted confectioners’ sugar, vanilla extract, cocoa powder, sour cream, and red food dye. Beat on medium-high speed until all ingredients are well incorporated and the mixture is smooth and uniformly vibrant red. Scrape down the sides of the bowl as needed to ensure even mixing.
-
Using a rubber spatula, gently fold the whipped cream into the red velvet cream cheese mixture. Be very careful to maintain the air in the whipped cream, using a light, lifting motion rather than stirring vigorously. If the color dulls slightly, you can add a few more drops of food coloring and gently fold again.
-
Pour the exquisite red velvet cheesecake filling into your chilled Oreo crust. Use a small offset spatula to gently smooth out the top surface of the filling. Cover the pan tightly with plastic wrap and refrigerate overnight, or for a minimum of 12 hours, for optimal setting. Once firm, remove the sides of the springform pan before serving.
Topping
-
Just before you’re ready to serve, place the remaining cold heavy cream and sugar in a medium mixing bowl. Using a hand-held mixer or a stand mixer with the whisk attachment, beat until beautiful, stiff peaks form.
-
Generously sprinkle the crushed Oreo cookie crumbs directly over the top of the set cheesecake filling, creating an attractive and flavorful layer.
-
Carefully transfer the freshly whipped cream into a piping bag fitted with your desired tip (a Wilton 1M creates lovely rosettes). Pipe swirls or dollops of whipped cream all along the sides or across the entire top of the cheesecake for a professional finish. Slice, serve, and enjoy!
Notes
Food Dye: For the most vibrant and authentic red velvet color, I recommend using Americolor gel food dye in the shade Tulip Red. Gel dyes offer superior color concentration without diluting your batter.
Room Temperature: It is absolutely critical for the cream cheese and sour cream to be at proper room temperature before you start this recipe. This ensures a smooth, lump-free cheesecake filling.
Cream Cheese Consistency (UK/Europe): For those in the UK, Europe, or if your cream cheese comes in tubs rather than blocks, it likely has a higher moisture content than North American cream cheese. To prevent a runny cheesecake, before beginning the recipe, place your cream cheese in a bowl, cover it with a piece of kitchen roll (paper towel), and gently press or squeeze it to remove any excess liquid. This simple step makes a huge difference.
Storage: Store your finished cheesecake securely wrapped in plastic wrap or in an airtight container in the refrigerator for up to 5 days. Please note that this no-bake cheesecake does not freeze well; the texture tends to become undesirable upon thawing.
Nutrition
Tried this recipe?
Leave a comment below! You can also tag me on Instagram @alpineella so I can see what you made!
