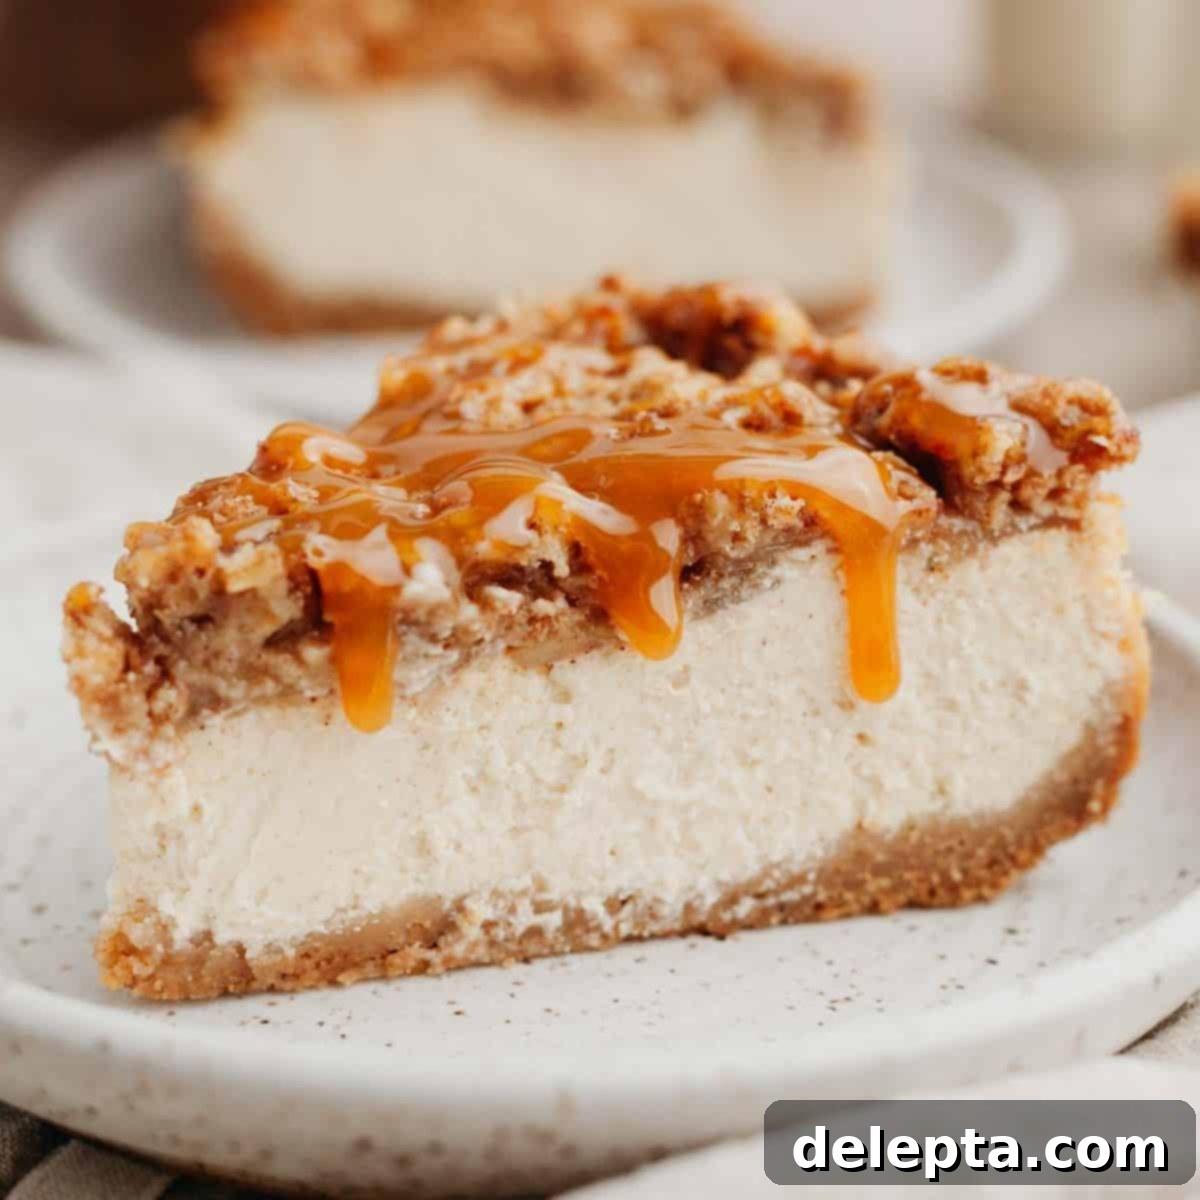
The Ultimate Fall Dessert: Decadent Apple Crisp Cheesecake with Cinnamon Streusel
Welcome the crisp air and vibrant colors of autumn with this truly irresistible apple crisp cheesecake! This sensational dessert combines the creamy, tangy delight of a classic cheesecake with the comforting, spiced flavors of a homemade apple crisp. Featuring a rich, cinnamon-infused cream cheese filling, it’s generously topped with tender, spiced cinnamon apples and a buttery, crunchy oat streusel. To crown this masterpiece, we drizzle it with a luscious homemade salted caramel sauce, creating a symphony of flavors and textures that defines cozy sweater weather.
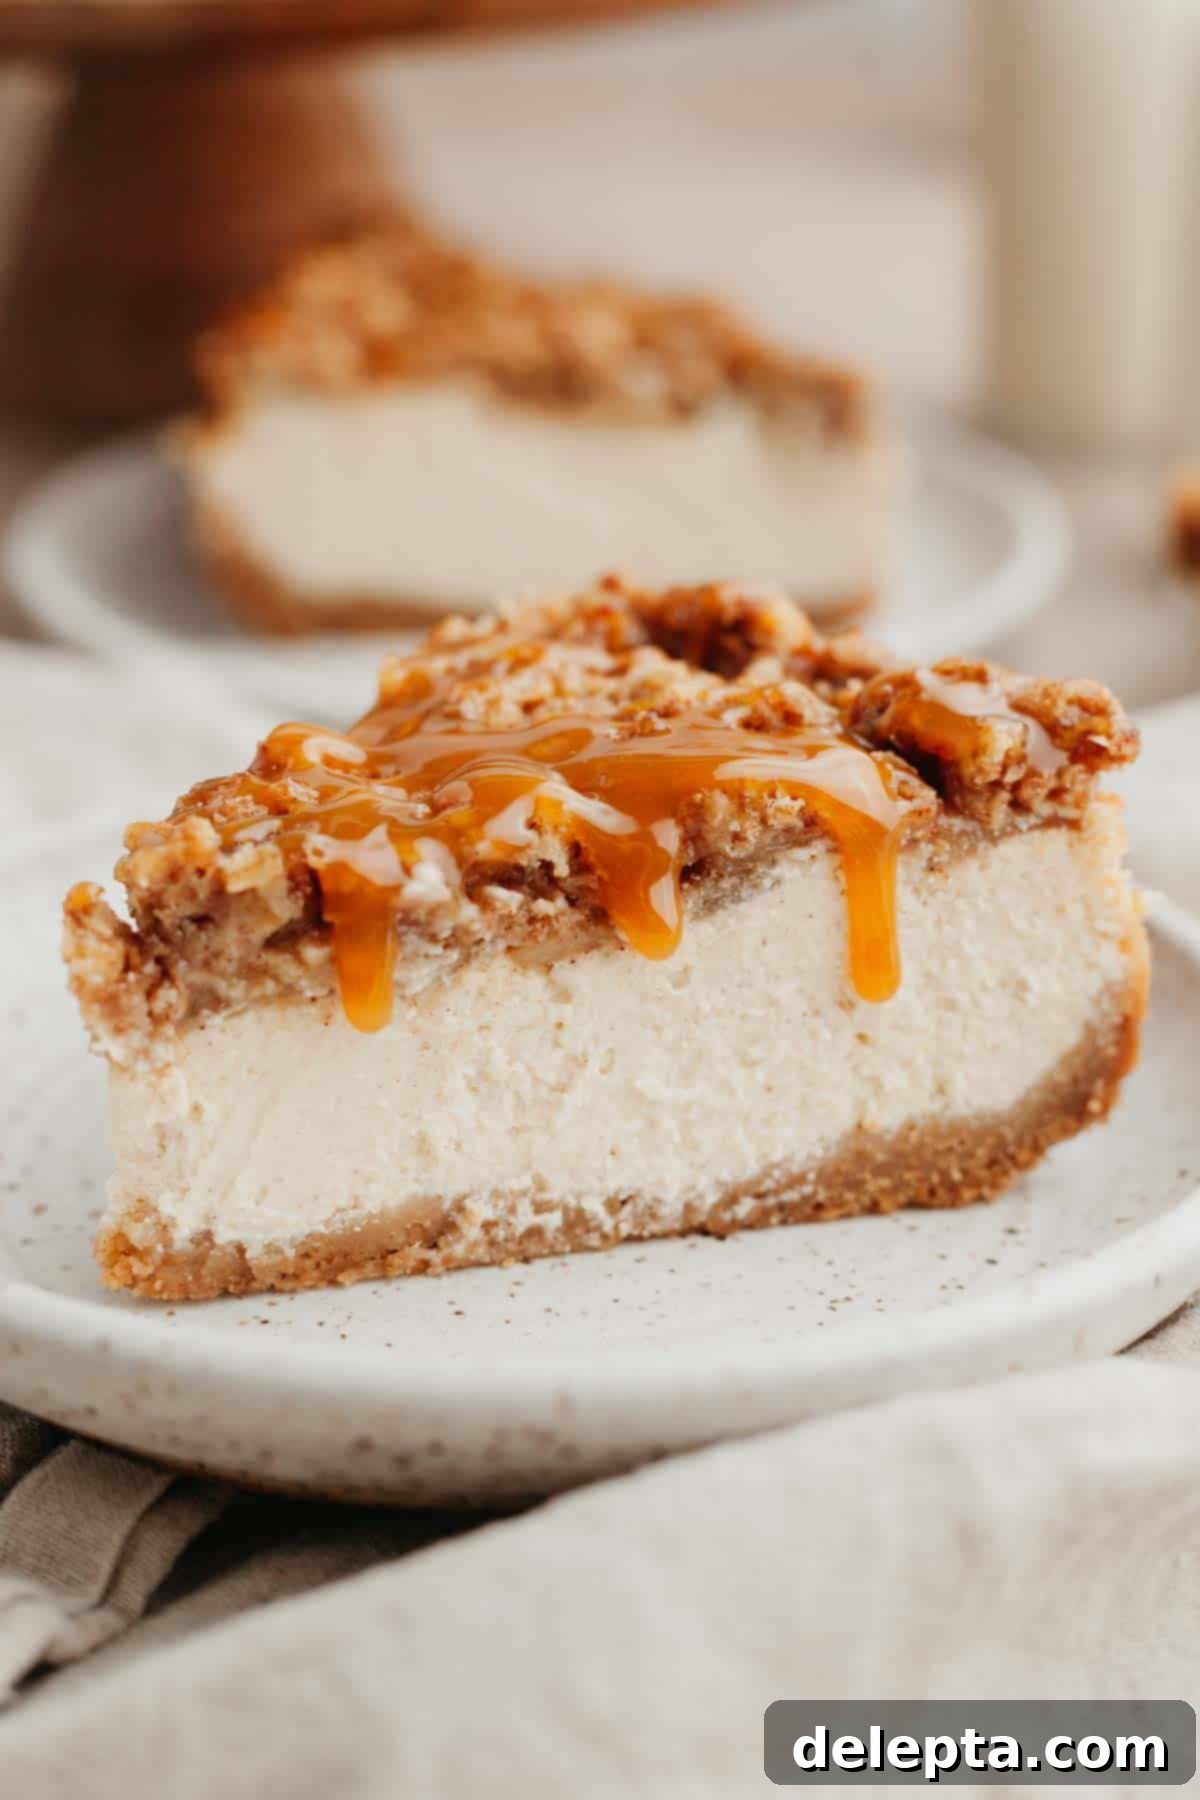
While I adore the simplicity of a no-bake cheesecake, like my red velvet Oreo cheesecake, there’s an undeniable satisfaction in baking a cheesecake from scratch. The anticipation as it slowly bakes, the delicate cooling process, and finally, the triumphant moment of slicing into a perfectly baked, smooth, and creamy dessert – it’s truly a rewarding experience!
This recipe provides all the handy tips and tricks you need to effortlessly create a smooth, creamy, and crack-free apple crisp cheesecake that will impress everyone. Say goodbye to the anxieties of traditional water baths, as I’ve perfected a method to achieve that desirable moist texture without the usual fuss.
Fall truly is my favorite season for baking! While pumpkin spices dominate many autumn dessert menus, my heart belongs to apples. Their versatility and natural sweetness make them perfect for a wide array of fall treats. If you’re as much of an apple enthusiast as I am, be sure to explore my other delicious recipes such as the hearty apple and pear crisp or the comforting apple crumble with custard. This apple crisp cheesecake, however, stands out as a unique and extraordinary celebration of autumn flavors, blending the best of both worlds into one spectacular dessert.
[feast_advanced_jump_to]
Why You’ll Love This Apple Crisp Cheesecake
This Apple Crisp Cheesecake isn’t just another dessert; it’s an experience designed to bring warmth and joy to your autumn gatherings. Here’s why this recipe will quickly become your new fall favorite:
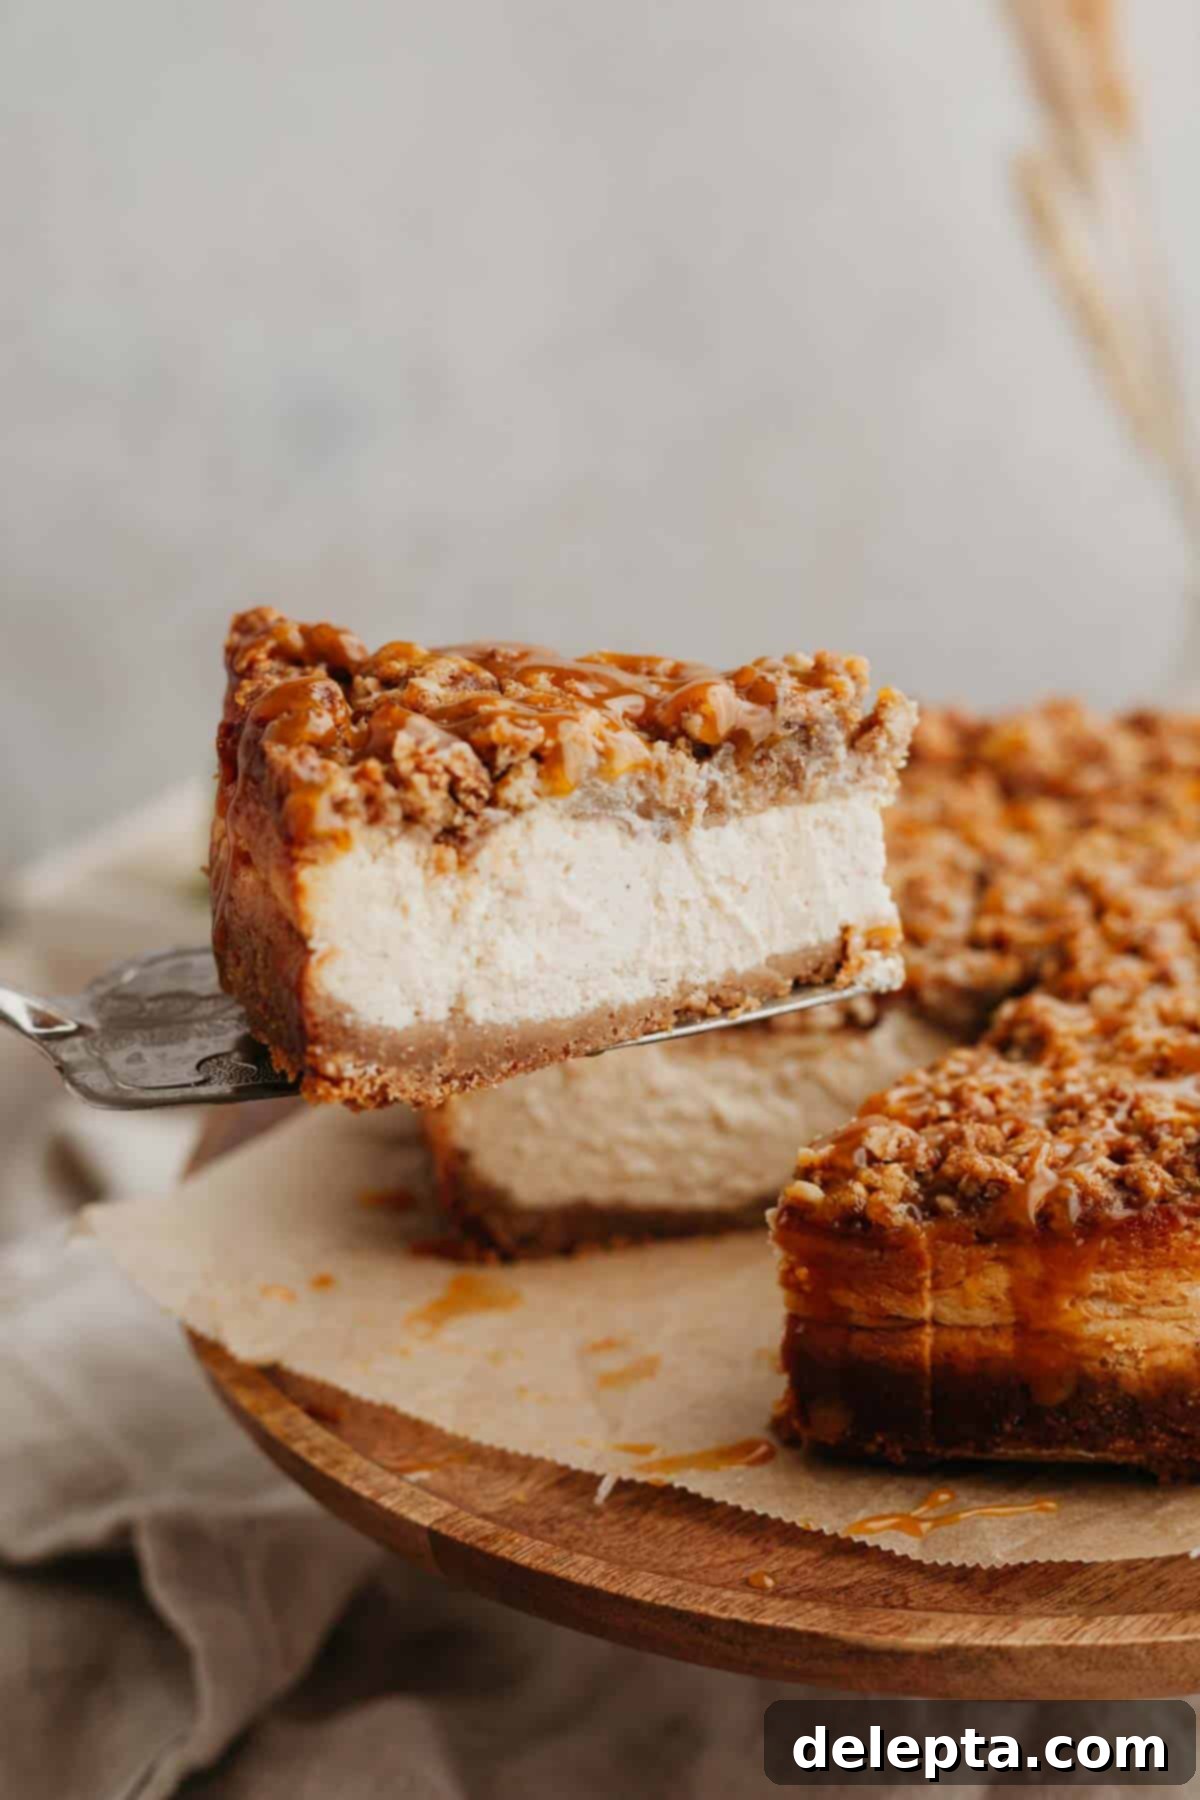
- The Ultimate Fall Cheesecake! Imagine a dessert that captures every essence of autumn. This cheesecake starts with a perfectly buttery graham cracker crust, offering a delightful foundation. Next, a velvety smooth cinnamon cheesecake filling provides a rich, spiced core. It’s then crowned with tender, sweet-tart cinnamon apples, perfectly baked into the top layer, and finished with a crunchy, golden oat streusel crisp. Every bite is a harmonious blend of creamy, crunchy, and fruity, making it the quintessential fall dessert for Thanksgiving, holidays, or any cozy occasion.
- Simple, Accessible Ingredients – Don’t let its impressive appearance fool you; this recipe calls for no fancy or hard-to-find ingredients. In fact, you likely have most of what you need already stocked in your pantry and refrigerator. We focus on quality, everyday staples to create extraordinary flavors. Plus, I’ve included a few easy substitution tips should you need them, ensuring this delicious cheesecake is accessible to all home bakers.
- No Water Bath Required – Many home bakers shy away from baked cheesecakes due to the intimidation of a traditional water bath. The fear of water leaking into the springform pan or the general complexity can be a deterrent. But fear not! I’ve developed a foolproof method that ensures your cheesecake remains super moist, wonderfully creamy, and completely crack-free, all without the stress and mess of a conventional water bath. This game-changing technique simplifies the baking process, allowing you to achieve professional-level results with ease.
- Perfect for Making in Advance – Planning for a party or a special dinner? This dessert is your ideal companion! It requires an overnight chilling period to fully set and develop its rich flavors and creamy texture. This means you can prepare it a day before your event, freeing up valuable time on the day itself and ensuring a perfectly chilled and ready-to-serve showstopper. It’s convenience and deliciousness rolled into one!
Ingredient Notes & Essential Tips
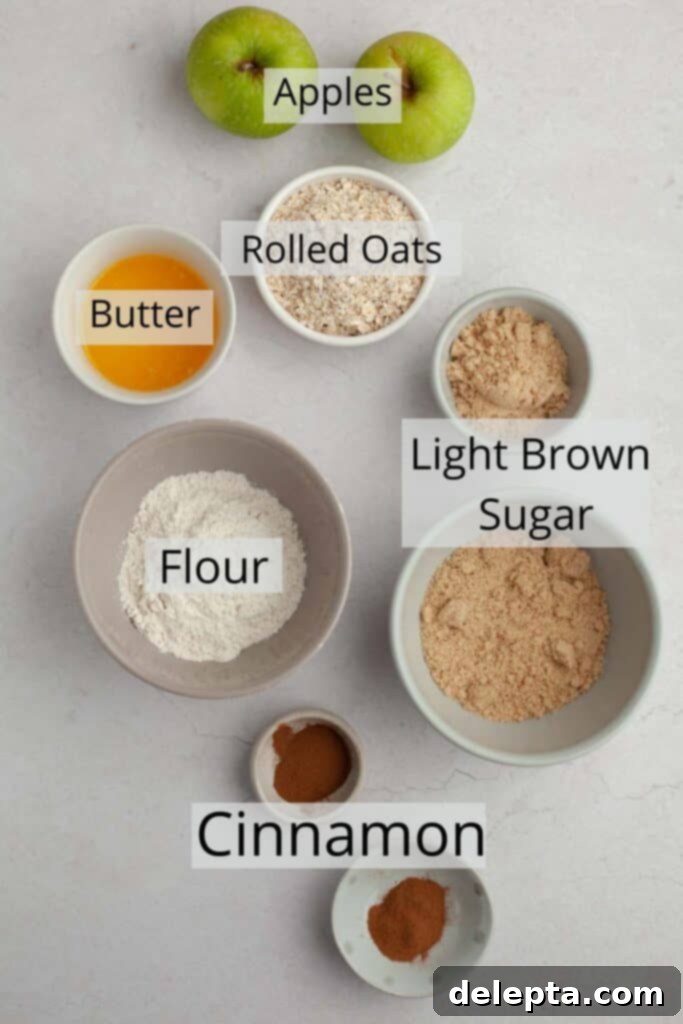
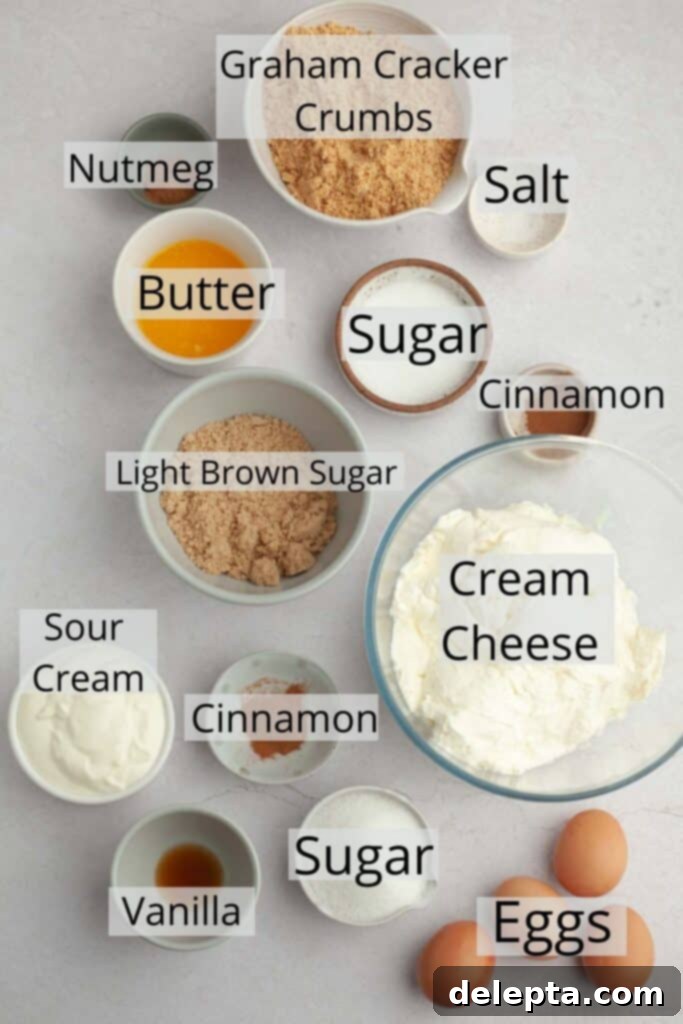
To ensure your apple crisp cheesecake turns out perfectly every time, paying attention to your ingredients is key. Here are some detailed notes to guide you:
Apples: For this recipe, I exclusively used crisp and tart Granny Smith apples. Their firm texture holds up beautifully during baking, preventing them from turning mushy, while their tartness provides a fantastic contrast to the sweet cheesecake filling. If Granny Smiths are unavailable or you prefer a slightly sweeter profile, Gala apples also work well, offering a good balance of sweetness and firmness. Avoid overly soft or mealy apple varieties, as they tend to lose their structure.
Rolled Oats: The streusel topping owes its delightful crunch to rolled oats. It’s crucial to use old-fashioned rolled oats, not quick oats or steel-cut oats. Quick oats are processed thinner and will become too soft, losing their crispness. Steel-cut oats are too coarse and won’t integrate properly into the streusel, making it dense and chewy rather than light and crumbly. Rolled oats provide the perfect texture for that signature crisp topping.
Flour: This recipe has been thoroughly tested using only all-purpose flour. Its balanced protein content provides the ideal structure for both the streusel and the graham cracker crust. While I haven’t specifically tested gluten-free alternatives for this recipe, a 1:1 gluten-free baking flour blend might work, but results could vary, especially in the streusel’s texture.
Butter: I consistently use unsalted butter, and often European-style butter, for both the streusel topping and the graham cracker crust. Unsalted butter allows you to control the overall saltiness of your dessert. European-style butter typically has a higher fat content and lower water content compared to American butter, which contributes to a richer flavor and a more tender, flakier texture in baked goods. If using American butter, the results will still be delicious, but the texture might be slightly different.
Cream Cheese: This is the star of any cheesecake! For the absolute best results, always use full-fat cream cheese. Low-fat or whipped varieties contain too much water and air, which can lead to a runny filling or a cheesecake that cracks easily. If you’re located in Europe, where cream cheese often comes in tubs and tends to have a higher moisture content, an important step is to pat it thoroughly dry with paper towels before mixing. This removes excess water, ensuring a dense, creamy, and perfectly set cheesecake texture. Also, make sure your cream cheese is at room temperature for a lump-free, smooth batter.
Eggs: All my recipe tests were conducted using large eggs. Eggs are crucial for binding the cheesecake filling and providing structure as it bakes. Like cream cheese, ensuring your eggs are at room temperature is vital. Cold eggs don’t emulsify as well with other ingredients, potentially leading to a lumpy batter and an unevenly baked cheesecake. Room temperature eggs create a smoother, more uniform filling.
Graham Crackers: The foundation of our cheesecake is a classic graham cracker crust. I’ve successfully tested this recipe with both traditional graham crackers and digestive biscuits, finding both yield excellent results. Digestive biscuits offer a slightly less sweet and more “biscuity” flavor, which some prefer. For an interesting twist, you could also experiment with gingersnaps for a spicier, more autumnal crust, though I haven’t personally tested this variation.
Step-by-Step Instructions for Your Perfect Apple Crisp Cheesecake
Creating this show-stopping apple crisp cheesecake is a straightforward process when you follow these clear, detailed steps. Precision and patience are your best friends in cheesecake baking!
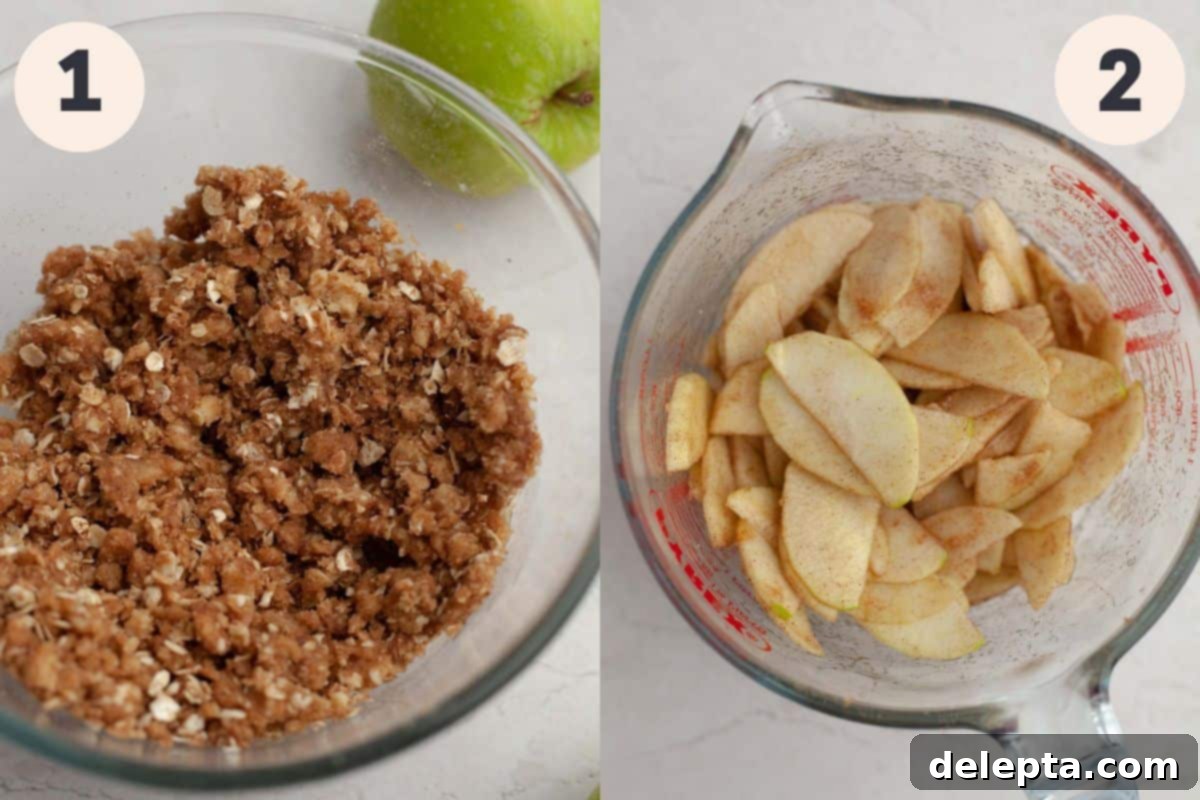
Step 1: Prepare the Cinnamon Streusel Topping. In a large mixing bowl, combine all of your streusel ingredients – flour, rolled oats, light brown sugar, ground cinnamon, and melted unsalted butter. Use your fingers or a fork to mix everything together until evenly moistened and distinct clumps begin to form. Ensure there are no dry spots. This clumpy texture is key to a perfectly crisp topping. Once mixed, place the bowl in the fridge to chill while you prepare the other components. Chilling helps the butter solidify, resulting in a crunchier streusel when baked.
Step 2: Season the Apples. Begin by thinly slicing your peeled Granny Smith (or Gala) apples. Aim for consistent, thin slices so they cook evenly and layer beautifully on top of the cheesecake. In a separate bowl, toss the apple slices with the cinnamon and brown sugar until they are thoroughly coated. The sugar will help draw out some moisture from the apples and caramelize slightly during baking, enhancing their flavor. Place these seasoned apples in the fridge as well to keep them cool and firm.
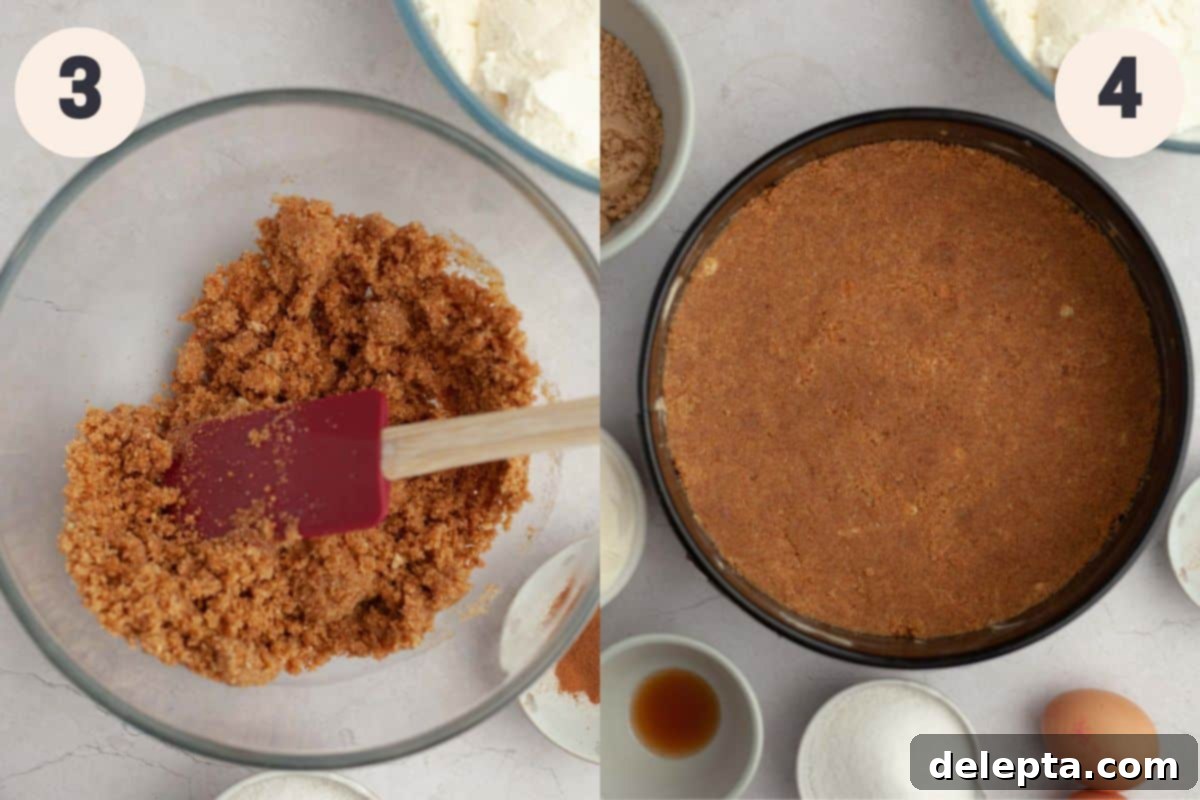
Step 3: Mix the Graham Cracker Crust. In a medium bowl, combine your graham cracker crumbs, sugar, ground cinnamon, ground nutmeg, and a pinch of salt. Pour in the melted unsalted butter and mix thoroughly until all the graham cracker crumbs are evenly moistened. The mixture should resemble wet sand and hold together when squeezed. Ensure there are no dry pockets, as this will affect the crust’s texture and ability to hold its shape.
Step 4: Form and Bake the Crust. Lightly spray a 9-inch springform pan with cooking spray or grease it with butter, then line the bottom with a round of parchment paper. This will ensure easy removal later. Press the graham cracker mixture firmly into the bottom of the prepared springform pan. I find the bottom of a flat-bottomed measuring cup or a glass works perfectly for this, helping to create an even, compact layer. Extend the crust slightly up the sides of the pan to create a sturdy edge. Bake in a preheated oven at 350°Fahrenheit (175°Celsius) for 10 minutes, until it’s lightly golden and fragrant. Remove from the oven and allow it to cool completely while you prepare the filling. Immediately lower your oven temperature to 325°Fahrenheit (160°Celsius). Ensure there is an oven rack positioned in the middle of the oven, and importantly, leave space at the bottom of the oven for the water pan we’ll use later.
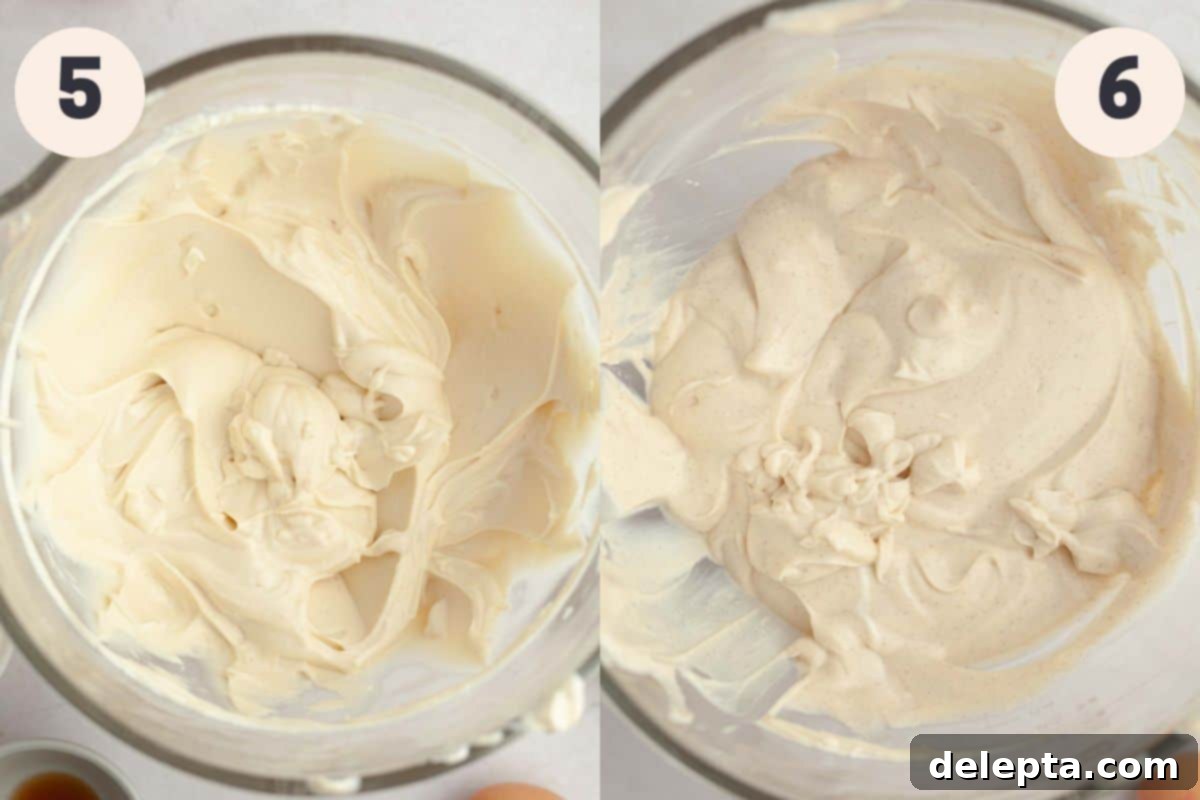
Step 5: Prepare the Cheesecake Base. In the bowl of a stand mixer fitted with the paddle attachment (or a large bowl with a hand mixer), combine the softened full-fat cream cheese with both the granulated sugar and light brown sugar. Beat on low speed until the mixture is smooth and creamy, with no lumps. It’s crucial not to overmix at this stage, as incorporating too much air can cause the cheesecake to crack during baking. Scrape down the sides of the bowl frequently to ensure everything is well combined.
Step 6: Add Wet Ingredients. To the cream cheese mixture, add the room temperature sour cream, vanilla extract, and ground cinnamon. Continue to beat on medium-low speed until all ingredients are just combined and the mixture is smooth. Again, be mindful not to incorporate excess air. The sour cream adds a delightful tang and contributes to the cheesecake’s incredibly moist texture.
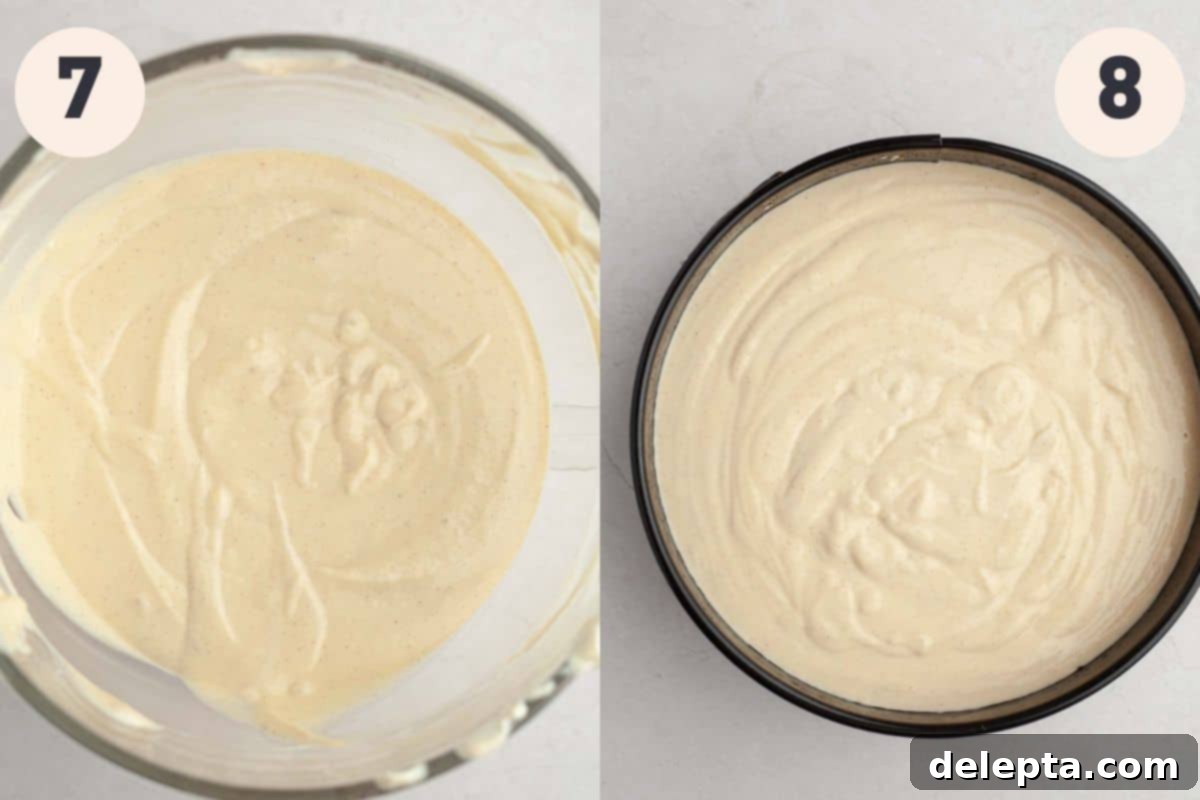
Step 7: Incorporate the Eggs. Add the large, room temperature eggs one at a time. After each egg, beat on the lowest speed possible just until it is combined into the batter. Immediately stop mixing as soon as the yolk disappears. Overmixing the eggs can incorporate too much air, which can cause the cheesecake to puff up in the oven and then sink or crack upon cooling. While you’re doing this, put your kettle on to boil water and retrieve a large roasting tin or oven-safe pan. This will be used for our alternative “water bath” method.
Step 8: Fill the Crust. Once the cheesecake batter is smooth and ready, pour it carefully into the cooled graham cracker crust in the springform pan. After pouring, gently tap the pan on your counter a few times. This simple step helps to release any trapped air bubbles from the batter, which contributes to a smoother, crack-free cheesecake surface.
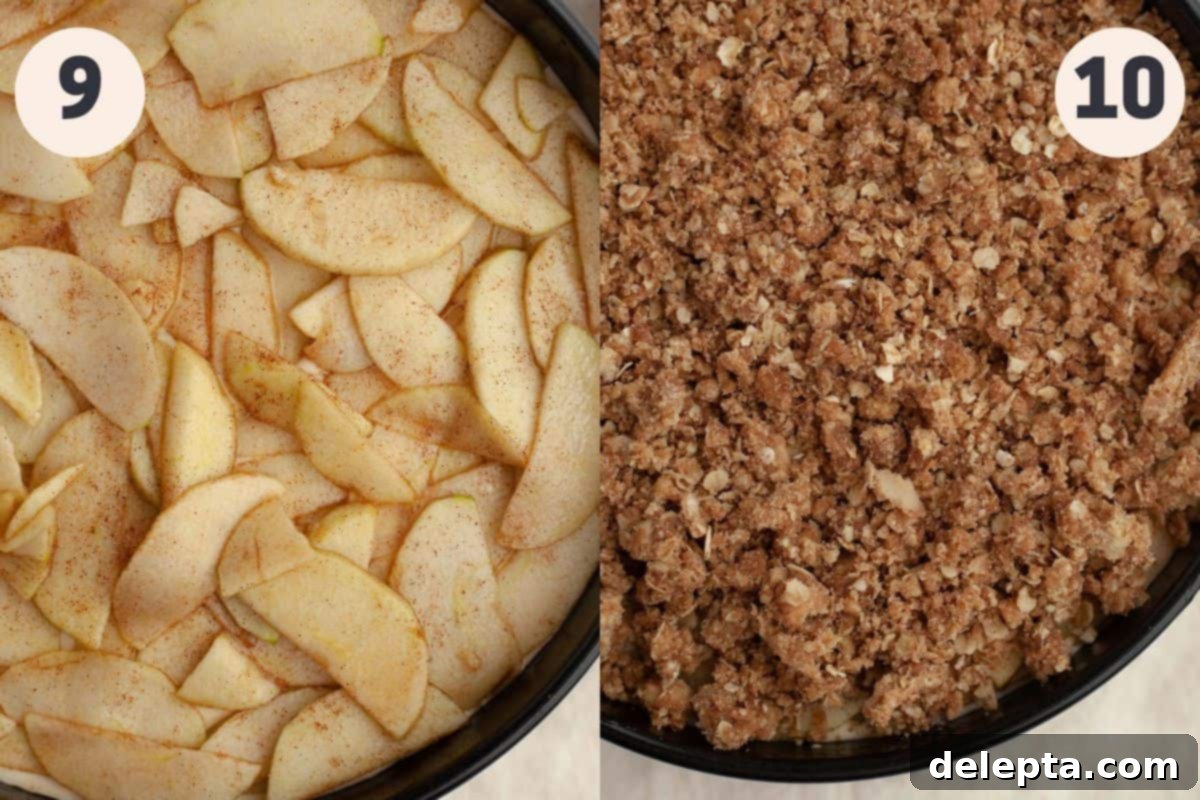
Step 9: Arrange the Apples. Retrieve your seasoned apple slices from the fridge. Carefully and artfully arrange them in a single, even layer on top of the unbaked cheesecake batter. Make sure the entire surface of the cheesecake is covered with apples. This not only ensures every slice gets apple goodness but also helps to protect the cheesecake surface during baking.
Step 10: Add the Streusel and Bake. Take the chilled streusel topping out of the fridge. Evenly sprinkle the streusel over the layer of apples, ensuring all the apples are covered. Now, pour about an inch of boiling water into your large roasting tin. Carefully open the preheated oven (set to 325°F/160°C) and place the roasting pan with the boiling water on the bottom shelf. Then, place your springform pan with the cheesecake on the middle rack, directly above the boiling water. This creates a steamy environment without submerging your cheesecake, keeping it moist and preventing cracks. Quickly close the oven door to trap the steam.
Bake the cheesecake for 60-65 minutes. The edges should be set, but the center should still have a slight jiggle when you gently shake the pan. Turn off the oven, but leave the cheesecake inside. Crack the oven door open about an inch (a wooden spoon handle works perfectly for this) and let the cheesecake slowly cool in the oven for an additional hour. This gradual cooling prevents sudden temperature changes that can cause cracks. After this hour, remove the cheesecake from the oven and let it cool completely to room temperature on a wire rack. Once at room temperature, transfer it to the fridge and chill overnight (at least 6-8 hours, but preferably longer) for optimal setting and flavor development. The next day, you can confidently remove it from the springform pan and prepare to serve your magnificent creation!
Expert Recipe Tips & Tricks for Cheesecake Success
Achieving a flawless, creamy cheesecake can seem daunting, but with these expert tips and tricks, you’ll master this Apple Crisp Cheesecake recipe like a pro:
- Embrace a Weighing Scale – For consistent and accurate baking results, I cannot recommend a kitchen weighing scale enough. Measuring ingredients, especially flour and sugar, by weight (the metric way) is far more precise than using volume measurements (cups). This precision makes a huge difference in the texture and overall outcome of your cheesecake, ensuring it turns out perfectly every time.
- Handling Cream Cheese in Tubs – As mentioned in the ingredient notes, cream cheese sold in tubs, particularly in Europe, often contains more moisture than the block-style cream cheese typically found in packets. To counteract this, before you begin mixing, make sure to vigorously pat your tub cream cheese dry with several layers of paper towels. Removing this excess moisture is crucial for achieving a firm, dense, and perfectly set cheesecake that won’t be too wet or prone to cracking.
- The No-Stress Water Bath Alternative – My chosen method of using a roasting pan with boiling water on the bottom shelf of the oven, directly beneath the cheesecake, provides all the benefits of a traditional water bath without the common headaches. This technique creates a steamy, humid environment that helps the cheesecake bake evenly, preventing it from drying out and cracking, but removes the risk of water leaking into your springform pan. This makes for a much less stressful baking experience with equally impressive, moist results.
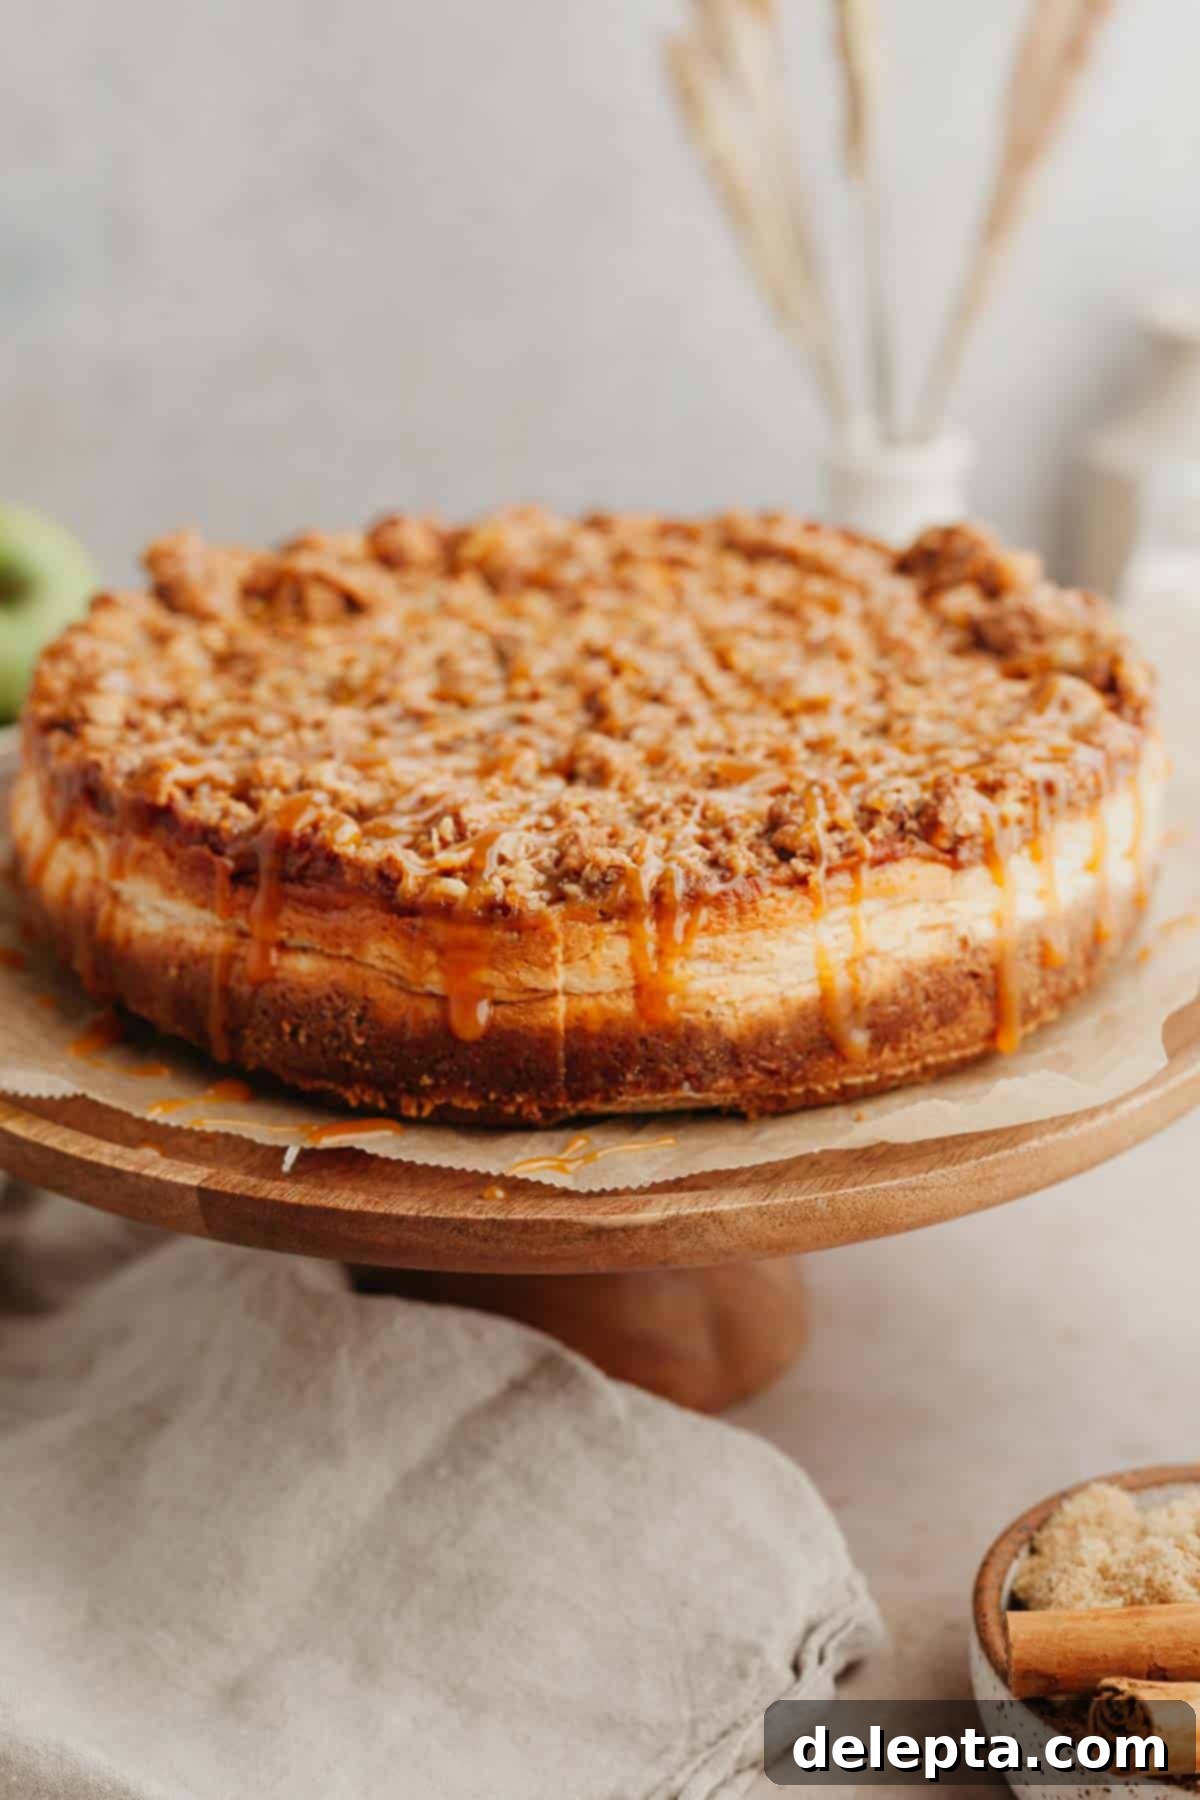
- Irresistible Toppings – While this Apple Crisp Cheesecake is a star on its own, a drizzle of rich, gooey salted caramel sauce takes it to an entirely new level. You could also experiment with other delightful toppings to complement its flavors. A dollop of freshly whipped cream adds a light, airy contrast, while a scoop of high-quality vanilla bean ice cream would make for an indulgent pairing. A sprinkle of toasted pecans or walnuts could also enhance the “crisp” element.
- Room Temperature Ingredients – This is perhaps one of the most critical tips for a smooth, lump-free, and evenly textured cheesecake filling. Ensure all your dairy ingredients, especially the cream cheese, sour cream, and eggs, are at proper room temperature before you start mixing. Cold ingredients don’t emulsify well, leading to a lumpy batter and potentially an uneven bake. Taking them out of the fridge at least an hour or two (or even longer for cream cheese) before you begin will guarantee a velvety smooth batter and a beautifully uniform cheesecake.
Frequently Asked Questions About Apple Crisp Cheesecake
Got questions about making this delightful fall dessert? Here are answers to some commonly asked questions to help you bake with confidence.
For baking, I highly recommend using Granny Smith apples. Their distinct tartness provides a wonderful contrast to the sweet, creamy cheesecake, and their firm texture ensures they hold their shape beautifully during baking, rather than turning mushy. Gala apples are another excellent choice if you prefer a slightly sweeter apple that still maintains its structure. Avoid varieties that become soft quickly, like Red Delicious, for the best results in your baked cheesecake.
If graham crackers aren’t available, or if you’re looking for an alternative, digestive biscuits are a fantastic substitute. They have a similar crumbly texture and mild flavor profile that works wonderfully for cheesecake crusts. I have personally tested this cheesecake with both graham crackers and digestive biscuits, and both yield delicious results. For a more adventurous and spiced crust that perfectly complements the fall flavors, you could also consider using gingersnap cookies. While I haven’t officially tested it with gingersnaps, their warm spice would be a delightful addition.
The cheesecake filling for this recipe is intentionally quite thick, which naturally helps support the apple slices. However, a key technique to ensure they don’t sink is to thinly slice your apples. Thinner slices are lighter and distribute their weight more evenly across the surface of the batter. They also bake faster and integrate more seamlessly into the top layer of the cheesecake, creating a beautiful, even surface without any sinking issues. The streusel topping also provides an additional layer of support.
To keep your cheesecake fresh and delicious, store it tightly wrapped in plastic wrap or in an airtight container in the refrigerator for up to 5 days. For longer storage, individual slices can be frozen. Wrap each slice tightly in plastic wrap, then again in aluminum foil, and place in a freezer-safe bag or container. Thaw frozen slices in the refrigerator overnight before serving. Keep in mind that while the cheesecake itself freezes well, the streusel topping might lose some of its original crunch after freezing and thawing.
Cheesecake cracks are typically caused by a few factors: overmixing the batter (especially after adding eggs, which incorporates too much air), overbaking (drying out the cheesecake), or a sudden, drastic temperature change during cooling. Following the instruction to mix on low speed, only until just combined, and allowing the cheesecake to cool slowly in the oven with the door cracked open will significantly reduce the risk of cracks. Our no-water-bath method also helps maintain moisture, further preventing cracking.
Expand Your Fall Baking: More Apple Recipes to Love!
If you’ve fallen in love with the comforting flavors of apple in this cheesecake, you’re in for a treat! Apples are incredibly versatile for baking, offering a wide spectrum of sweet, tart, and spiced desserts. Explore these other fantastic apple recipes that are perfect for autumn and beyond:
- Harvest Pear and Apple Crisp with Ginger Oat Topping
- Easy Strawberry Apple Crisp
- Classic Bourbon Apple Pie
- Comforting Apple Crumble with Custard
Have you made this delicious Apple Crisp Cheesecake recipe? Please rate the recipe below! Your feedback is incredibly valuable. Don’t forget to follow me on Instagram @alpineella and Pinterest to share your creations and stay updated on new recipes!
Recipe Card: Apple Crisp Cheesecake
Apple Crisp Cheesecake
Ella Gilbert
Pin Recipe
Save RecipeSaved!
Equipment
-
1 9″ springform pan
Ingredients
Cinnamon Streusel
- ½ cup all purpose flour
- ½ cup rolled oats
- ½ cup light brown sugar
- 1 teaspoon ground cinnamon
- 5 tablespoons unsalted butter melted
Apples
- 2 granny smith apples peeled and thinly sliced
- 3 tablespoons light brown sugar
- ½ teaspoon ground cinnamon
Graham Cracker Crust
- 1 ½ cups graham cracker crumbs
- 2 tablespoons sugar
- 6 tablespoons unsalted butter melted
- ½ teaspoon ground cinnamon
- ½ teaspoon ground nutmeg
- pinch salt
Cheesecake Filling
- 32 ounces full fat cream cheese room temperature
- ½ cup sugar
- ½ cup light brown sugar
- ⅔ cup sour cream room temperature
- 1 teaspoon ground cinnamon
- 1 teaspoon vanilla extract
- 4 large eggs room temperature
Instructions
Topping
-
In a large bowl, whisk together all the crisp topping ingredients: all-purpose flour, rolled oats, light brown sugar, ground cinnamon, and melted unsalted butter. Mix until well combined and small, moist clumps form. Place this mixture in the fridge to chill.½ cup all purpose flour, ½ cup rolled oats, ½ cup light brown sugar, 1 teaspoon ground cinnamon, 5 tablespoons unsalted butter
-
In another bowl, toss the thinly sliced granny smith apples with 3 tablespoons of light brown sugar and ½ teaspoon of ground cinnamon until evenly coated. Refrigerate these seasoned apples.2 granny smith apples, 3 tablespoons light brown sugar, ½ teaspoon ground cinnamon
Cheesecake Base
-
Preheat your oven to 350°Fahrenheit (175°Celsius). Lightly spray your 9-inch springform pan with cooking spray or grease with butter, then line the bottom with a circle of parchment paper.
-
In a bowl, whisk together the graham cracker crumbs, sugar, ground cinnamon, ground nutmeg, and a pinch of salt. Pour in the melted unsalted butter and mix well until all the crumbs are uniformly moist and cling together.1 ½ cups graham cracker crumbs, 2 tablespoons sugar, ½ teaspoon ground cinnamon, ½ teaspoon ground nutmeg, pinch salt, 6 tablespoons unsalted butter
-
Pour the graham cracker mixture into the prepared springform pan. Use the bottom of a measuring cup or a flat glass to firmly and evenly press the crumbs into the bottom and slightly up the sides of the pan, creating a compact crust.
-
Bake the crust for 9-10 minutes, or until it’s fragrant and lightly golden brown. Remove from the oven and set aside to cool completely. Immediately lower the oven temperature to 325°Fahrenheit (160°Celsius). Ensure there is an oven rack positioned in the middle, and importantly, ensure there’s free space on the bottom rack for your water pan.
Cheesecake Filling
-
Grab a large oven-safe pan or roasting tin for your water bath method, and put your kettle on to boil water.
-
In the bowl of a stand mixer fitted with the paddle attachment (or using a hand mixer in a large bowl), beat the room temperature full-fat cream cheese with the granulated sugar and light brown sugar on the lowest speed until smooth and creamy, with no lumps. Scrape down the bowl as needed.32 ounces full fat cream cheese, ½ cup light brown sugar, ½ cup sugar
-
Add the room temperature sour cream, vanilla extract, and ground cinnamon to the mixture. Beat on medium speed just until everything is well combined and the batter is smooth. Avoid overmixing.⅔ cup sour cream, 1 teaspoon vanilla extract, 1 teaspoon ground cinnamon
-
Crack the large eggs into a separate small bowl. Add them to the cheesecake batter one at a time, beating on the lowest speed. Mix only until each egg is just combined, then stop. Scrape down the sides of the bowl after each addition to ensure thorough mixing without incorporating too much air. Once the final egg is mixed in, stop the mixer immediately.4 large eggs
-
Pour the prepared cheesecake batter into the cooled graham cracker crust. Gently tap the springform pan on your counter a few times to release any air bubbles, ensuring a smooth top surface.
-
Retrieve the seasoned apple slices from the fridge and carefully arrange them in a single, even layer over the cheesecake batter, making sure the top is fully covered. Then, take the chilled streusel topping and evenly sprinkle it over the apples, ensuring complete coverage.
-
Carefully pour about 1 inch of boiling water into your roasting pan. Place this pan on the bottom shelf of your oven. Then, place the springform pan with the cheesecake on the middle oven rack, directly above the boiling water. This setup creates a moist, steamy environment that helps prevent cracking. Quickly close the oven door to trap the steam.
-
Bake for approximately 1 hour and 10 to 15 minutes. The cheesecake is done when the edges are set, but the very center still has a slight, gentle wobble when you lightly jiggle the pan.
-
Turn off the oven, but do not remove the cheesecake. Crack the oven door open about an inch (a wooden spoon handle is helpful for this) and let the cheesecake cool slowly in the oven for 1 hour. This gradual cooling prevents sudden temperature changes that can lead to cracks. After an hour, remove the cheesecake from the oven and let it cool completely to room temperature on a wire rack. Once fully cooled, run a small, flexible rubber spatula around the inner edge of the springform pan to ensure the cheesecake isn’t sticking. Place the cheesecake (still in the pan) in the fridge and chill overnight (at least 6-8 hours, but preferably longer) to allow it to fully set. Do not cover the top of the springform pan with plastic wrap during chilling, as this can cause condensation.
-
The next day, take the chilled cheesecake out of the fridge. Carefully unlatch and remove the sides of the springform pan. Serve your beautiful Apple Crisp Cheesecake as is, or drizzle with homemade salted caramel sauce or a scoop of vanilla ice cream!
Video Tutorial
Baker’s Notes
For a perfectly smooth and lump-free cheesecake batter, ensure all your ingredients, especially the full-fat cream cheese, sour cream, and eggs, are at room temperature before you begin the mixing process. This allows them to combine uniformly, creating a velvety texture.
Salted Caramel Sauce: Elevate your Apple Crisp Cheesecake by topping it with my delectable homemade salted caramel sauce recipe. It adds an extra layer of sweetness and sophistication.
Cream Cheese: Always use full-fat block cream cheese for the best texture and flavor. If your cream cheese comes in tubs (which often has a higher moisture content, especially in Europe), be sure to pat it thoroughly dry with paper towels to remove any excess liquid before using.
Apples: For optimal results, I strongly recommend using firm and tart Granny Smith apples in this recipe. They hold their shape and provide a balancing tartness against the sweet filling.
Graham Crackers: If graham crackers are not readily available, feel free to use digestive biscuits as a delicious and effective alternative for the crust!
Storage: Keep your Apple Crisp Cheesecake tightly wrapped in the fridge for up to 5 days. You can also freeze individual slices for longer storage, though the streusel topping may lose some of its original crispness after thawing. Wrap slices tightly in plastic wrap and then foil before freezing for best results.
Nutrition Information
