Effortless Mini Apple Pies with Puff Pastry: Your Ultimate Guide to a Quick & Delicious Fall Dessert
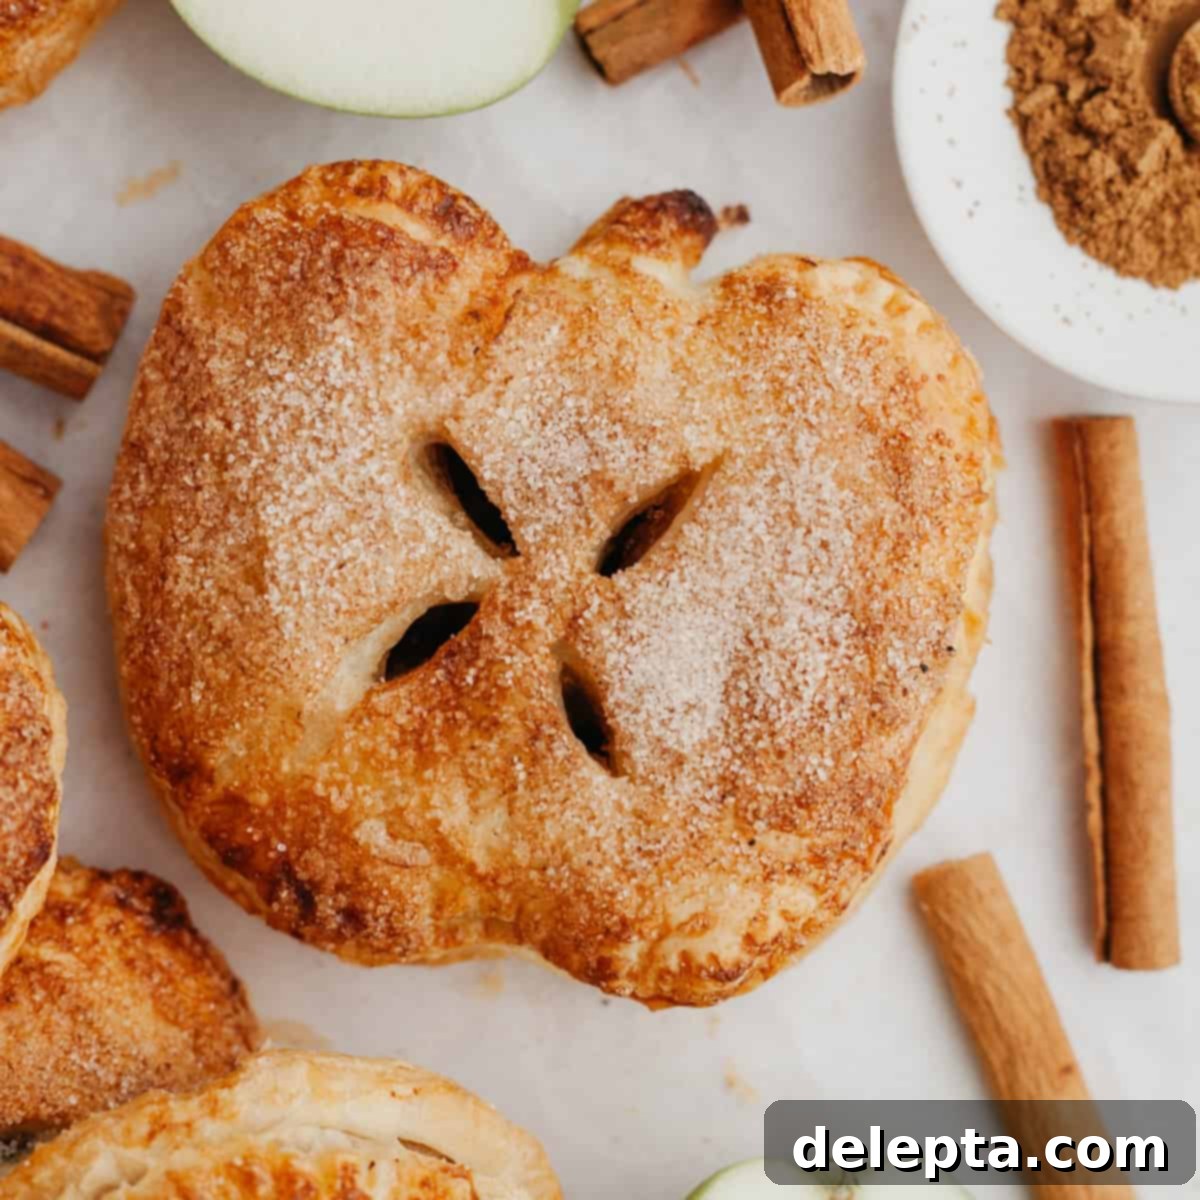
These simple, yet utterly delightful, mini apple pies with puff pastry are truly the perfect Fall dessert! Crafted with readily available store-bought puff pastry, these tiny apple hand pies are incredibly easy to whip up, making them a fantastic choice for any home baker, whether you’re a seasoned pro or just starting your baking journey. Their charming miniature size makes them ideal for entertaining, school lunches, or a delightful individual treat.
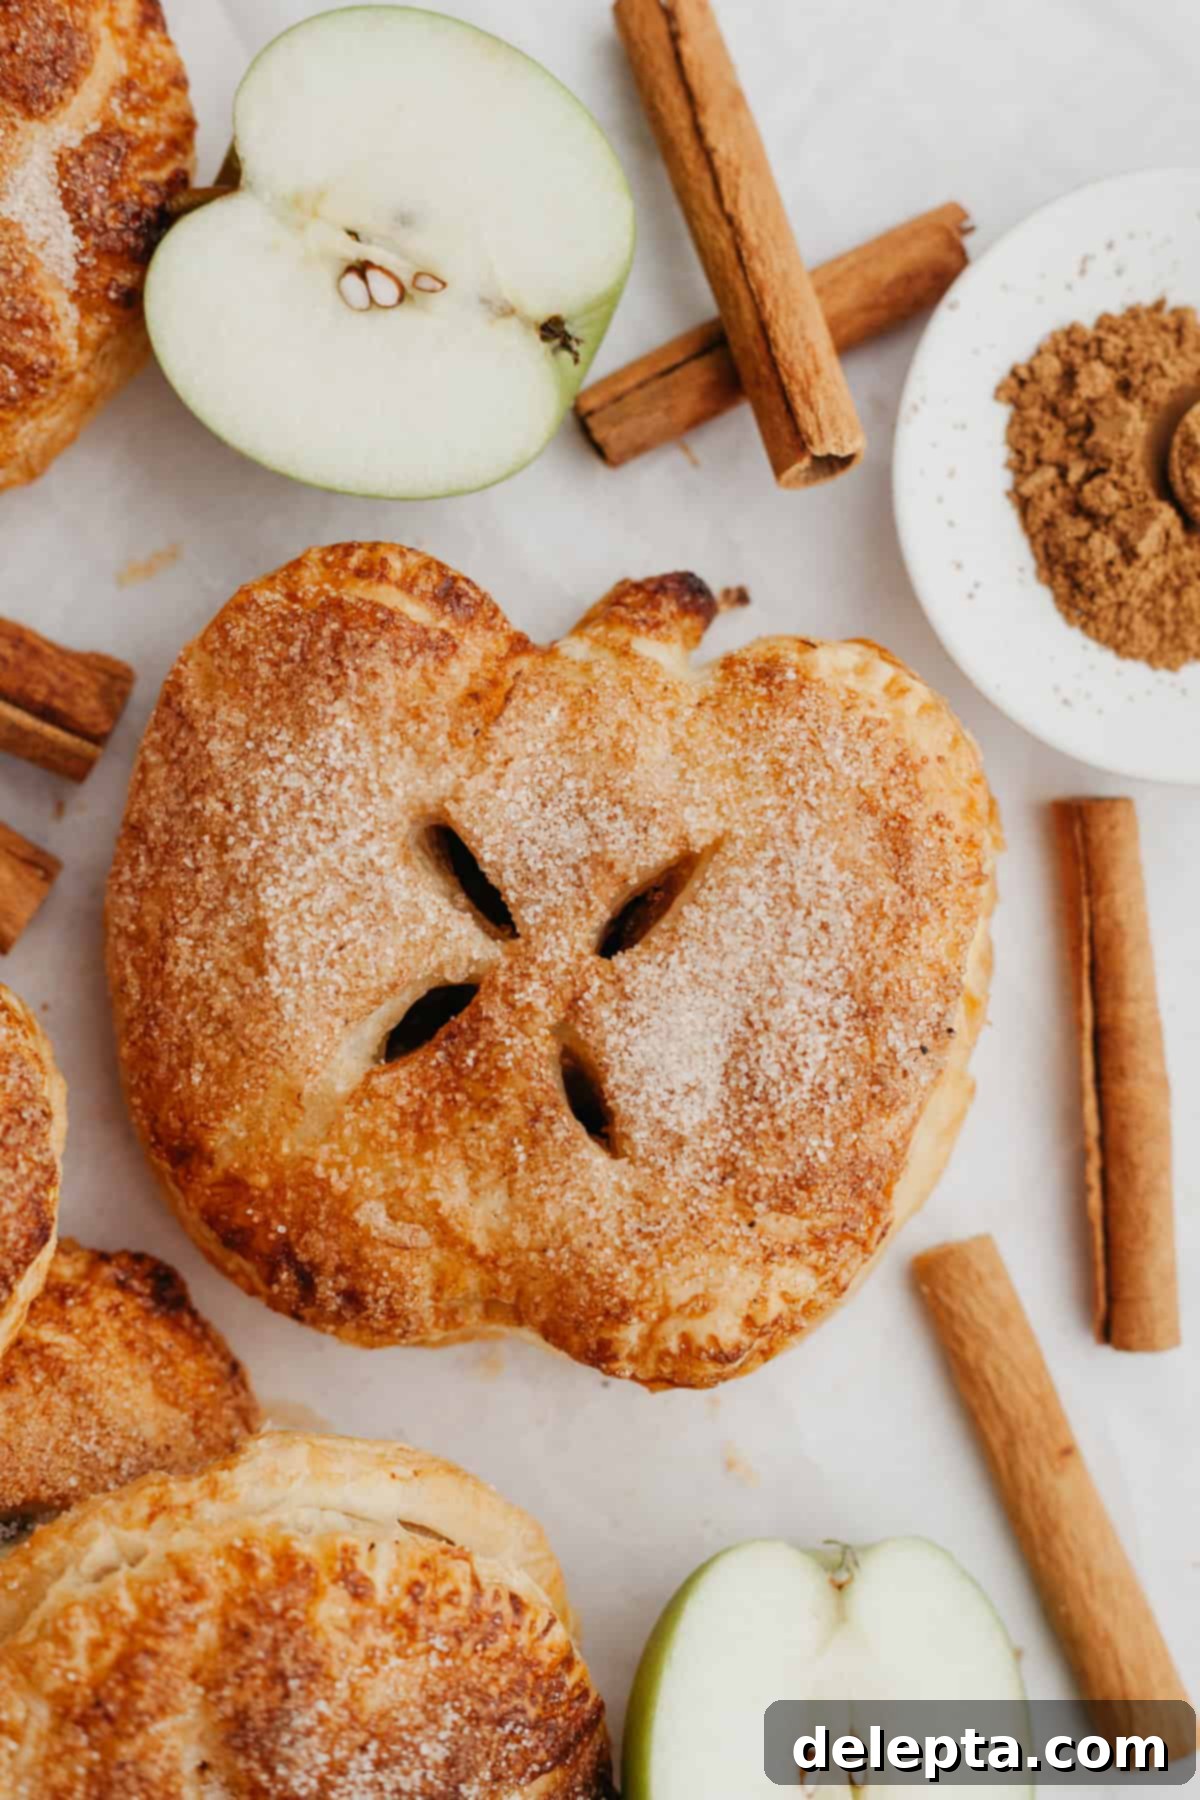
There’s an undeniable charm to mini desserts, isn’t there? From mini vanilla cupcakes to bite-sized brownies, small treats simply make everything feel a little more special. These mini apple hand pies are no exception – they offer all the comforting, nostalgic flavors of a classic apple pie, but in a convenient, portable, and utterly adorable tiny form! The secret to their effortless preparation lies in using store-bought puff pastry, a game-changer that will significantly simplify your baking process and save you precious time in the kitchen.
The filling is a rich, classic apple pie concoction, featuring sweet and tangy apples cooked down with light brown sugar, a medley of warming autumnal spices, and a touch of apple cider vinegar. The vinegar isn’t just for tang; it actually works wonders to enhance and brighten the natural apple flavor, creating a truly irresistible core for these pies.
To finish, I love to sprinkle them generously with a homemade apple pie spice sugar topping, which adds a beautiful shimmer and an extra layer of fragrant spice. However, if you prefer a different look or taste, sparkling sugar is also a fantastic alternative that provides a lovely crunch and visual appeal. If you’re looking for more apple-inspired treats beyond dessert, why not explore my cinnamon rolls with apple pie filling for a delightful breakfast, or my fluffy apple waffles? For those who can’t get enough apple desserts, you absolutely must try my rustic yet elegant apple oat crumble pie – it’s a true crowd-pleaser!
Why You’ll Fall in Love with These Easy Mini Apple Pies!
These aren’t just any apple pies; they’re designed for maximum enjoyment with minimal effort. Here’s why you’ll want to make them again and again:
- Effortlessly Simple Ingredients: Say goodbye to complex ingredient lists! This recipe focuses on readily available items, with ready-made puff pastry taking center stage to make your baking experience incredibly easy and stress-free. You’ll be amazed at how such simple components can create such a sophisticated and delicious dessert.
- Fantastic for Make-Ahead Preparation: Planning a party or just want to get a head start? The delicious apple pie filling can be prepared in advance, allowing you to assemble and bake these delightful treats whenever you’re ready. This flexibility makes them perfect for busy schedules and entertaining.
- Charming Mini Apple Pies: These are essentially a traditional apple pie transformed into an adorable, portable hand pie. There’s nothing quite like the convenience and fun of an individual dessert that fits perfectly in your hand, eliminating the need for plates and forks – perfect for picnics, potlucks, or just a cozy evening in.
- Irresistible Apple Pie Spice Sugar Topping: Each individual hand pie is generously sprinkled with a homemade apple pie spice sugar topping. This sweet and aromatic coating not only adds a beautiful golden sheen and texture but also infuses every bite with that signature warm, inviting flavor of fall.
- Quick Baking Time: Thanks to their small size and the magic of puff pastry, these mini pies bake up in a fraction of the time compared to a large pie, meaning you get to enjoy your delicious homemade treat even faster!
- Versatile & Customizable: While perfect as is, these pies are also a fantastic canvas for your creativity. Add a dollop of caramel, a scoop of vanilla ice cream, or a sprinkle of chopped nuts for an extra flourish.
Essential Ingredients for Your Mini Apple Pies
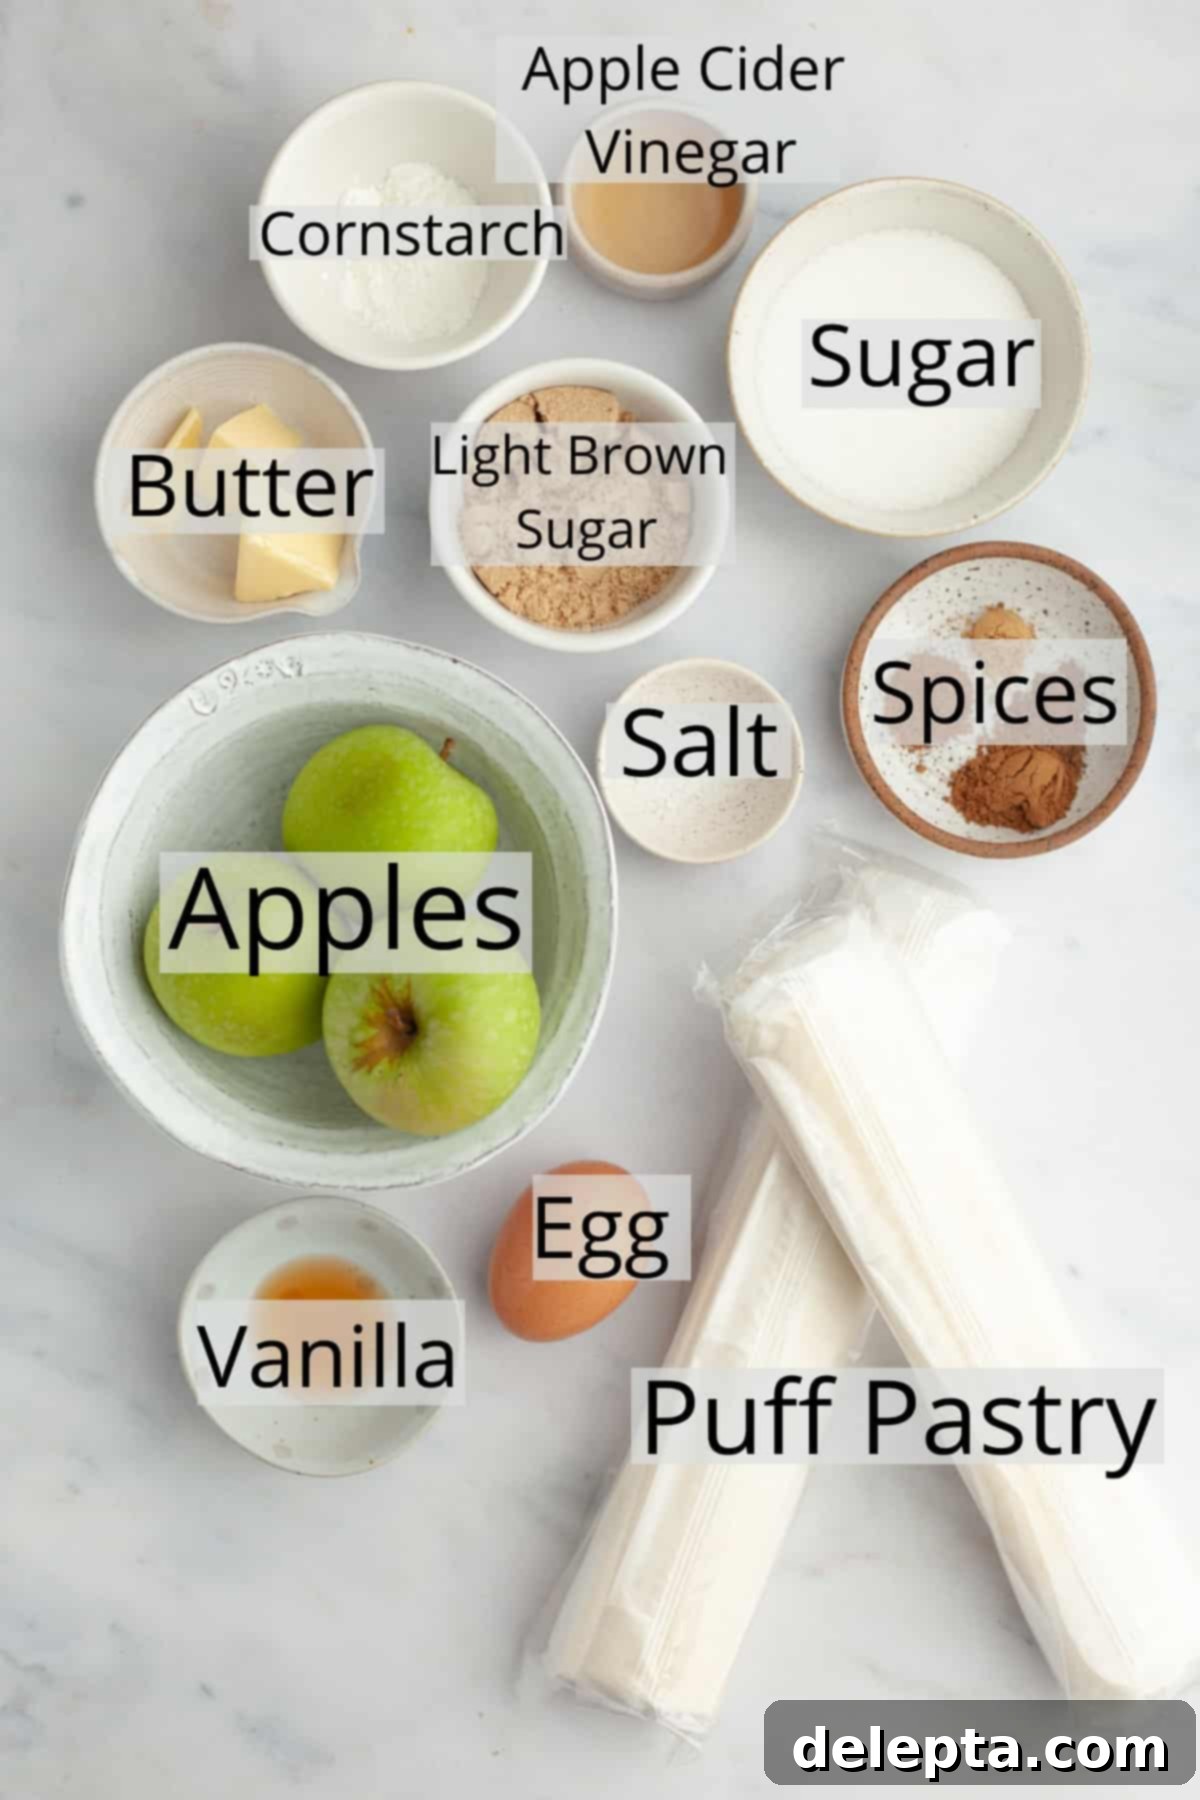
Creating these delightful mini apple pies requires a few key ingredients, most of which you likely already have in your pantry or can easily find at your local grocery store. Here’s a detailed look at what you’ll need and why each component is important:
- Puff Pastry: The true star of this recipe! I recommend using two packages of good quality store-bought puff pastry. This flaky, buttery dough is what gives these hand pies their incredible texture and professional look without all the fuss of making dough from scratch. If you’re using a frozen variety, ensure you give it ample time to thaw completely according to package instructions – usually several hours in the refrigerator. For chilled puff pastry (often found in the refrigerated section), take it out of the fridge about 10-15 minutes before you plan to use it to allow the dough to relax slightly, making it easier to roll and cut without cracking.
- Egg: A single large egg, beaten, is essential for our egg wash. Brushing the pastry with an egg wash before baking achieves two crucial things: it acts as a “glue” to help seal the edges of your pies, and it gives the finished pastries a beautiful, glossy, golden-brown color, making them look even more appetizing.
- Apples: For the best apple pie filling, I typically use Granny Smith apples due to their firm texture and tartness, which provides a lovely contrast to the sweet sugar and rich spices. However, feel free to experiment and swap them out for your favorite baking apple! Honeycrisp, Fuji, Gala, or Braeburn are all excellent choices that hold their shape well when cooked and offer a wonderful balance of sweet and tart flavors.
- Spices: This recipe uses a classic, warming spice combination that screams “fall!” We’re talking about ground cinnamon, ginger, nutmeg, and allspice. These aromatic spices come together to create that quintessential cozy apple pie flavor that everyone loves. Don’t skimp on these; they’re vital for the depth of flavor.
- Light Brown Sugar: This provides a deeper, more molasses-like sweetness compared to white sugar, adding richness and a subtle caramel note to the apple filling.
- Apple Cider Vinegar: My secret ingredient for bumping up the apple flavor! Just a couple of teaspoons of apple cider vinegar (or lemon juice if you prefer or have on hand) works magic. The acidity brightens the fruit and balances the sweetness, making the apple flavor pop even more.
- Cornstarch: This is a key thickening agent for our apple filling. Cornstarch (or cornflour, as it’s known in the UK) ensures that your apple filling is beautifully thick and luscious, preventing it from becoming watery or runny and leaking out of your delicate puff pastry.
- Unsalted Butter: A small amount of butter adds richness and a smooth texture to the cooked apple filling.
- Vanilla Extract: A touch of vanilla extract rounds out the flavors, adding warmth and depth to the apple filling.
- Kosher Salt: Just a pinch of salt helps to enhance all the other flavors, bringing out the sweetness of the apples and the warmth of the spices.
Easy Step-by-Step Instructions for Perfect Mini Apple Pies
Making these mini apple pies is a straightforward and enjoyable process. Follow these detailed steps to create your own batch of delicious hand-held treats:
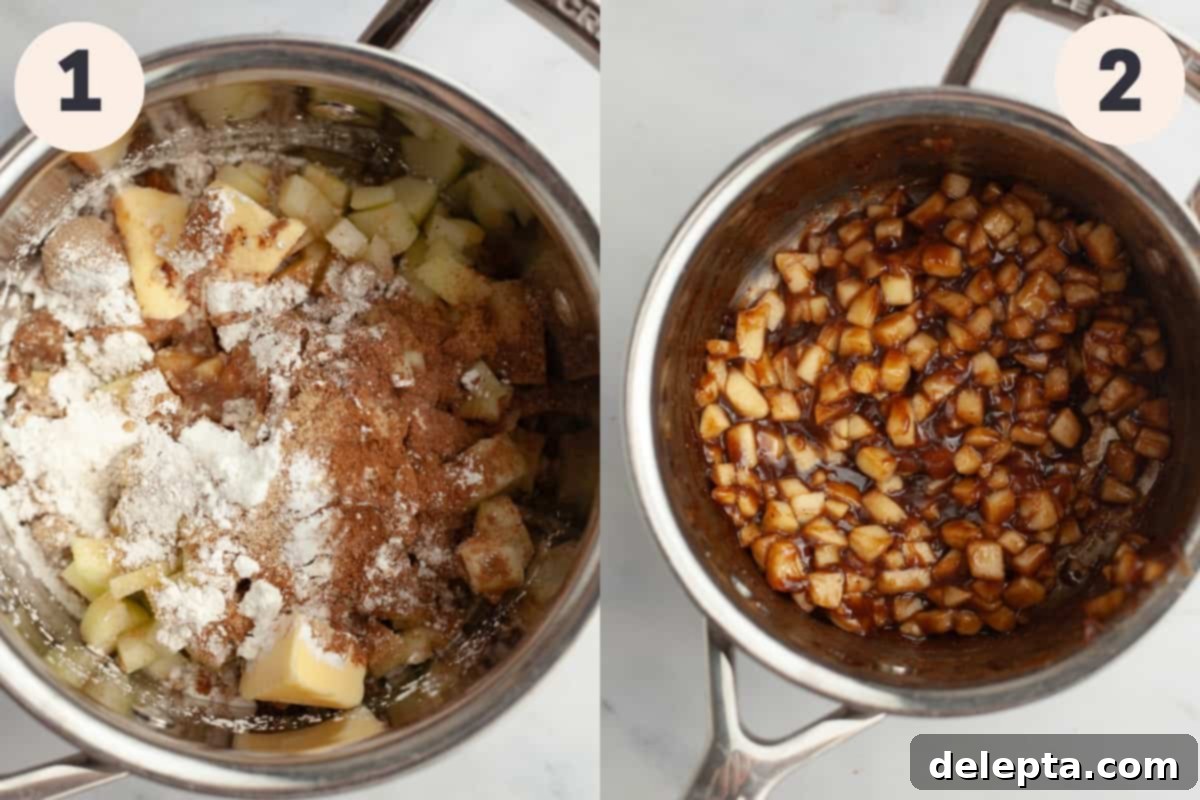
Step 1: Prepare the Apple Filling. Begin by peeling, coring, and dicing your chosen apples into small, uniform pieces. In a large saucepan, combine all of your apple pie filling ingredients: the diced apples, unsalted butter, light brown sugar, ground cinnamon, ground ginger, ground nutmeg, ground allspice, vanilla extract, kosher salt, apple cider vinegar, and cornstarch. Stir everything together until the apples are well coated with the spices and sugar.
Step 2: Cook the Filling to Perfection. Place the saucepan over medium-low heat. Cook the mixture, stirring constantly, until it begins to simmer gently. Continue to simmer for about 3-4 minutes, allowing the apples to soften slightly and the cornstarch to thicken the filling. Constant stirring is key here to prevent sticking and ensure even cooking. Once thickened and fragrant, remove the saucepan from the heat. Pour the cooked apple filling into a clean bowl and set it aside to cool completely. It’s crucial that the filling is entirely cool before you add it to the puff pastry, otherwise, it can make the pastry soggy and difficult to work with.
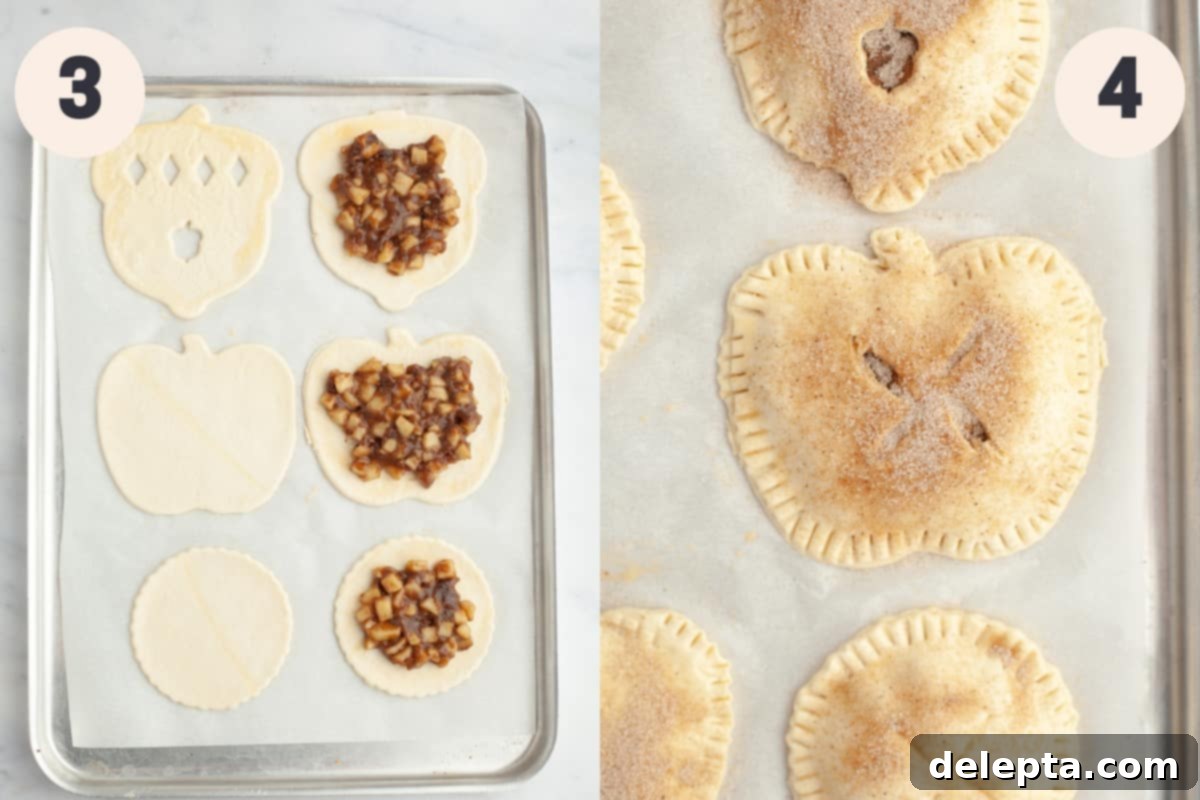
Step 3: Prepare the Puff Pastry and Assemble. While your filling cools, preheat your oven to 400°F (200°C) and line two baking sheets with parchment paper. Unroll your thawed puff pastry onto a lightly floured surface. You can cut the pastry into squares or rectangles, or use cookie cutters or hand-pie molds (like these hand-pie molds from Williams-Sonoma) to create fun shapes. Place half of your cut pastry shapes onto the prepared baking sheets. Spoon about 3 tablespoons of the completely cooled apple filling onto the center of each of these pastry pieces. Be careful not to overfill, as this can lead to leakage. Lightly brush the edges of the dough with the beaten egg wash.
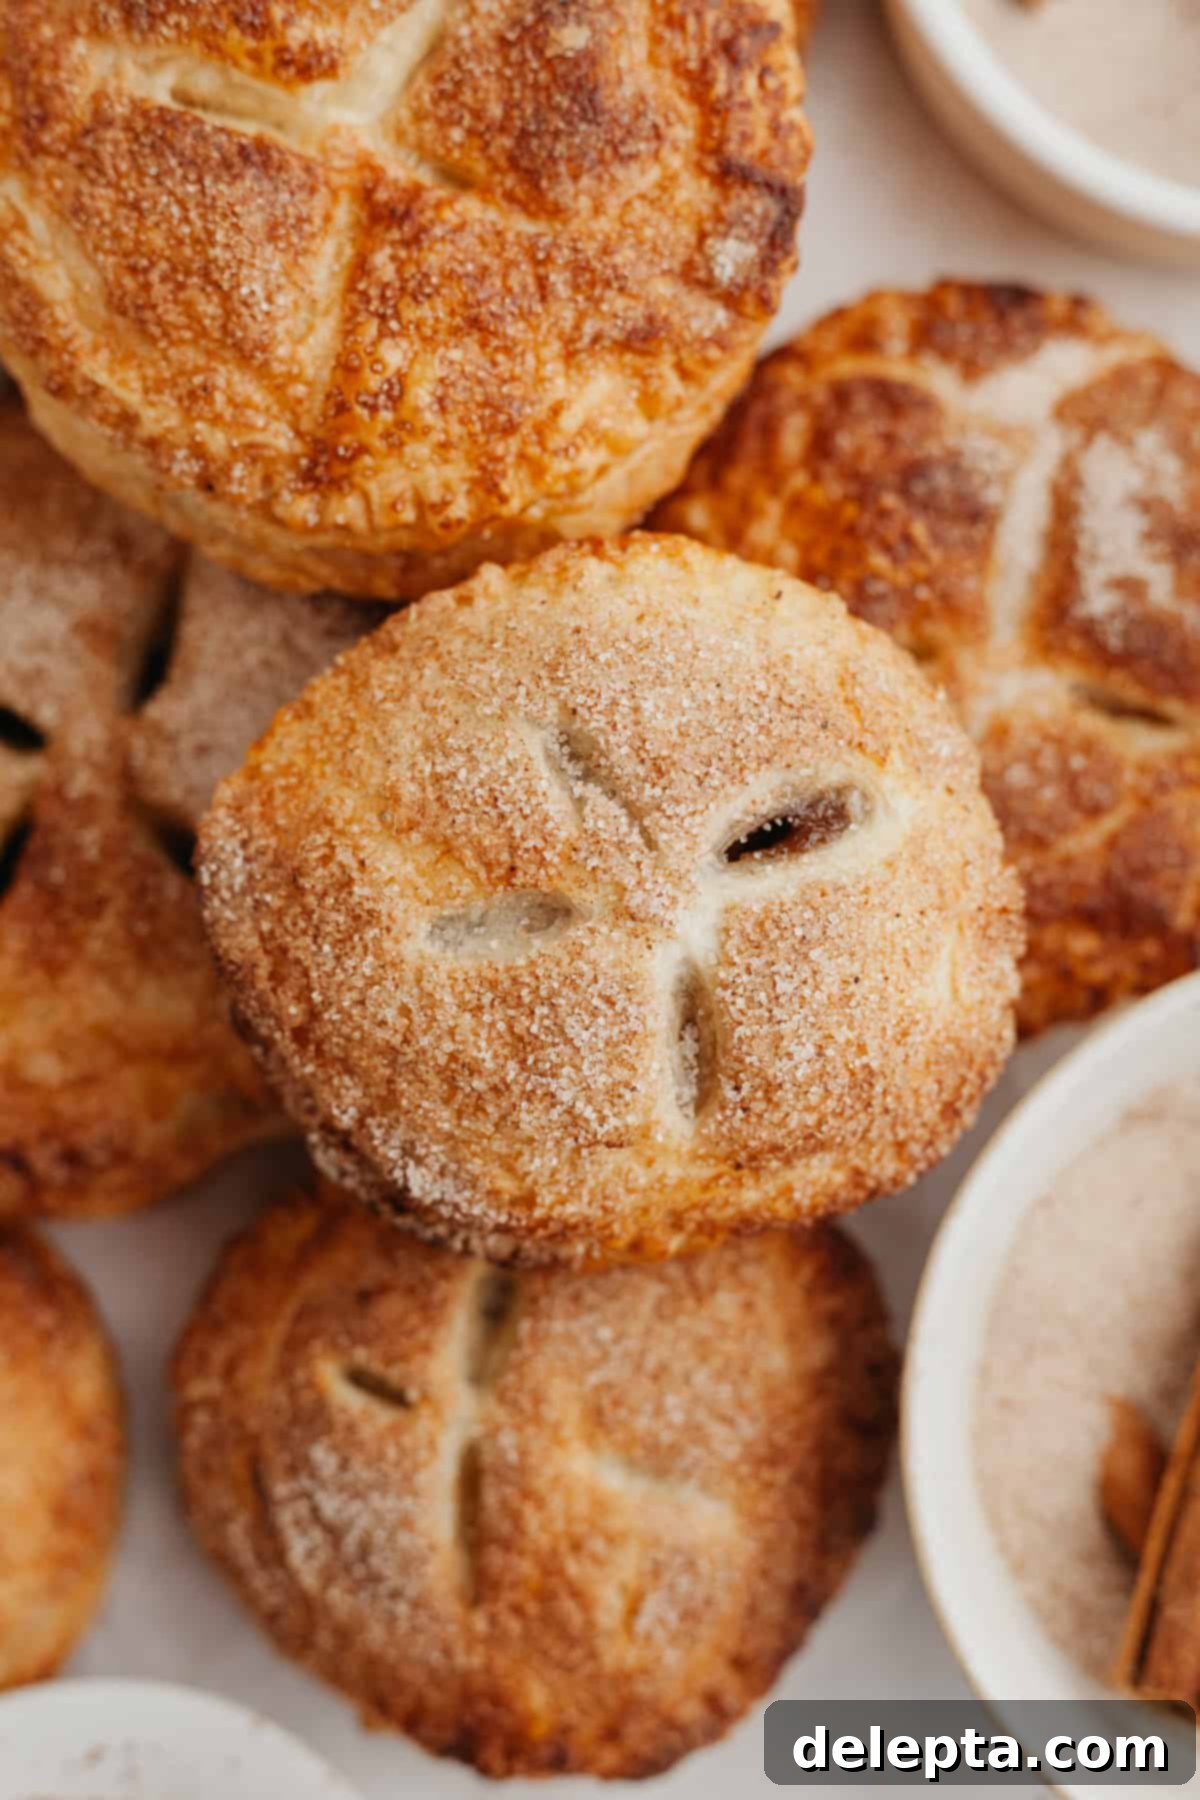
Step 4: Seal, Top, and Bake. Carefully place the remaining half of your pastry shapes on top of the filling-covered pieces. Use your fingers to gently press the two pieces of dough together around the filling, ensuring the edges are well sealed. Then, use the tines of a fork to crimp the edges all around, creating a decorative seal that also helps prevent the filling from escaping. In a small bowl, mix together your apple pie sugar topping ingredients (white sugar, ground cinnamon, ground nutmeg, and allspice). Take the baking sheet out of the fridge (if it was chilling), and lightly brush the top of each hand pie with the remaining egg wash. Using a small knife, cut two or three small slits in the top of each pie; these act as air vents, allowing steam to escape during baking and preventing the pies from bursting. Sprinkle the prepared apple pie sugar topping evenly over the tops of the pies. Bake one sheet at a time in your preheated oven at 400ºF (200°C) for approximately 20 minutes, or until the pastry is golden brown and puffed up. For even baking, remember to turn the baking sheet halfway through the cooking time. Allow to cool slightly on the baking sheet before transferring to a wire rack to cool completely. Repeat with the second batch.
Expert Tips & Tricks for Perfect Mini Apple Pies
Achieving bakery-worthy mini apple pies is easier than you think with these insider tips:
- Filling Quantity Matters: The amount of filling you’ll need per pie largely depends on the size of your chosen pastry shapes. For standard hand-pie molds or medium-sized cookie cutters, about 2-3 tablespoons of cooled filling is usually perfect. Avoid overfilling, as this is the most common cause of leakage during baking.
- Choosing Your Molds/Cutters: I personally used these hand-pie molds from Williams-Sonoma for their convenience and adorable shapes. However, you can achieve fantastic results with simple round biscuit cutters or various cookie cutters. Just be cautious with overly intricate cookie cutter designs, as they can be difficult to seal properly and may tear when handling.
- Crucial Air Vents: Regardless of whether you use a mold or cutters, always remember to cut a few small slits (2-3) in the top piece of dough before baking. These slits are essential air vents that allow steam from the cooking apple filling to escape, preventing your pies from puffing up uncontrollably or bursting open in the oven.
- Sparkling Sugar Alternative: If you’re looking for an alternative to the apple pie spice sugar, a sprinkle of sparkling sugar (also known as turbinado or coarse sugar) creates a beautiful, glistening finish and a delightful crunch. I’ve tested this, and it looks absolutely stunning!
- Don’t Skip the Egg Wash: The egg wash isn’t just for aesthetics. It plays a vital role in binding the two pieces of dough together, creating a strong seal that helps contain the filling. Additionally, it gives your mini pies that desirable golden-brown, shiny crust, enhancing their visual appeal.
- Ensure Filling is Completely Cool: This tip is paramount! Adding warm or hot apple filling to raw puff pastry will melt the butter in the pastry, making it sticky, difficult to handle, and compromising its flaky texture. Always allow the filling to cool completely before assembly. You can even make the filling a day or two in advance and chill it in the refrigerator.
- Chill Assembled Pies: If you’re working in a warm kitchen or your puff pastry feels too soft, consider placing the assembled but unbaked pies in the refrigerator for 10-15 minutes before baking. This helps firm up the butter in the pastry, contributing to a flakier crust.
- Rotate Baking Sheets: Ovens often have hot spots. For even browning, rotate your baking sheet halfway through the baking time.
Frequently Asked Questions About Mini Apple Pies
Yes, pre-cooking the apples is highly recommended and beneficial for several reasons. Firstly, it helps to soften the apples, ensuring they have a tender texture when the pies are baked. Secondly, it allows the flavors of the sugar and spices to meld and deepen, enhancing the overall taste of the filling. Lastly, cooking the apples down slightly prevents the dreaded “gap” inside your pies where raw apples would shrink significantly during baking, leaving an empty space.
Absolutely! While the assembled pies are best baked fresh, you can certainly prepare the apple pie filling two days ahead of time. Simply cook the filling as directed, then let it cool completely before transferring it to an airtight container and storing it in the refrigerator until you’re ready to assemble and bake your pies. This makes day-of preparation much quicker and easier!
Granny Smith apples are my top recommendation due to their firm texture and tart flavor, which holds up beautifully against the sweetness and spices. However, other good baking apples include Honeycrisp, Fuji, Gala, or Braeburn. You can even use a mix of two different types for a more complex flavor profile!
You can freeze unbaked pies! Assemble them completely, then arrange them on a baking sheet and freeze until solid. Once frozen, transfer them to an airtight freezer bag for up to 1-2 months. Bake from frozen, adding about 5-10 minutes to the baking time. Baked pies can also be frozen, wrapped individually, for up to 1 month. Thaw at room temperature and reheat in the oven.
Storage and Reheating Tips for Your Mini Apple Pies
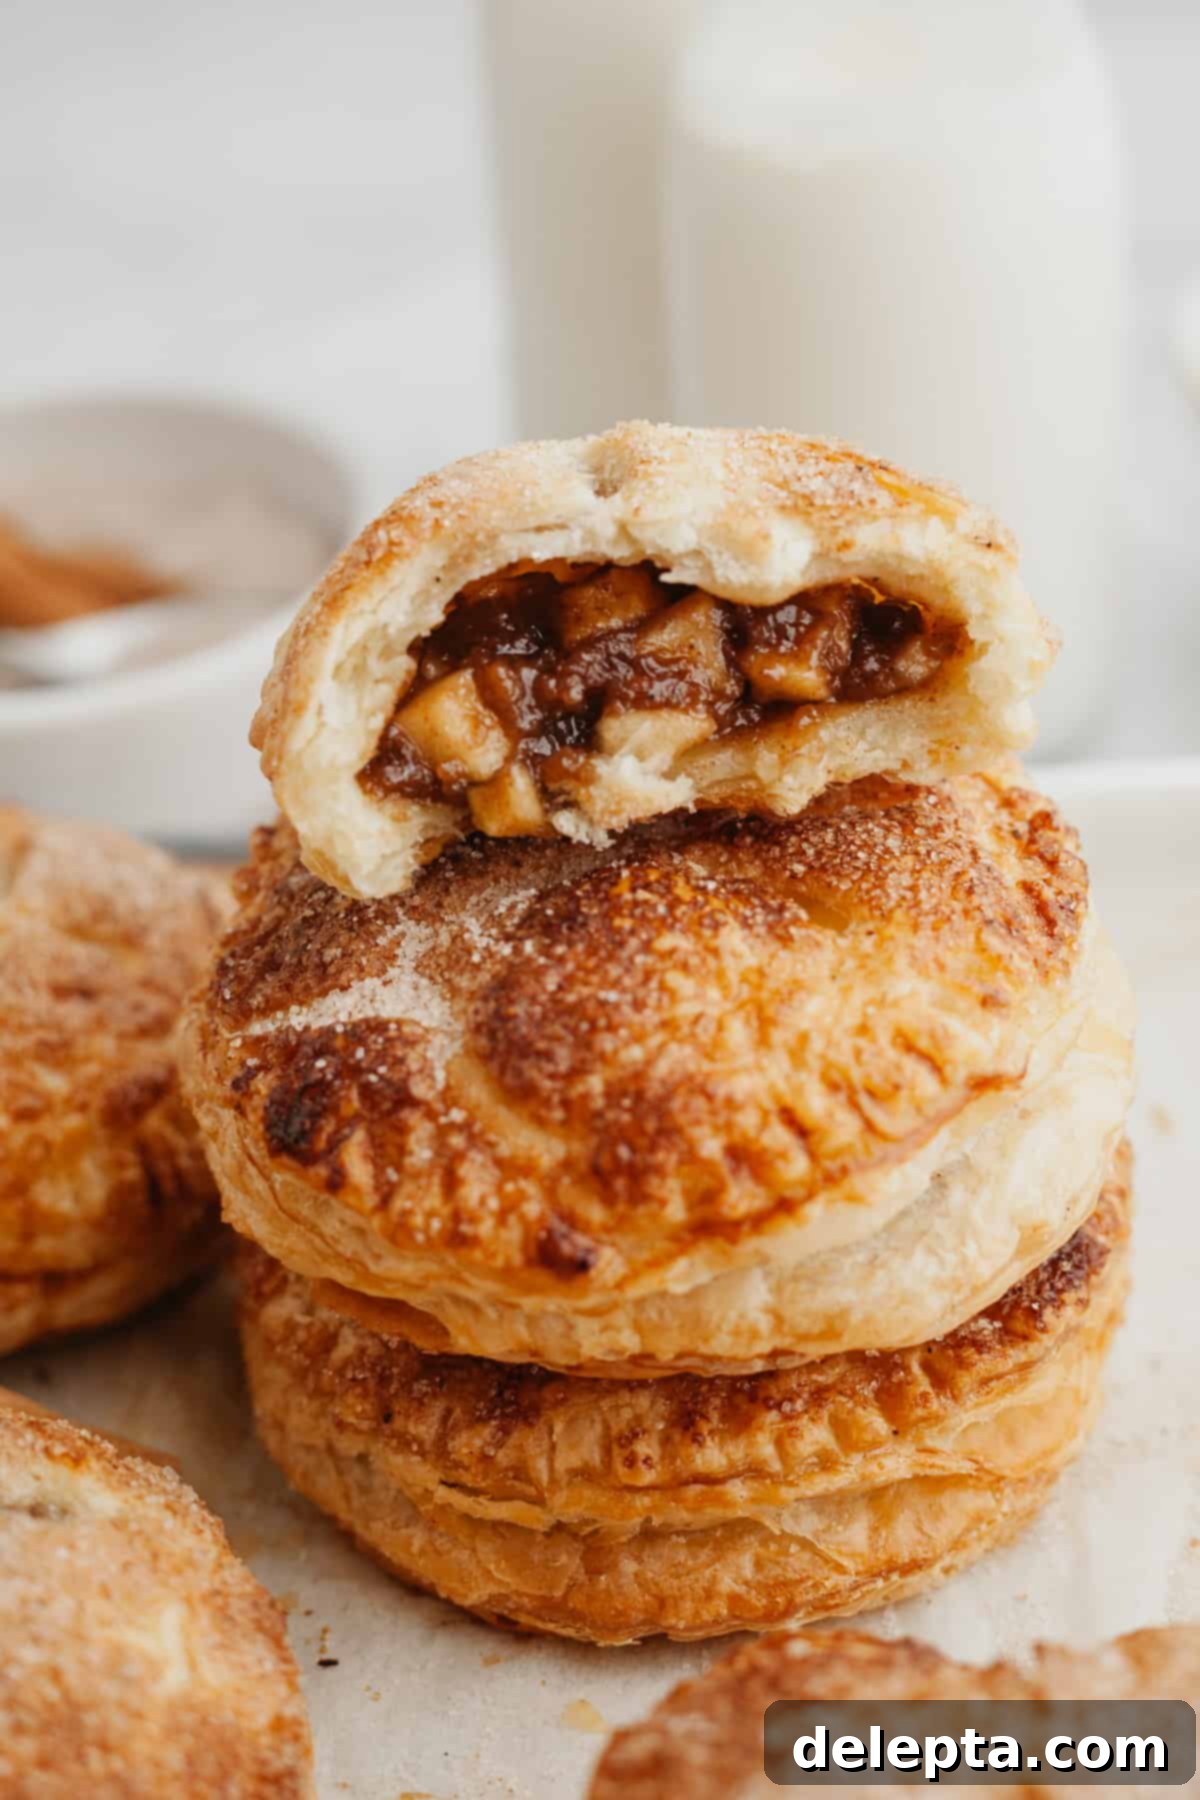
These mini apple pies are undeniably at their absolute best when enjoyed on the same day they are baked. The puff pastry is wonderfully crisp and flaky right out of the oven, and the filling is perfectly warm and luscious. However, if you happen to have any leftovers (which is rare!), here’s how to store and reheat them:
If you need to store them, place your cooled mini apple pies in an airtight container. They can be kept at room temperature for up to 1 day. Just be aware that the puff pastry will start to soften quite quickly after baking, losing some of its initial crispness. For slightly longer storage, you can keep them in the refrigerator for up to 2-3 days, though the pastry will become even softer.
To warm up your mini apple pies and bring back some of their inviting warmth, you have a couple of options:
- Microwave: For a quick reheat, pop a pie into the microwave for 20-30 seconds. This will warm the filling through, but the pastry will remain soft.
- Oven: For best results and to crisp up the pastry again, reheat the pies in a preheated oven at 300°F (150°C) for about 5-10 minutes, or until warmed through and the pastry is slightly crisper.
More Irresistible Fall Desserts to Try Next!
If you’ve enjoyed the comforting flavors of these mini apple pies, you’re in for a treat! Fall is a season rich with incredible baking opportunities, and I have plenty more recipes that capture the essence of autumn. Here are some other delightful, fall-inspired desserts you absolutely must try:
- Cinnamon Rolls with Apple Pie Filling
- Pumpkin Bread with Cream Cheese Frosting
- Chocolate Chip Pecan Cookies
- Maple Cupcakes
Have you made this incredible recipe? Please take a moment to rate the recipe below! Your feedback is invaluable and helps other bakers. Don’t forget to share your creations and follow me on Instagram @alpineella and Pinterest! I love seeing what you bake!
Recipe Card: Mini Apple Pies with Puff Pastry

Mini Apple Pies with Puff Pastry
Ella Gilbert
Pin Recipe
Save RecipeSaved!
Ingredients
Mini Apple Pies
- 3 apples peeled and diced (Granny Smith recommended)
- 2 tablespoons unsalted butter
- ¼ cup light brown sugar
- 2 teaspoon ground cinnamon
- ½ teaspoon ground nutmeg
- ½ teaspoon ground ginger
- ½ teaspoon ground allspice
- 1 teaspoon vanilla extract
- ¼ teaspoon kosher salt
- 2 teaspoons apple cider vinegar
- 3 teaspoons cornstarch
- 1 large egg beaten, for egg wash
Apple Pie Spice Sugar Topping
- ½ cup white sugar
- 1 teaspoon ground cinnamon
- ½ teaspoon ground nutmeg
- ¼ teaspoon allspice
- 22.5 oz puff pastry dough (2 packages, thawed if frozen)
Instructions
-
In a medium saucepan, combine the peeled and diced apples with the unsalted butter, light brown sugar, ground cinnamon, ground ginger, ground nutmeg, ground allspice, vanilla extract, kosher salt, apple cider vinegar, and cornstarch. Stir everything until the apples are well coated. Cook over medium-low heat, stirring constantly, until the mixture begins to simmer. Let it simmer gently for 3-4 minutes, continuing to stir, which will allow the apples to soften and the filling to thicken. Then, turn off the heat.3 apples, 2 tablespoons unsalted butter, ¼ cup light brown sugar, 2 teaspoon ground cinnamon, ½ teaspoon ground nutmeg, ½ teaspoon ground ginger, ½ teaspoon ground allspice, 1 teaspoon vanilla extract, ¼ teaspoon kosher salt, 2 teaspoons apple cider vinegar, 3 teaspoons cornstarch
-
Pour the cooked apple filling into a clean bowl and allow it to cool completely to room temperature. This step is crucial to prevent the puff pastry from becoming soggy.
-
Preheat your oven to 400℉/200℃. Line two large baking sheets with parchment paper for easy cleanup and to prevent sticking.
-
Unroll your thawed puff pastry dough onto a lightly floured surface. Use cookie cutters, biscuit cutters, or hand-pie molds to cut the dough into your desired shapes. You’ll need an even number of shapes (one for the bottom, one for the top). Place half of the cut shapes onto the prepared baking sheets.22.5 oz puff pastry dough
-
Spoon approximately 3 tablespoons of the completely cooled apple filling into the center of each pastry shape on the baking sheet. Be careful not to overfill. Lightly brush the edges of the dough with the beaten egg wash. Place a matching piece of dough on top of each filled pastry. Gently press the two pieces of dough together with your fingers to seal the filling inside. Then, use a fork to crimp the edges all around, creating a secure and decorative seal. If your oven is still preheating or if the pastry is becoming too warm, place the baking sheets in the fridge to keep the dough firm.1 large egg
-
In a small bowl, whisk together all the ingredients for the apple pie spice sugar topping: white sugar, ground cinnamon, ground nutmeg, and allspice. Set aside.½ cup white sugar, 1 teaspoon ground cinnamon, ½ teaspoon ground nutmeg, ¼ teaspoon allspice
-
Retrieve one baking sheet of pies from the fridge (leaving the other one chilled). Brush the top of each hand pie with the remaining egg wash. Using a sharp knife, carefully cut two to three small slits on the top of each pie. These slits act as crucial air vents, allowing steam to escape during baking. Finally, sprinkle a generous amount of your prepared apple pie spice sugar topping over the top of each pie.
-
Bake one sheet at a time in your preheated oven for approximately 20 minutes, or until the puff pastry is beautifully golden brown and puffed. For even baking, turn the baking sheet halfway through the cooking time. Allow the pies to cool slightly on the baking sheet before transferring them to a wire rack to cool completely. Repeat the process with the second baking sheet. Serve warm and enjoy!
Video Tutorial
Chef’s Notes & Pro Tips
Serving Size Variation: The total number of mini pies you yield will ultimately depend on the size of the shapes you cut. For reference, my charming apple-shaped hand pies measured approximately 4.75 x 5.25 inches each. Adjust your expectations based on your chosen cutters!
Optimal Filling Amount: While I generally recommend adding about 3 tablespoons of filling per pie, this can vary. Again, consider the size of your hand pie molds or cookie cutters and adjust the amount of filling accordingly to prevent overfilling and potential leaks.
Sparkling Sugar: If you’re looking for an alternative to the apple pie spice sugar topping, I’ve also had fantastic results and a beautiful presentation using a simple sprinkle of sparkling sugar. It adds a lovely textural contrast and shimmer.
Apple Variety: This recipe was specifically developed and tested using tart Granny Smith apples, which contribute a wonderful balance to the sweet filling.
Hand Pie Molds vs. Cutters: These Williams-Sonoma hand-pie molds were used for the specific shapes you see in the photos. However, don’t hesitate to use simple biscuit cutters or your favorite cookie cutters – just remember to cut vent holes!
