Ultimate Gooey M&M Rice Krispie Treats: Easy No-Bake Recipe for Sweet Nostalgia
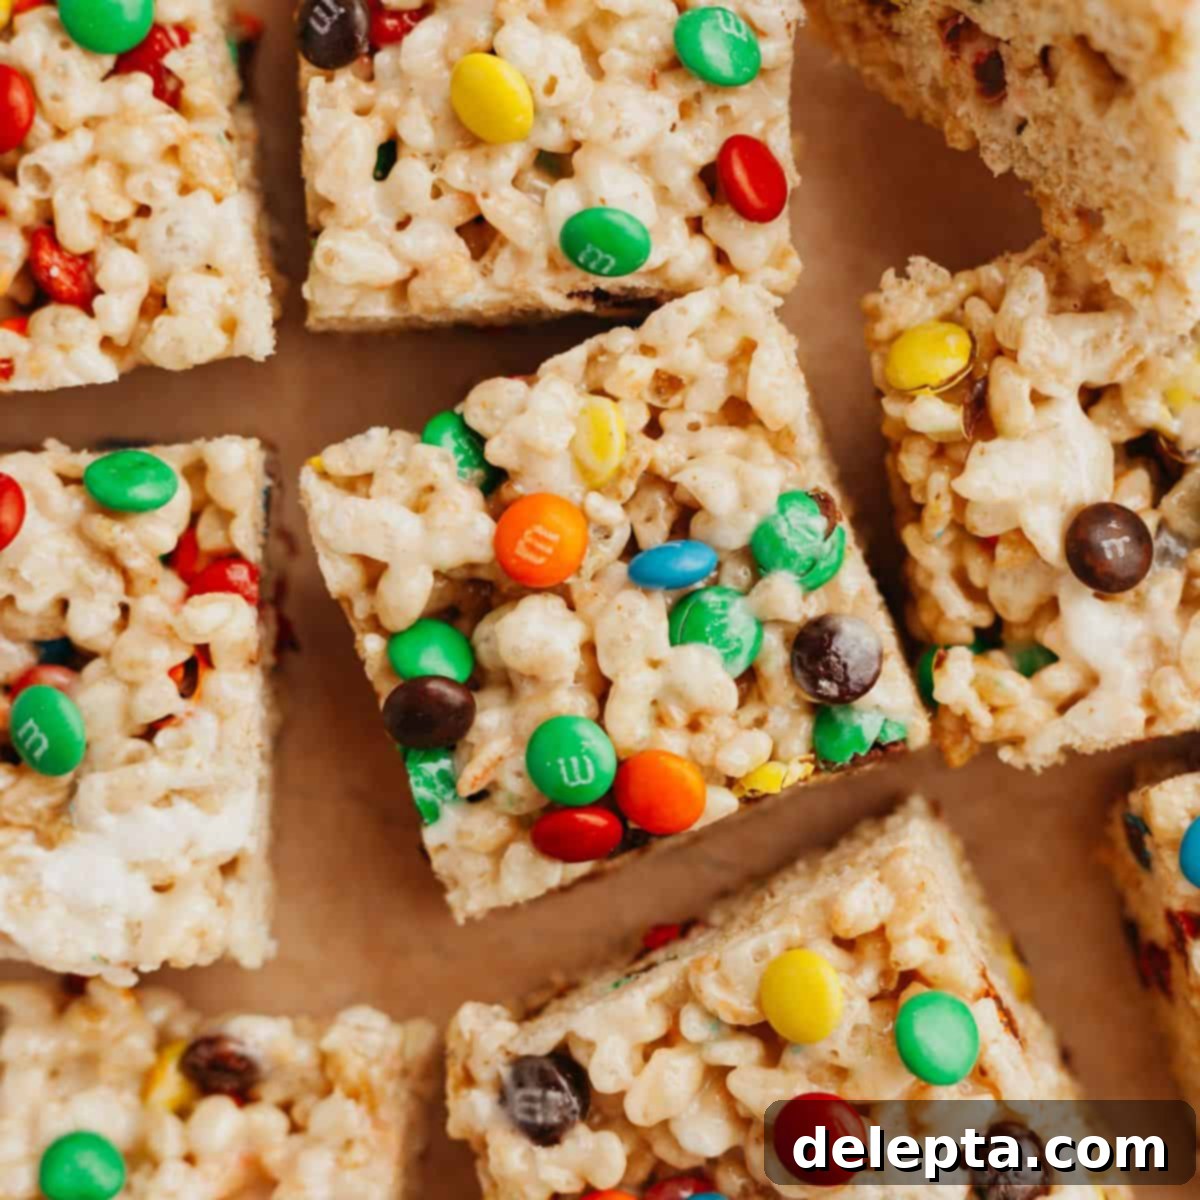
Get ready to rediscover a cherished childhood favorite with these irresistible M&M Rice Krispie Treats! These delightfully sticky, gooey squares are a celebration of marshmallow goodness, elevated by the colorful crunch of M&M candies. Requiring just 6 simple ingredients that you likely already have in your pantry, this recipe is incredibly easy to make. The best part? It’s a fantastic no-bake recipe, perfect for whipping up a quick dessert without turning on your oven!
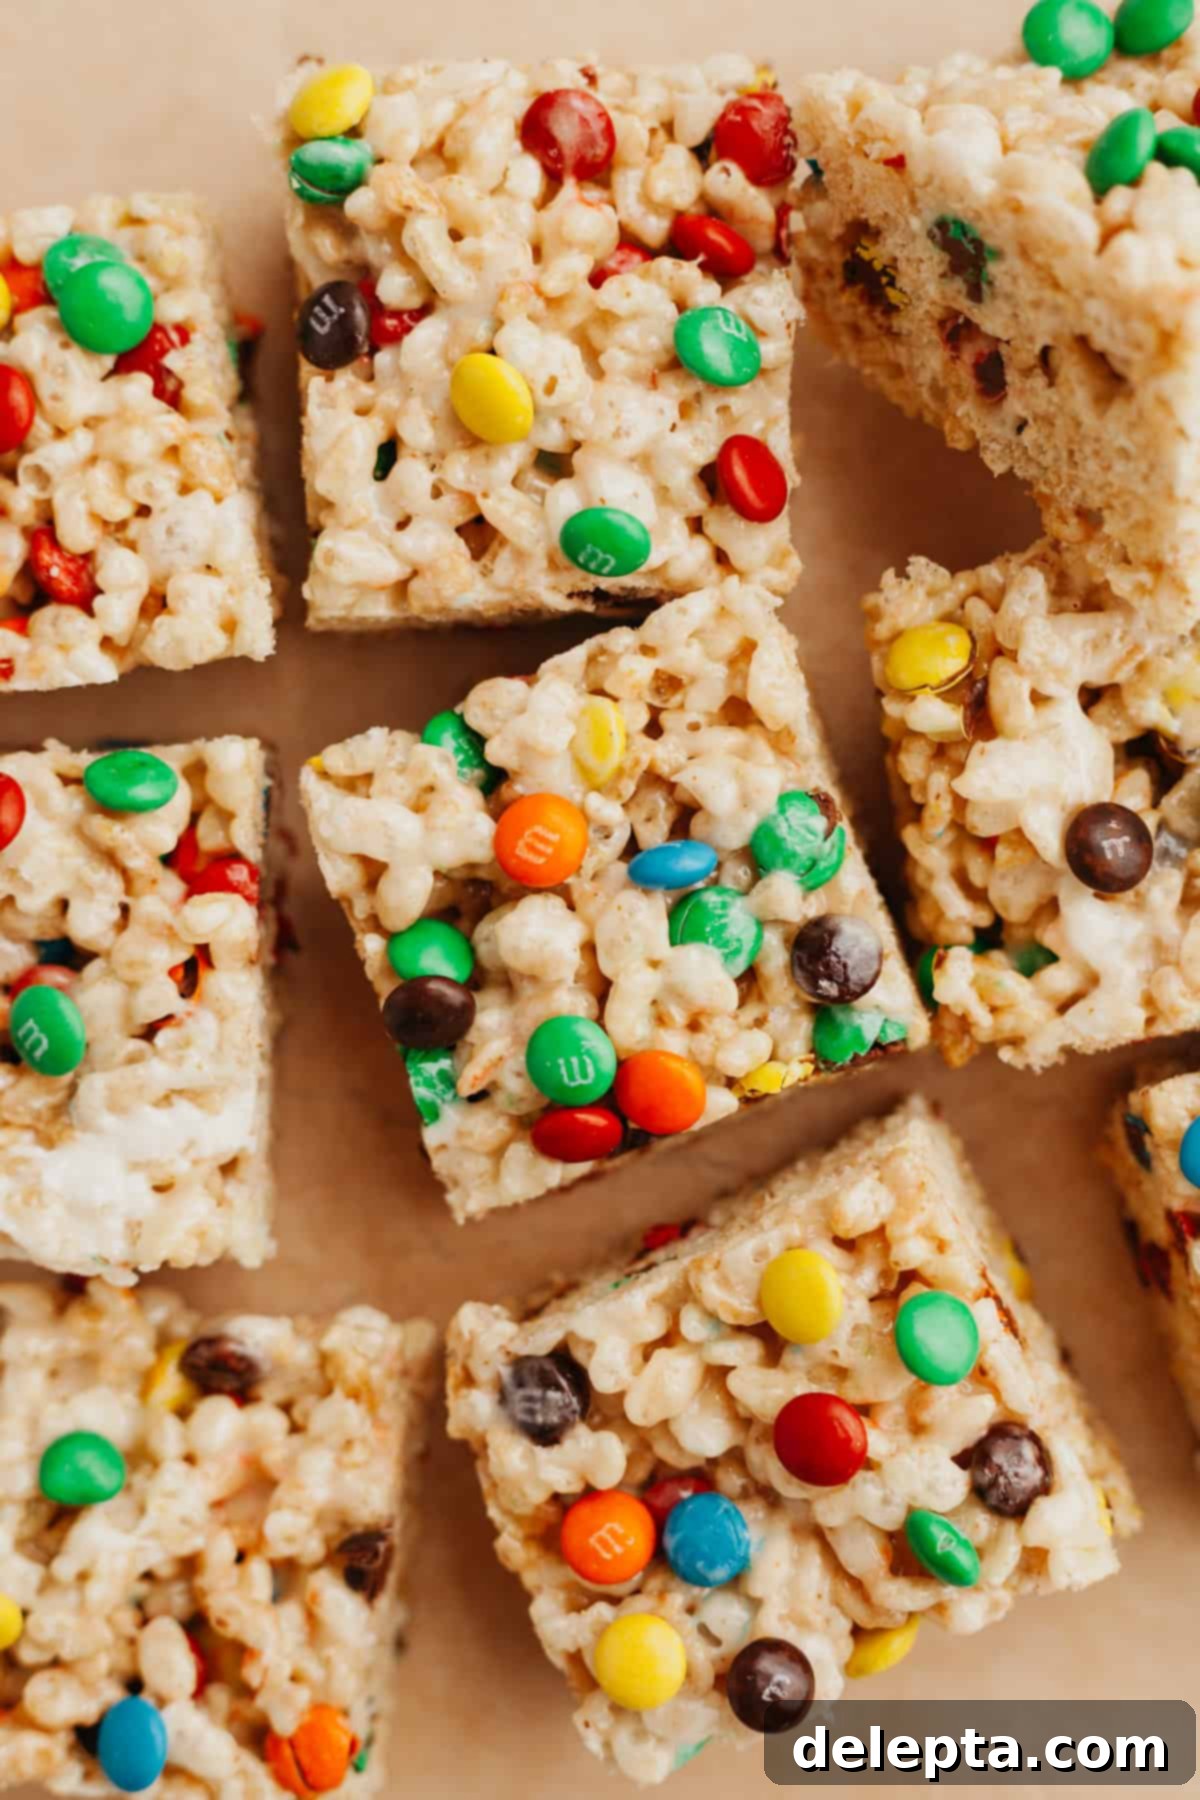
Who doesn’t have fond, nostalgic memories of classic rice krispie treats? For many, these chewy squares evoke images of after-school snacks, bake sales, and comforting homemade delights. While developing this recipe, my primary goal was to ensure it delivered that exact same level of gooey deliciousness and irresistible chewiness I remembered from my own childhood. And I’m thrilled to say, these M&M Rice Krispie Treats hit every mark!
This recipe builds upon the success of my chocolate covered rice krispie treats, maintaining its commitment to simplicity and ease. You won’t need any special equipment or advanced culinary skills, nor will you spend hours in the kitchen. In just minutes, you can have a batch of these delectable treats ready to chill. They’re an absolute crowd-pleaser for any occasion – whether it’s a family gathering, a school bake sale, a casual potluck, or simply an afternoon pick-me-up. You’ll instantly become a hero in the eyes of everyone who tries them, and I promise, your secret of how truly simple they are to make will be safe with me!
If you’re as big a fan of M&Ms as I am, you absolutely must explore some of my other fantastic M&M-infused recipes. Dive into the chewy perfection of my M&M chocolate chip cookies or discover the delightful bite-sized charm of my mini M&M cookies!
Why You’ll Adore These M&M Rice Krispie Treats!
These M&M Rice Krispie treats are more than just a dessert; they’re an experience waiting to happen. Here’s why this particular recipe will quickly become a favorite in your household:
- Effortless & Accessible: These M&M Rice Krispie Treats are a dream come true for busy individuals. They require just 6 simple ingredients, all of which are common pantry staples. You won’t need to make a special trip to the grocery store, making this a spontaneous treat you can whip up anytime!
- A Burst of Color and Flavor: By incorporating vibrant mini M&Ms, we’re not just adding a delightful crunch; we’re infusing this classic dessert with a spectacular pop of color and an undeniable burst of chocolatey goodness. The visual appeal alone makes them perfect for parties and celebrations.
- No-Bake Bliss: Forget preheating ovens or dealing with complex baking steps. This is a truly no-bake recipe, which means less time cleaning up and more time enjoying your delicious creation. It’s especially ideal for warm weather or when you just want a quick and easy treat.
- Surprisingly Quick: The most challenging part of this entire recipe is the anticipation – waiting for it to set! But trust me, every minute of that wait is absolutely worth it for the perfectly gooey and stable squares you’ll achieve. The active prep time is remarkably short.
- Brown Butter Boost: Unlike many basic recipes, we elevate the flavor profile here by browning the butter. This simple step adds incredible nutty, caramel-like notes that truly set these treats apart, giving them a depth of flavor you won’t find in standard versions.
- Marshmallow Flexibility: While classic marshmallows are called for, I also provide an alternative if you don’t have marshmallows on hand. This ensures you can still enjoy these treats, even with a slight ingredient swap.
- Customizable Fun: These treats are incredibly versatile. You can easily adapt them for different holidays or personal preferences by swapping out M&M colors or adding other mix-ins.
Essential Ingredients You’ll Need
Crafting these phenomenal M&M Rice Krispie Treats starts with a handful of readily available ingredients. Each component plays a crucial role in achieving the perfect balance of sweetness, chewiness, and flavor.
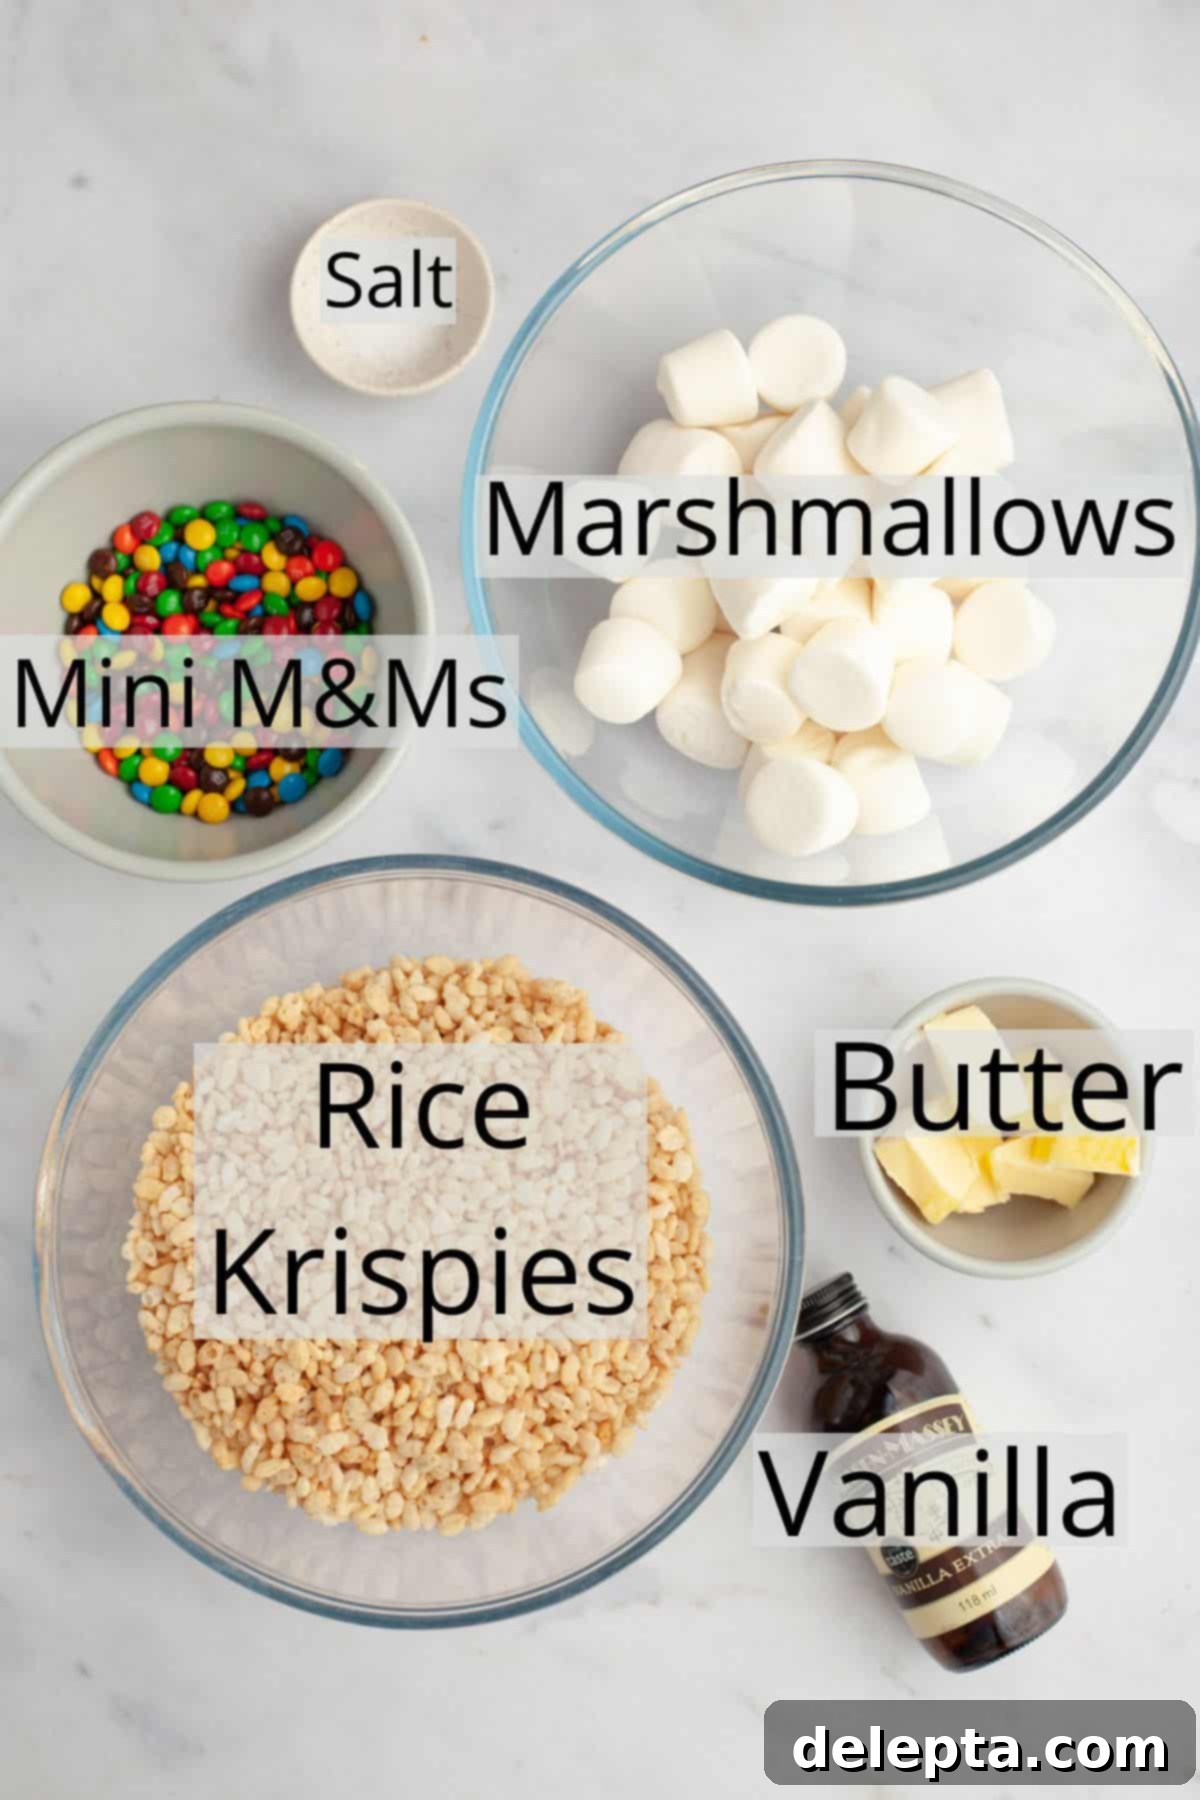
- Rice Krispies Cereal: This is, of course, the foundational ingredient for our M&M Rice Krispie Treats! The crisp texture of this puffed rice cereal provides the signature light and airy crunch. While name-brand Kellogg’s Rice Krispies work perfectly, feel free to use a generic or off-brand puffed rice cereal, as I often do, without compromising the delicious outcome.
- Unsalted Butter: We opt for unsalted butter because it gives us complete control over the saltiness in the recipe. The real magic happens when we brown the butter – a simple technique that adds an incredible depth of nutty, toasted flavor, transforming a basic treat into something extraordinary. This browning process is key to the elevated taste.
- Vanilla Extract: Just a touch of high-quality vanilla extract can make a world of difference. It enhances and rounds out all the other flavors, adding a warm, aromatic note that elevates the overall taste of your treats. When possible, use pure vanilla extract for the best results.
- Salt: While it might seem counterintuitive to add salt to a sweet dessert, a pinch of salt is essential! It doesn’t make the treats salty, but rather acts as a flavor enhancer, balancing the sweetness of the marshmallows and M&Ms and preventing the treats from tasting one-dimensionally sugary. Trust me on this one – it’s a small addition with a big impact!
- Mini M&Ms: I specifically chose mini M&Ms for this recipe because their smaller size allows for a more even distribution throughout the treats, ensuring a delightful chocolatey crunch in every bite. They also contribute beautifully to the vibrant visual appeal. However, don’t hesitate to use regular-sized M&Ms or even seasonal M&Ms to match a particular holiday or theme – they’re incredibly versatile!
- Marshmallows: These are the sticky, gooey heart of any great Rice Krispie Treat. You can use either regular-sized large marshmallows or mini marshmallows. Both work wonderfully, though mini marshmallows tend to melt a bit faster due to their smaller surface area. Ensure your marshmallows are fresh for the best texture and meltability.
Easy Step-by-Step Instructions to Deliciousness
Making these M&M Rice Krispie Treats is incredibly straightforward. Follow these simple steps to create perfectly gooey, flavorful squares every time. Precision is key for the best results, especially when it comes to the brown butter!
Step 1: Prep Your Pan & Brown the Butter
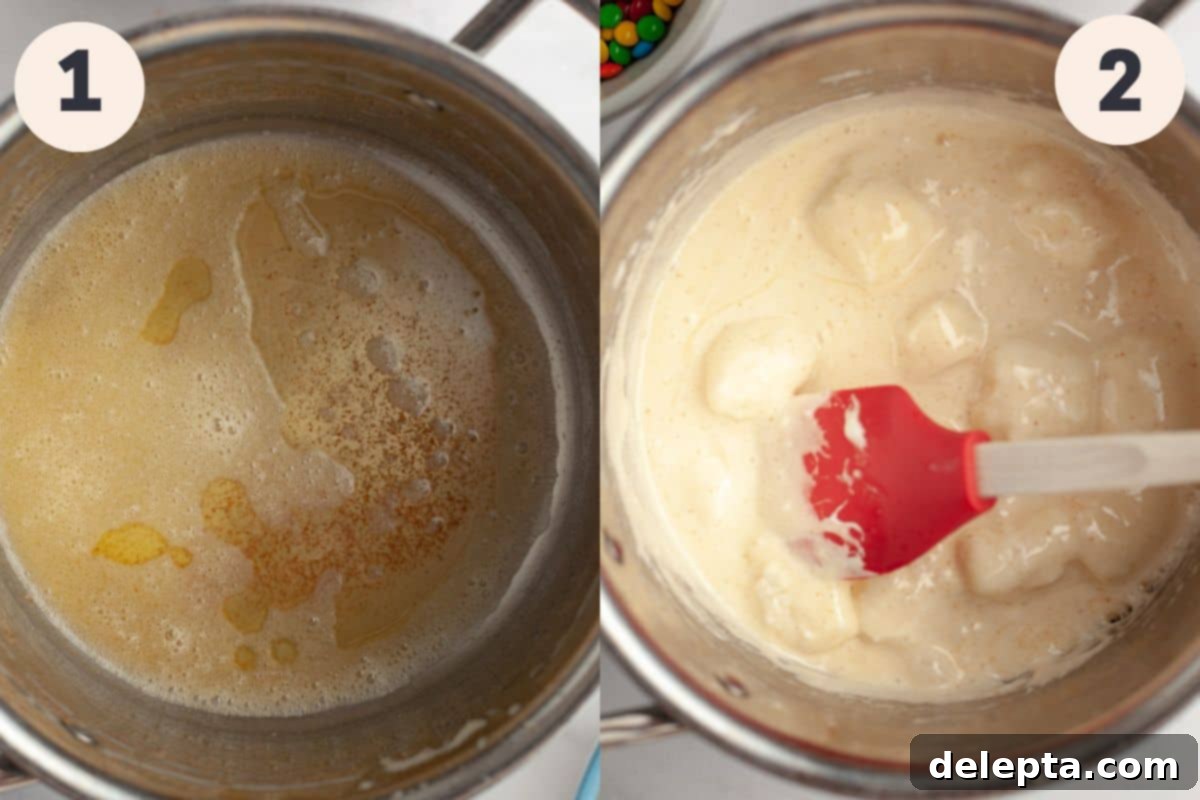
Before you begin melting, line an 8×8-inch (or 9×9-inch for slightly thinner treats) baking pan with parchment paper, leaving a slight overhang on the sides. This thoughtful preparation will make it incredibly easy to lift the finished treats out of the pan for slicing. Set this aside. Now, in a large, heavy-bottomed saucepan, melt the unsalted butter over medium-low heat. Keep a close eye on it. The butter will first melt, then begin to sputter and foam. As the milk solids separate and cook, they will settle at the bottom of the pan and turn golden brown. You’ll notice small, fragrant flakes of brown appearing – this is the dairy solids browning, and it’s going to infuse your treats with an incredible, deep, nutty, and almost caramel-like flavor. Swirl the pan occasionally to ensure even browning. Be careful not to burn it; as soon as it reaches a golden-brown hue and smells wonderfully nutty, move to the next step.
Step 2: Melt the Marshmallows
Once your butter is perfectly browned, reduce the heat to low (or even remove it from the heat if your stove runs hot). Immediately add the marshmallows, salt, and vanilla extract to the saucepan. Stir continuously with a rubber spatula over the low heat until the marshmallows are completely melted and smooth. This should take about 3-5 minutes. Avoid rushing this process with high heat, as it can make the marshmallows tough. As soon as the mixture is smooth and lump-free, remove the saucepan completely from the heat to prevent overcooking the marshmallows, which can lead to hard treats.
Step 3: Combine Cereal and M&Ms
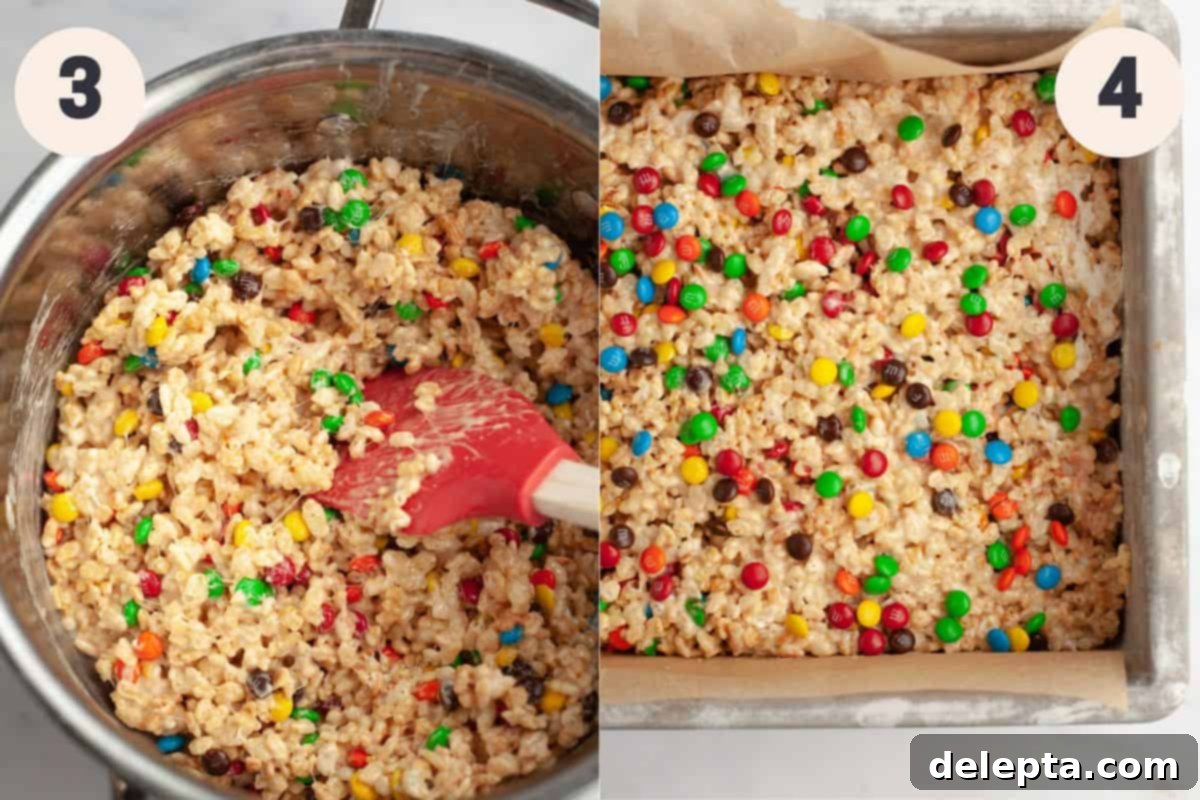
Working quickly, pour the Rice Krispies cereal into the warm marshmallow mixture in the saucepan. Use your rubber spatula to gently fold and stir until the cereal is thoroughly and evenly coated. It’s important to work swiftly here, as the marshmallow mixture will start to set as it cools. Once the cereal is mostly coated, gently stir in the mini M&Ms. Be very delicate with this step; excessive stirring, especially while the mixture is still quite warm, can cause the colors of the M&Ms to bleed into the marshmallow, affecting the vibrant appearance of your finished treats. The goal is to distribute them without smudging their beautiful candy shells.
Step 4: Press into Pan and Set
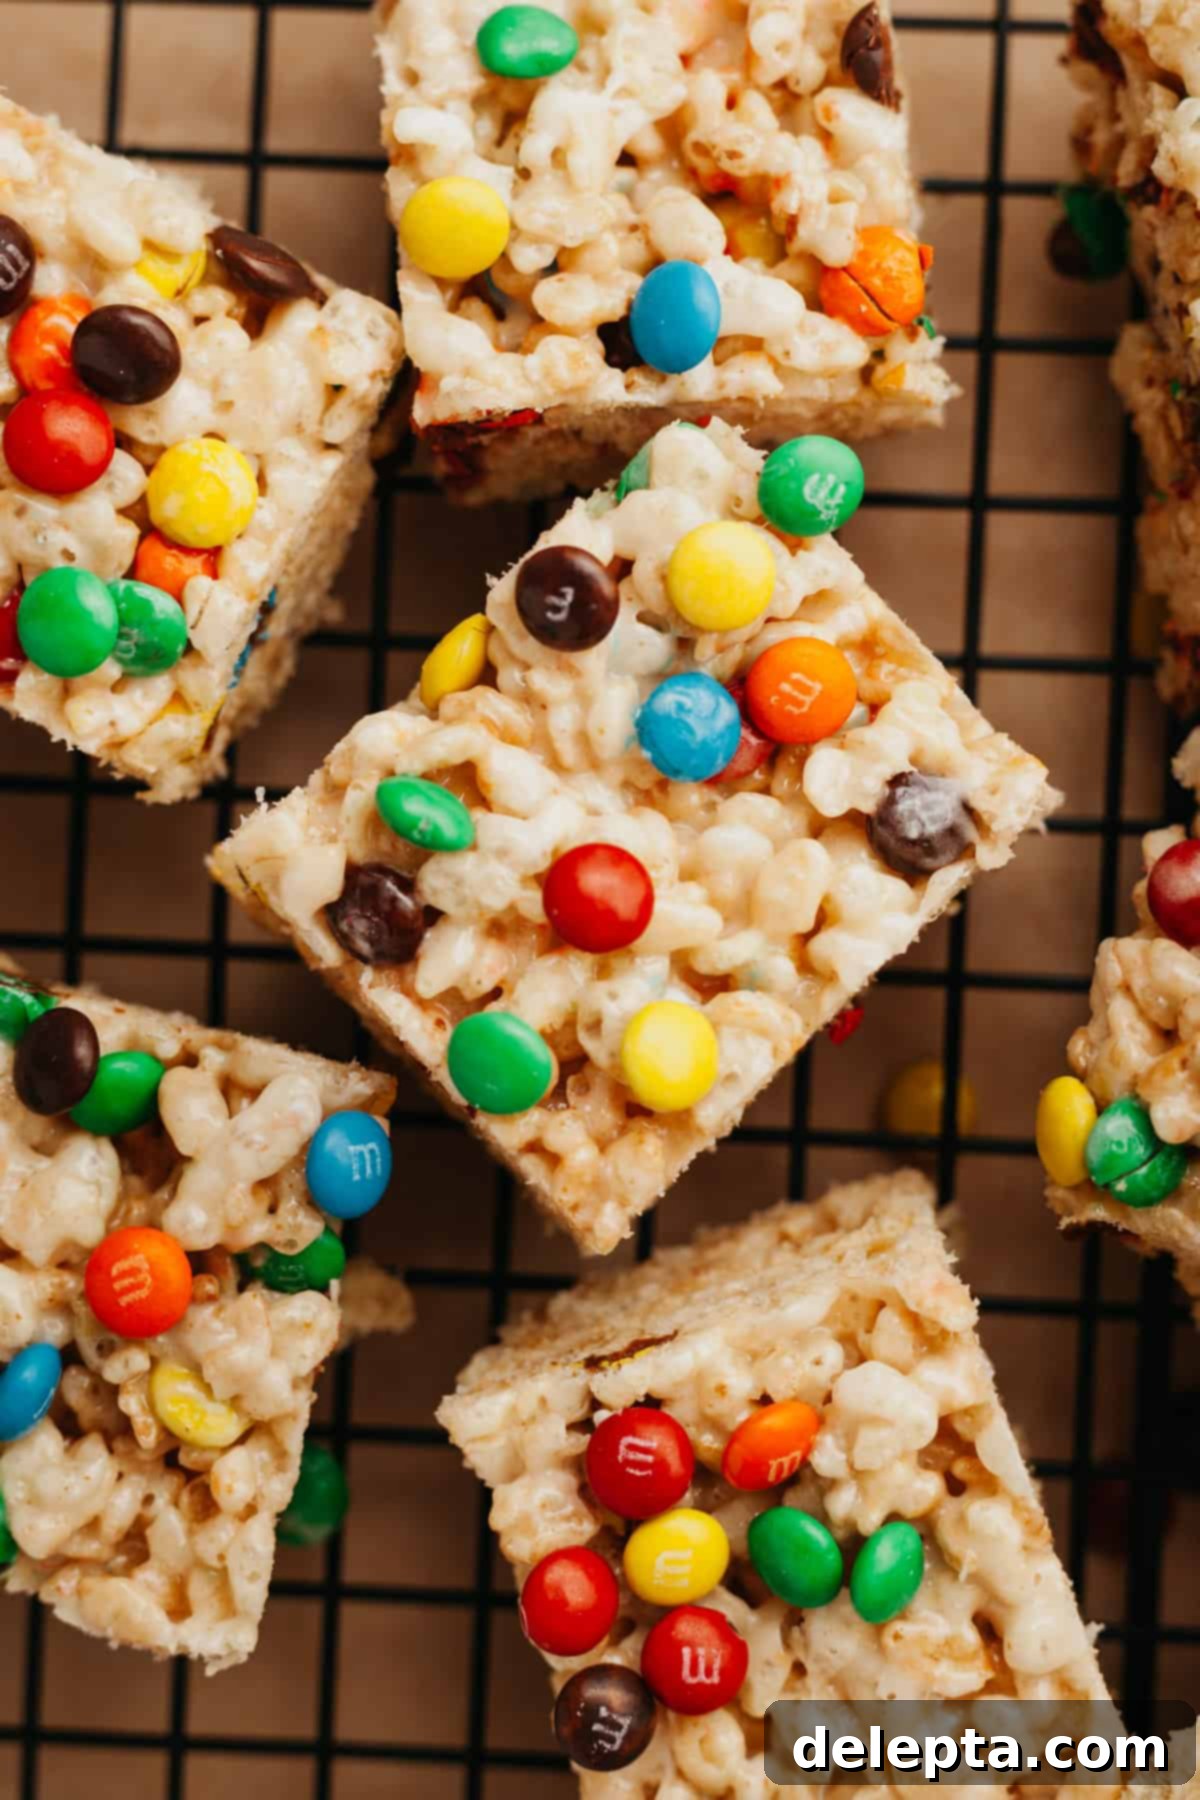
Carefully transfer the M&M Rice Krispie Treat mixture into your prepared 8×8-inch baking pan. To ensure a tender and chewy texture, gently pat the mixture down with an offset spatula or the back of a lightly buttered/greased rubber spatula. Resist the urge to press too firmly, as over-compressing can result in dense, hard treats instead of delightfully gooey ones. If you like, sprinkle a few extra mini M&Ms on top for an even more enticing finish. Once evenly distributed, let the treats set at room temperature for at least 2 hours, or place them in the refrigerator for about 1 hour for a quicker set. Once fully firm, use the parchment paper overhang to lift the entire slab out of the pan, then slice into 16 perfect squares. The wait is truly the hardest part!
Expert Tips & Tricks for Perfect M&M Rice Krispie Treats
Achieving the ultimate gooey and chewy M&M Rice Krispie Treats is simple with these insider tips and tricks:
- Proper Pan Preparation is Key: Don’t skip lining your baking pan! Make sure when you line the pan that the parchment paper is slightly overhanging on two opposite sides. This simple step creates convenient “handles” that will make it incredibly easy to lift the entire set block of M&M Rice Krispie Treats out of the pan once they’ve cooled and set, allowing for clean, effortless slicing. A little cooking spray on the parchment can also help.
- Patience with Cooling: This is a crucial step! Allow the M&M Rice Krispie Treats to cool completely and set before attempting to remove them from the pan or slice them. You need them to firm up entirely; otherwise, they’ll be incredibly difficult to slice neatly and might fall apart, losing their shape and delightful chewiness. Refrigerating them for an hour is a great shortcut.
- The Magic of Browning the Butter: While you can certainly just melt the butter, taking the extra few minutes to brown it is a game-changer! Browning the butter brings out a rich, nutty, and complex flavor that will make these Rice Krispie squares so much more delicious and sophisticated. Keep a close eye on the butter as it browns; swirl occasionally and remove from heat as soon as the milk solids at the bottom turn a beautiful golden-brown and smell fragrant, to prevent burning.
- Strategic M&M Addition: Timing is everything when adding your candies. Always take the saucepan completely off the stove after melting the marshmallows and combining with the cereal, *then* add the M&Ms. If you add the M&Ms while the pan is still on the heat or the mixture is too hot, it could melt the candy shells, causing the colors to bleed and creating a muddy, less appealing appearance. Gently fold them in for vibrant, intact candies.
- Don’t Over-Compress: When pressing the mixture into the prepared pan, resist the urge to compact it too firmly. Use a light touch with an offset spatula or the back of a buttered spoon. Pressing too hard will squeeze out the air pockets, resulting in dense, hard, and less enjoyable treats. A gentle pat is all you need to create an even surface while maintaining that desirable chewy texture.
- Fresh Marshmallows Matter: For the best gooey texture and meltability, always use fresh marshmallows. Older, stale marshmallows can be harder to melt smoothly and may result in a tougher treat.
- Use Quality Vanilla: Since there are so few ingredients, the quality of each really shines through. A good quality vanilla extract will significantly improve the overall flavor profile.
- Lightly Grease Your Hands/Spatula: If the mixture is too sticky to work with when pressing into the pan, lightly grease your hands or the spatula with a little butter or non-stick cooking spray. This will prevent sticking and make the process much smoother.
Creative Variations & Flavor Customizations
While the classic M&M Rice Krispie Treat is perfect on its own, this recipe is incredibly versatile and lends itself beautifully to creative variations. Feel free to experiment and make these treats uniquely yours!
- Chocolate Beyond M&Ms:
- Chocolate Chips: Swap out half or all of the M&Ms for chocolate chips (milk, semi-sweet, dark, or even white chocolate chips).
- Chopped Candy Bars: Fold in chopped pieces of your favorite chocolate bars, like Snickers, Milky Way, or Reese’s Peanut Butter Cups, for an extra indulgent twist.
- Drizzle: Once the treats are set, melt some chocolate (white, milk, or dark) and drizzle it over the top for an elegant finish. Add sprinkles before the drizzle sets!
- Nutty Additions:
- Chopped Nuts: Stir in a handful of chopped pecans, walnuts, or peanuts for added texture and a nutty flavor.
- Peanut Butter Swirl: After melting the marshmallows, swirl in a tablespoon or two of creamy peanut butter for a delightful peanut butter and chocolate combination.
- Extract Enhancements:
- Almond Extract: Replace a quarter of the vanilla extract with almond extract for a delicate, nutty aroma.
- Peppermint Extract: For a festive twist, especially around the holidays, add a few drops of peppermint extract to the marshmallow mixture.
- Citrus Zest: A little lemon or orange zest can add a surprising burst of freshness to the sweet treats.
- Seasonal & Themed Treats:
- Holiday M&Ms: Easily adapt these treats for any holiday! Use red and green M&Ms for Christmas, pastels for Easter, orange and black for Halloween, or red, white, and blue for the Fourth of July.
- Sprinkles: Before the treats fully set, sprinkle some colorful sprinkles on top for an extra festive touch.
- Other Cereal Combos:
- Chex Mix: Try using a combination of Rice Chex and Rice Krispies for a slightly different texture.
- Fruity Cereal: For an even more colorful and fruity treat, consider using a portion of Fruity Pebbles or Froot Loops alongside the Rice Krispies.
- Spices:
- A pinch of cinnamon or nutmeg can add a cozy warmth to the treats, especially during colder months.
Frequently Asked Questions (FAQ)
Here are some common questions you might have about making these M&M Rice Krispie Treats, along with helpful answers:
Absolutely! This recipe is incredibly adaptable. Feel free to use regular-sized M&Ms if you prefer, or get creative with seasonal M&Ms for holidays like Halloween, Fourth of July, Christmas, and Valentine’s Day. You can also mix in other small chocolate candies, chopped chocolate bars, or even chocolate chips for a unique twist.
No problem! If you’re out of traditional marshmallows, you can use marshmallow fluff as an alternative. I actually have a dedicated rice krispie treat recipe that uses marshmallow fluff here. Simply follow that recipe’s instructions for the marshmallow fluff base and then incorporate the M&Ms as directed in this recipe.
Not significantly for the final taste and texture, but it can affect melting time. You can use either mini marshmallows or regular-sized marshmallows. Just note that the regular-sized ones will take slightly longer to melt completely in the saucepan. Mini marshmallows tend to melt faster and more evenly.
There are a few common culprits. Firstly, make sure you’re melting the marshmallows over low heat and stirring constantly; overcooking marshmallows can make them tough. Secondly, avoid pressing the mixture too firmly into the pan. Compacting it too much removes air pockets, resulting in dense, hard treats. A gentle pat is all that’s needed.
This is a common issue! Lightly butter your hands or spray your rubber spatula with non-stick cooking spray before pressing the mixture into the pan. You can also dampen your hands slightly with water. This creates a barrier and helps prevent the sticky marshmallow mixture from adhering.
While unsalted butter is recommended for better control over the salt content, you can use salted butter in a pinch. If you do, omit the added salt in the recipe or significantly reduce it (e.g., to ⅛ teaspoon) to prevent the treats from becoming too salty. Taste as you go if you’re unsure.
Proper Storage for Freshness
To keep your M&M Rice Krispie Treats wonderfully fresh and chewy, proper storage is essential. I recommend storing these delightful squares in an airtight container at room temperature. They will maintain their best quality for up to 4-5 days – if they even manage to last that long in your household, given how irresistible they are!
Avoid refrigerating them for extended periods, as the cold temperature can cause the treats to become very firm and hard. If you do refrigerate them, let them come to room temperature for about 15-30 minutes before serving to restore their characteristic gooey texture. Freezing is generally not recommended as it can significantly alter the texture, making them crumbly or tough upon thawing.
Discover More No-Bake Delights!
If you’ve enjoyed the simplicity and deliciousness of these no-bake M&M Rice Krispie Treats, you’re in for a treat! Explore some of my other fantastic no-bake recipes that are just as easy to make and equally satisfying:
- Rice Krispie Treats with Marshmallow Fluff
- No Bake Peanut Butter Fudge
- Biscoff Rice Krispie Treats
- No Bake Cheesecake with Mascarpone
Have you made this incredibly easy and delicious recipe? Please take a moment to rate it below and share your experience! Don’t forget to follow me on Instagram @alpineella and Pinterest to see what I’m baking next and share your creations!
Recipe Card: M&M Rice Krispie Treats
M&M Rice Krispie Treats
Ella Gilbert
Pin Recipe
Save RecipeSaved!
Equipment
-
8×8 inch pan (or 9×9 inch for thinner bars)
-
Large saucepan
-
Rubber spatula or wooden spoon
-
Parchment paper
Ingredients
- 4 cups Rice Krispies cereal
- ½ stick (4 tablespoons) unsalted butter
- 10 ounce bag marshmallows (mini or regular)
- ½ teaspoon salt
- ¼ teaspoon vanilla extract (pure preferred)
- ½ cup mini M&Ms (plus extra for sprinkling, optional)
Instructions
-
Line an 8×8 inch baking pan (or 9×9 inch for thinner bars) with parchment paper, allowing an overhang on two sides for easy removal, and set aside.
-
In a large saucepan, melt the butter over medium-low heat. Continue to cook, stirring occasionally, until the butter begins to brown and small, fragrant brown flakes appear at the bottom of the pan. This browning will take about 3-5 minutes and adds a wonderful nutty flavor. Immediately remove the pan from the heat.
- Add the marshmallows, salt, and vanilla extract to the browned butter. Return the saucepan to low heat (or off heat if pan is still hot) and stir constantly with a rubber spatula until the marshmallows are completely melted and smooth – this should take about 3 minutes. Turn the heat off and remove the saucepan from the burner once fully melted.
Notes
Marshmallows: You can use either regular-sized large marshmallows or mini marshmallows for this recipe. Both will yield delicious results, though mini marshmallows may melt a bit faster. If you’re looking for a delightful twist or don’t have traditional marshmallows, check out this recipe for Rice Krispie treats made with marshmallow fluff, and simply add M&Ms to it!
M&Ms: I’ve opted for mini M&M’s in this recipe, which are widely available at major grocery stores and retailers like Target. However, you can absolutely substitute with regular-sized M&Ms or get festive with seasonal M&Ms to match any holiday! Get creative and make them your own.
Storage: Once the treats have completely set, slice them into 16 bars and store them in an airtight container at room temperature. They will remain wonderfully fresh and chewy for up to 5 days. For optimal texture, I do not recommend freezing these treats, as it can significantly alter the delightful gooey consistency upon thawing. If they become slightly firm, allowing them to sit at room temperature for a while can help restore their chewiness.
Nutrition Information
