The Ultimate Guide to Soft & Chewy Chocolate Chip Cookies Without Brown Sugar
Ever crave a batch of warm, gooey chocolate chip cookies only to discover your brown sugar jar is empty? Don’t let that baking dilemma derail your plans! This incredible recipe for chocolate chip cookies without brown sugar is your new go-to. Requiring just 8 simple ingredients, these cookies are surprisingly easy to make and deliver a delightful soft, chewy texture with a delicious gooey center, reminiscent of a classic sugar cookie but elevated with rich chocolate chips. You’ll be amazed at how quickly these come together, turning a potential baking crisis into a triumph!
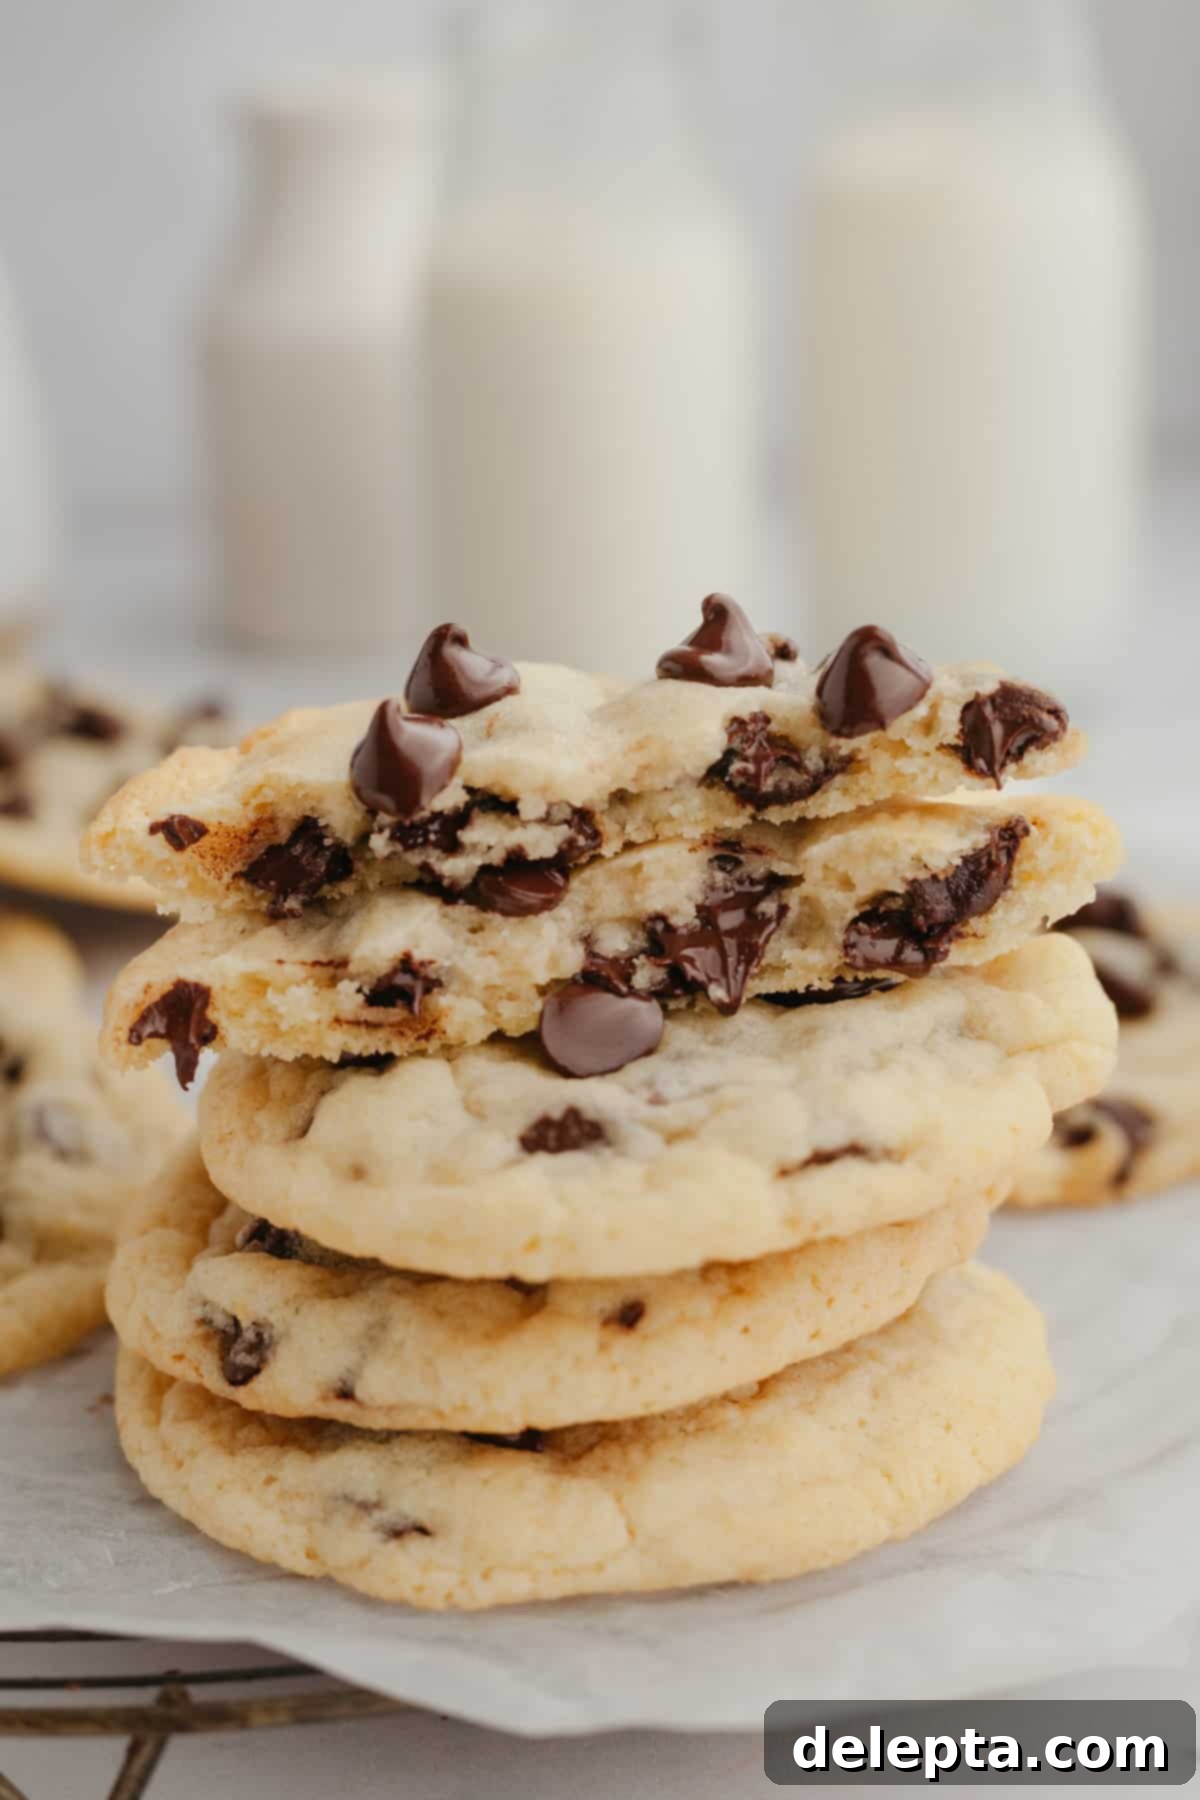
This beloved recipe was originally shared in December 2021 and has since been thoughtfully updated with a refined ingredient list and enhanced baking techniques, accompanied by brand new, mouth-watering images to inspire your next baking adventure.
We’ve all been there: a sudden craving for homemade chocolate chip cookies, only to open the pantry and find that crucial ingredient, brown sugar, missing. It can be incredibly frustrating! But fear not, because these chocolate chip cookies, made exclusively with granulated white sugar, are the perfect solution. They don’t just fill a void; they create a unique and equally delicious cookie experience that might just become your new favorite!
With a texture that beautifully marries the soft chewiness of a traditional sugar cookie with the rich indulgence of chocolate chips, these cookies are a delightful twist on a timeless classic. This truly is an incredibly straightforward recipe, suitable for bakers of all skill levels. The most challenging part? The anticipation of waiting for the cookie dough to properly chill in the refrigerator, ensuring perfectly shaped and wonderfully chewy results!
Discover the Magic of These No-Brown Sugar Chocolate Chip Cookies!
- Simple Pantry Staples: You’ll love that these chocolate chip cookies require just 8 basic ingredients. Chances are, you already have everything you need in your kitchen, making them perfect for spontaneous baking sessions!
- The Perfect Brown Sugar Substitute: This recipe is a lifesaver if you’ve run out of brown sugar or simply prefer not to use it. It proves that you don’t need brown sugar to achieve a wonderfully soft and flavorful chocolate chip cookie.
- Irresistible Texture: Prepare for cookies that are incredibly soft and delightfully chewy, with a luscious, slightly gooey center that melts in your mouth. They offer a unique texture profile compared to their brown sugar counterparts.
- Essential Chill Time: To ensure your cookies maintain their perfect shape and don’t spread too much during baking, chilling the dough for at least 2 hours is crucial. This step allows the butter to firm up, resulting in a thicker, more satisfying cookie.
- A Unique Flavor Profile: While similar to a sugar cookie in its use of granulated sugar, the addition of chocolate chips transforms it into a distinct and equally beloved treat. You’ll enjoy a brighter, cleaner sugar flavor that truly lets the chocolate shine.
Essential Ingredients for Your Granulated Sugar Chocolate Chip Cookies
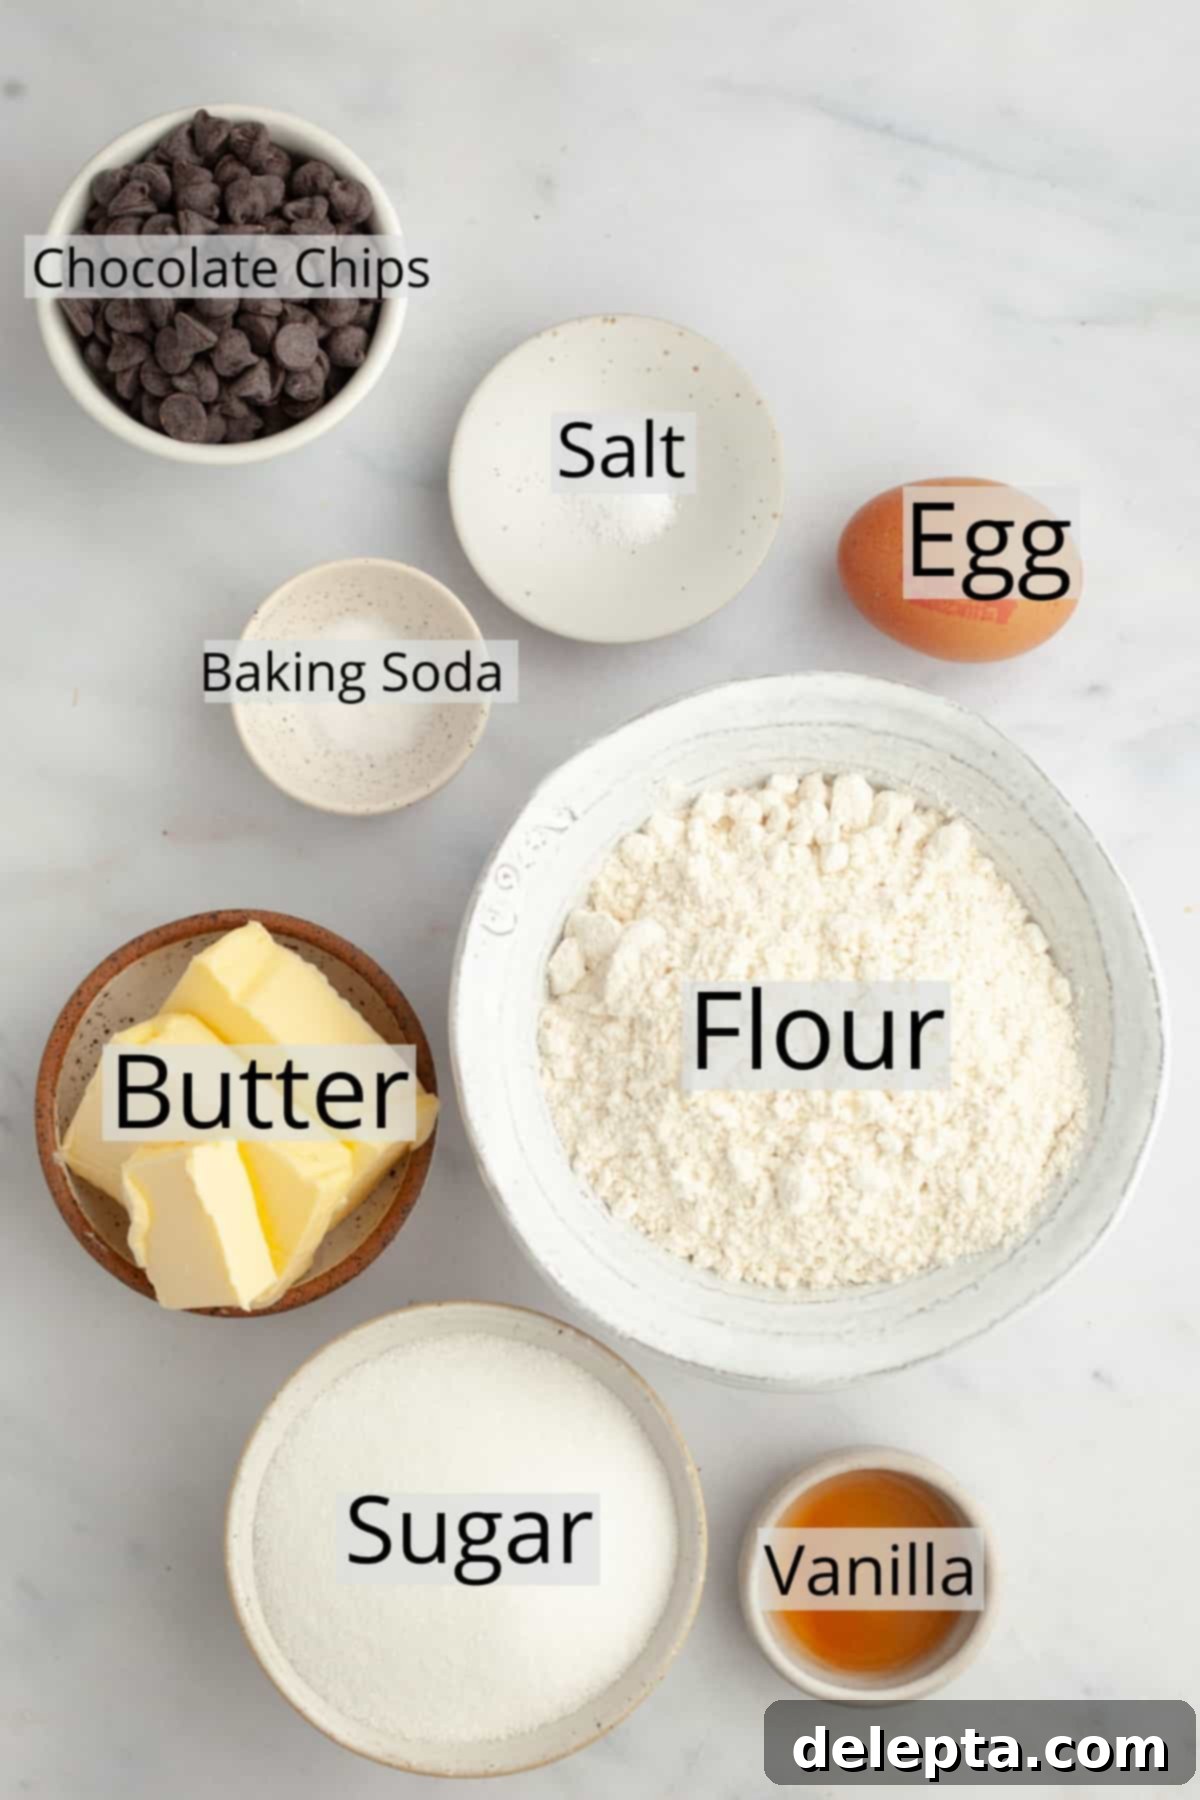
- All-Purpose Flour: The foundational dry ingredient for our cookies. It provides the structure. For best results, I always recommend weighing your flour with a kitchen scale rather than using measuring cups, as this ensures unparalleled accuracy and prevents adding too much, which can lead to dry, dense cookies.
- Chocolate Chips: This is where you can truly personalize your cookies! Feel free to use your favorite type of chocolate chips—bittersweet, semisweet, milk, or even white chocolate. Dark chocolate chips are my personal favorite as they wonderfully balance the sweetness of the granulated sugar. For an extra touch of luxury and varied texture, you can also chop up a high-quality chocolate bar if that’s what you have on hand.
- Unsalted Butter: Using unsalted butter allows you to control the total salt content in your recipe. I consistently opt for European-style butter in my baking. This type of butter boasts a higher butterfat content, which contributes significantly to a richer, creamier dough and a superior final texture in your baked goods. Ensure your butter is at room temperature for optimal creaming.
- Granulated White Sugar: Since we’re making these without brown sugar, granulated sugar is our sole sweetener. It plays a crucial role in creating a crisper edge and a beautifully chewy interior, differentiating these cookies from their brown sugar counterparts and giving them a delightful sugar cookie-like quality with added chocolate goodness.
- Baking Soda: This acts as our primary leavening agent. Baking soda reacts with acidic ingredients (even mild ones in flour or chocolate) to produce carbon dioxide, which helps the cookies rise and spread, contributing to that desired soft and chewy texture. Using baking powder would result in a cakeier cookie, which isn’t what we’re aiming for here.
- Salt: A pinch of salt is vital for balancing the sweetness and enhancing all the other flavors in the cookie. I typically use kosher salt, specifically Diamond Crystal salt, as it has a lighter, flakier texture compared to standard table salt. If using fine table salt, remember to halve the amount specified in the recipe.
- Egg: A single large egg binds all the ingredients together, providing moisture, structure, and richness. Ensure your egg is at room temperature for better emulsification with the creamed butter and sugar.
- Vanilla Extract: Essential for imparting that classic, warm, and comforting cookie flavor. Use a good quality pure vanilla extract for the best results.
Easy Step-by-Step Instructions for Perfect Cookies
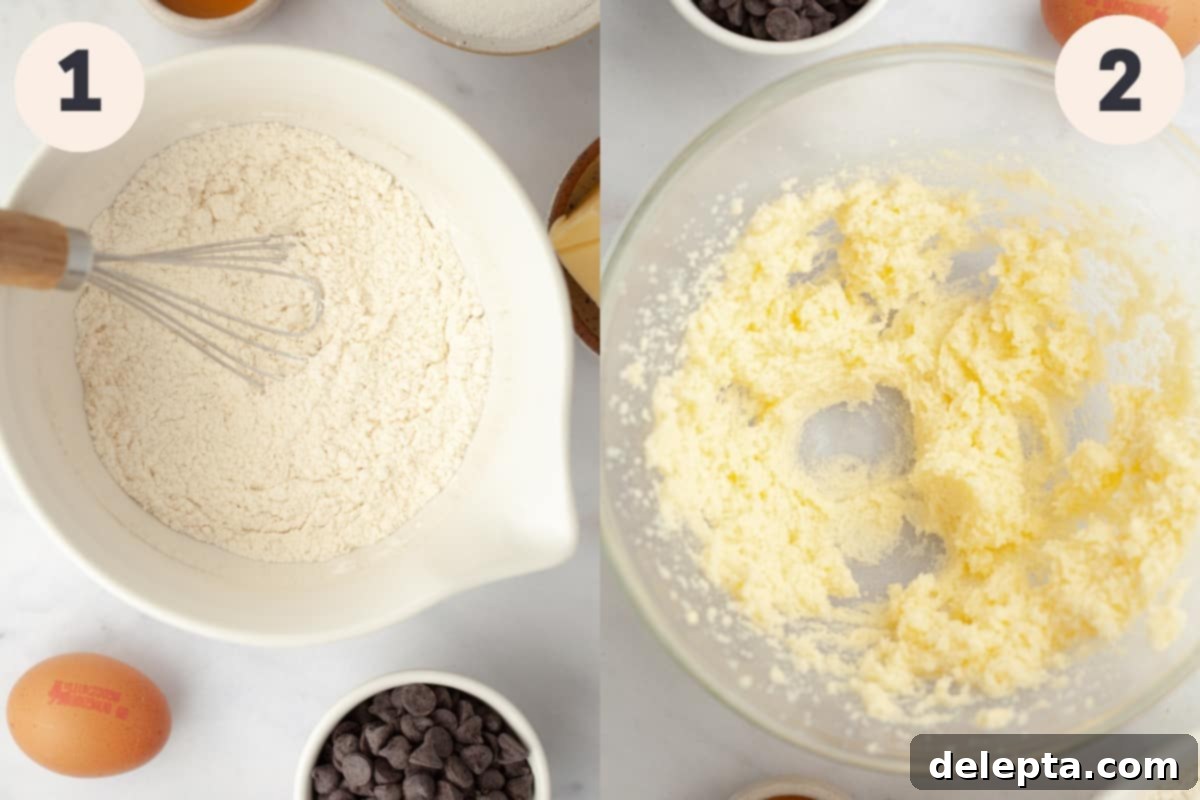
Step 1: Prepare Your Dry Ingredients. In a medium-sized mixing bowl, whisk together your all-purpose flour, baking soda, and salt. Make sure these dry ingredients are thoroughly combined to ensure even distribution throughout the cookie dough. Set aside.
Step 2: Cream Butter and Sugar. In the bowl of a stand mixer fitted with the paddle attachment, or using a large bowl with a handheld electric mixer, combine your room temperature unsalted butter and granulated sugar. Beat them together on medium speed for 1-2 minutes until the mixture becomes wonderfully light, fluffy, and pale in color. This creaming process is crucial as it incorporates air, which contributes to the cookies’ texture.
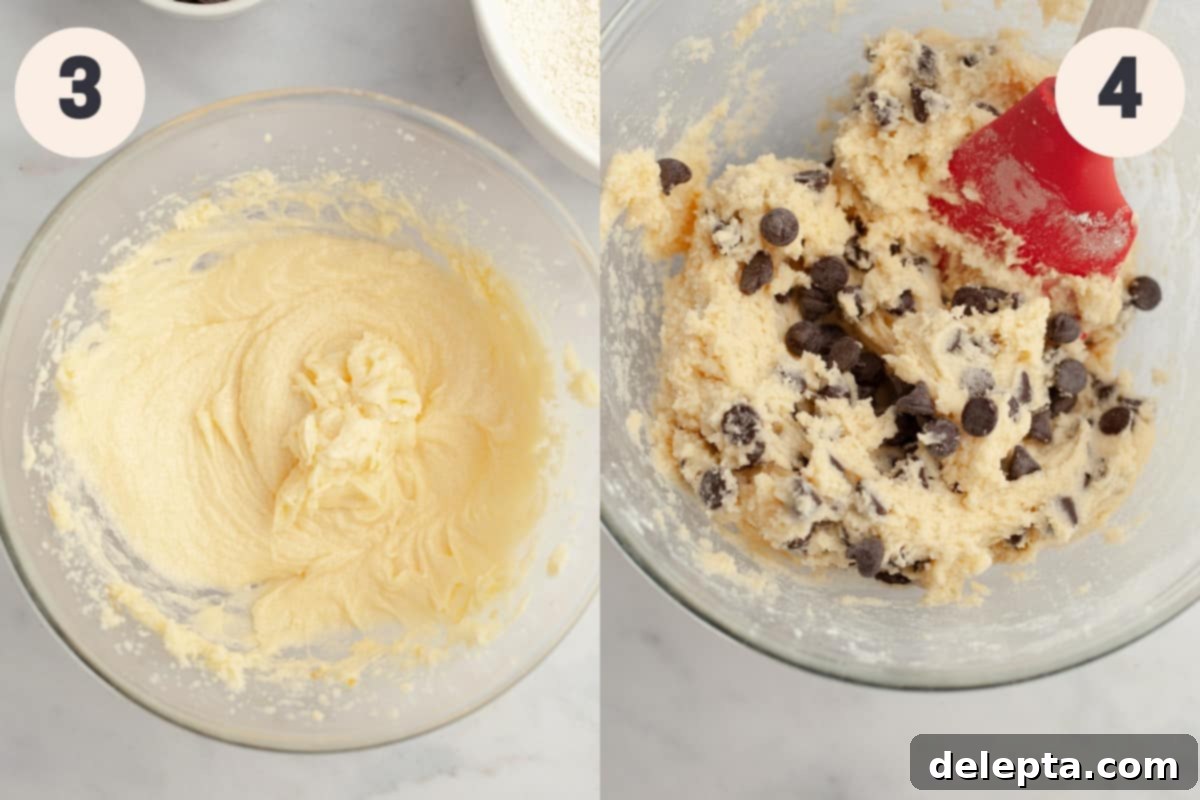
Step 3: Incorporate Wet Ingredients. Add your room temperature egg and vanilla extract to the creamed butter and sugar mixture. Continue to beat on medium speed for about one minute, scraping down the sides and bottom of the bowl as needed, until the egg and vanilla are completely incorporated and the mixture is smooth and cohesive.
Step 4: Combine Wet and Dry Mixtures. Gradually add the whisked dry ingredients into the wet ingredients. Mix on low speed, or use a rubber spatula, until just combined. Be careful not to overmix; stop as soon as there are no more streaks of flour visible. Gently fold in your chosen chocolate chips until they are evenly distributed throughout the dough.
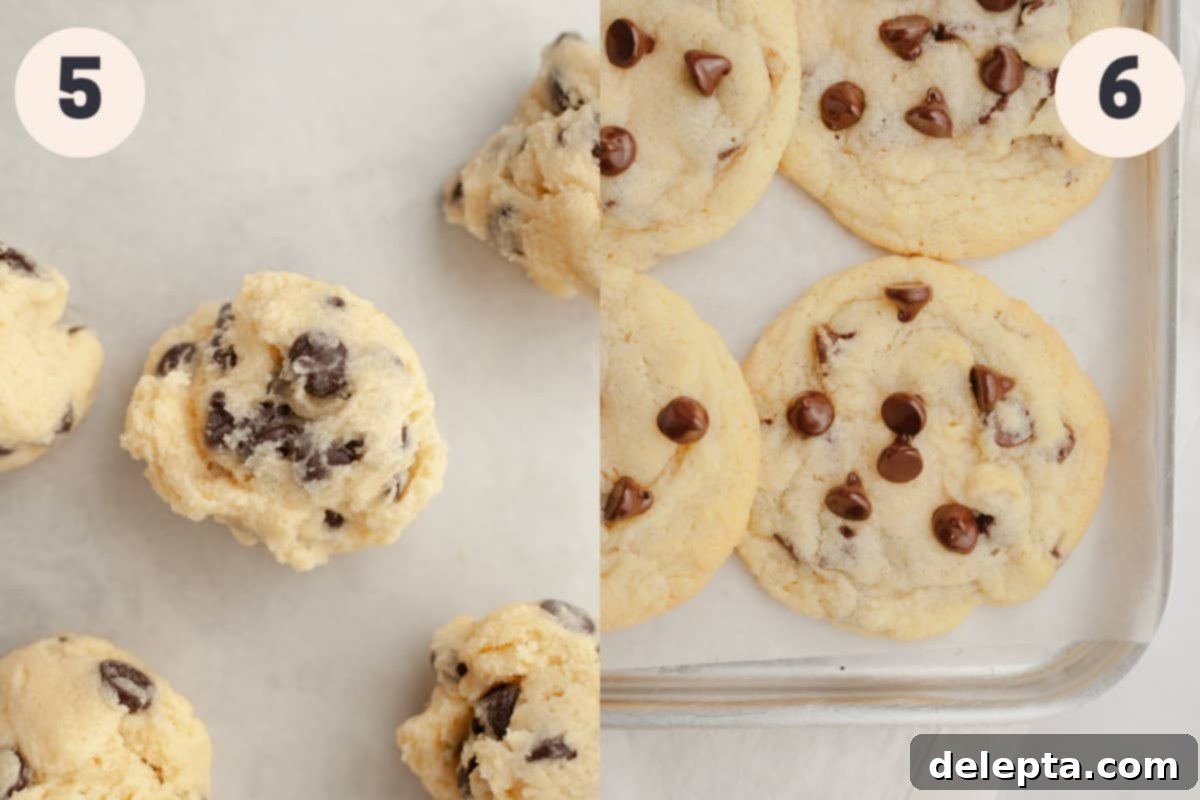
Step 5: Scoop and Chill the Dough. Using a cookie scoop (approximately 2 tablespoons in size) or a regular tablespoon, portion out the dough and roll each portion into a smooth ball. Place the cookie dough balls onto a plate or a baking tray lined with parchment paper. This step is crucial: chill the dough in the refrigerator for a minimum of 2 hours. This chilling period helps the butter firm up, preventing the cookies from spreading too much in the oven and ensures a thicker, chewier final product. You can even chill the dough for up to 3 days, just make sure it’s well covered with cling film to prevent drying out.
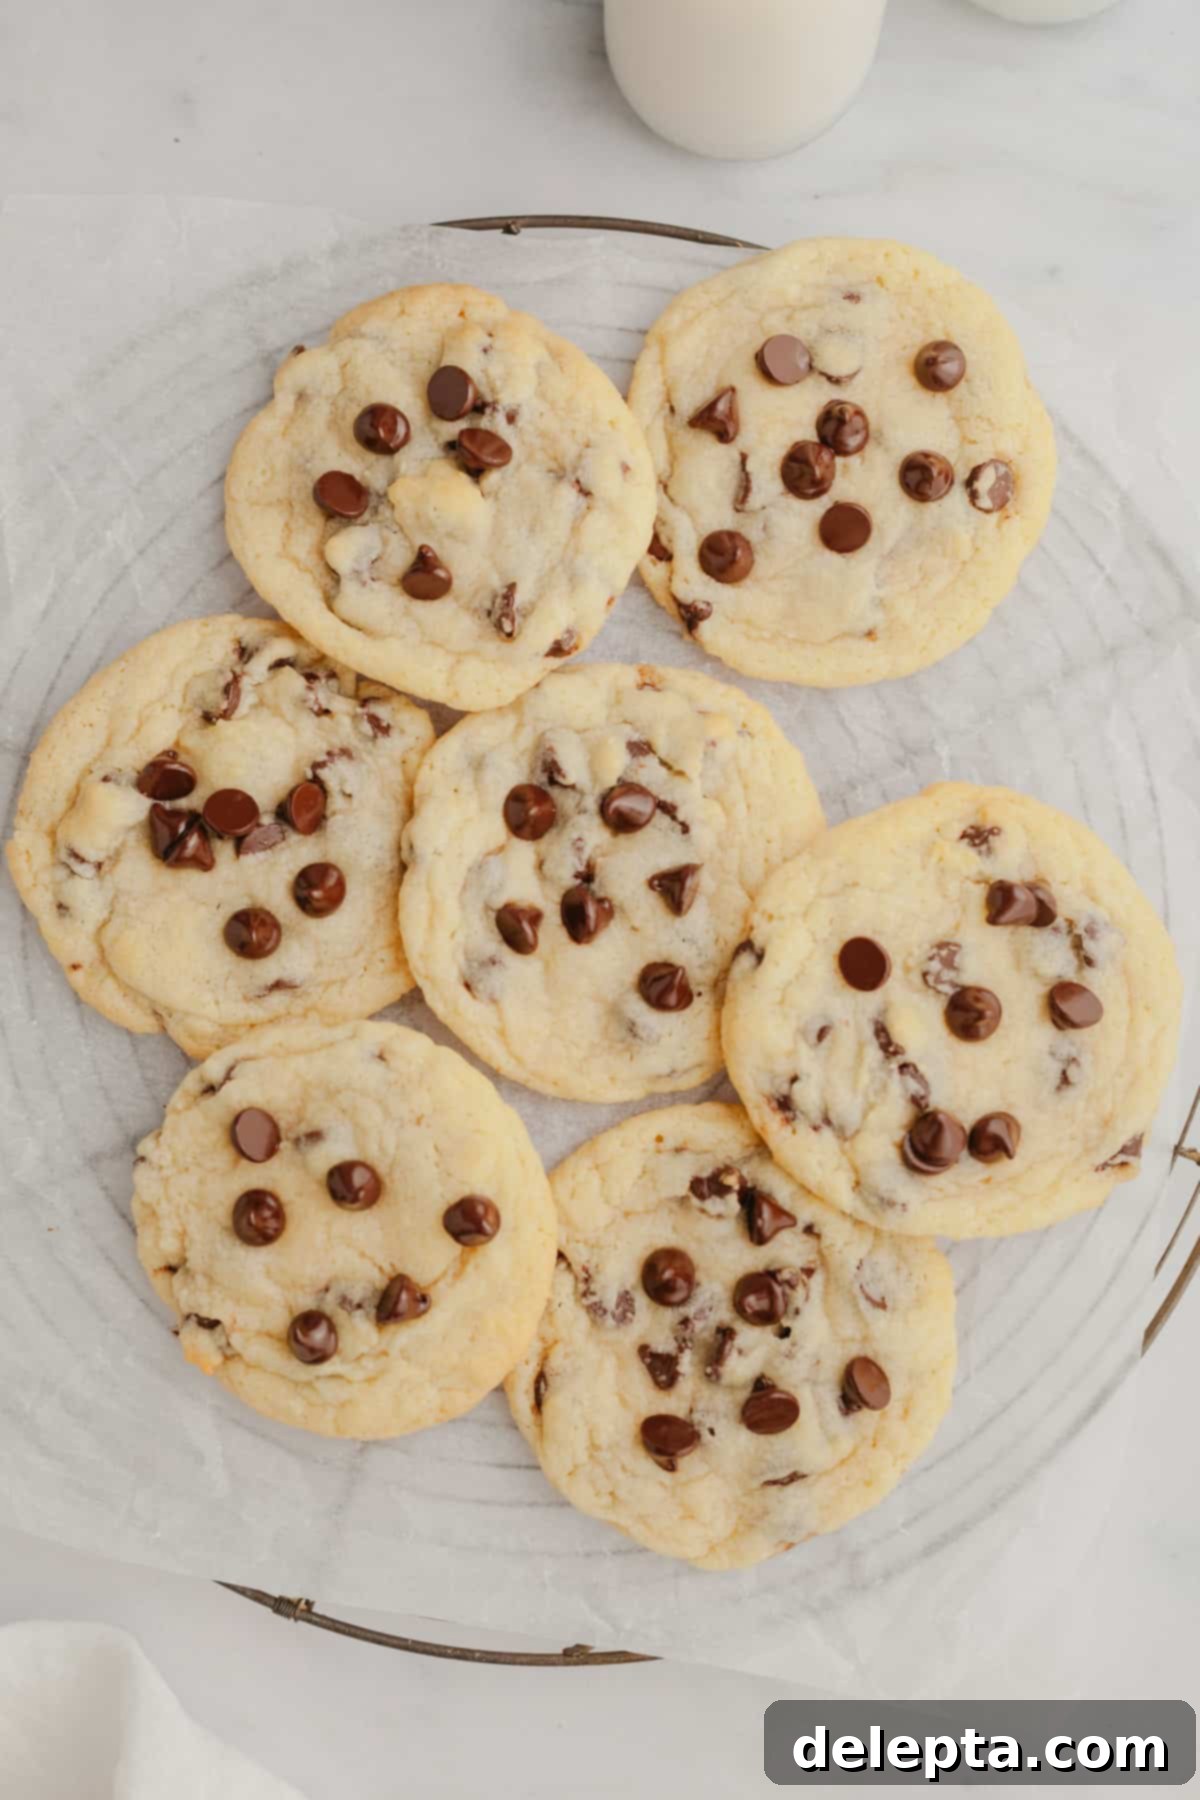
Step 6: Bake to Perfection. Preheat your oven to 350°F (175°C). Line two baking sheets with fresh parchment paper. Arrange the chilled cookie dough balls on the prepared baking trays, ensuring they are spaced about 3 inches apart to allow for spreading. Bake for 12-14 minutes, or until the edges are set and a beautiful golden brown, while the centers still appear slightly underbaked and soft. This ensures a wonderfully gooey middle. Once baked, remove the trays from the oven and let the cookies cool on the baking sheet for 10-15 minutes before carefully transferring them to a wire cooling rack to cool completely. This cooling period on the hot tray continues the baking process subtly and helps the cookies set without crumbling.
Expert Tips & Tricks for Baking Success
- Precision is Key: Weigh Your Ingredients! For truly consistent and perfect baking results, I cannot stress enough the importance of using a kitchen scale and measuring your ingredients, especially flour, using the metric system. It makes a significant difference. It’s incredibly easy to inadvertently add too much flour when using measuring cups, leading to dry, dense, and cakey cookies. A scale eliminates this guesswork, ensuring your cookies are always soft and chewy.
- Room Temperature Matters: Always ensure all your cold ingredients, such as butter and eggs, are at room temperature before you begin mixing. Room temperature butter creams more easily with sugar, incorporating more air, which leads to a lighter texture. Room temperature eggs emulsify better with the butter mixture, resulting in a smoother, more cohesive dough. Plan ahead and pull them out of the fridge at least an hour before you start baking.
- Customize Your Chocolate: While semisweet chocolate chips are a classic choice, don’t hesitate to experiment! You can use milk chocolate chips for a sweeter cookie, dark chocolate for a richer, more intense flavor, white chocolate chips for a creamy sweetness, or even peanut butter chips for a nutty twist. Chopping up a high-quality chocolate bar can also provide lovely varied pockets of melted chocolate throughout the cookies.
- Don’t Skip the Chill Time: Adhering to the full 2-hour chilling period for your cookie dough is absolutely vital for this recipe. This step isn’t just about convenience; it significantly impacts the final texture and appearance of your cookies. Chilling allows the butter to re-solidify, which prevents the dough from spreading excessively in the hot oven, resulting in thicker, chewier cookies with a more concentrated flavor.
- Achieving Your Desired Texture: If you love super soft chocolate chip cookies with gooey centers, follow the recommended baking time. However, if you prefer a chewier cookie with slightly crispier, golden-brown edges, simply bake them for an additional 1-2 minutes until they reach your desired level of crispness. Keep a close eye on them during these extra minutes to prevent over-baking.
- The Secret to Perfectly Round Cookies: For that bakery-perfect aesthetic, once your cookies are fresh out of the oven and still warm and pliable, take a large circular cookie cutter (slightly larger than your cookies) or even a glass. Place it over each cookie and gently scoot the cutter around the cookie in a circular motion. This clever trick will help smooth out any irregular edges and magically transform your cookies into perfectly round masterpieces.
Frequently Asked Questions
Once your cookies are out of the oven, while they are still warm and malleable, grab a large circular cookie cutter or a glass that is slightly larger than your cookie. Place it over the cookie and gently swirl it around the edges. This simple technique helps to reshape any irregular edges, resulting in a beautifully round cookie every time.
Not quite! Traditionally, chocolate chip cookies often contain brown sugar, which contributes to their characteristic chewiness and deeper, molasses-like flavor. Sugar cookies, on the other hand, typically rely solely on granulated white sugar, resulting in a crisper edge and a more uniform texture. This recipe bridges the gap, offering a chocolate chip cookie with the granulated sugar base of a sugar cookie.
Yes, chilling the dough is a non-negotiable step for these cookies! This process solidifies the butter in the dough, which significantly reduces how much the cookies spread in the oven. The result is a thicker, chewier cookie with a more concentrated flavor. Skipping this step would likely lead to flatter, greasier cookies.
Storage & Freezing Instructions
To keep your delicious chocolate chip sugar cookies fresh, store the completely cooled baked cookies in an airtight container at room temperature for up to 5 days. For longer storage, you have two great options:
- Freezing Baked Cookies: Once fully cooled, place the baked cookies in a single layer on a baking sheet and freeze until solid. Then, transfer the frozen cookies to a freezer-safe bag or airtight container, separating layers with parchment paper to prevent sticking. They will keep well in the freezer for up to 2 months. To enjoy, simply let them thaw at room temperature for a few hours.
- Freezing Unbaked Dough: For future freshly baked treats, scoop out the cookie dough balls as directed in the recipe, then place them on a parchment-lined baking sheet and freeze until solid. Once frozen, transfer the dough balls to a freezer-safe bag. They can be stored for up to 2 months. When you’re ready to bake, place the frozen dough balls on a baking sheet and bake as usual, adding an extra 1-3 minutes to the baking time, as they will need a little longer to cook through from frozen.
Expand Your Baking Repertoire: Try These Other Delicious Cookie Recipes!
- Irresistible Chocolate Chip Pecan Cookies
- Hearty Oatmeal Cranberry Walnut Cookies
- Safe & Delicious Edible Sugar Cookie Dough
- Soft and Chewy Sprinkle Sugar Cookies
Have you made these incredible chocolate chip cookies without brown sugar? We’d absolutely love to hear about your experience! Make sure to tag me on Instagram @alpineella and leave a review below to share your thoughts and tips. If you’re looking for even more delightful baking ideas and inspiration, be sure to follow me on Pinterest!
Full Recipe Details

Classic Chocolate Chip Cookies (No Brown Sugar Needed!)
By Ella Gilbert
Pin Recipe
Save Recipe
Saved!
Ingredients
- 1 ¾ cups all-purpose flour
- ½ teaspoon kosher salt
- 1 stick (½ cup) unsalted butter at room temperature
- 1 cup granulated sugar
- 1 large egg at room temperature
- 2 teaspoons pure vanilla extract
- ½ teaspoon baking soda
- 1 cup chocolate chips (semi-sweet or dark chocolate recommended)
Instructions
-
In a medium bowl, whisk together your all-purpose flour, baking soda, and kosher salt. Ensure they are thoroughly combined for even distribution in the dough. Set aside.1 ¾ cups all-purpose flour, ½ teaspoon baking soda, ½ teaspoon kosher salt
-
In a stand mixer fitted with the paddle attachment (or using a hand mixer in a large bowl), beat the room temperature unsalted butter and granulated sugar together on medium speed for 1-2 minutes until the mixture is light, fluffy, and noticeably pale. This step incorporates essential air into the dough.1 stick unsalted butter, 1 cup granulated sugar
-
Add the room temperature egg and pure vanilla extract to the butter mixture. Beat again on medium-high speed for about one minute, making sure to stop and scrape down the bottom and sides of the bowl to ensure everything is fully incorporated.1 large egg, 2 teaspoons pure vanilla extract
-
Gradually fold the whisked dry ingredients into the wet mixture. Mix on low speed, or gently by hand with a rubber spatula, until just combined and no streaks of flour remain. Overmixing can lead to tough cookies. Finally, stir in your chocolate chips until evenly distributed throughout the dough.1 cup chocolate chips
-
Using a cookie scoop (approx. 2 tablespoons) or a tablespoon, portion out the dough and roll each portion into a smooth ball. Place the dough balls onto a plate or a parchment-lined baking tray and chill in the refrigerator for at least 2 hours. This crucial step prevents spreading and creates thicker, chewier cookies. The dough can be chilled for up to 3 days if covered tightly with cling film.
-
Preheat your oven to 350°F (175°C). Line two baking sheets with parchment paper. Arrange the chilled cookie dough balls on the prepared sheets, ensuring they are about 3 inches apart. Bake for 12-14 minutes, or until the edges are golden brown and set, while the centers appear slightly soft and underbaked for a gooey texture.
-
Once baked, remove the cookies from the oven and let them cool on the baking sheet for 10-15 minutes. This allows them to finish setting and prevents crumbling. After this initial cooling, carefully transfer them to a wire cooling rack to cool completely.
Notes
Achieving Chewier Cookies: If you prefer your cookies to have a chewier texture and crispier edges, simply extend the baking time by an additional 1-2 minutes in the oven. Keep a close eye on them to prevent over-baking.
Butter Choice: For a truly rich and creamy bake, I consistently use European-style butter, such as Kerrygold, in my recipes. Its higher butterfat content contributes significantly to the superior flavor and texture of the finished cookies.
Salt Type Matters: This recipe calls for kosher salt. I use Diamond Crystal Kosher Salt, which has a coarser flake and lighter salinity compared to fine table salt. If you are using fine table salt, please halve the amount specified in the recipe (e.g., if the recipe calls for 1 teaspoon of kosher salt, use ½ teaspoon of fine salt) to avoid over-salting. Morton Salt, another type of coarse kosher salt, is also much saltier than Diamond Crystal, so adjust accordingly.
Storage Tips: Store baked and completely cooled chocolate chip cookies in an airtight container at room temperature for up to 5 days to maintain their freshness. For longer storage, you can freeze unbaked cookie dough balls. Simply scoop them, freeze until solid, then transfer to a freezer-safe bag. When ready to bake, place frozen dough balls on a baking sheet and bake for an extra minute or two beyond the recommended time.
Nutrition Information
Carbohydrates: 40g
Protein: 2g
Fat: 13g
Saturated Fat: 8g
Polyunsaturated Fat: 0.4g
Monounsaturated Fat: 2g
Trans Fat: 0.3g
Cholesterol: 34mg
Sodium: 149mg
Potassium: 71mg
Fiber: 0.5g
Sugar: 25g
Vitamin A: 255IU
Calcium: 18mg
Iron: 1mg
Tried this recipe?Leave a comment below! You can also tag me on Instagram @alpineella so I can see what you made!
