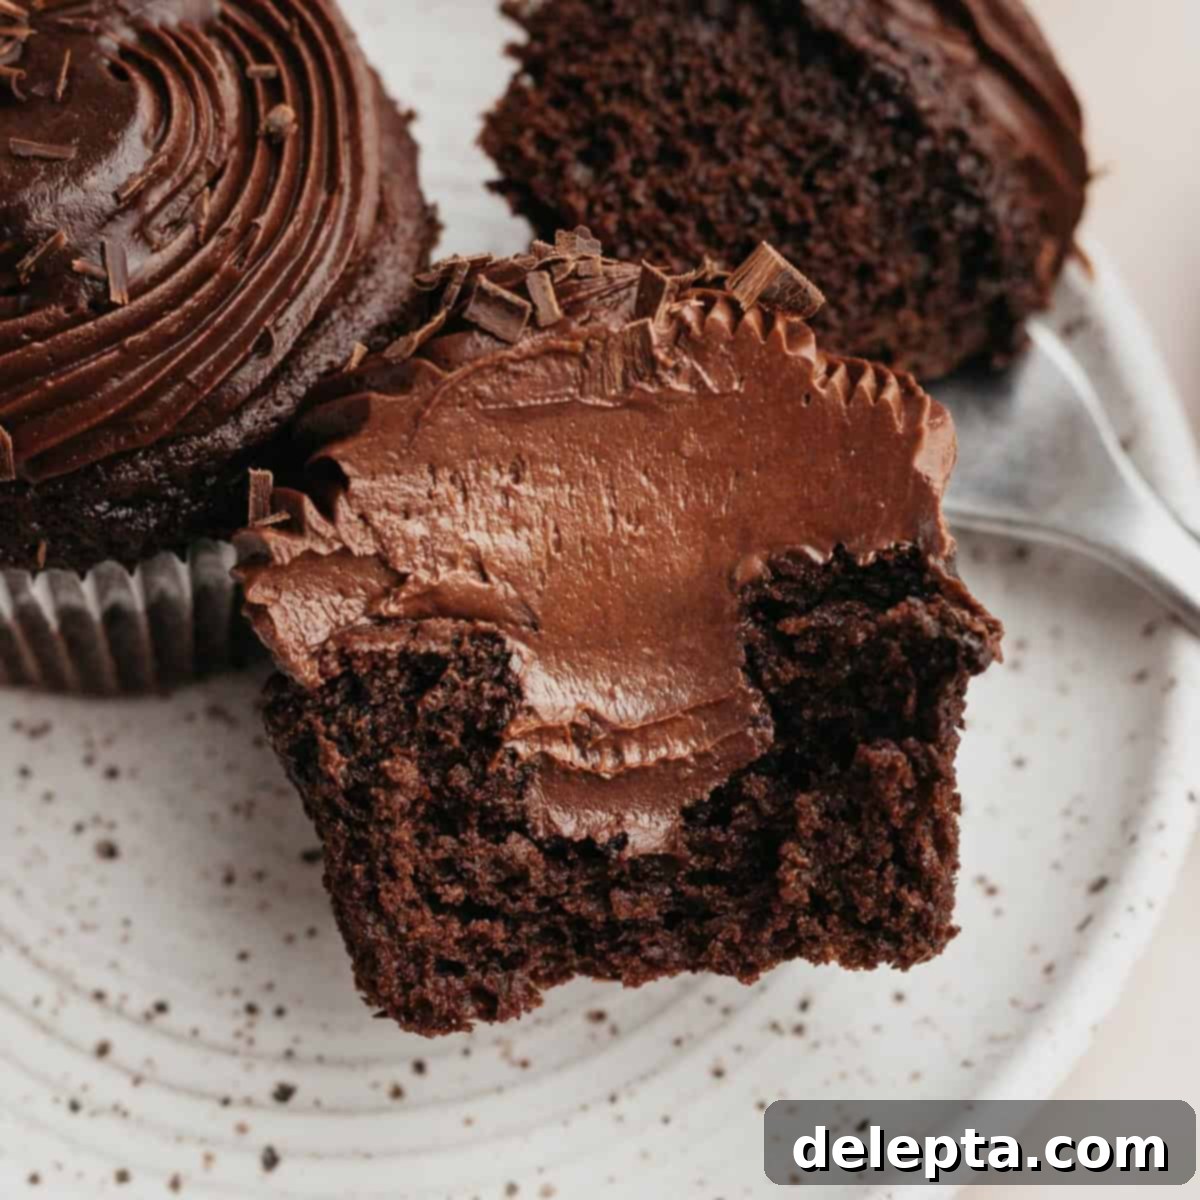
Irresistible Chocolate Fudge Cupcakes: Ultra-Moist with Homemade Ganache Filling & Whipped Frosting
Prepare yourself for a truly indulgent treat! These chocolate fudge cupcakes are the ultimate dream for any chocolate enthusiast. Imagine biting into incredibly moist chocolate cupcakes, each one generously filled with luscious homemade chocolate ganache and crowned with a decadent, super fudgy whipped chocolate ganache frosting. What makes this recipe even sweeter? You don’t need a stand mixer to create these bakery-quality delights, making them accessible for home bakers of all skill levels. They are perfect for celebrations, gatherings, or simply when a serious chocolate craving strikes.
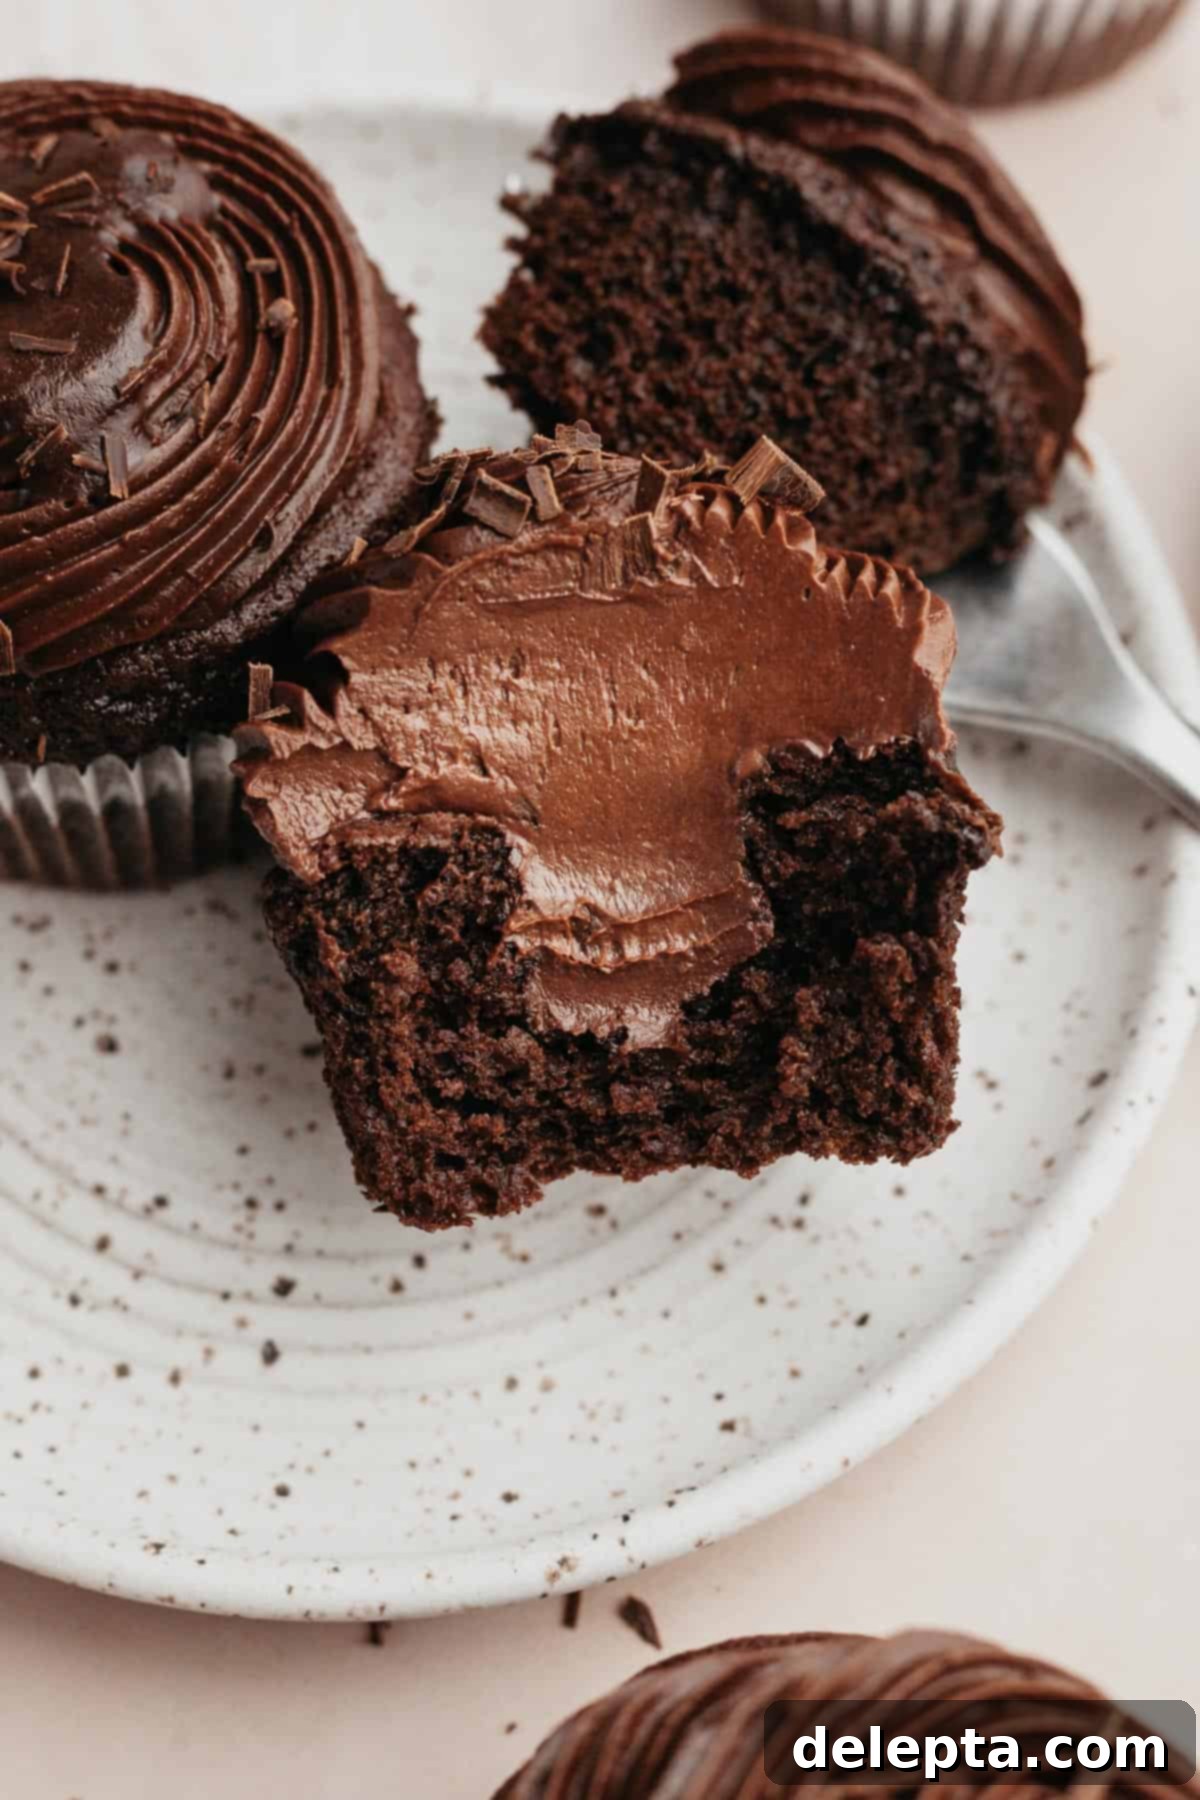
These chocolate fudge cupcakes are akin to the cupcake rendition of my beloved triple chocolate layer cake – but in a perfectly portable, personal size! Each bite delivers an unparalleled richness, making these super indulgent cupcakes taste like pure, melt-in-your-mouth fudge. As a devoted admirer of chocolate desserts, I confidently consider this to be the definitive chocolate cupcake recipe, designed to satisfy even the most intense cocoa cravings.
When I embark on the journey of developing and testing new recipes for my blog, my primary goal is always to discover methods that simplify the baking process, requiring less specialized equipment, while still yielding truly impressive and delicious results. These chocolate fudge cupcakes embody that philosophy perfectly! You won’t need a bulky stand mixer for the cupcake batter itself. Furthermore, both the velvety ganache filling and the fluffy frosting are crafted with just three simple ingredients, making them surprisingly easy to prepare. Decorating these beauties is also a breeze, ensuring a stunning presentation without complicated techniques. If you’re on the hunt for even more delightful chocolate cupcake options, be sure to explore my recipe for chocolate cupcakes with cream cheese frosting, offering a slightly different, yet equally delicious, flavor profile.
[feast_advanced_jump_to]
Recipe Snapshot: Why You’ll Love These Fudge Cupcakes
- Unbelievably Moist Texture: The secret to their incredible moisture lies in the use of oil instead of butter in the cupcake batter. Oil distributes more evenly throughout the batter, resulting in a crumb that stays exceptionally soft and moist for days, without drying out.
- No Mixer Required: Forget about lugging out your heavy stand mixer! The cupcake batter comes together beautifully with just a whisk and two bowls. This simplicity makes the recipe more accessible and cleanup a breeze, perfect for busy bakers.
- Guaranteed Crowd Pleaser: This recipe yields a dozen perfect cupcakes, making them an ideal choice for birthday parties, potlucks, or any celebration. Who can resist a rich, chocolatey cupcake? Certainly not me, and I’m confident your guests will feel the same way! Their decadent flavor and elegant appearance make them a surefire hit.
- Luxurious Fudge Filling: Each cupcake is generously filled with a rich, homemade chocolate ganache. This simple yet sophisticated addition elevates these from ordinary chocolate cupcakes to an extraordinary dessert experience. And I promise, making homemade ganache is far easier than you might think! It adds an extra layer of chocolate intensity that truly sets these cupcakes apart.
Behind the Scenes: The Evolution of This Chocolate Cupcake Recipe
Developing the perfect chocolate cupcake often involves meticulous testing and refinement. Much like my popular chocolate walnut cake and chocolate Nutella filled cupcakes, these particular chocolate cupcakes feature an oil base instead of butter. My extensive testing has consistently shown that using a neutral oil, such as vegetable or canola oil, is paramount for achieving a consistently super soft, tender, and incredibly moist crumb that retains its freshness for several days. Butter, while offering a rich flavor, can sometimes lead to a slightly drier texture in cupcakes and can be more prone to becoming dense when overmixed.
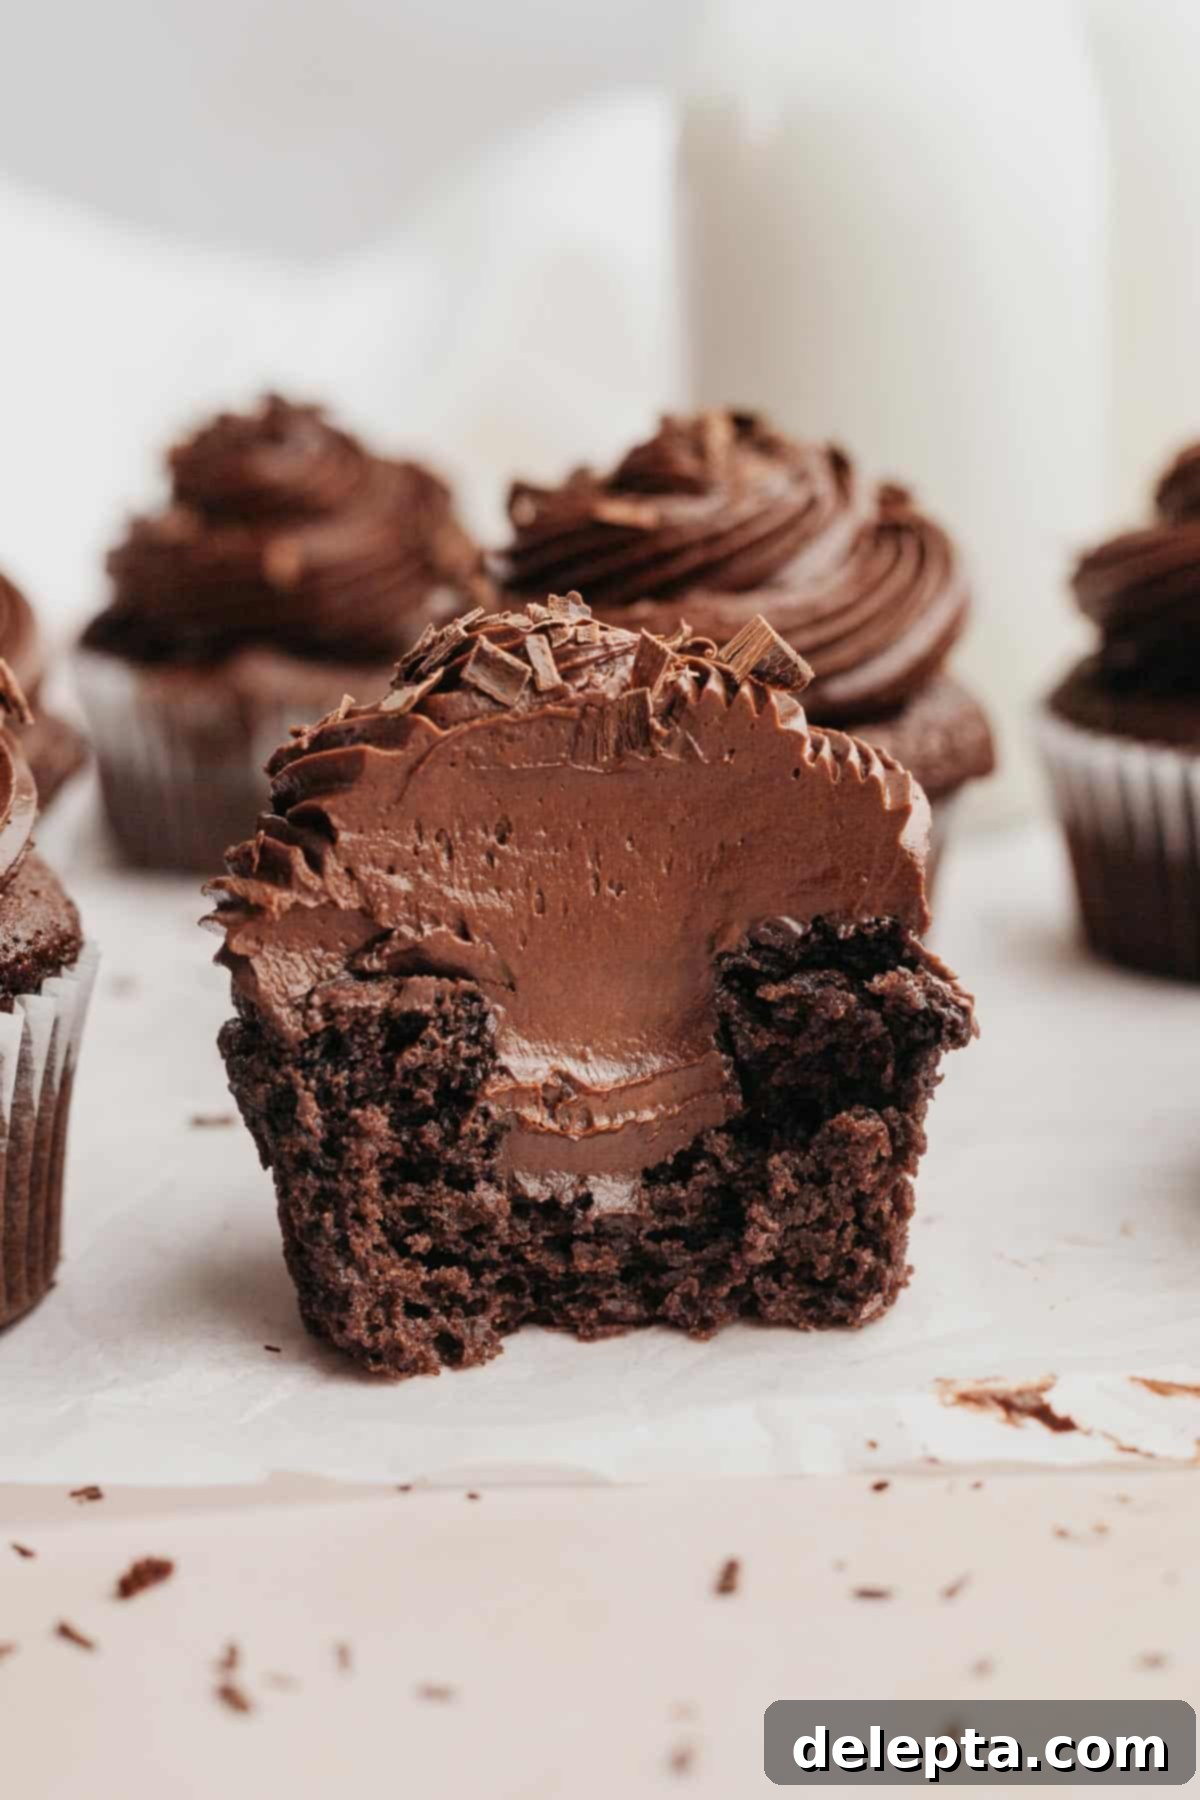
During the initial stages of this recipe’s development, these chocolate cupcakes were delicious but lacked a distinctive “wow” factor. They were simply topped with a classic chocolate frosting. I wanted to create something truly unique and intensely indulgent. Given that the planned topping was a whipped chocolate ganache frosting, an idea sparked: “What if I filled each cupcake with ganache as well?” This simple addition proved to be a game-changer. Filling each cupcake with a hidden core of smooth, rich ganache not only enhances the chocolate flavor dramatically but also contributes significantly to their moistness and overall luxuriousness. It transforms them into an incredibly rich and indulgent experience, elevating them from a standard cupcake to a truly gourmet dessert.
Essential Ingredients for Decadent Fudge Cupcakes
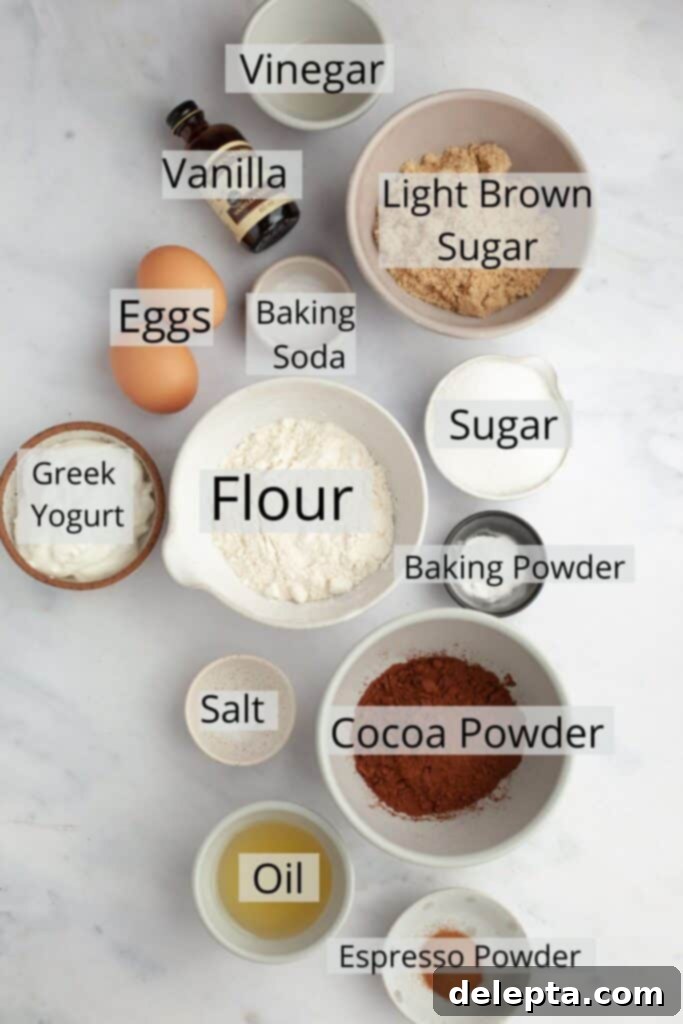
- All-Purpose Flour: For these particular cupcakes, I have exclusively tested and developed the recipe using standard all-purpose flour. Its balanced protein content provides the perfect structure without making the cupcakes too dense.
- Dutch-Processed Cocoa Powder: This is a crucial ingredient for achieving a deep, dark chocolate color and a smoother, less acidic chocolate flavor. Not sure what kind you have in your pantry? Simply check the ingredients label! If it explicitly mentions “alkali” or “acidity regulator,” then you have dutch-processed cocoa powder. This type of cocoa reacts differently with leavening agents compared to natural cocoa, which is why the vinegar in this recipe is important.
- Greek Yogurt: This seemingly unconventional ingredient is a secret weapon for creating exceptionally moist and tender cupcakes. The yogurt’s acidity tenderizes the crumb, and its fat content contributes to a rich, velvety texture that lasts. Ensure it’s at room temperature for optimal mixing.
- Espresso Powder: Don’t worry, this isn’t going to make your cupcakes taste like coffee! Its primary role is to intensify and deepen the natural chocolate flavor, making it richer and more robust. It acts as a flavor enhancer, much like salt enhances savory dishes.
- Neutral Oil: Opt for a neutral-flavored oil such as vegetable oil or canola oil. These oils contribute significantly to the cupcakes’ moistness and tender crumb, and unlike butter, they remain liquid at room temperature, keeping the cupcakes soft for longer.
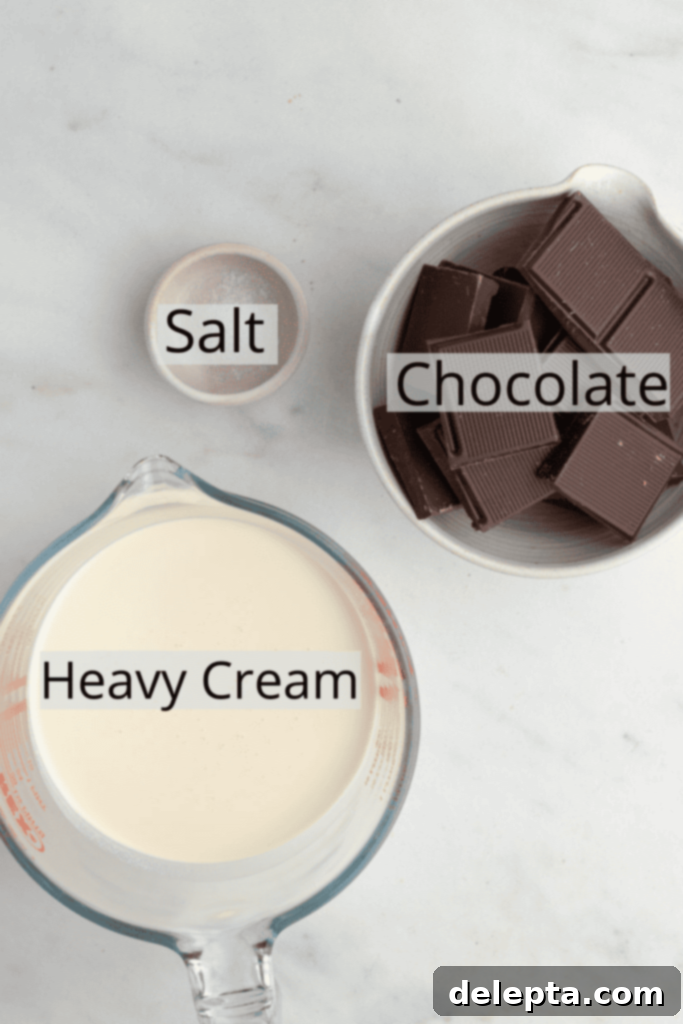
- High-Quality Chocolate: For the ganache (both filling and frosting), using a high-quality chocolate bar is paramount. I strongly advise against using chocolate chips, as they often contain emulsifiers and stabilizers that make them resist melting smoothly, leading to a grainy or separated ganache. Look for a bar with 60-70% cacao for best results.
- Heavy Whipping Cream: This ingredient forms the creamy base of your ganache. In many European countries, you can use “double cream” as an equivalent. Ensure it has a high fat content (at least 35%) for a stable and luxurious ganache.
For precise measurements and detailed instructions, please refer to the comprehensive recipe card below.
Get Creative: Flavor Variations & Ingredient Swaps
- Greek Yogurt Alternatives: If Greek yogurt isn’t available or preferred, you can easily substitute it with an equal amount of sour cream or buttermilk. Both options will provide the necessary acidity and moisture to keep your cupcakes tender and delicious.
- Alternative Frosting Options: While the whipped chocolate ganache frosting is truly divine, if you desire a different flavor or texture, feel free to swap it out. My fudgy chocolate sour cream frosting is an excellent alternative, offering a rich, tangy, and deeply chocolatey finish.
- Cocoa Powder Considerations: This recipe calls for Dutch-processed cocoa powder. If your pantry only holds natural cocoa powder, it’s essential to omit the white vinegar from the cupcake batter. Natural cocoa is acidic and reacts differently with baking soda than Dutch-processed cocoa, so adjusting for this ensures proper leavening.
- Decadent Chocolate Strawberry Cupcakes: For a delightful fruity twist, replace the chocolate ganache filling with a vibrant homemade strawberry cake filling or even a high-quality store-bought strawberry jam. The combination of rich chocolate and sweet, tart strawberries is simply irresistible.
- Simplified Double Chocolate Option: If you’re short on time or prefer a less intense chocolate experience, you can certainly skip making the second batch of chocolate ganache for the filling. The cupcakes will still be wonderfully rich and moist, making them delicious double chocolate cupcakes topped with the whipped ganache frosting.
Step-by-Step Guide: Crafting Your Chocolate Fudge Cupcakes
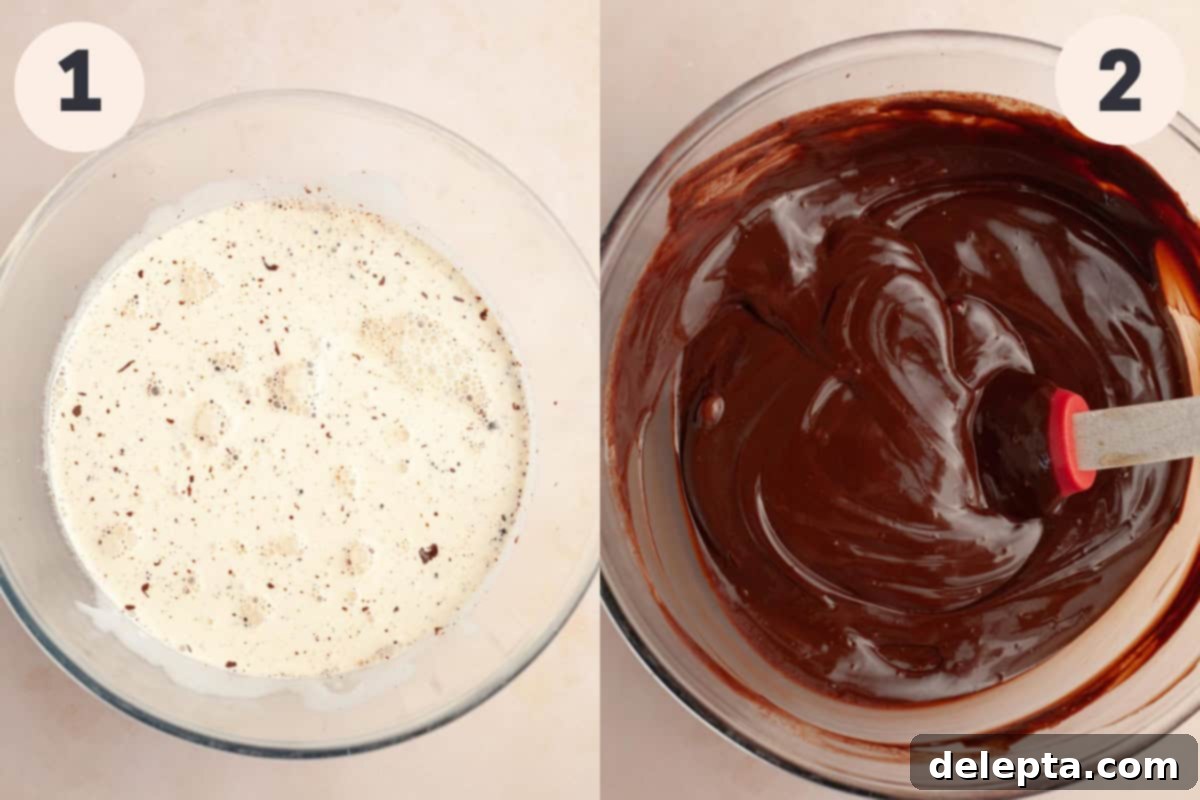
Step 1: Prepare the Chocolate Ganache. Begin by making your chocolate ganache. This crucial step requires several hours for the ganache to properly set and achieve the right consistency, so I highly recommend tackling this first. Place your finely chopped high-quality chocolate into a large, heatproof bowl. In a small saucepan or microwave-safe container, gently heat the heavy whipping cream until it reaches a gentle simmer, just before it begins to boil. Immediately pour the hot cream over the chopped chocolate and let it sit undisturbed for 5 minutes. This allows the hot cream to melt the chocolate evenly.
Step 2: Emulsify the Ganache. After the chocolate has had time to melt, use a rubber spatula (avoid a whisk, as it can introduce too many air bubbles, leading to a less smooth ganache) to gently stir the heavy cream and chocolate together. Start stirring from the center, gradually working your way outwards until the mixture is completely smooth, glossy, and emulsified. If you notice any stubborn unmelted chocolate pieces, you can microwave the ganache in very short 5-10 second bursts, stirring well after each interval, until fully melted. Allow the ganache to sit at room temperature for several hours until it hardens to a spreadable but firm consistency, similar to soft peanut butter.
Baking Tip: Two Batches for Perfect Portions! Even though the frosting and the filling utilize the exact same ingredients and preparation method, I discovered during my recipe testing that it was significantly easier and more efficient to prepare the ganache in two separate batches. This approach allowed me to precisely control and know exactly how much ganache I had designated for the frosting and how much for the filling, eliminating the need for tricky portioning later on. It ensures you have enough for both layers without any guesswork.
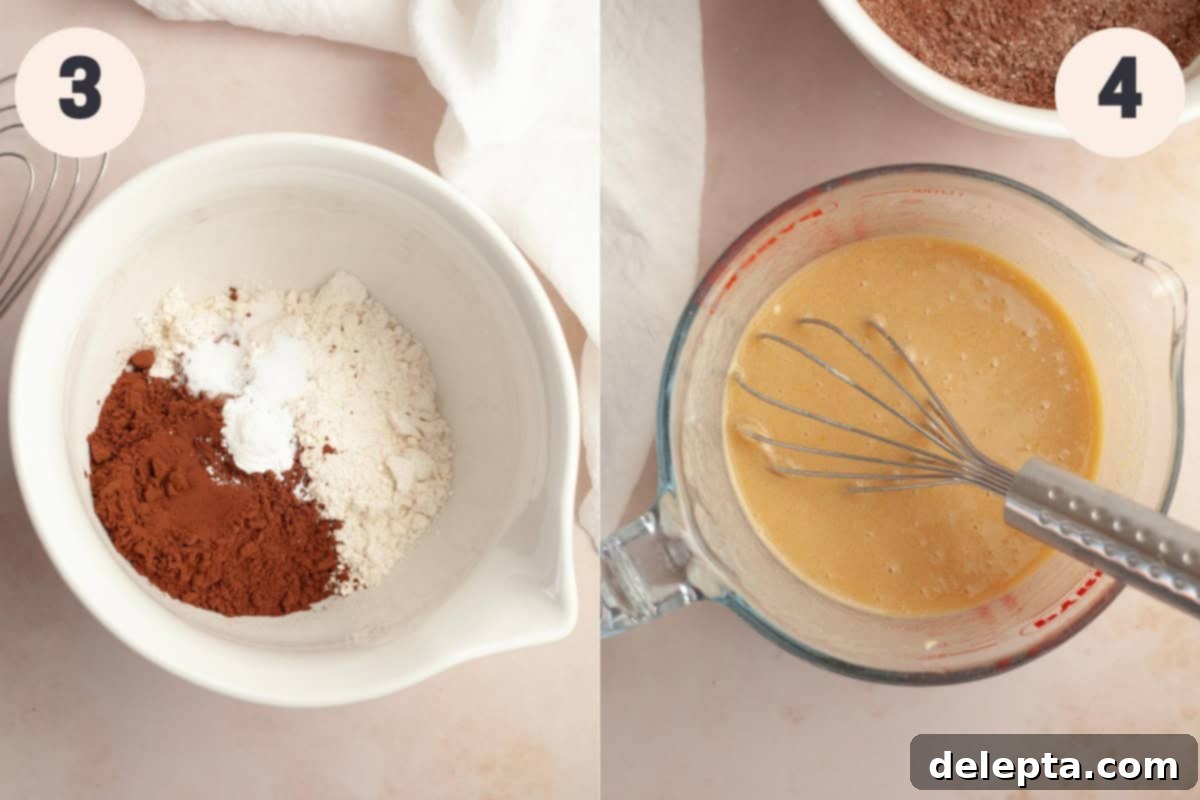
Step 3: Prepare Dry Ingredients and Oven. Preheat your oven to 350°F (175°C) and line a 12-cup cupcake pan with paper liners. Using the right pan is key, I personally love this one from Nordic Ware for its even baking. In a large mixing bowl, thoroughly whisk together all the dry ingredients: the all-purpose flour, Dutch-processed cocoa powder, baking powder, baking soda, and kosher salt. Whisking ensures they are well combined and evenly distributed throughout the batter.
Step 4: Combine Wet Ingredients. In a separate large measuring jug or a medium bowl, whisk together the wet ingredients until completely smooth. This includes the room temperature large eggs, Greek yogurt, neutral oil (vegetable or canola), vanilla extract, white granulated sugar, light brown sugar, the prepared coffee (espresso powder dissolved in hot water), and white vinegar. The vinegar reacts with the baking soda and Dutch-processed cocoa to create a light and airy crumb, while the coffee enhances the chocolate flavor without adding a distinct coffee taste.
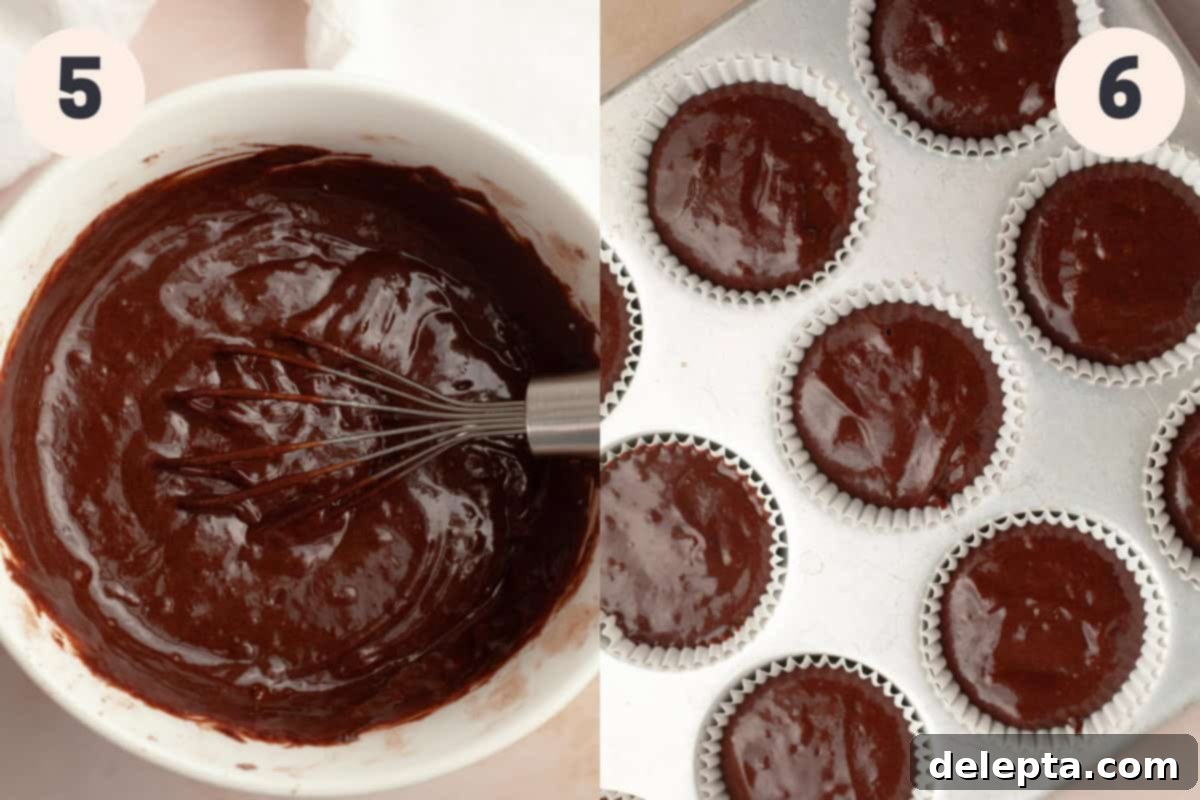
Step 5: Mix the Batter. Pour the wet ingredients mixture into the bowl containing the dry ingredients. Using a rubber spatula, gently fold everything together until the batter is just smooth and no streaks of dry flour remain. Be careful not to overmix, as overmixing can develop the gluten in the flour, resulting in tough, dry cupcakes. A few small lumps are perfectly fine.
Step 6: Bake the Cupcakes. Evenly distribute the chocolate cupcake batter among the prepared cupcake liners. I find that a large cookie scoop or an ice cream scoop works perfectly for this, ensuring consistent sizes. Fill each liner approximately ¾ of the way full to allow for proper rising without overflowing. Bake for 18-20 minutes, or until a toothpick inserted into the center of a cupcake comes out clean or with only a few moist crumbs attached. Let the cupcakes cool in the pan for about 10 minutes to firm up slightly before carefully transferring them to a wire cooling rack to cool completely. This prevents them from becoming soggy.
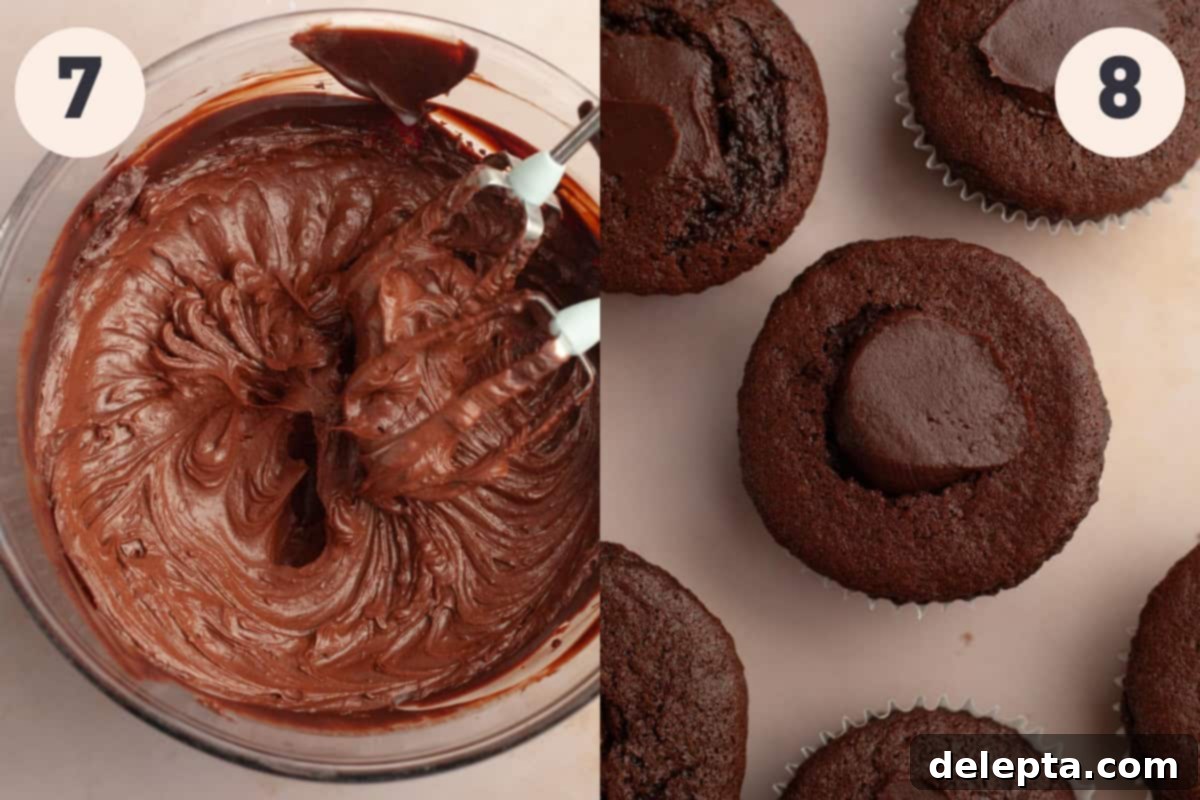
Step 7: Create Whipped Ganache Frosting. Once the larger batch of chocolate ganache (designated for frosting) has set at room temperature to a firm but still pliable consistency, use a handheld electric mixer to whip it. Beat on medium-high speed until the ganache becomes light, fluffy, and noticeably paler in color, similar to a rich mousse. This is your luxurious whipped chocolate ganache frosting!
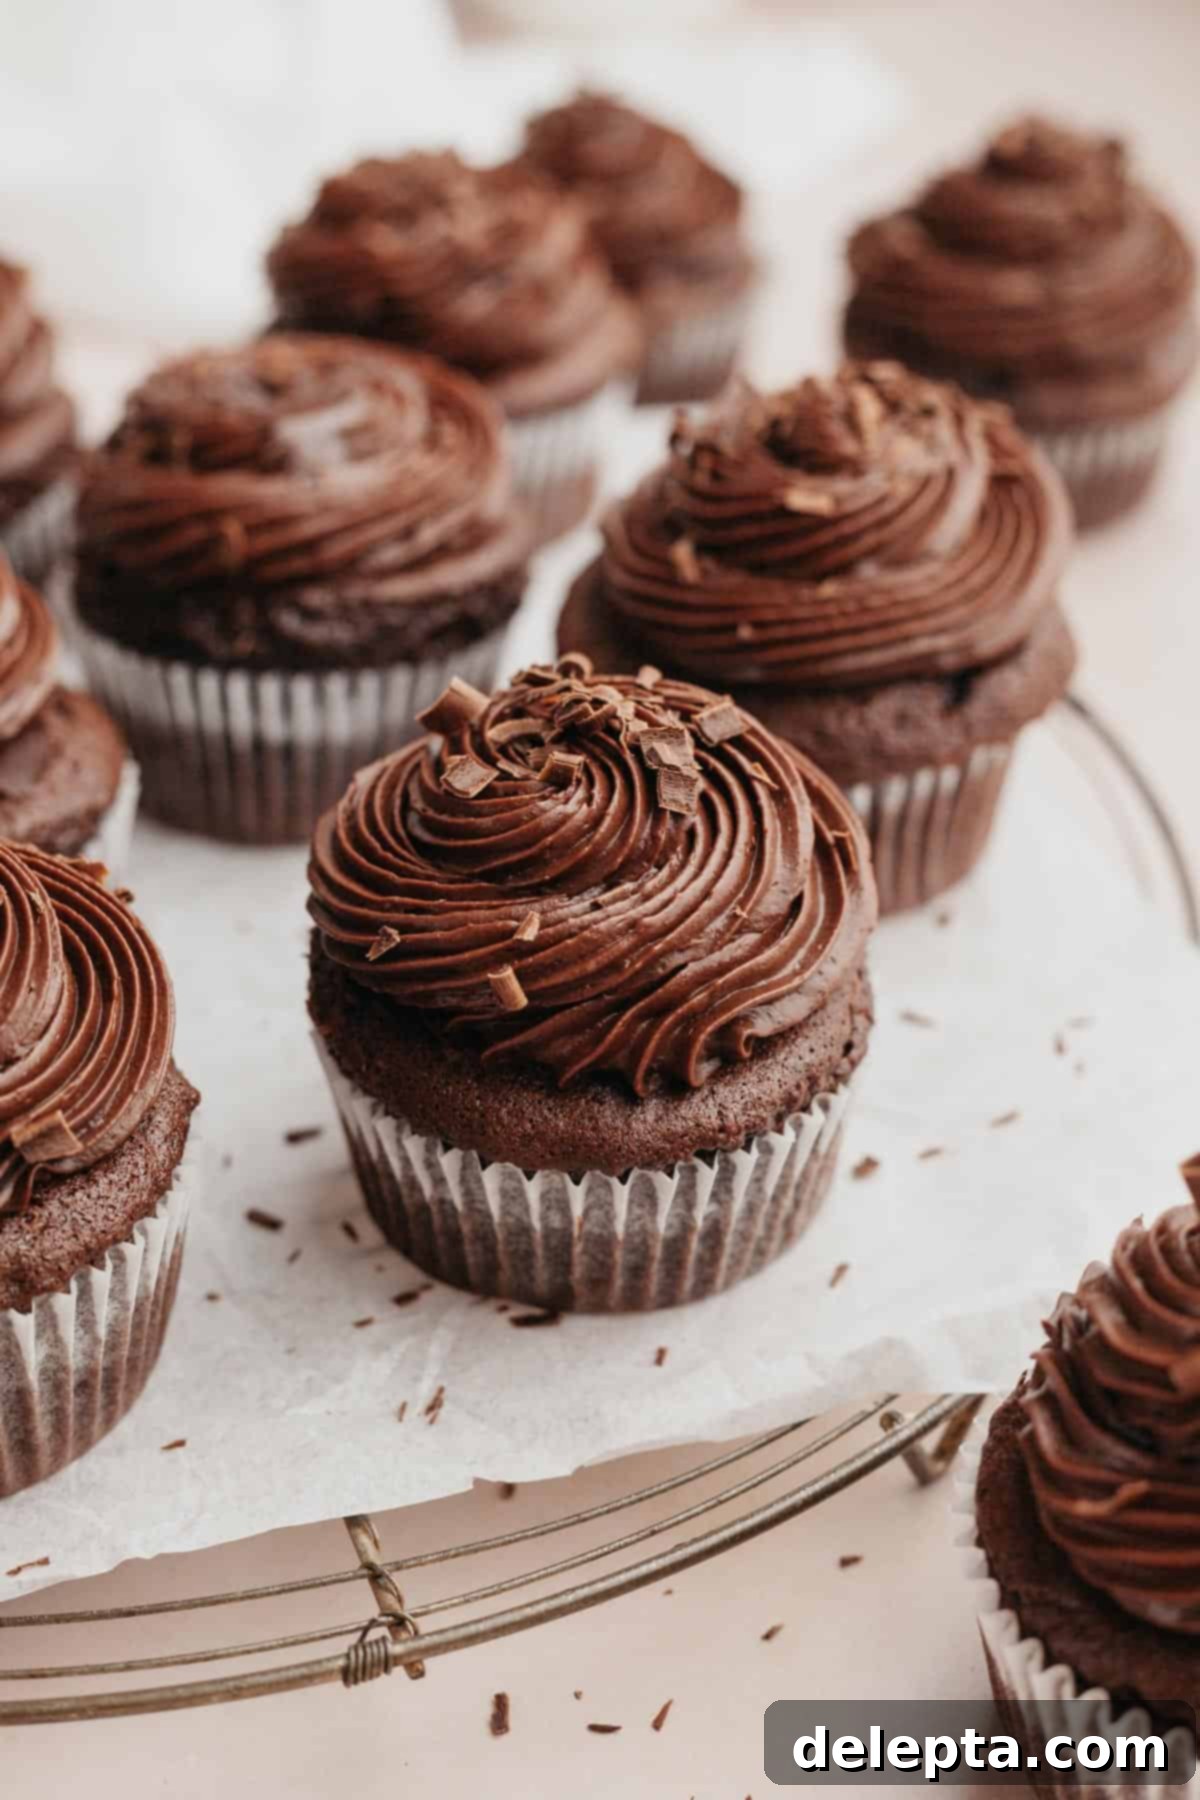
Step 8: Fill and Frost. With your cupcakes completely cooled, use a cupcake corer or the base of a large piping tip to carefully remove a small center from each cupcake, creating a cavity for the filling. Transfer the smaller batch of set chocolate ganache (the filling) into a piping bag fitted with a round tip. This makes filling each cupcake much easier and neater, though a small spoon can also be used. Generously pipe the ganache into each cored cupcake. Finally, pipe the whipped ganache frosting on top of each filled cupcake using your preferred piping tip (a Wilton 4B or 1M works beautifully for a classic swirl). Serve and enjoy these utterly decadent chocolate fudge cupcakes!
Expert Baking Tips for Perfect Chocolate Fudge Cupcakes
- Ensure Cupcakes Are Completely Cool: This tip is absolutely critical! Before you even think about filling or frosting your cupcakes, they must be completely and utterly cool. If the cupcakes are even slightly warm, the delicate chocolate ganache filling and the whipped frosting will melt, creating a messy situation and compromising the texture. Patience here truly pays off.
- Embrace Your Kitchen Scale for Accuracy: For consistent and professional-level baking results, it’s incredibly important to use a digital kitchen scale to measure your dry ingredients, especially flour and cocoa powder. It’s surprisingly easy to accidentally add too much flour or cocoa powder when measuring by volume (cups), which can lead to dense, dry, and crumbly cupcakes. Weighing ensures precision every time.
- Avoid Boiling the Cream for Ganache: When heating the heavy cream for your chocolate ganache, watch it carefully and ensure it only comes to a gentle simmer, never a rolling boil. If the cream boils vigorously, it can cause the ganache to “split” or separate, resulting in an oily, grainy texture that is difficult to fix. I often prefer using the stovetop over a microwave for heating cream, as it allows for more precise control over the temperature.
- Room Temperature Ingredients are Key: For a smooth, well-emulsified batter and ganache, all your cold ingredients (eggs, Greek yogurt, cream for ganache if making fresh) should be brought to room temperature before you begin. This allows them to mix more uniformly, preventing lumps and ensuring a consistent final product.
Planning Ahead: Make-Ahead Tips for Stress-Free Baking
Chocolate Cupcakes: I understand that when hosting a party or preparing for an event, being able to prepare desserts in advance can significantly ease the pressure. You’ll be delighted to know that you can bake these incredible chocolate fudge cupcakes up to 2 days ahead of your event. Once they have completely cooled, simply store them in an airtight container at room temperature. This will keep them wonderfully fresh and moist until you’re ready to fill and frost them.
Chocolate Ganache (Filling & Frosting): Both the ganache for the filling and the frosting can also be prepared well in advance. Make both batches up to 4 days ahead of time and store them in their respective bowls, covered, in the refrigerator. For the best results, I recommend waiting to whip the larger batch of ganache into frosting until you are just about ready to decorate your cupcakes. When it’s time to assemble, take both bowls of ganache out of the fridge. If they’re too firm, gently warm them in 5-second increments in the microwave, stirring after each, until they reach your desired scoopable or pipeable consistency. For the whipped frosting, re-warm slightly then whip until fluffy.
Frequently Asked Questions About These Chocolate Fudge Cupcakes
Cupcakes sinking in the middle can be a frustrating baking dilemma, but it’s usually due to a few common culprits. Firstly, your leavening agents – baking powder and baking soda – might have expired or lost their potency. Always check their expiry dates and ensure their lids are tightly closed after use to maintain their activity. Secondly, opening the oven door too early during baking can cause a sudden temperature drop, leading to the collapse of the delicate cupcake structure. Resist the urge to peek until at least two-thirds through the baking time. Finally, underbaking is another frequent reason; if cupcakes are removed from the oven before they’re fully set, their internal structure isn’t strong enough to hold its shape as it cools.
These chocolate fudge cupcakes are a fantastic canvas for various decorations! For piping the whipped ganache frosting, I personally used a Wilton 4B tip, which creates a lovely textured swirl. However, a classic Wilton 1M star tip would also look absolutely beautiful, giving a more traditional rosette effect. To elevate the visual appeal, consider adding some delightful toppings. My favorites include delicate chocolate curls, which you can easily make by dragging a vegetable peeler across a bar or block of room-temperature chocolate directly over the frosted cupcakes. For a pop of color and a festive touch, rainbow sprinkles are always a hit. You could also dust them lightly with a touch of cocoa powder or serve with a fresh raspberry for a touch of elegance.
Yes, absolutely! If you’re pressed for time and need your chocolate ganache to set more quickly, you can place the bowl containing the ganache in the refrigerator. However, it’s crucial to stir the ganache periodically – perhaps every 15-20 minutes – to ensure it sets evenly throughout and prevents the edges from hardening before the center. If you forget about it and it becomes too firm in the fridge, don’t despair! Simply warm it up in very short 5-second increments in the microwave, stirring after each, until it returns to your desired consistency. Be careful not to overheat it.
Expand Your Chocolate Repertoire: More Decadent Recipes to Explore!
- Chocolate Salted Caramel Cupcakes
- Matilda’s Chocolate Cake (20 minutes)
- Banana Cake with Chocolate Frosting
- Chocolate Sour Cream Pound Cake
If you’ve had the pleasure of making this recipe, please don’t forget to leave a ⭐️ rating and a thoughtful review below! Your feedback is invaluable and helps other bakers discover these amazing cupcakes. I absolutely love seeing your creations, so please tag me on Instagram @alpineella when you share your delicious results! You can also stay connected and discover more recipes by following along on Pinterest, Facebook, and TikTok!
Recipe
Moist Chocolate Fudge Cupcakes with Chocolate Filling
Ella Gilbert
Pin Recipe
Save RecipeSaved!
Equipment
-
12 cup cupcake tray
Ingredients
Cupcakes
- 95 grams all purpose flour
- 43 grams cocoa powder dutch processed
- ¾ teaspoon baking powder
- ½ teaspoon baking soda
- ½ teaspoon kosher salt
- 2 large eggs room temperature
- 100 grams sugar
- 100 grams light brown sugar
- 50 ml vegetable oil
- 1 teaspoon vanilla extract
- 113 grams greek yogurt room temperature
- 1 teaspoon espresso powder
- 2 tablespoon hot water
- 2 teaspoon white vinegar
Whipped Ganache Frosting
- 340 ml heavy whipping cream
- 340 grams semisweet chocolate chopped
- pinch salt
Chocolate Filling
- 113 ml heavy whipping cream
- 113 grams semisweet chocolate chopped
Instructions
Make Frosting and Filling
-
To make our lives easier and ensure proper portioning, set aside one large heatproof bowl for the frosting ganache and one medium heatproof bowl for the filling ganache. We’re going to prepare these two ganache batches separately.
-
Let’s begin with the frosting ganache. Place the chopped chocolate for the frosting into the large bowl. In a small saucepan, gently heat the heavy whipping cream until it just begins to simmer around the edges, but do not let it boil vigorously. Pour the hot cream immediately over the chopped chocolate and allow it to sit undisturbed for 5 minutes. This gentle waiting period allows the heat from the cream to thoroughly melt the chocolate.340 grams semisweet chocolate, 340 ml heavy whipping cream
-
Using a rubber spatula or a wooden spoon (it’s important to avoid a whisk here, as it can incorporate too much air, leading to a less stable ganache), gently stir the cream and chocolate together. Begin stirring from the center of the bowl and slowly expand outwards until the chocolate is completely melted and the mixture is smooth and glossy. If you find any small, stubborn chocolate pieces, you can briefly warm the bowl in the microwave for 5-10 second intervals, stirring well after each, until fully melted and combined.
-
Stir in the pinch of salt. This enhances the chocolate flavor. Leave this large bowl of ganache at room temperature for a few hours. It needs to set until it’s firm enough to scoop but still pliable enough to whip into a fluffy frosting. This could take 2-4 hours depending on your room temperature.pinch salt
-
Now, repeat the exact same steps outlined above for the chocolate filling, using the medium bowl. Pour the steaming heavy cream over the chopped chocolate, let it sit for 5 minutes, then stir gently until smooth and fully emulsified. Allow this batch of ganache to sit at room temperature until it has hardened to a scoopable consistency, ready to be piped into the cupcakes.113 ml heavy whipping cream, 113 grams semisweet chocolate
Make Cupcakes
-
Preheat your oven to 350°F (175°C) and meticulously place 12 paper cupcake liners into the cavities of your muffin tray. Ensuring your oven is at the correct temperature before baking is key for even rising.
-
In a large mixing bowl, thoroughly whisk together all the dry ingredients: the precisely measured all-purpose flour, Dutch-processed cocoa powder, baking powder, baking soda, and kosher salt. Whisking ensures these ingredients are evenly distributed, which is crucial for the cupcakes to rise properly and have a consistent texture. Set this bowl aside.95 grams all purpose flour, 43 grams cocoa powder, ¾ teaspoon baking powder, ½ teaspoon baking soda, ½ teaspoon kosher salt
-
In a mug or small cup, combine the espresso powder with 2 tablespoons of hot water to create a strong coffee. This addition is not meant to make the cupcakes taste like coffee; instead, it serves to significantly enhance and deepen the rich, complex flavor of the chocolate. It also helps to “bloom” the cocoa powder, releasing its full aromatic potential.1 teaspoon espresso powder, 2 tablespoon hot water
-
In a large measuring jug or a separate medium bowl, whisk together the wet ingredients until they are thoroughly combined and smooth. This includes the room temperature eggs, the prepared coffee mixture, room temperature Greek yogurt, neutral oil, vanilla extract, white granulated sugar, light brown sugar, and white vinegar. Ensure there are no lumps and the sugars are well dissolved for a consistent batter.2 large eggs, 100 grams sugar, 50 ml vegetable oil, 1 teaspoon vanilla extract, 113 grams greek yogurt, 2 teaspoon white vinegar, 100 grams light brown sugar
-
Carefully pour the wet mixture into the bowl containing the dry ingredients. Using a rubber spatula, gently fold everything together until the batter is just smooth. It’s crucial not to overmix the batter at this stage, as this can lead to tough cupcakes. A few small lumps are perfectly acceptable and often indicate you haven’t overmixed.
-
Divide the chocolate cupcake batter evenly among the prepared cupcake liners, filling each liner approximately ¾ of the way full. This allows sufficient space for the cupcakes to rise beautifully without overflowing. Bake for 18-20 minutes, or until a wooden toothpick inserted into the center of a cupcake comes out clean or with only a few moist crumbs attached.
-
Once baked, allow the cupcakes to cool in their muffin tray for about 15 minutes. This cooling period helps them firm up and prevents them from sticking. After 15 minutes, carefully remove them from the tray and transfer them to a wire cooling rack to cool down completely to room temperature. This step is essential before you proceed with filling and frosting.
Finish Frosting and Filling
-
Once your cupcakes have cooled completely, it’s time to prepare them for their decadent filling. Use a dedicated cupcake corer or, if you don’t have one, the base of a large piping tip to carefully cut and remove a small center portion from each cupcake. This creates the perfect cavity for our rich chocolate ganache filling. Set the cored cupcakes aside.
-
Take the chocolate ganache from the medium bowl (this is your filling). If it’s too hard, microwave it in 5-second bursts, stirring until it’s soft enough to pipe. Scoop this ganache into a piping bag fitted with a round tip. This makes filling each cupcake much more controlled and less messy. Generously pipe the ganache into the core of each cupcake. While a spoon can be used, the piping bag method ensures a neat and full filling.
-
Finally, retrieve the large bowl of ganache (your frosting base). Using a handheld electric mixer, whip this ganache on medium-high speed until it becomes wonderfully light, airy, and fluffy, almost like a chocolate cloud. Transfer this whipped ganache frosting into a piping bag fitted with your desired piping tip. Pipe a generous swirl of frosting on top of each filled cupcake. Your irresistible chocolate fudge cupcakes are now ready to be enjoyed!
Video
Notes
For optimal results and a beautifully smooth batter and ganache, it is essential that all your ingredients are at room temperature before you begin baking. This includes eggs, Greek yogurt, and especially the heavy whipping cream if you plan to make the ganache immediately. Bringing ingredients to room temperature allows them to emulsify properly, creating a more uniform mixture and contributing to the overall tender texture of the cupcakes. So, remember to pull out all necessary ingredients a good hour or two before you start your baking adventure!
Salt Type: The recipe specifies kosher salt. If you do not have kosher salt on hand, you will need to adjust the quantity. As a general rule, halve the amount of salt called for in the recipe if using fine table salt, as it is much denser and saltier by volume. For example, 1 teaspoon of kosher salt is roughly equivalent to ½ teaspoon of fine salt. Please note, I use Diamond Crystal Kosher Salt in my recipes, which is less salty by volume than Morton Kosher Salt, so be mindful of the brand you use.
Greek Yogurt Substitution: If Greek yogurt is unavailable or you prefer an alternative, you can seamlessly substitute it with an equal amount of sour cream. Both options provide the necessary fat and acidity to ensure the cupcakes remain wonderfully moist and tender.
Cocoa Powder Note: This recipe is formulated specifically for Dutch-processed cocoa powder. If you’re unsure which type you have, check the ingredient list – Dutch-processed cocoa will typically mention “alkali” or “acidity regulator.” If you choose to use natural cocoa powder instead, it is crucial to omit the white vinegar from the cupcake batter. Natural cocoa is acidic and reacts differently with baking soda, so removing the vinegar maintains the correct pH balance for proper leavening.
Storage Instructions: To keep your chocolate fudge cupcakes fresh and delicious, store them in an airtight container in the refrigerator for up to 5 days. For the best eating experience, allow the cupcakes to sit at room temperature for about 30 minutes before serving. This brings the frosting and cake to their optimal texture and flavor.
Make-Ahead Options: These cupcakes are wonderfully accommodating if you need to prepare components in advance. The baked cupcakes can be made a few days ahead of time; simply store them in an airtight container at room temperature once fully cooled. For the ganache (both filling and frosting), prepare it as instructed, then store it in its respective bowls, covered, in the fridge for up to 4 days. When you’re ready to assemble and decorate, allow the ganache to come to room temperature, or gently warm it in very short microwave increments (5 seconds at a time), stirring after each, until it reaches a scoopable or pipeable consistency. Remember to only whip the frosting ganache just before you plan to frost the cupcakes.
Nutrition
