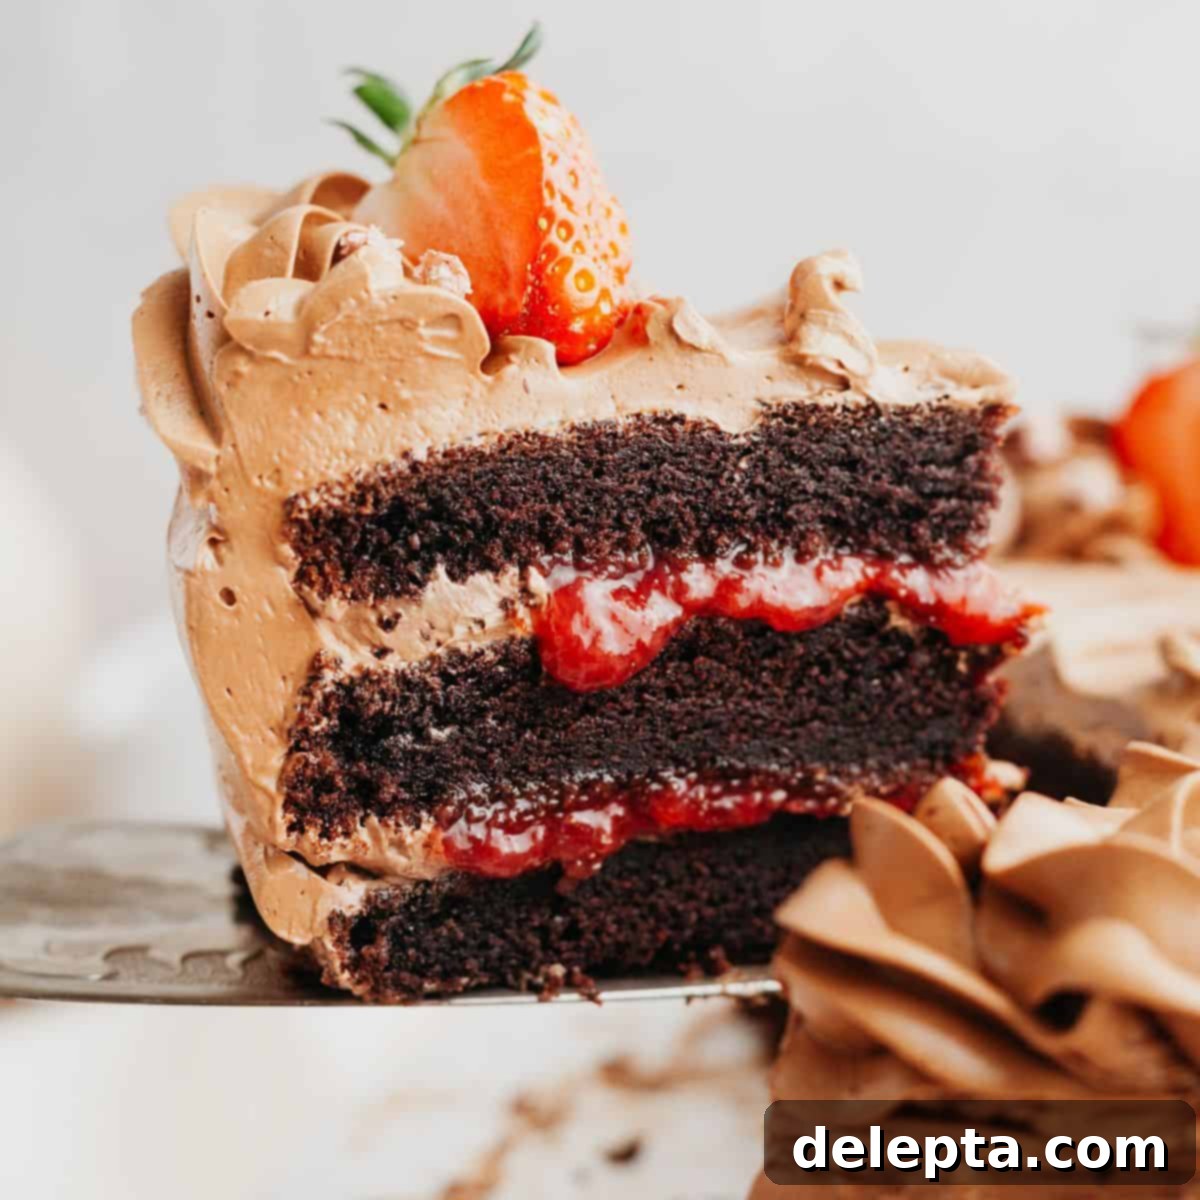
Decadent Chocolate Strawberry Cake with Silky Swiss Meringue Buttercream
Indulge your senses with this spectacular chocolate cake with strawberry filling, a true masterpiece for anyone who adores the classic pairing of chocolate and fresh strawberries! This recipe promises an unforgettable dessert experience, featuring incredibly moist chocolate cake layers generously filled with a vibrant, homemade strawberry preserve, all enrobed in a luxurious, velvety chocolate Swiss meringue buttercream. It’s more than just a cake; it’s a celebration in every bite, perfect for making any occasion extra special.
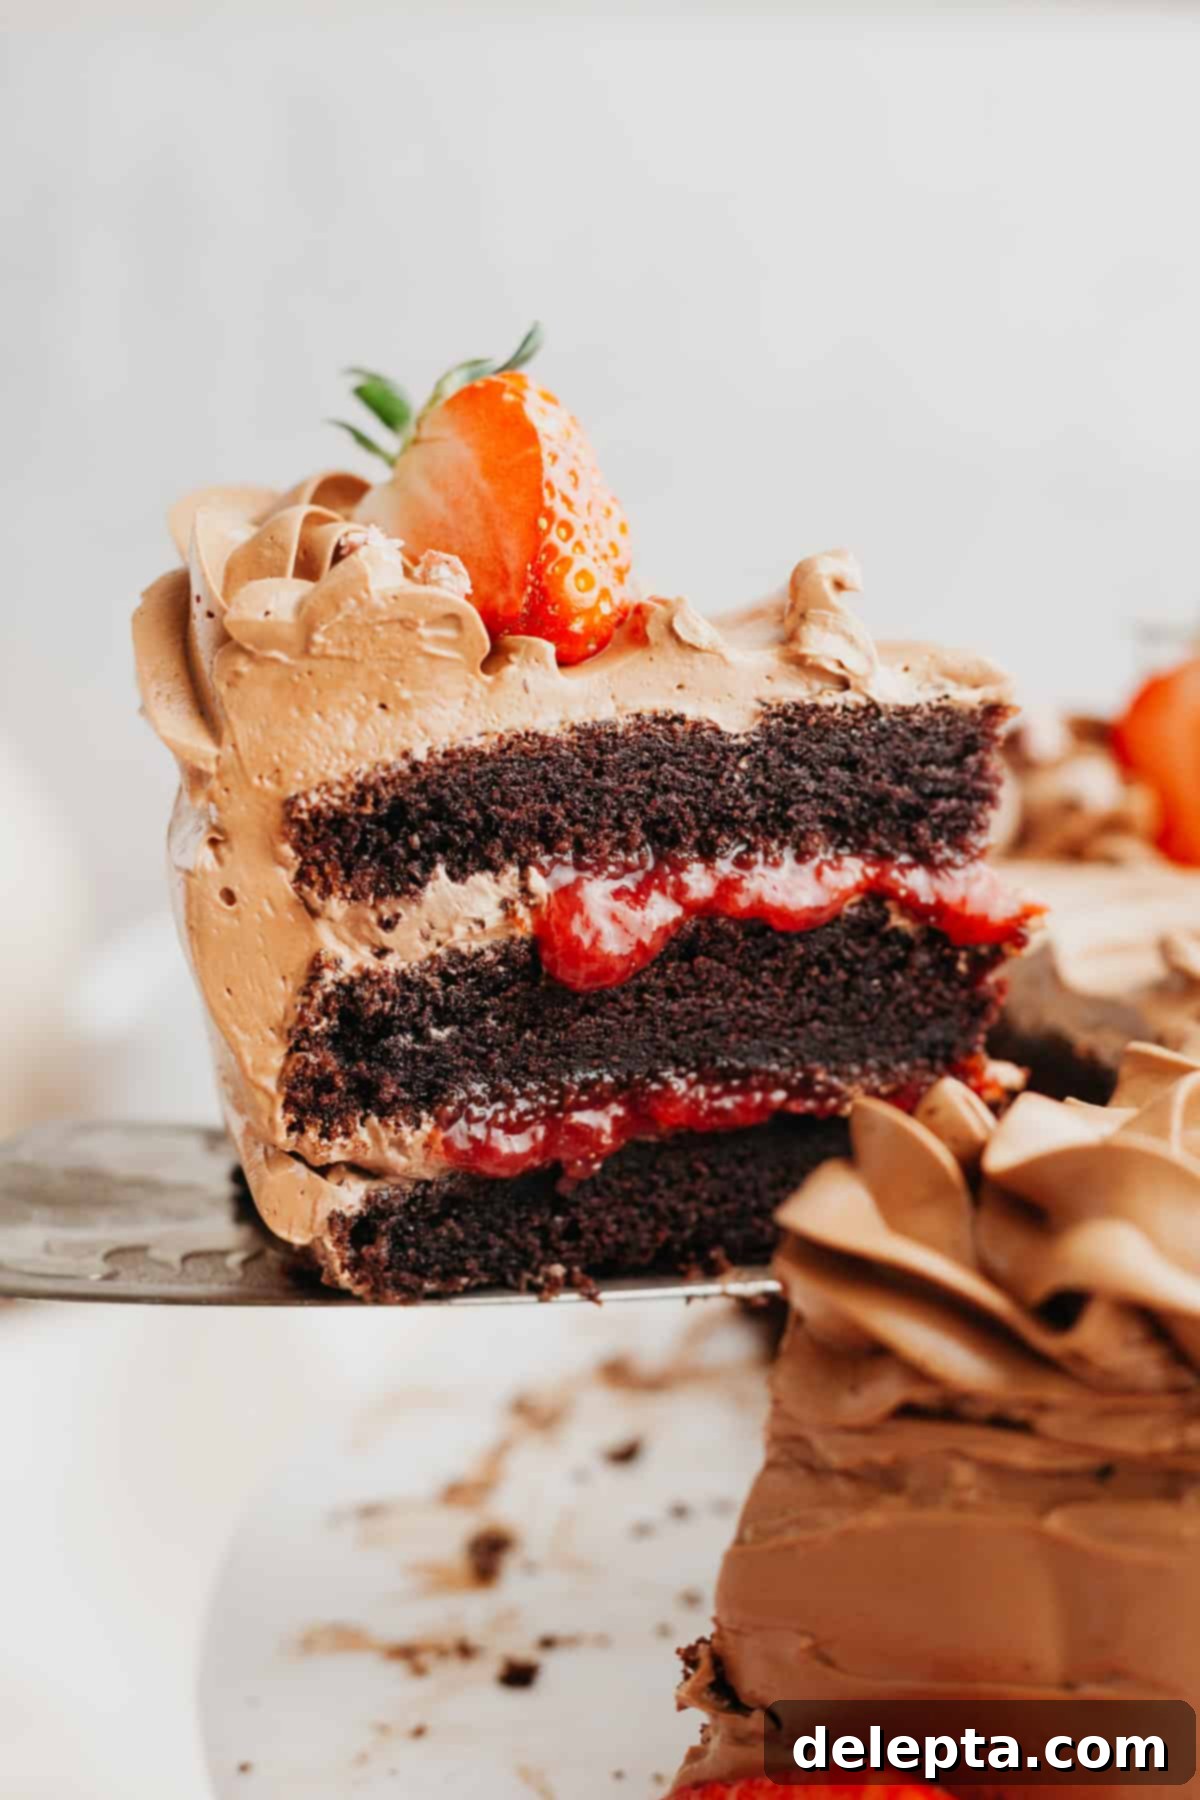
This chocolate cake with strawberry filling is a truly irresistible combination of two beloved flavors. Each moist chocolate cake layer delivers a deep, rich cocoa taste, perfectly complemented by the bright burst of fresh strawberry flavor from the homemade preserve filling. The entire creation is then adorned with a dreamy, velvety smooth chocolate Swiss meringue buttercream that provides a sophisticated sweetness without being cloying. This isn’t just a dessert; it’s a dream come true for chocolate and strawberry enthusiasts!
While this strawberry-filled chocolate cake does involve a few more steps than a simpler recipe, like my chocolate cake with cream cheese frosting, I wholeheartedly promise that the effort is incredibly rewarding. The result is a truly show-stopping cake that will impress everyone. Its elegant appearance and harmonious flavors make it the perfect centerpiece for a birthday party, a special celebration, or a romantic holiday like Valentine’s Day. It truly is the ultimate cake for those who crave the harmonious blend of strawberries and chocolate!
The foundation of this incredible dessert is my acclaimed triple chocolate layer cake, ensuring a rich and robust chocolate flavor. For the delightful center, we use my popular homemade strawberry jam recipe, previously featured in my vanilla cake with strawberry filling. These tried-and-tested components guarantee a perfect balance of textures and tastes.
If you find yourself craving even more delicious strawberry recipes after enjoying this cake, be sure to explore my other fantastic creations: the luxurious chocolate covered strawberry cake, delightful strawberry-filled cupcakes, comforting strawberry crumble, and the decadent strawberry white chocolate cheesecake. Each offers a unique way to savor the incredible flavor of strawberries!
Why You’ll Adore This Recipe!
- An Unbeatable Classic Combo: Strawberries and chocolate are a match made in heaven, a timeless pairing that appeals to almost everyone. The contrast between the sweet, slightly tart berries and the rich, deep chocolate creates an incredibly satisfying flavor profile that your family and guests are sure to love. It’s a universally cherished combination that never goes out of style.
- Excellent for Making Ahead: Life is busy, and baking a show-stopping cake can feel daunting. That’s why this recipe is designed with convenience in mind! You can prepare the homemade strawberry filling several days in advance, allowing its flavors to deepen beautifully. The chocolate cake layers can also be baked up to two days prior, or even frozen for longer storage. This makes assembling the cake on the day of your event a stress-free and enjoyable process.
- Luxurious Swiss Meringue Buttercream: While Swiss meringue buttercream might have a reputation for being a bit tricky, don’t be intimidated! I’ve included comprehensive tips and tricks to guide you through every step, ensuring your success. This type of buttercream is truly worth the effort; it’s incredibly smooth, stable, and pipes beautifully, making cake decoration a breeze. Unlike overly sweet American buttercreams, Swiss meringue offers a delicate sweetness, allowing the chocolate and strawberry flavors to shine. It’s the frosting of choice for a truly elegant and sophisticated finish.
- Perfect for Strawberry Season: This cake truly shines when made with peak-season fresh strawberries, especially for decorating the top. Making this cake during the height of strawberry season means you’ll be using the sweetest, most flavorful berries, which enhances both the filling and the fresh garnish. It’s a wonderful way to celebrate and incorporate seasonal produce into a spectacular dessert.
- A True Showstopper: With its elegant layers, vibrant filling, and perfectly smooth frosting, this cake is visually stunning. It’s the kind of dessert that elicits gasps of delight when brought to the table. Whether for a birthday, anniversary, or any gathering, this chocolate strawberry cake is guaranteed to be the star of the dessert spread.
Essential Ingredients for Your Cake
Crafting this magnificent chocolate strawberry cake requires a selection of high-quality ingredients, each playing a vital role in achieving its perfect flavor and texture. Here’s a detailed look at what you’ll need:
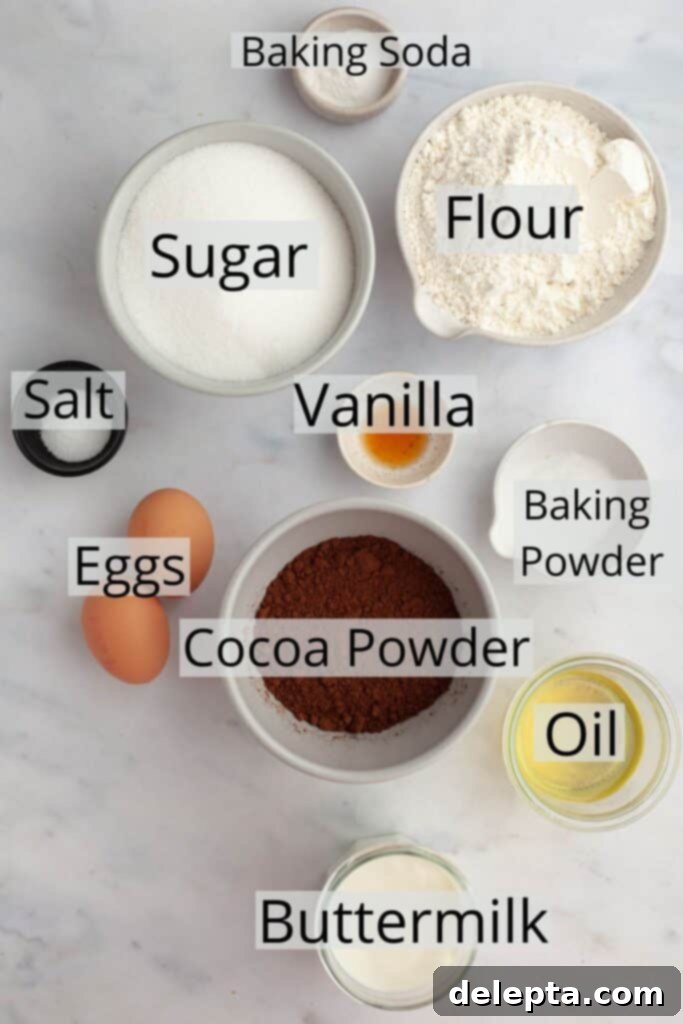
- All-Purpose Flour: The structural backbone of our cake. I’ve specifically tested and developed this recipe using all-purpose flour for consistent results, ensuring a tender crumb and perfect rise.
- Dutch-Processed Cocoa Powder: This is crucial for achieving that deep, rich, dark chocolate color and intense chocolate flavor. Dutch-processed cocoa has a milder, less acidic taste than natural cocoa, which works wonderfully with baking soda in this recipe.
- Granulated Sugar: Sweetens the cake and contributes to its moistness and tender texture. It’s balanced perfectly with the cocoa and strawberry flavors.
- Buttermilk: The secret to an incredibly moist and tender chocolate cake! Its acidity reacts with the baking soda, aiding in leavening and creating a fine crumb. Make sure it’s at room temperature for best results.
- Baking Powder & Baking Soda: Our leavening agents. Always check their expiry dates! Fresh leaveners are essential for ensuring your cake rises beautifully and achieves that desirable light, airy texture.
- Neutral Oil: Using a neutral-flavored oil like vegetable oil, sunflower oil, or canola oil keeps the cake incredibly moist and tender, and ensures the chocolate flavor remains dominant. Oil also contributes to the cake’s keeping qualities, keeping it soft for longer.
- Eggs: Provide structure, richness, and moisture to the cake layers. Ensure they are at room temperature to emulsify properly with other ingredients.
- Vanilla Extract: Enhances the overall flavor profile of both the cake and the buttercream, adding a warm, aromatic note that complements the chocolate and strawberry beautifully.
- Salt (Kosher): Don’t skip the salt! It’s a flavor enhancer that balances the sweetness and intensifies the chocolate notes in both the cake and frosting. I use kosher salt; if using fine table salt, remember to halve the amount.
- Very Hot Water: Added to the chocolate cake batter to “bloom” the cocoa powder, enhancing its flavor and making the cake even more moist. Be cautious when adding it!
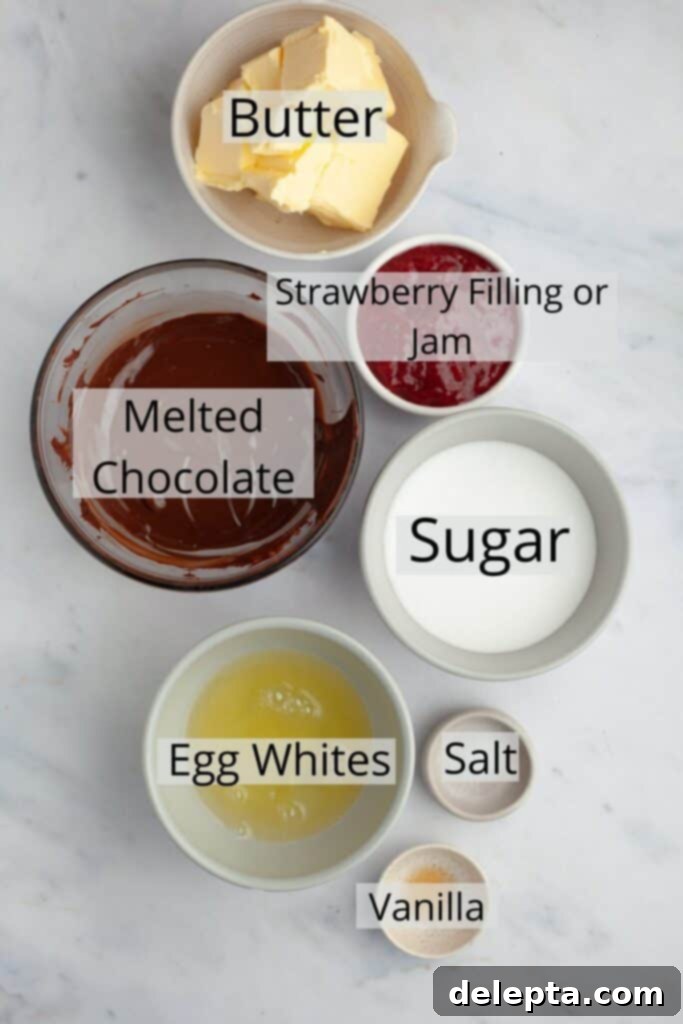
- Strawberries (fresh, diced): The star of our homemade filling! Fresh, ripe strawberries are ideal for the most vibrant flavor and natural sweetness.
- Lemon Juice & Lemon Zest: Brightens the strawberry filling, adding a zesty tang that cuts through the sweetness and enhances the natural fruit flavor.
- Semisweet Chocolate (70% cocoa): Used for our chocolate Swiss meringue buttercream. Choosing a good quality chocolate, around 70% cocoa, will give you a rich, deep chocolate flavor. Make sure it’s melted and cooled before incorporating into the buttercream.
- Unsalted Butter (room temperature): The primary ingredient for Swiss meringue buttercream. It needs to be at a cool room temperature – soft enough to indent, but not greasy or melted – for proper emulsification and a stable, fluffy frosting.
- Large Egg Whites: Form the meringue base of our buttercream, providing its characteristic lightness and stability. Ensure no trace of yolk is present, as fat can prevent the whites from whipping correctly.
For precise measurements and full ingredient quantities, please refer to the detailed recipe card below.
Creative Variations & Smart Substitutions
This chocolate strawberry cake recipe is wonderfully versatile, allowing for several adjustments to suit your preferences or what you have on hand. Feel free to experiment with these variations:
- Buttermilk Alternatives: If you don’t have buttermilk, you can easily make your own by adding 1 tablespoon of lemon juice or white vinegar to 1 cup of regular milk and letting it sit for 5-10 minutes until it slightly curdles. Alternatively, you can swap buttermilk directly with an equal amount of full-fat sour cream or plain full-fat yogurt. Both options will maintain the cake’s desired moisture and tender crumb.
- Fruit Filling Options: While homemade strawberry filling is highly recommended for its fresh flavor, you have options! You can opt for a high-quality store-bought strawberry jam or preserves for a quicker approach. For an entirely different flavor profile, consider using other fruit fillings such as raspberry jam, cherry pie filling, or even a mixed berry preserve. Just ensure your chosen filling is thick enough not to leak out of the cake layers.
- Alternative Frostings: If Swiss meringue buttercream feels a bit too adventurous or you prefer a different taste, this cake is also delightful with other frostings. Consider using my rich chocolate sour cream frosting from my triple chocolate layer cake for an even deeper chocolate experience, or the tangy and creamy cream cheese frosting from my chocolate cake with cream cheese frosting for a delightful contrast. A simple homemade strawberry frosting would also enhance the berry notes beautifully.
- Spice It Up: For an added layer of complexity, try adding a pinch of cinnamon or a tiny bit of cayenne pepper to the chocolate cake batter. These spices can surprisingly enhance the deep chocolate flavor without overpowering it.
- Add Liqueur: For an adult twist, brush the cooled cake layers with a light simple syrup infused with a complementary liqueur, such as Chambord (raspberry liqueur) or a strawberry liqueur, before frosting. This adds extra moisture and a sophisticated flavor kick.
Detailed Step-by-Step Baking Guide
Follow these comprehensive instructions carefully to bake and assemble your flawless chocolate strawberry cake. Precision is key in baking, especially when working with Swiss meringue buttercream!
Part 1: Preparing the Moist Chocolate Cake Layers
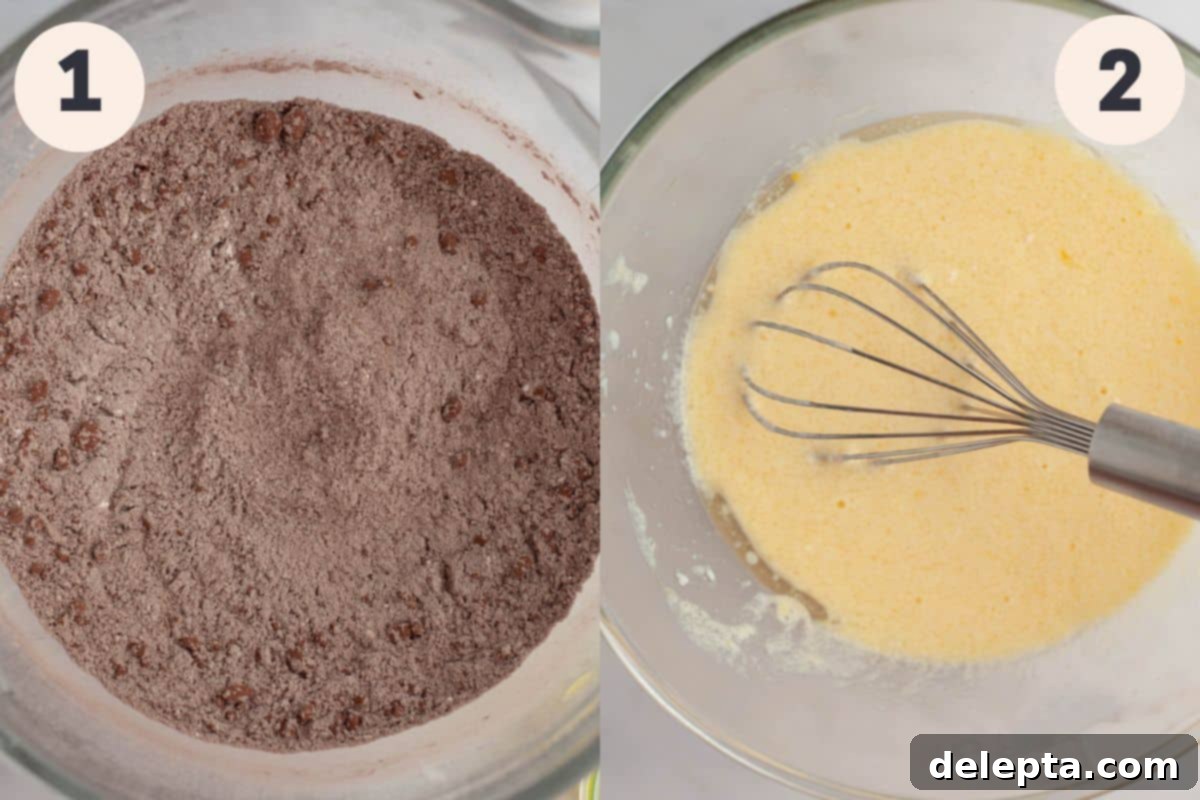
Step 1: Combine Dry Ingredients. In a large mixing bowl or the bowl of a stand mixer fitted with the paddle attachment, thoroughly combine the all-purpose flour, rich Dutch-processed cocoa powder, granulated sugar, fresh baking soda, baking powder, and kosher salt. Mix on low speed until all ingredients are just combined and appear smooth, ensuring no lumps remain. This ensures even distribution of leavening agents.
Step 2: Prepare Wet Ingredients. In a separate, medium-sized bowl or a large liquid measuring jug, whisk together the room temperature buttermilk, neutral vegetable oil, large eggs, and fragrant vanilla extract until the mixture is completely smooth and well emulsified. Aim for a consistent, uniform liquid with no streaks.
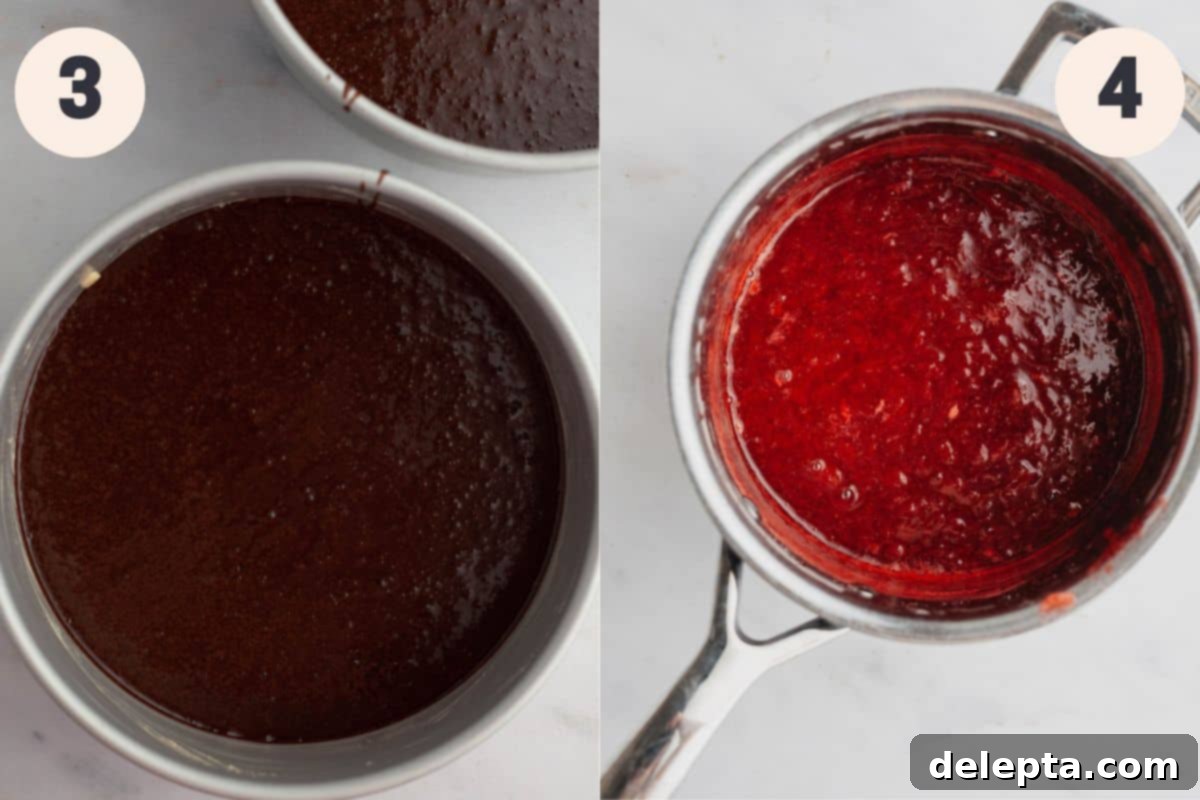
Step 3: Combine and Bake. With the stand mixer running on its lowest speed, slowly and carefully pour the wet ingredients into the dry ingredients. Once partially combined, continue to slowly pour in the very hot water. Be extremely careful, as it can splash! The batter will appear quite thin, which is perfectly normal for this recipe. Mix just until no dry streaks remain; avoid overmixing. Divide the copious cake batter evenly among three greased and parchment-lined 8-inch baking pans. Bake in a preheated oven until a toothpick inserted into the center comes out clean. Allow cakes to cool in pans for 10-15 minutes before inverting onto a wire rack to cool completely.
Part 2: Crafting the Homemade Strawberry Filling
Step 4: Cook the Strawberry Filling. In a medium saucepan, combine the diced fresh strawberries, white sugar, fresh lemon juice, and aromatic lemon zest. Place the saucepan over medium-low heat and bring the mixture to a gentle simmer. Cook, stirring frequently with a spatula or wooden spoon to prevent sticking, until the strawberries have broken down significantly and the filling has thickened to a jam-like consistency. This process usually takes about 25-30 minutes. Once thickened, remove from heat and allow it to cool completely to room temperature before transferring to the refrigerator to chill further. A well-chilled filling is essential for assembly.
Part 3: Mastering the Chocolate Swiss Meringue Buttercream
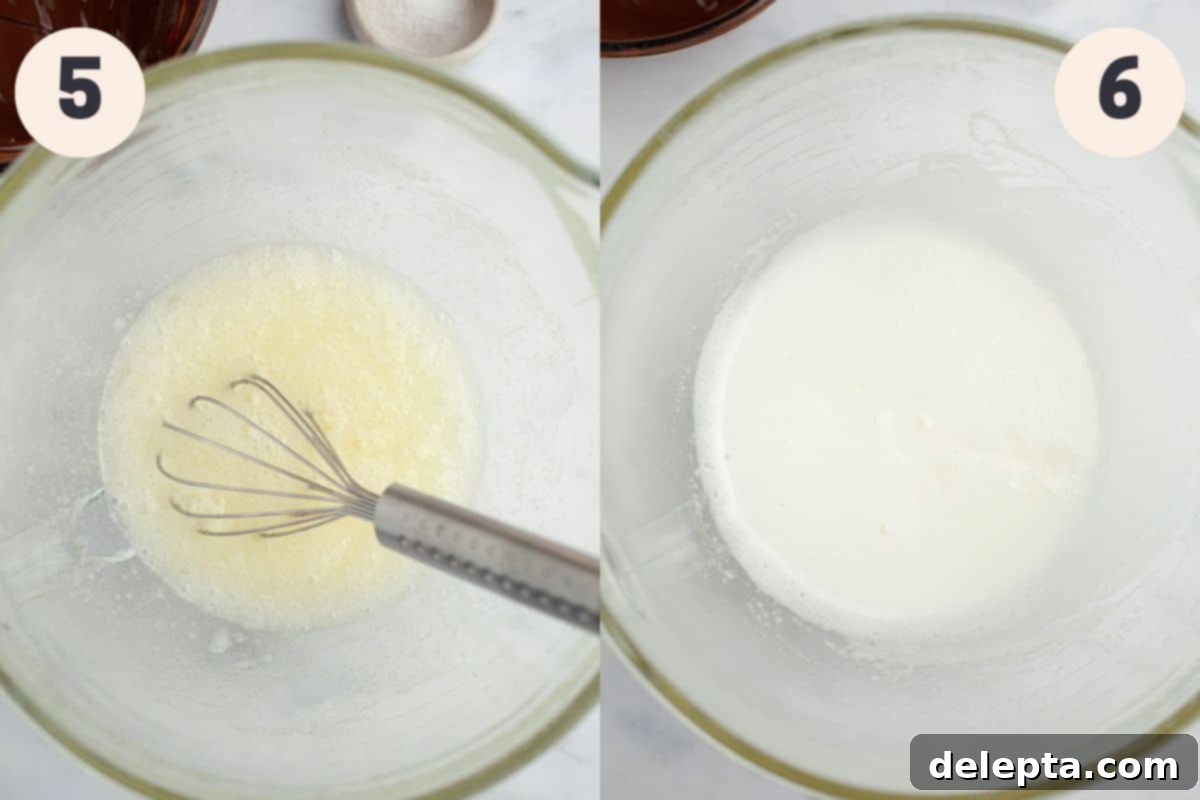
Step 5: Prepare the Meringue Base. In a large heatproof bowl (preferably your stand mixer bowl), combine the large egg whites and white sugar. Set this bowl over a saucepan containing about an inch of simmering water, ensuring the bottom of the bowl does not touch the water. Whisk this mixture continuously and vigorously until the sugar completely dissolves. The egg whites will transform from a yellowish, granular liquid into a smooth, white, and opaque consistency. If you don’t have a thermometer, rub a small amount between your fingers – you shouldn’t feel any sugar granules. For precision, use a candy thermometer to ensure the mixture reaches 140°F (60°C). This pasteurization step is crucial for food safety and a stable meringue.
Step 6: Whip the Meringue. Carefully remove the bowl from the simmering water and attach it to your stand mixer, fitted with the whisk attachment (or use a high-powered hand mixer). Begin whisking on medium-high speed. Continue to whisk for 10-15 minutes, or potentially up to 20 minutes if your kitchen is warm or humid, until you achieve a very stiff, glossy meringue. The bowl should feel completely cool to the touch – this is a critical indicator that the meringue is ready for the butter. Stiff peaks should hold their shape without bending when the whisk is lifted.
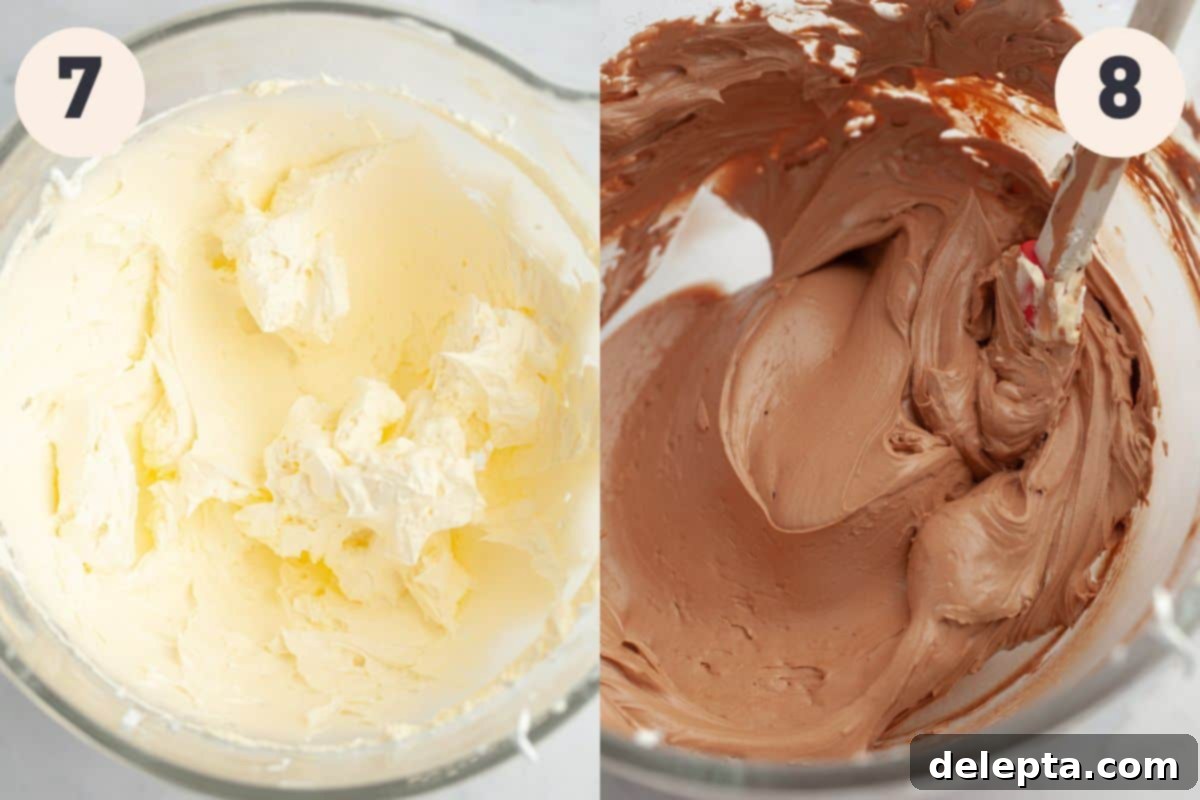
Step 7: Incorporate the Butter. Switch the mixer attachment from the whisk to the paddle. With the mixer running on medium speed, begin adding the room temperature unsalted butter, one piece at a time. Ensure each piece of butter is fully incorporated into the meringue before adding the next. The mixture may look curdled or “broken” at this stage; this is normal! Keep mixing, and it will eventually come together into a smooth, fluffy buttercream. This process can take 8-12 minutes.
Step 8: Add Chocolate and Flavorings. Once all the butter is incorporated and the buttercream is beautifully soft and fluffy, slowly pour in the cooled, melted semisweet chocolate, vanilla extract, and kosher salt. Mix on low-medium speed until everything is thoroughly combined and the buttercream is uniform in color and texture. Give it a final scrape down with a rubber spatula to ensure even distribution of chocolate.
Part 4: Assembling Your Masterpiece
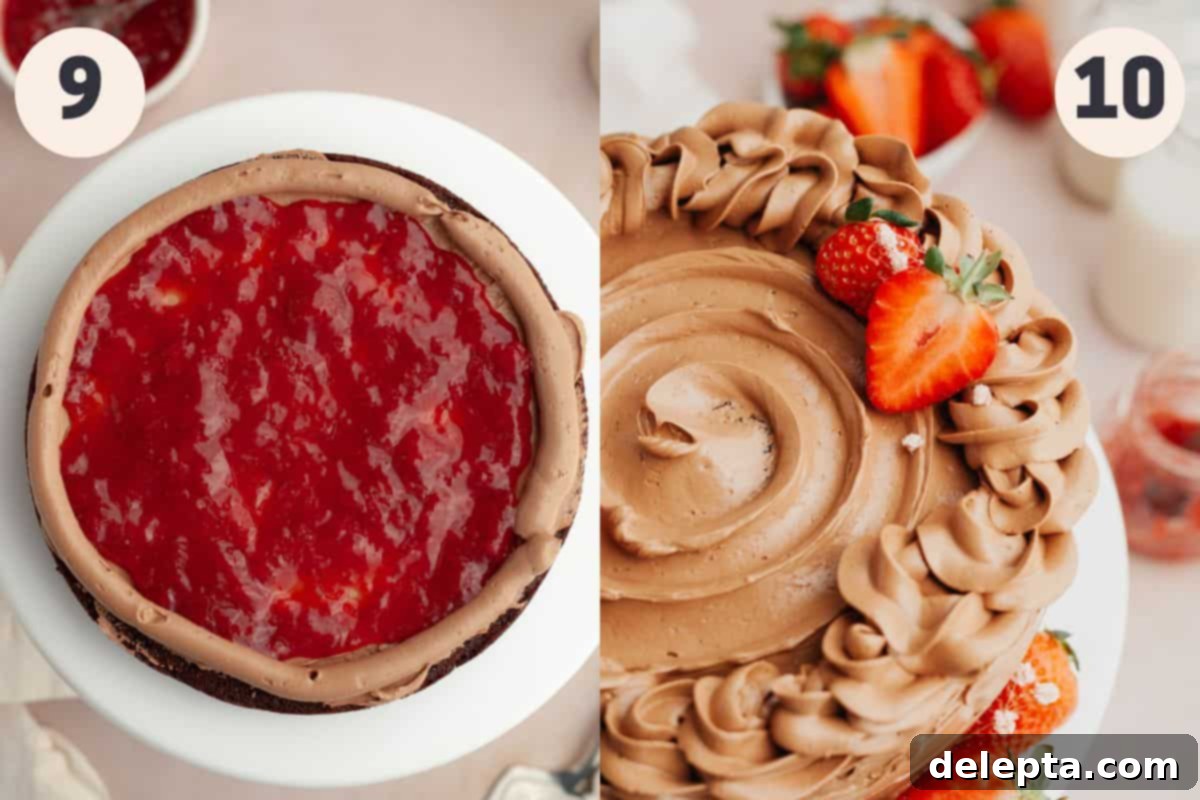
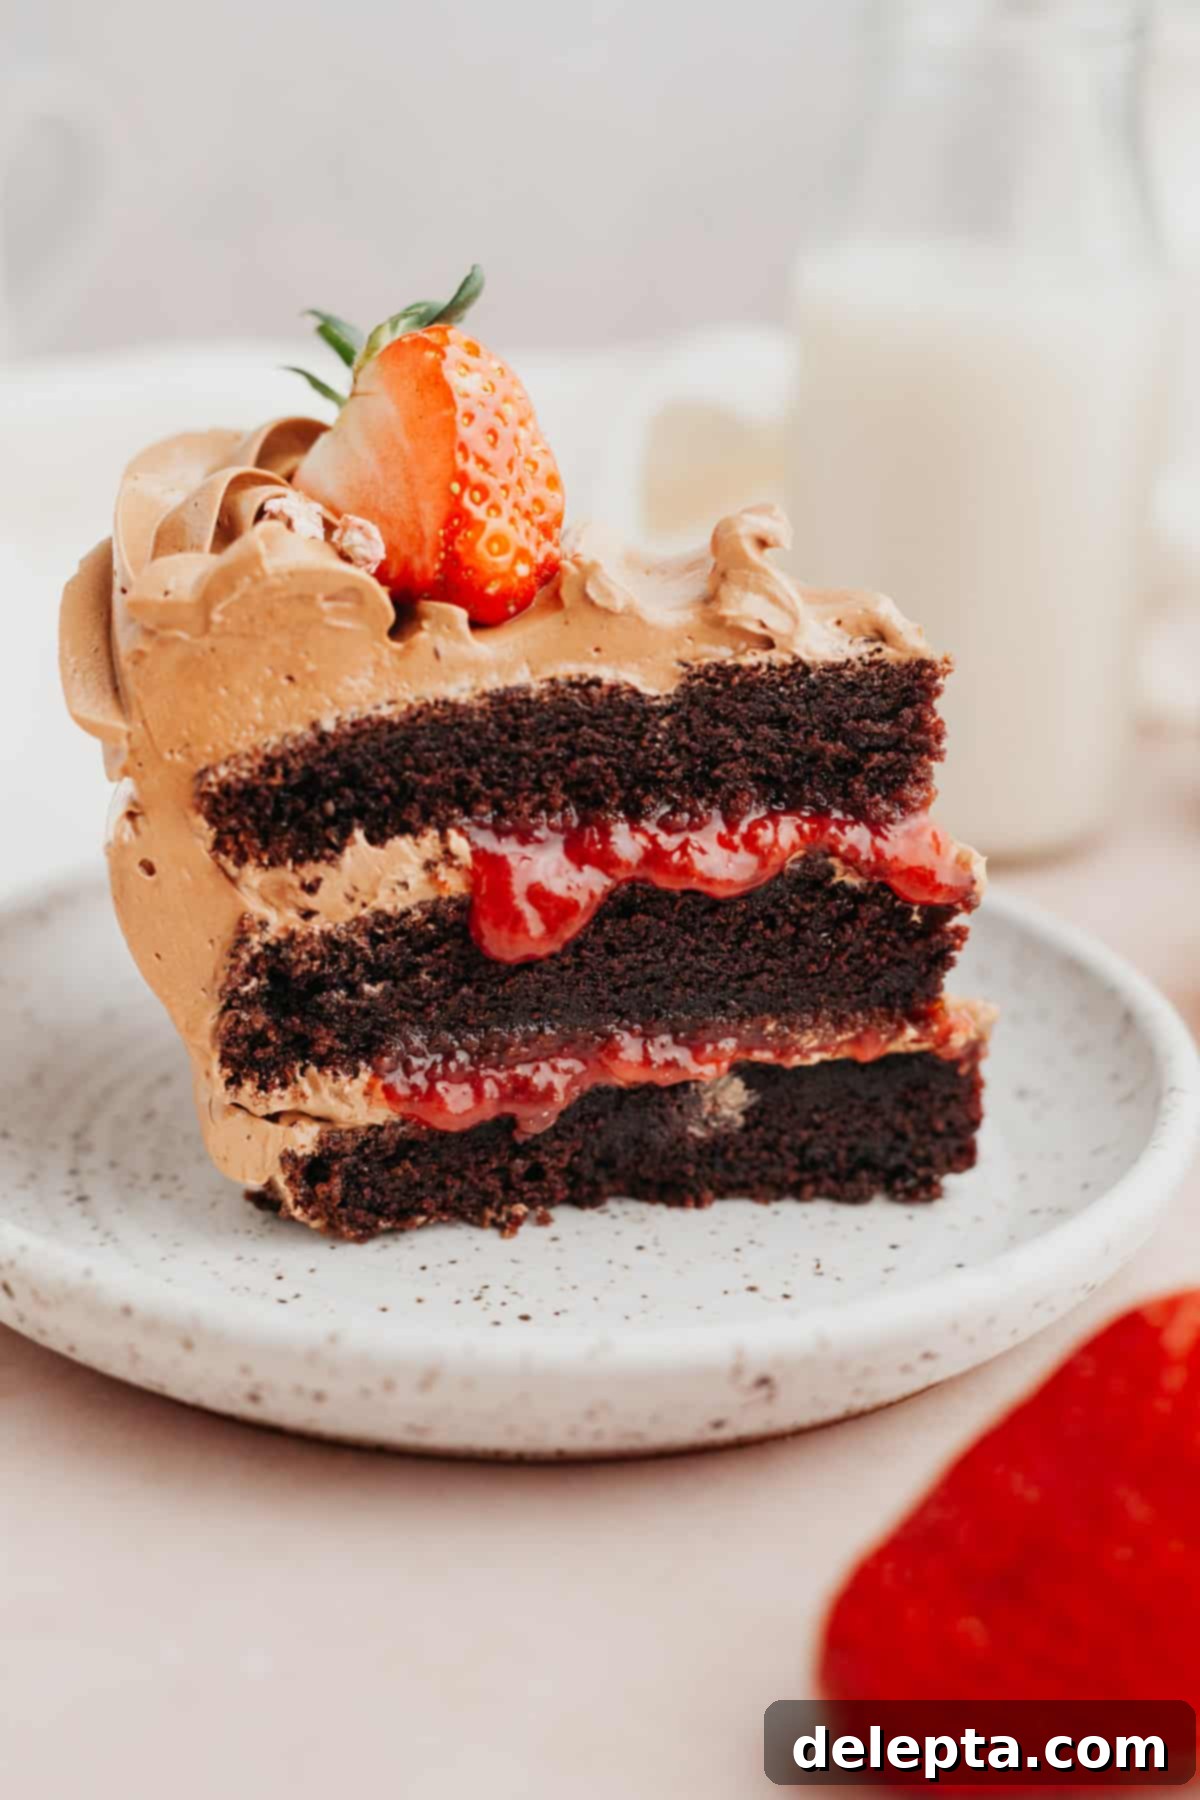
Step 9: Layering the Cake. Place one completely cooled chocolate cake layer onto your serving plate or cake stand. Spread a thin, even layer of the chocolate Swiss meringue buttercream over the top of the cake. Next, using a piping bag fitted with a round tip, pipe a sturdy ring of frosting around the outer edge of this cake layer. This “dam” will prevent the luscious strawberry filling from leaking out. Spoon a generous amount of the chilled strawberry filling into the center of the frosting dam and gently spread it evenly with an offset spatula. Place the second cake layer on top and repeat this frosting and filling process.
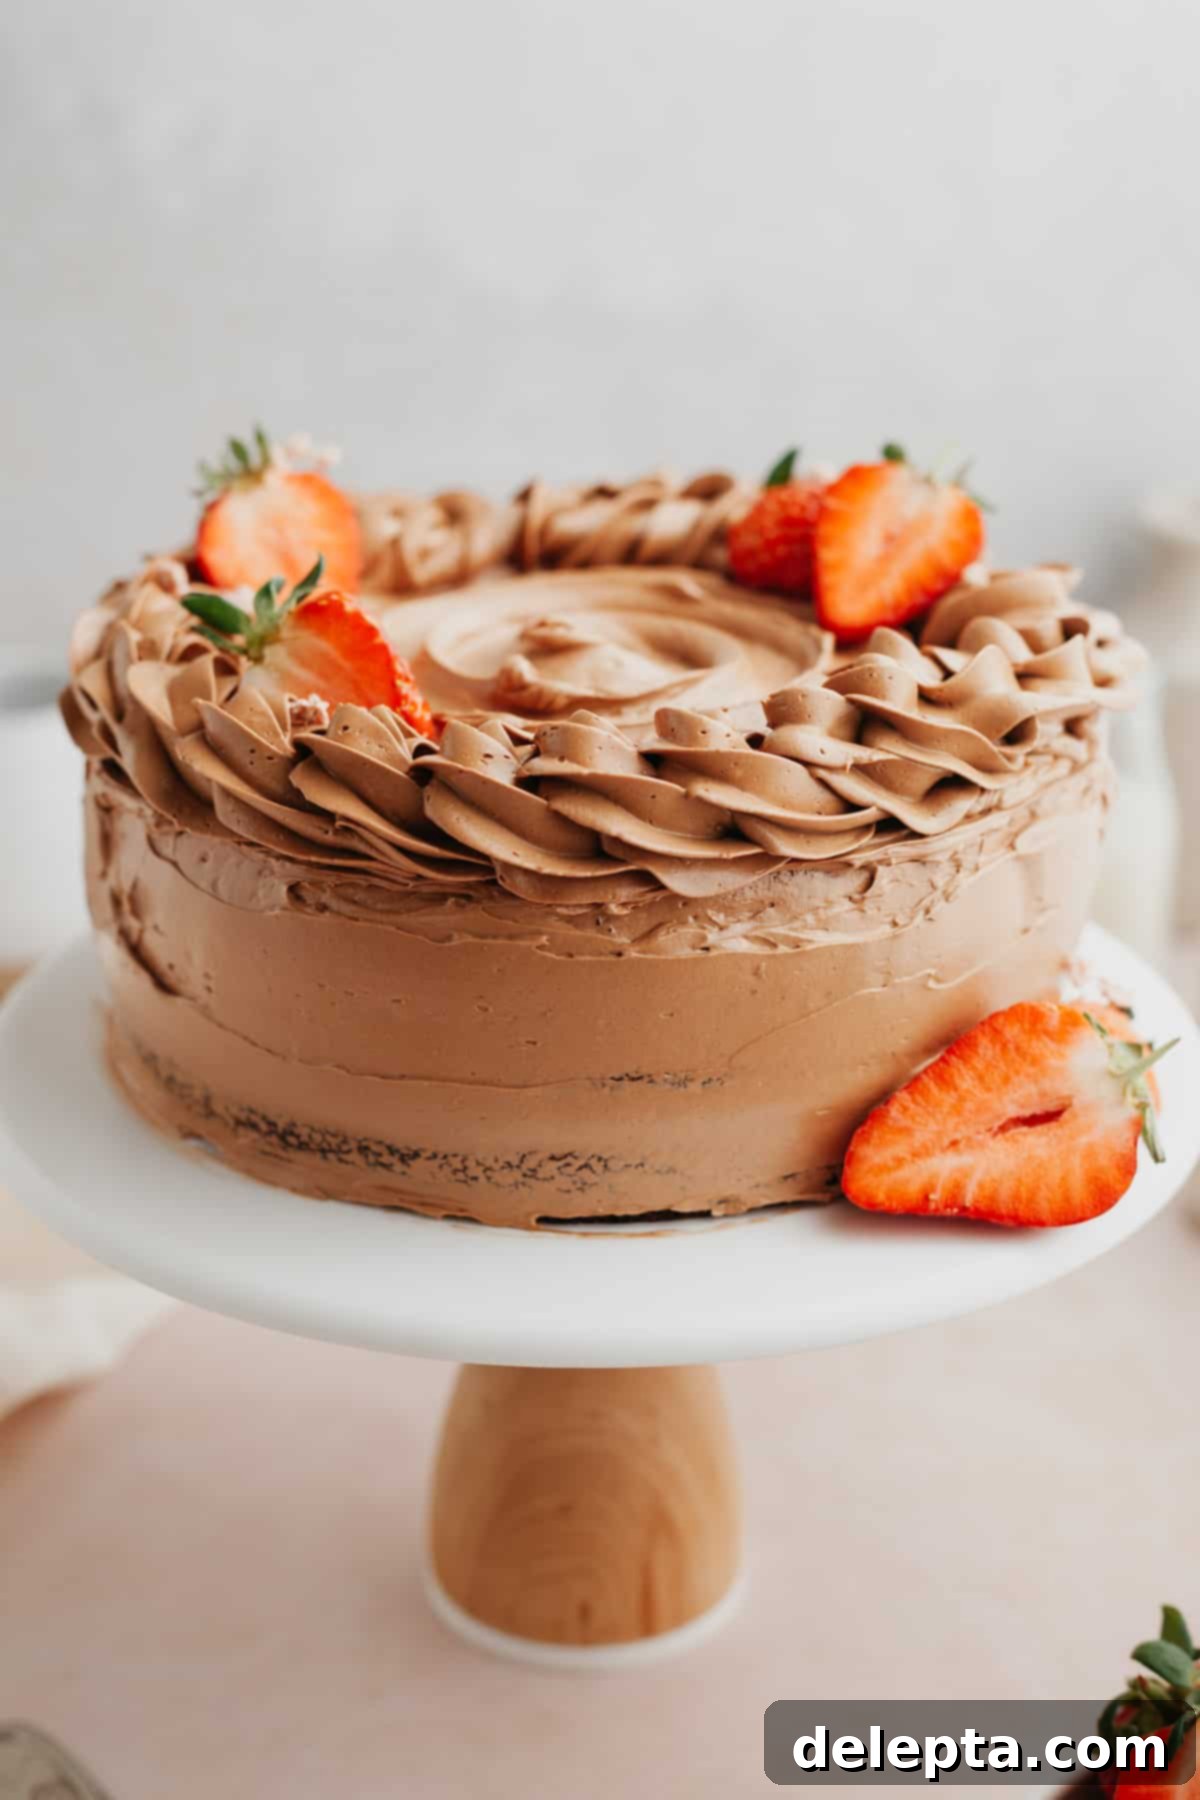
Step 10: Final Frosting and Decoration. Carefully place the third and final cake layer on top. Use the remaining chocolate Swiss meringue buttercream to frost the entire cake, covering the top and sides smoothly. For a beautiful finish, you can use an offset spatula to create swirls or a piping bag with a decorative tip (like a Wilton 1M) to add a beautiful border. Finally, arrange fresh, vibrant strawberries on top of the cake to decorate, adding a touch of natural beauty and a hint of the delicious filling within.
Expert Tips & Tricks for Perfect Cake Success
Achieving a bakery-worthy chocolate strawberry cake is easier with a few insider secrets. These tips will help you navigate the baking process like a pro:
- Embrace Your Weighing Scale: For unparalleled accuracy in baking, especially with delicate recipes like this, I cannot stress enough the importance of using a digital kitchen scale. Measuring ingredients in grams (metric) is far more precise than using volume measurements (cups), which can vary significantly. This attention to detail will make a huge difference in the consistency and outcome of your cake.
- The Magic of Room Temperature Ingredients: Ensure all your ingredients, particularly for the cake batter and especially the butter and egg whites for the Swiss meringue buttercream, are at true room temperature. Cold ingredients can lead to a lumpy batter and a “broken” or unstable buttercream. Room temperature ingredients emulsify more effectively, resulting in a smooth batter and a perfectly stable, airy frosting. For butter in SMB, it should be cool to the touch but soft enough to leave an impression when gently pressed.
- The Crucial Frosting Dam: When layering your cake, creating a sturdy “dam” of frosting around the perimeter of each cake layer before adding the strawberry filling is non-negotiable. This barrier acts as a protective wall, preventing the juicy filling from oozing out the sides of your cake and compromising its stability and appearance. Simply transfer some buttercream to a piping bag fitted with a round tip and pipe a thick ring.
- Strategize with Ahead-of-Time Prep: To make assembly day a breeze, plan your baking! The strawberry filling can be made up to a week in advance and stored in an airtight container in the refrigerator. The chocolate cake layers can also be baked two days ahead, cooled completely, tightly wrapped in plastic, and stored at room temperature (or frozen for up to two months). Defrost frozen layers overnight in the fridge before bringing them to room temperature for frosting.
- Personalized Decorating Touches: After frosting the cake with the exquisite chocolate buttercream, let your creativity shine! I often use a Wilton 1M piping tip to create elegant swirls or rosettes along the top edge or base of the cake. Other beautiful decorating ideas include a glossy chocolate drip, similar to what I did for my Oreo drip cake, scattering chocolate shavings, or arranging an abundance of fresh, whole strawberries artfully on top.
- Level Your Cake Layers: For a professional-looking cake, ensure your cooled cake layers are level. Use a serrated knife or a cake leveler to gently trim any domed tops, creating flat surfaces that stack neatly and evenly.
- Chill Between Steps: Don’t rush the process! If your frosting becomes too soft while decorating, or if you’re struggling with stacking, pop the cake (or just the bowl of frosting) into the refrigerator for 15-20 minutes to firm things up. This makes handling and decorating much easier.
Swiss Meringue Buttercream Troubleshooting Guide
Swiss meringue buttercream is renowned for its smooth, less-sweet profile, but it can sometimes present a few challenges. Don’t worry, these common issues are usually easy to fix!
- “I can’t get stiff peaks!” This is a common hurdle. The primary culprit is often a trace of fat (even a tiny bit of egg yolk) in the egg whites or a greasy bowl. Fat inhibits egg whites from whipping properly. Ensure your mixing bowl and whisk attachment are impeccably clean – wipe them down with lemon juice or vinegar before starting. Additionally, separate your egg whites one at a time into a separate small bowl before adding them to the main mixture to prevent a single broken yolk from ruining the entire batch. If it’s a particularly hot and humid day, it simply might take longer for the egg whites to achieve stiff peaks; patience is key.
- “How do I know when the meringue is ready?” The meringue is ready when it forms very stiff, glossy peaks. To test, stop your mixer and lift the whisk attachment straight up. The peaks should stand tall and firm without drooping or bending at the tip. Another crucial indicator is the temperature of the bowl itself: it should feel completely cool to the touch. If it’s still warm, continue whipping until it cools down, as residual warmth will melt the butter.
- “My buttercream is soupy after adding butter!” This usually happens when the meringue wasn’t sufficiently cooled before the butter was added, or if your butter itself was too warm and soft. The warm meringue melts the butter. Don’t panic! Stop the mixer, place the entire mixing bowl (with the soupy contents) into the refrigerator for 20-30 minutes, giving the mixture a chance to cool down. Once chilled (but not solidified), return it to the mixer and continue beating. It should magically come together into a smooth buttercream.
- “The buttercream seems to be curdling!” This is another common sight that can be alarming but is almost always fixable. It often looks like cottage cheese or scrambled eggs. The primary reasons are often temperature differences: either the butter was too cold when added, or the meringue was slightly too cool, causing the butter to seize up. The solution is simple: just keep mixing! It might take another 5-10 minutes, but with continuous beating, the friction from the mixer will gradually bring the mixture to the correct temperature and emulsify it into a perfectly smooth and fluffy buttercream. If it’s very stubborn, try gently warming the bottom of the bowl over a hot water bath for a few seconds, then continue mixing.
- Over-whipped Buttercream: While Swiss meringue buttercream is generally more stable than other types, over-whipping can sometimes make it lose its smooth texture and become greasy or grainy. If this happens, try stirring it vigorously by hand with a spatula for a minute or two, or briefly warming a small portion and mixing it back in.
Frequently Asked Questions
Planning ahead is a great way to make baking this showstopper cake manageable! You can prepare the delicious homemade strawberry filling up to 7 days in advance. Store it in an airtight container in the refrigerator, allowing the flavors to deepen. The chocolate cake layers can be baked up to 2 days ahead of time. Once completely cooled, wrap each layer tightly in plastic wrap to prevent them from drying out, and store them at room temperature. For longer storage, the cooled cake layers can be frozen for up to 2 months; simply defrost them overnight in the refrigerator and bring them to room temperature before assembling and frosting.
Absolutely, you can easily adapt this recipe to a two-layer cake instead of three. You will use the same amount of ingredients for the cake batter; simply divide it between two 8-inch cake pans instead of three. Due to the thicker layers, you will need to adjust the baking time. Increase the baking time to approximately 35-40 minutes, or until a toothpick inserted into the center comes out clean. Be sure to check for doneness periodically to avoid overbaking.
Yes, this cake is wonderfully adaptable to different frosting preferences! If you’re looking for an even richer chocolate experience, consider my chocolate sour cream frosting from my triple chocolate layer cake – it’s incredibly moist and decadent. For a tangy contrast that beautifully complements the sweet strawberries, my chocolate cream cheese frosting from my chocolate cake with cream cheese frosting would be an excellent choice. Alternatively, to really highlight the strawberry element, a light and fruity strawberry frosting would also be a fantastic option, adding another layer of berry goodness to each bite.
Expand Your Baking Repertoire: Try These Recipes Next!
Loved this chocolate strawberry cake? Then you’re sure to enjoy these other delightful baking projects:
- Vanilla Cake with Strawberry Filling
- Easy Yogurt Plum Cake (1-Bowl)
- Lemon Curd Cake
- Nutella Filled Cake
If you’ve made this incredibly delicious chocolate strawberry cake recipe, make sure to leave a ⭐️ rating and a thoughtful review below! I absolutely love seeing your culinary creations and hearing your feedback. Please tag me on Instagram @alpineella so I can admire your beautiful bakes! You can also stay connected and discover more recipes by following along on Pinterest, Facebook, and TikTok!
Recipe
Chocolate Cake with Strawberry Filling
Ella Gilbert
Pin Recipe
Save Recipe
Saved!
1 hour
25 minutes
1 hour
25 minutes
Dessert
American
12
slices
705
kcal
Equipment
-
3 8″ round cake pans
Ingredients
Chocolate Cake
-
¾ cup cocoa powder dutch processed -
1 ¾ cups granulated sugar -
¾ teaspoon vanilla extract -
¾ teaspoon kosher salt -
2 eggs room temperature -
2 cups all purpose flour -
2 teaspoon baking soda -
1 teaspoon baking powder -
1 cup buttermilk room temperature -
½ cup vegetable oil -
1 cups very hot water
Strawberry Filling
-
2 cups strawberries diced -
4 tablespoons white sugar -
1 ½ tablespoons lemon juice -
lemon zest
Chocolate Swiss Meringue Buttercream
-
8 oz semisweet chocolate melted and cooled -
1 cup white sugar -
4 large egg whites -
1 ⅓ cups unsalted butter room temperature -
½ teaspoon kosher salt -
½ teaspoon vanilla extract
Instructions
Make Cake
-
Preheat your oven to 350°F (175°C). Prepare three 8-inch round baking pans by greasing them thoroughly with butter or baking spray, then lining the bottoms with parchment paper. If you only have two pans, you can bake the first two cake layers, let them cool slightly, then clean and reuse one of the pans for the third layer.
-
In the bowl of a stand mixer fitted with the paddle attachment (or a large mixing bowl for a hand mixer), combine the all-purpose flour, Dutch-processed cocoa powder, granulated sugar, baking powder, baking soda, and kosher salt. Mix on low speed for about 30 seconds until all dry ingredients are well combined and uniform.¾ cup cocoa powder,
1 ¾ cups granulated sugar,
¾ teaspoon kosher salt,
2 cups all purpose flour,
2 teaspoon baking soda,
1 teaspoon baking powder -
In a large liquid measuring jug or a separate bowl, whisk together the room temperature buttermilk, neutral vegetable oil, large eggs, and fragrant vanilla extract until the mixture is completely smooth and evenly combined.2 eggs,
1 cup buttermilk,
½ cup vegetable oil,
¾ teaspoon vanilla extract -
With the stand mixer running on its lowest speed, slowly pour the prepared wet ingredients into the dry ingredients. Mix until just combined, being careful not to overmix.
-
While the mixer is still running on its lowest setting, carefully and slowly add the very hot water. The batter will become quite thin, which is the correct consistency for this recipe, so do not be alarmed. Ensure the mixer remains on its lowest speed to prevent splashing. Mix until just combined.1 cups very hot water
-
Divide the batter evenly among the three prepared pans. Each pan should contain approximately 470 grams of batter. Bake for 22-25 minutes, or until a wooden toothpick inserted into the center of a cake layer comes out clean with no wet batter attached.
-
Allow the baked cakes to cool in their pans on a wire rack for 10 minutes. This helps them firm up slightly. After 10 minutes, carefully invert the cakes onto the wire rack, remove the parchment paper, and let them cool completely to room temperature before attempting to frost them.
Make Filling
-
In a medium saucepan, combine the diced fresh strawberries, white sugar, fresh lemon juice, and finely grated lemon zest. Stir gently to combine all ingredients. Place the saucepan over medium-low heat and bring the mixture to a gentle simmer, stirring occasionally.2 cups strawberries,
4 tablespoons white sugar,
1 ½ tablespoons lemon juice,
lemon zest -
Continue to simmer the strawberry mixture for approximately 25-30 minutes, stirring frequently to prevent scorching. You may need to lower the heat to low if the mixture is bubbling too aggressively. The goal is for the strawberries to break down and the sauce to thicken significantly into a jam-like consistency.
-
You’ll know the strawberry sauce is perfectly ready when it coats the back of a spoon thickly, and when you draw a line through it with your finger, the line remains clear without the sauce running back together. Remove the saucepan from the heat and immediately pour the filling into a clean jar or heatproof bowl. Let it cool completely to room temperature before placing it in the refrigerator to chill thoroughly. A cold filling is easier to work with.
Make Frosting
-
Fill a medium saucepan with about an inch of water and bring it to a gentle simmer. In a large heatproof mixing bowl (ideally the bowl of your stand mixer), combine the large egg whites and white sugar. Place this bowl over the simmering water, ensuring the bottom of the bowl does not touch the water. This creates a double boiler effect.4 large egg whites,
1 cup white sugar -
Continuously whisk the egg white and sugar mixture over the simmering water until the sugar has completely dissolved. The mixture will transform from a slightly yellow and grainy liquid into a smooth, white, and opaque syrup; this typically takes around 5 minutes. To ensure all sugar crystals dissolve, occasionally brush down the sides of the bowl with a pastry brush. The ideal temperature, measured with a thermometer, is 140°F (60°C). If you don’t have a thermometer, gently rub a small amount of the mixture between your fingers – it should feel completely smooth, without any grit.
-
Carefully remove the bowl from the saucepan and attach it to your stand mixer fitted with the whisk attachment (or use a powerful hand mixer). Begin beating the mixture on medium-high speed. Continue to whisk for 10-15 minutes, or up to 20 minutes in very warm or humid conditions, until you achieve a thick, glossy meringue with very stiff peaks. A crucial check is that the mixing bowl should be completely cool to the touch. If the meringue or bowl is still warm, it will melt the butter in the next step, leading to a soupy buttercream.
-
Switch the mixer attachment to the paddle attachment. With the mixer running on medium-high speed, add the room temperature unsalted butter, one cube at a time, ensuring each piece is fully incorporated before adding the next. The mixture may appear curdled, lumpy, or even soupy at various stages – this is entirely normal! Keep mixing, and after 8-12 minutes, it will miraculously transform into a smooth, light, and fluffy buttercream. Once smooth, slowly pour in the cooled melted semisweet chocolate, vanilla extract, and kosher salt. Mix on low-medium speed until all ingredients are thoroughly combined and the buttercream is uniform in color and texture. Use a rubber spatula to scrape down the sides of the bowl and ensure everything is perfectly blended.8 oz semisweet chocolate,
1 ⅓ cups unsalted butter,
½ teaspoon vanilla extract,
½ teaspoon kosher salt
Assembly
-
Transfer a portion of your chocolate Swiss meringue buttercream into a piping bag fitted with a round tip (e.g., Wilton 1A or a similar size). Place one completely cooled cake layer onto your desired serving plate or cake stand. Spread a very thin layer of buttercream over the entire surface of this cake layer; this acts as a ‘crumb coat’ and helps to secure the next layer. Then, using the piping bag, pipe a sturdy ring of frosting around the outer edge of the cake. This forms a crucial “dam” to prevent the strawberry filling from leaking out.
-
Spoon a generous amount of the thoroughly chilled strawberry filling into the center of the frosting dam you’ve created. Use an offset spatula to gently spread the filling evenly, ensuring it stays within the piped barrier. You can choose to have a thin, delicate layer or a thick, substantial one, depending on your preference for fruit.
-
Carefully place the second cooled cake layer directly on top of the strawberry filling. Gently press down to ensure it’s level. Repeat the process: spread a thin layer of buttercream, pipe another frosting dam, and spoon in more chilled strawberry filling.
-
Finally, gently place the third and final cake layer on top. Use the remaining chocolate buttercream to frost the entire cake, covering both the top and sides smoothly and evenly. For a decorative flourish, I often use a Wilton 1M piping tip to create beautiful swirls or rosettes around the top and bottom edges of the cake. Finish with fresh strawberries for an elegant and inviting presentation!
Notes
My recipes have been meticulously developed and tested using metric grams. For the most accurate and consistent baking results, I highly recommend using a digital kitchen scale and measuring all your ingredients the metric way. While I have provided a conversion to US cups, please note that the recipe has not been extensively tested with volume measurements, and results may vary. To access the precise metric measurements, simply click on ‘METRIC’ above the ingredients list in the recipe card.
Always ensure all of your ingredients are at true room temperature before you begin the recipe. This is especially crucial for the butter and eggs in the Swiss meringue buttercream, as it ensures proper emulsion and a smooth, stable frosting. Pull out all ingredients well in advance of baking.
Butter: For the best flavor and texture, I exclusively use European-style unsalted butter in my recipes, such as Kerrygold. This type of butter has a higher fat content and a richer flavor, which contributes significantly to a creamier and more luxurious buttercream. For the Swiss meringue buttercream, the butter must be at a cool room temperature – it should be firm enough to hold its shape but soft enough to leave a slight indentation when pressed.
Salt: I use Diamond Crystal kosher salt in all my recipes, which is lighter and less salty by volume compared to other brands like Morton’s or fine table salt. If you are using fine table salt or Morton kosher salt, please halve the amount called for in the recipe to avoid an overly salty taste. A good rule of thumb is: 1 teaspoon of Diamond Crystal kosher salt is roughly equivalent to ½ teaspoon of fine salt.
Buttermilk: If you don’t have store-bought buttermilk on hand, you can easily make your own substitute. For every cup of buttermilk required, simply add 1 tablespoon of fresh lemon juice or white vinegar to 1 cup of regular milk (dairy or non-dairy). Stir it gently and let it sit for 5-10 minutes until it visibly curdles. Alternatively, an equal amount of full-fat sour cream or plain full-fat yogurt can be used as a direct substitute in the cake batter for similar moistness and tang.
Neutral Vegetable Oil: For the cake batter, it’s important to use an unflavored, neutral oil that won’t overpower the chocolate flavor. Excellent choices include vegetable oil, canola oil, or rapeseed oil. These oils contribute significantly to the cake’s moistness and tender texture.
Two-Layer Cake Option: If you prefer a simpler, two-layer cake instead of a three-layer one, simply divide the same cake batter between two 8-inch cake pans. Keep in mind that these thicker layers will require a longer baking time. Bake them for approximately 35-40 minutes, or until a wooden toothpick inserted into the center comes out clean.
Weighing Egg Whites: For the most consistent and reliable Swiss meringue buttercream, I highly recommend weighing your egg whites. This ensures you have the precise amount needed for the perfect sugar-to-egg-white ratio, which is critical for achieving a stable and glossy meringue.
Fixing ‘Broken’ Buttercream: If your Swiss meringue buttercream appears “broken” (soupy or curdled), don’t despair – it’s usually a temperature issue and easily fixable! If it’s looking soupy, it means your meringue was too warm when the butter was added, causing the butter to melt. Place the entire mixing bowl (with the soupy buttercream) into the refrigerator for about 20 minutes to cool down. Then, return it to the mixer and continue beating on medium-high speed until it comes together. If it looks curdled, the butter might have been too cold. Keep mixing! The friction from the mixer will gradually warm it, and it will eventually smooth out. You can also gently warm a small portion of the buttercream over a double boiler for a few seconds before reincorporating it to help it smooth out.
Storage: To keep this beautiful chocolate strawberry cake fresh, store it tightly wrapped in plastic wrap or in an airtight cake dome in the refrigerator for up to 5 days. For the best flavor and texture, allow the cake to come to room temperature for at least 30-60 minutes before slicing and serving.
Making Ahead: This cake is excellent for making components in advance. The cake layers can be baked, cooled completely, tightly wrapped in plastic wrap, and stored in the fridge for up to 2 days, or frozen for up to 2 months. If frozen, ensure they are fully defrosted and at room temperature before frosting. The strawberry filling can also be made up to a week in advance and stored in an airtight container in the refrigerator.
Nutrition
Calories:
705
kcal
Carbohydrates:
86
g
Protein:
8
g
Fat:
39
g
Saturated Fat:
20
g
Polyunsaturated Fat:
7
g
Monounsaturated Fat:
10
g
Trans Fat:
1
g
Cholesterol:
85
mg
Sodium:
517
mg
Potassium:
313
mg
Fiber:
5
g
Sugar:
63
g
Vitamin A:
715
IU
Vitamin C:
15
mg
Calcium:
80
mg
Iron:
3
mg
Tried this recipe?
Leave a comment below! You can also tag me on Instagram @alpineella so I can see what you made!
