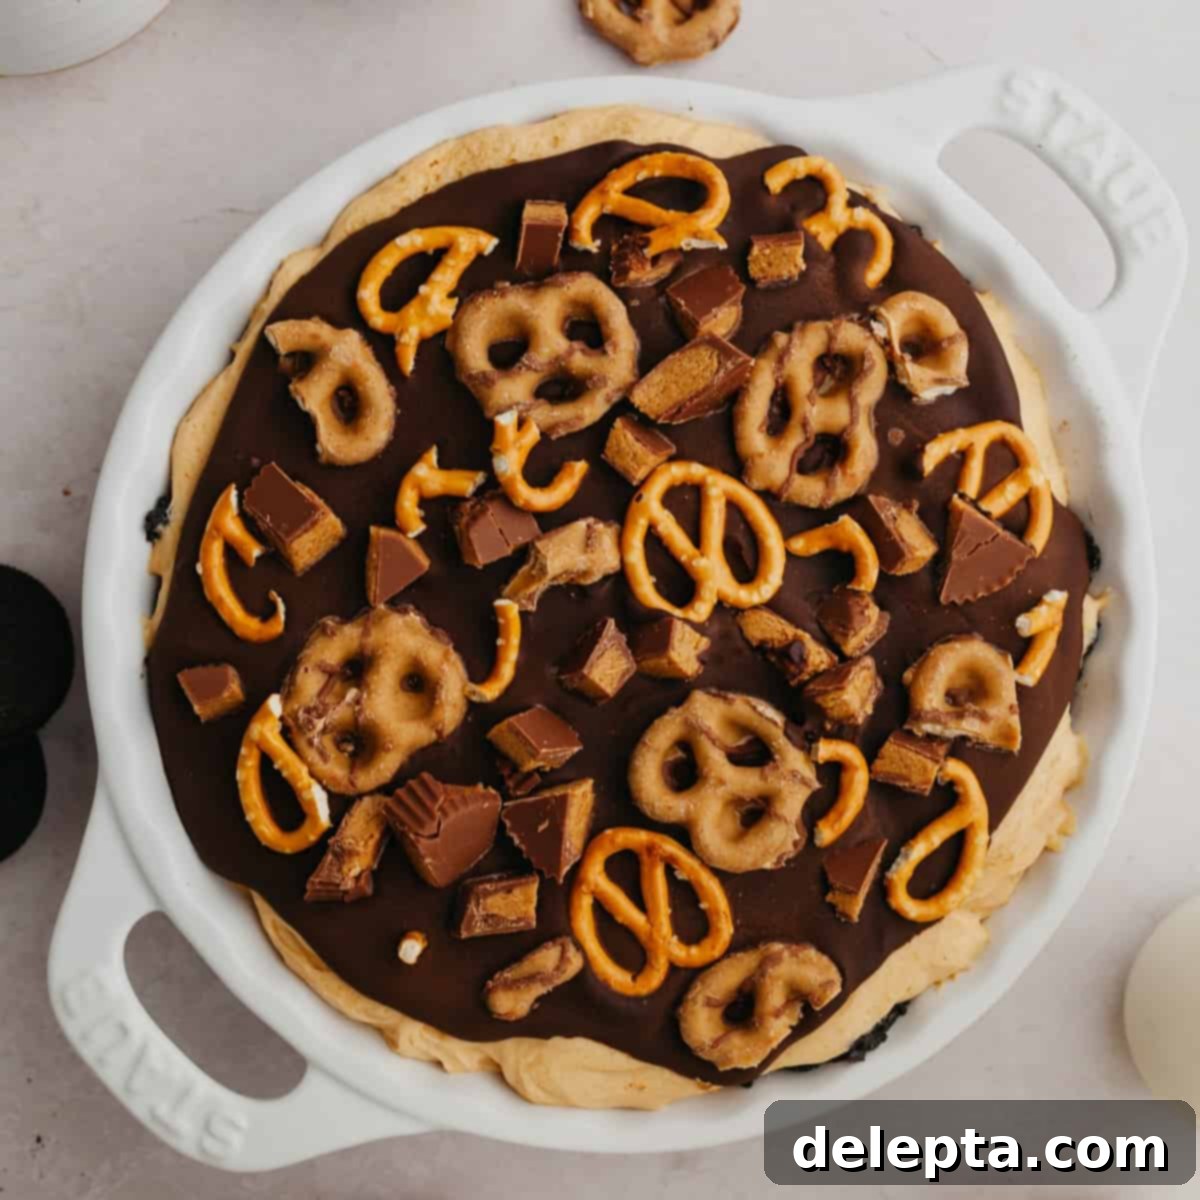
Irresistible No-Bake Oreo Peanut Butter Pie: Your New Favorite Easy Dessert
Prepare yourself for a dessert experience that’s like a dream come true for any chocolate and peanut butter enthusiast! This no-bake Oreo peanut butter pie is an extraordinary mashup of your favorite childhood treats, combining the beloved crunch of Oreos with the creamy, rich flavor of peanut butter cups. It’s incredibly easy to make, featuring a delightful, crisp Oreo crust, a luxuriously smooth peanut butter filling, and crowned with a luscious chocolate ganache. If you’re searching for a show-stopping dessert that requires no oven time and guarantees smiles, look no further!
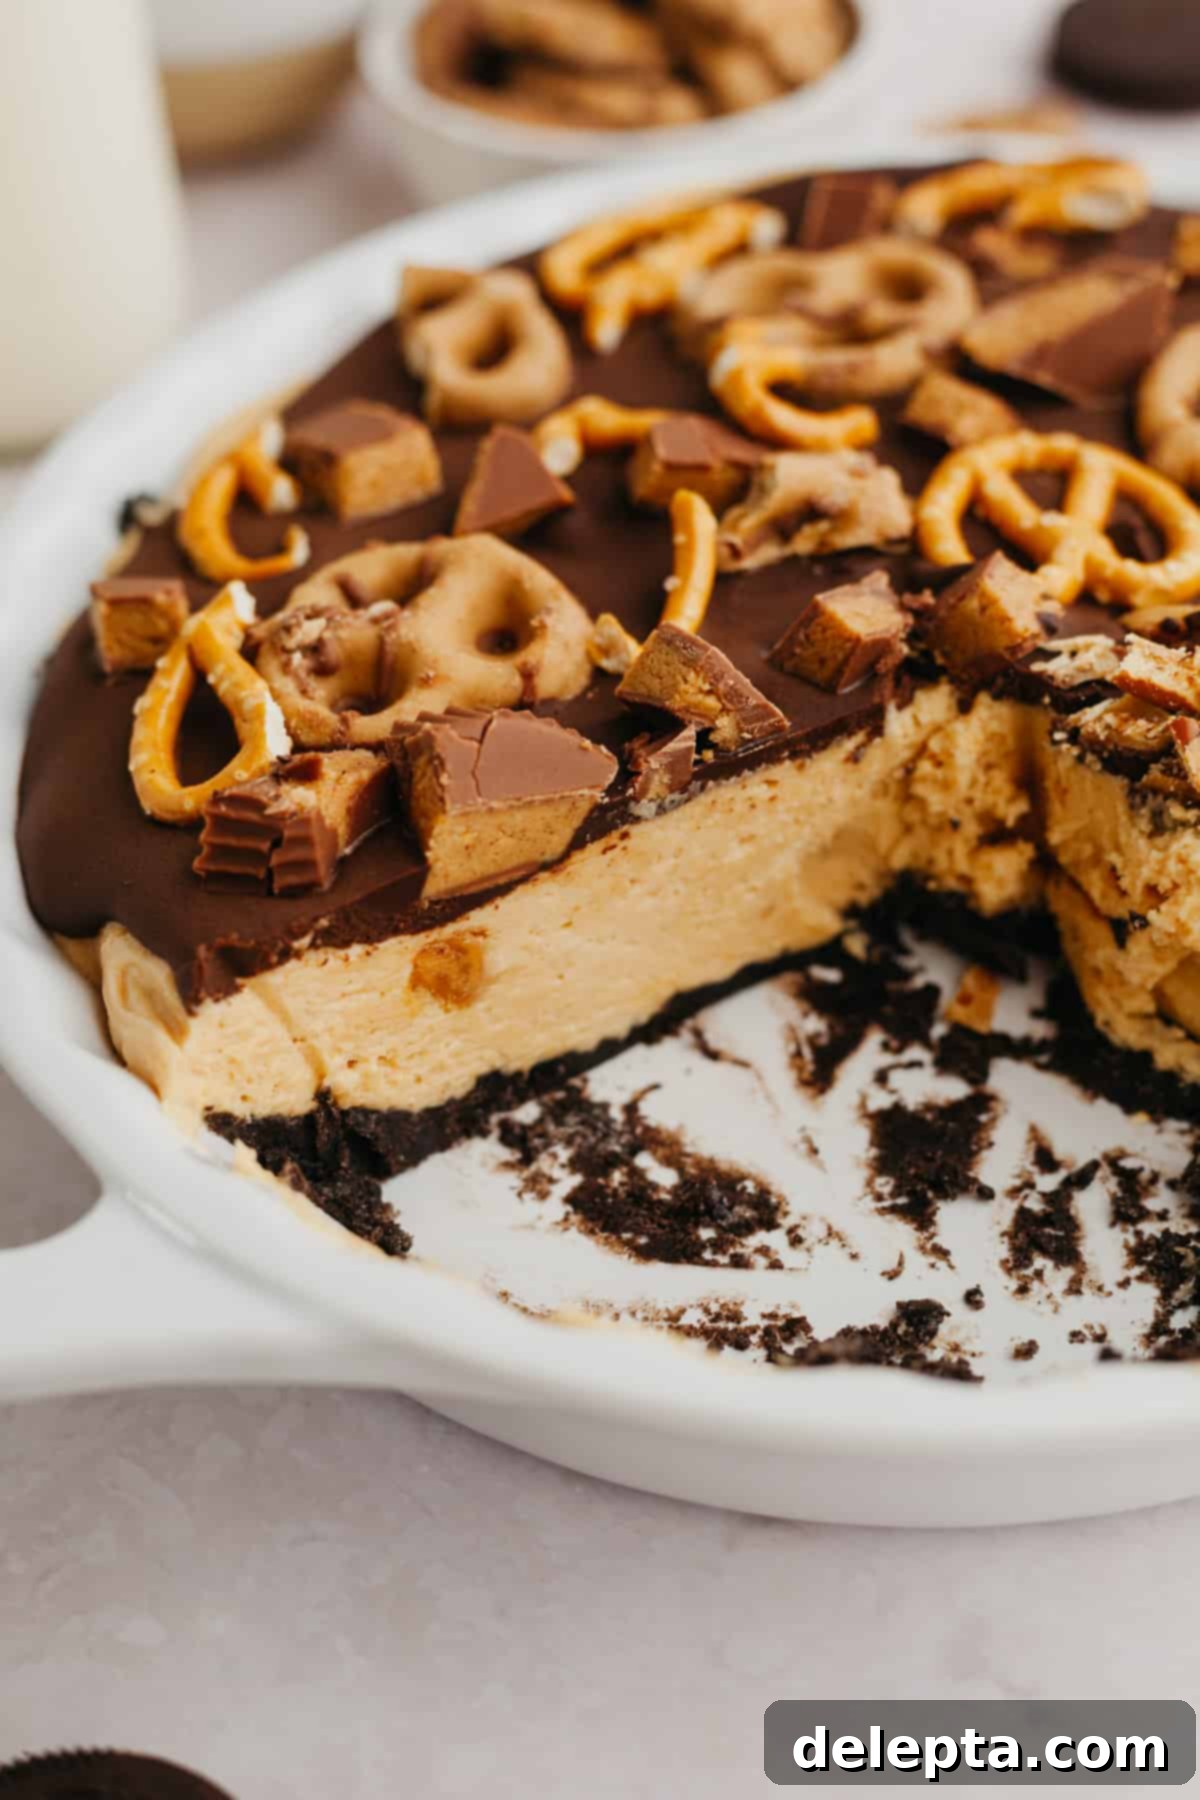
This recipe has been thoughtfully updated! Originally published in 2021, we’ve refined the crust for ultimate no-bake convenience and introduced fresh, inviting images to inspire your baking adventure.
The combination of peanut butter and chocolate is a culinary masterpiece that has stood the test of time, and for good reason. That perfect balance of salty and sweet is simply irresistible. When you introduce the classic crunch and chocolatey goodness of Oreos into this legendary duo, you elevate it to an entirely new level of deliciousness. This pie isn’t just a dessert; it’s an homage to a flavor pairing that brings joy with every single bite.
Our original Oreo peanut butter pie featured a more traditional chocolate cookie crust, but we’ve since optimized it for pure simplicity. We’ve embraced a full Oreo crust, making this pie entirely no-bake and significantly easier to prepare without sacrificing any flavor. The star of the show, the filling, is intensely flavored with peanut butter, making it an absolute dream for dedicated peanut butter lovers. Each spoonful delivers a rich, creamy explosion of peanut butter goodness. If you find yourself craving even more chocolatey delights, be sure to try our peanut butter cream cheese brownies for another unforgettable treat.
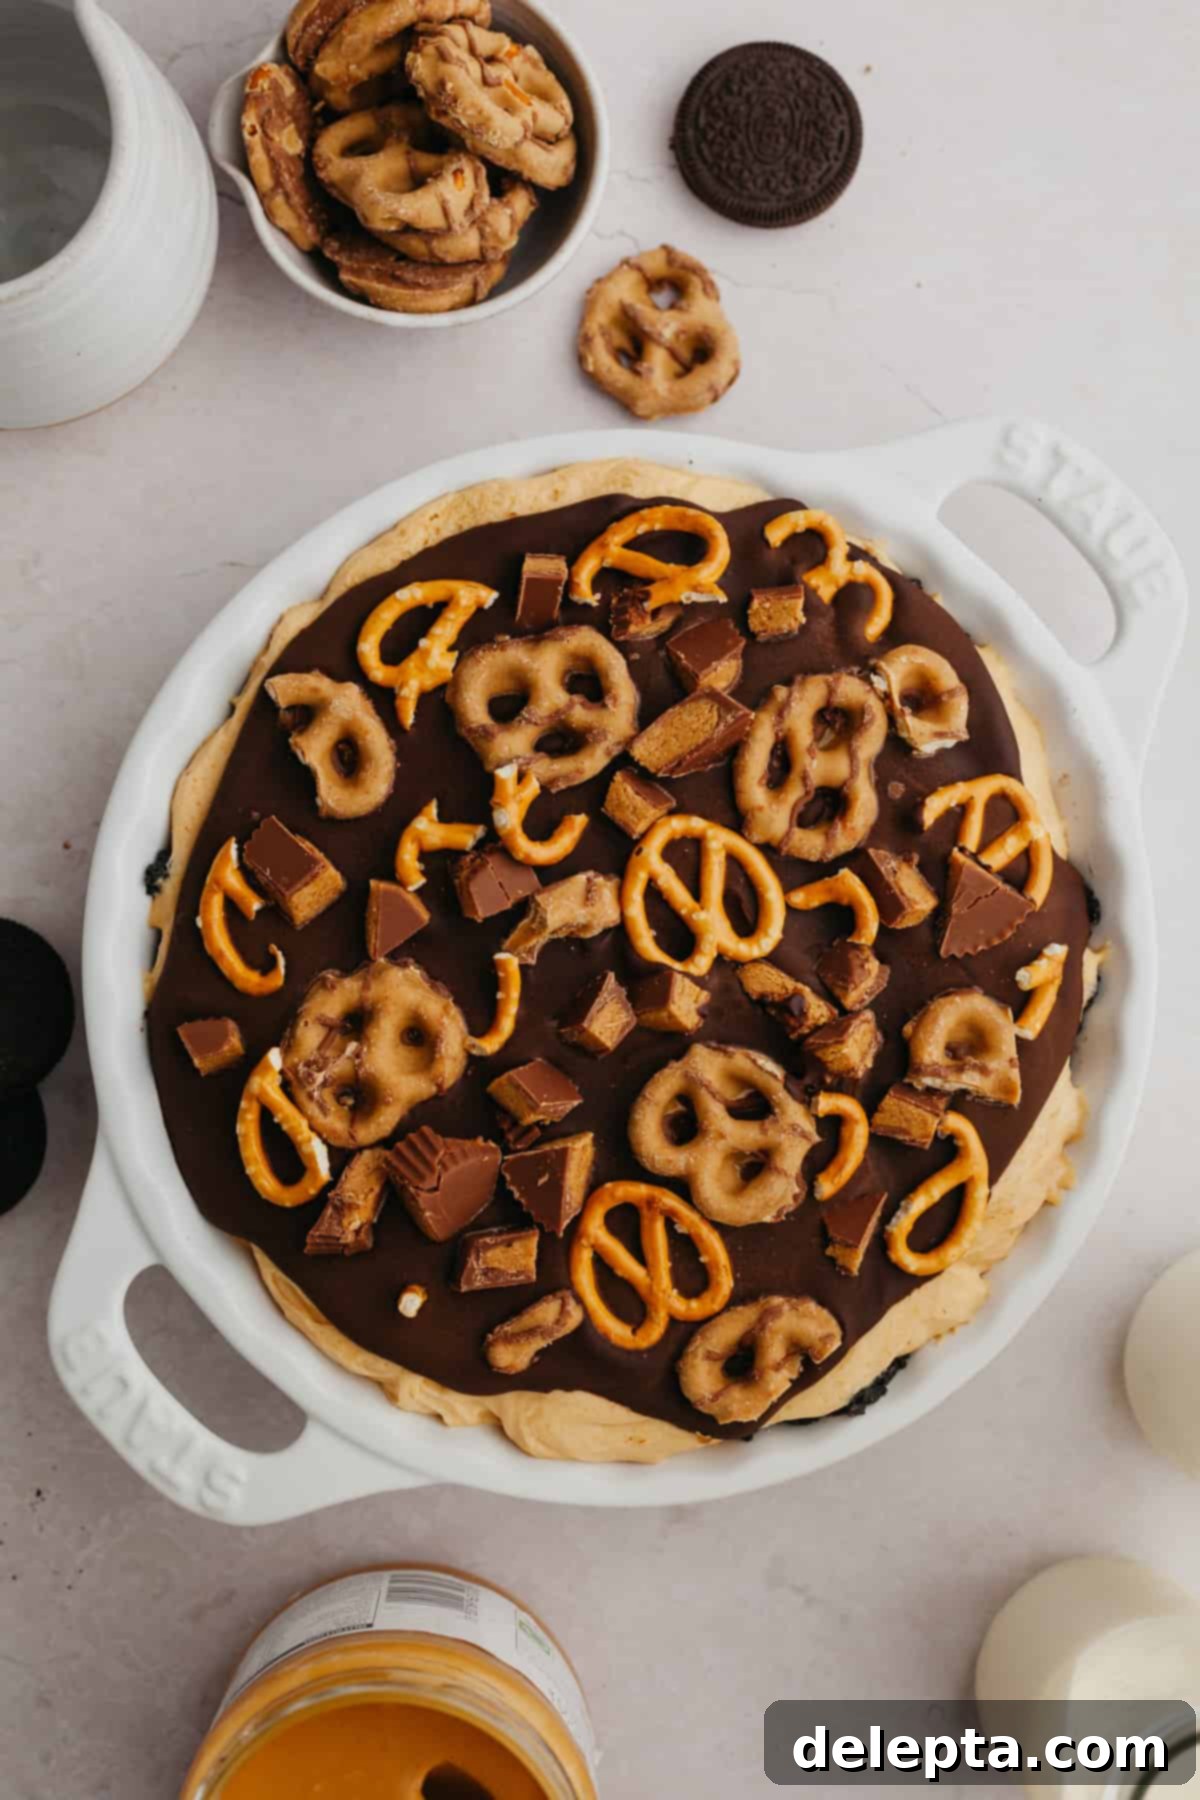
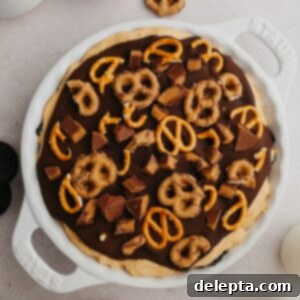
To complete this magnificent no-bake creation, we’ve generously topped it with a decadent chocolate ganache. For added texture and a touch of whimsy, we’ve also sprinkled on Reese’s pretzels and regular pretzels. However, feel free to get creative with your toppings! Mini Oreo cookies or Nutter Butter pieces would add fantastic complementary flavors and textures. Imagine a sprinkle of chopped peanut butter cups, a drizzle of caramel, or even a handful of chocolate chips – the possibilities are endless to customize this pie to your liking!
Can’t get enough of the glorious chocolate peanut butter combination? We understand! Explore more of our delectable recipes that celebrate this iconic pairing: indulge in our peanut butter Nutella cookies, savor the richness of our brownies with peanut butter cups, or enjoy a nostalgic treat with our chocolate peanut butter rice krispie treats. Each recipe is designed to satisfy your deepest chocolate peanut butter cravings.
Why You’ll Adore This No-Bake Oreo Peanut Butter Pie!
- Effortless Elegance & Guaranteed Crowd-Pleaser: This isn’t just an easy peanut butter pie; it’s a dessert that effortlessly combines sophistication with comfort. It’s a guaranteed hit at any gathering, from casual family dinners to festive holiday parties. The classic combination of chocolate and peanut butter appeals to nearly everyone, making it a safe bet to impress your guests and leave them asking for the recipe. Its inviting appearance and rich flavors ensure it stands out on any dessert table.
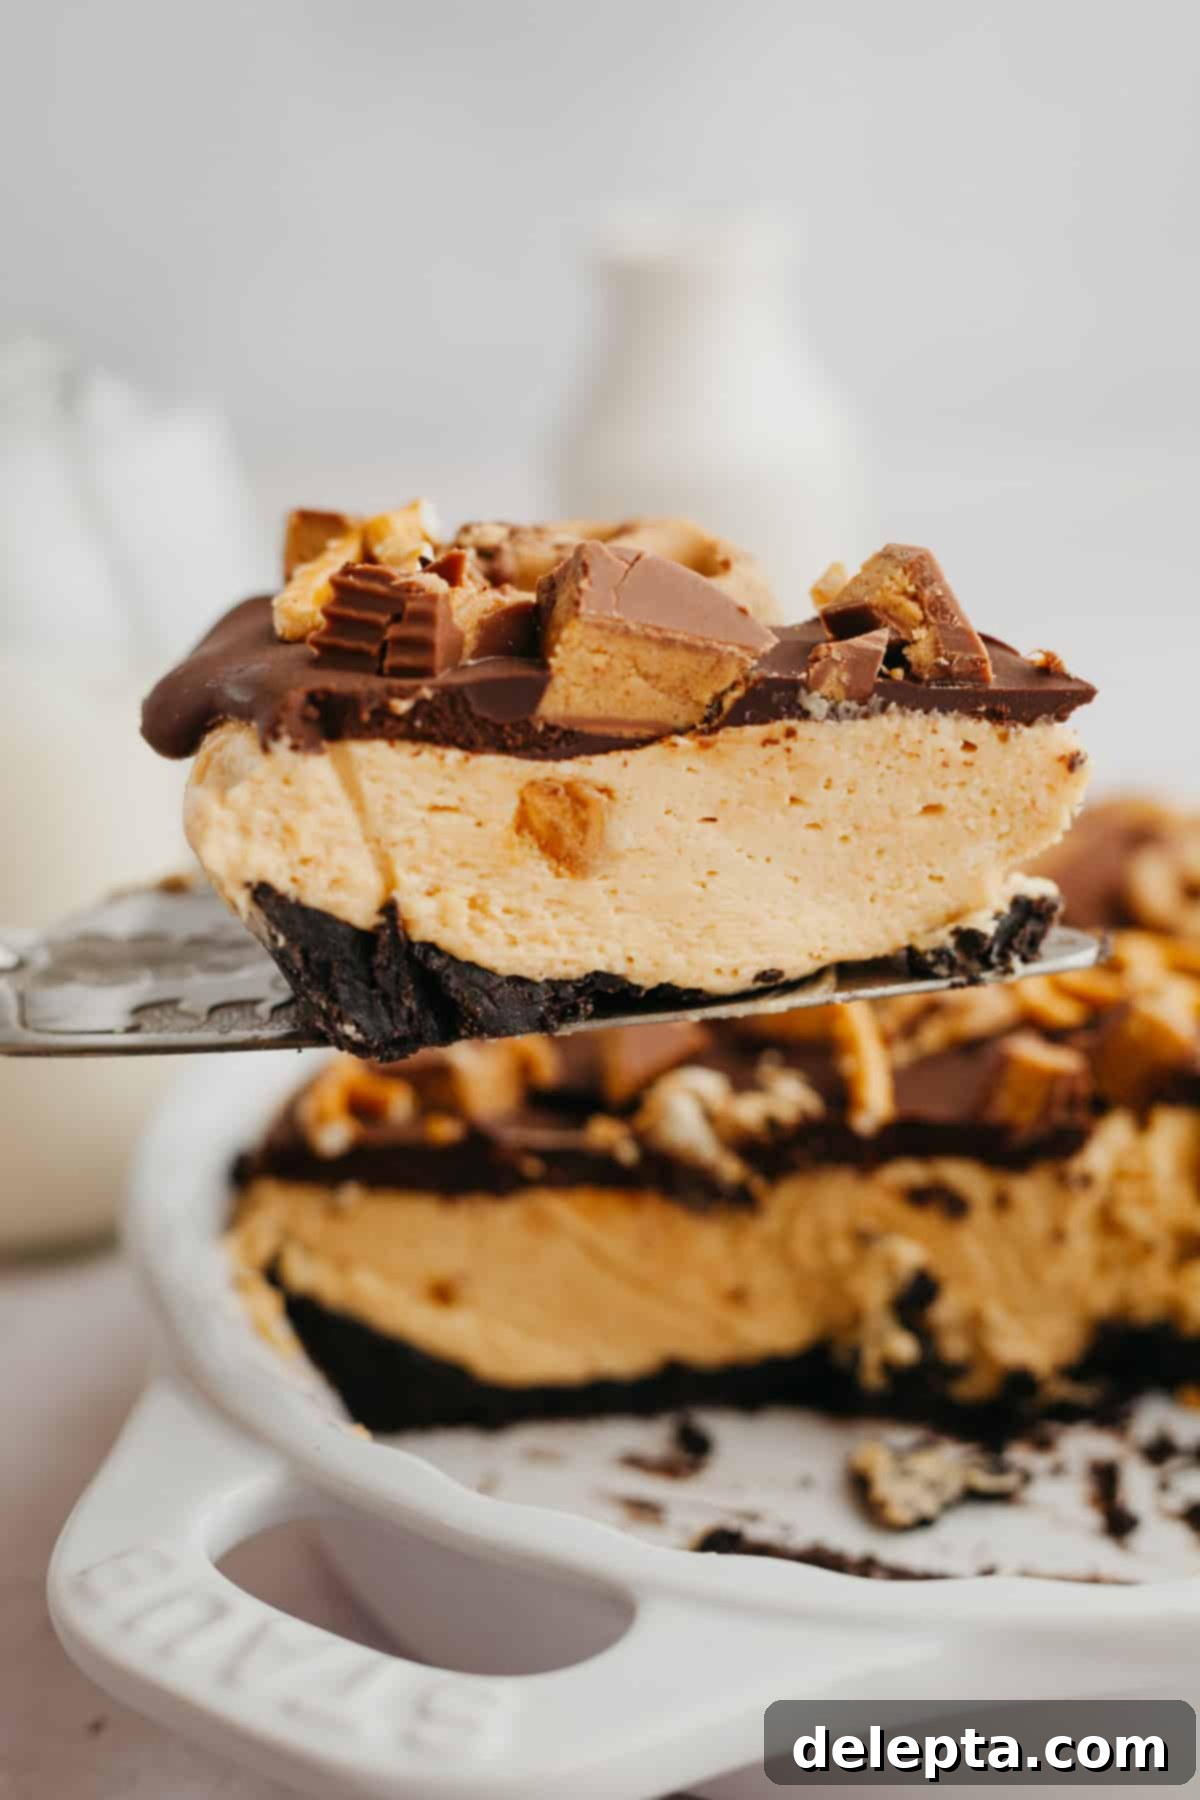
- Silky Smooth No-Bake Peanut Butter Filling: The heart of this pie is its incredibly simple yet luxurious no-bake peanut butter filling. Crafted from a blend of creamy cream cheese and light whipped cream, it achieves a texture that is nothing short of velvety. The cream cheese adds a delightful tang and stability, while the whipped cream incorporates air, making the filling wonderfully light and airy, melting in your mouth with every bite. It’s a filling that truly delivers on its promise of rich peanut butter flavor without being overly heavy.
- Decadent Dark Chocolate Ganache Topping (with options!): We’ve crowned this magnificent pie with a rich dark chocolate ganache that sets beautifully firm in the refrigerator. This dark chocolate layer not only adds a beautiful glossy finish but also perfectly balances the sweetness of the peanut butter filling, providing a sophisticated depth of flavor. For those who prefer a lighter touch, you can easily substitute the ganache with a generous swirl of freshly whipped cream, or even a mix of both for an extra decadent look. The versatility allows you to tailor the pie to your personal preference.
- The Perfect Make-Ahead Dessert: Planning a holiday feast, birthday celebration, or an elegant dinner party? This pie is your ideal make-ahead solution! Since it requires ample chilling time to set properly, you can prepare it a day or even two in advance. This frees up your precious time on the day of your event, allowing you to focus on other preparations or simply relax. The extended chill time actually enhances the flavors and ensures beautifully clean, smooth slices, making your serving experience a breeze.
Essential Ingredients for Your Perfect Pie
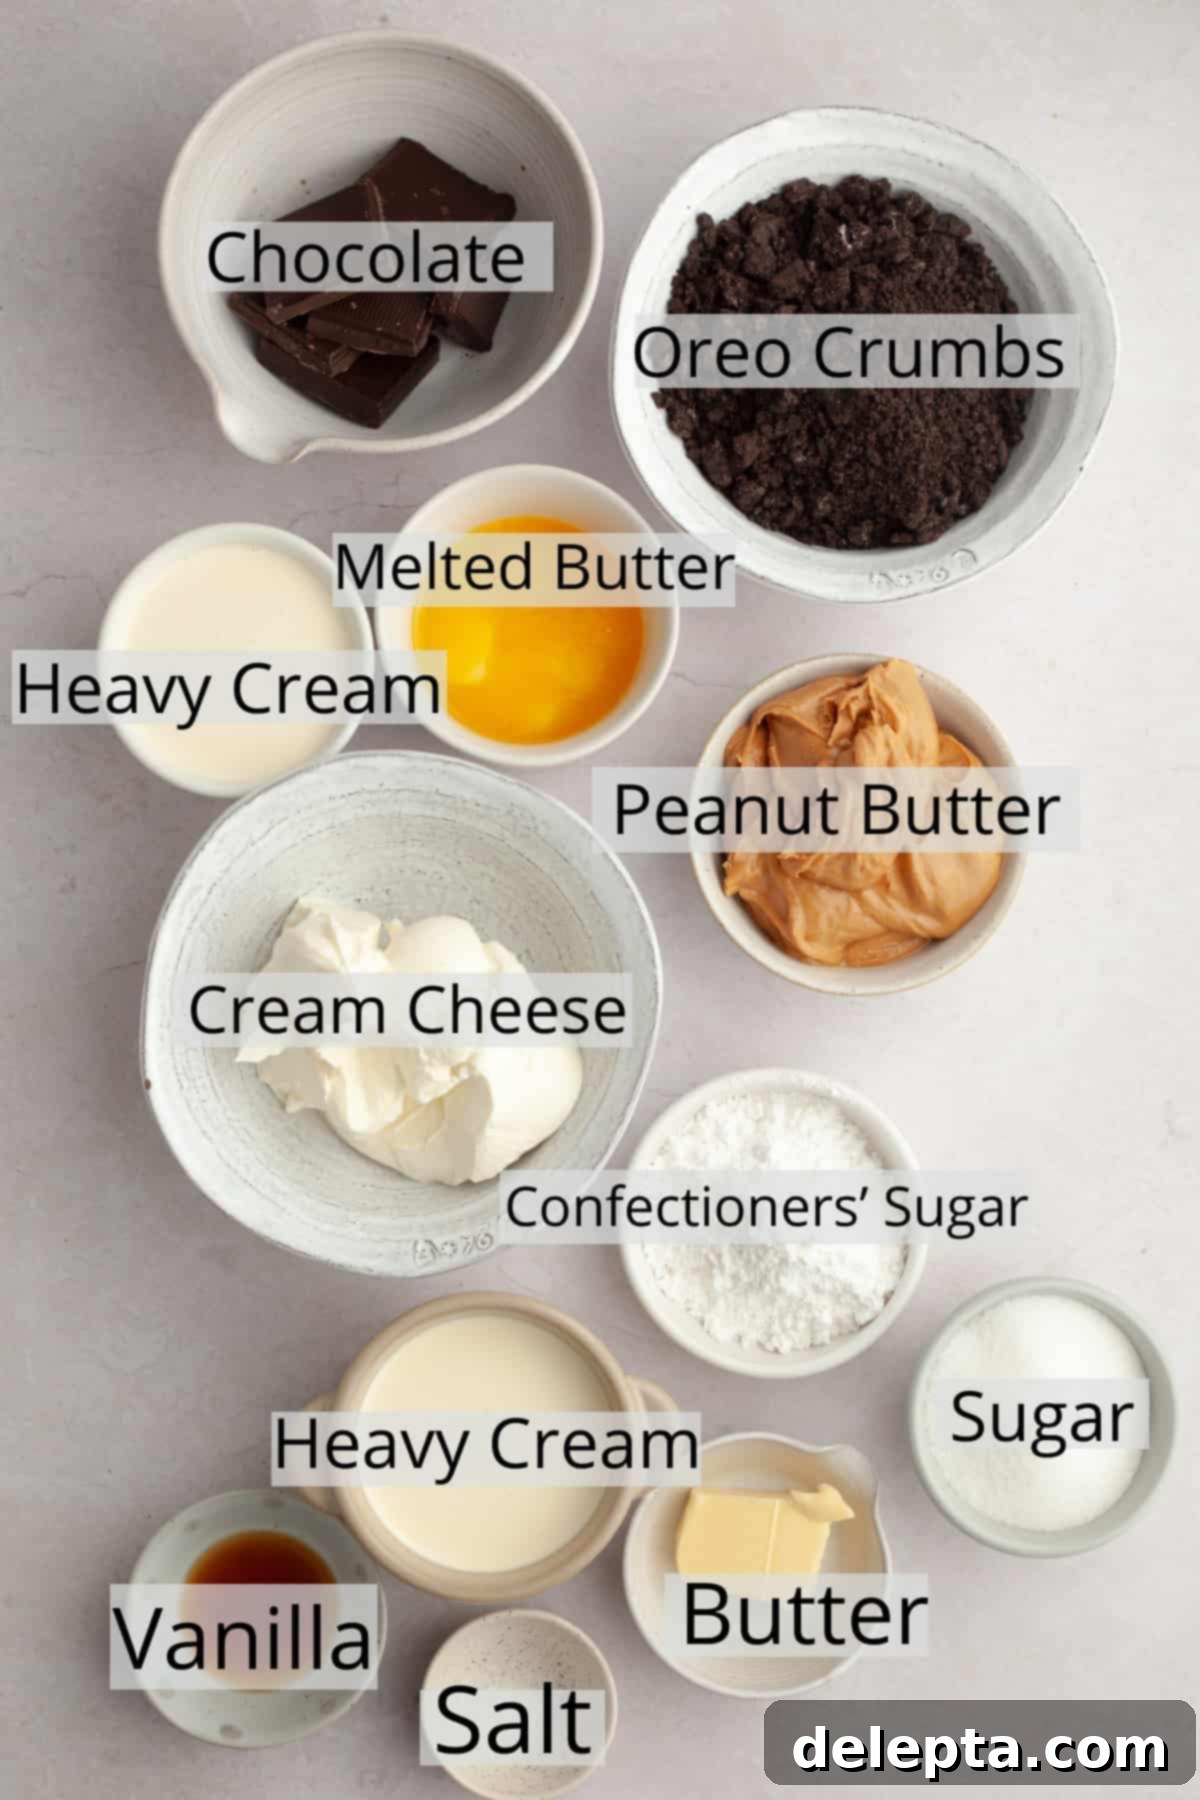
- Peanut Butter: For the smoothest and most consistent filling, it’s crucial to use a good quality, smooth, commercial peanut butter. Brands like Jif or Skippy are perfect as they have a uniform texture and emulsified oils. Avoid using natural peanut butter, which typically has separated oils at the top. The excess oil in natural peanut butter can make your filling too oily and prevent it from setting correctly, resulting in a less desirable consistency.
- Cream Cheese: We highly recommend using full-fat Philadelphia cream cheese for the best results. Full-fat cream cheese provides the necessary richness and stability for a firm yet creamy filling. If you are located in Europe where cream cheese often comes in tubs and can have higher moisture content, make sure to gently pat it down with paper towels to absorb any excess liquid. This step is vital to prevent your filling from becoming too loose; cream cheese in North America generally doesn’t require this step. Ensure your cream cheese is at room temperature for smooth blending.
- Butter: Using unsalted butter is always preferred in baking as it gives you complete control over the saltiness of your dessert. We specifically opt for European-style butter, which boasts a higher butterfat content compared to American varieties. This higher fat content contributes significantly to a richer, creamier, and more luxurious texture in both the crust and the filling, elevating the overall indulgence of the pie. Ensure butter for the filling is at room temperature.
- Chocolate: For the ganache, we suggest using dark chocolate with around 60-70% cocoa solids. This level of darkness helps to beautifully balance the inherent sweetness of the peanut butter filling, creating a harmonious flavor profile. However, if you prefer a sweeter ganache, you can certainly use semisweet chocolate. High-quality chocolate chips or a finely chopped chocolate bar will both work well.
- Oreos: The star of our crust! You’ll need classic Oreo cookies for the perfectly chocolatey, crunchy base. Feel free to experiment with flavored Oreos, such as peanut butter Oreos, for an extra layer of peanut butter goodness and a slight variation on the traditional crust. Ensure they are crushed into fine crumbs for an even crust.
- Sugar: The filling is sweetened with a thoughtful combination of both white granulated sugar and fine powdered (confectioners’) sugar. Granulated sugar provides foundational sweetness, while powdered sugar helps to create that silky-smooth texture, preventing any graininess in your no-bake filling.
- Heavy Cream: This essential ingredient serves a dual purpose: it’s whipped to create the light, airy base of our peanut butter filling, and it forms the luxurious, smooth chocolate ganache topping. Ensure your heavy cream is very cold before whipping for optimal volume and stability. Look for cream with at least 36% fat content.
- Vanilla Extract: A splash of pure vanilla extract enhances all the other flavors, adding a warm, aromatic depth that complements both the chocolate and peanut butter beautifully.
- Kosher Salt: A small amount of kosher salt in the filling is crucial. It doesn’t make the pie taste salty, but rather acts as a flavor enhancer, intensifying the sweetness and richness of the chocolate and peanut butter, balancing the overall profile.
Easy Step-by-Step Instructions to Make Your Pie
Creating this magnificent no-bake Oreo peanut butter pie is a straightforward and enjoyable process. Follow these detailed steps to ensure a perfect, delicious dessert every time.
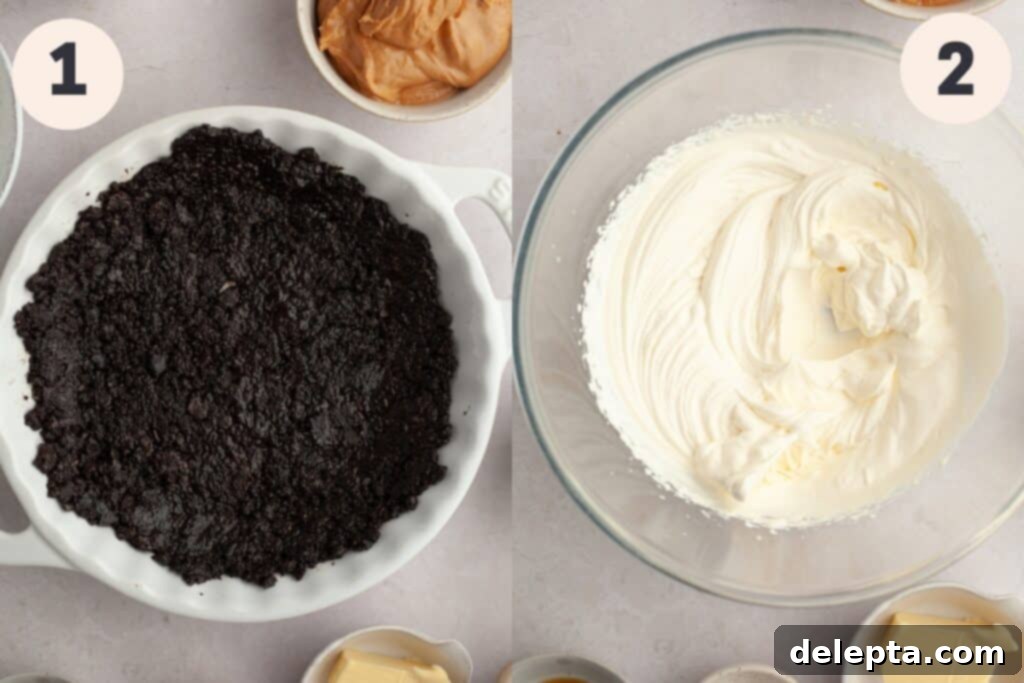
Step 1: Craft the Perfect Oreo Crust. Begin by crushing your Oreo cookies. A food processor or blender works wonders to achieve fine, consistent crumbs quickly. If you don’t have these tools, simply place the cookies in a sturdy ziploc bag and use a rolling pin to crush them thoroughly. The finer the crumbs, the more cohesive your crust will be. Once crushed, transfer the crumbs to a large mixing bowl and combine them with the melted butter. Stir until all the crumbs are evenly moistened and no dry spots remain. This ensures your crust will hold together beautifully. Press this mixture firmly into a 9-inch pie pan, using the bottom of a measuring cup or a rubber spatula to create an even layer across the bottom and slightly up the sides of the pan. The firmer you press, the sturdier your crust will be. Place the prepared crust into the freezer for at least 20 minutes while you prepare the filling. This chilling time helps the butter solidify, creating a wonderfully crisp base.
Step 2: Prepare the Whipped Cream. Pour the very cold heavy cream into a large, chilled mixing bowl. Using a handheld mixer or a stand mixer fitted with the whisk attachment, beat the cream on medium-high speed until it forms medium peaks. Medium peaks hold their shape but still have a slight curl at the tip. Be careful not to overmix, as it can turn grainy. Once whipped, gently transfer the cream to a separate bowl and immediately place it in the fridge to keep it cold and stable while you work on the peanut butter mixture.
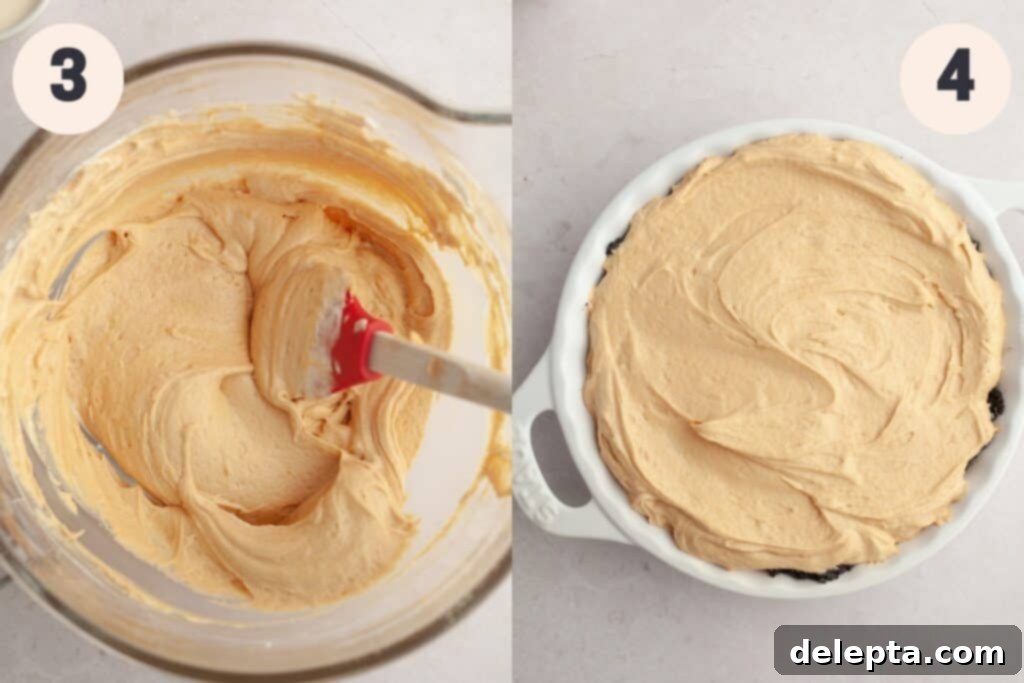
Step 3: Create the Rich Peanut Butter Base. In a clean stand mixer bowl fitted with the paddle attachment (or using a clean large bowl and a hand mixer), combine the room-temperature cream cheese and smooth peanut butter. Beat them together on medium speed until the mixture is completely smooth, creamy, and well combined, with no lumps of cream cheese remaining. Next, add the white granulated sugar, confectioners’ (powdered) sugar, softened unsalted butter, kosher salt, and vanilla extract. Continue to beat on medium speed for about 5 minutes until the mixture becomes wonderfully light, fluffy, and significantly paler in color. This extended beating time incorporates air, contributing to the airy texture of the final filling.
Step 4: Fold in the Whipped Cream and Chill. Take your prepared whipped cream from the fridge. Add about half a cup of the whipped cream to the peanut butter mixture and gently stir it in quickly with a rubber spatula. This step helps to lighten the peanut butter mixture, making it easier to incorporate the rest of the whipped cream without deflating it. Then, carefully fold in the remaining whipped cream in three equal additions, using a light hand to preserve as much air as possible. Stir quickly but gently each time until just combined. Pour this heavenly peanut butter filling into your cold Oreo cookie crust. Spread the top evenly with a spatula. Cover the pie tightly with plastic wrap to prevent any skin from forming and place it in the fridge to set for a minimum of 3 hours. For the best results and easiest slicing, chilling it for at least 6 hours or even overnight is highly recommended.
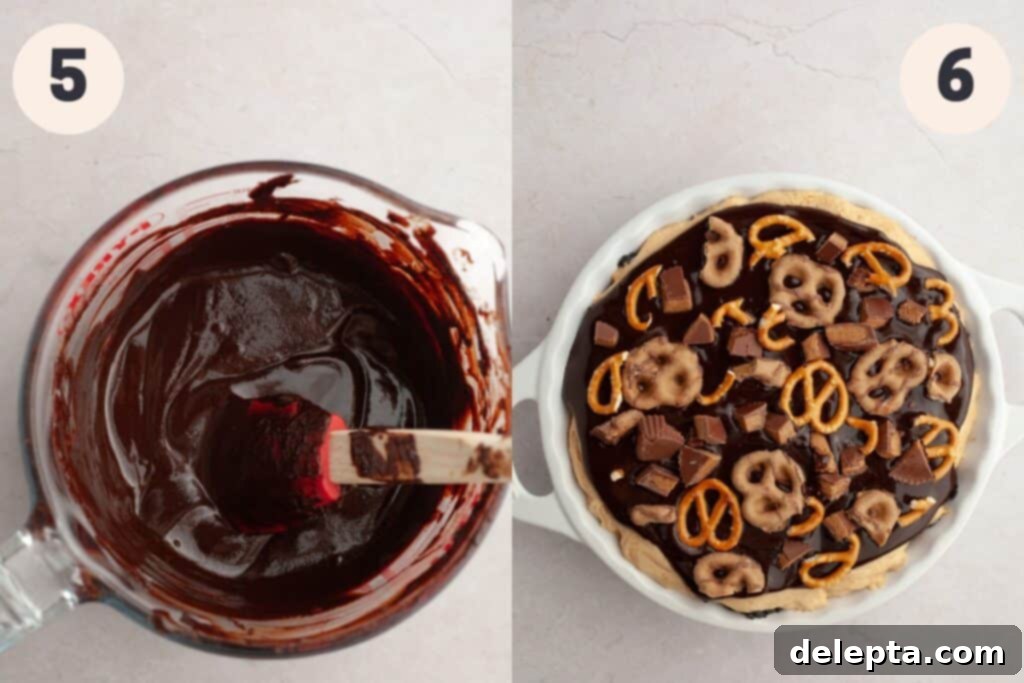
Step 5: Prepare the Silky Chocolate Ganache. While your pie is chilling, prepare the chocolate ganache. Finely chop your chosen chocolate and place it in a heatproof bowl. In a small, heavy-bottomed saucepan, heat the heavy cream until it just begins to gently simmer around the edges – do not let it boil vigorously. Immediately pour the hot cream over the chopped chocolate. Let it sit undisturbed for 3 to 5 minutes to allow the chocolate to melt. Then, using a rubber spatula, start stirring from the center outwards until you achieve a thick, smooth, and glossy ganache. If there are any stubborn lumps, you can gently heat it over a double boiler or in short bursts in the microwave, stirring frequently, until completely smooth.
Step 6: Finish with Ganache and Toppings. Once the ganache has cooled slightly but is still pourable (it shouldn’t be hot enough to melt the peanut butter filling), carefully pour it over the chilled peanut butter pie filling. Gently spread it to create an even layer. Now is the perfect moment to add your favorite toppings! Sprinkle on crushed Reese’s pretzels, regular pretzels, mini Oreo cookies, chopped peanut butter cups, or chocolate chips. The choices are endless! Once decorated, place the pie back in the fridge for another 2 hours to allow the ganache to set and the entire pie to firm up completely before slicing and serving. This final chill is crucial for picture-perfect slices.
Expert Tips & Tricks for Your Best Pie Yet
- Embrace Accurate Measurements: For consistent and professional baking results, I cannot stress enough the importance of using a kitchen scale and measuring your ingredients in metric grams. This is by far the most accurate method and how all my recipes are developed and tested. While I do provide approximate US customary measurements in the recipe card, please note that the recipe’s precise ratios and outcomes are optimized for metric weighing.
- The Power of the Chill: Patience is truly a virtue when it comes to no-bake pies. For the cleanest, smoothest slices and the most cohesive texture, try to keep your pie in the refrigerator for as long as possible before slicing. An overnight chill (6+ hours) makes a significant difference compared to the minimum 3-hour recommendation. The longer it sets, the more delightful the experience will be.
- Get Creative with Toppings: The finishing touches can elevate your pie from great to unforgettable! Beyond the suggested Reese’s pretzels and regular pretzels, consider an array of delightful options: finely chopped peanut butter cups, vibrant Reese’s Pieces candies, more crushed Oreo cookies, a shower of mini chocolate chips, a drizzle of warm caramel sauce, a sprinkle of flaky sea salt (to enhance the chocolate and peanut butter flavors), or even a dollop of extra whipped cream for a lighter, fluffier finish.
- Choose Your Peanut Butter Wisely: This is a critical tip! Always use a smooth, commercial-brand peanut butter like Jif, Skippy, or Peter Pan. These brands are emulsified and consistent, ensuring a stable filling. Natural peanut butter, which often separates into oil and solids, contains too much liquid oil that will make your filling greasy and prevent it from setting properly, leading to a soft, undesirable texture.
- Room Temperature for Key Ingredients: Ensure your cream cheese and the 2 tablespoons of unsalted butter for the filling are at true room temperature (soft to the touch, but not melted). This allows them to cream together smoothly with the peanut butter and sugar, creating a lump-free, airy filling. Cold ingredients won’t emulsify properly and can result in a lumpy, dense filling. Remember, only the heavy cream should be kept cold!
- Boost the Peanut Butter Punch: For an intensely peanut-forward experience, consider swapping out the regular Oreo cookies for peanut butter-flavored Oreos in your crust. This simple substitution amplifies the peanut butter notes throughout the entire pie, making it an absolute dream for dedicated peanut butter aficionados.
- Troubleshooting a Split Ganache: If your ganache appears to separate or look greasy after stirring, it likely got too hot or was stirred too vigorously. Don’t panic! Add a tablespoon of cold heavy cream and gently whisk it in. This can often bring the ganache back together into a smooth, emulsified state.
Frequently Asked Questions:
To maintain its incredible taste and texture, this Oreo peanut butter pie is best kept in the refrigerator. Store it in an airtight container or ensure it is tightly wrapped in plastic wrap to prevent it from absorbing any odors and to keep it fresh. When properly stored, it will last beautifully for up to 4 days, though its irresistible nature often means it disappears much faster!
Absolutely! If you prefer a lighter, airier topping or simply aren’t a fan of ganache, replacing it with homemade whipped cream is a fantastic option. To do so, whip 235 grams (or 1 cup) of heavy cream in a chilled bowl until it begins to thicken. While the mixer is running on medium speed, gradually stream in 50 grams (or ¼ cup) of granulated or powdered sugar. Continue whipping until you achieve beautiful medium peaks that hold their shape. You can then spread or pipe this over your chilled peanut butter pie.
Yes, this pie freezes exceptionally well! For best results, allow the pie to set completely in the refrigerator with the ganache topping. Then, wrap it tightly in several layers of plastic wrap, followed by a layer of aluminum foil. You can freeze the entire pie or individual slices. It will keep in the freezer for up to 1 month. To serve, thaw the pie in the refrigerator for several hours or overnight until it is soft enough to slice and enjoy.
This recipe is perfectly designed for a standard 9-inch (23 cm) pie dish. This size ensures the correct proportion of crust to filling and yields a good number of slices. If you use a slightly larger or smaller dish, you might find the crust or filling layers to be thinner or thicker, respectively. No adjustments to the recipe are typically needed for minor variations, but for best results, stick to a 9-inch dish.
Can’t Get Enough Peanut Butter? Try These Recipes Next!
If you’re a true connoisseur of all things peanut butter, your culinary adventure doesn’t have to end with this incredible pie. The rich, nutty, and comforting flavor of peanut butter is versatile and brings a unique charm to countless desserts. We’ve curated a collection of other fantastic recipes that celebrate this beloved ingredient in various forms. Each one is designed to bring you joy and satisfy your cravings, so be sure to explore these delightful creations after you’ve savored every last bite of your no-bake Oreo peanut butter pie!
- No Bake Peanut Butter Fudge
- Chocolate Peanut Butter Rice Krispie Treats
- Brownies with Peanut Butter Cups
- Classic Thumbprint Hershey Kiss Cookies
Have you tried this irresistible No-Bake Oreo Peanut Butter Pie? We’d absolutely love to hear from you! Please take a moment to rate the recipe below. And don’t forget to share your delicious creations with me on Instagram @alpineella and Pinterest! Your feedback and photos inspire us!
Recipe
Oreo Peanut Butter Pie
Ella Gilbert
Pin Recipe
Save RecipeSaved!
Equipment
-
9 inch pie plate
-
Food processor or blender (optional, for crushing Oreos)
-
Stand mixer with whisk and paddle attachments (or hand mixer)
-
Rubber spatula
-
Small saucepan (for ganache)
-
Heatproof bowl (for ganache)
Ingredients
Oreo Cookie Crust
- 6 tablespoon unsalted butter melted
- 2 cup Oreo cookies crushed (about 20-24 standard cookies)
Peanut Butter Filling
- 8 ounces cream cheese full-fat, room temperature
- 1 cup peanut butter smooth, commercial brand (e.g., Jif, Skippy)
- ½ cup powdered sugar
- ½ cup granulated sugar
- 2 tablespoon unsalted butter room temperature
- 1 tablespoon vanilla extract pure vanilla extract for best flavor
- ¾ cup heavy cream cold, at least 36% fat
- ¾ teaspoon kosher salt or half the amount of fine salt
Chocolate Ganache
- ½ cup heavy cream at least 36% fat
- 6 ounces semisweet chocolate or dark chocolate (60-70% cocoa), finely chopped
- Optional: Your favorite toppings for decoration (e.g., crushed pretzels, mini Oreos, chopped peanut butter cups)
Instructions
Make Oreo Crust
-
In a large mixing bowl, thoroughly whisk your finely crushed Oreo crumbs with the melted unsalted butter. Continue mixing until all the crumbs are evenly moistened and there are absolutely no dry patches remaining. This ensures a cohesive and delicious crust.6 tablespoon unsalted butter, 2 cup Oreo cookies
-
Pour the buttered crumbs into a 9-inch pie dish. Use the flat bottom of a measuring cup, a clean glass, or a rubber spatula to press the crumbs down firmly and evenly into the bottom of the dish and slightly up the sides. Ensure it’s packed tightly for a sturdy crust. Once pressed, place the pie dish into the freezer for at least 20 minutes to allow the crust to firm up.
Make Filling
-
In a stand mixer with the whisk attachment (or using a large bowl with a hand mixer), whisk the cold heavy cream until it forms medium peaks. This means the cream holds its shape but the tip still gently curls. Transfer the whipped cream to a separate bowl and keep it chilled in the fridge while you prepare the peanut butter mixture.¾ cup heavy cream
-
Clean out your mixing bowl (or use a fresh one). With the paddle attachment, beat the room-temperature cream cheese and smooth peanut butter together until they are completely well-blended and smooth. Add the granulated sugar, confectioners’ (powdered) sugar, softened unsalted butter, kosher salt, and vanilla extract. Continue to beat on medium speed for about 5 minutes until the mixture becomes wonderfully light, airy, and fluffy.8 ounces cream cheese, 1 cup peanut butter, ½ cup powdered sugar, ½ cup granulated sugar, 2 tablespoon unsalted butter, 1 tablespoon vanilla extract, ¾ teaspoon kosher salt
-
Add about half a cup of the chilled whipped cream to the peanut butter mixture. Stir it in quickly but gently with a rubber spatula to lighten the base. Then, carefully fold in the remaining whipped cream in three separate additions, using a light hand each time to preserve the airiness. Mix until just combined and no streaks of white cream remain.
-
Carefully spoon the smooth peanut butter filling into the cold Oreo cookie crust. Spread the top evenly with a spatula. Cover the pie tightly with plastic wrap and refrigerate for a minimum of 3 hours to allow it to set completely. For the best, cleanest slices, an overnight chill (6+ hours) is highly recommended.
Chocolate Ganache
-
In a small, heavy saucepan, heat the ½ cup heavy cream until it just begins to gently simmer around the edges. Remove from heat immediately. Place your finely chopped semisweet or dark chocolate in a heatproof bowl. Pour the hot cream over the chocolate and let it sit undisturbed for 3-5 minutes to allow the chocolate to melt. Then, use a rubber spatula to stir from the center outwards until the mixture is thick, smooth, and glossy. Allow the ganache to cool slightly to a pourable temperature, but not hot enough to melt the pie filling. Gently spread it evenly over the chilled peanut butter pie. Add any desired toppings now. Place the pie back in the fridge for at least 2 more hours to allow the ganache to set firmly.½ cup heavy cream, 6 ounces semisweet chocolate
Video
Notes
Butter: For superior flavor and texture, I exclusively use European-style butter (such as Kerrygold) in my recipes. Its higher butterfat content contributes to a noticeably richer and creamier finished dessert, enhancing the indulgence of this pie.
Salt: If you don’t have kosher salt on hand, which is often coarser, you should halve the amount of salt specified in the recipe. As a general rule, 1 teaspoon of kosher salt is approximately equivalent to ½ teaspoon of fine table salt. This adjustment helps maintain the perfect balance of flavors.
Peanut Butter: For the best results in this recipe, I strongly advise using a smooth, commercial-style peanut butter. Popular brands like Skippy or Jif are ideal due to their consistent texture and emulsified oils. I do not recommend using natural peanut butter, which typically has a visible layer of oil on top; this excess, separated oil will make your filling greasy and prevent it from setting properly, leading to a runny pie.
Storage: Your delicious Oreo Peanut Butter Pie should always be kept in the refrigerator. For optimal freshness and to prevent it from absorbing other food odors, ensure it is tightly wrapped in plastic wrap or stored in an airtight container. It will remain fresh and delightful for up to 4 days.
Nutrition
