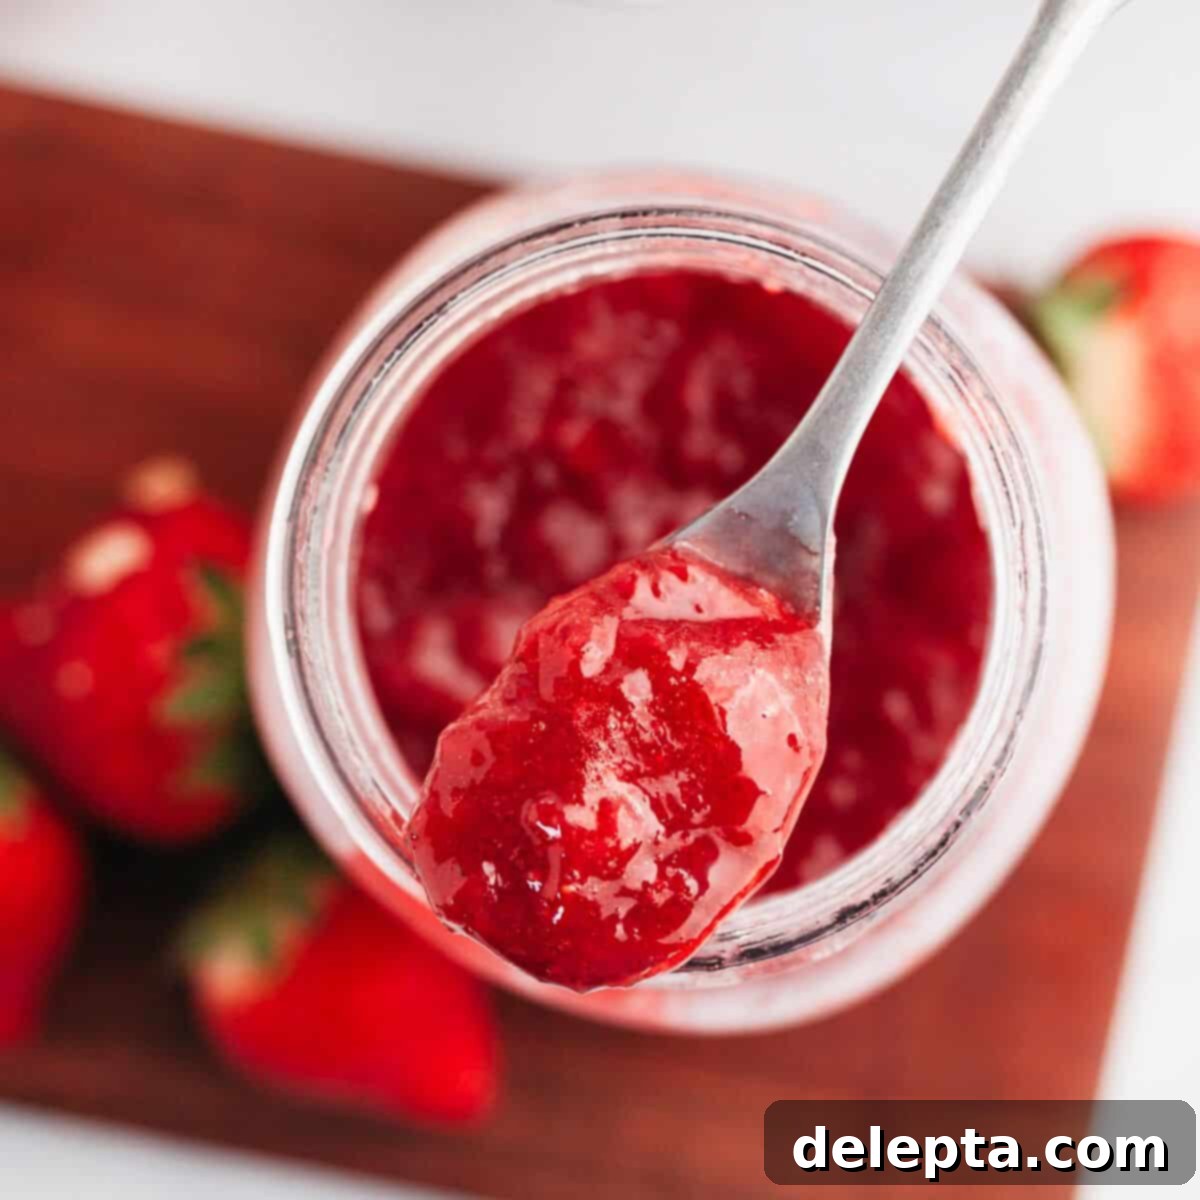
The Best Easy Homemade Strawberry Filling: Perfect for Cakes & Cupcakes!
Unlock the secret to creating the most luscious, perfectly sweet, and delightfully tart homemade strawberry filling for your cakes, cupcakes, and an array of other desserts! This versatile strawberry sauce is incredibly simple to prepare, requiring just three core ingredients, and guarantees a vibrant burst of fresh berry flavor in every bite. Whether you’re crafting an elegant layer cake, individual gourmet cupcakes, or simply indulging in a spoonful straight from the jar, this recipe is destined to become a staple in your kitchen.
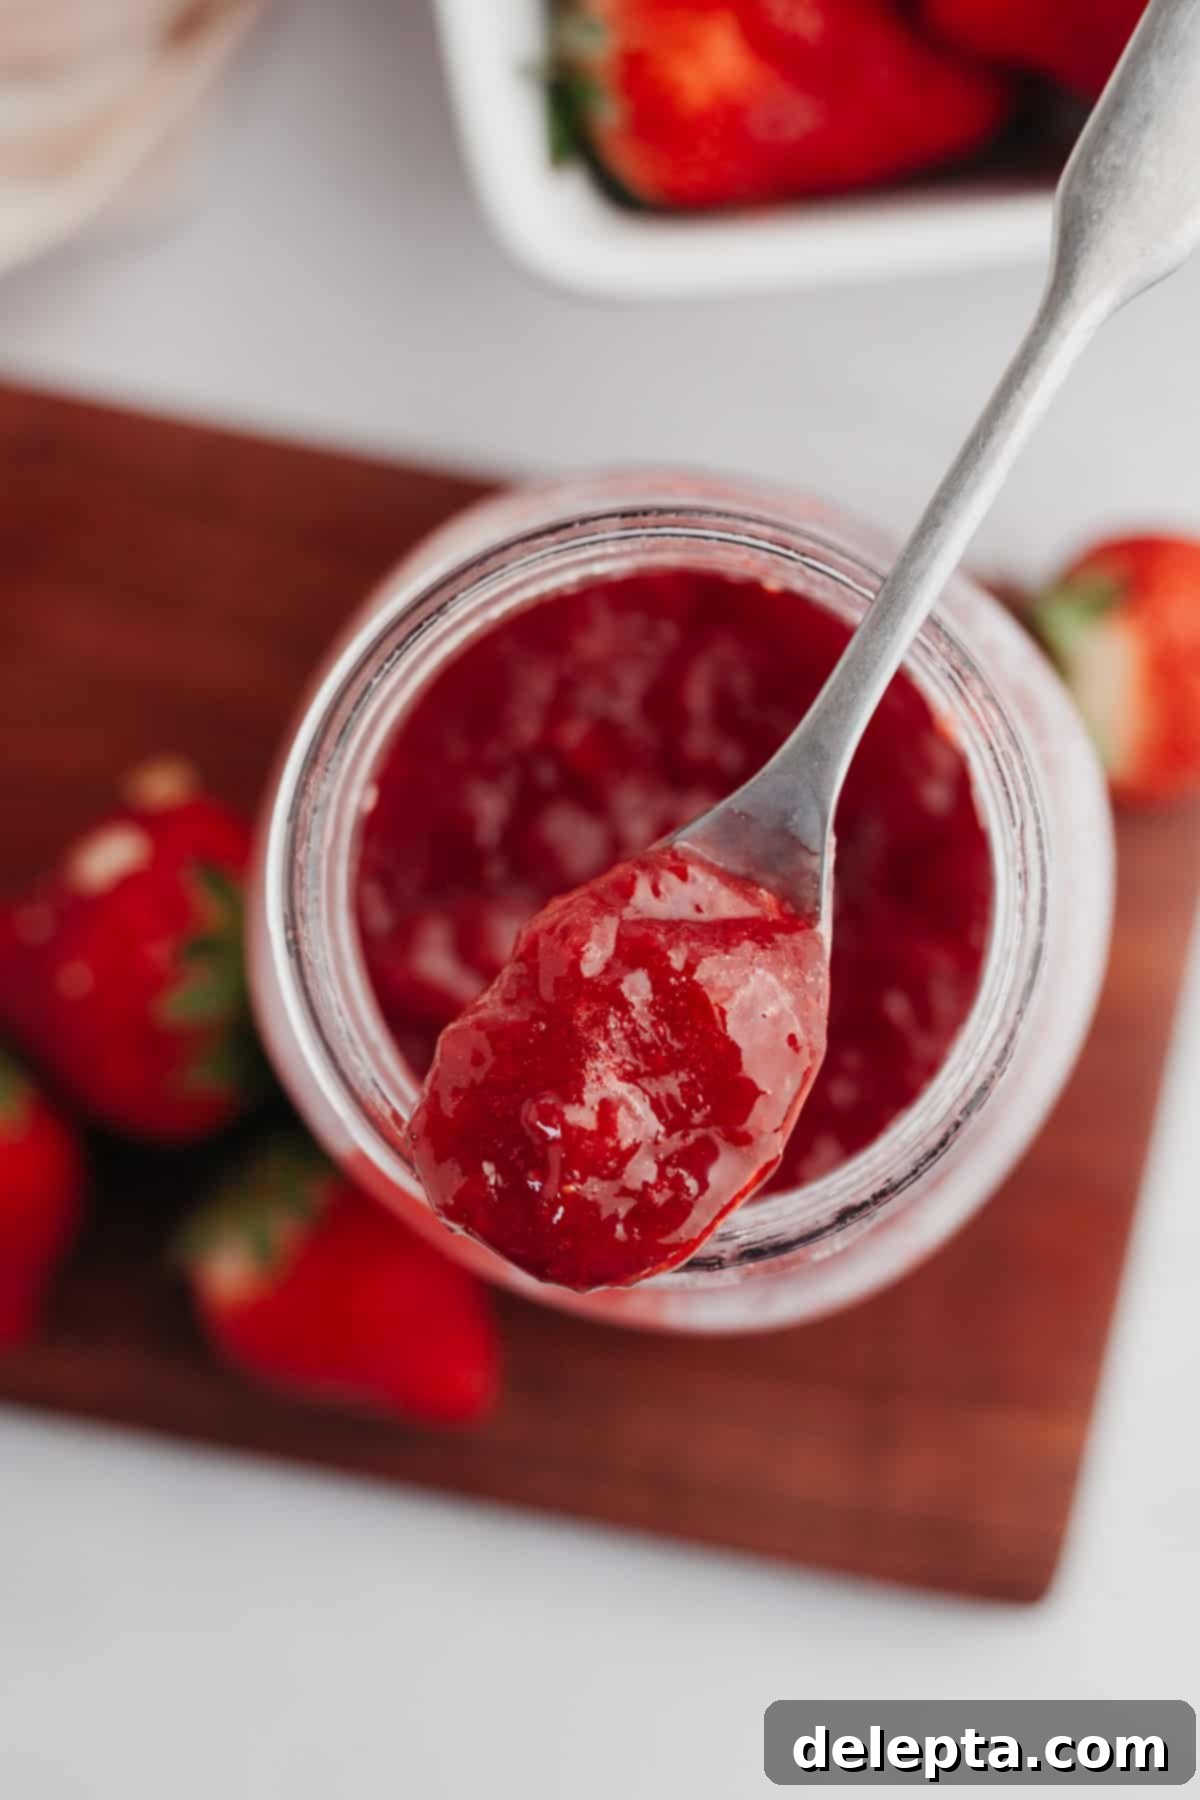
If your search for the perfect, fruit-forward cake filling has led you here, especially with summer’s bounty of berries on your mind, then this homemade strawberry sauce is precisely what you need. Made with just a few incredibly simple ingredients, and requiring only a short time simmering over the stove, this berry-sweet concoction transforms fresh strawberries into a luxurious, vibrant, and utterly irresistible filling.
I find myself constantly reaching for this delightful strawberry cake filling for a variety of desserts. It truly shines when used in strawberry filled cupcakes, bringing a moist, fruity surprise to the center. It also forms a magnificent pairing with a classic vanilla cake, a zesty lemon cake, or even a rich chocolate cake, creating an exquisite flavor profile that’s hard to beat. This recipe delivers a fresh, homemade strawberry filling that is wonderfully similar to premium preserves or a bright strawberry jam, yet it avoids the laborious process of sterilizing jars typically associated with traditional canning. It’s designed for immediate enjoyment and convenient short-term storage in your refrigerator.
While this recipe is primarily lauded as a fresh strawberry filling for cakes and cupcakes, its impressive versatility means its uses extend far beyond traditional baked goods. Imagine this vibrant sauce spooned generously over a warm slice of pie, drizzled decadently onto creamy vanilla ice cream, swirled into a morning bowl of yogurt or oatmeal, or even, let’s be completely honest, simply savored by the spoonful directly from the mixing bowl. Its rich flavor, vibrant color, and appealing texture make it an outstanding complement to almost any sweet creation.
For those eager to explore a broader spectrum of berry flavors, I highly recommend trying my mixed berry compote, which offers a delightful medley of seasonal fruits!
[feast_advanced_jump_to]
Why You’ll Fall in Love with This Strawberry Cake Filling
This homemade strawberry filling is more than just a recipe; it’s a delightful enhancement for all your dessert aspirations. Here’s a detailed look at why it will quickly become your absolute favorite:
- Incredibly Simple & Minimal Ingredients: Gone are the days of complex ingredient lists. For this recipe, you truly only need three core components: ripe, fresh strawberries, a touch of granulated sugar, and a bright, zesty lemon. These readily available items combine with minimal effort to transform into something truly extraordinary.
- Unbeatable Fresh & Sweet Strawberry Flavor: The undeniable magic of this filling truly comes alive when you use perfectly ripe, in-season strawberries. Utilizing berries at their peak ensures a deeply sweet, intensely aromatic, and authentic strawberry flavor that tastes like pure sunshine. While alternatives like frozen strawberries can work, crafting this filling during the peak of strawberry season guarantees the most vibrant color, juicy texture, and unparalleled taste.
- Effortless Make-Ahead Convenience: Planning ahead for a special celebration or simply want to streamline your baking process? This strawberry filling is an ideal make-ahead component. You can easily prepare it up to a week in advance, storing it securely in an airtight container within your refrigerator. This foresight allows you to have a gourmet-quality filling ready whenever inspiration strikes, making entertaining and party preparation incredibly stress-free!
- Remarkably Versatile Beyond Cakes: While its primary purpose is to fill cakes and cupcakes, the applications for this delicious sauce are truly limitless. Imagine drizzling generous spoonfuls over fluffy pancakes or crispy waffles, stirring it into a wholesome bowl of yogurt or hearty oatmeal, topping your favorite creamy ice cream, or even spreading it as a delightful preserve on morning toast or scones. It effortlessly adds a gourmet touch and vibrant flavor to countless dishes.
- Superior to Store-Bought Alternatives: Say goodbye to the artificial flavors, preservatives, and often excessive sweetness found in commercial fruit fillings. This homemade version offers pure, unadulterated strawberry goodness, providing you with complete control over the sweetness and tartness, allowing you to tailor it precisely to your personal palate. Enjoy the confidence of serving something truly fresh and natural.
Essential Ingredients for Your Luscious Strawberry Filling
Crafting this vibrant and flavorful strawberry filling requires only a few carefully selected ingredients. To achieve the absolute best taste and texture, always prioritize freshness and quality in your produce.
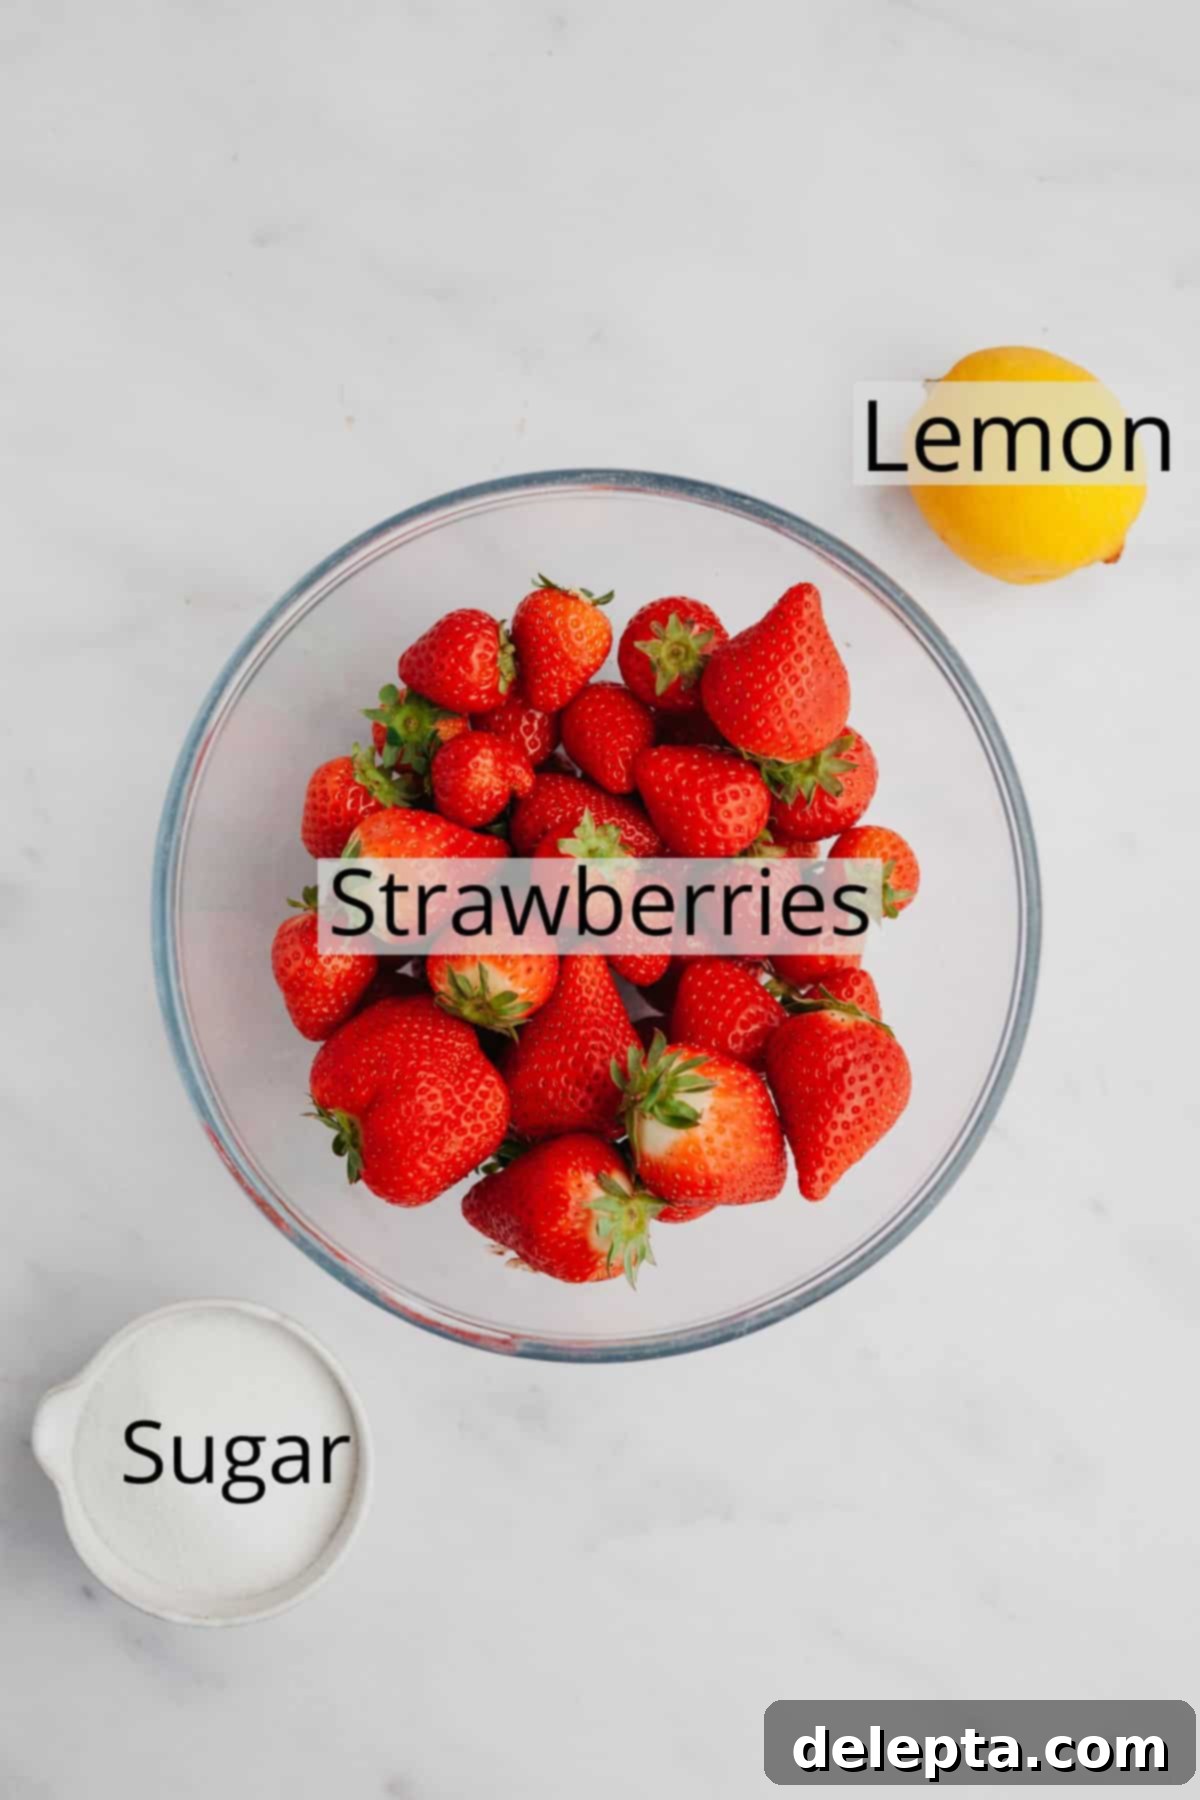
- Fresh Strawberries: These are undoubtedly the star of our show! Select strawberries that are vibrantly red, fragrant, firm to the touch, and ideally, in season for unparalleled flavor. You will need to “hull” them, which means removing the green leafy tops and the small white core. After hulling, dice them into your preferred size – smaller pieces for a smoother filling, larger for a chunkier texture. While this recipe is meticulously developed for fresh strawberries, many inquire about substitutes. Although I haven’t specifically tested this exact recipe with frozen or freeze-dried strawberries, frozen berries typically work but may release more water, necessitating a slightly longer cooking time to reach the desired thickness. For the most superior results, stick with fresh.
- Lemon: A seemingly small but critically important component that provides essential brightness and balance to the sweet strawberries. You’ll be utilizing both the fragrant lemon zest, which infuses the filling with aromatic citrus notes, and the tangy lemon juice, which expertly cuts through the sweetness and significantly enhances the natural acidity and flavor of the strawberries. The lemon juice also plays a role in activating the natural pectin present in strawberries, which aids in the thickening process.
- Granulated Sugar: A measured amount of white granulated sugar is added to both sweeten the filling to perfection and assist in achieving the ideal thickened consistency. The precise quantity of sugar can be thoughtfully adjusted based on two factors: the inherent sweetness of your chosen strawberries (some varieties are sweeter than others) and your personal preference for overall sweetness. If your berries are particularly tart, a little extra sugar might be beneficial. Conversely, if they are exceptionally sweet, you may wish to reduce the sugar slightly.
Essential Kitchen Equipment for Strawberry Filling
One of the beauties of this recipe is its simplicity, which extends to the tools you’ll need. No fancy gadgets required, just a few basic kitchen essentials:
- Medium Saucepan: Choose a saucepan with a heavy bottom to ensure even heat distribution and prevent the fruit mixture from sticking and burning. This is where all the magic happens!
- Wooden Spoon or Heat-Resistant Spatula: Indispensable for stirring the strawberry mixture frequently, which is crucial for preventing scorching and achieving a smooth, even cook.
- Cutting Board and Sharp Knife: For safely and efficiently hulling (removing the green tops) and dicing your fresh strawberries to your desired size.
- Lemon Zester (Microplane) and Juicer: To extract the maximum amount of aromatic zest and fresh juice from your lemon, both vital for flavor.
- Airtight Container or Mason Jar: Once your delicious homemade strawberry filling has cooled, you’ll need this for proper storage in the refrigerator.
Customizing Your Strawberry Filling: Substitutions & Variations
This fundamental strawberry filling recipe is wonderfully adaptable, allowing you to effortlessly customize its taste and texture to suit your precise preferences and specific dessert needs:
- Tailor the Texture to Your Liking: The texture of your strawberry filling is entirely within your control. If you desire a silky-smooth strawberry cake filling with minimal fruit chunks, ensure you dice your fresh strawberries into very small, uniform pieces before introducing them to the saucepan. You can even gently mash them further with a fork or a potato masher as they soften and cook. Conversely, if you appreciate a delightful filling boasting more substantial strawberry pieces and a pleasingly chunky consistency, simply opt to leave your strawberries in slightly larger chunks. The choice is yours to make for the perfect bite!
- Fine-Tune the Sweetness: As previously highlighted in the ingredients section, don’t hesitate to slightly increase or decrease the quantity of granulated sugar. This adjustment should be based on the natural sweetness and ripeness of the specific strawberries you are using, as well as your personal preference for a sweeter or more tart outcome.
- Infuse with Vanilla: For an added layer of warmth and complexity, a small splash of pure vanilla extract (approximately ½ teaspoon), stirred in at the very end of the cooking process, can beautifully complement and enhance the natural strawberry flavors.
- Boost the Tanginess: If you’re a fan of an extra bright and tart kick, consider increasing the amount of lemon juice slightly. Alternatively, a tiny pinch of food-grade citric acid can deliver a similar zesty boost without adding additional liquid.
- Optional Thickening Agent for Jam-Like Consistency: While this recipe is designed to thicken naturally through simmering, if you require a much thicker, more robust jam-like consistency more rapidly, or if your berries are particularly watery, you can easily incorporate a cornstarch or arrowroot powder slurry. Simply whisk together 1-2 teaspoons of either cornstarch or arrowroot powder with a tablespoon of cold water until smooth, then stir this mixture into the simmering sauce during the final 5 minutes of cooking. Continue to cook, stirring, until the desired thickness is achieved.
Easy Step-by-Step Process for Perfect Strawberry Filling
Creating this irresistible homemade strawberry filling is a remarkably straightforward process, yielding consistently delicious results. Follow these clear and detailed steps to achieve perfection:
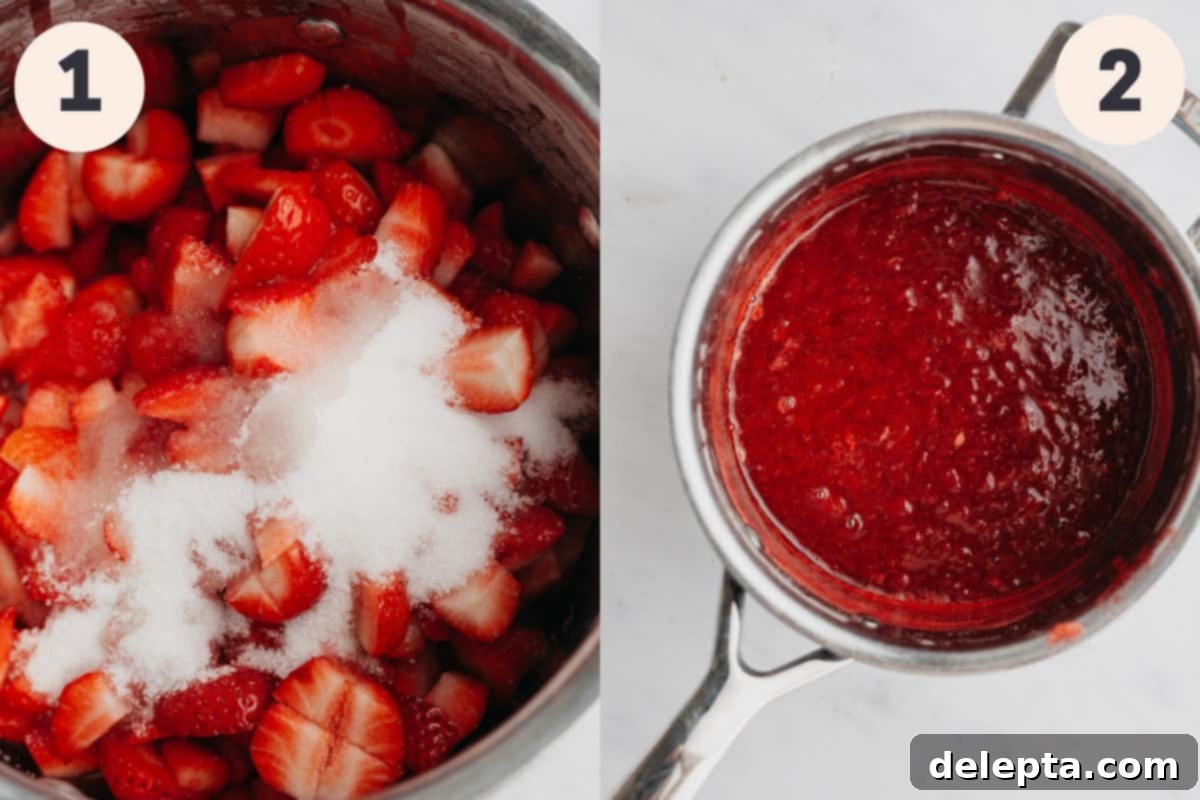
Step 1: Combine Ingredients and Initiate Simmering. Begin by carefully combining your meticulously diced fresh strawberries, the granulated sugar, the aromatic lemon zest, and the tangy fresh lemon juice in a medium-sized saucepan. Place this saucepan over a consistent medium-low heat setting on your stovetop. Stir the mixture frequently and gently as it gradually warms and begins to reach a gentle simmer. It is crucial to prevent the mixture from coming to a vigorous, rolling boil, as this can cause it to thicken prematurely and risks scorching the fruit. Should you observe the mixture bubbling too intensely, promptly reduce the heat to a lower setting. The objective here is a gentle, consistent simmering action.
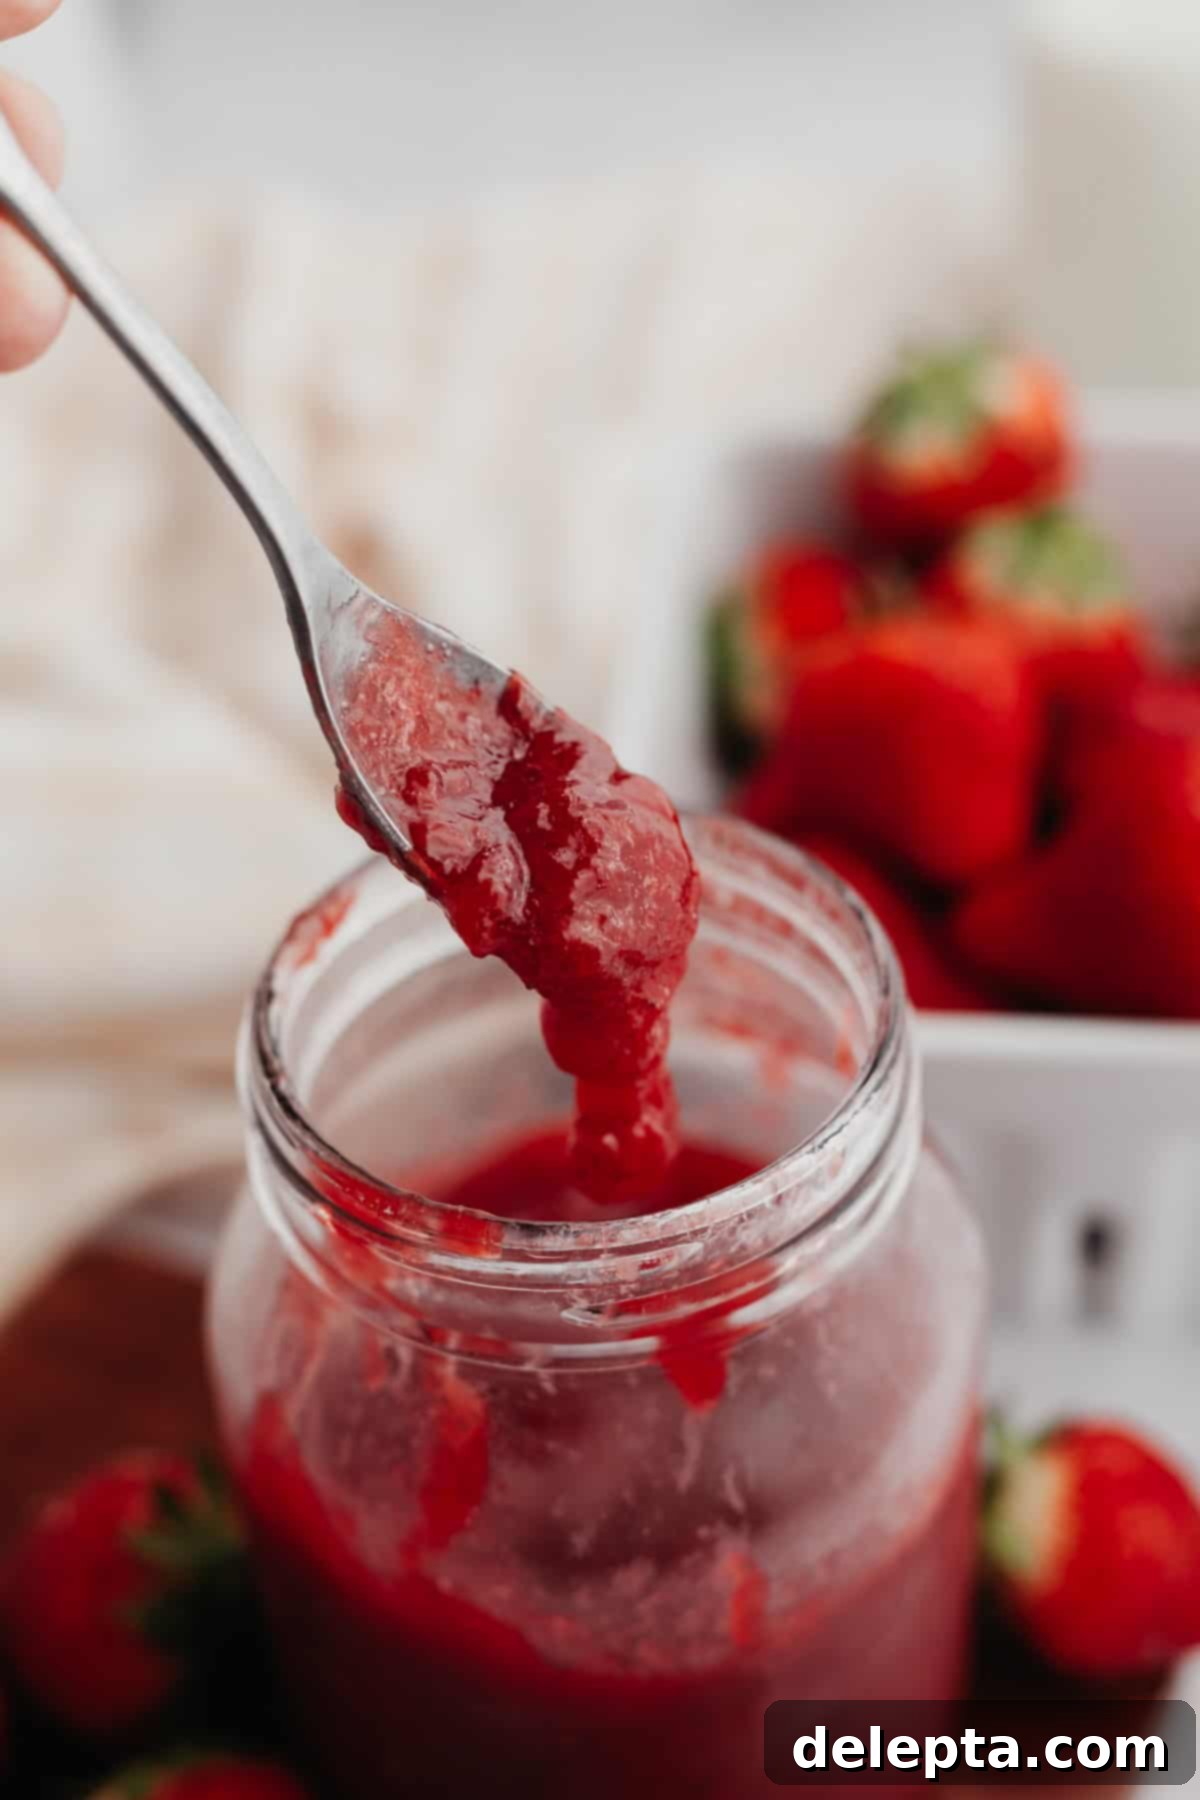
Step 2: Cook to Ideal Consistency. Continue to simmer the strawberry mixture over medium-low to low heat for approximately 25-30 minutes. Throughout this period, the fresh strawberries will naturally soften and gracefully break down, releasing their flavorful juices and gradually transforming into a beautifully thick, rich, and vibrant strawberry sauce. You’ll know your filling has reached its peak readiness when you can successfully perform the classic “spoon test”: simply dip the back of a clean spoon into the simmering sauce, then use your finger to draw a clear, defined line across the back of the spoon. If this line remains distinctly visible and the sauce does not immediately run or drip back together, then your filling has achieved the perfect, desired consistency! At this point, carefully remove the saucepan from the heat and allow the hot filling to cool completely to room temperature. Once cooled, transfer your exquisite strawberry filling into a clean, large mason jar or any other suitable airtight container, and then place it into the refrigerator to chill thoroughly.
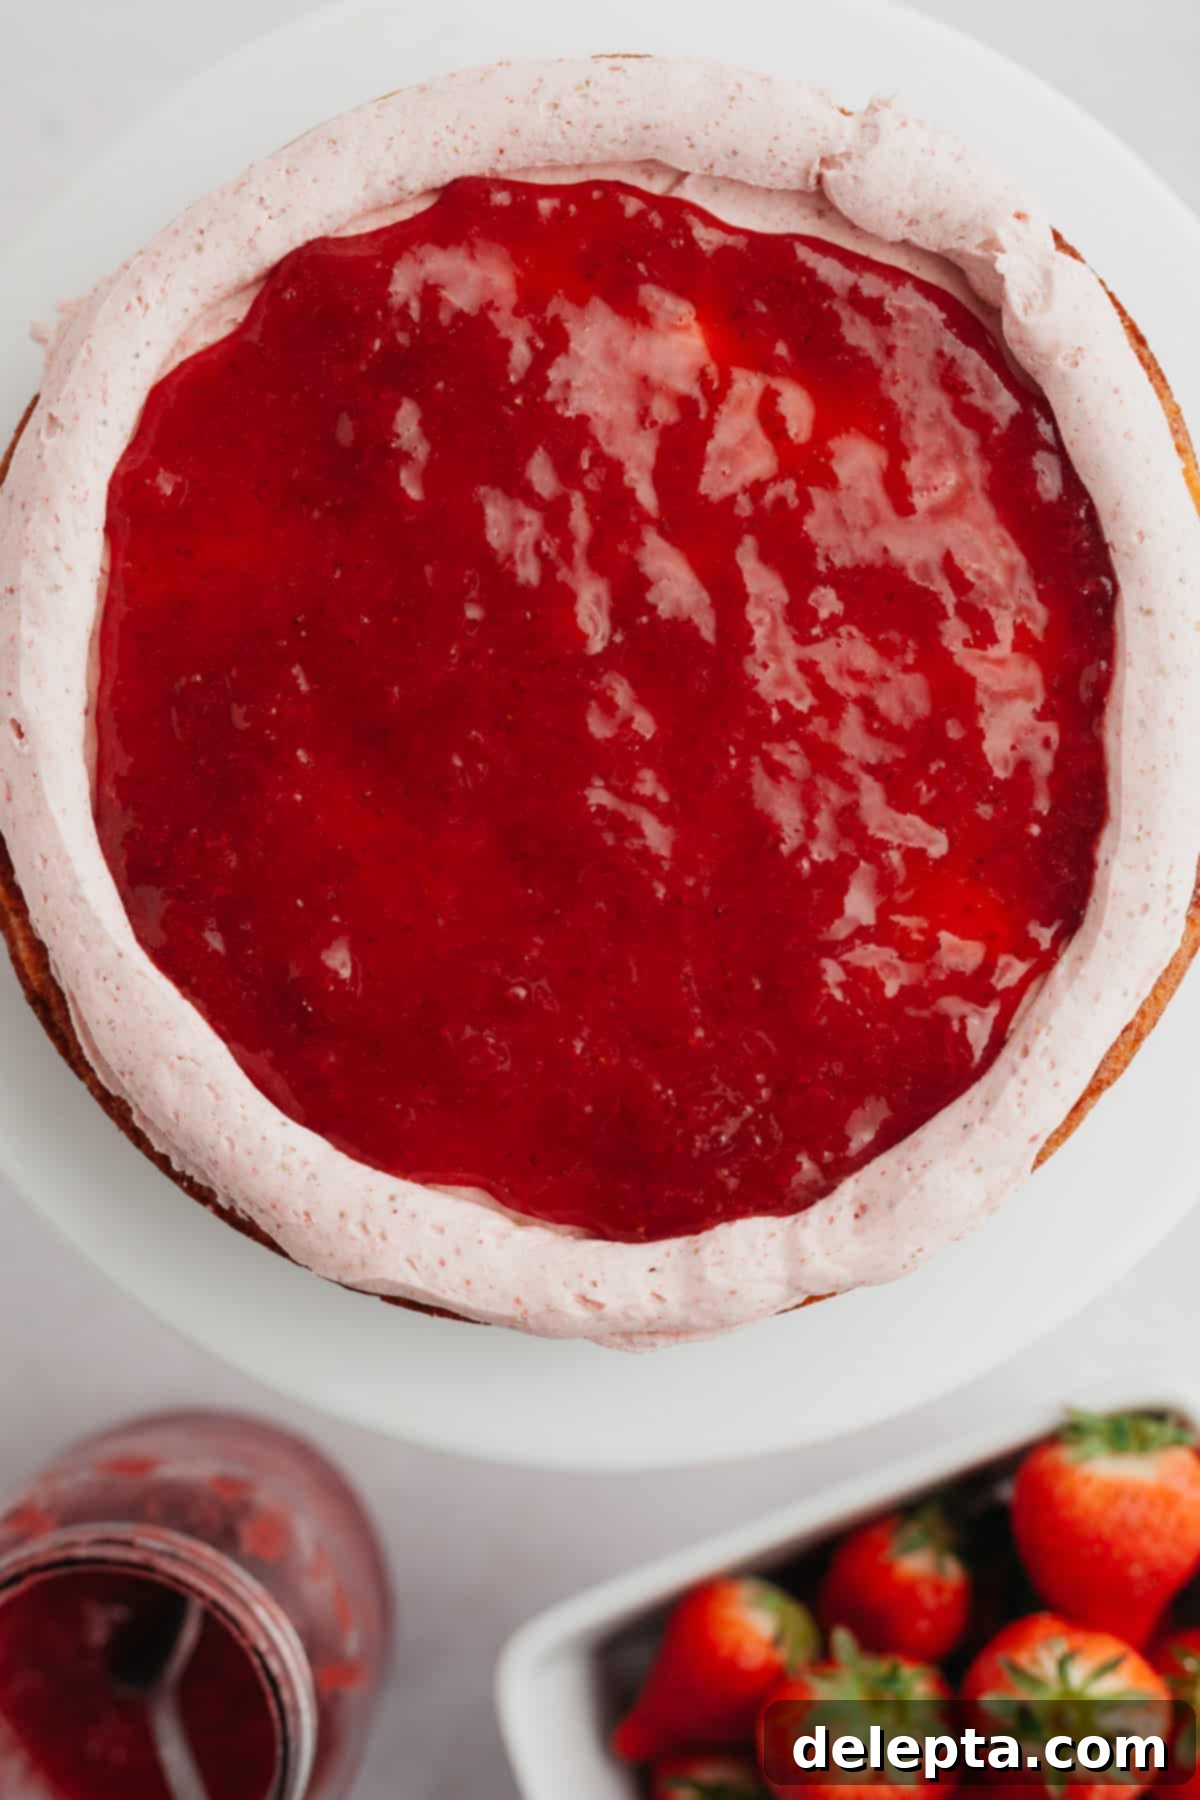
For the absolute best texture, stability, and ease of handling, I wholeheartedly recommend preparing this delicious homemade strawberry filling at least a full day in advance. This crucial chilling period in the refrigerator allows the natural pectins present within the fruit to fully activate and set, resulting in a significantly thicker, more stable, and wonderfully spreadable filling. Once perfectly chilled, it will be ideally set and ready to be used as a glorious, show-stopping cake filling, as elegantly illustrated below, or to lavishly fill your favorite homemade cupcakes, adding a burst of fresh strawberry goodness!
Expert Tips & Tricks for Achieving the Best Strawberry Filling
Crafting the perfect strawberry filling is made simple with these tried-and-true expert tips and tricks:
- For a More Pronounced Tart Filling: If your palate prefers a filling with a brighter, more assertive tartness that truly highlights the natural acidity of the strawberries and lemon, you can subtly reduce the amount of granulated sugar. A good starting point is to try using just 3 tablespoons of sugar instead of the recommended 4 tablespoons. This slight reduction will allow the natural tangy notes to shine through beautifully.
- Mastering Your Desired Consistency:
- For a Thinner, Syrupy Sauce: If your ideal strawberry sauce is a bit thinner and more syrupy, perfect for drizzling generously over desserts, simply reduce the cooking time slightly. Aim for around 20-22 minutes of simmering. This delightful consistency is absolutely fantastic for topping vanilla ice cream, fluffy waffles, delicate pancakes, rich cheesecakes, or even stirring into plain Greek yogurt.
- For a Thicker, Jam-Like Filling: Conversely, if you require a very thick, almost jam-like filling that will hold its shape impeccably within cake layers, you can extend the simmering time by a few extra minutes, potentially up to 35-40 minutes. Remember to maintain constant stirring throughout this extended period. Always bear in mind that the filling will continue to thicken considerably as it cools, so don’t overcook it!
- Consistent Stirring is Crucial: Throughout the entire simmering process over the heat, it is absolutely essential to stir the mixture frequently, ideally almost constantly. This diligent stirring prevents the strawberries from sticking to the bottom of your saucepan, which can lead to burning and impart an unpleasant, scorched flavor to your otherwise perfect filling. You may also need to actively adjust and lower the heat on your stovetop as the mixture cooks to ensure it maintains a gentle simmer rather than an aggressive, rapid boil.
- Preventing Soggy Cakes and Leaky Fillings: When integrating this luscious strawberry filling into a layer cake, employ a straightforward yet highly effective barrier technique. First, pipe a sturdy ring of your chosen frosting (a classic buttercream works wonders here) around the very outer edge of the cake layer. After creating this “dam,” then spoon in your strawberry filling. This clever barrier will securely contain the fruit filling, effectively preventing it from bleeding into the delicate cake layers or, worse, leaking unattractively out the sides. As an extra layer of protection, I often apply a very thin “crumb coat” of frosting directly onto the cake layer before piping the frosting ring. This creates an even stronger seal, ensuring your cake layers remain perfectly moist without becoming soggy.
- Achieving a Smoother Filling: If your preference leans towards a strawberry filling with minimal fruit chunks and a luxuriously silky consistency, make sure to dice your fresh strawberries into very small, uniform pieces. Smaller pieces naturally break down much more easily and quickly during the simmering process, contributing to a smoother final texture. You can also lightly mash the strawberries with a fork or potato masher as they simmer to further aid in achieving this smooth consistency.
- Allow Ample Cooling & Chilling Time: This step cannot be overstated and is arguably one of the most vital for a successful filling! After the cooking process is complete, allow the hot strawberry filling to cool completely to room temperature. Once cooled, transfer it to an airtight container and refrigerate it overnight (or for a minimum of 6-8 hours). This essential chilling period permits the natural pectins in the fruit to fully activate and set, resulting in the optimal, perfectly thickened, and wonderfully spreadable consistency that is much easier to work with, especially when assembling delicate cake layers.
- Select Fresh, Ripe Strawberries: The ultimate flavor of your finished filling is directly proportional to the quality of your strawberries. Always choose berries that are bright red, intensely fragrant, and firm. Avoid any that are pale, soft, or moldy.
Creative Serving Suggestions Beyond Cake & Cupcakes
While this homemade strawberry filling is undeniably tailor-made for enhancing cakes and cupcakes, its extraordinary deliciousness and versatility mean its applications extend far beyond traditional baked goods. Here are some inspiring and fantastic ways to enjoy your vibrant homemade strawberry sauce:
- Elevate Your Breakfast & Brunch:
- Spoon generously over stacks of fluffy pancakes, crispy waffles, or golden French toast for a truly gourmet breakfast experience.
- Swirl vibrant streaks into a bowl of creamy Greek yogurt, hearty oatmeal, or even cottage cheese for a burst of fresh fruit flavor and natural sweetness.
- Spread it lavishly on warm toast, flaky croissants, delicate scones, or savory biscuits for a delightful morning treat that tastes like summer.
- Enhance Your Desserts & Treats:
- Decadently top scoops of classic vanilla ice cream, elegant pavlova, panna cotta, or a rich crème brûlée for an instant upgrade.
- Serve it as a vibrant accompaniment alongside slices of rich cheesecake, delicate tarts, rustic fruit crisps, or even simple fruit salads.
- Layer it artfully in trifles or parfaits, alternating with whipped cream, custard, cake pieces, and crunchy granola for a stunning presentation.
- For an instant flavor boost, gently stir this strawberry sauce into whipped cream, cream cheese frosting, or vanilla buttercream to effortlessly create a custom strawberry-flavored topping or filling.
- Refresh Your Beverages:
- Mix a spoonful or two into sparkling water or club soda for a delightfully refreshing homemade strawberry soda.
- Incorporate a touch of its fruity sweetness into your favorite cocktails or mocktails for a seasonal twist.
Frequently Asked Questions About Strawberry Filling
Yes, absolutely! It is highly recommended that any cake or dessert containing a fruit-based filling, particularly one crafted with fresh fruit, be stored in the refrigerator. This practice is essential for maintaining optimal freshness, ensuring food safety, and preventing premature spoilage. Be sure to cover the cake loosely or place it within an airtight cake carrier to protect its integrity.
Not at all, especially if you diligently follow our expert tips! To effectively prevent your cake layers from becoming soggy and to ensure the delicious filling remains perfectly contained, I strongly advise two crucial preparatory steps: Firstly, apply a thin, even layer of your chosen frosting directly onto your cake layer. Secondly, and equally important, pipe a robust and sturdy ring of frosting around the outer perimeter of that same cake layer *before* you spoon in your strawberry filling. This clever “dam” technique creates an impermeable barrier that skillfully locks in the moisture and prevents the flavorful filling from seeping into the delicate cake or leaking unsightly out the sides. This ensures a beautifully structured and perfectly moist cake.
This highly versatile recipe is designed to yield a generous quantity of approximately 1 to 1.5 cups of luscious strawberry filling. This amount is typically sufficient to provide a perfectly thick and flavorful layer for an 8-inch, two-layer cake or to generously fill around 24 standard-sized cupcakes. If your baking project calls for a larger quantity, perhaps for a multi-tiered cake or numerous batches of cupcakes, the recipe can be easily scaled up proportionally.
The creative possibilities for utilizing this strawberry filling are truly boundless! Beyond its excellent performance as a simple yet exquisite cake filling for recipes like my vanilla cake with strawberry filling and chocolate cake with strawberry filling, you can explore many other delightful applications. Consider coring your cupcakes and filling them for a delightful, fruity surprise center. You can also effortlessly stir the strawberry sauce directly into cream cheese frosting or a classic vanilla buttercream to instantly create a vibrant, strawberry-flavored frosting. Furthermore, it’s wonderful drizzled over ice cream, spread on pancakes, waffles, or gently swirled into your morning yogurt.
While this particular recipe is optimally designed to showcase the superior flavor and texture of fresh, ripe strawberries, you can certainly use frozen ones if fresh are unavailable. If opting for frozen berries, it is best to thaw them thoroughly first and then drain any significant excess liquid. Be aware that frozen strawberries tend to release more water during the cooking process, which may necessitate a slightly longer simmering time to achieve the desired thickened consistency. Additionally, the overall flavor profile might be marginally less vibrant compared to peak-season fresh berries.
The primary method for controlling the thickness of your strawberry filling is through adjusting the cooking time. For a notably thicker consistency, ideal for holding its shape within cakes, simply simmer the mixture for a few extra minutes beyond the recommended time, ensuring it passes the spoon test prominently. Conversely, if you desire a thinner, more syrupy sauce perfect for drizzling, reduce the cooking time slightly. For a quick and guaranteed thickening boost, you can stir in a cornstarch or arrowroot powder slurry (1-2 teaspoons mixed with 1 tablespoon of cold water) during the last 5 minutes of simmering. Cook, stirring, until the desired thickness is achieved.
Storage & Freezing Instructions for Strawberry Filling
Proper storage is key to preserving the freshness and delicious flavor of your homemade strawberry filling for as long as possible. Follow these guidelines for optimal results:
- Refrigerator Storage: Once your strawberry filling has completely cooled to room temperature, transfer it into a clean, large mason jar or any other suitable airtight container. Store this tightly sealed container in the refrigerator for up to 1 week. Ensuring it’s properly sealed is crucial to prevent the filling from absorbing unwanted odors from other foods in your fridge.
- Freezer Storage: For extended preservation, this homemade strawberry filling freezes exceptionally well! Allow the filling to cool entirely, then transfer it into a freezer-safe airtight container or a heavy-duty freezer bag, leaving a small amount of headspace to allow for expansion. Label the container clearly with the date and freeze for up to 3 months. To use, simply thaw the frozen filling overnight in the refrigerator. After thawing, give it a good stir, as some natural separation may occur, and it will be ready to use as desired.
More Delicious Strawberry Recipes to Explore!
If you adore strawberries as much as we do, you’ll be thrilled to discover these other fantastic strawberry-inspired recipes that are perfect for any occasion:
- Strawberry and White Chocolate Cheesecake (No Bake)
- Strawberry Filled Cake
- Strawberry Crumble
- Strawberry Crunch Cheesecake (No Bake)
If you’ve had the pleasure of preparing this delightful strawberry filling recipe, we would absolutely love to hear about your experience! Please take a moment to leave a ⭐️ rating and a thoughtful review below to share your insights and any tips you discovered. Your valuable feedback is incredibly helpful to us and to other fellow bakers in our community! I always get so much joy from seeing your culinary creations, so don’t hesitate to tag me on Instagram @alpineella with your beautiful photos. You can also stay connected and discover even more delicious recipes by following along on Pinterest, Facebook, and TikTok!
Recipe Card
Easy Homemade Strawberry Filling for Cake
Ella Gilbert
Pin Recipe
Save RecipeSaved!
Equipment
-
1 medium saucepan
-
Wooden spoon or spatula
-
Cutting board and knife
-
Lemon zester/juicer
Ingredients
- 2 cups fresh strawberries hulled & diced
- 4 tablespoons granulated white sugar
- 1.5 tablespoons fresh lemon juice
- Zest of 1 fresh lemon
Instructions
-
In a medium saucepan, combine the diced fresh strawberries with the granulated sugar, fresh lemon juice, and aromatic lemon zest. Place over medium-low heat and bring the mixture to a gentle simmer, stirring frequently. If it starts to bubble too much, simply lower the heat to prevent scorching.2 cups fresh strawberries, 4 tablespoons granulated white sugar, 1.5 tablespoons fresh lemon juice, zest of 1 fresh lemon
-
Allow the strawberry mixture to simmer gently for 25-30 minutes, ensuring you stir it frequently throughout this process. The strawberries will soften and break down, yielding a wonderfully thick strawberry sauce. The filling is ready when it coats the back of a spoon and a line drawn across it with your finger remains visible without the sauce immediately dripping back together.
-
Once the desired consistency is reached, remove the pan from the heat. Let the strawberry filling cool completely to room temperature. This step is crucial for optimal thickening.
-
Transfer the cooled filling to a large mason jar or any other airtight container. Store it in the fridge for up to 1 week. For best results and thickness, chill overnight before use.
Notes
Prefer it more tart? If you desire a less sweet and more tart strawberry filling, reduce the sugar to just 3 tablespoons instead of the recommended 4 tablespoons.
For a smoother consistency: To achieve a filling with fewer strawberry chunks and a silkier texture, ensure you dice your strawberries into very small pieces. This facilitates faster breakdown during simmering. You can also lightly mash them as they cook.
Yield: This recipe produces enough filling (approximately 1 to 1.5 cups) to generously fill a standard 2-layer 8-inch cake or about 24 cupcakes.
Preventing a soggy cake: When filling a cake, always pipe a ring of frosting around the edge of the cake layer before adding the strawberry filling. This acts as a barrier to keep the fruit filling contained and prevents it from making your cake layers soggy.
Nutrition
