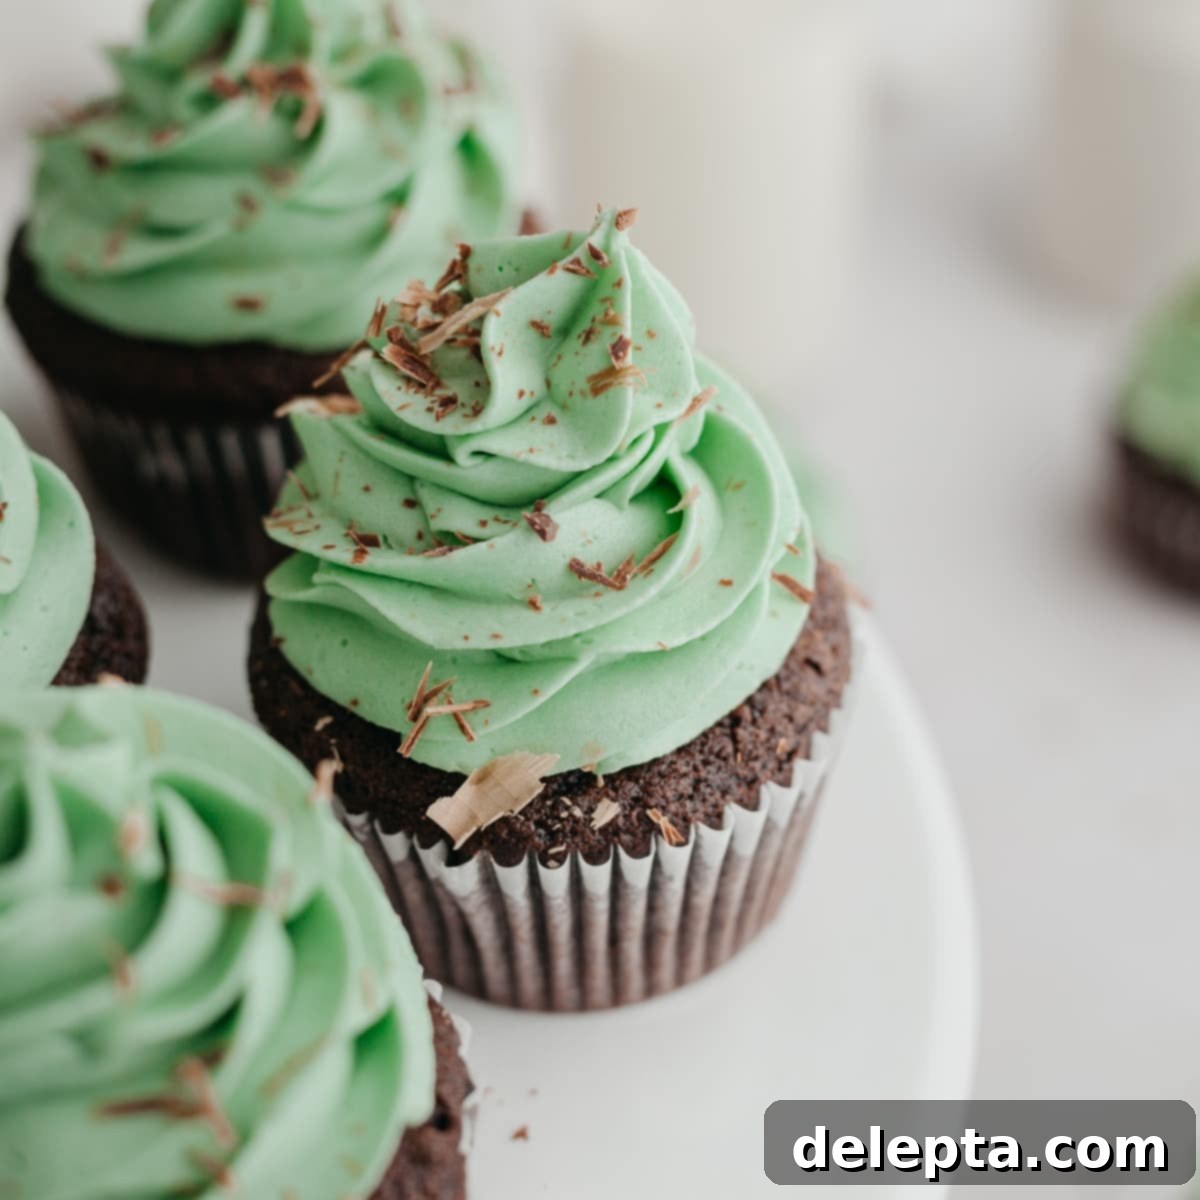
Easy & Creamy Mint Frosting Recipe: The Ultimate 5-Minute Buttercream
Prepare to elevate your baking with this incredibly delicious and effortlessly **creamy mint frosting**! This vibrant, refreshing buttercream is not only a joy to taste but also incredibly simple to make, requiring just 6 basic ingredients and taking a mere 5 minutes of active prep time. Whether you’re a seasoned baker or just starting out, this recipe promises a smooth, luscious frosting that’s perfect for a variety of treats. It’s the quintessential American buttercream, infused with that invigorating mint flavor we all love, making it an absolute must-try for anyone looking to add a touch of fresh elegance to their desserts.
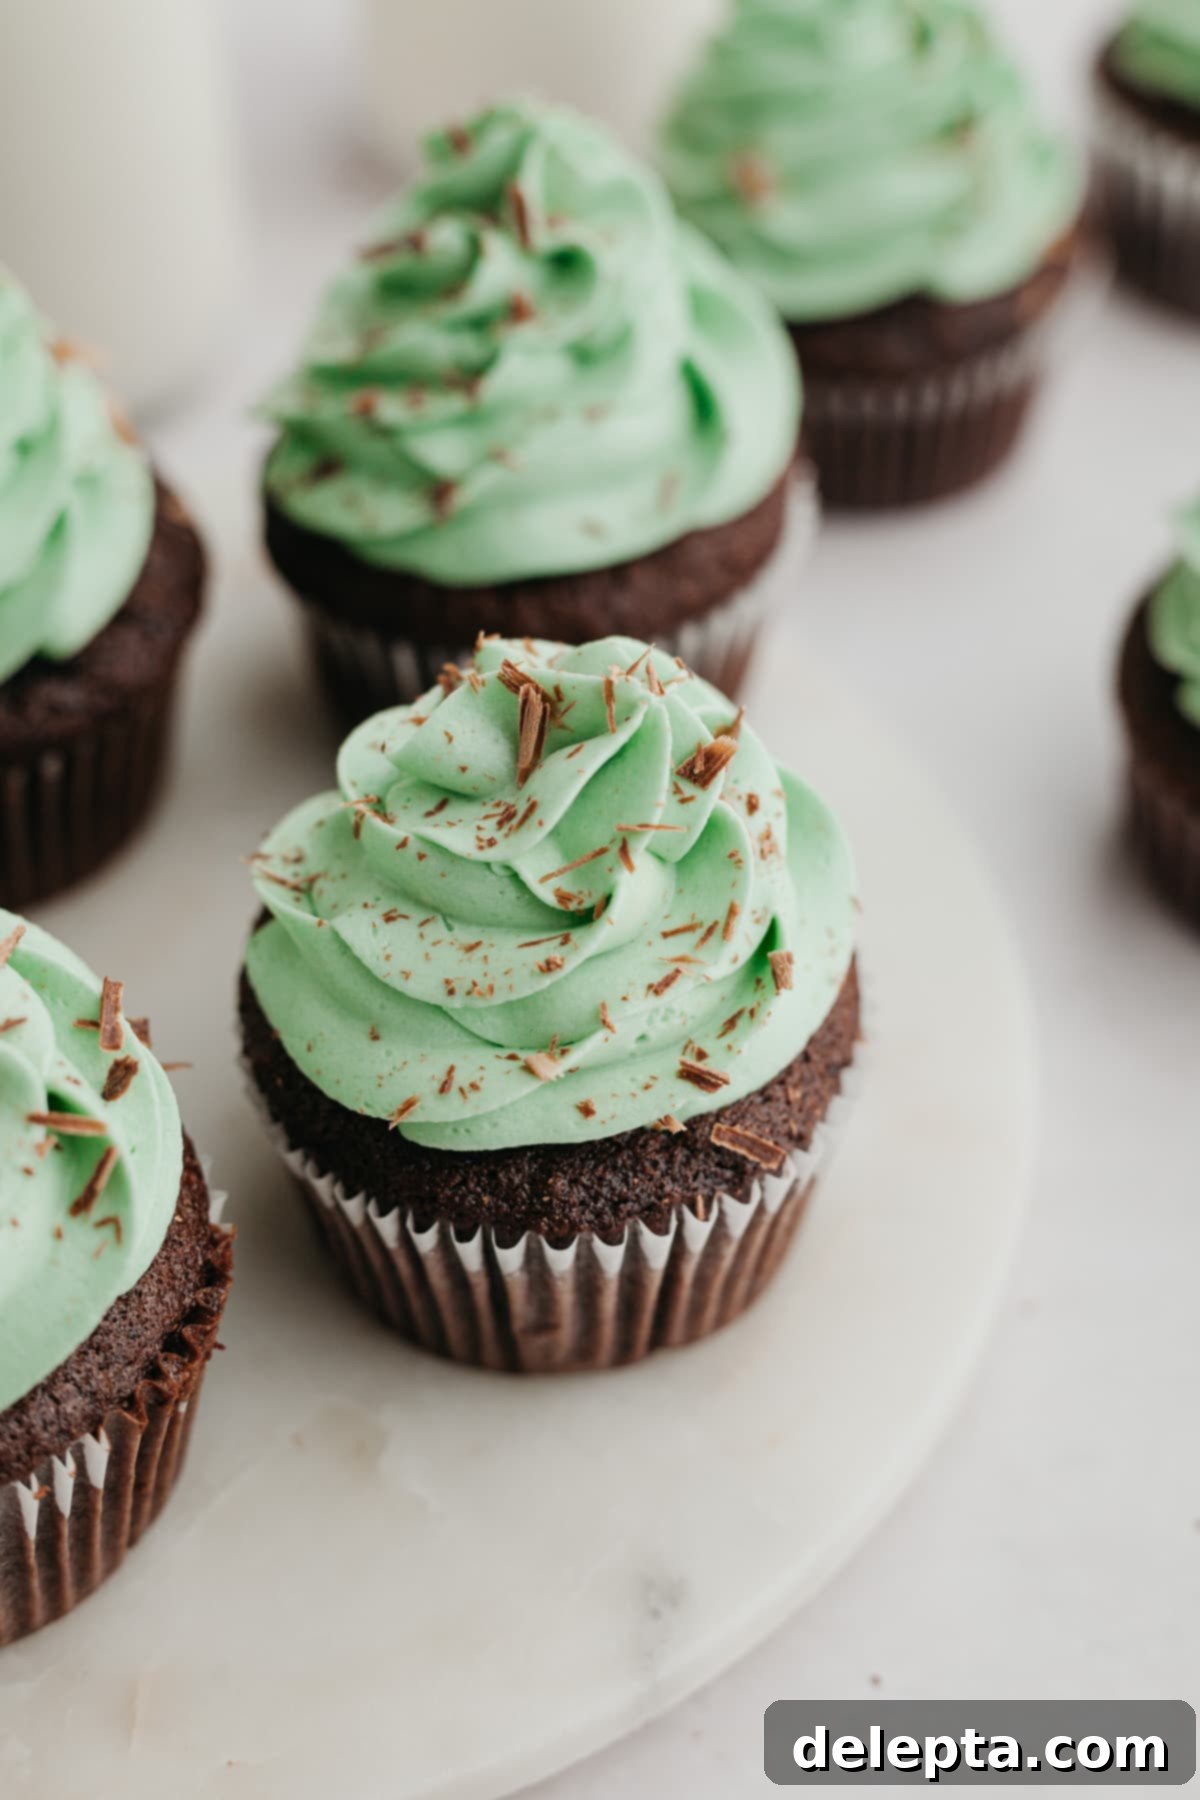
This delightful mint frosting is a classic American buttercream, renowned for its rich texture and ease of preparation. Crafted from simple, readily available ingredients such as softened unsalted butter, fine confectioners’ sugar, a generous splash of heavy cream, and, of course, a high-quality mint extract, it delivers an unparalleled flavor. The magic truly happens as these ingredients combine to form a fluffy, spreadable, and utterly irresistible frosting.
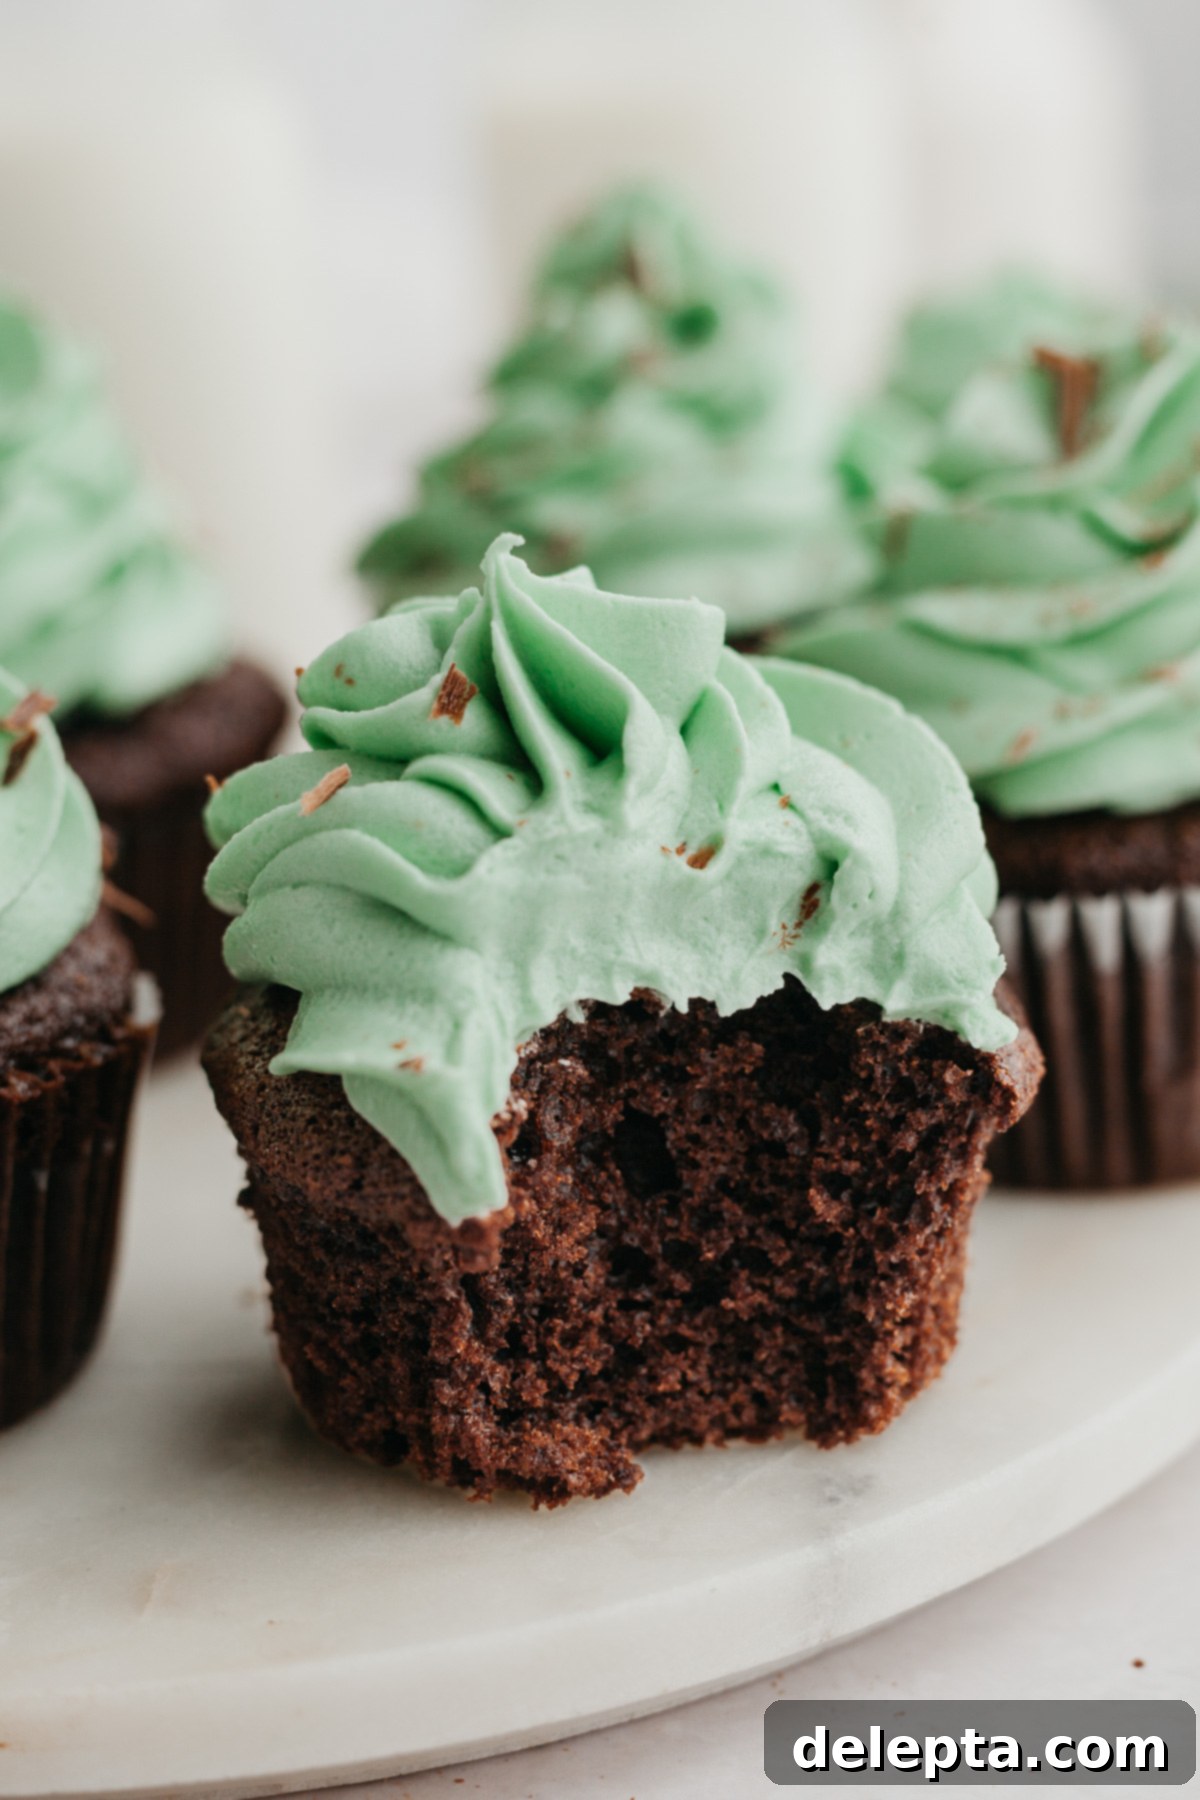
The versatility of this simple mint buttercream is astounding. It serves as an exquisite pairing for a decadent chocolate layer cake, adding a refreshing contrast to the deep cocoa notes. It’s equally perfect for decorating light and airy mini vanilla cupcakes, or complementing the robust flavor profile of mint chocolate cupcakes. Imagine it piped onto brownies, used as a filling for sandwich cookies, or even swirled onto hot chocolate for a festive touch!
If you’re a devoted “thin mint” cookie enthusiast or simply adore the refreshing taste of mint, this mint frosting recipe is an absolute dream come true. It’s an incredibly straightforward frosting to whip up, requiring minimal cleanup as you only need a single bowl for mixing. Get ready to impress with this beautifully flavored and perfectly textured homemade mint buttercream!
Jump to Section:
- Why You’ll Love This Recipe
- Ingredients Needed
- Equipment You’ll Need
- Step by Step Instructions
- Recipe Tips & Tricks
- Serving Suggestions
- Flavor Variations
- Frequently Asked Questions
- Storage
Why You’ll Love This Easy Mint Frosting Recipe!
- Incredibly Simple: You’ll be amazed at how few ingredients are needed for such a delightful result. With just 6 pantry staples, you can create a professional-quality frosting right in your kitchen.
- Effortlessly Easy to Make: American buttercream holds the crown as one of the simplest frostings to master. Its forgiving nature makes it ideal for beginners, yet its delicious outcome satisfies even the most discerning palates. Just a few steps stand between you and a bowl of creamy mint perfection!
- Beautifully Customizable: While we’ve opted for a delicate, light mint green shade, this frosting offers endless possibilities for customization. Feel free to adjust the amount of food gel to achieve a darker, more vibrant green, or even experiment with other shades to match your festive theme.
- Unforgettable Fresh Flavor: The secret lies in using quality mint extract, delivering a burst of cool, refreshing mint that perfectly balances the sweetness. It’s a flavor profile that transports you to a gourmet bakery with every bite.
- Versatile for Any Dessert: From fluffy cupcakes to elegant layer cakes, rich brownies, or delicate sandwich cookies, this mint buttercream is the ideal accompaniment. Its smooth, spreadable consistency makes decorating a breeze.
- Quick & Convenient: In just about 5 minutes of hands-on time, you can have a batch of homemade mint frosting ready. This makes it a perfect last-minute addition to any dessert, saving you time without compromising on flavor or quality.
Essential Ingredients for Your Mint Frosting
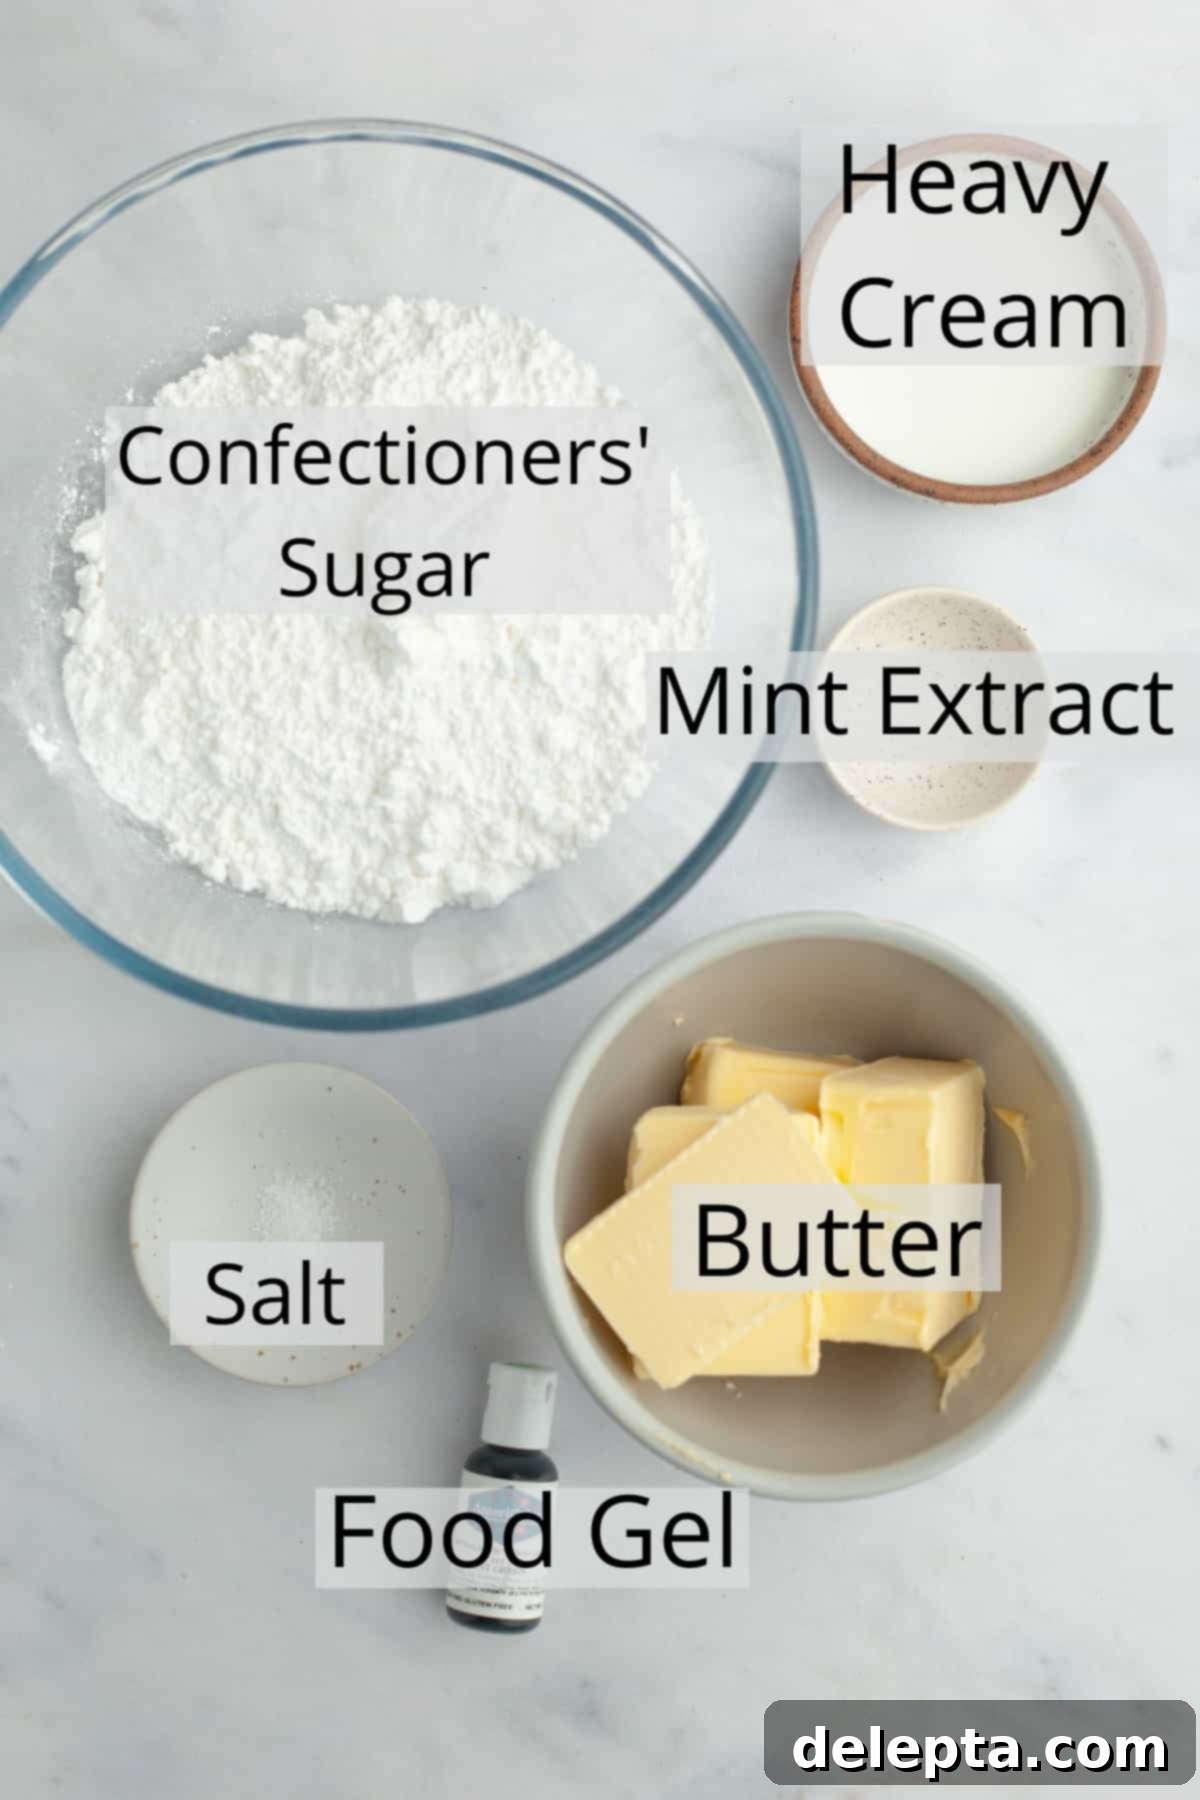
Gathering your ingredients before you begin is key to a smooth and successful frosting-making experience. Each component plays a vital role in achieving that perfect creamy texture and vibrant mint flavor.
- Confectioners’ Sugar: Also widely known as icing sugar or powdered sugar, this ultra-fine sugar is the primary sweetener and structure builder for your frosting. Its powdered form dissolves instantly into the butter, ensuring a perfectly smooth, grit-free buttercream. For the best results, consider sifting your confectioners’ sugar to remove any lumps, which can affect the final texture.
- Unsalted Butter: We highly recommend using unsalted butter in all baking recipes, including this mint frosting. This allows you complete control over the salt content, ensuring a balanced flavor. For an extra touch of richness and unparalleled creaminess, opt for a high-quality European-style butter, such as Kerrygold. Remember, your butter must be at **room temperature** – not melted, not too cold – for proper emulsification and a smooth consistency. This is crucial for achieving that light and fluffy texture.
- Heavy Cream: This essential liquid ingredient transforms the butter and sugar mixture into a luxuriously creamy and effortlessly spreadable frosting. It adds richness and helps achieve the desired consistency. You can adjust the amount slightly to make your frosting thicker or thinner, depending on your application (e.g., piping vs. spreading). Whole milk can be substituted in a pinch, but heavy cream offers the best flavor and texture.
- Mint Extract: This is where the magic happens for that signature mint flavor! It is absolutely vital to ensure you are using **mint extract** and not peppermint extract. While they might seem similar, peppermint extract often has a much stronger, sometimes almost toothpaste-like, flavor. Mint extract provides a softer, more balanced, and authentic mint taste that’s perfect for desserts. Adjust the amount to your personal preference for mint intensity.
- Green Food Gel: To give your mint frosting that iconic green hue, food gel is the ideal choice. Unlike liquid food colorings, gel food colors are highly concentrated, meaning you only need a tiny amount to achieve vibrant results without thinning out your frosting. My personal favorite brand for consistent and beautiful colors is Americolor, and I used their ‘Mint Green’ shade for the frosting pictured. This ingredient is entirely optional; if you prefer a naturally colored white or off-white frosting (depending on your butter), you can simply omit it.
- Kosher Salt: A pinch of kosher salt is a secret ingredient that elevates this frosting from good to great. It doesn’t make the frosting taste salty but rather balances the sweetness of the confectioners’ sugar, enhancing all the other flavors, particularly the mint. If you’re using fine table salt, remember to halve the amount, as kosher salt crystals are larger and less dense.
Equipment You’ll Need
Having the right tools on hand will make preparing this mint frosting even easier:
- Stand Mixer with Paddle Attachment: While a hand mixer works well, a stand mixer is ideal for thoroughly creaming butter and sugar, and for hands-free mixing. The paddle attachment is crucial for achieving a smooth, aerated buttercream without incorporating too much air (which can lead to crumbly frosting).
- Large Mixing Bowl: Essential if using a hand mixer, or for scraping down the sides of your stand mixer bowl.
- Rubber Spatula: Perfect for scraping down the sides of the bowl to ensure all ingredients are evenly incorporated and for transferring the finished frosting.
- Measuring Cups and Spoons: For accurately measuring out your ingredients. Using a kitchen scale for confectioners’ sugar and butter can lead to even more consistent results.
Step by Step Instructions for Perfect Mint Frosting
Follow these simple steps to create a beautiful, fluffy, and perfectly flavored mint buttercream:
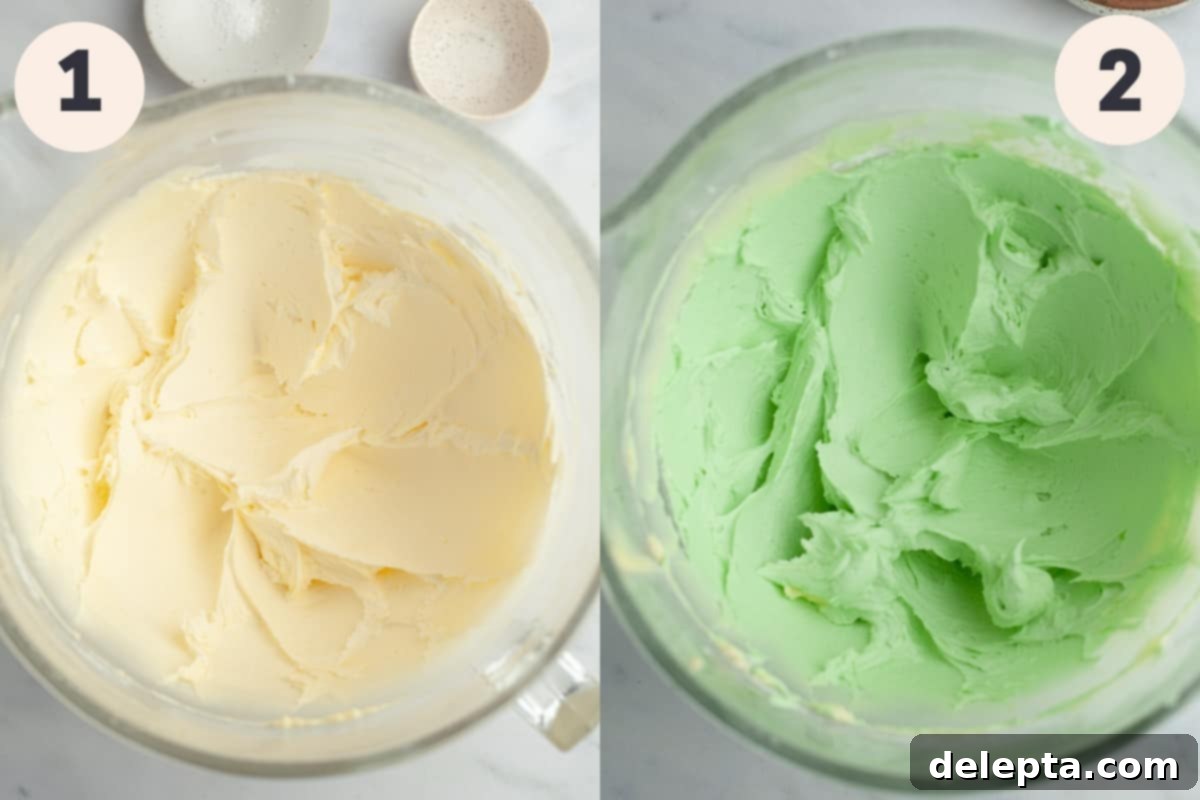
Step 1: Combine Butter and Sugar. In the bowl of a stand mixer fitted with the paddle attachment (or a large bowl with a handheld mixer), begin by adding your room temperature unsalted butter and confectioners’ sugar. Mix on **low speed** initially. This crucial step prevents the powdered sugar from flying out of the bowl and creating a messy cloud in your kitchen! Continue mixing on low until the butter and sugar are just combined and no dry pockets of sugar remain. Once combined, increase the speed to medium-high and beat for about 2-3 minutes. This process is essential for creaming the butter and sugar together, making the mixture thick and fluffy, which forms the base of your creamy mint frosting.
Step 2: Add Flavor and Color. Stop the mixer and use a rubber spatula to scrape down the sides of the bowl, ensuring all ingredients are fully incorporated. Now, add your pinch of kosher salt, a few drops of green food gel (if using), and the mint extract. Resume beating on medium-high speed for another 2 minutes. This vigorous mixing helps to evenly distribute the flavor and color, and also incorporates a bit more air, contributing to the light and airy texture of the finished buttercream.
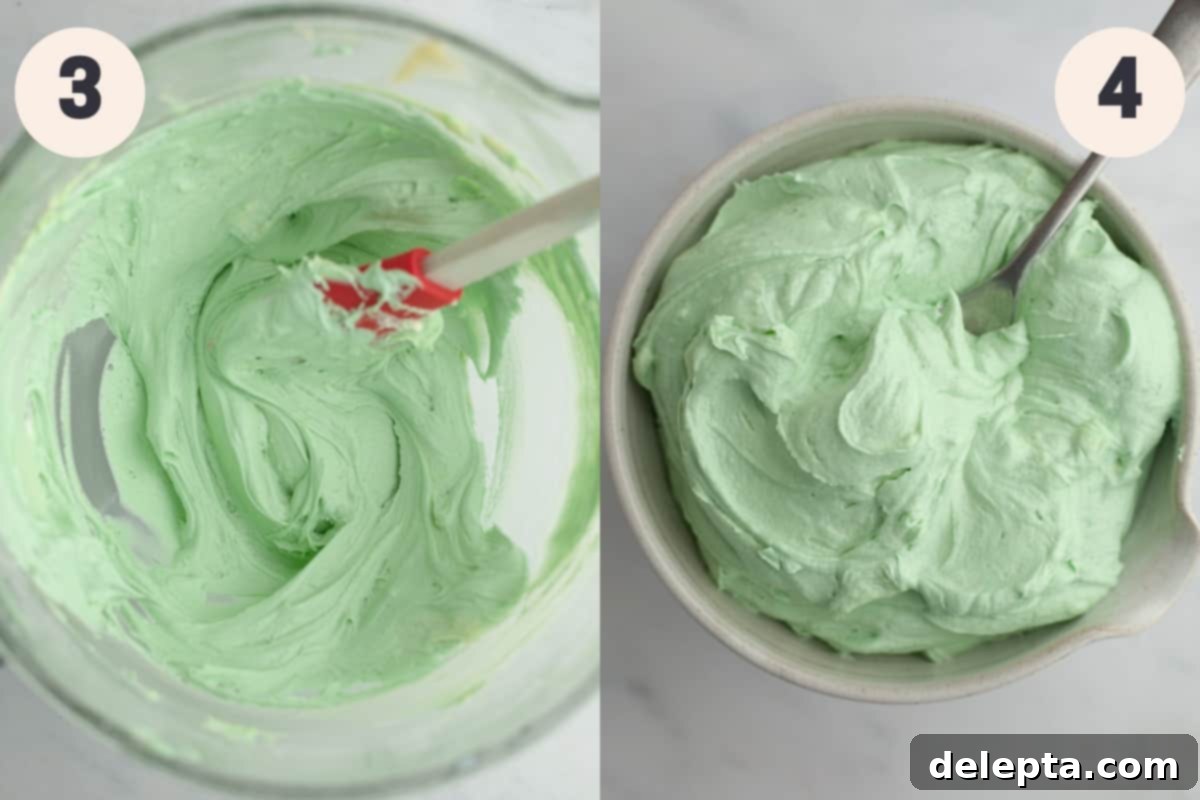
Step 3: Adjust Consistency with Cream. With the mixer running on its lowest speed, slowly and gradually pour in the heavy cream. Begin with a smaller amount (e.g., half of the ¼ cup) and observe the frosting’s consistency. Continue adding cream, a little at a time, until the frosting reaches your desired spreadable and creamy texture. If you plan to pipe the frosting, you might want it a bit stiffer; for spreading, a slightly looser consistency works well. Be careful not to add too much at once, as it can quickly become too thin.
Step 4: Use Immediately & Enjoy! Once your mint frosting has reached its perfect, smooth, and creamy consistency, it’s ready to be used! Generously spread it on your favorite cakes, swirl it high on cupcakes, pipe it onto brownies, or use it as a delightful filling for sandwich cookies. The refreshing flavor and beautiful color will make any dessert a showstopper!
Expert Recipe Tips & Tricks for the Best Mint Frosting
Achieving bakery-quality mint frosting is easier than you think with these expert tips:
- Start Low, Prevent the Cloud: When combining the butter and confectioners’ sugar, always begin mixing on the lowest speed. This simple trick is a lifesaver, preventing the powdered sugar from creating a “sugar cloud” that will dust your entire kitchen! Once the sugar is mostly incorporated, then you can increase the speed.
- Gel is Your Best Friend for Color: If you’re using food coloring, especially for vibrant shades like mint green, opt for gel food coloring over liquid. Gel colors are highly concentrated, meaning you only need a couple of drops to achieve a rich, beautiful color without adding excess moisture that can alter your frosting’s consistency. Liquid food colors may require much more, potentially thinning out your buttercream.
- Room Temperature Butter is Non-Negotiable: This is perhaps the most crucial tip for any buttercream! Ensure your unsalted butter is at true room temperature (soft enough to indent with a finger, but not greasy or melted) before you start. Cold butter will result in a lumpy, inconsistent frosting, while melted butter will prevent proper emulsification and leave you with a soupy mess. Plan ahead and take your butter out of the fridge at least 1-2 hours before you begin.
- Mint, Not Peppermint: As emphasized in the ingredients section, always use mint extract for this recipe. Peppermint extract has a much stronger, often artificial taste that can evoke flavors of toothpaste. Mint extract provides a more natural, subtle, and delicious minty essence perfect for desserts.
- Don’t Overbeat the Final Mix: Once you’ve added the heavy cream, beat only until the frosting reaches your desired consistency. Overbeating at this stage can incorporate too much air, making the frosting excessively fluffy, potentially crumbly, or difficult to pipe cleanly.
- Sift for Smoothness: For the ultimate silky-smooth frosting, take an extra minute to sift your confectioners’ sugar. This removes any small lumps and ensures a perfectly uniform texture free of gritty bits.
- Adjusting Consistency: If your frosting turns out too thick, add heavy cream (or milk) one tablespoon at a time until it’s just right. If it’s too thin, add a quarter cup of confectioners’ sugar at a time until it stiffens up. Always mix well after each addition to assess the new consistency.
Delightful Serving Suggestions
This creamy mint frosting isn’t just for cupcakes! Its versatile flavor and texture make it perfect for a wide array of treats:
- Classic Cupcakes & Cakes: The obvious choice! Pipe or spread generously onto chocolate, vanilla, or even red velvet cupcakes and cakes.
- Brownies: A thick layer of mint frosting on rich, fudgy brownies creates an irresistible chocolate-mint pairing.
- Sandwich Cookies: Use it as a filling between chocolate wafers, oatmeal cookies, or even homemade sugar cookies for a delightful twist.
- Whoopie Pies: Substitute your usual filling with this mint buttercream for a refreshing take on this classic treat.
- Hot Chocolate Topping: A dollop of mint frosting on top of a warm mug of hot chocolate makes for a luxurious and festive drink.
- Ice Cream Sundaes: A swirl of this frosting can add a unique and creamy element to your favorite ice cream sundaes.
- Chocolate Dipped Pretzels: Dip pretzels in melted chocolate, let them set, then drizzle or pipe thin lines of mint frosting for a sweet and salty snack.
Exciting Flavor Variations
While this classic mint frosting is perfect as is, you can easily adapt it to create new and exciting flavors:
- Chocolate Mint Dream: For an intense chocolate-mint experience, melt 2-3 ounces of unsweetened or semi-sweet chocolate, let it cool slightly, then slowly beat it into the finished mint frosting. This will create a darker, richer frosting.
- Mint Chip Frosting: Fold in 1/4 to 1/2 cup of finely chopped mini chocolate chips (or finely grated chocolate bar) into the finished buttercream for a delightful textural contrast.
- Double Mint: If you’re a true mint fanatic, you can slightly increase the amount of mint extract, adding a few extra drops until it reaches your desired intensity.
- Spearmint Sensation: If you have spearmint extract on hand and prefer its slightly sweeter, milder mint flavor, you can substitute it for the regular mint extract.
Frequently Asked Questions About Mint Frosting
If your frosting ends up being thinner than desired, don’t worry! This is an easy fix. When you’re slowly pouring in the heavy cream, the key is to stop as soon as the frosting reaches your preferred consistency. If you’ve already added too much, simply add ¼ cup of confectioners’ sugar at a time, beating after each addition, until the frosting thickens to your desired consistency. Repeat as necessary, taking care not to add too much sugar at once.
Absolutely not! The green food coloring is purely for aesthetic appeal and is entirely optional. If you prefer not to add food coloring, or if you simply don’t have it on hand, you can easily leave the frosting as is. Just note that the final color will be a shade of white or light yellow, depending on the natural color of the butter you use. The flavor will remain just as delightful!
Yes, this mint buttercream is excellent for making in advance! Prepare the frosting as directed, then transfer it to an airtight container. It can be stored in the fridge for up to a week. When you’re ready to use it, let it come to room temperature for about 30-60 minutes, then give it a good mix with a handheld mixer or stand mixer (using the paddle attachment) on medium-low speed. This will help restore its creamy, fluffy texture and make it easy to spread or pipe.
This recipe yields a generous amount of mint frosting, enough to beautifully decorate approximately 12-14 standard-sized cupcakes. Alternatively, it provides ample frosting to cover and fill a two-layer 8-inch cake, ensuring a luscious coating for every slice.
While heavy cream provides the richest texture and flavor, you can substitute it with whole milk or half-and-half if absolutely necessary. Start with slightly less milk than cream, adding it slowly, as milk has a thinner consistency and may make your frosting too thin more quickly. The flavor might also be slightly less rich.
Lumpy frosting is usually due to one of two reasons: either your butter wasn’t at proper room temperature (it was too cold), or your confectioners’ sugar wasn’t sifted and contained lumps. Ensure butter is soft before starting, and always sift your powdered sugar for the smoothest result.
Storage Instructions for Mint Buttercream
Proper storage is essential to keep your mint frosting fresh and delicious for future use:
- Refrigeration: Any leftover mint frosting should be transferred to an airtight container and stored in the refrigerator for up to one week. When you’re ready to use it, allow it to come to room temperature (about 30-60 minutes), then re-whip it with a handheld mixer or the paddle attachment of a stand mixer on medium-low speed until it regains its smooth and fluffy consistency.
- Freezing: For longer storage, this mint buttercream freezes beautifully! Place the frosting in an airtight, freezer-safe container or a heavy-duty freezer bag, pressing out any excess air. It can be frozen for up to 2 months. To thaw, transfer the container to the refrigerator overnight, then let it come to room temperature on the counter. Before using, re-whip it as described above until it’s light and smooth again.
Explore Other Delicious Frosting Recipes!
If you loved this mint buttercream, you’ll certainly enjoy exploring other frosting recipes that can elevate any dessert. Here are a few recommendations to expand your baking repertoire:
- Rich Chocolate Whipped Cream Frosting
- The Easiest Whipped Chocolate Ganache Frosting for Cake
- Indulgent Oreo Cookie Frosting
- Quick Biscoff Buttercream (Only 5 Ingredients!)
Have you made this refreshing mint frosting recipe? Please take a moment to rate the recipe below! We love hearing from you. Don’t forget to follow me on Instagram @alpineella and Pinterest to share your creations and find more delicious recipes!
Printable Recipe Card

Delicious & Creamy Mint Frosting
By Ella Gilbert
Pin Recipe
Save RecipeSaved!
Ingredients
For the Creamy Mint Frosting
- 2 sticks unsalted butter softened to room temperature
- ½ teaspoon kosher salt (or ¼ tsp fine salt)
- 3 cups confectioners’ sugar (sifted for best results)
- ¼ cup heavy cream (or more, for desired consistency)
- 1-2 teaspoons mint extract (not peppermint, to taste)
- green food gel (optional, for color)
Instructions
Preparing Your Mint Buttercream
-
In the bowl of a stand mixer fitted with the paddle attachment (or a large bowl with a handheld mixer), add the room temperature unsalted butter and confectioners’ sugar. Start mixing on a low speed until the ingredients are just combined and no dry pockets of sugar remain. This prevents a sugar cloud.2 sticks unsalted butter, 3 cups confectioners’ sugar
-
Increase the mixer speed to medium-high and beat vigorously for 2 minutes. This creaming process will make the mixture thick, fluffy, and well aerated.
-
Stop the mixer and scrape down the sides of the bowl with a rubber spatula. Add the kosher salt, green food gel (if using), and mint extract. Beat again on medium-high speed for another 2 minutes until everything is evenly incorporated and the color is consistent.½ tsp kosher salt, 1-2 tsp mint extract, green food gel
-
Turn the mixer to its lowest speed. Slowly and gradually pour in the heavy cream, a little at a time, beating until the frosting becomes wonderfully creamy and reaches your desired spreadable consistency. Be careful not to over-thin.¼ cup heavy cream
-
Your fresh, creamy mint frosting is now ready! Use it immediately to frost your favorite cupcakes, cakes, brownies, or other delightful desserts. Enjoy!
Notes
Butter: For an incredibly rich and creamy texture in your finished frosting, I suggest using high-quality European-style butter, such as Kerrygold. Ensure it is at proper room temperature before starting.
Salt: If you don’t have kosher salt, you can substitute with fine table salt. Just remember to halve the amount called for in the recipe, as fine salt is more potent. (e.g., ½ teaspoon kosher salt = ¼ teaspoon fine salt).
Food Gel: I achieved the beautiful light green shade using Americolor food gel in ‘Mint Green’. You can adjust the quantity to reach your desired color intensity, or omit it entirely for a white frosting.
Mint Extract: This is crucial for the perfect flavor! Make sure you’re using true mint extract, not peppermint extract, to avoid a flavor that can taste like toothpaste.
Storage: To store leftover buttercream, place it in an airtight container and refrigerate for up to one week. For longer preservation, it can be frozen for up to 2 months. Always allow it to thaw and come to room temperature, then re-whip with a hand mixer or stand mixer before using to restore its smooth consistency.
Nutritional Information
