Ultimate Chocolate S’mores Cookies: Fudgy, Chewy & Irresistibly Easy One-Bowl Recipe
Prepare yourself for an extraordinary treat with these chocolate s’mores cookies! They are incredibly fudgy, bursting with delightful mini marshmallows, crunchy crushed graham crackers, and rich chocolate. Crafted with ease in just one bowl, these cookies require only 10 minutes to bake, making them perfect for any craving or gathering.

After perfecting my chocolate marshmallow cookies – a recipe my brother declared the best cookie he’d ever tasted – I knew a s’mores version was an absolute must. These cookies build on that incredible foundation, offering the same super fudgy and intensely chocolatey experience, but elevated with the classic s’mores trinity: melt-in-your-mouth mini marshmallows, chopped chocolate pieces, and perfectly crushed graham crackers. Each bite transports you to a campfire, without the need for a tent!
Imagine your favorite gooey, chocolatey s’more, but in the convenient and utterly satisfying form of a cookie. That’s precisely what these deliver. If your preference leans more towards a traditional chocolate chip s’more cookie, you might want to explore my chocolate chip and marshmallow cookies. For those who believe there’s no such thing as too much chocolate, you absolutely have to try my fudgy triple chocolate chunk cookies, also made conveniently in one bowl. These s’mores cookies, however, strike the perfect balance between deep chocolate flavor and that unmistakable campfire charm.
These cookies aren’t just a dessert; they’re an experience. They capture the essence of a beloved summertime treat and transform it into a year-round delight. Whether you’re hosting a party, looking for a comforting snack, or simply indulging your sweet tooth, these chocolate s’mores cookies are guaranteed to become a new favorite in your baking repertoire. The simplicity of the recipe belies the complex, satisfying flavors within, making them accessible to bakers of all skill levels.
Why You’ll Fall in Love with These Chocolate S’mores Cookies!
These aren’t just another cookie recipe; they’re a revelation. Here’s why I find myself making them again and again, and why I believe you will too:
- Effortlessly Easy – Baking should be fun, not a chore! This recipe epitomizes simplicity. You literally need just one bowl to mix all the ingredients, cutting down significantly on cleanup time. This makes them perfect for busy weeknights, spontaneous baking sessions, or when you just want a delicious treat without a lot of fuss. The straightforward steps ensure a stress-free baking experience from start to finish.
- Bursting with S’mores Flavor – Every bite is a delightful journey back to childhood campfires. We’ve meticulously combined rich chopped chocolate, crunchy crushed graham crackers, and soft, gooey mini marshmallows to ensure that unmistakable, nostalgic s’mores taste shines through. It’s the perfect harmony of textures and flavors that makes these cookies utterly irresistible and truly reminiscent of the classic toasted treat.
- Decadently Rich & Fudgy – The base of these cookies is a deep, dark chocolate dough that’s incredibly fudgy and chewy, not dry or crumbly. My husband, Will, described their chocolate flavor as exceptionally rich, saying they actually reminded him of luxurious hot cocoa. This intense chocolatey goodness provides the perfect contrast to the sweet marshmallows and slightly salty graham crackers, creating a balanced and deeply satisfying dessert.
- Quick to Bake – Who wants to wait hours for cookies? These beauties bake up in just 8-10 minutes, meaning you can go from craving to indulging in under an hour (including a short chill time). This speed is ideal for unexpected guests or when a sudden sweet tooth strikes.
- Crowd-Pleaser Guaranteed – Whether you’re bringing them to a potluck, serving them at a party, or simply sharing them with family, these cookies are universally loved. The familiar and beloved s’mores profile ensures they’ll disappear quickly, leaving everyone asking for the recipe!
The Journey to Perfection: My Recipe Testing Process
Developing the perfect cookie is a labor of love, and these chocolate s’mores cookies are a testament to that process. They are directly inspired by and based on my immensely popular chocolate marshmallow cookie recipe. While that recipe is fantastic on its own, I knew that adding graham crackers to the mix required some careful adjustments to maintain the signature fudgy texture.
During initial testing, I observed that simply adding crushed graham crackers to the original cookie dough sometimes resulted in a slightly drier cookie if it wasn’t paired with a large, melty marshmallow like in the original. To counteract this and ensure every s’mores cookie was as soft and chewy as possible, I experimented with a few modifications. The breakthrough came when I added an extra egg yolk to the dough. This simple addition made a profound difference, boosting the fat content and providing extra moisture, resulting in a cookie that was noticeably softer, chewier, and maintained its rich texture even with the inclusion of the graham crackers.
This enhanced chocolate cookie base is so reliable and delicious that it’s actually the same recipe I use for my highly-praised cosmic brownie cookies! Its versatility and consistent results make it a true winner. This careful fine-tuning ensures that each chocolate s’mores cookie is not only packed with flavor but also boasts an absolutely perfect, irresistible texture – a true balance of fudgy, chewy, and tender.
Gather Your Essential Ingredients for S’mores Cookie Bliss
Crafting these sensational chocolate s’mores cookies requires a selection of quality ingredients. Each component plays a vital role in achieving that perfect fudgy texture and nostalgic s’mores flavor. Here’s a detailed look at what you’ll need and why:
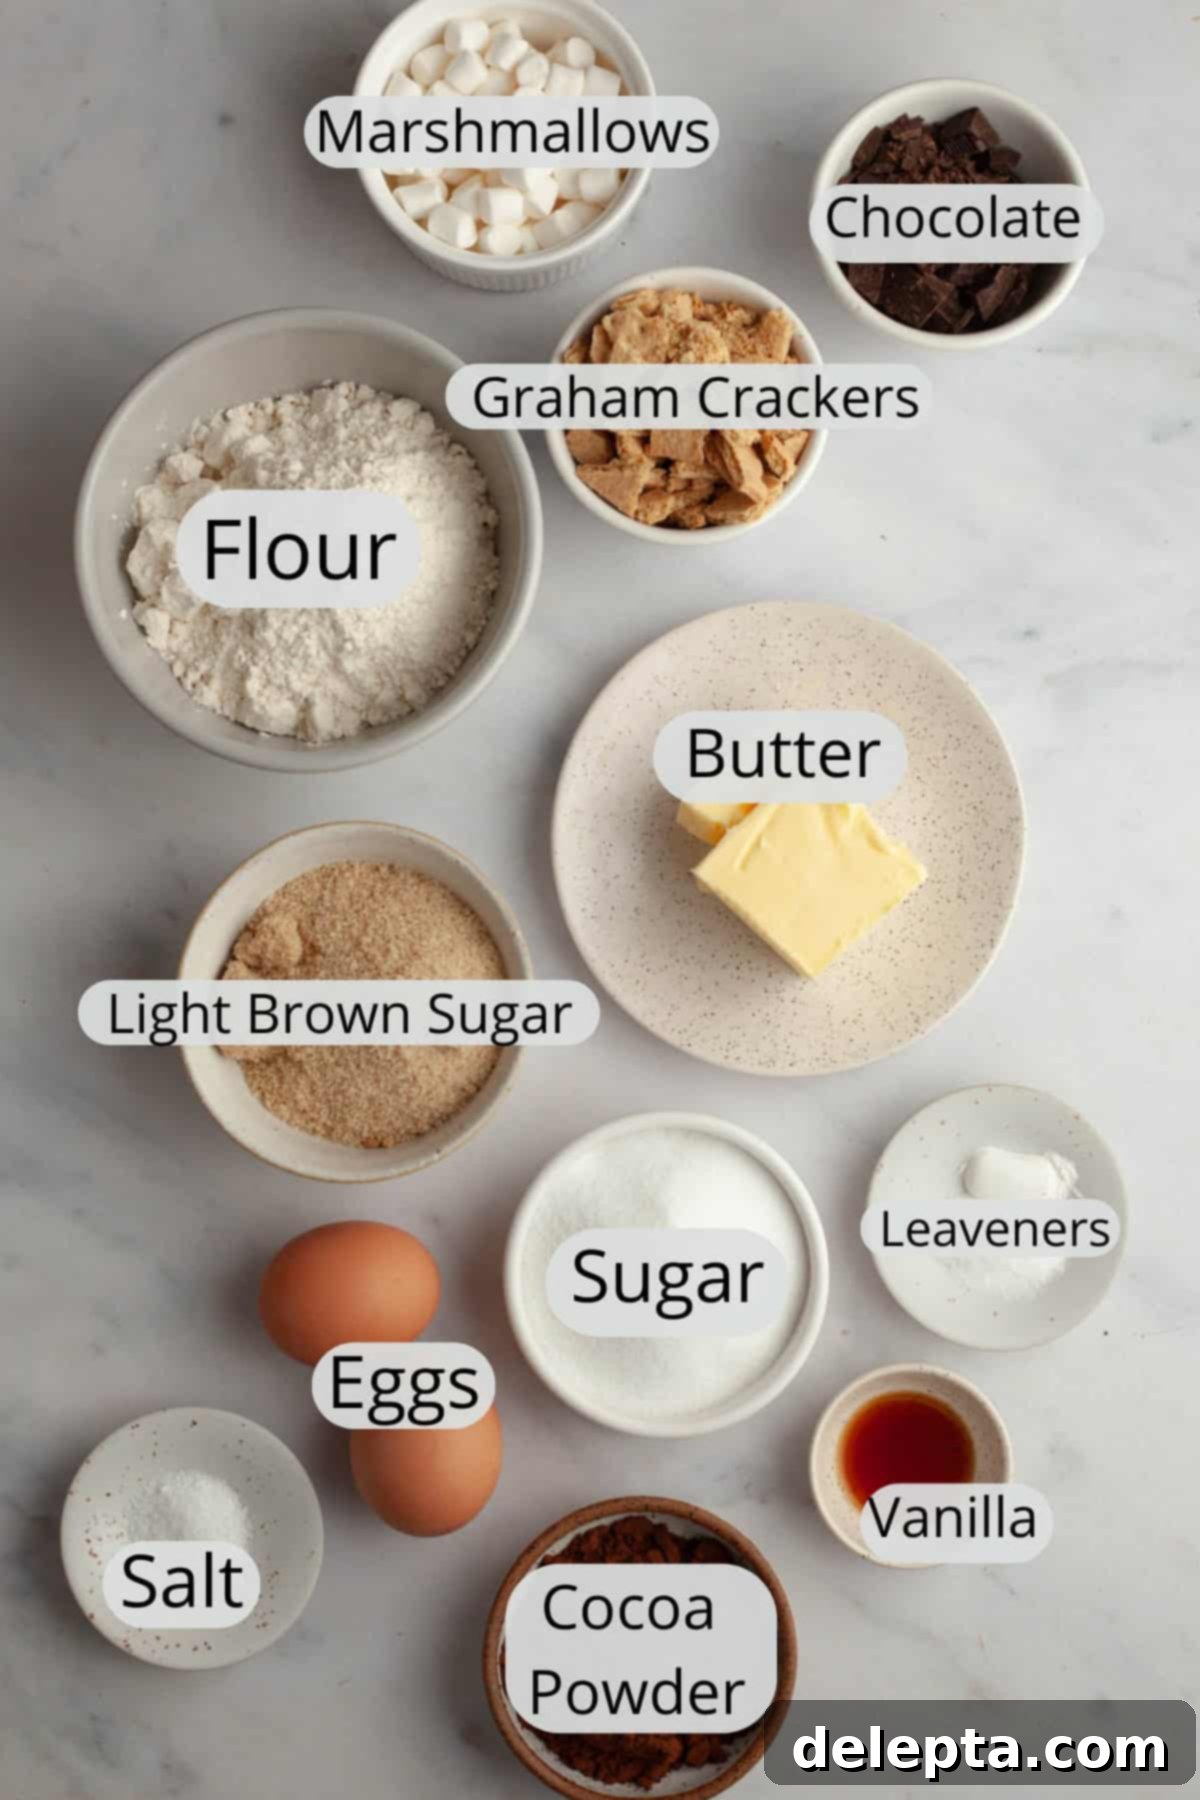
- Unsalted Butter: Ensure your butter is at room temperature. This is crucial for properly creaming it with the sugars, creating a light and fluffy base that contributes to the cookie’s tender crumb. Using unsalted butter gives you control over the overall saltiness of the cookies.
- White Granulated Sugar & Light Brown Sugar: The combination of these two sugars is key. Granulated sugar helps with spread and crisp edges, while light brown sugar adds moisture, chewiness, and a subtle caramel note that complements the chocolate beautifully.
- Large Egg & Large Egg Yolk: The whole egg provides structure and moisture, while the extra egg yolk (a secret weapon from my recipe testing!) is essential for that extra fudginess and chewiness that makes these cookies stand out. Make sure they are at room temperature to incorporate smoothly into the batter.
- Vanilla Extract: A touch of pure vanilla extract enhances all the other flavors, adding depth and warmth to the rich chocolate base. Don’t skip it!
- Kosher Salt: Salt is vital for balancing sweetness and enhancing flavor. It truly makes the chocolate taste more chocolatey. If you’re using fine table salt, remember to halve the amount, as it’s much saltier by volume than kosher salt.
- All-Purpose Flour: The foundational dry ingredient, providing structure to the cookies. Measure it correctly, preferably by weight, to avoid a dense or dry cookie.
- Baking Powder & Baking Soda (Leaveners): This dynamic duo works together to give the cookies their perfect rise and soft texture. Baking soda reacts with acidic ingredients (like cocoa powder) and brown sugar, while baking powder provides extra lift, ensuring a fluffy yet chewy interior.
- Dutch-Processed Cocoa Powder: This is non-negotiable for achieving that deep, rich, and intense chocolate flavor. Dutch-processed cocoa powder has been treated with an alkali to reduce its acidity, resulting in a darker color and a mellower, less bitter chocolate taste. Natural cocoa powder reacts differently with baking soda and baking powder, so it’s not a direct swap if you want to maintain the intended texture and leavening. It truly makes these cookies taste incredibly rich, almost like molten hot cocoa.
- Graham Crackers: Crush your favorite brand of graham crackers. These add that signature honey-graham crunch and flavor that is essential to any s’mores experience. Aim for a mix of fine crumbs and slightly larger pieces for varied texture.
- Chocolate: For the best results, I recommend chopping up a high-quality chocolate bar (dark, semi-sweet, or milk chocolate, depending on your preference). This yields beautifully melty pockets of chocolate throughout the cookie. However, if semisweet chocolate chips are all you have on hand, they will work perfectly fine and still deliver a delicious chocolatey punch.
- Mini Marshmallows: I specifically use mini marshmallows because their smaller size allows for more marshmallows in every single bite, ensuring a gooey, melty pocket of sweetness in nearly every morsel. If you only have regular-sized marshmallows, you can absolutely use them, but I strongly recommend chopping them into smaller pieces to achieve a similar distribution and melt.
Having all your ingredients prepped and at room temperature (where specified) will ensure a smooth baking process and the best possible results for your fudgy s’mores cookies!
How to Create Your Perfect Chocolate S’mores Cookies
Making these decadent chocolate s’mores cookies is a straightforward and enjoyable process. Follow these detailed steps to achieve perfectly fudgy, chewy, and flavor-packed results:
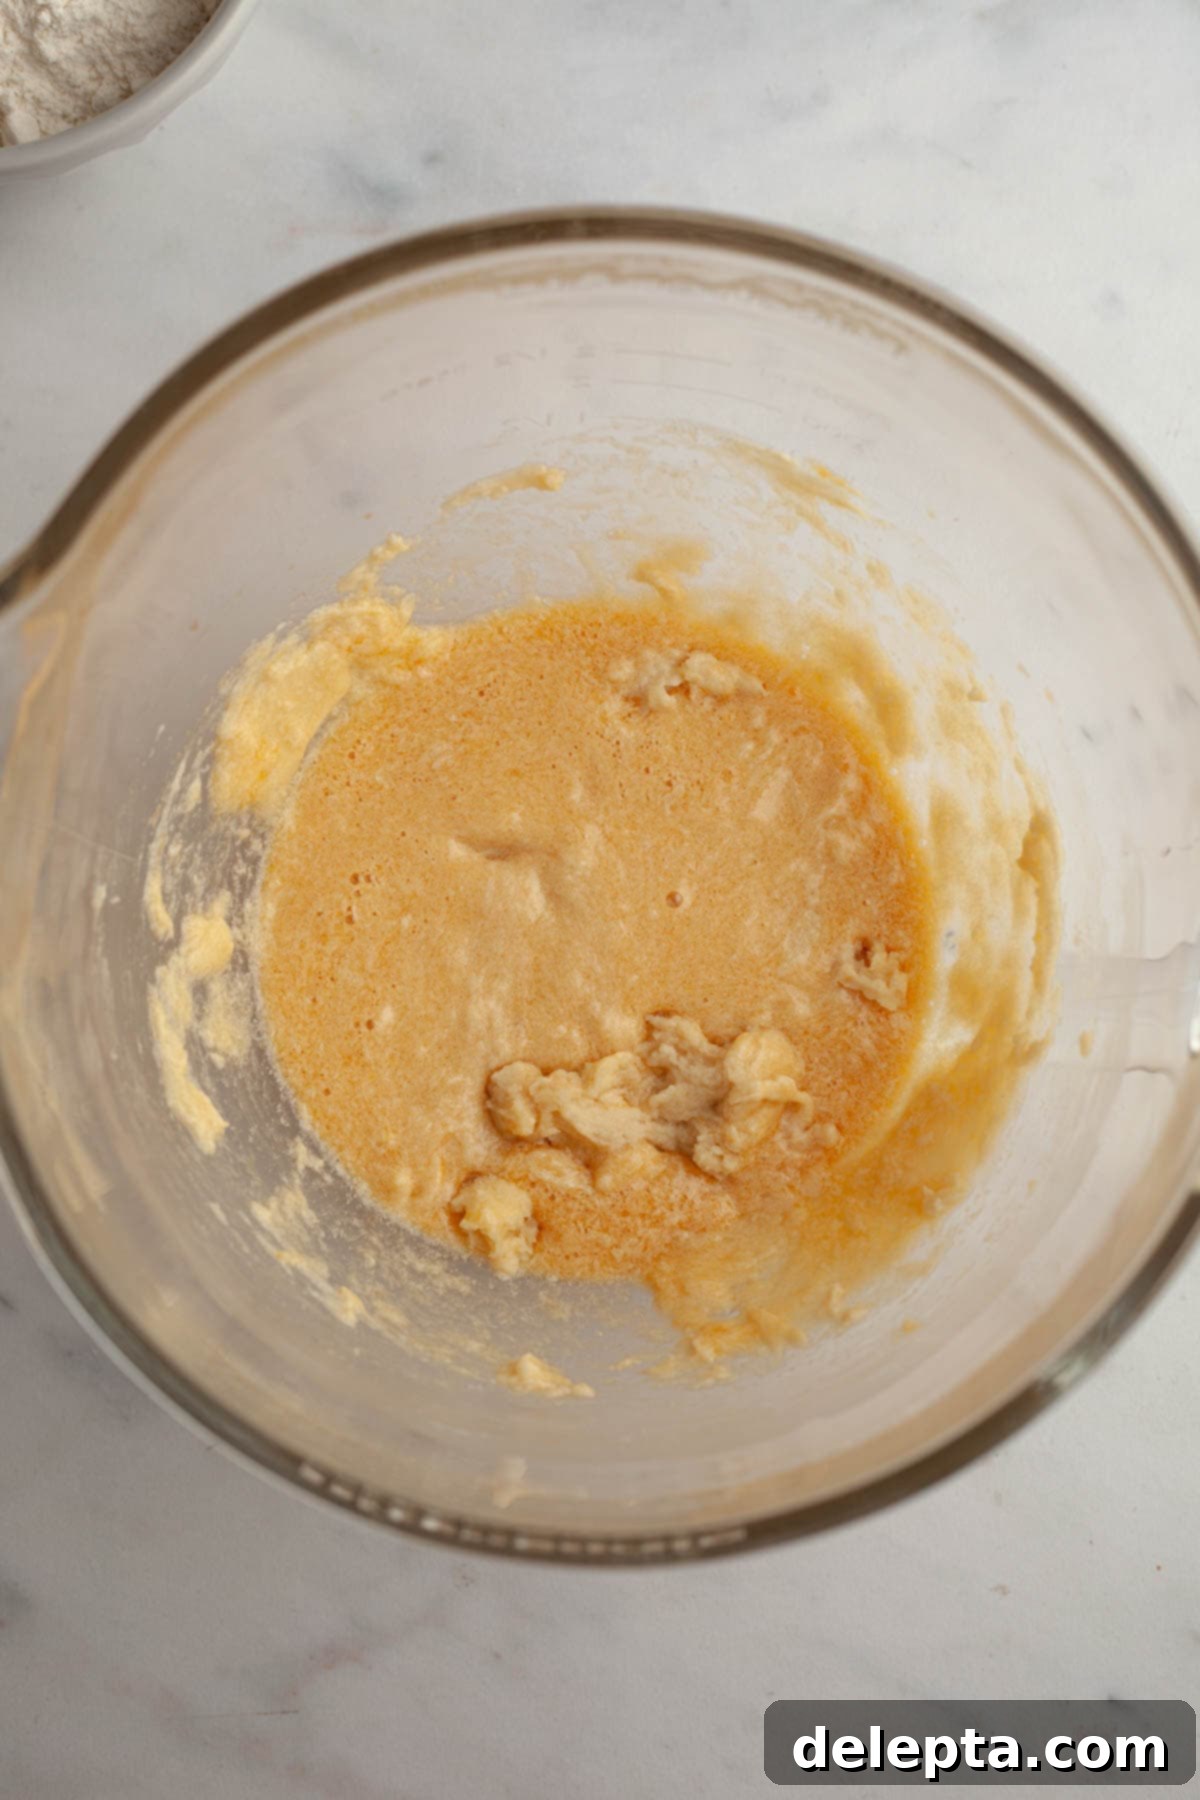
Step 1: Cream Wet Ingredients. In the bowl of a stand mixer fitted with the paddle attachment (or using a large bowl and a hand mixer), combine the softened unsalted butter, granulated sugar, and light brown sugar. Beat these together on medium speed for about 2 minutes until the mixture is visibly light and fluffy, and has turned a slightly paler, creamy color. This aeration is crucial for a tender cookie texture. Once properly creamed, add the vanilla extract, the large egg, and the extra egg yolk. Continue to beat on medium speed for another minute, ensuring everything is thoroughly combined and smooth. Remember to scrape down the sides of the bowl with a rubber spatula to incorporate all ingredients evenly.
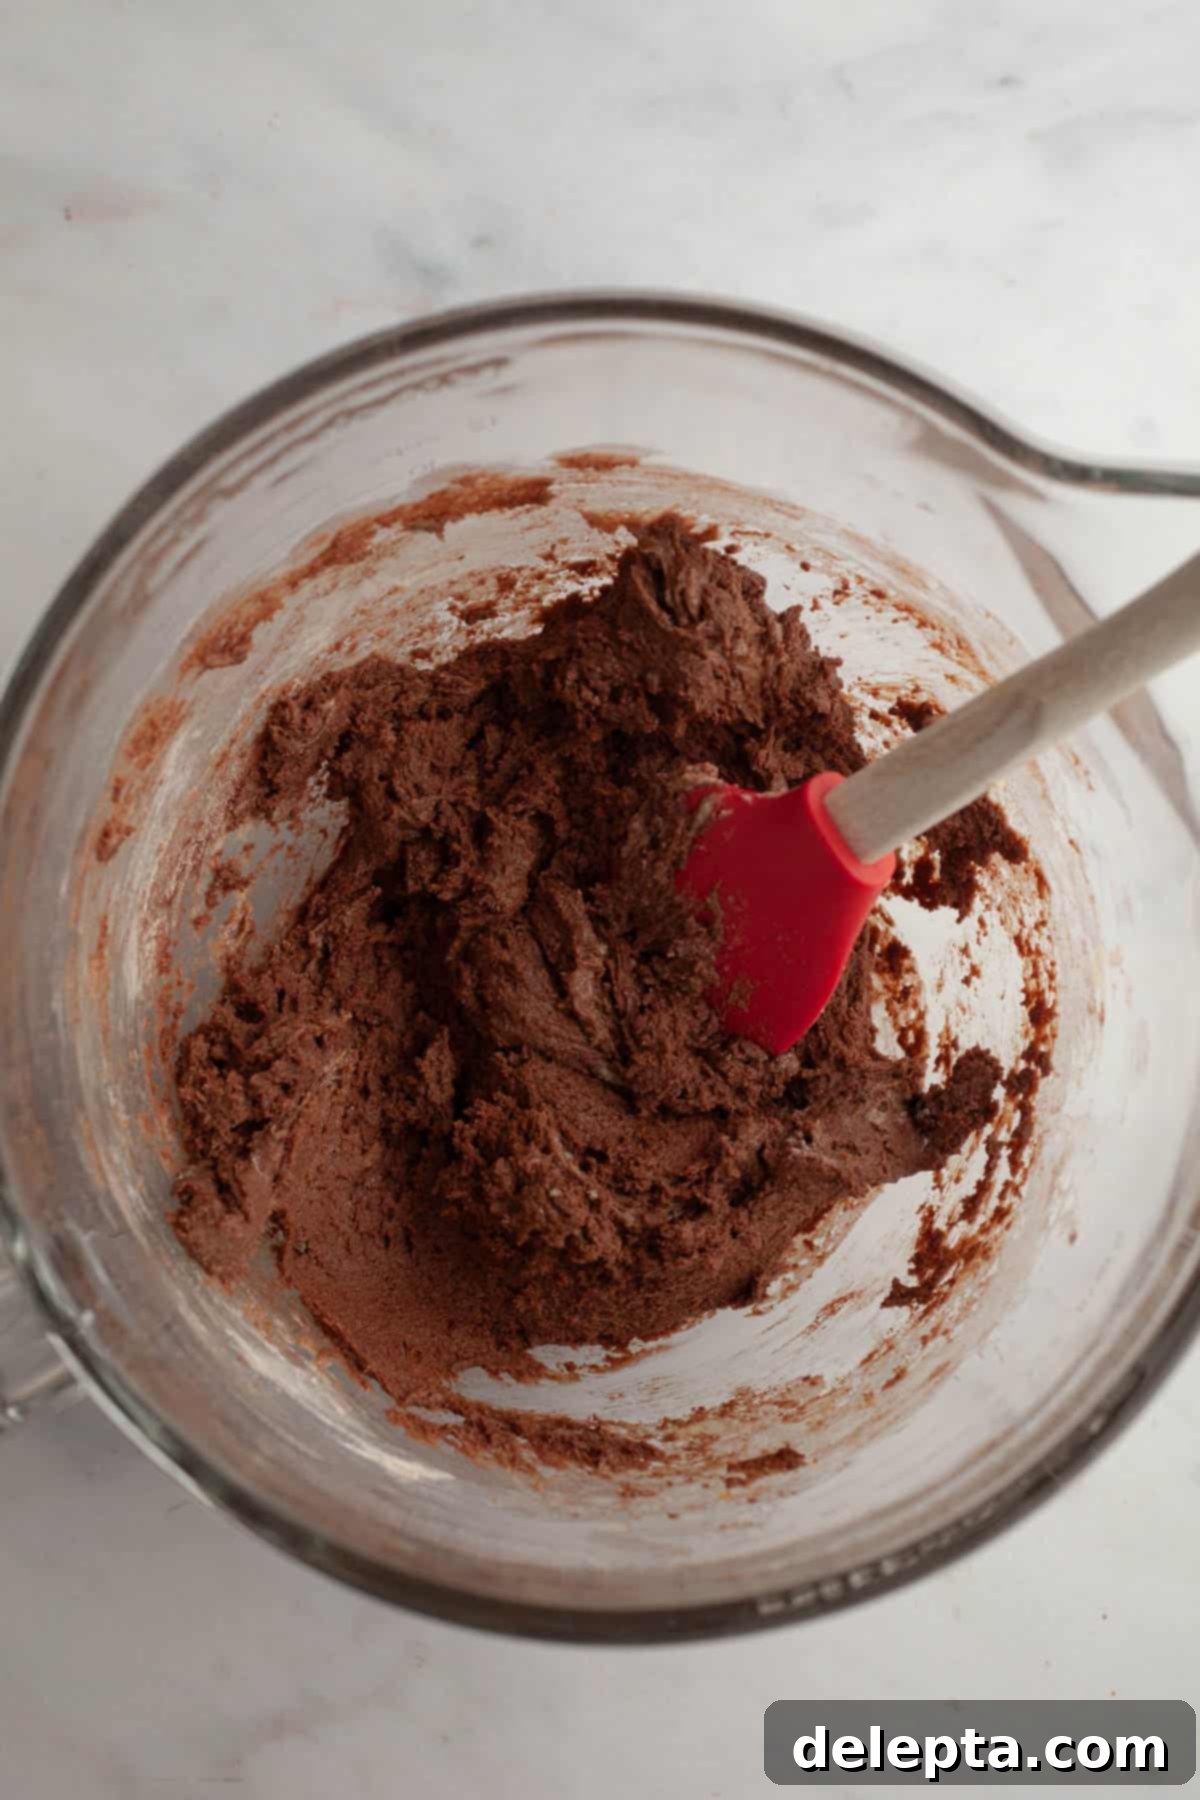
Step 2: Combine Dry Ingredients. Reduce the mixer speed to low. Gradually add all your dry ingredients: the all-purpose flour, Dutch-processed cocoa powder, kosher salt, baking powder, and baking soda. Mix until just combined. It’s important not to overmix the dough at this stage, as overworking the gluten in the flour can lead to tough cookies. As soon as no streaks of flour remain, stop the mixer. Use your rubber spatula again to scrape down the sides and bottom of the bowl, ensuring all the dry ingredients are fully incorporated into the fudgy chocolate dough.
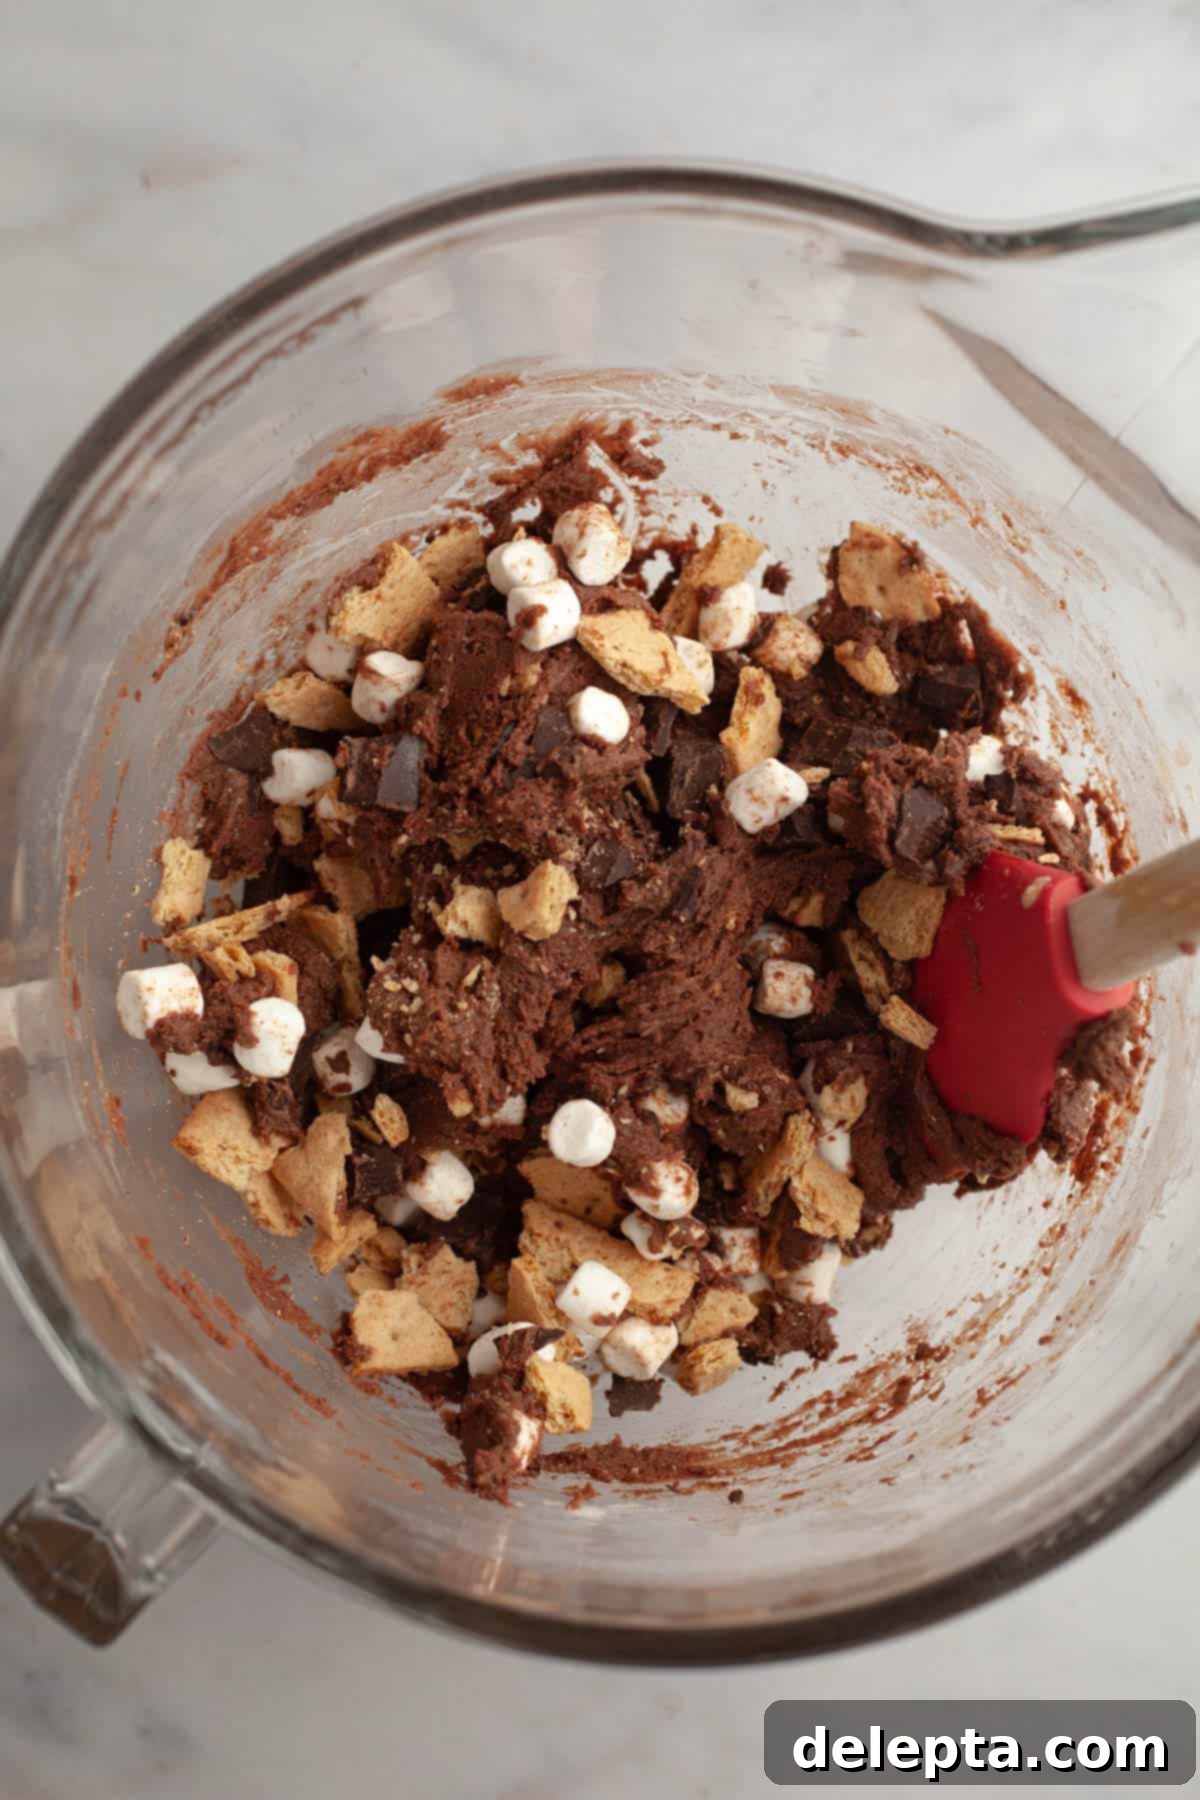
Step 3: Fold in the S’mores Goodies & Chill. Remove the bowl from the mixer. Now it’s time for the stars of the show! Gently fold in the crushed graham crackers, chopped chocolate pieces, and mini marshmallows using your spatula. Be careful not to crush the marshmallows too much. Once evenly distributed, cover the bowl and place the cookie dough in the fridge to chill for 30-60 minutes. This chilling step is highly recommended as it helps prevent the cookies from spreading too much during baking, ensuring a thicker, chewier cookie. While the dough chills, prepare your baking setup: line two baking sheets with parchment paper for easy removal and to prevent sticking.
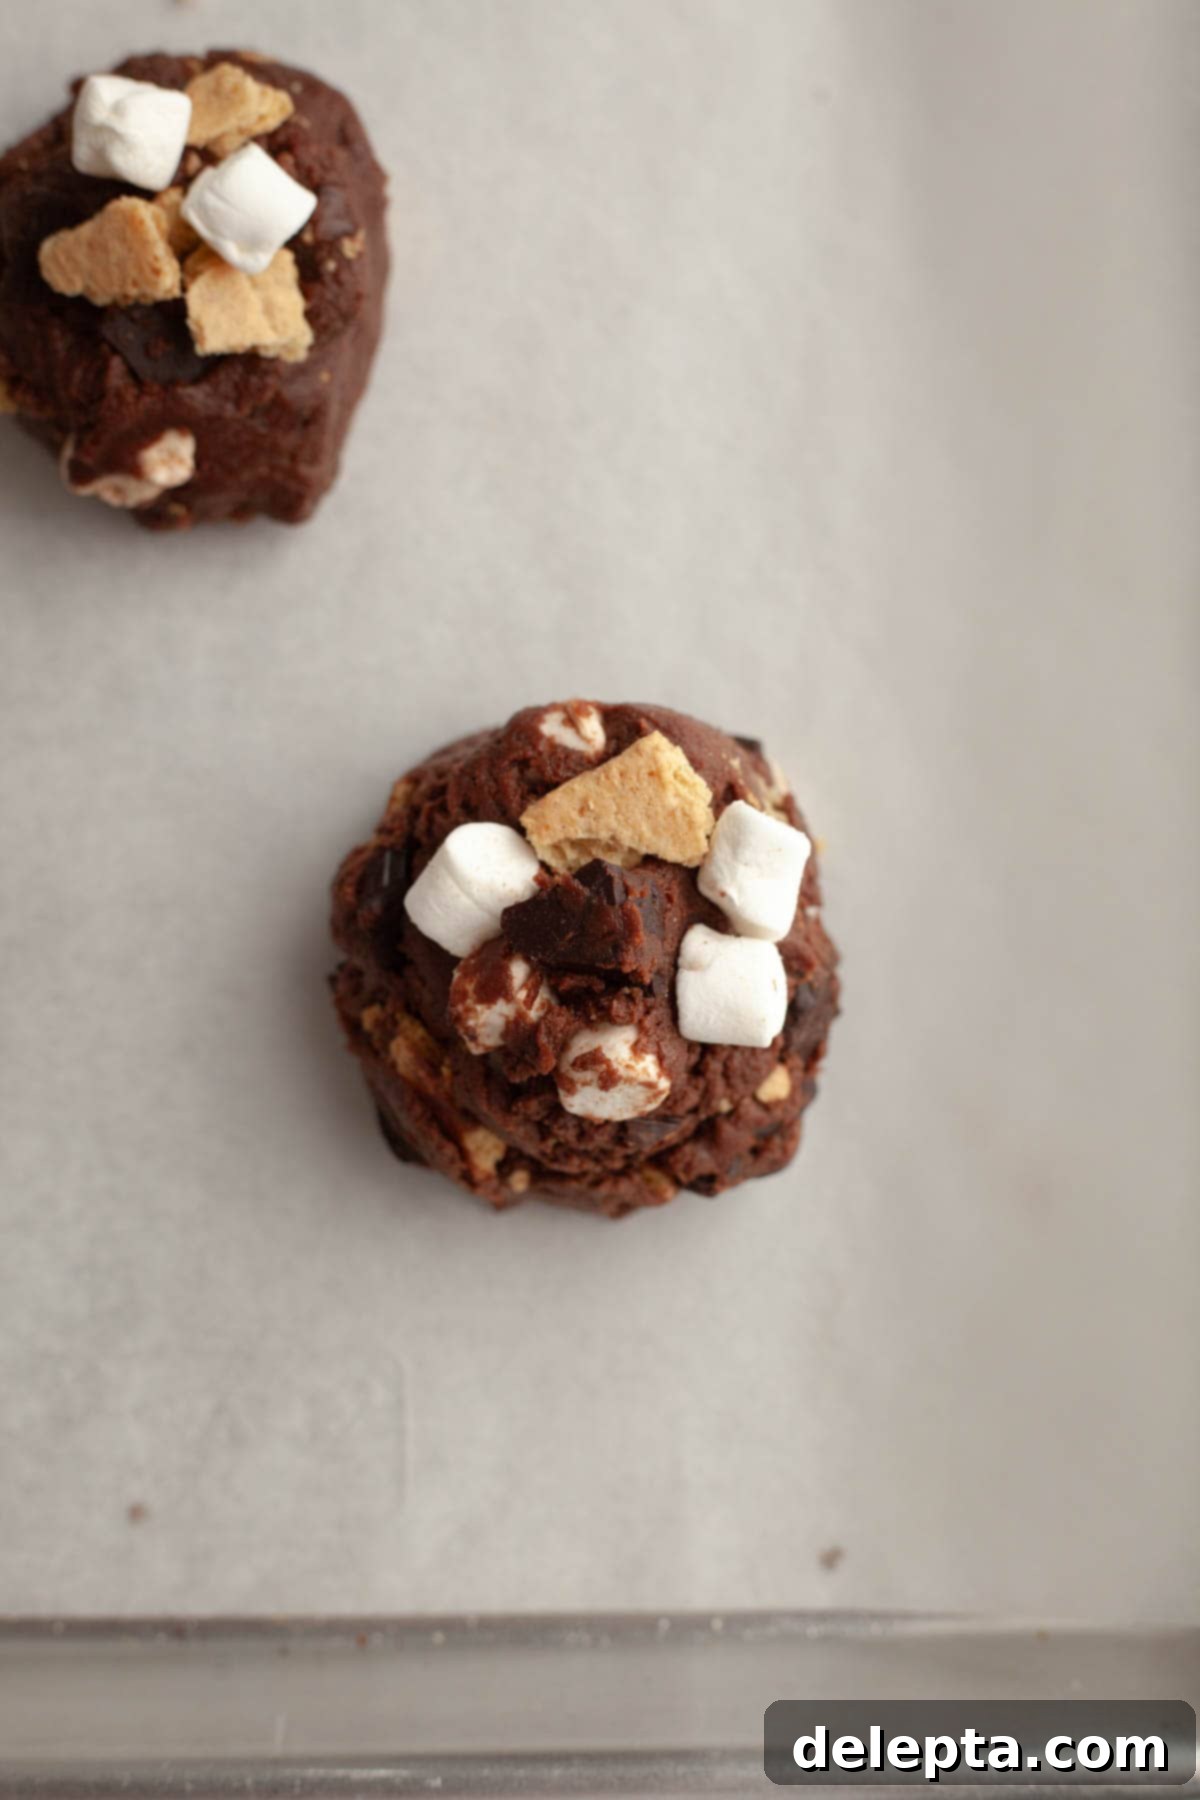
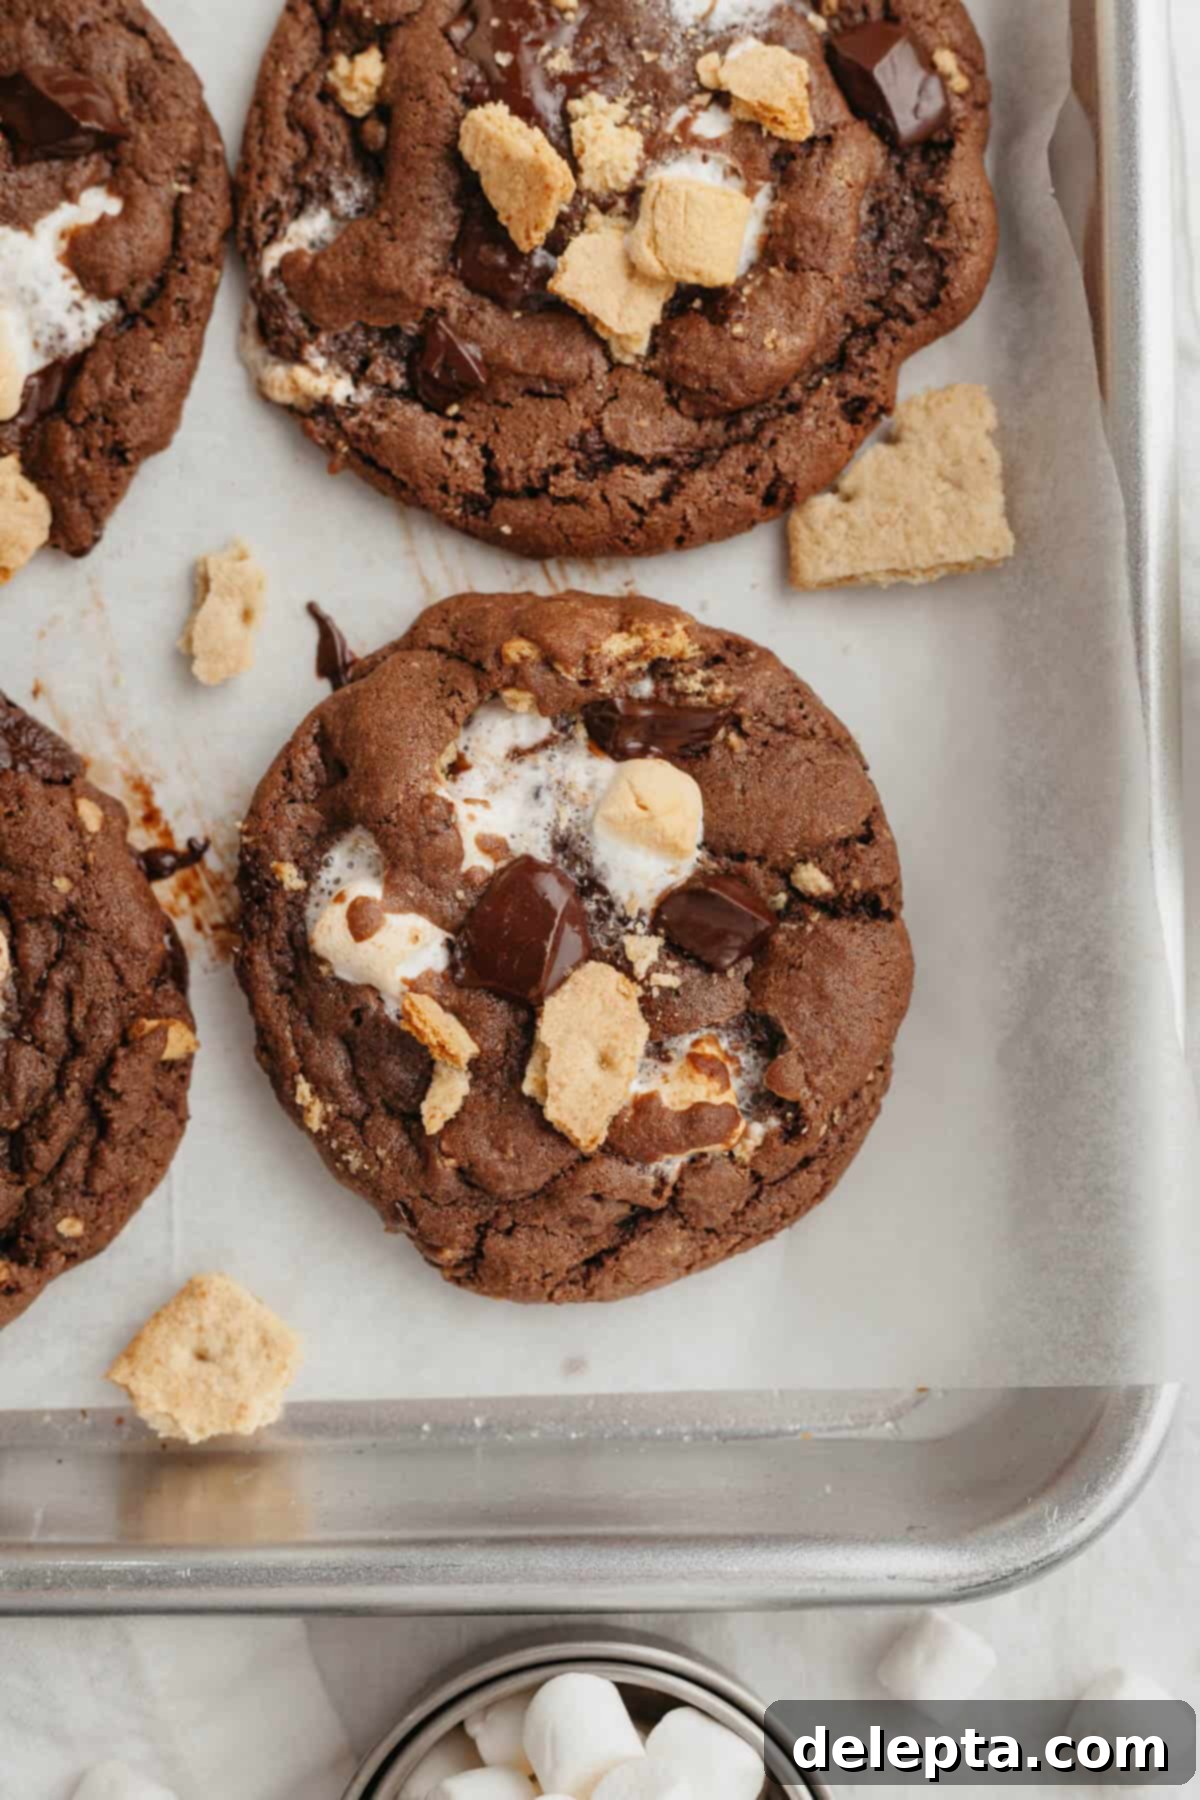
Step 4: Scoop, Bake, and Enjoy! Preheat your oven to 350ºF (175ºC) while the dough is chilling. Once the oven is ready and the dough is chilled, use a large cookie scoop or a spoon to scoop out generous portions – about 3 tablespoons each – of cookie dough. Place them onto the prepared baking sheets, leaving enough space between each cookie for even baking. Bake in the preheated oven for 8-10 minutes. The edges should be set, but the centers should still look slightly soft and gooey – this is key for that fudgy texture. Allow the cookies to cool on the baking sheet for a few minutes before transferring them to a wire rack to cool completely. This helps them set and prevents them from falling apart.
Ella’s Expert Baking Tips for Perfect S’mores Cookies
Achieving bakery-quality cookies at home is entirely possible with a few simple tricks. Here are my top baking tips to ensure your chocolate s’mores cookies turn out absolutely perfect every single time:
- Don’t Skip Chilling the Cookie Dough (If Possible!) – While I’ve occasionally lived dangerously and skipped this step for some recipes, I highly recommend chilling the cookie dough for these s’mores cookies. Chilling for at least 30-60 minutes solidifies the butter in the dough, which significantly helps in preventing the cookies from spreading out too much in the oven. The result is a thicker, chewier cookie with a more concentrated flavor profile. If you’re short on time, a shorter chill is better than no chill! Just be aware that skipping it might lead to flatter cookies.
- Add Extras for that “Bakery Style” Look – Want your cookies to look like they came from a gourmet bakery? Just before baking, gently press a few extra mini marshmallows and chopped chocolate pieces onto the top of each scooped cookie dough ball. As the cookies bake, these additions will melt beautifully on the surface, creating those irresistible, gooey puddles and making them look incredibly appealing and professional.
- Bake One Sheet at a Time for Even Results – For consistent baking and perfectly golden-brown cookies, I always recommend baking one cookie sheet at a time in the center rack of your oven. While one batch is baking, keep the other prepared sheet of cookie dough in the fridge. This ensures that all your cookies bake evenly, without competition for heat, and prevents the dough from getting too warm and spreading prematurely.
- The “Cookie Scoot” Trick for Perfect Circles – This is one of my favorite secrets for achieving perfectly round cookies! As soon as the cookies come out of the oven, while they are still hot and pliable, use a large biscuit cutter or the rim of a mug that is slightly larger than your cookie. Place it around a cookie and gently swirl it in a circular motion. This will “scoot” the warm cookie into a beautiful, perfectly round shape, tidying up any irregular edges.
- Use Parchment Paper – Always line your baking sheets with parchment paper. Not only does it prevent sticking, but it also helps with even heat distribution and makes cleanup a breeze. Plus, it makes transferring the hot cookies much easier.
- Don’t Overbake! – For truly fudgy and chewy cookies, it’s crucial not to overbake them. The cookies should look set around the edges but still appear slightly soft and gooey in the center when you take them out of the oven. They will continue to cook slightly from residual heat on the baking sheet as they cool, firming up to the perfect texture.
Expand Your Baking Repertoire: Try These Delicious Chocolate Recipes Next!
If you’ve loved these chocolate s’mores cookies and are looking for more ways to satisfy your chocolate cravings or expand your baking skills, I have a few more irresistible recommendations for you. These recipes also focus on ease, incredible flavor, and that comforting homemade touch:
- Homemade Oreo Chocolate Chip Cookies (1-Bowl)
- Fudgy M&M Brownies
- The Best Chocolate Filled Cookies (Thick and Gooey)
- Bakery Style Chocolate Chunk Banana Muffins
Chocolate S’mores Cookies Recipe

Chocolate S’mores Cookies
Ella Gilbert
Save Recipe
Saved!
Ingredients
- ½ cup unsalted butter room temperature
- ½ cup white sugar
- ½ cup light brown sugar
- 1 large egg room temperature
- 1 large egg yolk room temperature
- 1 teaspoon vanilla extract
- 1 teaspoon kosher salt
- 1 ¾ cups all purpose flour
- ½ teaspoon baking powder
- 1 teaspoon baking soda
- ⅓ cup dutch processed cocoa powder
- ½ cup graham crackers crushed
- ½ cup mini marshmallows
- ¾ cup chocolate bar chopped
Instructions
-
In a stand mixer fitted with the paddle attachment, or in a large bowl with a hand mixer, beat the room temperature unsalted butter with the white sugar and light brown sugar for 2 minutes. Continue beating until the mixture is light, fluffy, and has turned a slightly paler color, indicating it’s well aerated.½ cup unsalted butter, ½ cup white sugar, ½ cup light brown sugar
-
Stop the mixer and use a rubber spatula to carefully scrape down the sides and bottom of the bowl, ensuring all ingredients are fully incorporated. Add the large egg, the additional large egg yolk, and the vanilla extract. Beat again on medium speed for 1 minute until all ingredients are perfectly combined and the mixture is smooth.1 large egg, 1 teaspoon vanilla extract, 1 large egg yolk
-
With the mixer still off, add all your dry ingredients to the bowl: the all-purpose flour, baking powder, baking soda, kosher salt, and Dutch-processed cocoa powder. Begin beating on low speed to prevent the dry ingredients from flying out of the bowl. Mix until just combined, being careful not to overmix. Stop the mixer and scrape the sides and bottom of the bowl again to ensure everything is thoroughly incorporated into the chocolate dough.1 teaspoon kosher salt, 1 ¾ cups all purpose flour, ½ teaspoon baking powder, 1 teaspoon baking soda, ⅓ cup dutch processed cocoa powder
-
Gently stir in the crushed graham crackers, the chopped chocolate, and the mini marshmallows using a sturdy rubber spatula. Mix just until these s’mores components are evenly distributed throughout the dough.½ cup graham crackers, ½ cup mini marshmallows, ¾ cup chocolate bar
-
Cover the bowl with plastic wrap and place the cookie dough in the fridge to chill for 45-60 minutes. This chilling period is crucial as it helps the butter solidify, preventing the cookies from spreading too much during baking and resulting in a thicker, chewier final product. This dough can be a bit sticky, and chilling will make it much easier to scoop and handle.
-
While the dough is chilling, preheat your oven to 350°F (175°Celsius). Line two large baking sheets with parchment paper; this will prevent sticking and make for easy cleanup.
-
Using a large cookie scoop (approximately 3 tablespoons per scoop) or a spoon, scoop out generous portions of cookie dough. Place them onto the prepared baking sheets, ensuring there’s ample space between each cookie to allow for proper spreading and even baking.
-
Bake the cookies for 8-10 minutes. For best results, I recommend baking one sheet at a time, keeping the other prepared sheet of dough in the fridge until it’s ready to go into the oven. The cookies are done when the edges are set and lightly golden, but the centers still look soft and slightly underbaked – this ensures maximum fudginess.
-
Once baked, let the cookies cool on the baking sheet for at least 5-10 minutes. This allows them to set up properly and prevents them from breaking apart when you transfer them. After cooling slightly on the sheet, transfer them to a wire rack to cool completely before indulging!
Notes
Salt: The type of salt used can significantly impact the final taste. If you don’t have kosher salt on hand, please remember to halve the amount of salt specified in the recipe. As a general rule of thumb, 1 teaspoon of Diamond Crystal Kosher Salt (my preferred brand for its milder salinity) is roughly equivalent to ½ teaspoon of fine table salt. Be cautious, as Morton Kosher Salt is denser and saltier than Diamond Crystal, so using it in the specified amount might make your cookies too salty.
Chilling: While I highly recommend chilling the cookie dough for 45-60 minutes to promote a thicker, chewier cookie and minimize spreading, I have tested these cookies with a shorter chill or even no chill at all. If you choose to skip or shorten the chilling time, please be aware that your cookies will likely spread more in the oven, resulting in a flatter texture. They will still be delicious, just visually different!
Chocolate: For an ultimate chocolate experience and that picture-perfect bakery-style finish, gently press a few extra pieces of chopped chocolate onto the top of each cookie as soon as they emerge from the oven. The residual heat will melt them beautifully. Feel free to swap out the chopped chocolate bar for your favorite chocolate chips (semi-sweet, milk, or dark) – they will all work wonderfully.
Marshmallows: I personally prefer using mini marshmallows because they distribute more evenly throughout the dough and create more pockets of gooey goodness in every bite. However, if you only have regular-sized marshmallows, don’t fret! You can simply snip them into smaller pieces with kitchen shears (lightly greased if they’re too sticky) to achieve a similar effect.
Storage: To maintain their freshness and deliciousness, store the baked chocolate s’mores cookies in an airtight container at room temperature for up to 1 week. If you’re planning ahead, you can freeze unbaked cookie dough balls for up to 3 months. When you’re ready to bake a fresh batch, simply take the frozen dough balls directly from the freezer, place them on a prepared baking sheet, and bake at the same temperature as indicated, but allow for an additional 1-2 minutes of baking time. This way, you can enjoy warm, fresh cookies whenever the craving strikes!
Nutrition
Tried this recipe?Leave a comment below! You can also tag me on Instagram @alpineella so I can see what you made! Your feedback and shared creations truly make my day!
