Mastering the Flaky Strawberry Rhubarb Pie: An American Classic from Scratch

Embarking on a quest for the perfect homemade pie can be a surprisingly challenging adventure, especially when you’re searching for specific baking equipment in an unexpected place. Imagine the difficulty of trying to find a standard 9-inch glass pie plate in London – it feels almost impossible, as I soon discovered!
My journey into the world of American-style pies began with a nostalgic trip down memory lane. I was reminiscing with my husband about my first Fourth of July celebration after moving to America as a child. I vividly recalled a vibrant outdoor gathering, a sprawling green lawn filled with people, and a magnificent long white table overflowing with an array of beautiful pies. It was meant to be a pie *contest*, but in my six-year-old mind, it was clearly a pie *eating* contest. I was convinced I could win, channeling my inner Bruce Bogtrotter! This fond memory ignited a powerful craving within me; it had been far too long since I’d savored a truly proper, American-style fruit pie.
Now, when you talk about “pies” in the UK, the culinary landscape is quite different. The term usually conjures images of savory delights: hearty pork pies, festive mince pies, robust kidney pies, or classic steak and ale pies. But the pie I yearned for was a completely different beast – an iconic American dessert, an all-butter creation so quintessentially American it felt as though an eagle should be soaring overhead, carrying it in its talons while Bruce Springsteen crooned in the background. Thus began my dedicated mission: to meticulously gather every ingredient and essential supply needed to recreate that perfect, memory-laden pie.
Crafting the Perfect Pie Dough: The Foundation of Flavor and Flakiness
The literal and metaphorical glue holding any great pie together is its dough. A perfect crust is paramount, capable of elevating a simple fruit filling into an extraordinary dessert. My research into various pie dough recipes revealed a common thread: the critical importance of very cold ingredients. I was determined to avoid the dreaded “soggy bottom” – a culinary sin that would undoubtedly make any esteemed baking judge, like Mary Berry, recoil in horror. That unfortunate experience with a pumpkin pie many moons ago served as a powerful lesson.
My quest for the ultimate flaky crust led me to the renowned Erin Jeanne McDowell. Her expertise in pie making is undeniable, with an entire book dedicated solely to the art of pies. I meticulously followed her method for achieving a super flaky pie dough. What sets her approach apart from many others is her technique with butter. Instead of grating or chopping the butter into tiny pieces, she advocates for keeping the butter pieces relatively large. This method is crucial for encouraging a more pronounced lamination process within the dough. As the large pockets of butter melt during baking, they release steam, which then separates the layers of dough, resulting in an incredibly flaky and tender crust – precisely the texture one dreams of in a perfect pie.
The Elusive 9-Inch Glass Pie Plate: A London Expedition
One of Erin Jeanne McDowell’s key recommendations, and a pivotal element in my pie-making success, is the use of a glass pie plate. The transparency of glass allows you to visibly monitor the bottom of your pie during the baking process, ensuring it cooks evenly and achieves that coveted golden-brown crispness all the way through – a critical detail that had eluded my previous pie attempts. However, acquiring such a specific item proved to be an unexpected challenge in London’s bustling culinary scene. Despite countless searches in kitchenware shops, department stores, and even online, a standard 9-inch glass pie plate seemed to be a mythical artifact.
After a considerable search, I finally located one, though the delivery fees were certainly a point of mild contention at the time! Yet, looking back, the investment was undeniably worth it. The difference a proper glass pie plate makes is truly remarkable. It ensures a consistent bake, preventing the dreaded undercooked or “soggy bottom” that can ruin an otherwise perfect pie. The ability to see the crust browning in real-time provides invaluable feedback, allowing for precise baking and a superior result every single time. This seemingly small piece of equipment became an indispensable tool in my pie-baking arsenal, transforming my efforts from merely good to truly exceptional.
Seasonal Delights: Crafting the Strawberry Rhubarb Filling
With the crust strategy solidified and the essential pie plate finally in hand, my attention turned to the filling. My local fruit and vegetable box offered a delightful abundance of fresh strawberries and rhubarb, a classic and beloved combination that strikes a perfect balance between sweet and tart flavors. This seasonal bounty felt like a sign, guiding my choice for the pie’s heart.
Given that my precious pie plate was on a journey of its own, I decided to prepare the fruit mixture in advance. This involved combining the fresh rhubarb and strawberries with vanilla, both granulated and brown sugars, cornstarch (or cornflour as it’s known here), and a touch of kosher salt. After mixing thoroughly to ensure the fruit was evenly coated, I transferred the entire vibrant mixture into a freezer bag, carefully shaping it into a circular disc. This foresight allowed the flavors to meld beautifully and offered a convenient solution for when the pie plate eventually arrived. Once my pie dough was ready and chilled, I simply retrieved the frozen fruit mix, which had solidified into a perfect pie-sized disc, and placed it directly into the prepared pie dish before a final quick chill in the fridge. While fresh-from-the-garden fruit always offers an unparalleled vibrancy, working with what’s available and adapting your methods, like freezing the filling, can still yield wonderfully delicious results. The freezing also helps to prevent the filling from becoming too watery during baking, contributing to a perfectly set pie.

Essential Pie Baking Tips for Success
- Keep all of your ingredients cold: This is arguably the most crucial tip for a truly flaky crust. Cold butter creates pockets of steam in the oven, which puff up and separate the dough layers, resulting in a light, airy texture. If your butter is warm, it will incorporate too readily into the flour, leading to a tough, dense crust.
- Take your time, especially with the dough: Patience is a virtue in pie making. I often prepare the first part of my dough the night before, allowing it to chill thoroughly overnight. This extended chilling period not only ensures the butter remains firm but also gives the gluten in the flour time to relax, making the dough easier to roll out and preventing shrinkage during baking.
- If the butter in your dough starts to get too warm or sticky, pop it back into the fridge: Don’t hesitate to refrigerate your dough at any stage if it becomes difficult to handle or if you notice the butter softening. A quick 10-15 minute chill can make all the difference, firming up the butter and making the dough pliable again. This prevents overworking, which can lead to a tough crust.
- Don’t overwork the dough: Excessive handling develops gluten, leading to a tough rather than tender crust. Mix just until combined and handle as little as possible. Visible streaks of butter are a good sign!
- Vent your top crust: If you opt for a full top crust rather than a lattice, remember to cut several slits or designs into the dough. These vents allow steam to escape during baking, preventing a soggy top crust and ensuring the filling cooks evenly without boiling over.
- Let the pie rest after baking: This step is often overlooked but is absolutely essential. After removing your pie from the oven, allow it to cool and rest for at least 3-4 hours, or even longer for very juicy fillings. This resting period allows the filling to set and solidify, preventing a runny slice when you cut into it.
Recipe

Strawberry & Rhubarb Pie
Ella Gilbert
Pin Recipe
Save RecipeSaved!
Equipment
-
9-inch pie dish
Ingredients
- 2 recipes flaky pie dough You can use store-bought, but I highly recommend making your own for the best results!
- 600 grams rhubarb cut into 1 cm pieces
- 450 grams strawberries washed, hulled and quartered
- 1 teaspoon vanilla extract
- ½ cup granulated sugar
- ⅓ cup brown sugar
- 5 tablespoon cornstarch (cornflour)
- ½ teaspoon kosher salt if you only have fine sea salt, use half the amount
- 1 egg for egg wash
- 1 tablespoon turbinado sugar
Instructions
-
In a medium bowl, add rhubarb, strawberries, vanilla, both sugars, cornstarch, and salt. Mix well to coat the fruit completely.
-
Carefully transfer the mixture to a large ziplock bag. Once the bag is closed, try to squish the mixture into a circular shape.
-
Pop the mixture into the freezer until ready to use. This can be done days or weeks in advance.
Day of Baking
-
Preheat oven to 220° Celsius (425°F).
-
Once your pie dough is prepared and rolled out, take the frozen fruit mixture out of the freezer. It will defrost quite quickly.
-
Pour the mixture into your prepared pie dish. If the mixture didn’t freeze in a perfect circular shape, wait a few minutes for it to soften slightly, then break up the mix so it can fill the dish more evenly.
-
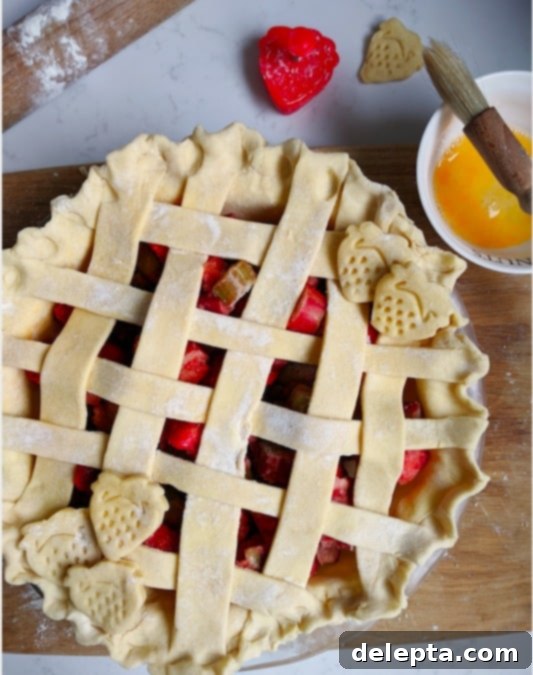
You can now add your top layer, whether that is a beautiful lattice crust like I’ve done or a full lid. If you are doing a full lid, make sure to slash some holes for steam to escape. Gently press the edges of the top crust (or lattice strips) to the edges of the bottom crust. Crimp the edges as desired for a decorative finish.
-
Whisk your egg to create an egg wash and lightly brush it over the entire top dough surface. Sprinkle generously with turbinado sugar for a glistening, crunchy finish. Pop the pie into the fridge to chill for another 10-15 minutes. This helps set the crust and prevents shrinkage.
-
Transfer the pie dish to a baking sheet lined with foil (this will catch any bubbling juices!). Place the pie into the preheated oven for 5 minutes, then reduce the temperature to 190° Celsius (375°F), and continue to bake for a further 75-90 minutes.
-
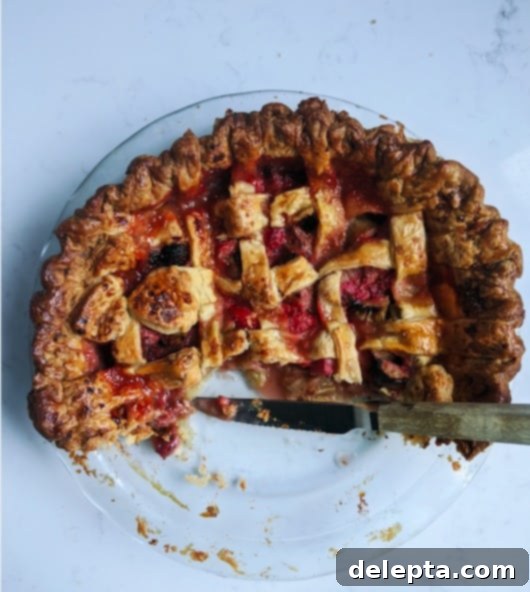
Your pie is ready when the crust is beautifully golden brown and you can see the fruit juices bubbling thickly through any vents or lattice openings. If using a glass pie dish, you can conveniently check the bottom crust for perfect doneness. Crucially, let the pie rest for a minimum of 4 hours at room temperature before slicing. This extended resting time is vital for the filling to fully solidify, ensuring clean, gorgeous slices.
