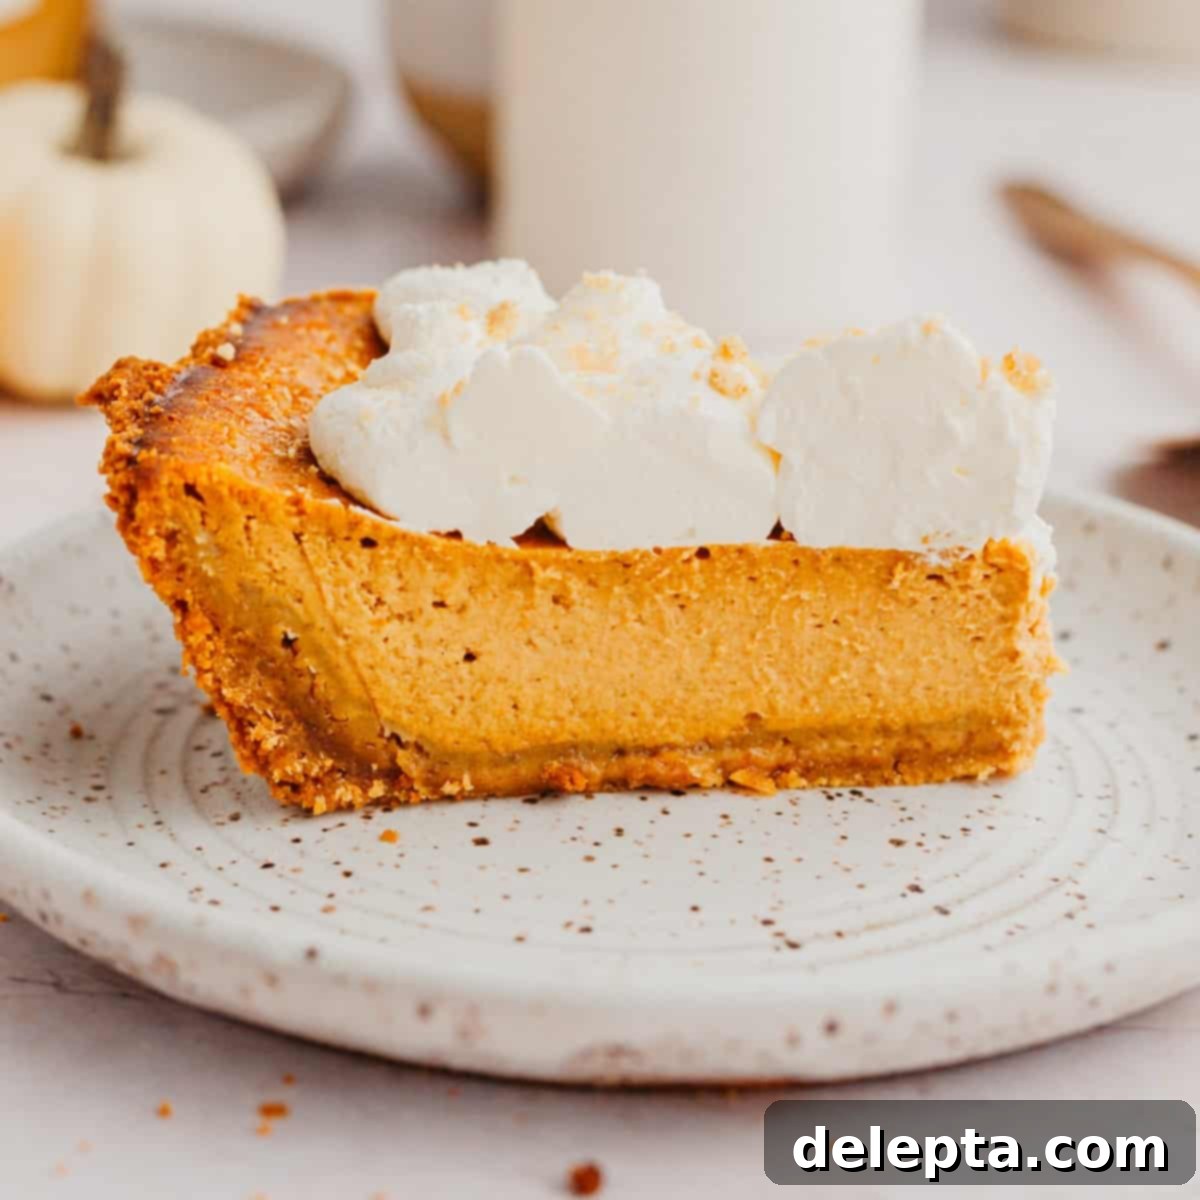
Easy Homemade Pumpkin Pie with Graham Cracker Crust: A Festive Favorite
There’s nothing quite like a slice of homemade pumpkin pie to complete a holiday meal, and this pumpkin pie with graham cracker crust offers a delightful twist on a beloved classic! Imagine a rich, incredibly creamy pumpkin pie filling, bursting with warm spices, baked to perfection in a sweet, buttery, and slightly crunchy graham cracker crust. This flavor combination is truly a match made in heaven, making it the ideal dessert for Thanksgiving, Friendsgiving gatherings, or any festive celebration throughout the autumn and winter seasons.
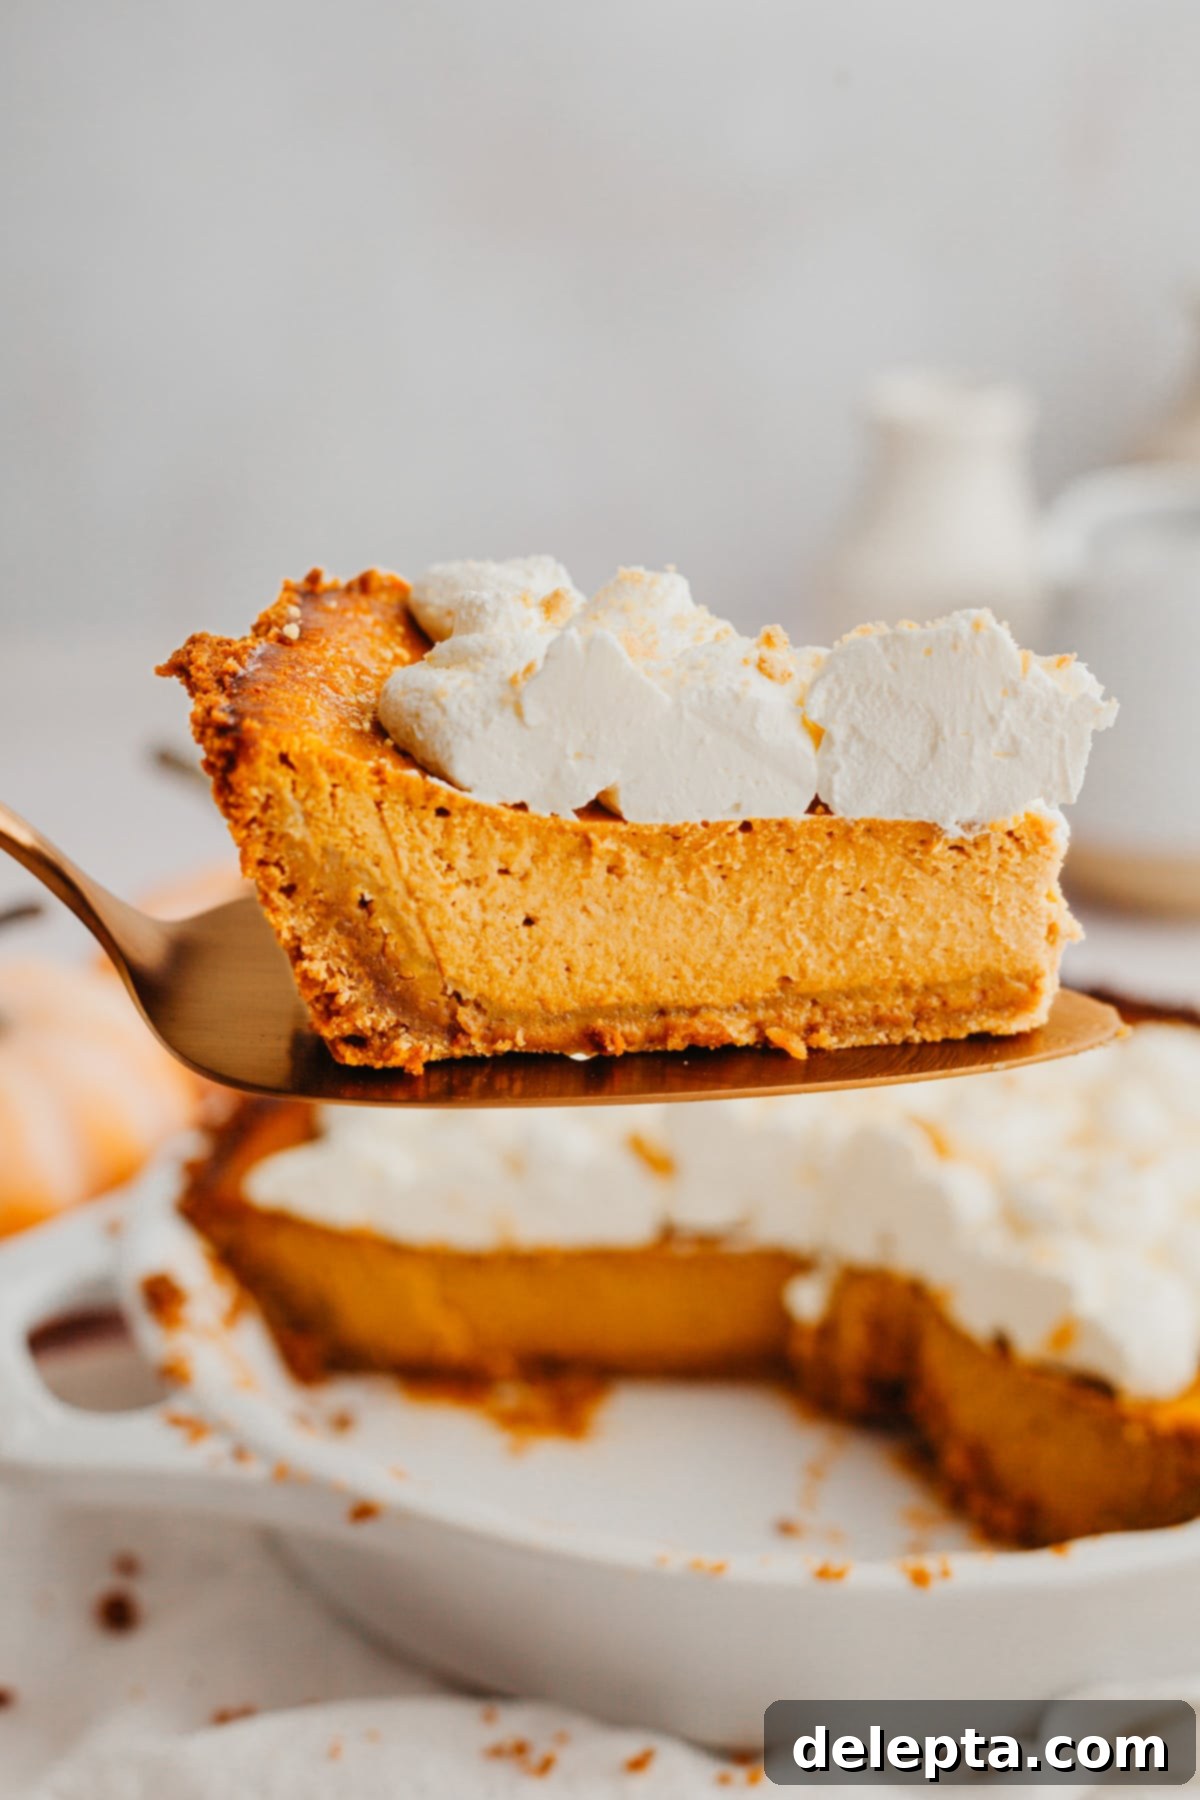
While I certainly appreciate the timeless elegance of a classic pumpkin custard pie with its traditional pastry crust, sometimes it’s fun to explore new textures and tastes. This graham cracker crust pumpkin pie is exactly that – a refreshing change that maintains all the comforting flavors you adore. If you’re someone who finds making pie dough intimidating, or if you simply prefer the sweet, crumbly texture of a graham cracker base, then this recipe is tailor-made for you. It simplifies the pie-making process without sacrificing any of the decadent taste.
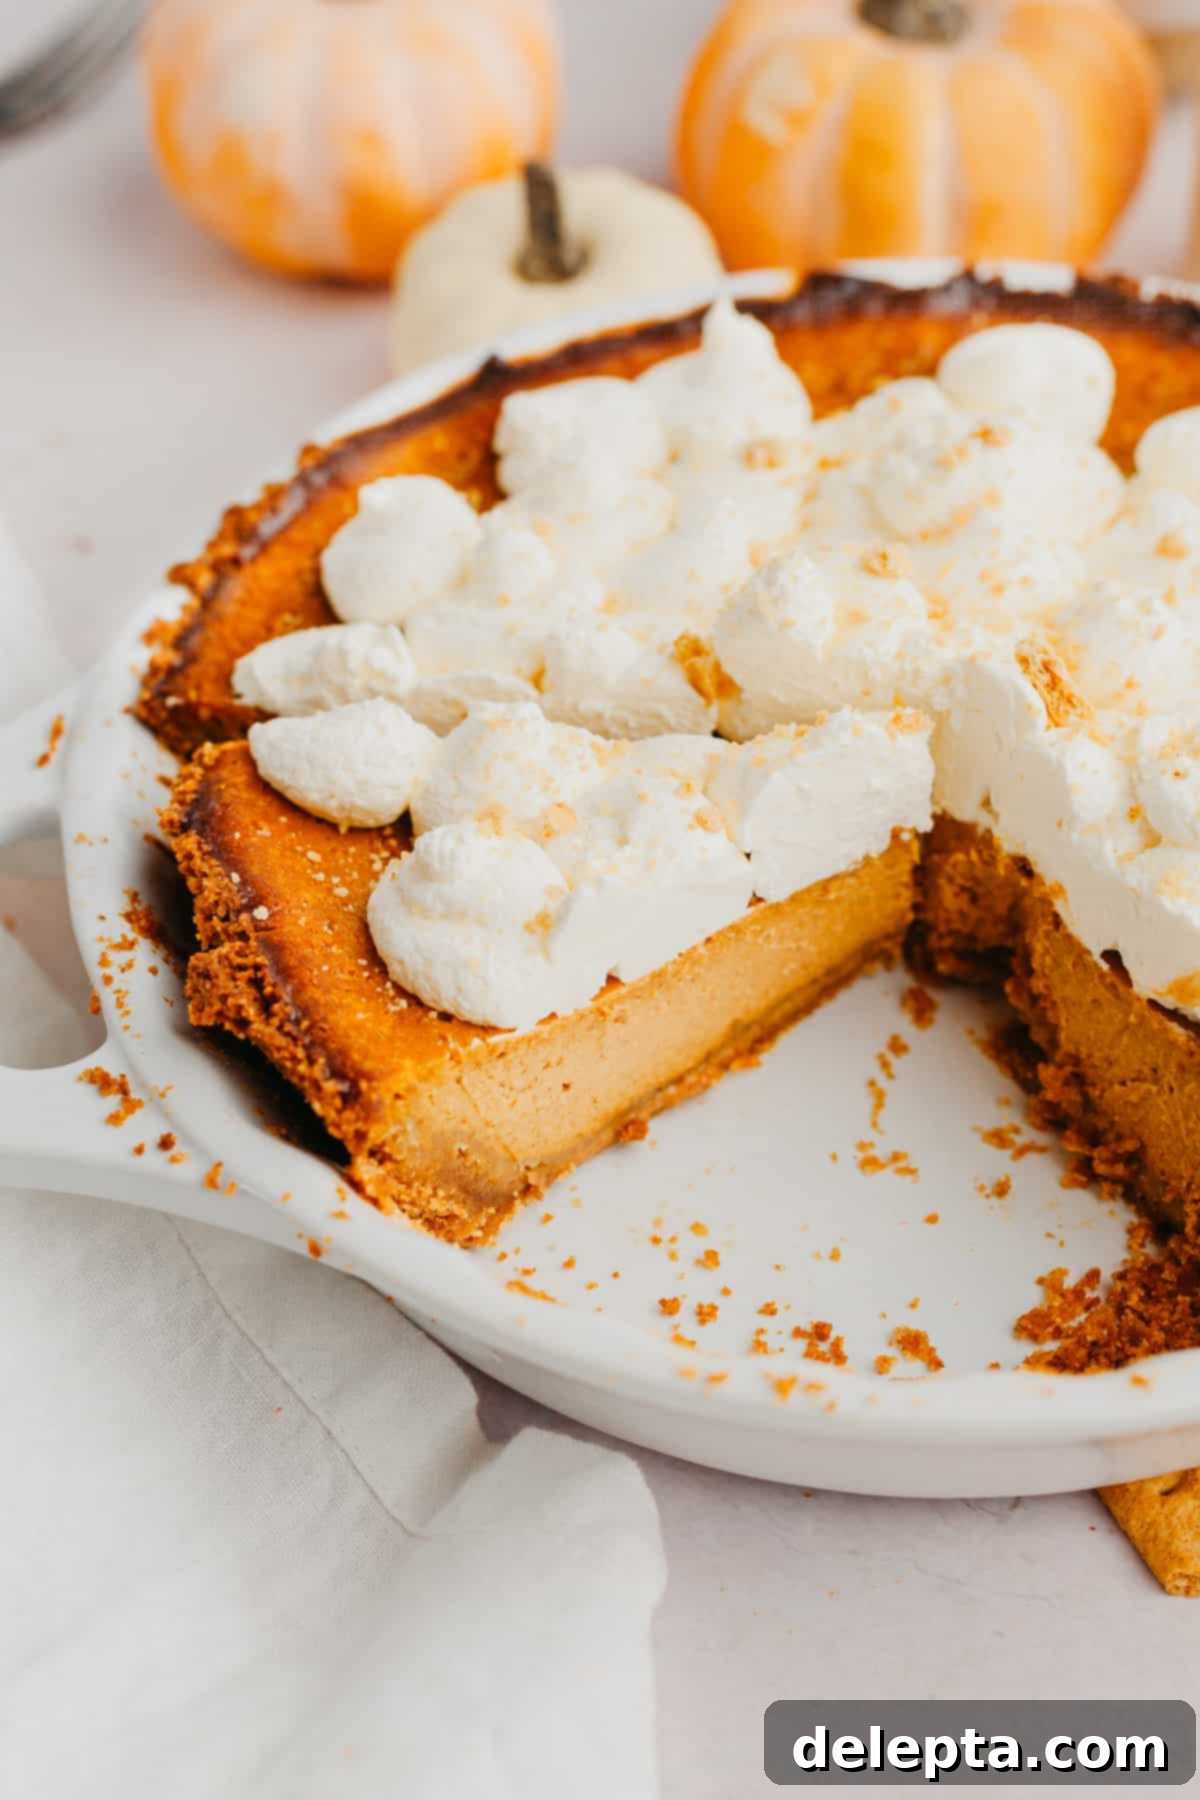
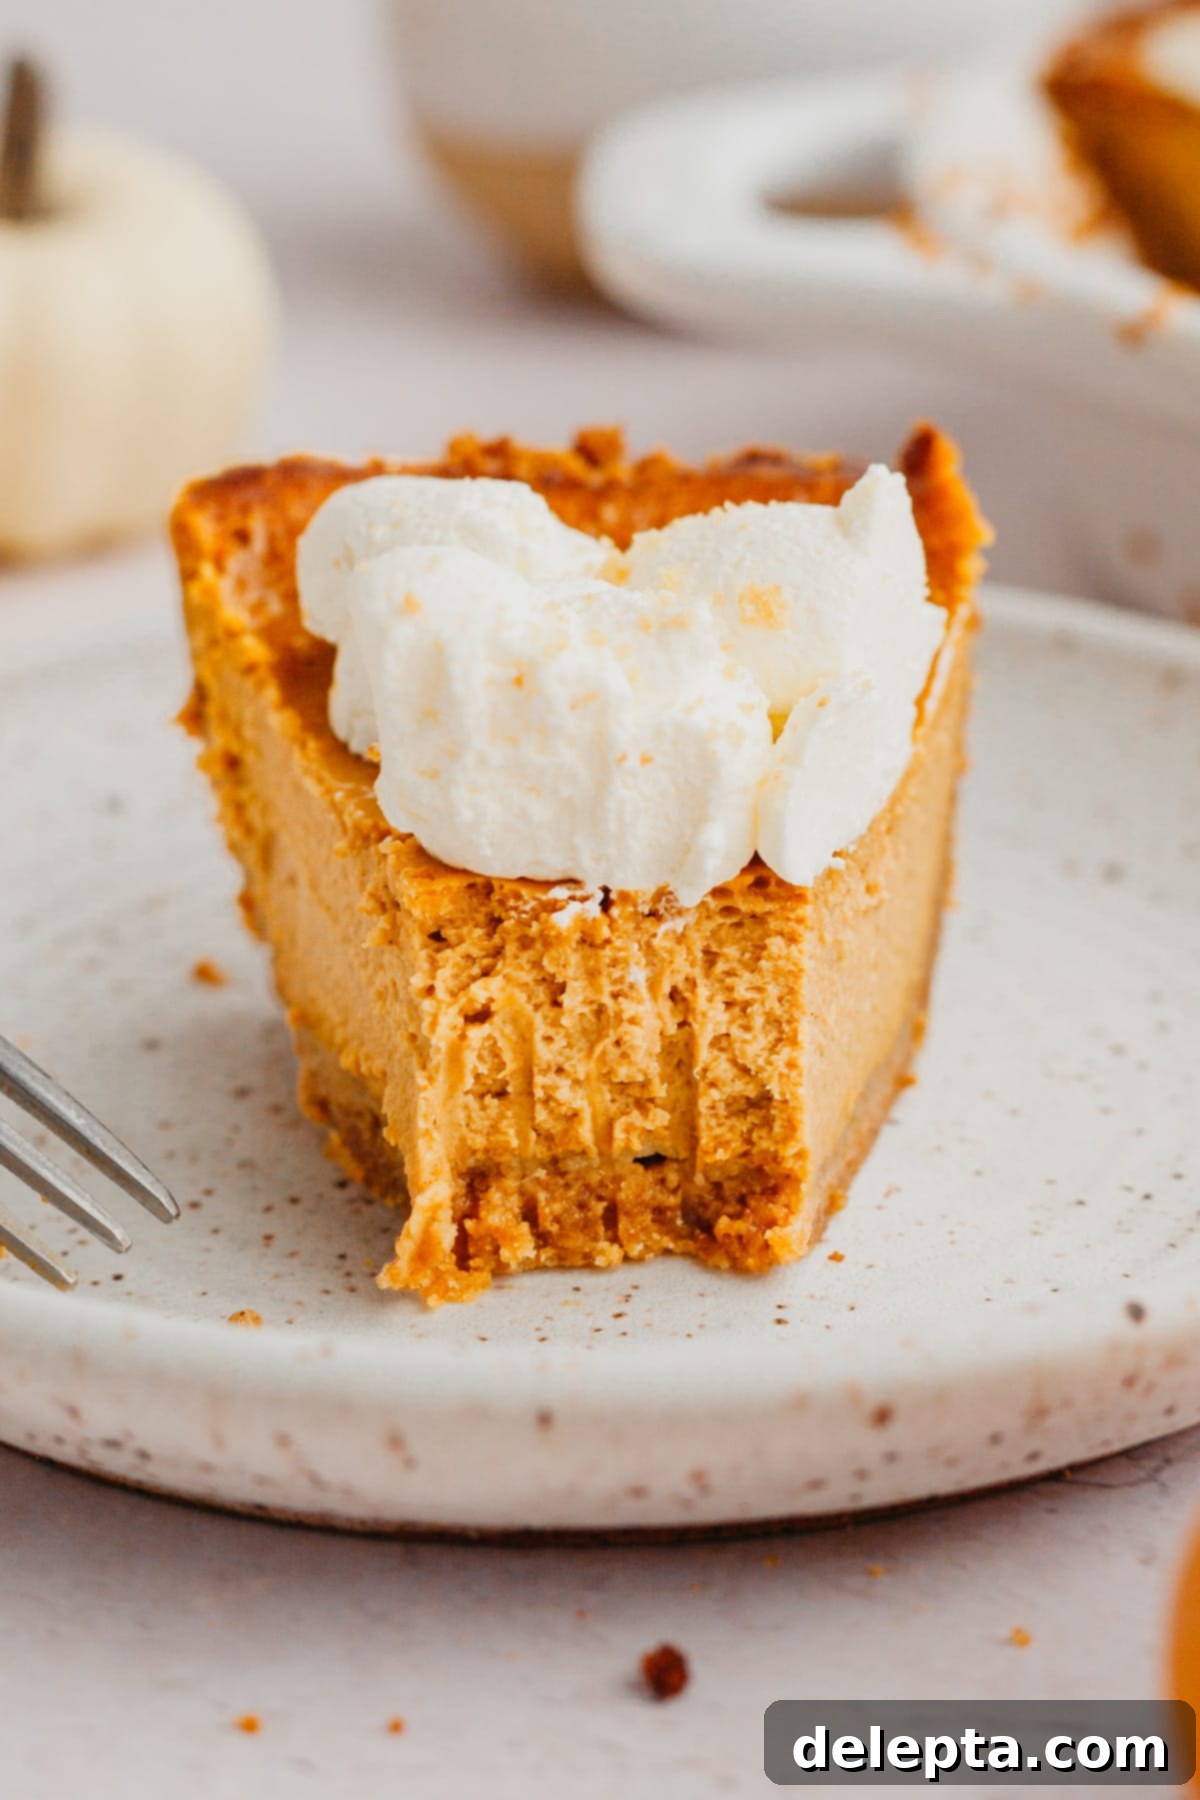
What makes this recipe even more appealing is its incredible simplicity. You’ll achieve the same creamy and indulgent pumpkin pie filling as a traditional recipe, but with the added convenience of requiring only two bowls and no heavy stand mixer or electric mixer. This means less cleanup and a more streamlined baking experience, perfect for busy holiday preparations. To elevate the experience, I love topping my finished pumpkin pie with a generous dollop of homemade whipped cream, often garnished with a sprinkle of extra graham cracker crumbs for an irresistible textural contrast.
Crafted with readily available, simple ingredients, this easy pumpkin pie recipe ensures a stress-free baking adventure. It’s not just a dessert; it’s a centerpiece, a conversation starter, and a sweet symbol of gathering. Whether you’re hosting a grand Thanksgiving dinner, sharing joy at a Friendsgiving potluck, or bringing a show-stopping treat to any holiday party, this pie is guaranteed to impress with its homemade charm and incredible flavor.
If you’re a devoted pumpkin enthusiast like me, there’s a whole world of pumpkin delights waiting for you beyond this pie! Be sure to explore my other favorite pumpkin recipes, including this cozy pumpkin walnut bread, delightful pumpkin white chocolate chip cookies, and a refreshing pumpkin pie smoothie. For those craving a dessert without turning on the oven, my no-bake pumpkin cheesecake bars offer a wonderfully creamy and cool alternative. Each recipe is designed to bring the warm, comforting taste of pumpkin to your table in exciting new ways!
Why You’ll Fall in Love with This Graham Cracker Pumpkin Pie!
- Traditional Pumpkin Pie Filling, Elevated: This isn’t just any pumpkin pie filling; it’s an incredibly indulgent and rich blend that’s packed with vibrant flavor. My special addition of sour cream contributes an unparalleled richness and a subtle tang that beautifully balances the sweetness. Combined with a symphony of aromatic spices, every bite is a luxurious experience that captures the essence of classic pumpkin pie with a gourmet touch.
- Effortless & Delicious Graham Cracker Crust: Say goodbye to the fuss of traditional pastry! This easy, classic graham cracker crust offers a perfect complement to the creamy pumpkin filling. It’s wonderfully buttery, slightly sweet, and provides a delightful crunch that contrasts with the smooth custard. I’ve included a straightforward homemade recipe for the best fresh flavor, but for ultimate convenience, you can absolutely use a store-bought graham cracker crust.
- No Special Equipment Required: Baking a magnificent pie doesn’t have to mean cluttering your kitchen with heavy machinery. This recipe keeps it simple, requiring just two bowls – one for the crust and one for the filling. Forget about hauling out a bulky stand mixer or an electric hand mixer; a simple whisk and a bit of elbow grease are all you need, making this recipe approachable for even novice bakers.
- Perfect for Make-Ahead Holiday Planning: Holiday hosting can be hectic, but your dessert doesn’t have to be. This pumpkin pie is an ideal make-ahead treat, as it can be prepared the day before your event. This allows the flavors to meld beautifully and frees up your valuable time on the day of the party, letting you focus on other dishes or simply enjoy time with your guests without a last-minute rush in the kitchen.
- Versatile for Any Occasion: While it’s undeniably a Thanksgiving star, this pumpkin pie transcends the holiday. Its comforting flavors and inviting aroma make it perfect for Friendsgiving, autumn potlucks, family dinners, or simply a cozy night in. It’s a crowd-pleaser that fits seamlessly into any festive or casual setting, bringing a touch of homemade warmth wherever it goes.
Essential Ingredients for Your Perfect Pie
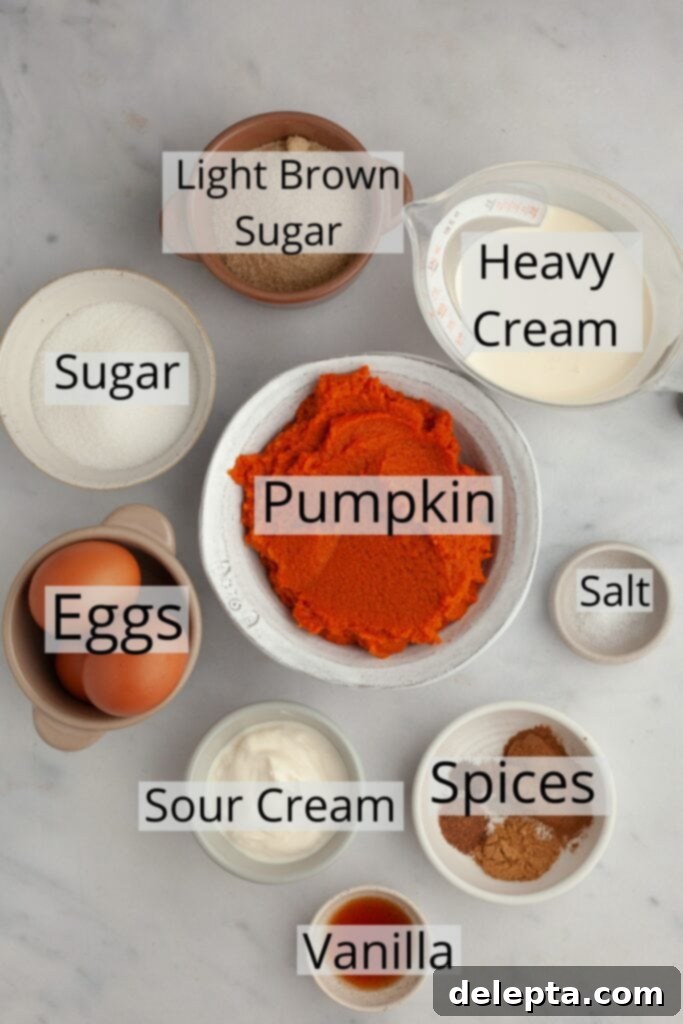
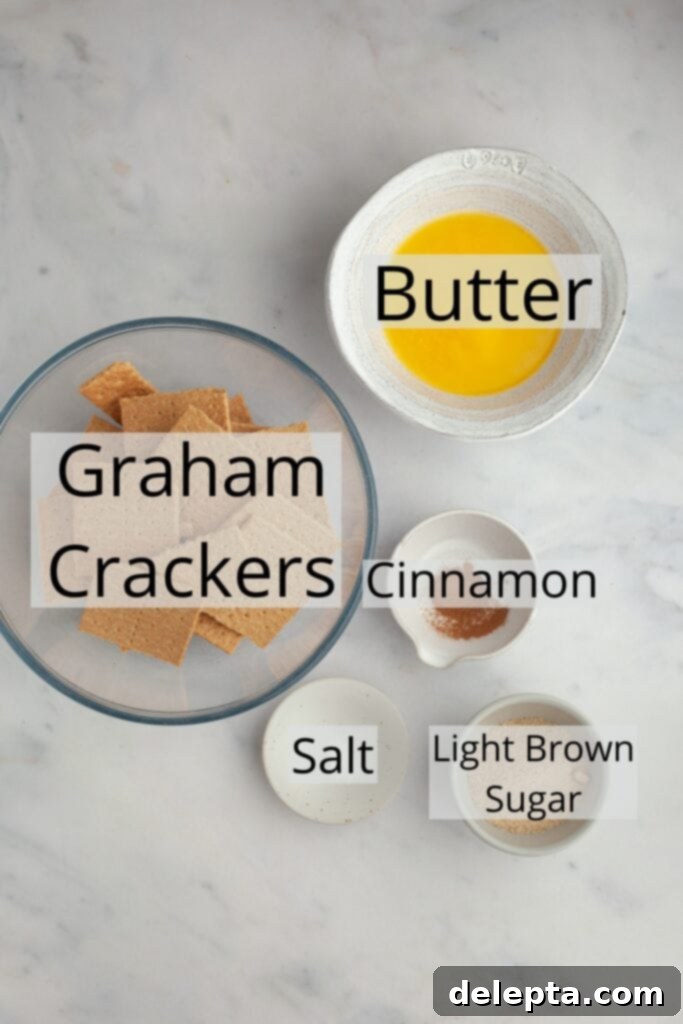
Gathering the right ingredients is the first step to a flawless pumpkin pie. Here’s a detailed look at what you’ll need and why each component is crucial:
- Canned Pumpkin: This recipe calls for 100% pure pumpkin puree, not pumpkin pie filling. It’s a crucial distinction, as pumpkin pie filling already contains added sugars and spices, which would throw off the flavor balance of our carefully crafted recipe. Look for cans labeled simply “pumpkin” or “100% pure pumpkin.”
- Sour Cream: This ingredient is a game-changer! Adding sour cream (or crème fraîche, which I’ve successfully tested as an alternative) contributes an incredible depth of flavor and a luxurious, silken texture to the pumpkin filling. It also provides a slight tang that beautifully cuts through the sweetness, creating a more complex and balanced taste profile. Ensure it’s at room temperature for smooth incorporation.
- Spices: My custom blend of spices creates a wonderfully warm and inviting aroma and taste. I use a combination of ground cinnamon, nutmeg, ginger, cloves, and a tiny pinch of black pepper. Think of this as a slightly spicier, more nuanced version of a typical pumpkin pie spice blend. The black pepper is a secret ingredient that subtly enhances the other spices, adding a hint of complexity without making the pie overtly peppery.
- Eggs: As with any traditional custard-based pie, eggs are essential for setting the pumpkin filling. They act as a binder, giving the pie its characteristic smooth, firm yet tender texture when baked. For best results, use large eggs that are at room temperature, as they incorporate more smoothly into the other ingredients.
- Graham Crackers: You’ll need approximately 12 sheets of graham crackers to yield about 1 ½ cups of fine crumbs for our buttery crust. If you’re in the UK, digestive biscuits make an excellent substitute. However, keep in mind that digestive biscuits tend to be richer and more buttery than graham crackers, so you might need to slightly reduce the amount of melted butter specified for the crust to achieve the perfect consistency.
- Unsalted Butter: Melted unsalted butter is the magical glue that binds the graham cracker crumbs together, forming a sturdy yet tender crust. Using unsalted butter allows you to control the overall saltiness of the pie, ensuring a perfectly balanced flavor. Make sure it’s fully melted and then slightly cooled before mixing with the crumbs.
- Sugars (Light Brown & Granulated): A combination of light brown sugar and granulated white sugar is used to achieve the ideal sweetness and caramel notes in the filling. Brown sugar adds moisture and a deeper, molasses-like flavor, while white sugar provides clean sweetness.
- Heavy Cream: This rich dairy component is crucial for the ultra-creamy, velvety texture of the pumpkin pie filling. It contributes to the luxurious mouthfeel and helps create a perfectly smooth custard.
For precise measurements and detailed quantities of all ingredients, please refer to the comprehensive recipe card located below.
Step-by-Step Guide to Baking Your Perfect Pumpkin Pie
Follow these detailed instructions to create a truly unforgettable pumpkin pie with a graham cracker crust. Each step is designed for clarity and ease, ensuring a delicious result every time.
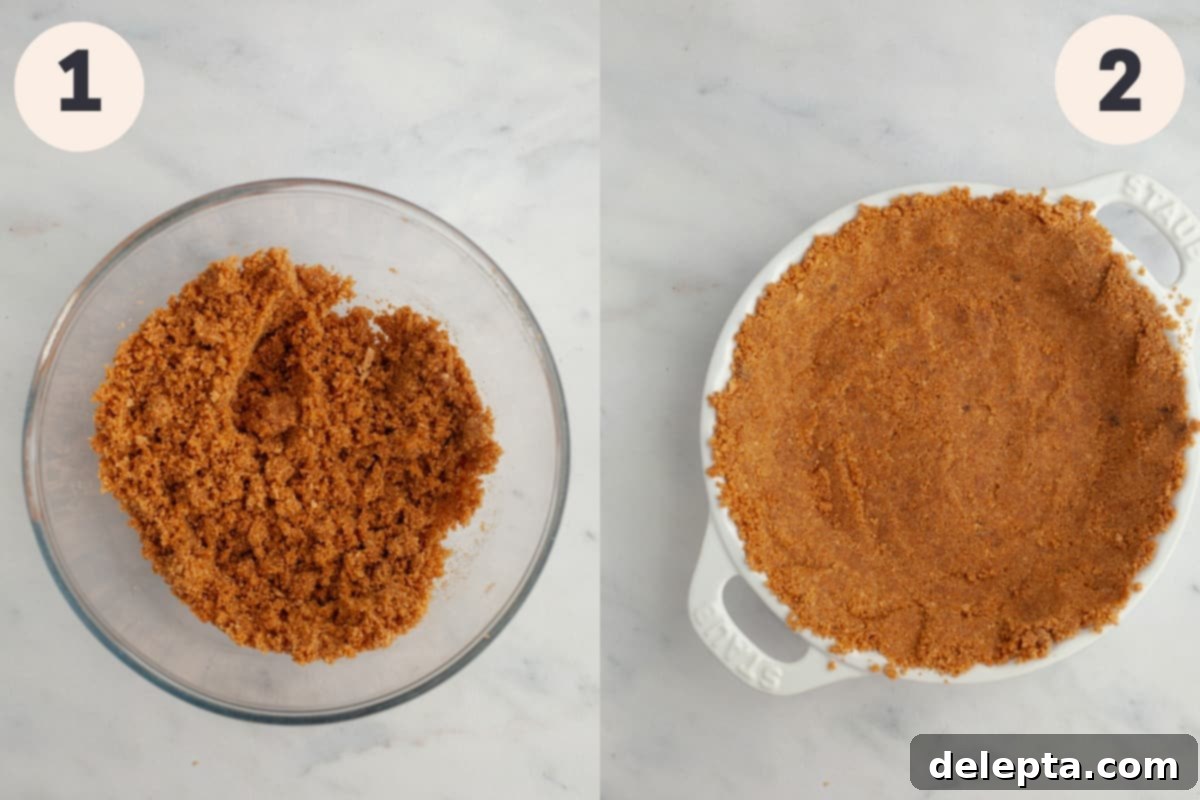
Step 1: Prepare Your Graham Cracker Crust. Begin by preheating your oven to 350°F (175°C). Next, you’ll prepare your graham cracker crumbs. If using whole graham cracker sheets, crush them finely in a food processor until they resemble coarse sand. Alternatively, you can place them in a resealable plastic bag and crush them with a rolling pin until fine. In a large mixing bowl, combine the crushed graham cracker crumbs with the melted unsalted butter, light brown sugar, a pinch of salt, and ground cinnamon. Stir thoroughly with a spoon or your hands, ensuring all the crumbs are evenly moistened by the butter, achieving a texture similar to wet sand.
Step 2: Form and Pre-Bake the Crust. Pour the moistened graham cracker mixture into your 9-inch pie dish (either a regular or deep-dish will work). Using the bottom of a flat-bottomed measuring cup, firmly press the crumbs into an even layer across the bottom and up the sides of the pie dish. For a cleaner look and easier slicing later, I find it helpful to use the back of a spoon to gently round out the ‘corner’ where the bottom and sides of the crust meet. This tip, inspired by Sally’s Baking Addiction, ensures a well-defined and sturdy crust. Bake the pressed crust in your preheated oven for 8-9 minutes. This crucial step helps to firm up the crust and prevent it from becoming soggy once the filling is added. Once baked, remove the crust from the oven and allow it to cool slightly while you prepare the filling.
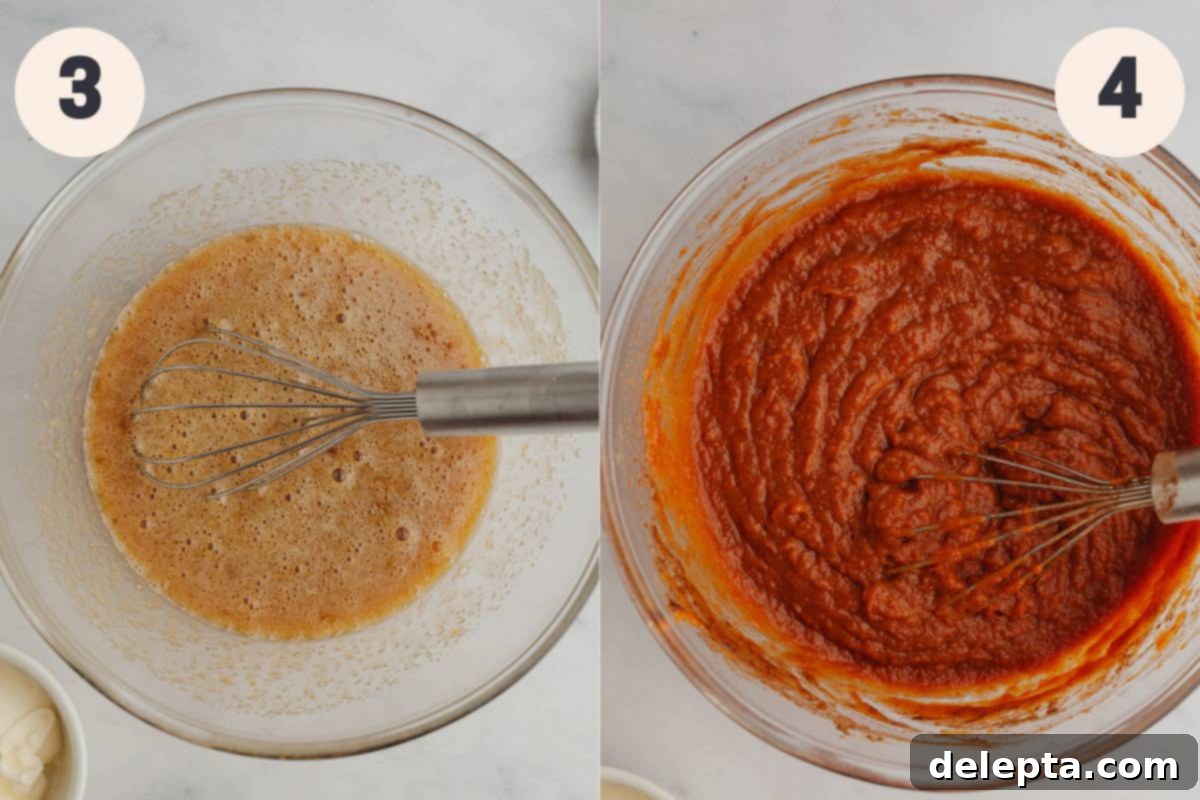
Step 3: Whisk Wet Ingredients. In a separate large mixing bowl, using a whisk, combine the room temperature eggs with the granulated white sugar, light brown sugar, and vanilla extract. Whisk vigorously until the mixture is well combined and slightly frothy, ensuring the sugars have begun to dissolve. This step creates the smooth base for your custard filling.
Step 4: Incorporate Pumpkin and Spices. To the whisked egg mixture, add the 100% pure pumpkin puree, your carefully selected blend of warm spices (cinnamon, nutmeg, ginger, cloves, and black pepper), and the kosher salt. Continue to whisk until all these ingredients are thoroughly incorporated and the mixture is smooth and evenly colored. Ensure there are no streaks of unmixed pumpkin or spices.
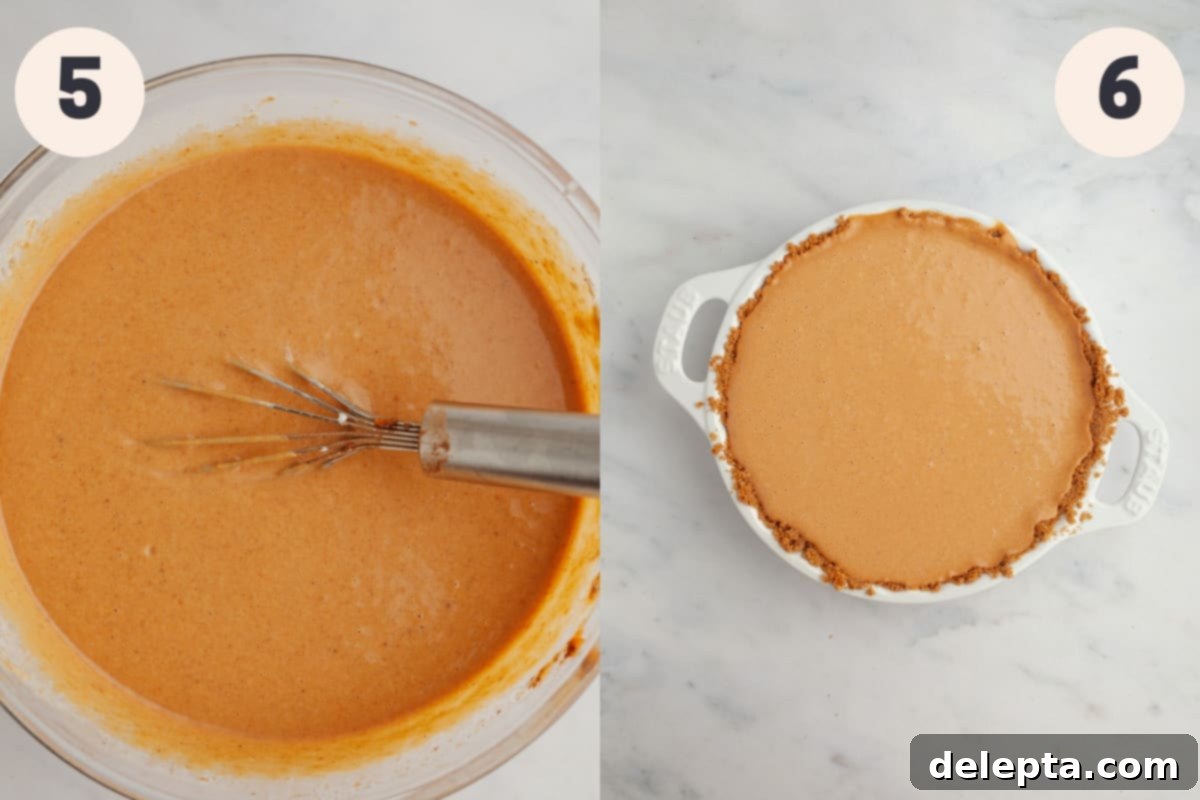
Step 5: Add Dairy for Richness. Finally, pour in the heavy cream and the sour cream (or crème fraîche). Whisk gently but thoroughly until the filling is completely smooth and uniform in consistency. Be careful not to over-whisk at this stage, as too much air can cause cracks during baking.
Step 6: Fill and Bake the Pie. Carefully pour the prepared pumpkin filling into your cooled graham cracker crust, filling it almost to the very top. Gently tap the pie dish on the counter a few times to release any trapped air bubbles. Please note that depending on the exact size and depth of your pie dish, you might have a small amount of leftover filling. Bake the pie in the oven, still preheated to 350°F (175°C), for approximately 45 minutes. The pie is done when the edges have slightly puffed up and set firmly, but the center still has a slight, delicate jiggle when gently nudged. This “jiggle test” is key to preventing overbaking, which can lead to cracks. Once the pie reaches this stage, turn off the oven. Use the handle of a wooden spoon or a heat-proof utensil to wedge the oven door open slightly, allowing the pie to cool down slowly inside the gradually cooling oven. This gradual cooling process is a fantastic tip for helping to prevent any surface cracks from forming on your beautiful pie. Let it cool completely in the oven before transferring to the fridge.
Expert Tips & Tricks for Pumpkin Pie Perfection
- Choosing Your Pie Dish: The size and depth of your pie dish can influence the outcome. You can use either a standard 9-inch pie dish or a deep-dish pie plate. If you opt for a regular pie dish, be aware that you might have a bit of pumpkin pie filling leftover. Don’t waste it! You can bake any excess filling in small ramekins or custard cups for mini crustless pumpkin custards.
- Protecting Crust Edges from Burning: Graham cracker crusts can brown quickly. To prevent the edges from burning while the filling bakes, I highly recommend covering the perimeter of the pie dish with aluminum foil. This is typically best done around the 25-30 minute mark of baking, once the crust is already golden but before it starts to get too dark. You can buy pre-made pie shields, or simply tear off a piece of foil and crimp it around the edges of your pie dish.
- Achieving Perfect Graham Cracker Crumbs: Fine, uniform crumbs are key to a cohesive and sturdy crust. A food processor is the quickest and easiest way to achieve this. Simply pulse the graham cracker sheets until they reach a fine, sand-like consistency. If you don’t have a food processor (or don’t want to deal with cleaning it!), a ziploc bag and a rolling pin work just as well. Place the graham cracker sheets in a heavy-duty ziploc bag, remove excess air, and then use a rolling pin to crush them into fine crumbs. For extra security, especially if you’re crushing many crackers, I suggest placing the first ziploc bag inside another one – this prevents any accidental holes and spills!
- Preventing Cracks in Your Pie: Cracks in pumpkin pie are usually a result of overbaking or rapid temperature changes. To avoid this, bake until the pie edges are set but the center still has a slight, delicate wobble. Crucially, once baked, turn off your oven, crack the door open (using a wooden spoon handle to prop it open), and let the pie cool down very slowly inside the oven. This gradual cooling minimizes thermal shock. If, despite your best efforts, cracks appear, don’t fret! Simply cover them up beautifully with homemade vanilla bean whipped cream, a dusting of powdered sugar, or even homemade marshmallow fluff for a visually stunning (and delicious!) disguise.
- Serving Suggestions & Toppings: While the pie is divine on its own, a dollop of fresh whipped cream is classic. Consider adding a drizzle of caramel sauce, a sprinkle of toasted pecans, or extra graham cracker crumbs for added texture and flavor. Serve at room temperature or slightly chilled for the best experience.
- Exploring Traditional Pumpkin Pies: If you’re a purist who adores a classic pastry crust, you can still enjoy this incredible pumpkin filling! Simply prepare my pumpkin custard pie recipe, which features the same decadent filling baked in a traditional pie crust. Or, for a rich, nutty twist, try my brown butter pumpkin pie – it’s equally enchanting!
Your Pumpkin Pie Questions Answered 🥧
The key to a crisp, non-soggy bottom is pre-baking your graham cracker crust. Baking the crust for approximately 8-9 minutes before adding the filling helps to firm it up and create a barrier against moisture, ensuring a delightfully sturdy and crunchy base for your pumpkin pie.
Pumpkin pies commonly crack due to overbaking or sudden temperature changes during cooling. To prevent this, aim to remove the pie from the main baking phase when the edges are set and slightly puffed, but the very center still has a slight, delicate jiggle. Then, allow it to cool slowly by turning off the oven and propping the door open with a wooden spoon. This gradual cooling process minimizes thermal shock. If a crack still appears, don’t worry! It can be easily covered and disguised with a generous layer of whipped cream, making your pie look perfect.
Yes, absolutely! Since pumpkin pie is a custard-based dessert containing eggs and dairy, it requires refrigeration for food safety. Once your pumpkin pie has cooled completely to room temperature, typically a few hours after baking, it should be promptly transferred to the refrigerator. Chill it for at least 2-4 hours before serving to ensure it sets properly and is perfectly cool.
Yes, you certainly can! While my homemade graham cracker crust recipe is simple and yields fantastic flavor, feel free to substitute it with a ready-made graham cracker crust that you can purchase at most grocery stores. This is a great shortcut, especially during busy holiday seasons, and will still result in a delicious pumpkin pie.
Yes, pumpkin pie freezes beautifully! Once completely cooled and chilled, wrap the whole pie (or individual slices) tightly in several layers of plastic wrap, then an additional layer of aluminum foil. Freeze for up to 1 month. To thaw, unwrap and refrigerate overnight. Add whipped cream just before serving.
Properly stored, covered pumpkin pie will last for up to 4-5 days in the refrigerator. Always ensure it’s kept airtight to maintain freshness and prevent it from absorbing other food odors.
Storage Best Practices for Your Pumpkin Pie
Proper storage is essential to keep your pumpkin pie fresh, flavorful, and safe to eat. Once your pumpkin pie has completely cooled to room temperature, which can take a few hours after it comes out of the oven, it must be refrigerated. Cover the pie tightly with plastic wrap or aluminum foil, ensuring it’s well-sealed to prevent it from drying out or absorbing odors from other foods in your fridge. Stored this way, your delicious homemade pumpkin pie will remain fresh and enjoyable for up to 4 to 5 days. For the best presentation and taste, I highly recommend waiting to add any whipped cream or other perishable toppings until just before you’re ready to serve each slice. This keeps the toppings fresh and prevents them from becoming watery or deflating prematurely.
Don’t Stop There! Explore More Festive Desserts!
If you’ve enjoyed this delightful pumpkin pie, you’re in for a treat! Here are more fantastic Thanksgiving and holiday-inspired desserts that are sure to become new family favorites. Expand your baking repertoire and impress your guests with these equally delicious recipes:
- Easy Chai Cake with Spiced Buttercream
- Pecan Pie Cheesecake
- Turtle Pie (No Bake)
- Apple Crisp Cheesecake
If you’ve made this incredibly delicious pumpkin pie with graham cracker crust, I would absolutely love to hear from you! Please make sure to leave a ⭐️ rating and a thoughtful review below to share your experience and tips. Your feedback is invaluable and helps other bakers in our community. I cherish seeing all your wonderful creations, so don’t forget to tag me on Instagram @alpineella when you post pictures of your pie! You can also stay connected and discover more delightful recipes by following along on Pinterest, Facebook, and TikTok! Happy baking!
Recipe
Pumpkin Pie with Graham Cracker Crust
Ella Gilbert
Pin Recipe
Save RecipeSaved!
Equipment
-
1 9″ pie plate
Ingredients
Graham Cracker Crust
- 1 ½ cups graham cracker crumbs from 12 graham cracker sheets
- 6 tablespoons unsalted butter melted
- pinch salt
- 4 tablespoons light brown sugar
- ½ teaspoon ground cinnamon
Pumpkin Pie Filling
- 3 large eggs room temperature
- ½ cup light brown sugar
- ½ cup white sugar
- 15 oz pumpkin puree
- 2 teaspoons vanilla extract
- 2 teaspoons ground cinnamon
- 1 teaspoon ground ginger
- ¼ teaspoon ground nutmeg
- ⅛ teaspoon ground cloves
- pinch ground black pepper
- 1 teaspoon kosher salt
- 1 cup heavy cream
- ⅓ cup sour cream
Whipped Cream
- 1 cup heavy cream
Instructions
Make Graham Cracker Crust
-
Preheat your oven to 350℉/175℃. Pulse the graham cracker sheets in a food processor until you have fine crumbs.1 ½ cups graham cracker crumbs
-
Mix the graham cracker crumbs with the melted butter, pinch of salt, light brown sugar and ground cinnamon. Stir until the crumbs are evenly moist.6 tablespoons unsalted butter, pinch salt, 4 tablespoons light brown sugar, ½ teaspoon ground cinnamon
-
Pour the graham cracker crumbs into a 9-inch pie dish (deep dish or regular!). Use the bottom of a measuring cup to press the crumbs into the bottom and sides of the dish. Use the back of a small spoon to help create a kind of corner, where the edge and bottom of the dish meets. This creates a rounded edge and it’ll be easier to slice!
-
Bake in the preheated oven for 8-9 minutes. Remove from the oven and let cool slightly.
Make Pie Filling
-
Keep the oven at 350℉/175℃ with a rack in the center of the oven.
-
Whisk together the eggs, sugars and vanilla. Add the pumpkin puree, spices and salt. Whisk in your sour cream, and heavy cream.3 large eggs, ½ cup light brown sugar, ½ cup white sugar, 15 oz pumpkin puree, 2 teaspoons vanilla extract, 2 teaspoons ground cinnamon, 1 teaspoon ground ginger, ¼ teaspoon ground nutmeg, ⅛ teaspoon ground cloves, pinch ground black pepper, 1 teaspoon kosher salt, 1 cup heavy cream, ⅓ cup sour cream
-
Pour the filling into the crust. Tap on the counter to get rid of any air bubbles. Depending on the size of your dish you might have some leftover pie filling so keep that in mind!
-
After 25-30 minutes, check on the pie. If the edges are looking brown I recommend placing aluminum foil on the edges so they don’t brown.
-
Bake for 45 minutes and check it, the filling should be puffed but the edges should have set. You may need another 5 or 10 minutes! Note, depending on your oven you may need less time so keep an eye on it!
-
Open the oven door and keep it open a crack with the handle of a wooden spoon. This helps it cool down slowly so it is less likely to crack.
-
Once completely cool, take out of the now cold oven and let chill in the fridge for 2 hours before enjoying.
Whipped Cream
-
In a stand mixer fitted with the whisk attachment, or in a bowl with a hand mixer, whisk the heavy cream until you have stiff peaks. Dollop on top of the pie or on each individual slice. I also sprinkled over some crushed graham crackers on top!1 cup heavy cream
Video
Notes
Salt: If you don’t have kosher salt, halve the amount of salt called for in the recipe. 1 teaspoon kosher salt = ½ teaspoon fine salt.
Graham Cracker Crust: feel free to use a store bought graham cracker crust.
Pie Dish: This recipe uses a regular 9″-pie dish, but you can also use a deep dish if that’s all you have! Depending on the size of your dish, you may have some leftover pie filling so be careful when pouring it into the pie crust.
Storage: Cover leftovers tightly and keep in the fridge for up to 5 days.
Nutrition
