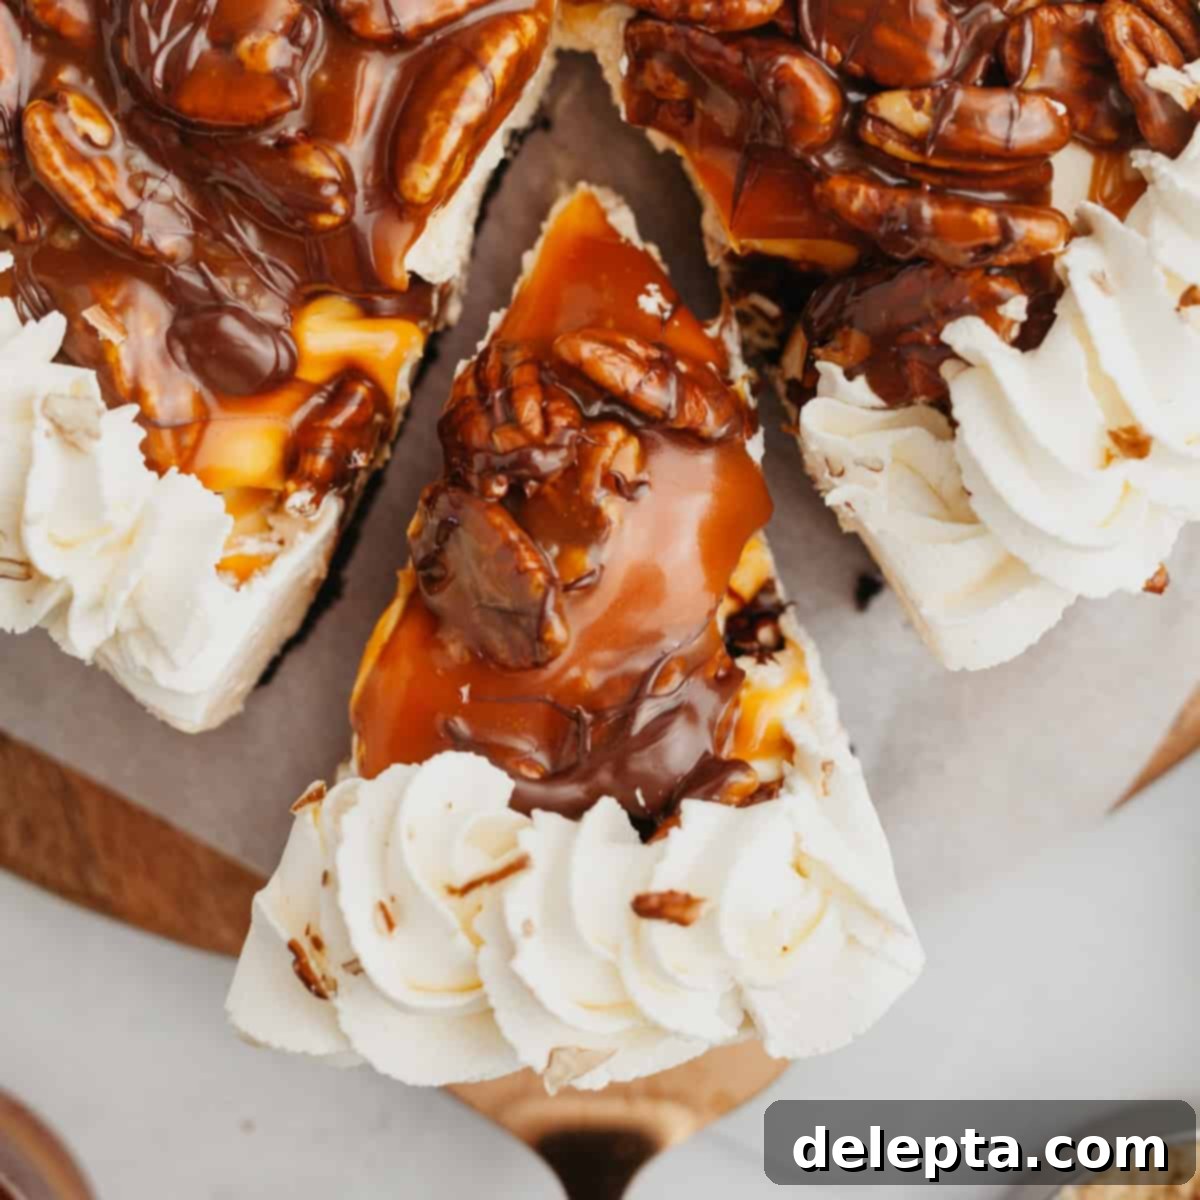
Decadent No-Bake Turtle Cheesecake Pie: The Ultimate Salted Caramel & Oreo Dessert
Prepare to be amazed by this incredibly easy no-bake turtle pie recipe! Featuring a rich, creamy salted caramel cheesecake filling nestled in a crunchy Oreo cookie crust, and generously topped with luxurious caramel pecans and a drizzle of melted chocolate. Finish it off with a cloud of homemade whipped cream, and you’ve created a truly decadent, showstopping dessert that’s perfect for any occasion.
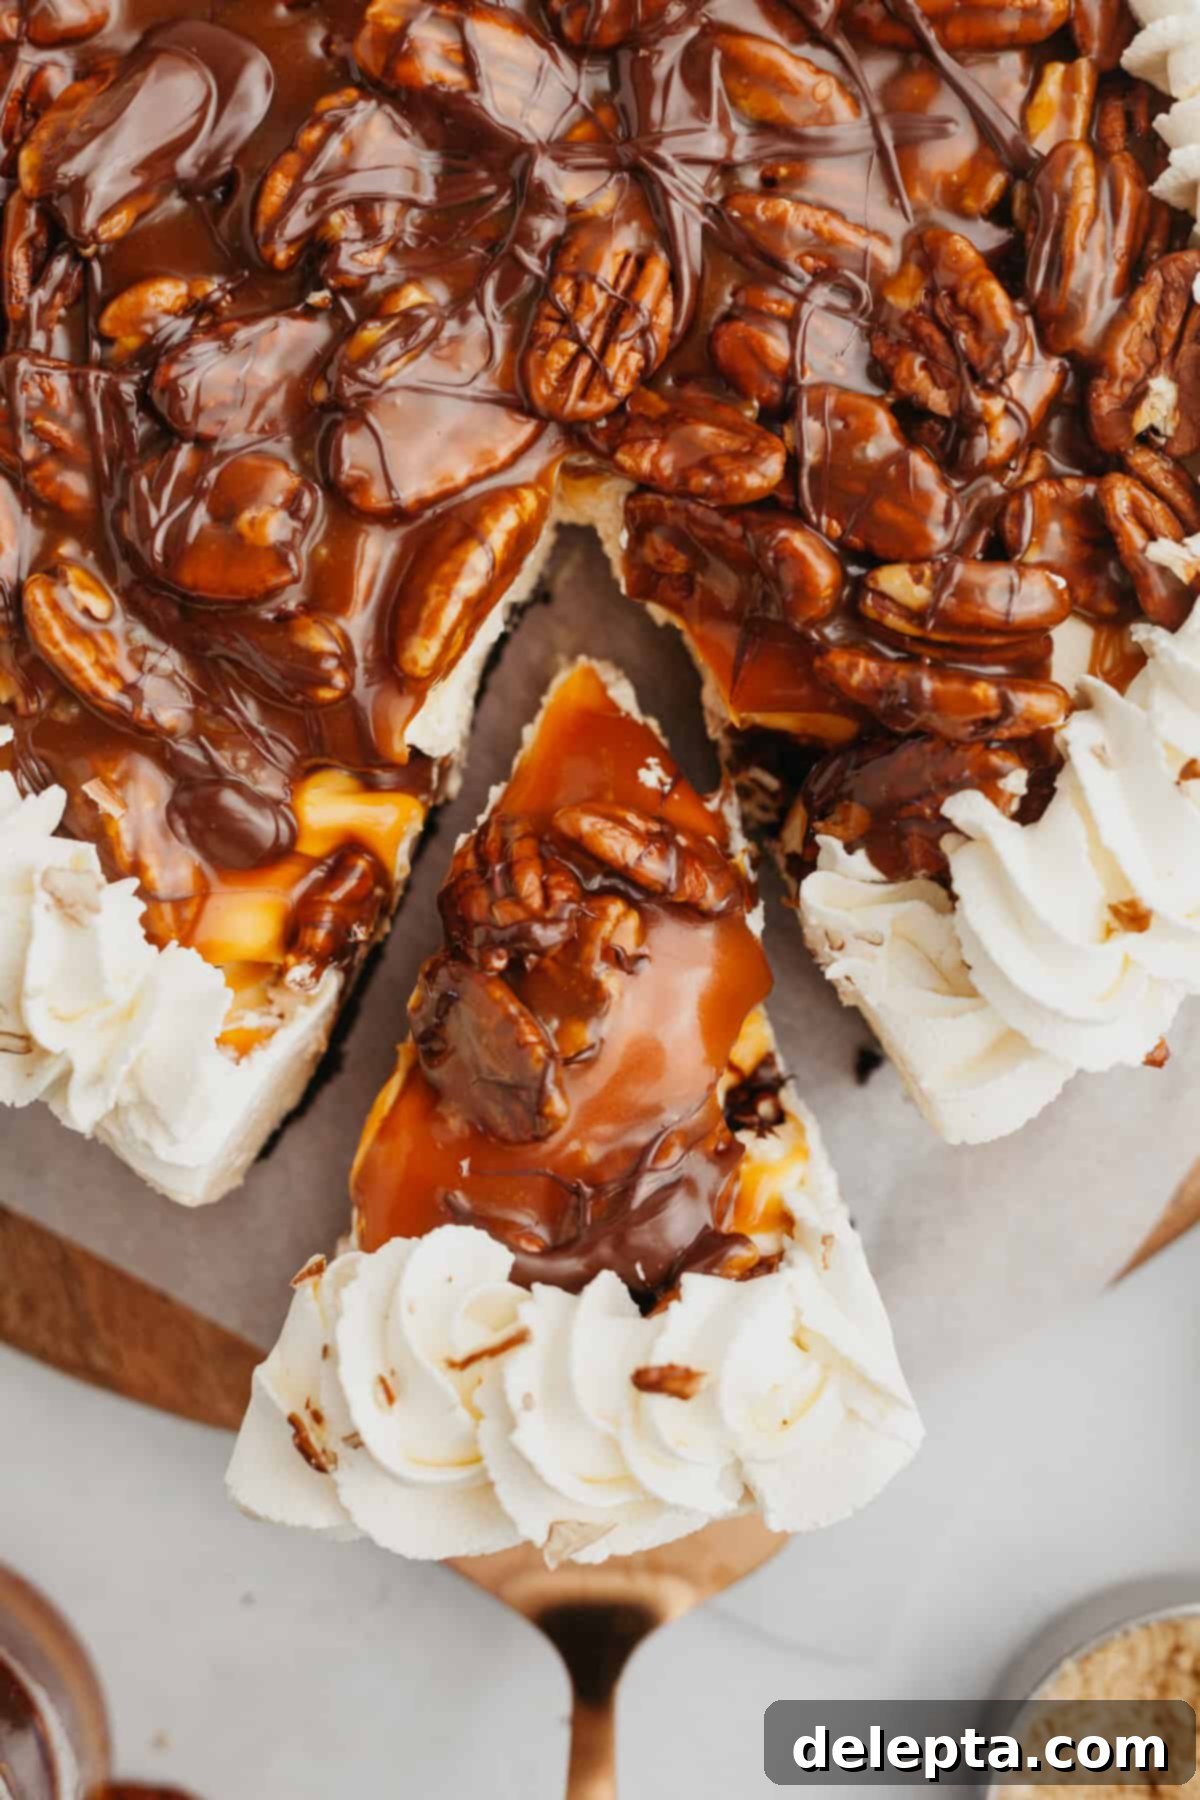
This beloved recipe was originally shared in November 2021 and has recently been updated with fresh images and an enhanced recipe to ensure the best possible experience for you.
This exquisite turtle cheesecake pie captures all the irresistible flavors of classic chocolate turtles – that delightful combination of chocolate, caramel, and pecans. From the intensely rich and smooth homemade salted caramel filling to the perfectly coated caramel pecans, every bite is a celebration of flavor and texture. It’s truly an ideal dessert for festive holidays like Thanksgiving or Christmas, or as a spectacular centerpiece for a birthday celebration.
Just like our popular Oreo peanut butter pie, this turtle pie starts with a simple yet delicious no-bake Oreo cookie base. We then layer it with my signature, tried-and-tested cheesecake filling, which I consistently use for all my no-bake cheesecakes (including my indulgent strawberry and white chocolate cheesecake). This filling is renowned for its incredible richness, luxurious creaminess, and surprisingly light texture that melts in your mouth. The combination of these elements creates a dessert that’s both deeply satisfying and incredibly enjoyable.
Beyond its incredible taste, this is also an exceptionally easy recipe to prepare and can be made well in advance, making it a stress-free option for busy holiday entertaining. Imagine the convenience of having a showstopping dessert ready the night before your big family gathering!
Why This No-Bake Turtle Pie Recipe is a Must-Try!
If you’re looking for a dessert that delivers on flavor, convenience, and visual appeal, this no-bake turtle pie is your answer. Here’s why it stands out:
- Simple, Accessible Ingredients: You won’t need to hunt for exotic or hard-to-find items. All the components for this delectable turtle pie are readily available at your local grocery store, making preparation straightforward and hassle-free. We focus on quality everyday ingredients that come together to create something extraordinary.
- Effortlessly Easy to Make: The beauty of this turtle pie lies in its no-bake nature. Forget about preheating ovens, monitoring baking times, or worrying about cracks in your cheesecake. The cheesecake filling requires no baking, saving you time and effort in the kitchen. This makes it perfect for novice bakers and seasoned pros alike, guaranteeing a perfect result every time without the complexity of traditional baking.
- The Ultimate Holiday Dessert: The ability to prepare this pie entirely ahead of time makes it an absolute lifesaver during the busy holiday season. You can assemble the entire pie (crust and filling) the day before, allowing it to chill perfectly overnight. On the day of your gathering, simply add the final touches – a generous swirl of whipped cream and a sprinkle of caramel pecans – just before serving. This frees up your valuable oven space and allows you more time to enjoy with family and friends. It’s a crowd-pleaser that consistently receives rave reviews!
- A Symphony of Textures and Flavors: This pie offers a harmonious blend of creamy cheesecake, crunchy Oreo crust, chewy pecans, rich caramel, and decadent chocolate. Each component contributes to a dessert that is incredibly satisfying and never boring.
- Visually Stunning: With its beautifully layered appearance and elegant toppings, this turtle pie is not just a treat for the taste buds but also a feast for the eyes. It’s guaranteed to impress your guests and be the star of any dessert table.
Essential Ingredients for Your Turtle Pie
Crafting this incredible turtle pie requires a few key ingredients. Make sure they’re at the right temperature and consistency for the best results.
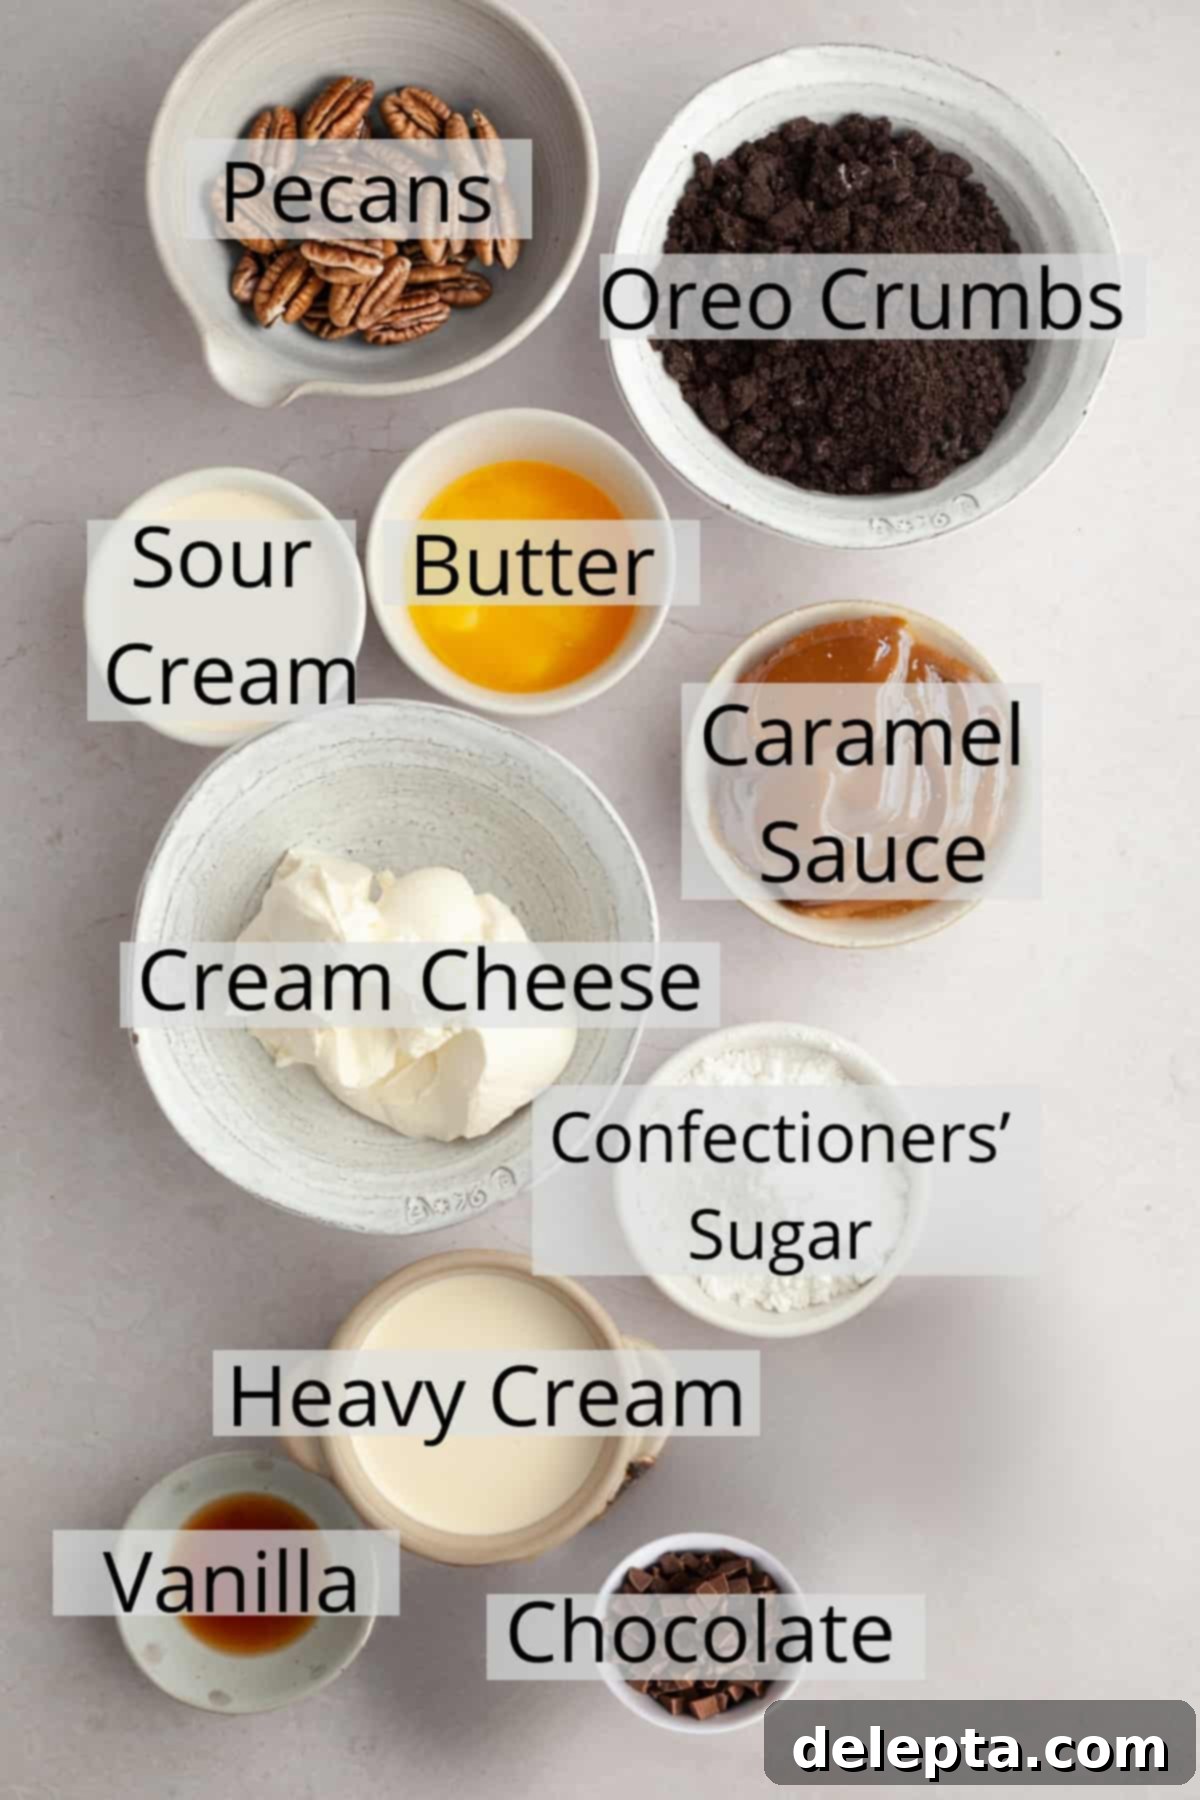
- Cream Cheese: It is absolutely crucial for your cream cheese to be at room temperature before you start mixing. This ensures a smooth, lump-free filling. If you’re using cream cheese that comes in tubs (common in Europe), it often contains more moisture. To prevent a runny filling, gently pat it dry with paper towels to remove any excess liquid before using.
- Oreos: For the crust, I recommend classic chocolate Oreo cookies, crushed into fine crumbs. These provide a perfect contrast to the creamy filling. However, feel free to get creative! You could substitute with wafer cookies, graham crackers, or even chocolate digestive biscuits for a slightly different flavor profile. A food processor makes quick work of turning them into a fine powder, or you might find pre-crushed Oreo cookies at some larger grocery stores for added convenience.
- Chocolate: A high-quality semi-sweet chocolate or chocolate chips are ideal for drizzling over the finished pie. This adds that essential chocolatey finish. You can also use milk chocolate for a sweeter touch or dark chocolate for a more intense flavor, depending on your preference. Ensure you melt it gently to achieve a smooth, pourable consistency.
- Confectioners’ Sugar: Also widely known as powdered sugar or icing sugar, this ingredient serves two vital purposes in our recipe: it sweetens the rich turtle pie filling beautifully and also plays a crucial role in providing structure and stability to the no-bake cheesecake. Sifting it before use can help prevent lumps.
- Heavy Cream: This is the secret to achieving that wonderfully light and airy texture in your pie filling. We’ll whip the heavy cream until it forms stiff peaks, creating homemade whipped cream that gets carefully folded into the cheesecake mixture. If you’re short on time or prefer an alternative, you can certainly swap it out for an equal amount of store-bought Cool Whip.
- Caramel Sauce: While I’ve included a recipe for a luscious homemade salted caramel sauce, don’t hesitate to use a good quality store-bought caramel if you’re looking to save time. Both options will deliver fantastic results, but homemade caramel adds an extra layer of rich flavor.
- Sour Cream: This ingredient adds a subtle tang and helps balance the sweetness of the filling, contributing to the cheesecake’s signature creamy texture. Ensure it’s also at room temperature.
- Vanilla Extract: A splash of good quality vanilla extract enhances all the sweet flavors in both the cheesecake filling and the homemade caramel.
- Pecans: These are a star of the turtle pie! Opt for fresh, good quality pecans for the best flavor and crunch.
Easy Step-by-Step Instructions for Your No-Bake Turtle Pie
Follow these simple steps to create your showstopping turtle pie. Precision is key for the best results!
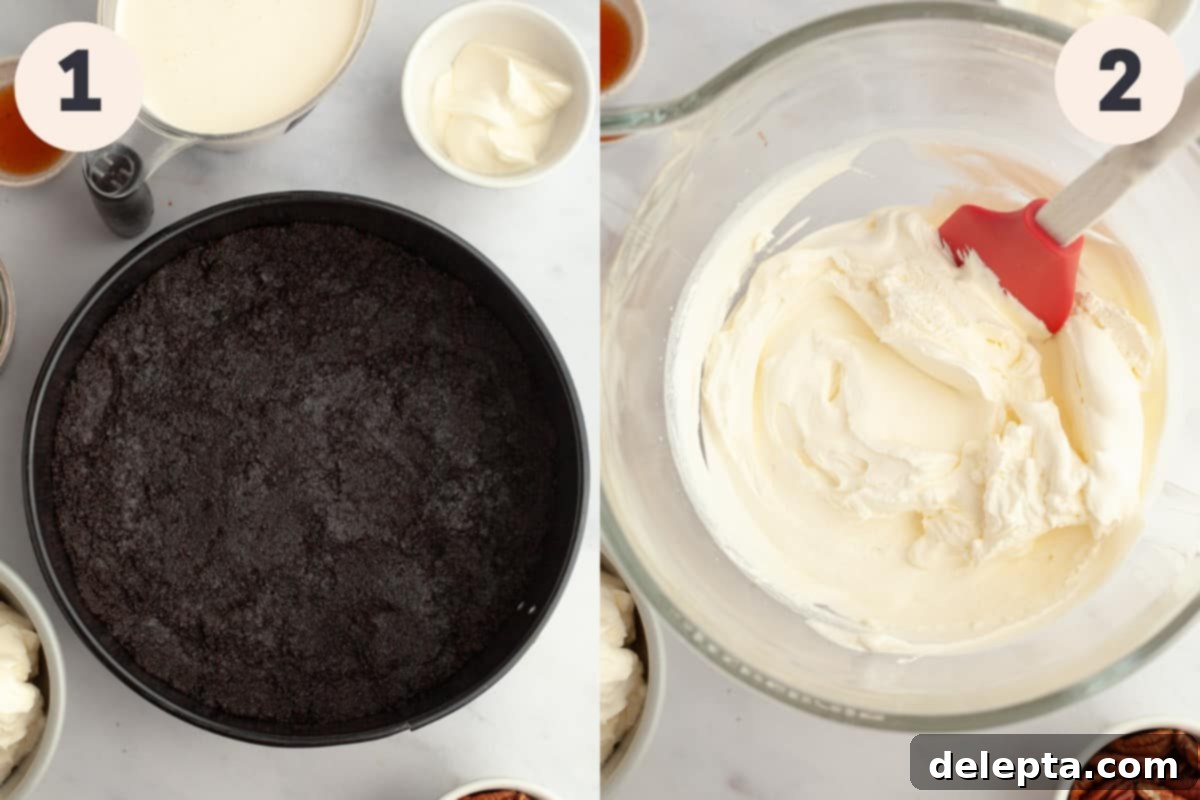
Step 1: Prepare the Oreo Cookie Crust. Begin by thoroughly crushing your Oreo cookies in a food processor until they form fine, even crumbs. Transfer these crumbs to a bowl, then pour in your melted butter. Mix everything together until all the cookie crumbs are thoroughly moistened and resemble wet sand. Take a 9-inch springform pan and line its bottom with parchment paper for easy removal later. Press the moist crumbs evenly into the bottom of the pan and slightly up the sides to form a sturdy crust. Using the bottom of a measuring cup or a flat-bottomed glass helps compact the crust firmly. Once pressed, place the pan in the freezer for at least 20 minutes to allow the crust to firm up while you prepare the filling.
Step 2: Whip the Heavy Cream. In a clean mixing bowl, using either a handheld mixer or a stand mixer fitted with the whisk attachment, beat the cold heavy cream on medium-high speed. Continue beating until you achieve stiff peaks. This process might take anywhere from 4 to 5 minutes, so be patient and avoid over-whipping. Once stiff peaks have formed, gently set the whipped cream aside. It will be folded into the cheesecake mixture later, adding a light, airy texture.
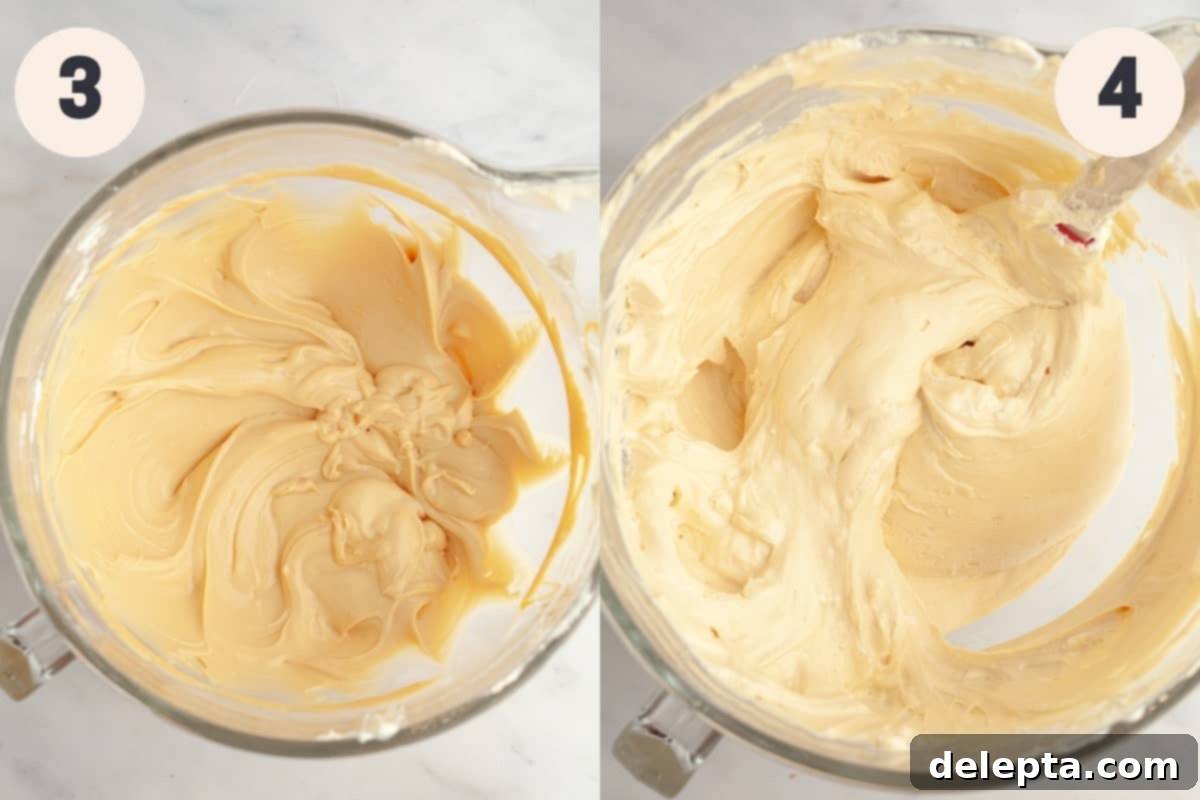
Step 3: Create the Cheesecake Filling. In a stand mixer fitted with the paddle attachment, beat the room-temperature cream cheese until it is completely smooth and free of any lumps. Add the vanilla extract, sour cream, a portion of your salted caramel sauce (reserving some for topping), and the sifted confectioners’ sugar to the cream cheese mixture. Beat on medium speed until all the ingredients are thoroughly combined and the mixture is perfectly smooth and creamy. Make sure to scrape down the sides of the bowl occasionally to ensure everything is incorporated. Once smooth, turn off the mixer.
Step 4: Fold in the Whipped Cream. Carefully and gently fold the previously whipped heavy cream into the smooth cream cheese mixture. Use a rubber spatula and a gentle hand, lifting from the bottom and folding over, to avoid deflating the whipped cream. Continue folding until the whipped cream is fully incorporated into the cheesecake mixture, resulting in a light and airy filling.
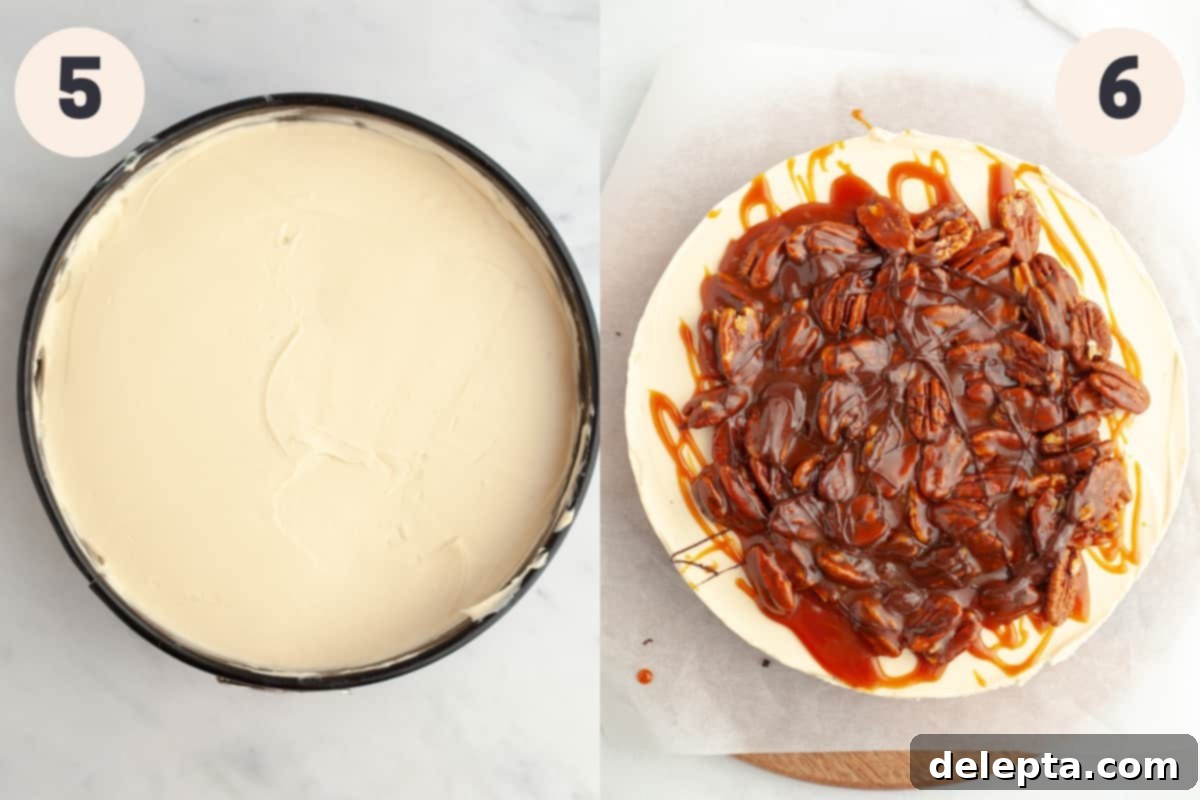
Step 5: Chill the Pie. Remove the chilled Oreo crust from the freezer. Pour the creamy cheesecake filling evenly into the crust. Use a small offset spatula or the back of a spoon to gently smooth out the top of the filling, creating an even surface. Once smoothed, cover the springform pan tightly with plastic wrap, ensuring the wrap doesn’t touch the filling directly if possible. Place the pie in the refrigerator to chill for a minimum of 12 hours. This extended chilling time is crucial for the pie to set properly and achieve its firm, sliceable consistency.
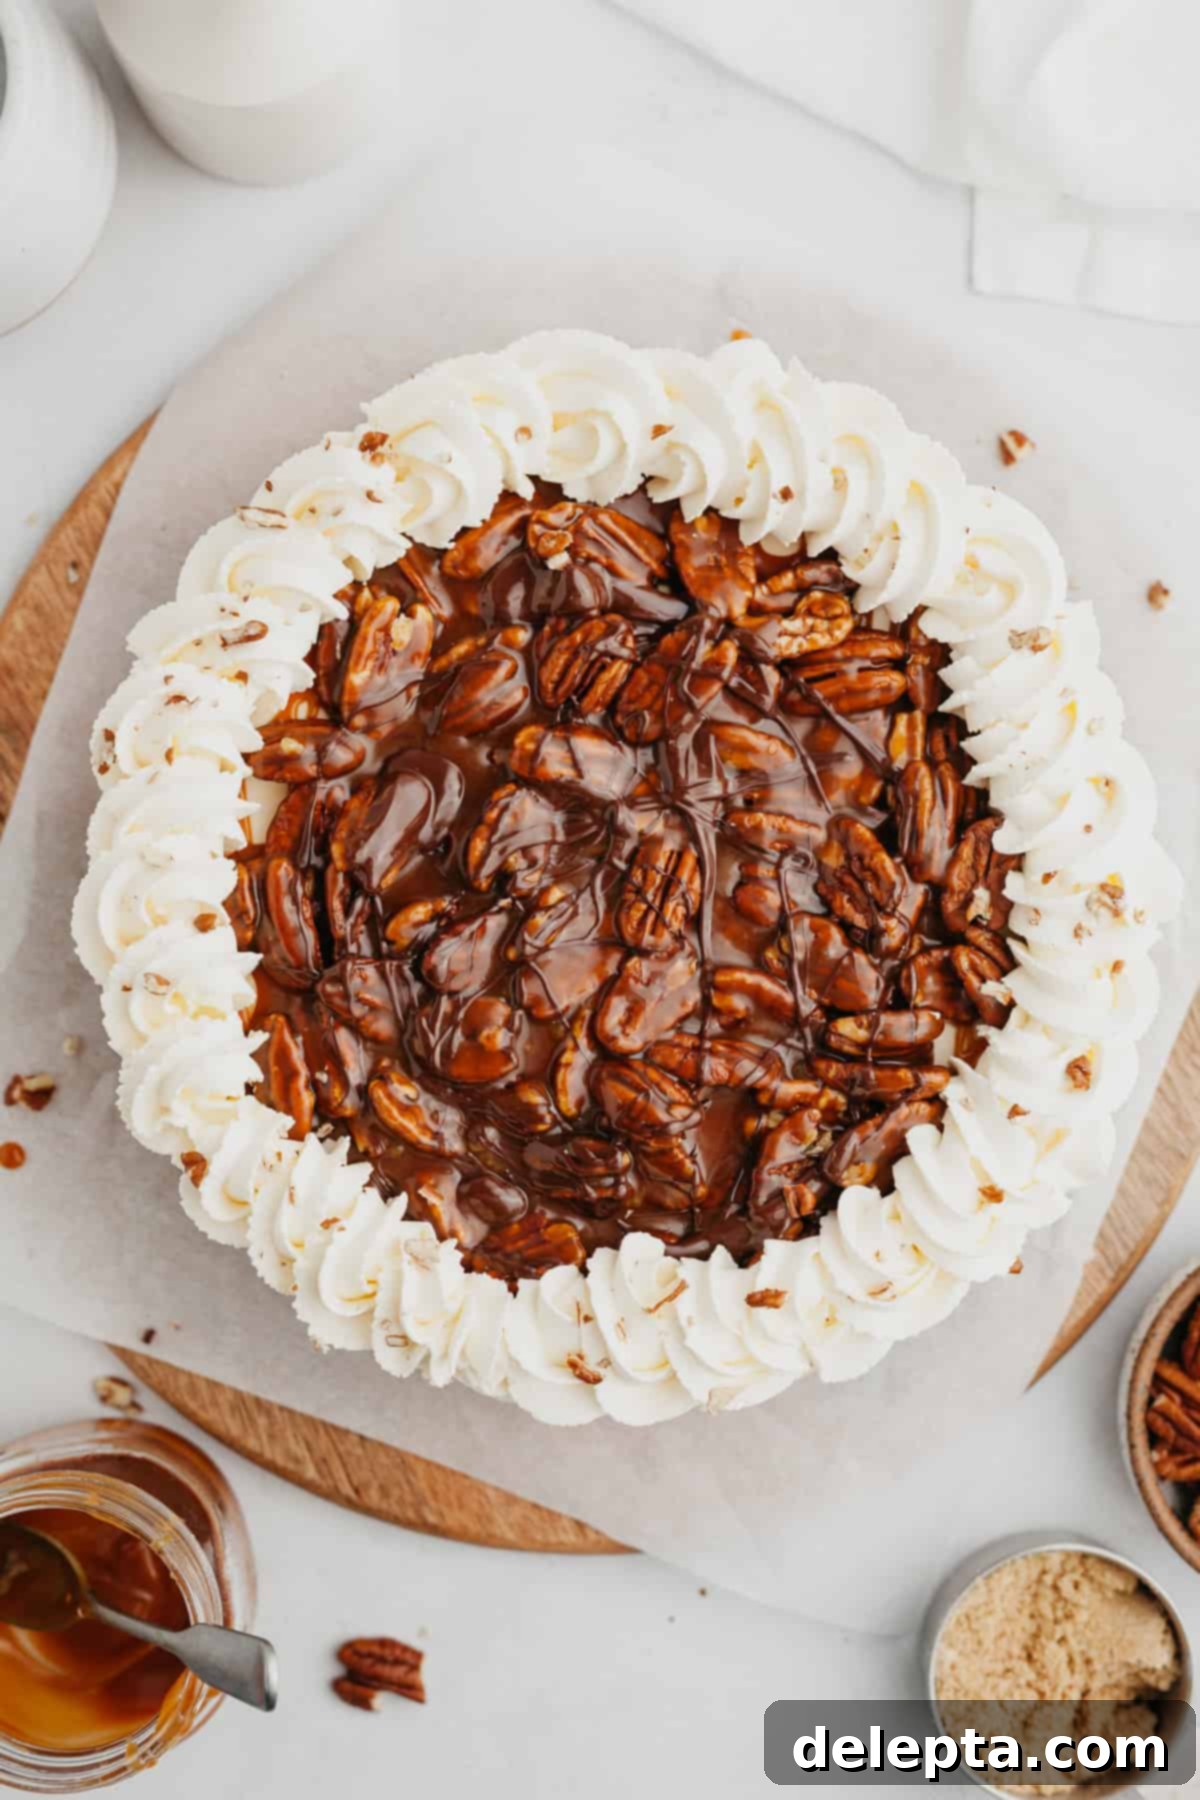
Step 6: Assemble and Serve. When you’re ready to serve your magnificent turtle pie, gently remove it from the springform pan. The easiest way to do this is to run a thin, small silicone spatula or a butter knife along the edges of the pie to loosen it, then unclip and remove the sides of the pan. In a separate bowl, mix the pecans with the remaining salted caramel sauce until they are thoroughly coated. Spoon this luscious caramel pecan mixture generously over the top of the pie. Finally, gently melt your semi-sweet chocolate (in the microwave in short bursts, stirring frequently, or over a double boiler) and drizzle it artfully over the caramel pecans. For an extra touch of elegance, pipe additional homemade whipped cream along the edges of the pie using a decorative piping tip. Slice, serve, and enjoy this irresistible dessert!
Expert Tips & Tricks for a Perfect Turtle Pie
Achieve perfection with your no-bake turtle pie by incorporating these professional tips and tricks:
- Embrace a Kitchen Scale: For truly accurate and consistent baking results, I cannot stress enough the importance of using a kitchen scale and measuring your ingredients in metric grams. This method eliminates the inaccuracies of volume measurements (like cups) and makes a monumental difference in the final texture and success of your desserts. It’s the most reliable way to bake!
- Cream Cheese Preparation is Key: If you’re located in Europe or commonly purchase cream cheese in tubs, it’s essential to pat down your cream cheese thoroughly with a paper towel before using it. European cream cheese typically has a higher moisture content than its North American counterpart, and failing to remove this excess moisture can result in a filling that isn’t firm enough, leading to a softer pie that doesn’t hold its shape as well. Room temperature cream cheese is also non-negotiable for a smooth, lump-free filling.
- Flawless Whipped Cream Piping: For an elegant and professional finish, I used a Wilton 1M piping tip to decorate the pie with whipped cream along the edges. This creates beautiful rosettes or a classic shell border. Practice on a plate first if you’re new to piping!
- Choosing Your Pie Pan: While I prefer a 9-inch springform pan for its ease of slicing and presentation, a standard 9-inch pie dish can also be used effectively. The springform pan allows for a clean release of the pie, making for picture-perfect slices.
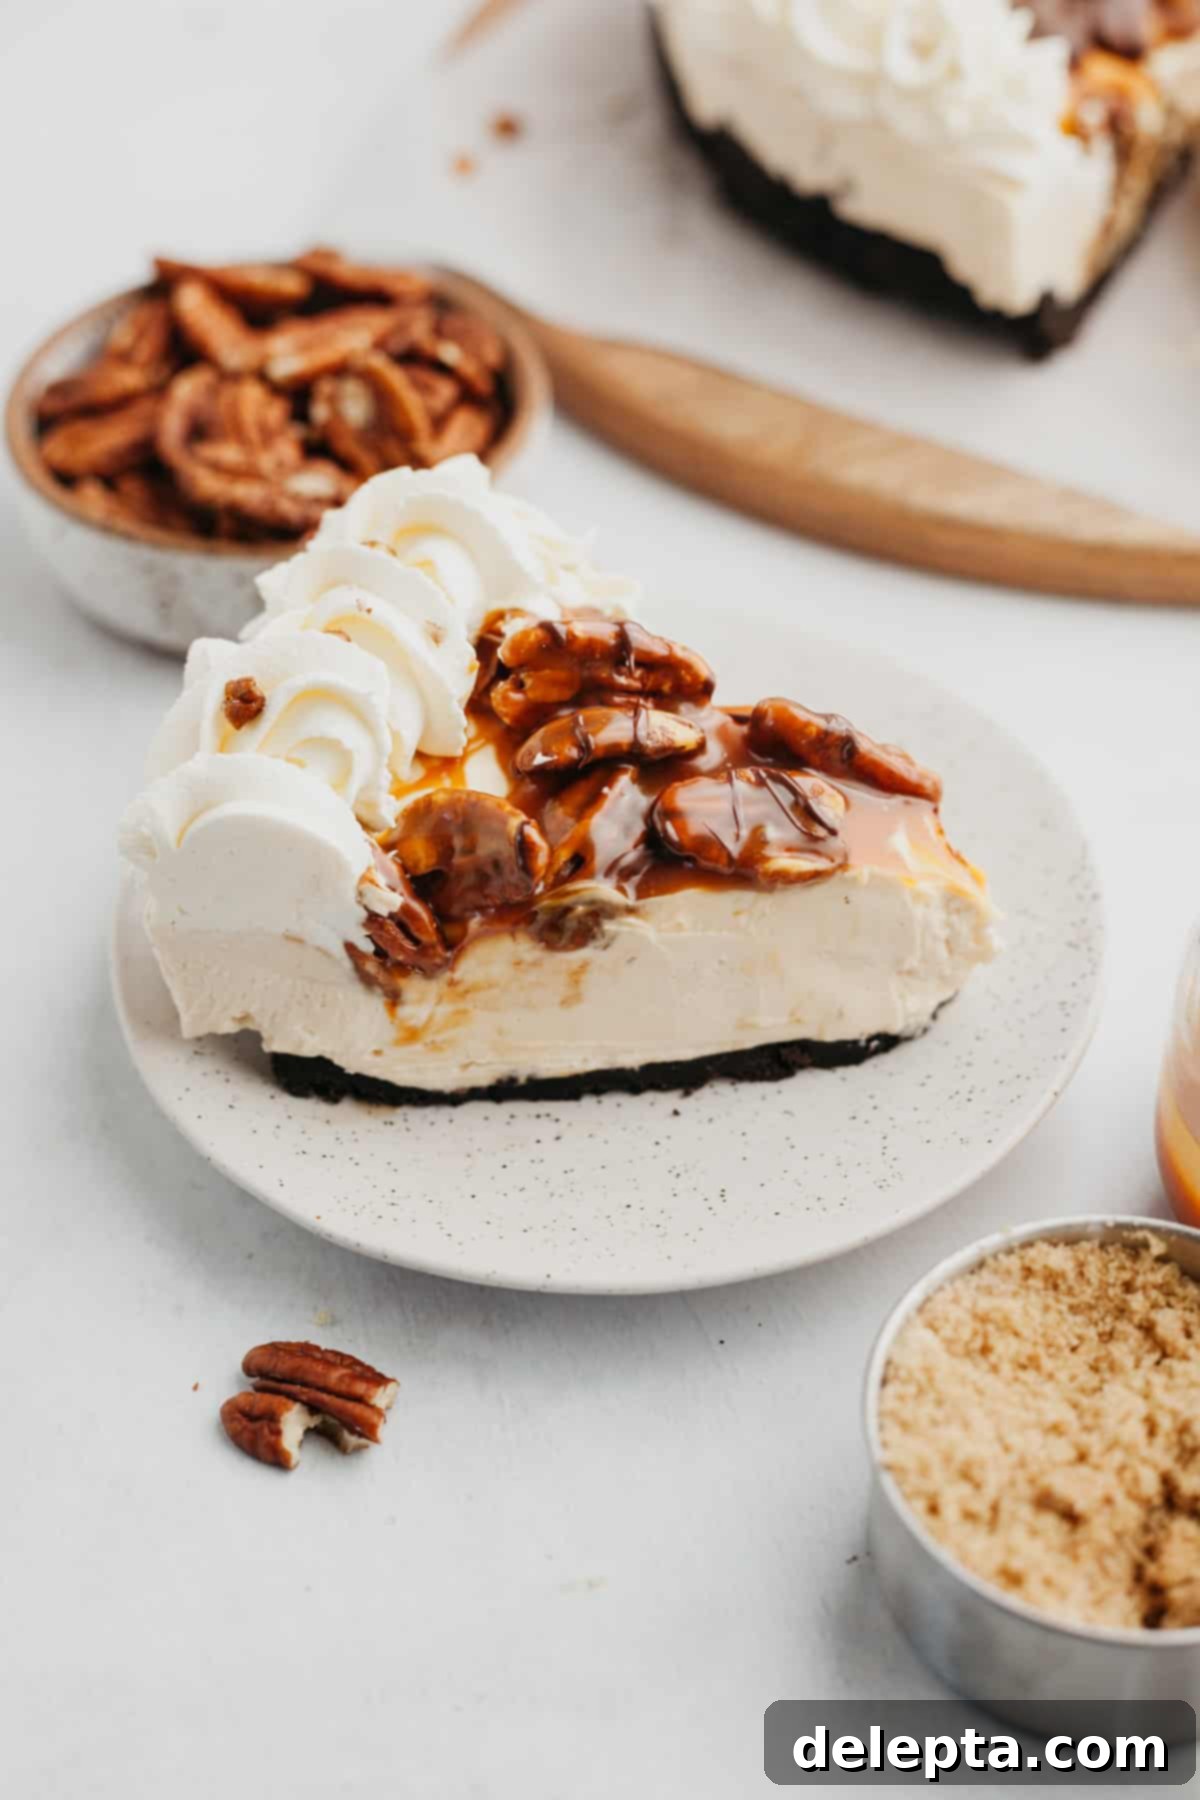
- The Art of Chilling: For optimal results and to achieve the cleanest, most defined slices, allow your turtle cheesecake to chill in the refrigerator for a minimum of 12 hours. While I’ve tested slicing it after 6 hours, the difference in firmness and neatness after a full 12-hour chill is remarkable and well worth the wait. Patience truly pays off here.
- Temperature of Caramel for Pecans: When mixing the pecans with the remaining caramel for the topping, ensure the caramel is completely cooled (or at least lukewarm) and not hot. Warm caramel could potentially melt and compromise the firm structure of your chilled pie filling, leading to a messy presentation.
- Crust Compression: Don’t just pour the crushed Oreos into the pan; really press them down firmly with the bottom of a measuring cup or glass. This creates a dense, stable crust that won’t crumble when sliced.
- Melting Chocolate: For a smooth chocolate drizzle, melt your semi-sweet chocolate gently. Use a microwave in 15-second intervals, stirring after each, or a double boiler. Avoid overheating, which can cause the chocolate to seize.
Frequently Asked Questions About Turtle Pie
Turtle pie is a delightful dessert that celebrates the classic flavor combination found in chocolate turtles: chocolate, caramel, and pecans. The name “turtle” comes from the original candy, which features pecans clustered together, coated in caramel, and then dipped in chocolate, resembling a turtle’s shape! This pie takes those beloved flavors and transforms them into a creamy, dreamy cheesecake format.
There are a couple of common reasons why your no-bake pie might not firm up properly. Firstly, adequate chilling time is absolutely crucial; you’ll need to ensure your pie chills for a minimum of 12 hours in the refrigerator for it to set completely and allow for clean, beautiful slices. Secondly, if you’re in Europe and using tub-style cream cheese, remember that it often contains more moisture. It’s vital to pat it thoroughly dry with paper towels to remove any excess liquid before incorporating it into the filling, as this extra moisture can prevent the cheesecake from firming up as it should.
Absolutely! This pie is a fantastic make-ahead dessert, perfect for entertaining. You can prepare the homemade caramel sauce several days in advance and store it in the fridge; just warm it gently in the microwave for 15-20 seconds before use to make it pourable. The entire pie, including the crust and filling, can be assembled and chilled up to two days before serving. This allows the flavors to meld beautifully and the pie to set perfectly, making your event day much smoother.
Yes, you definitely can! While I’ve included a recipe for making your own delicious homemade salted caramel sauce, using a good quality store-bought version is a perfectly acceptable and time-saving alternative. It won’t compromise the overall deliciousness of your turtle pie.
Storage Recommendations for Your Turtle Pie
To maintain its optimal freshness, flavor, and texture, store your turtle pie in an airtight container in the refrigerator for up to 4 days. This dessert is best enjoyed cold, straight from the fridge. For the best presentation and whipped cream consistency, I highly recommend only adding the final whipped cream topping just before you plan to serve it.
Explore More Delicious Pie Recipes!
If you’ve loved this decadent no-bake turtle pie, you’re sure to enjoy these other fantastic pie recipes from our collection. Each offers a unique blend of flavors and textures, perfect for any occasion or craving.
- Pumpkin Custard Pie
- Easy Apple Oat Crumble Pie (Dutch Apple Pie)
- Oreo Peanut Butter Pie (No-Bake)
- Easy Cinnamon Pie
Have you tried making this irresistible turtle pie recipe? We’d love to see your creations! Make sure to tag me on Instagram @alpineellaand leave a review below to share your experience! For more delicious baking ideas and inspiration, you can also follow me on Pinterest. Happy baking!
Recipe Card

Turtle Pie
Ella Gilbert
Pin Recipe
Save RecipeSaved!
Equipment
-
9″ springform pan
-
Food processor or blender
-
Electric mixer (handheld or stand mixer with whisk and paddle attachments)
-
Rubber spatula
-
Small offset spatula (optional, for smoothing)
-
Small saucepan (for caramel)
-
Piping bag and Wilton 1M tip (optional, for decoration)
Ingredients
Cheesecake Crust
- 24 Oreos
- 6 tablespoons unsalted butter melted
Cheesecake Filling
- 2 cups heavy cream
- ¼ cups sour cream room temperature
- 16 oz cream cheese room temperature, patted dry if from a tub
- 2 teaspoons vanilla extract
- 1 cup confectioners’ sugar sifted
- ½ cups salted caramel sauce store-bought, or use the homemade caramel recipe below
Homemade Salted Caramel (Optional)
- 1 cup granulated sugar
- 3 tablespoons unsalted butter cubed, at room temperature
- ½ cup heavy cream
- ½ teaspoon vanilla extract
- ½ teaspoon kosher salt
Toppings
- 1 cup pecans
- ½ cup salted caramel sauce
- ½ cup semi-sweet chocolate melted, for drizzling
- 1 cup heavy cream for whipped cream topping
Instructions
Crust Preparation
-
In a food processor or blender, pulse the Oreo cookies until they form fine, even crumbs. Pour the melted butter into the crumbs and mix thoroughly with a spoon or rubber spatula until the crumbs are completely moistened.
-
Press the buttered crumbs firmly and evenly into the bottom of a 9-inch springform pan that has been lined with parchment paper. Use the bottom of a measuring cup or a flat glass to ensure a compact and even crust. Place the pan in the freezer for at least 20 minutes to chill and set while you prepare the filling.
Cheesecake Filling
-
Using either a handheld mixer or a stand mixer fitted with the whisk attachment, whip the 2 cups of heavy cream in a clean bowl until stiff peaks form. This typically takes 4-5 minutes. Set aside the whipped cream.
-
In a stand mixer fitted with the paddle attachment, beat the room-temperature cream cheese until it is completely smooth and lump-free. Ensure the cream cheese is at room temperature to prevent a lumpy texture.
-
Add the sifted confectioners’ sugar, sour cream, ½ cup of salted caramel sauce, and vanilla extract to the beaten cream cheese. Beat on medium speed until all ingredients are well combined and the mixture is perfectly smooth and creamy. Scrape down the sides of the bowl as needed to ensure even mixing. Stop the mixer once smooth.
-
Gently fold the reserved whipped cream into the cream cheese mixture using a rubber spatula. Use a light touch to avoid deflating the whipped cream. Continue folding until the whipped cream is fully incorporated and the filling is uniform.
-
Retrieve the chilled crust from the freezer. Pour the cheesecake filling evenly into the crust. Use a small offset spatula or the back of a spoon to smooth the top surface of the filling. Cover the springform pan tightly with plastic wrap and chill in the refrigerator for a minimum of 12 hours to allow the pie to set completely.
Homemade Salted Caramel (Optional Steps)
-
Place a small, heavy-bottomed saucepan over medium heat on your stove. Add the granulated sugar ¼ cup at a time, allowing each addition to dissolve completely and caramelize before adding the next ¼ cup. Stir occasionally with a heatproof spatula.
-
Continue cooking and stirring until all the sugar has dissolved and transformed into a beautiful dark amber color. Immediately turn off the heat to prevent burning.
-
Carefully add the cubed room-temperature butter, one piece at a time, stirring constantly with your heatproof spatula. Be cautious as the mixture may bubble and sputter. Once the butter is incorporated, slowly pour in the heavy cream, followed by the salt and vanilla extract, continuing to stir until smooth. Let the caramel cool until it thickens significantly. If not using immediately, transfer to an airtight container and refrigerate. When ready to use, warm in the microwave for 15-20 seconds until pourable.
Assembly and Finishing Touches
-
After at least 12 hours of chilling, remove the cheesecake from the refrigerator. To release it from the springform pan, gently run a thin butter knife or an offset spatula along the inner edges of the pan before unclipping and removing the sides.
-
In a bowl, combine the 1 cup of pecans with the remaining ½ cup of salted caramel sauce, tossing until the pecans are thoroughly coated. Generously spoon this caramel pecan mixture over the top of the chilled pie. You may have a little caramel leftover, which is perfect for an extra drizzle!
-
Melt your ½ cup of semi-sweet chocolate. Place chocolate in a microwave-safe bowl and melt in 15-second increments, stirring well after each, until smooth and fully melted. Drizzle the melted chocolate artistically over the caramel pecans on the pie using a spoon.
-
For the final flourish, whip the additional 1 cup of heavy cream in a large bowl with a handheld mixer or stand mixer (whisk attachment) until stiff peaks form. Transfer the whipped cream to a piping bag fitted with your desired tip (like a Wilton 1M) and pipe a beautiful border along the edge of the pie. Slice, serve, and enjoy your spectacular homemade turtle pie!
Video Tutorial
Chef’s Notes & Tips
Cream Cheese Quality: I always use full-fat Philadelphia cream cheese for its superior richness and texture. If you’re based in Europe and your cream cheese comes in tubs, it’s essential to pat the cream cheese dry with a paper towel before use. This step removes excess moisture that could otherwise prevent your cheesecake filling from setting firmly.
Heavy Cream Alternatives: For our UK readers, “heavy cream” refers to double cream. If you prefer, you can also substitute the heavy cream with an equal amount of store-bought Cool Whip for convenience, ensuring a similar light and creamy texture.
Caramel Sauce Choices: While a homemade salted caramel adds an unparalleled depth of flavor, feel free to use your favorite high-quality store-bought salted caramel instead. It’s a great time-saver without sacrificing deliciousness!
Advance Preparation: This pie is an excellent make-ahead dessert! You can prepare the entire pie (crust and filling) up to 2 days in advance. Simply keep it covered tightly in the fridge and hold off on adding the caramel pecans, chocolate drizzle, or whipped cream until just before you are ready to serve.
Optimal Storage: Store any leftover turtle cheesecake pie in an airtight container in the refrigerator for up to 5 days. It’s best served chilled.
Nutritional Information
