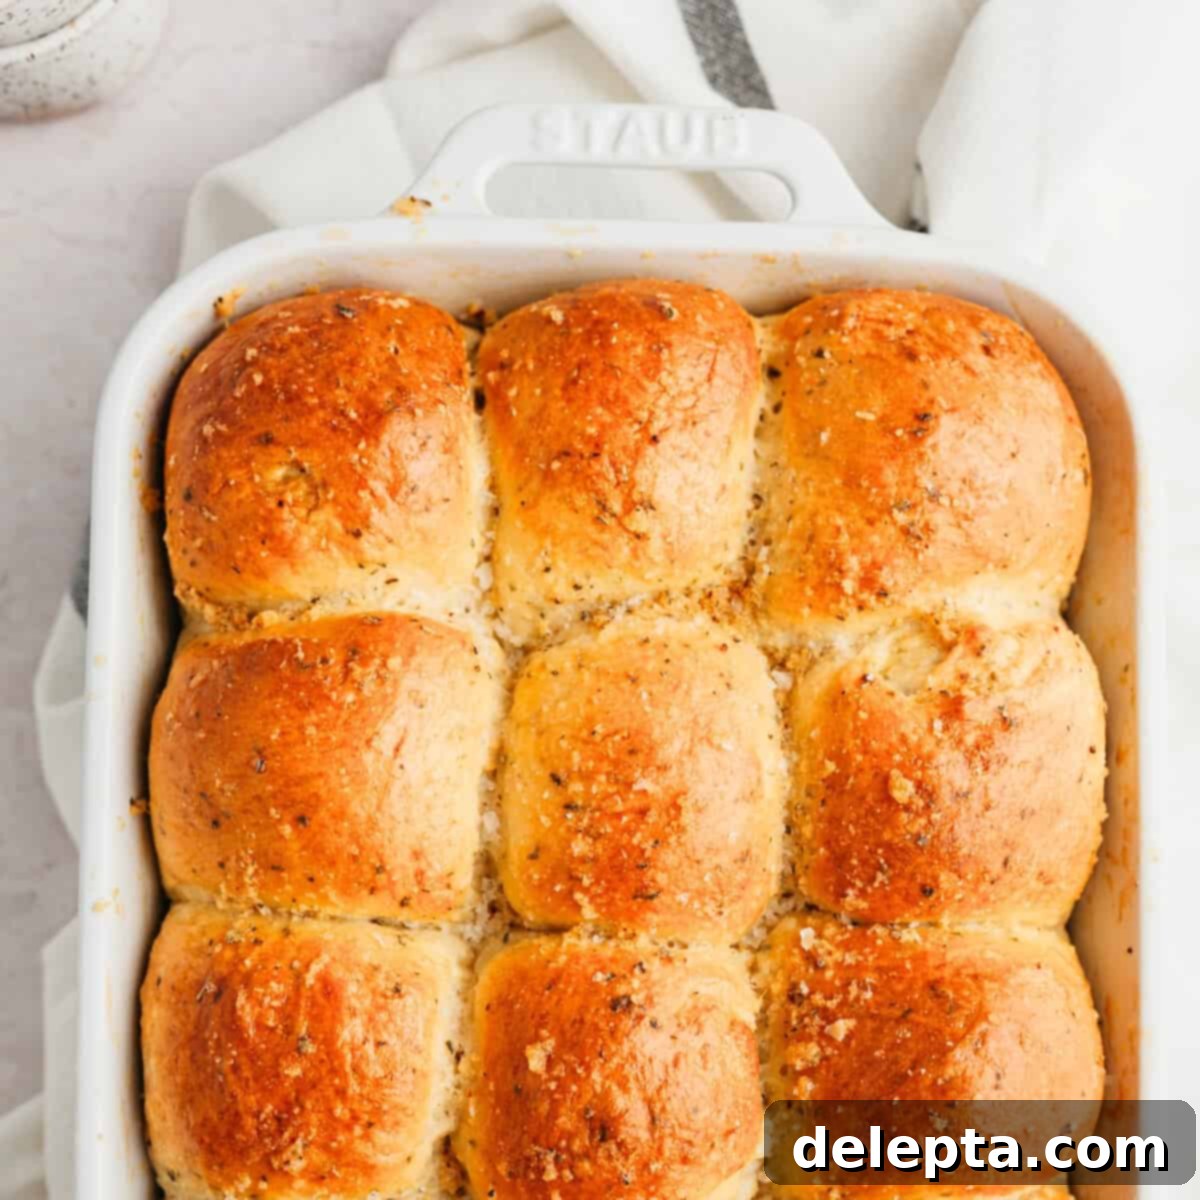
Irresistible Garlic Herb Brioche Dinner Rolls: Your Guide to Perfect Fluffy Homemade Bread
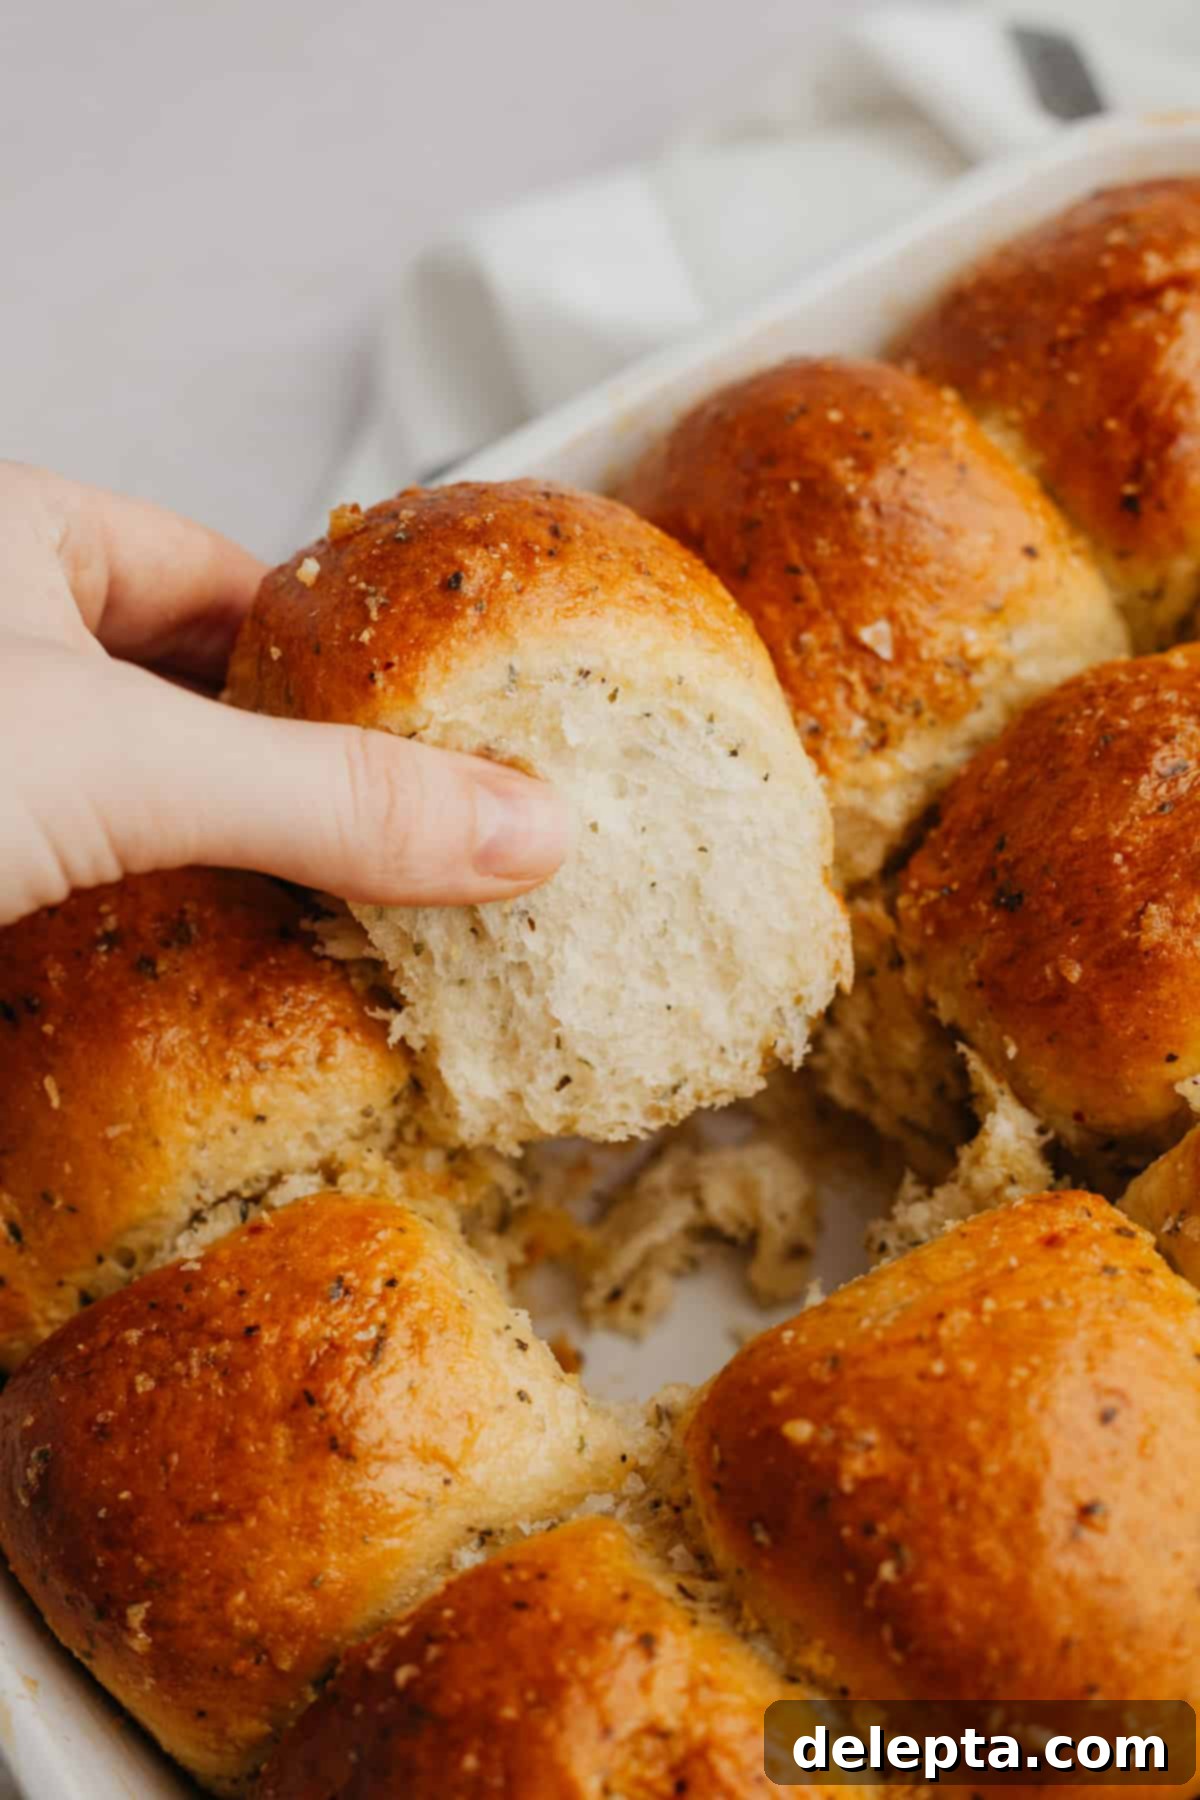
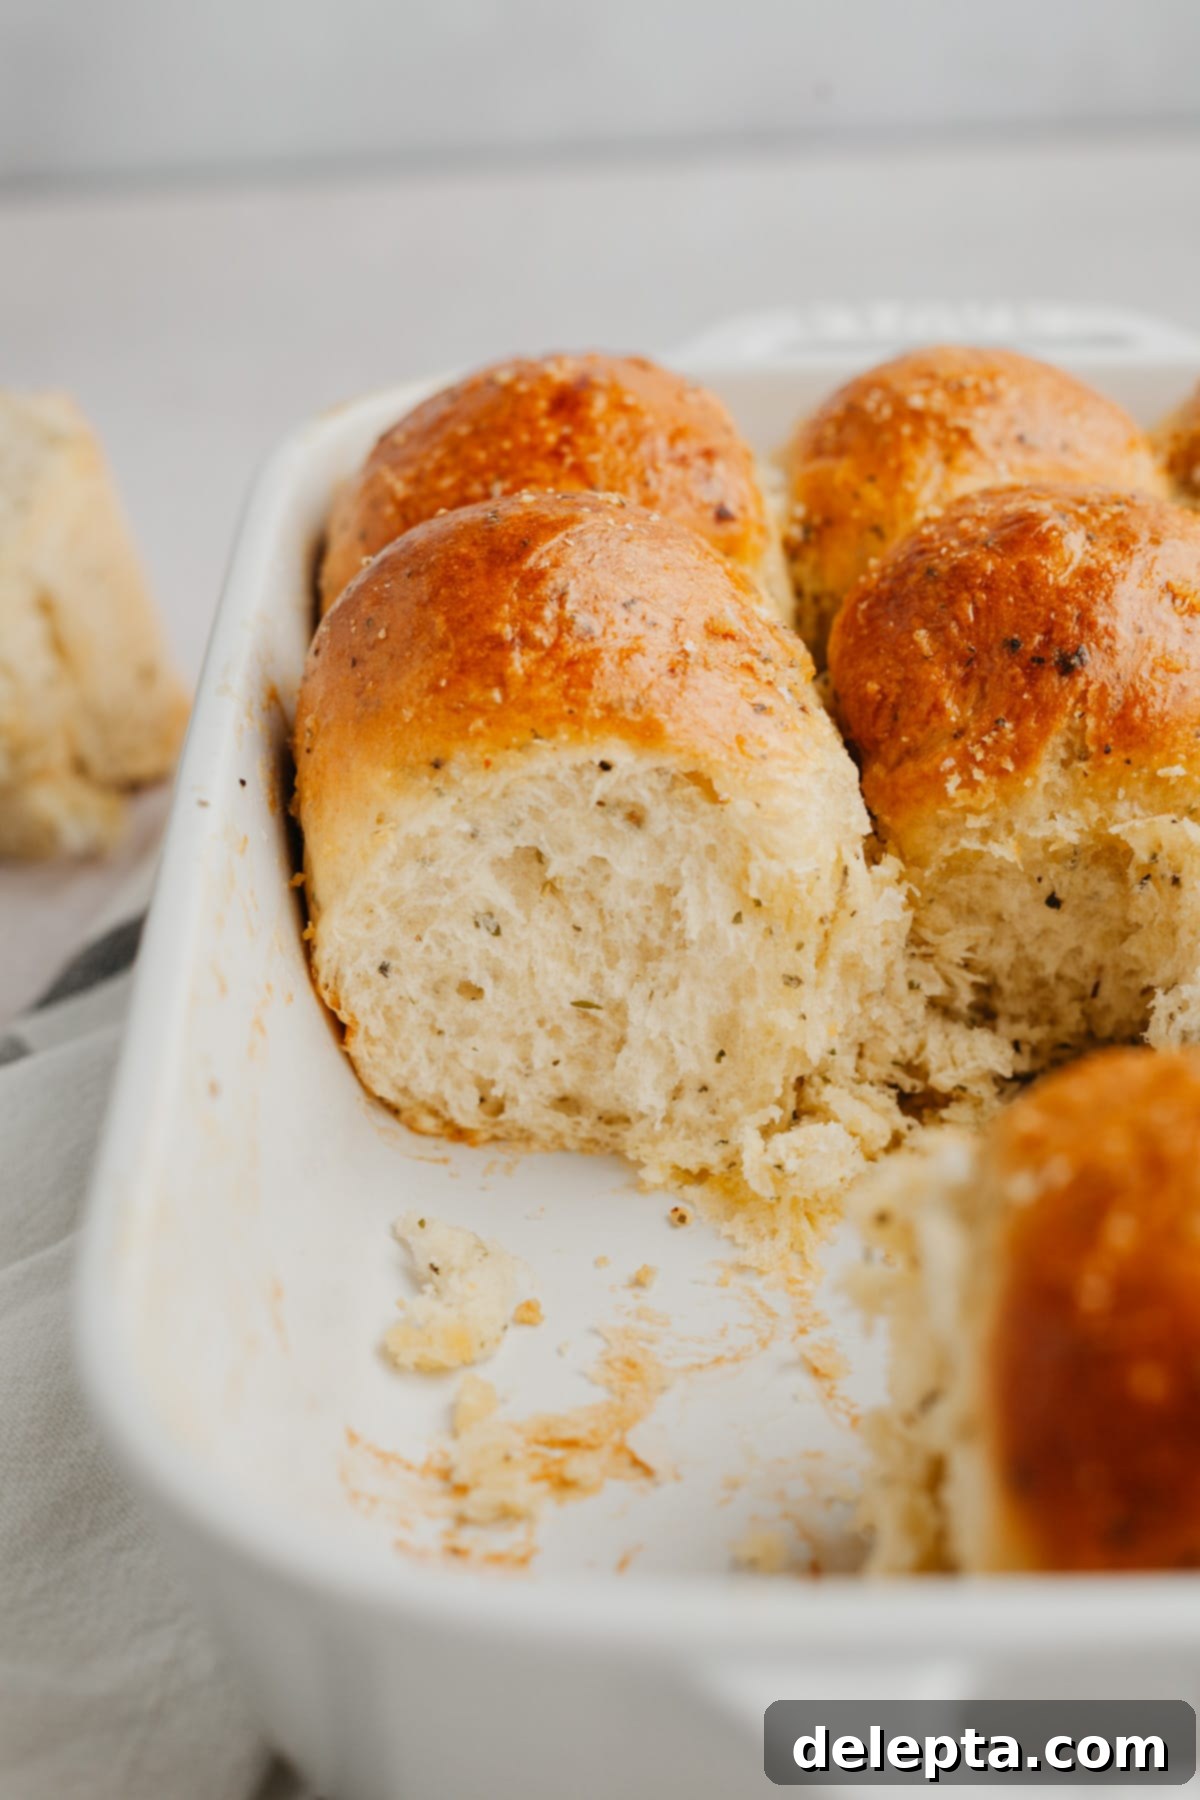
These garlic dinner rolls are more than just a side dish; they are the perfect centerpiece for your holiday spread or a comforting addition to any meal. Imagine soft, cloud-like brioche rolls, generously infused with aromatic garlic and brushed with a fragrant garlic herb butter. These aren’t just any rolls; they’re an experience in texture and flavor, designed to be extra soft, fluffy, and utterly irresistible.
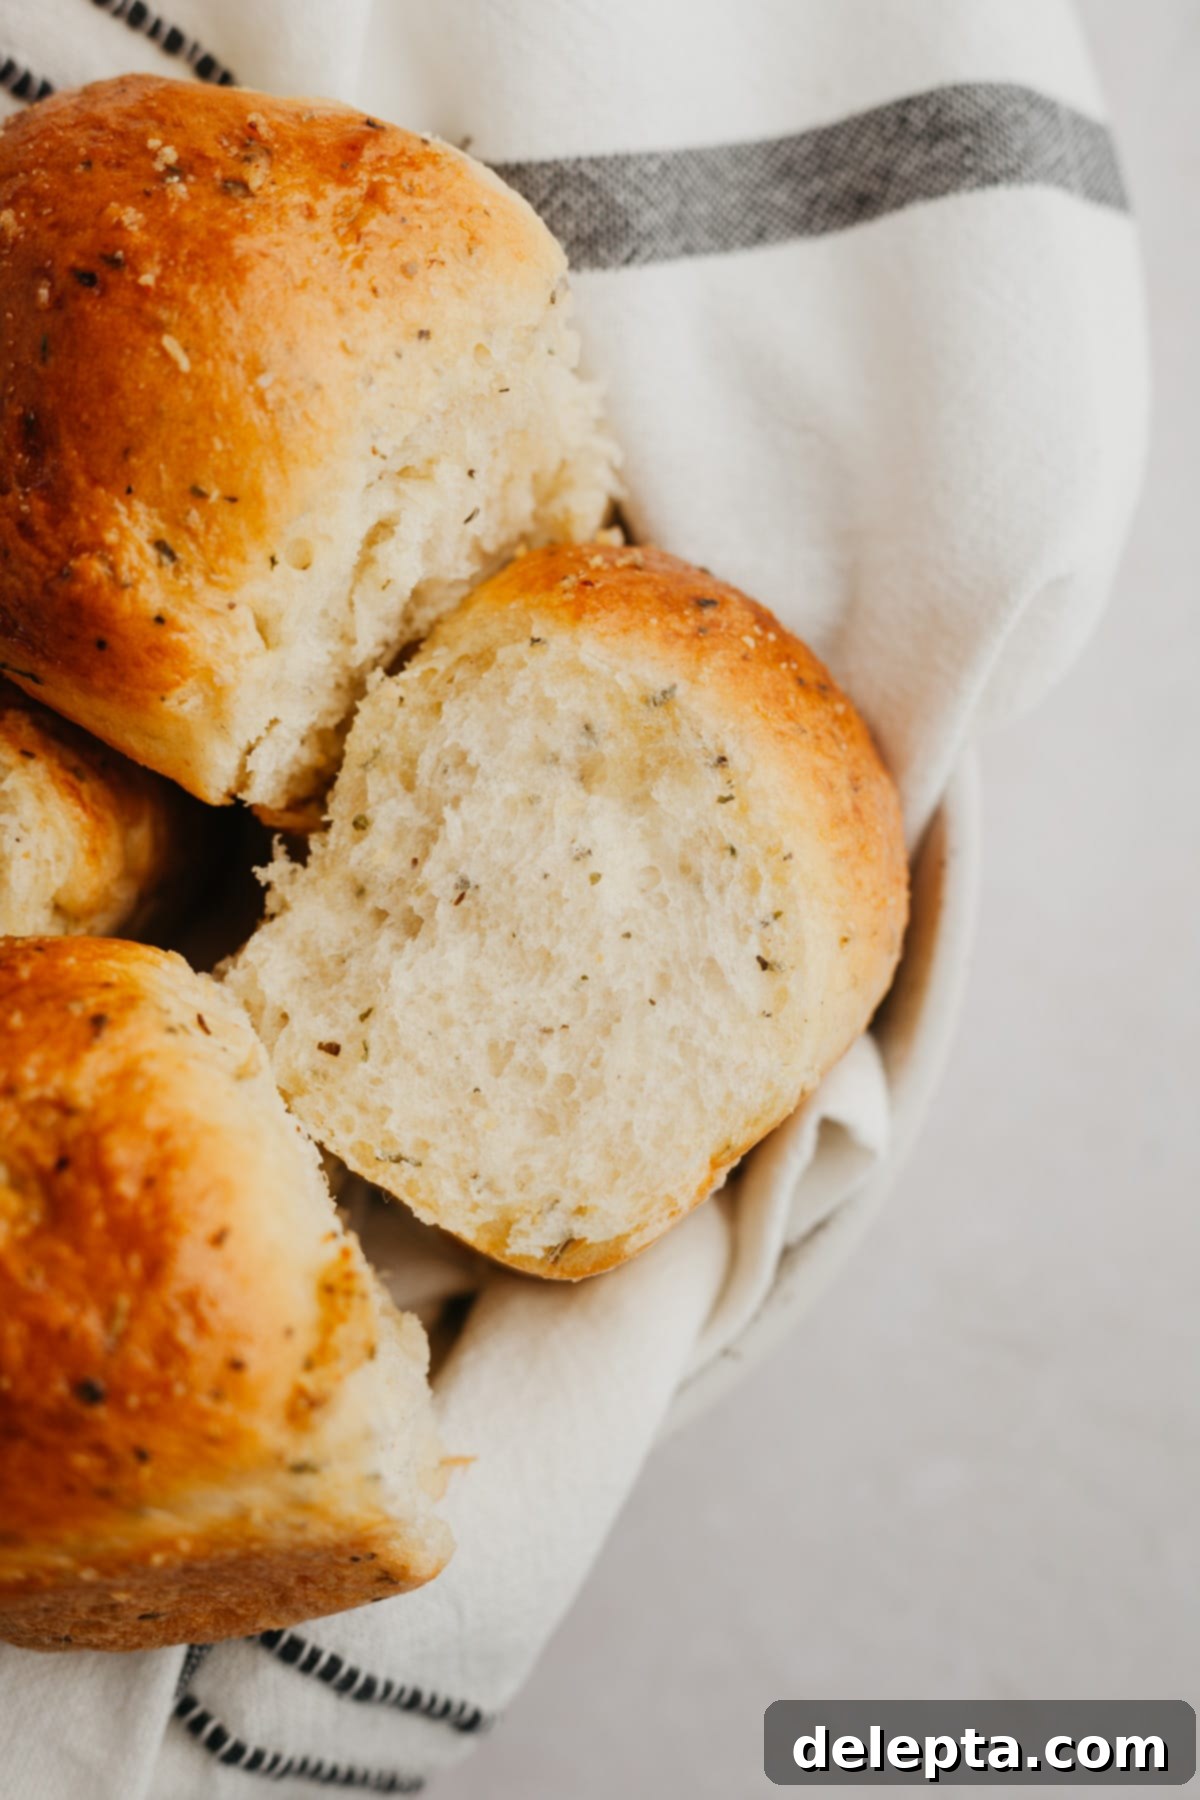
After perfecting my classic brioche dinner roll recipe last year, I knew I had to create a garlic and herb variation. There’s something truly magical about working with brioche dough. Its richness, achieved through a generous addition of butter and eggs, transforms into a remarkably soft, tender, and fluffy bread that’s simply unmatched by other doughs. This recipe takes that beloved brioche foundation and elevates it with savory garlic and aromatic herbs, creating a side dish that will undoubtedly steal the show.
These tender, homemade dinner rolls are ideal for any festive occasion. Picture them gracing your Thanksgiving table, adding a touch of elegance to Friendsgiving, or being the star alongside your Christmas dinner. Throughout my childhood, helping my mom prepare our elaborate holiday feasts, I always dreamt of making impressive, giant bread rolls that everyone would adore. These garlic herb brioche rolls fulfill that dream, bringing warmth and incredible flavor to any gathering, big or small.
Even if you’re not planning a grand feast, these versatile rolls are a fantastic accompaniment to a variety of dishes. Their savory notes make them a perfect pairing with a hearty potato and leek soup, a creamy and comforting chicken and broccoli cheddar soup, or even a flavorful spicy vodka pasta dish. They soak up rich sauces beautifully and add a delightful texture to any meal, transforming an ordinary dinner into something truly special.
[feast_advanced_jump_to]
Why You’ll Fall in Love with These Garlic Brioche Rolls!
- Unbelievably Super Soft & Rich: The secret to these incredibly soft garlic butter rolls lies in the enriched brioche dough. Unlike standard bread dough, brioche is generously made with eggs, butter, and milk. This creates a dough that is not only much softer and richer but also has a more delicate crumb and a beautiful golden hue. Each bite is a luxurious experience, melting in your mouth with its tender texture.
- Bursting with Garlic & Herb Flavor: These rolls are a true celebration of flavor. The dough itself is infused with fragrant garlic and dried herbs, building a foundational layer of savory taste. But the magic doesn’t stop there! Immediately after baking, while still warm, these irresistible rolls are generously brushed with a potent herb and garlic butter. This double-layer of flavor ensures that every part of the roll, from the crust to the very center, delivers a delightful garlicky punch. Prepare for your entire house to be filled with the most AMAZING aroma – it’s a sensory delight that will have everyone eager for a taste!
- Surprisingly Easy to Make: Don’t be intimidated if this is your first time venturing into baking with yeast. I promise you, this recipe is designed to be straightforward and easy to follow! While yeast baking does require a little patience for the dough to rise, the active preparation steps are simple. The process is incredibly rewarding, and you’ll gain confidence with each successful batch. Just remember to set aside the necessary rising time, and you’ll be well on your way to baking perfection.
- Far Superior Homemade Quality: Once you taste these homemade garlic bread rolls, you’ll never go back to the store-bought versions. The difference in freshness, flavor, and texture is truly incomparable. Homemade rolls offer a depth of flavor and a tenderness that pre-packaged alternatives simply cannot achieve. Plus, there’s immense satisfaction in baking something so delicious from scratch, knowing exactly what ingredients went into it.
Essential Ingredients for Your Garlic Rolls
Crafting these delectable garlic dinner rolls requires a selection of quality ingredients. Here’s a closer look at what you’ll need and why each component is important:
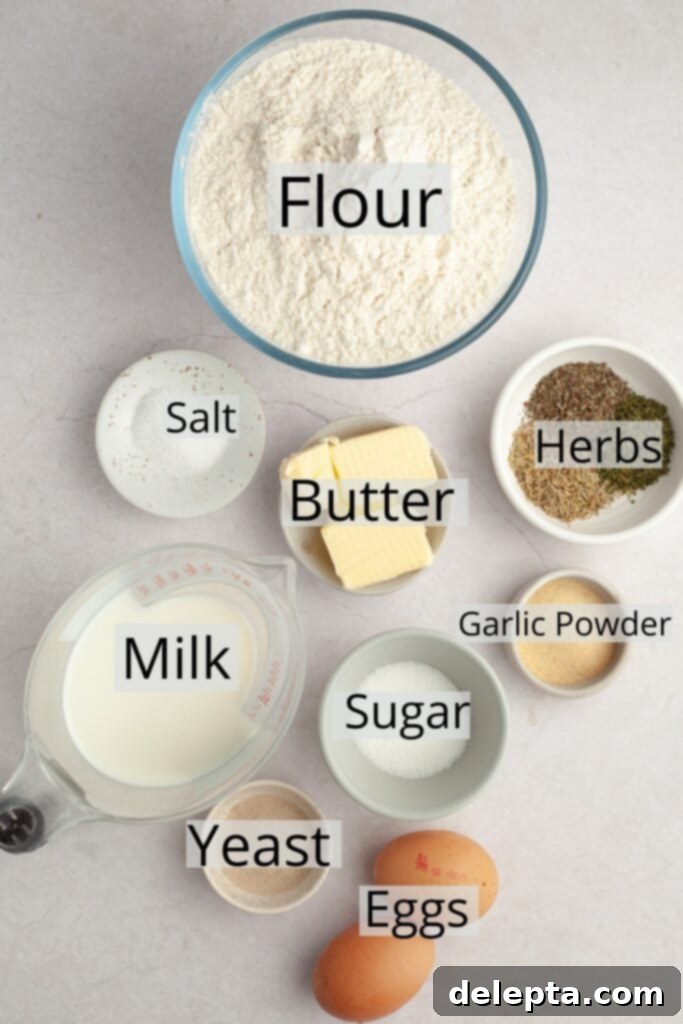
- Flour: For the best results, I recommend using bread flour. Its higher protein content contributes to stronger gluten development, resulting in a wonderfully chewy yet tender crumb typical of brioche. However, if you don’t have bread flour, you can confidently swap it out for all-purpose flour; your rolls will still be delicious, just perhaps a touch less chewy.
- Milk: Always opt for full-fat milk or whole milk in this recipe. The higher fat content of whole milk adds incredible richness, moisture, and a tender texture to the brioche dough, contributing significantly to its signature softness.
- Sugar: We incorporate just a small amount of white sugar into the brioche dough. This sugar serves multiple purposes: it feeds the yeast, helping it activate and produce carbon dioxide for a good rise, and it also contributes to the beautiful golden-brown color and subtle sweetness of the finished rolls.
- Yeast: Yeast is the leavening agent that makes these rolls rise and become fluffy. I’m using instant yeast here, which can be added directly to the dry ingredients without prior activation. If you opt for active dry yeast, remember that it needs to be activated first by dissolving it in warm water (around 105-115°F or 40-46°C) with a pinch of sugar and letting it sit until foamy (about 5-10 minutes). Always check the expiration date on your yeast; expired yeast will not activate, and your dough will not rise.
- Unsalted Butter: Butter is a key ingredient in brioche, providing richness and flavor. I particularly love using European-style unsalted butter, which typically has a higher fat content than American butter, resulting in a much richer and creamier texture in the final product. Ensure your butter is at room temperature for the dough so it can incorporate smoothly.
- Eggs & Egg Yolk: The eggs contribute to the dough’s richness, color, and structure, making the rolls tender and moist. The additional egg yolk further enhances the richness and contributes to that desirable golden crumb. Make sure they are at room temperature.
- Herbs: For the bread dough, I’m using a blend of dried parsley, dried basil, and dried rosemary. These dried herbs infuse the dough with a wonderfully aromatic and savory flavor. Feel free to adjust the ratios or experiment with other dried herbs like oregano or thyme to suit your preference.
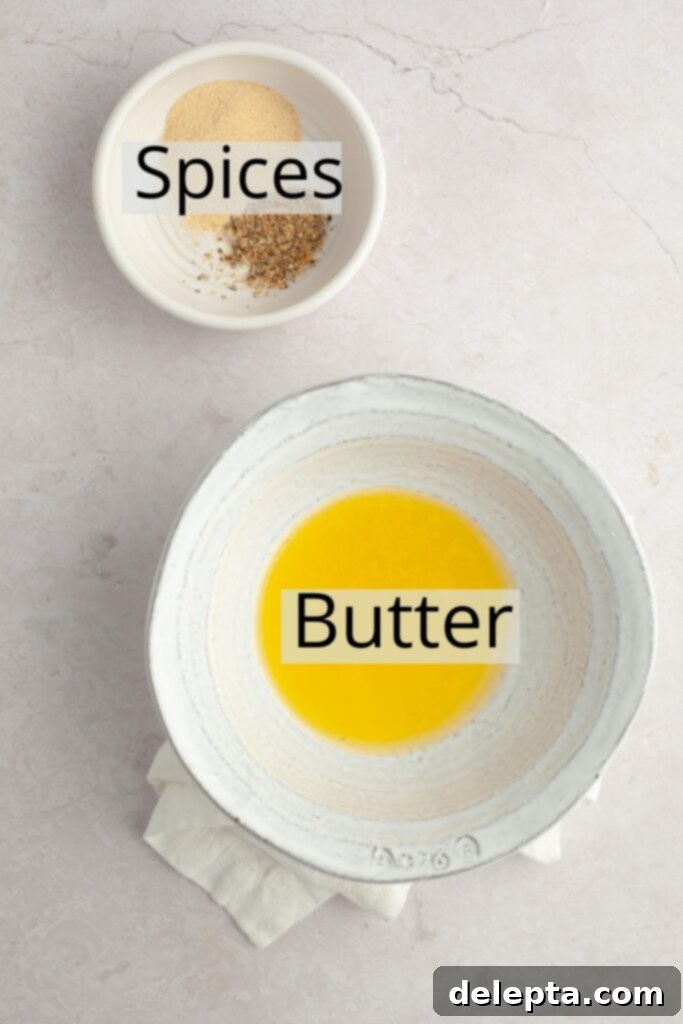
- Garlic: This recipe utilizes garlic powder for both the dough and the garlic herb butter. Garlic powder offers a consistent, mellow garlic flavor that distributes evenly. However, for the post-bake garlic butter, you can absolutely swap the garlic powder for 2 fresh garlic cloves, finely minced. Be aware that using fresh minced garlic will deliver a much punchier and more intense garlic flavor, which some garlic lovers truly enjoy!
- Salt: Fine salt balances the flavors and also plays a crucial role in controlling yeast activity and strengthening the gluten structure in the dough. Flaky sea salt is used at the end for an extra burst of flavor and texture.
Easy Steps to Your Perfect Garlic Dinner Rolls
Follow these detailed steps to create the most incredible homemade garlic dinner rolls:
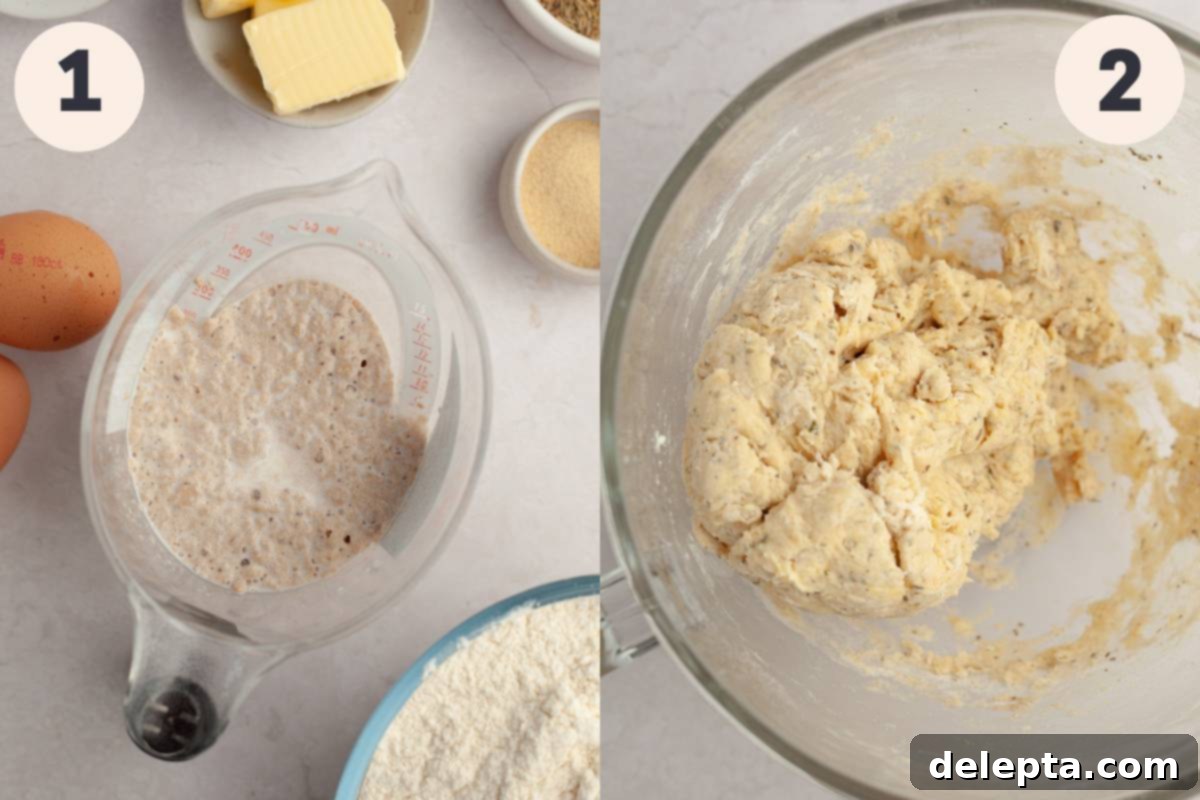
Step 1: Activate the Yeast. In a large jug or bowl, combine the warm milk (ensure it’s lukewarm, not hot, to avoid killing the yeast), one tablespoon of white sugar, and the instant yeast. Give it a gentle whisk to combine everything. Let this mixture sit undisturbed for about 10 minutes. During this time, the yeast will activate, consuming the sugar and producing bubbles, resulting in a foamy layer on top. This foam indicates your yeast is active and ready to work its magic!
Step 2: Prepare the Dough. Pour the activated yeast mixture into the bowl of a stand mixer. If you don’t have a stand mixer, a large mixing bowl and strong arms will work! Add the remaining white sugar, the large egg, egg yolk, softened unsalted butter, fine salt, garlic powder, and dried herbs. Finally, add the bread flour. Fit your stand mixer with the hook attachment and beat on low speed for 2-3 minutes until the ingredients come together and form a cohesive, shaggy dough. Increase the speed to medium and continue beating for another 2-3 minutes. The dough will be soft and somewhat sticky – this is normal for brioche. If it’s excessively sticky and hard to handle, you can add one more tablespoon of flour, but be careful not to add too much, as this can make the rolls tough.
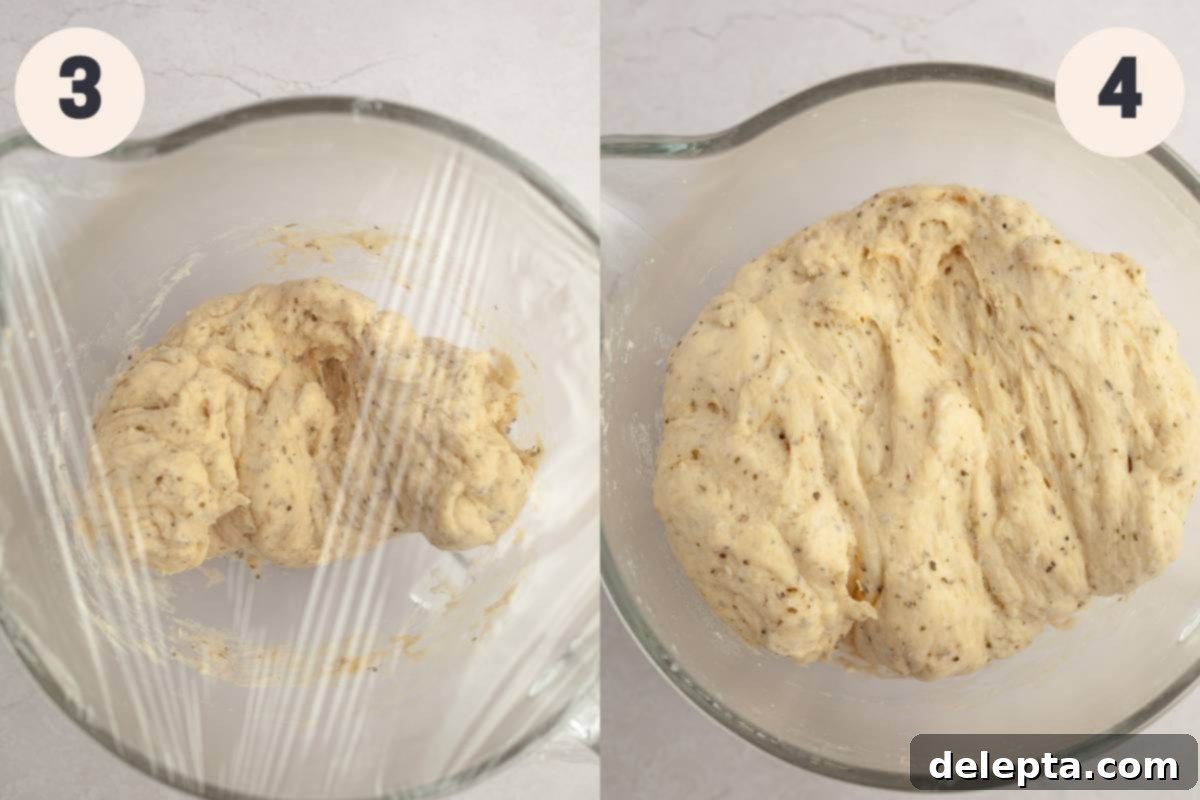
Step 3: First Rise (Bulk Fermentation). Lightly grease a clean large bowl with a neutral oil, such as vegetable oil, to prevent the dough from sticking. Transfer the dough into the oiled bowl, turning it once to coat all sides lightly. Cover the bowl tightly with a clean kitchen towel or plastic wrap. Place it in a warm, draft-free spot to rise for about an hour to an hour and a half. This initial rise allows the gluten to relax and flavors to develop.
Step 4: Check the Dough. By this point, your dough should have proudly doubled in size, becoming light and airy. The exact timing can vary; if your kitchen is particularly cold, or if you’re using active dry yeast instead of instant, it might take a bit longer for the dough to reach its full volume. Patience is key here!
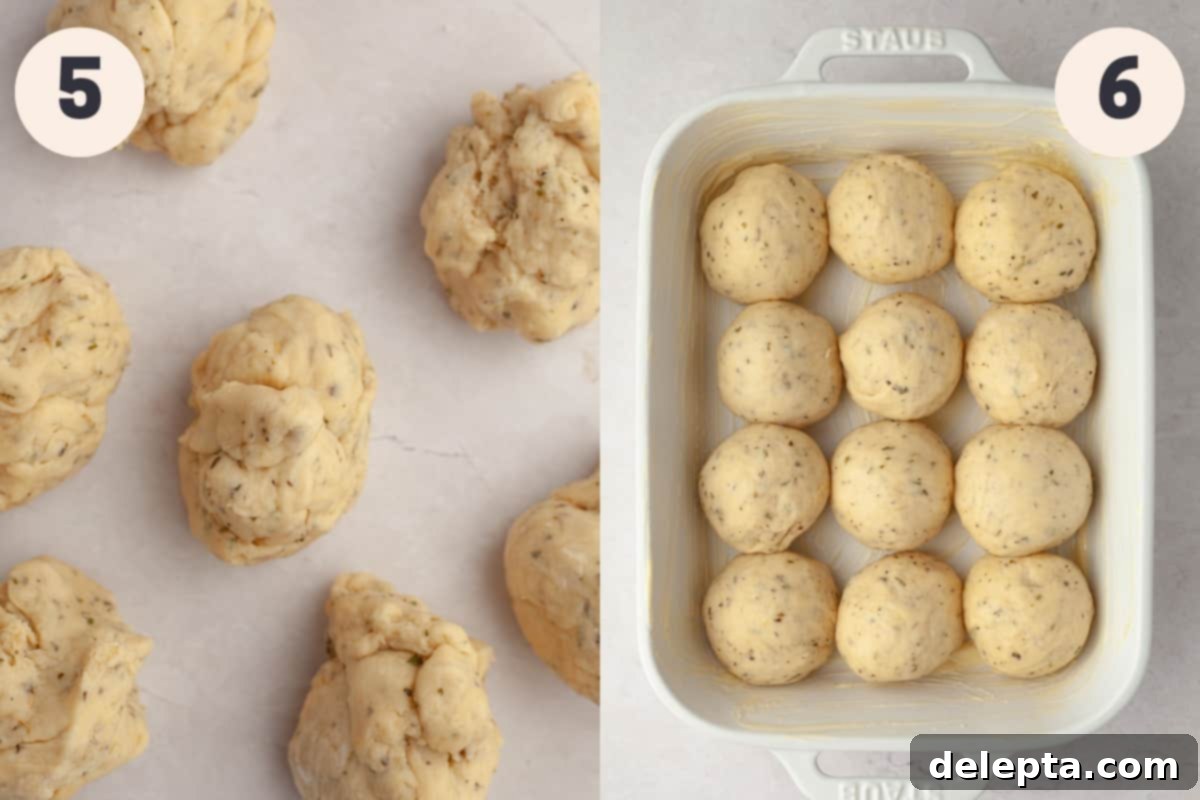
Step 5: Divide and Shape the Rolls. Gently deflate the risen dough by punching it down with your fist. Transfer the dough to a lightly floured surface. Using a bench scraper or a sharp knife, divide the dough into 12 equal pieces. For consistent sizing and baking, I highly recommend using a kitchen scale to weigh each piece, aiming for approximately 76 grams per roll. Take each piece and gently roll it on an unfloured surface to form a smooth, tight dough ball. The friction on the surface helps create tension, resulting in beautifully rounded rolls. If you’re unsure of the technique, watch the video provided in the recipe card below!
Step 6: Second Rise (Proofing). Lightly butter an 8×10 inch or 9×13 inch baking pan. Arrange the shaped dough balls evenly in the prepared pan. They should be relatively close but not quite touching at this stage. Cover the pan loosely with plastic wrap or a clean kitchen towel and let the rolls rise for another 45 minutes to an hour. Again, the exact rising time will depend on the warmth of your kitchen. The rolls should visibly increase in size and nearly touch each other, becoming puffy and airy.
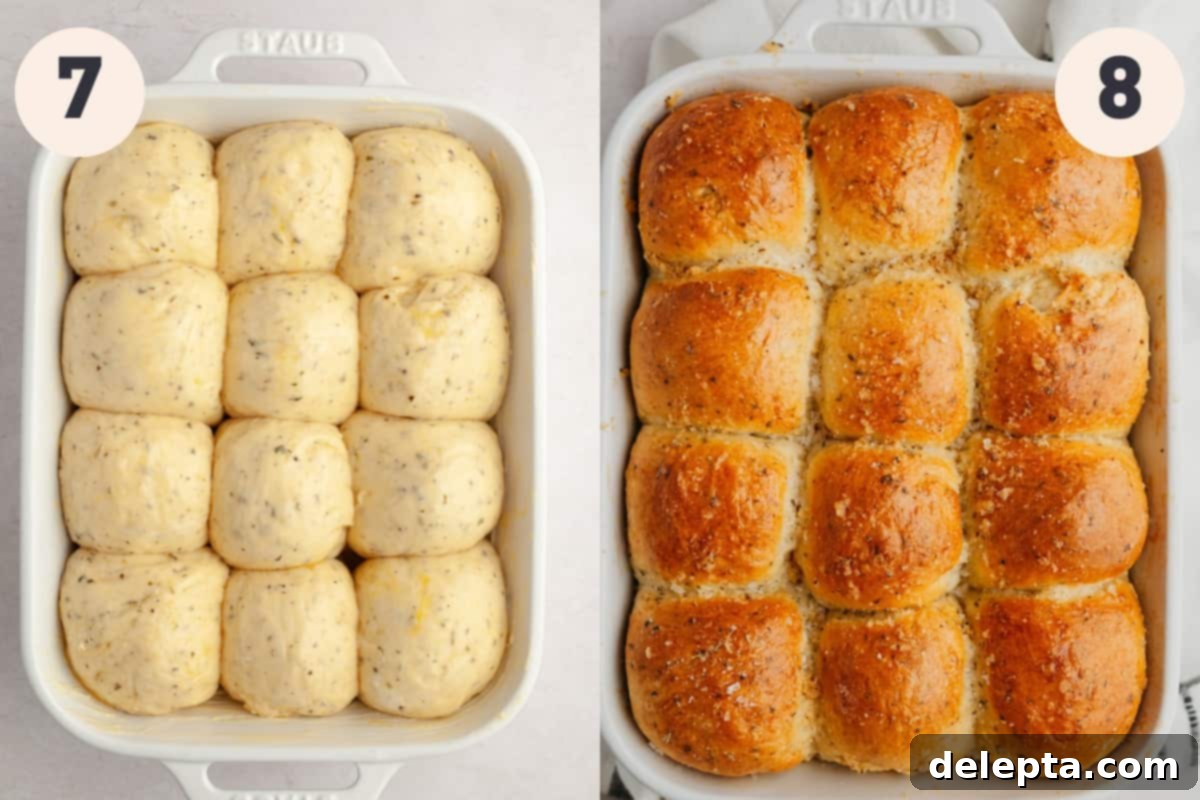
Step 7: Egg Wash and Preheat. While the rolls are completing their second rise, preheat your oven to 350°F (175°C). In a small bowl, whisk one large egg with a tablespoon of water to create an egg wash. Once the rolls have risen sufficiently, carefully remove the cover and gently brush the tops of each roll with the egg wash. This step is crucial as it gives the rolls that irresistible deep golden-brown color and a beautiful glossy finish after baking.
Step 8: Bake and Finish. Bake the garlic rolls in the preheated oven for 23-28 minutes, or until they are puffed up, deeply golden brown, and cooked through. While the rolls are baking, prepare the aromatic garlic herb butter: in a small bowl, whisk together the melted unsalted butter with the garlic powder and Italian seasoning (or your preferred herbs). As soon as the perfectly baked bread rolls emerge from the oven, immediately brush their warm tops generously with the melted garlic herb butter using a pastry brush. For an extra touch of flavor and a pleasing textural contrast, sprinkle some flaky sea salt over the brushed rolls. Serve warm and enjoy these heavenly homemade garlic dinner rolls!
Expert Tips & Tricks for Perfect Brioche Garlic Rolls
Achieving bakery-quality garlic dinner rolls at home is easier than you think with these expert tips:
- Embrace Your Kitchen Scale: While cup measurements are provided, I always, always recommend using a kitchen scale when baking, especially for bread. Baking is a precise science, and a slight variation in flour measurement (which is very common with volume measuring) can significantly impact the dough’s hydration. Too much flour will result in dense, tough bread rolls that lack that signature brioche softness. A scale ensures accuracy and consistent, perfect results every time.
- Customize Your Herbs: I’ve used a blend of dried herbs in both the bread dough and the garlic butter topping for convenience and consistent flavor. However, feel free to get creative! If you prefer fresh herbs, chop them finely and adjust the quantities to taste (you’ll typically need more fresh herbs than dried). Rosemary, thyme, oregano, and chives are all wonderful additions that complement garlic beautifully.
- Choosing the Right Baking Dish: This recipe has been thoroughly tested and works wonderfully in both a 9×13 inch and an 8×10 inch baking pan. The 8×10 inch pan will yield slightly taller, more compact rolls, which I personally find aesthetically pleasing and delightfully soft. If you’re using a metal baking pan, I strongly recommend lining it with parchment paper to prevent any sticking to the bottom, ensuring your beautiful rolls come out perfectly intact. A ceramic pan often has a natural non-stick quality, but parchment is still a good safeguard.
- Don’t Skip the Egg Wash: Brushing the dough with an egg wash (a whisked egg mixed with a tablespoon of water) before baking might seem like a small step, but it makes a huge difference. This simple coating is responsible for the rolls’ gorgeous deep golden-brown color and their subtly shiny, professional-looking crust. It also helps to create a slightly crisp exterior that contrasts beautifully with the soft interior.
- Room Temperature Ingredients are Key: For optimal dough development and yeast activity, ensure all your dairy and eggs are at room temperature before you begin. Cold ingredients can shock the yeast and slow down the rising process, affecting the final texture of your rolls. Plan ahead and pull them out of the fridge at least an hour before you start mixing.
Frequently Asked Questions About Garlic Dinner Rolls
The “poke test” is your best friend here! When the dough balls are in the pan for their second rise, gently poke one of them with your finger. If the dent springs back slowly but not completely, leaving a slight indentation, your dough is perfectly proofed and ready for the oven. If it bounces back immediately, the dough needs more time to rise. If a dent stays in the dough and doesn’t bounce back at all, the dough is likely over-proofed. Don’t worry if it’s slightly over-proofed, they’ll still be tasty, but might not rise as much in the oven.
Absolutely! Adding cheese is a fantastic idea for an even more indulgent roll. I recommend grating some fresh Parmesan cheese or a blend of Italian cheeses over the tops of the rolls just before you brush them with the egg wash and pop them into the oven. The cheese will melt and become beautifully golden and bubbly, adding a delicious salty, savory dimension to your garlic rolls.
Yes, you certainly can use fresh garlic! For the dough, you could mince 2-3 cloves very, very finely and add them with the other ingredients. For the post-bake garlic butter, 2 finely minced fresh garlic cloves work wonderfully. Just be aware that fresh garlic has a much more potent, punchier flavor than dried garlic powder. Adjust the quantity to your personal preference for garlic intensity. If you love a strong garlic kick, fresh is the way to go!
Expand Your Baking Repertoire: Try These Recipes Next!
- Classic Brioche Dinner Rolls
- Cinnamon Rolls with Apple Pie Filling
- Fluffy Cornbread (No Buttermilk Needed!)
- Creamy Pumpkin Custard Pie
Have you made this recipe? Please rate the recipe below! Don’t forget to follow me on Instagram @alpineella and Pinterest!
Recipe Card: Garlic Dinner Rolls
Fluffy Garlic Herb Brioche Dinner Rolls
Ella Gilbert
Pin Recipe
Save RecipeSaved!
Equipment
-
8×10″ baking pan you can also use a 9×13 pan for slightly flatter rolls
-
Stand mixer with hook attachment
-
Kitchen scale (highly recommended for accuracy)
-
Large mixing bowls
-
Pastry brush
Ingredients
For the Brioche Dinner Rolls
- 1 cup whole milk lukewarm (approx. 105-115°F / 40-46°C)
- 2 ¼ teaspoons instant yeast
- 2 tablespoons white sugar (1 tbsp for yeast activation, 1 tbsp for dough)
- 4 tablespoons unsalted butter room temperature
- 1 large egg room temperature
- 1 large egg yolk room temperature
- 1 ½ teaspoons fine salt
- 4 ⅛ cups bread flour (or all-purpose flour)
- 1 ½ teaspoons dried rosemary
- 1 ½ teaspoons dried parsley
- 1 ½ teaspoons dried basil
- 2 teaspoons dried garlic powder
For the Topping & Glaze
- 1 large egg room temperature (for egg wash)
- 2 tablespoons unsalted butter melted
- 1 teaspoon garlic powder (for garlic butter)
- ½ teaspoon Italian seasoning (or a mix of dried parsley, basil, rosemary for garlic butter)
- flakey sea salt (for sprinkling after baking)
Instructions
-
In a large jug or bowl, whisk together the warm whole milk, 1 tablespoon of white sugar, and instant yeast. Let this mixture sit for 10 minutes, or until a foamy layer appears on the surface, indicating the yeast is active.1 cup whole milk, 2 ¼ teaspoons instant yeast, 2 tablespoons white sugar
-
Pour the milk-yeast mixture into the bowl of a stand mixer fitted with the hook attachment. Add the remaining 1 tablespoon of sugar, 1 large egg, 1 large egg yolk, room temperature butter, fine salt, garlic powder, and dried herbs. Finally, add the bread flour. Beat on low speed for 2 minutes until the dough starts to come together. Increase the speed to medium and beat for another 2-3 minutes until the dough is smooth but still soft and slightly sticky. If the dough is too sticky to handle, add an additional tablespoon of flour, but be cautious not to add too much.4 tablespoons unsalted butter, 1 large egg, 1 large egg yolk, 1 ½ teaspoons fine salt, 4 ⅛ cups bread flour, 1 ½ teaspoons dried rosemary, 1 ½ teaspoons dried parsley, 1 ½ teaspoons dried basil, 2 teaspoons dried garlic powder
-
Lightly oil a large, clean bowl with a neutral vegetable oil. Transfer the dough to this bowl, turning it once to coat all sides with oil. Cover the bowl with a clean kitchen towel or plastic wrap. Let the dough rise in a warm, draft-free place for 1 to 1 ½ hours, or until it has doubled in size. Note: Rising time can vary depending on your kitchen’s temperature.
-
Generously grease an 8×10 inch or 9×13 inch baking pan with butter.
-
Once the dough has doubled, gently deflate it with your fist. Transfer the dough onto a clean, unfloured surface. Use a bench scraper or pizza wheel to divide the dough into 12 equal pieces. For best consistency, I recommend weighing each piece; they should be approximately 76 grams each.
-
To shape each roll, gather the edges of a dough piece and pinch them together at the bottom to form a smooth top. Place the dough ball seam-side down on your unfloured counter. Cup your hand over the dough ball and roll it in a circular motion with light pressure until the seam is sealed and you have a smooth, taut, round ball. Refer to the video in the recipe card if you need a visual guide for this technique. Place the shaped dough balls into your prepared buttered pan.
-
Cover the pan loosely with a clean kitchen towel or cling film and let the rolls rise for a second time, for about 1 hour, or until they are visibly puffy and nearly touching each other. Meanwhile, preheat your oven to 350°F (175°C). In a small bowl, whisk one large egg with a tablespoon of water to create an egg wash. Once the rolls have sufficiently risen, carefully remove the cover and brush each roll generously with the egg wash for a beautiful golden crust.1 large egg
-
Bake the rolls for 23-28 minutes, or until they are puffed up and deep golden brown. While the rolls are baking, prepare the garlic herb butter: in a small bowl, whisk together the melted unsalted butter, 1 teaspoon of garlic powder, and ½ teaspoon of Italian seasoning. As soon as the rolls come out of the oven, immediately brush their tops generously with the melted garlic butter mixture and sprinkle with flaky sea salt. Serve warm and enjoy!2 tablespoons unsalted butter, 1 teaspoon garlic powder, flakey sea salt, ½ teaspoon Italian seasoning
Video Tutorial
Chef’s Notes & Tips
To ensure your dough comes together smoothly and the yeast activates optimally, it’s essential that all your perishable ingredients, including milk, eggs, and butter, are at room temperature before you begin baking. Plan ahead and take them out of the refrigerator at least an hour or two before you start your recipe prep.
Butter Matters: I consistently use European-style unsalted butter in my recipes. This type of butter typically boasts a higher butterfat content, which contributes significantly to the incredibly rich, creamy, and tender texture of the brioche dough, making your rolls exceptionally delicious. If you can find it, it’s worth the investment!
Freezing for Freshness: These garlic dinner rolls freeze beautifully! Once baked and completely cooled, place them in a freezer-safe bag or airtight container. They can be frozen for up to 3 months without losing their quality. To serve, simply remove them from the freezer the night before and let them thaw in the refrigerator. The next morning, preheat your oven to 350°F (175°C) and warm the defrosted rolls for about 10 minutes until heated through and soft again.
Yeast Choices: This recipe is written for instant yeast, which can be directly combined with your dry ingredients. If you prefer to use active dry yeast, you’ll need to activate it first. Dissolve it in the warm milk and 1 tablespoon of sugar in Step 1, letting it sit for 5-10 minutes until foamy, before proceeding with the rest of the recipe. Note that active dry yeast might also require slightly longer rising times.
Pan Size Aesthetics: I’ve successfully tested these bread rolls in both a 9×13 inch and an 8×10 inch baking pan. While both sizes work, using the 8×10 inch pan will result in taller, more uniform rolls as the dough has less space to spread horizontally. This yields a lovely, plump appearance for your dinner rolls, which I personally adore!
Make-Ahead Magic: To streamline your baking, you can prepare this recipe partially in advance. Follow all instructions up until the end of Step 6, where the shaped dough balls are placed in the baking dish for their second rise. Instead of letting them rise for the full hour, allow them to proof for just 30 minutes at room temperature. Then, cover the pan tightly with plastic wrap and transfer it to the refrigerator to retard the rise overnight (for 8-12 hours). The next morning, take the pan out of the fridge and let the rolls come to room temperature for about 1 hour before proceeding with the egg wash and baking. This technique allows for fresh-baked rolls with minimal morning effort!
Nutrition Information
