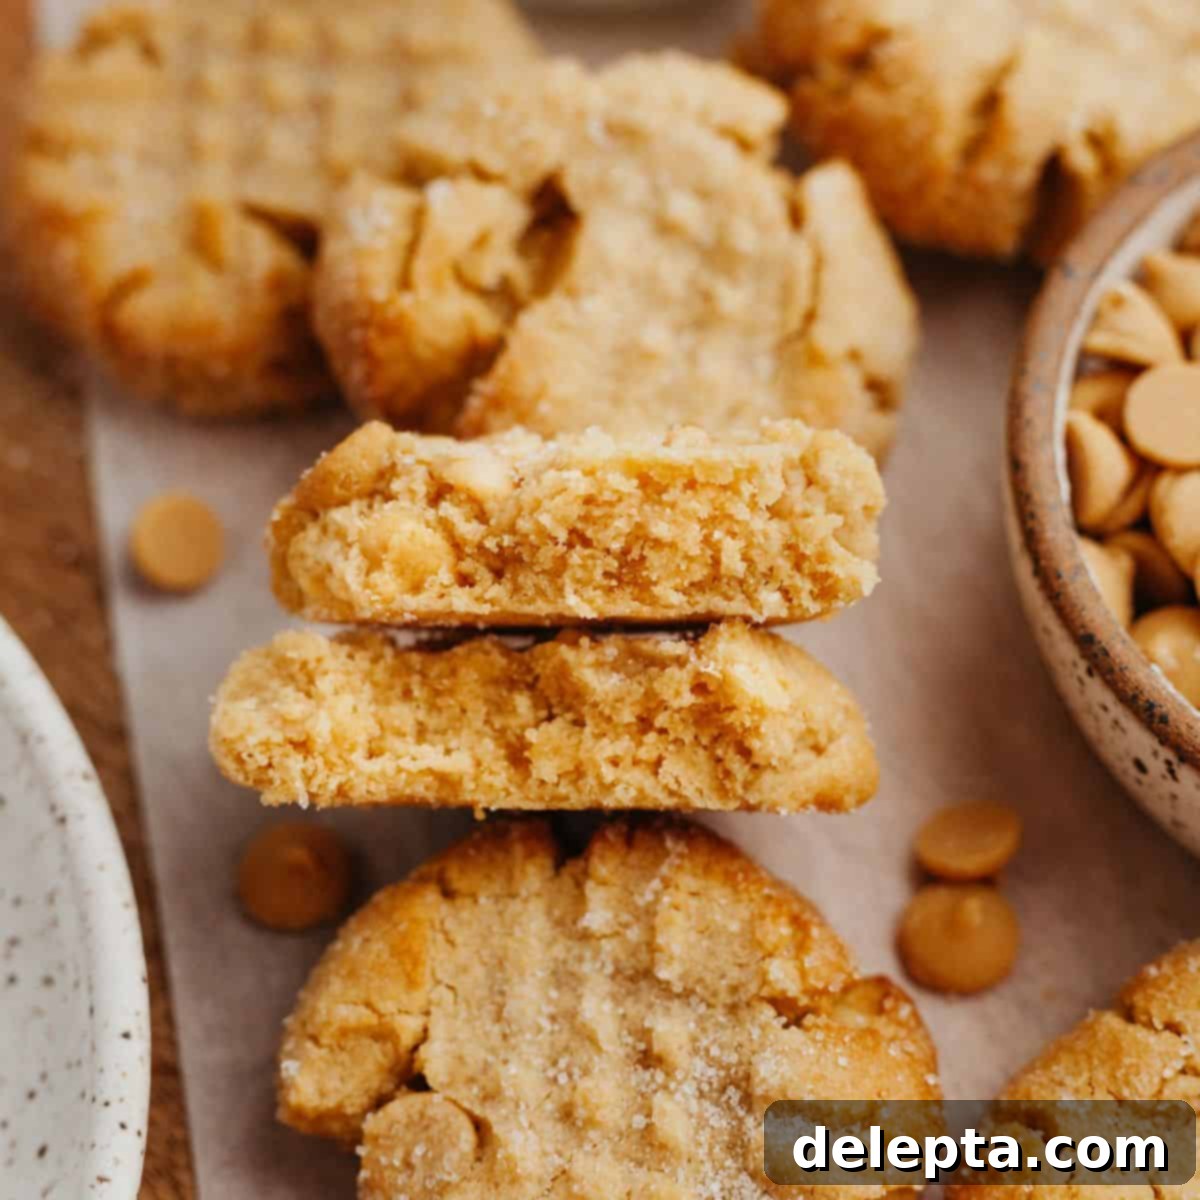
Delicious Small Batch Peanut Butter Cookies: Soft, Chewy & Ready in Minutes!
Craving a warm, homemade peanut butter cookie but don’t want to bake an entire batch? Look no further! These irresistible small batch peanut butter cookies are the answer to your sweet tooth desires. Perfectly soft, delightfully chewy, and packed with rich peanut butter flavor, this recipe yields just six cookies – ideal for satisfying a sudden craving, a cozy night in, or sharing with a loved one without any waste. Forget about long chill times; these cookies come together with minimal fuss and simple ingredients you likely already have in your pantry, making them a go-to treat for any occasion.
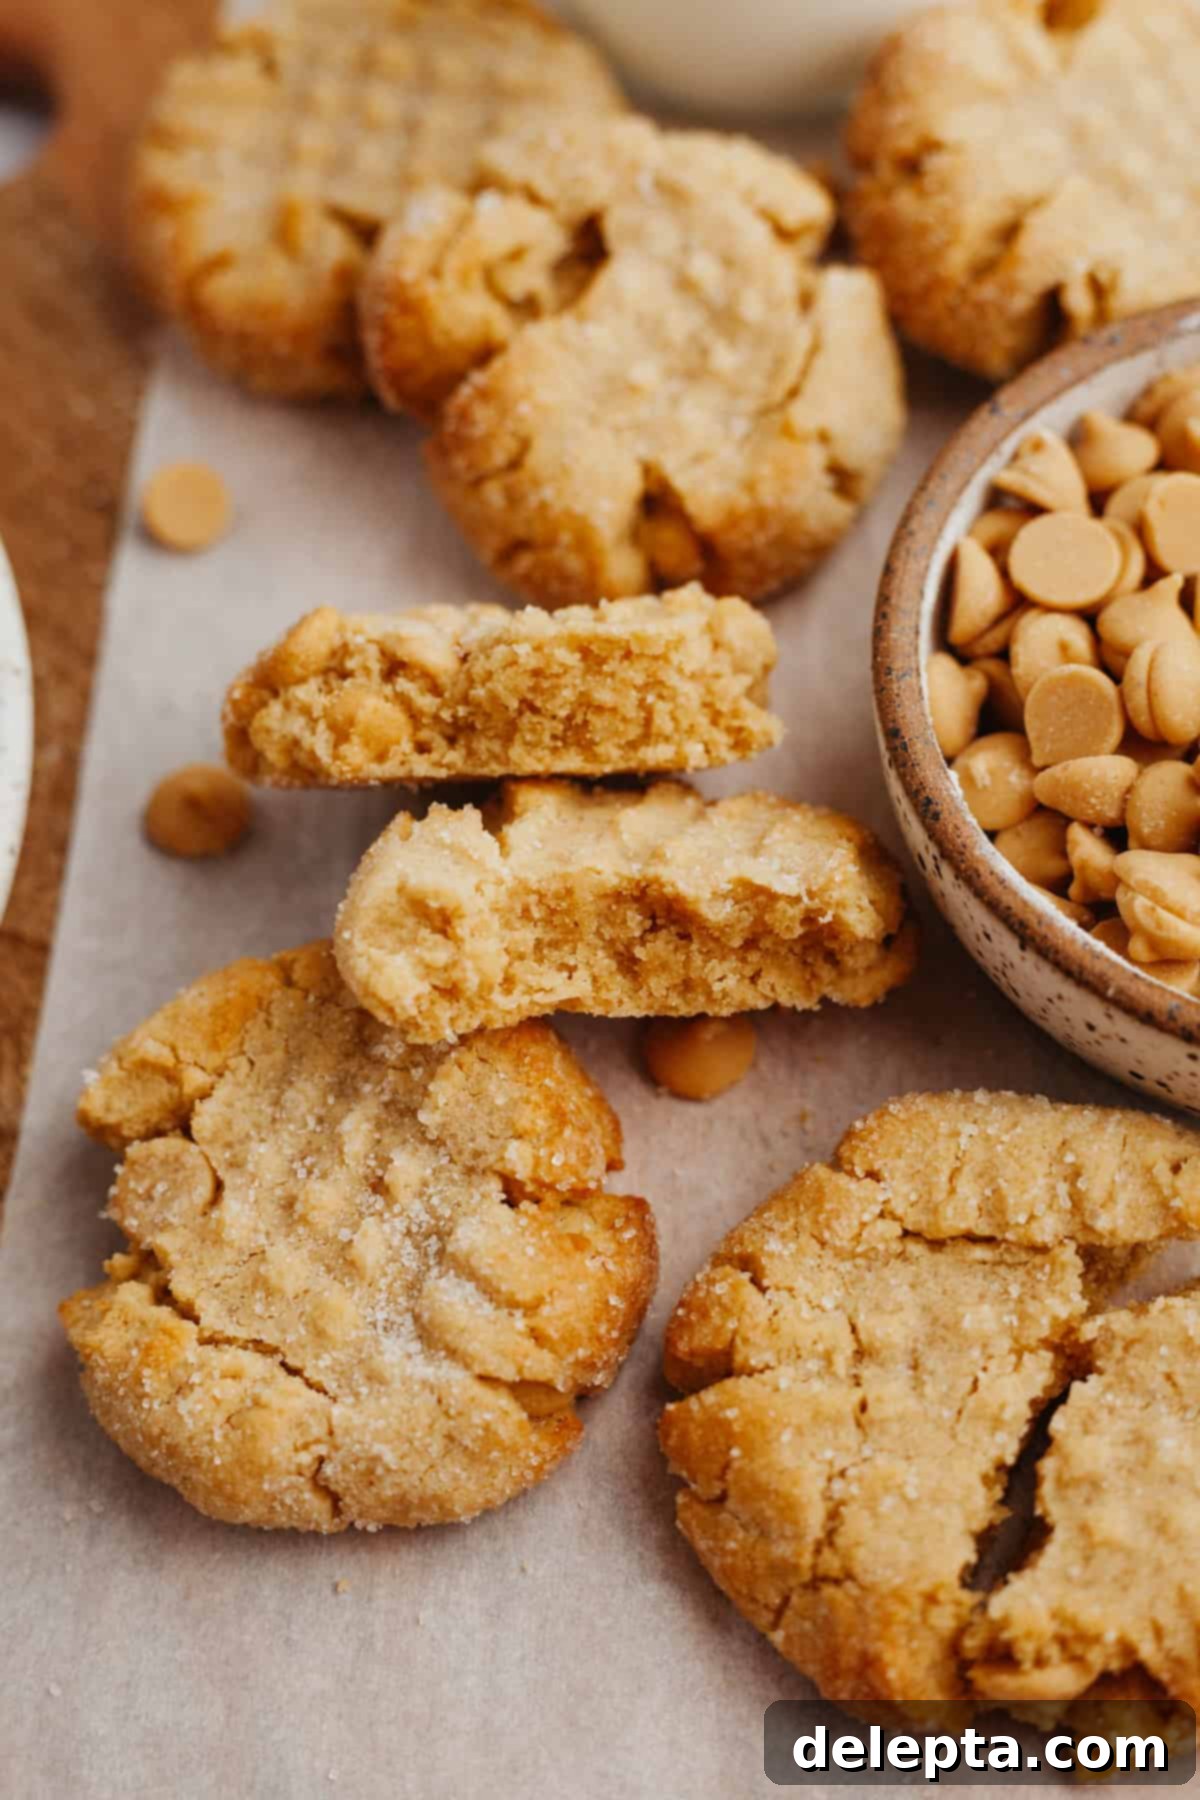
There’s something incredibly comforting about a freshly baked cookie, and a small batch recipe ensures you get that comforting experience whenever the mood strikes. This recipe takes homemade peanut butter cookies to the next level by incorporating not just creamy peanut butter into the dough, but also a generous helping of peanut butter chips, intensifying that nutty flavor profile. If you’re a true peanut butter enthusiast, prepare to fall in love with these quick and easy treats. They are designed for ultimate convenience and maximum deliciousness, making them perfect for those moments when a full-sized baking project feels like too much, but you absolutely need that sweet, salty, and chewy peanut butter fix.
Why You’ll Adore This Small Batch Peanut Butter Cookie Recipe
This recipe isn’t just about making cookies; it’s about making baking easy, accessible, and perfectly portioned for your needs. Here’s why these small batch peanut butter cookies will quickly become a favorite in your kitchen:
- This is a truly small batch cookie recipe which only makes 6 cookies. This is fantastic for portion control, preventing excess waste, or when you’re simply baking for one or two people. Enjoy the pleasure of warm, fresh cookies without the commitment of a huge batch taking up your counter space or tempting you for days. It’s the ideal solution for satisfying that specific sweet craving.
- These cookies are primarily made in one bowl, significantly cutting down on your cleanup time. Who wants to spend more time washing dishes than enjoying delicious cookies? This streamlined process makes baking a joy, not a chore.
- These incredibly soft and chewy peanut butter cookies don’t require any chill time for the dough. That means from the moment you decide you want cookies, you’re only minutes away from pulling a tray of warm, fragrant treats from the oven. Instant gratification at its finest!
- You have the flexibility to use a stand mixer, a hand mixer, or even make the dough by hand with a sturdy wooden spoon (though you’ll need a little more “elbow grease” for that!). This adaptability means you can whip these up regardless of your kitchen equipment, making it a truly versatile recipe.
- This is a genuinely easy recipe to master, using everyday simple ingredients that are likely staples in your pantry. It takes just about 7 minutes to prepare the dough and less than 10 minutes of baking time. This speedy turnaround is perfect for busy schedules, impromptu dessert cravings, or a fun, quick baking project with kids.
Essential Equipment for Your Peanut Butter Cookies
You don’t need a lot of fancy tools to make these delightful small batch peanut butter cookies. Here’s a quick list of what will make your baking process smooth and enjoyable:
- Mixing Bowls: One medium bowl for the cookie dough and a small bowl for rolling the cookies in sugar.
- Electric Mixer (Optional but Recommended): A hand mixer or a stand mixer with a paddle attachment will make creaming the butter and peanut butter much easier and faster. If you don’t have one, a sturdy wooden spoon and some muscle will work just fine!
- Rubber Spatula: Essential for scraping down the sides of the bowl and gently folding in dry ingredients.
- Measuring Cups and Spoons: For accurate ingredient measurement. While US customary units are provided, metric gram measurements are highly recommended for precision.
- Baking Sheet: A standard baking sheet will be perfect for baking your six cookies.
- Parchment Paper: Lining your baking sheet with parchment paper prevents sticking and makes cleanup incredibly easy.
- Cookie Scoop (Optional): A 2-tablespoon cookie scoop helps create uniformly sized cookies, ensuring even baking.
- Fork: For creating that classic criss-cross pattern on top of the peanut butter cookies.
Key Ingredient Insights
Each ingredient plays a vital role in achieving the perfect soft and chewy texture and rich flavor of these small batch peanut butter cookies. Understanding their purpose can help you achieve the best results:
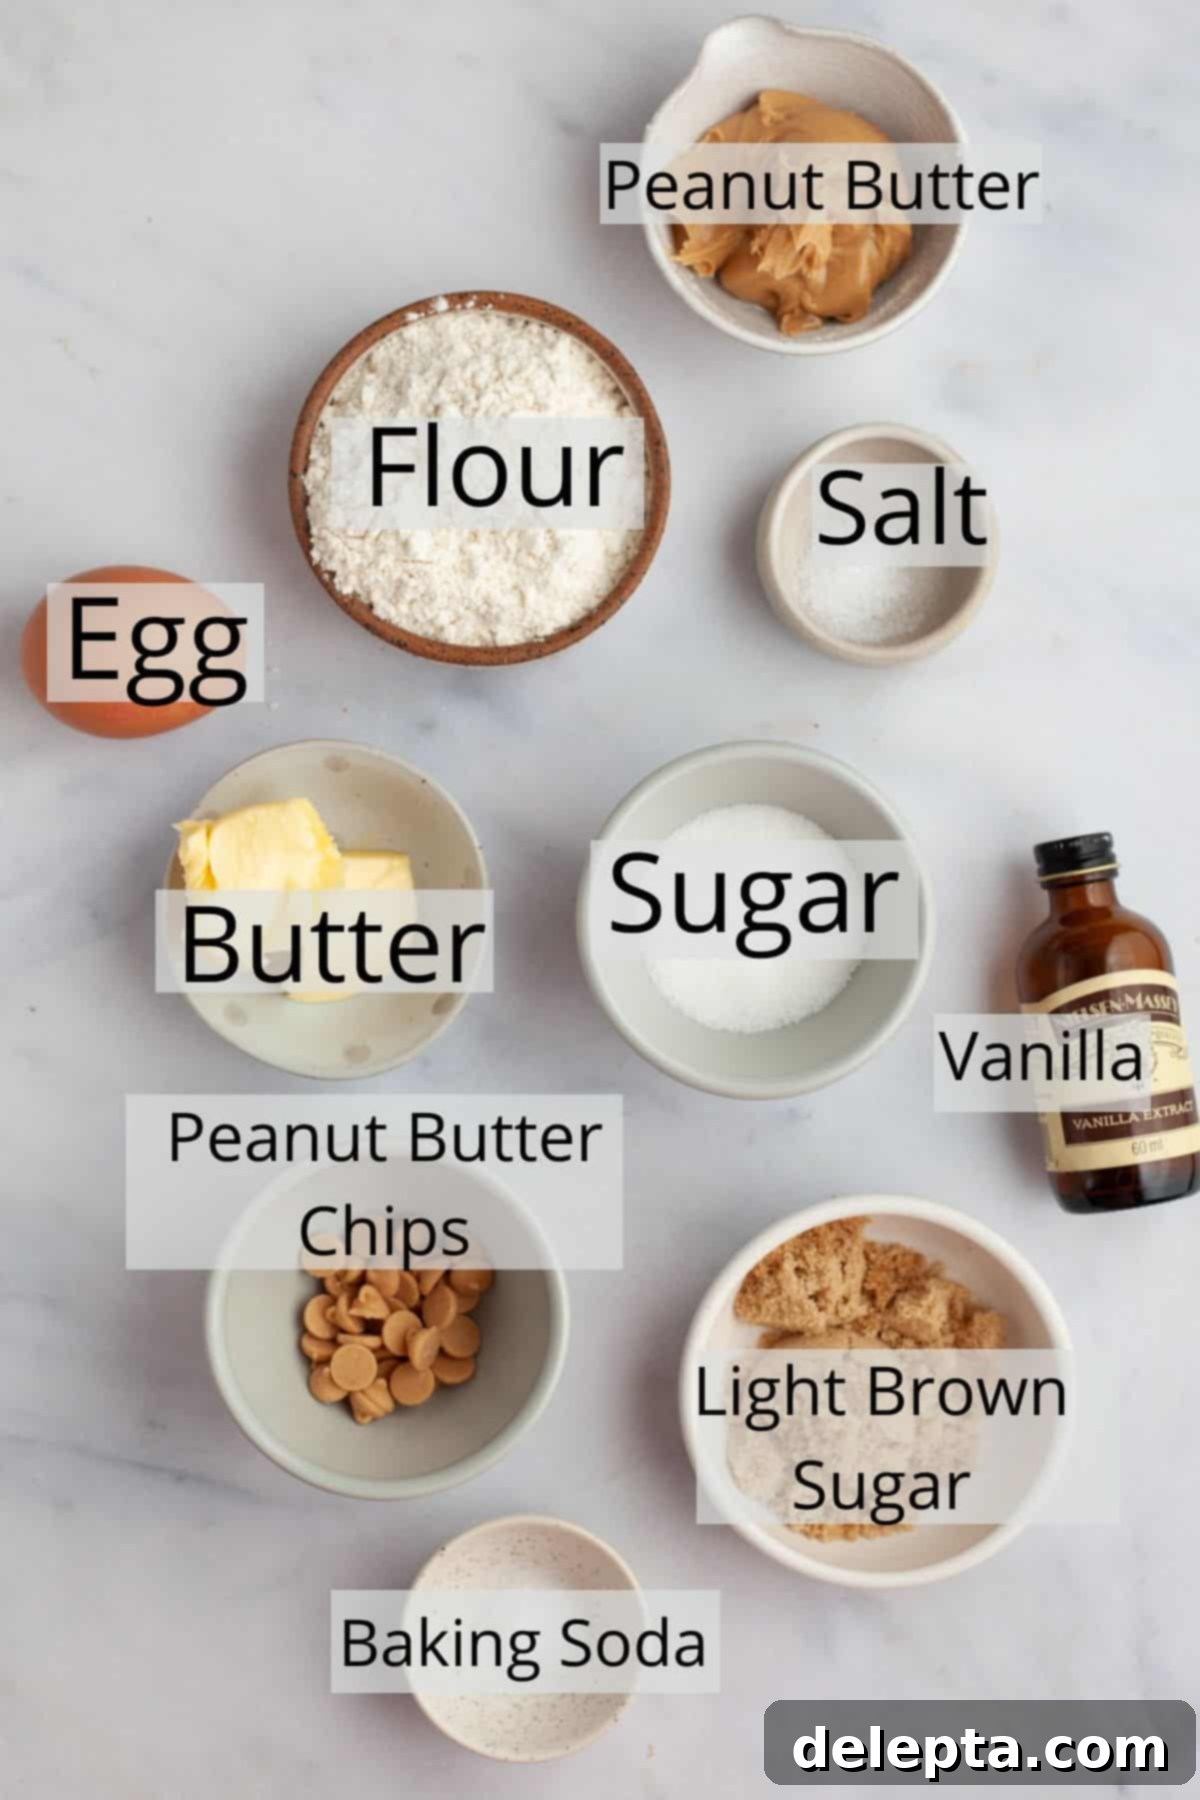
All-Purpose Flour: I used standard all-purpose flour for this recipe, which provides the necessary structure without making the cookies too dense. I haven’t personally tried this recipe with gluten-free flour, but if you do, a 1:1 gluten-free baking blend designed for cookies would be your best bet, though results may vary in texture.
Sugars (White Granulated Sugar & Light Brown Sugar): This recipe uses a balanced combination of both white granulated sugar and light brown sugar. White sugar contributes to a slightly crisp edge and helps the cookies spread, while light brown sugar adds moisture, depth of flavor, and that delightful chewiness that we all love in a good cookie. You’ll also need a little extra white sugar specifically for rolling the cookie dough balls before baking, which gives them a beautiful sparkle and a delightful textural contrast.
Baking Soda (Bicarbonate of Soda): Known as bicarbonate of soda in the UK, this leavening agent is crucial for giving these cookies their signature soft and chewy texture. It reacts with the acidic components in the dough (like brown sugar) to create carbon dioxide, which helps the cookies rise slightly and contributes to their tender crumb. Make sure your baking soda is fresh for optimal results.
Creamy Peanut Butter: For this recipe, I strongly recommend using commercial creamy peanut butter, such as Jif or Skippy, which has a consistent texture and added oils/sugars that are essential for the cookie’s structure and spread. It’s important to avoid natural peanut butter, which typically has separated oil on top and a different fat/sugar content. Using natural peanut butter will result in a much drier, more crumbly cookie that won’t hold its shape as well.
Peanut Butter Chips: While entirely optional, these small chips are a fantastic addition for an extra burst of concentrated peanut butter flavor. They melt beautifully into the dough, creating pockets of intense peanut butter goodness. If you don’t have them, you can omit them or substitute with an equal amount of mini chocolate chips for a peanut butter chocolate chip cookie variation!
Egg Yolk: Instead of a whole egg, this recipe specifically calls for just the egg yolk. The yolk adds richness, helps bind the ingredients together, and contributes to the cookie’s chewy texture without adding too much liquid, which can make the cookies spread too much or become cakey.
Salt (Kosher Salt): A pinch of salt is crucial in almost any sweet baked good, and cookies are no exception! It balances the sweetness of the sugars and enhances all the other flavors, especially the peanut butter. I’m using kosher salt for its clean taste and coarser flakes, but if you’re using fine table salt, remember to halve the amount as it’s more concentrated.
Unsalted Butter: Using unsalted butter gives you full control over the salt content in your cookies. Ensure your butter is at room temperature before you begin, as this allows it to cream properly with the peanut butter and sugars, creating a smooth, emulsified dough.
Step-by-Step Guide: Crafting Your Perfect Peanut Butter Cookies
Making these small batch peanut butter cookies is a breeze, requiring just a few simple steps. Follow these instructions carefully for the best soft and chewy results:
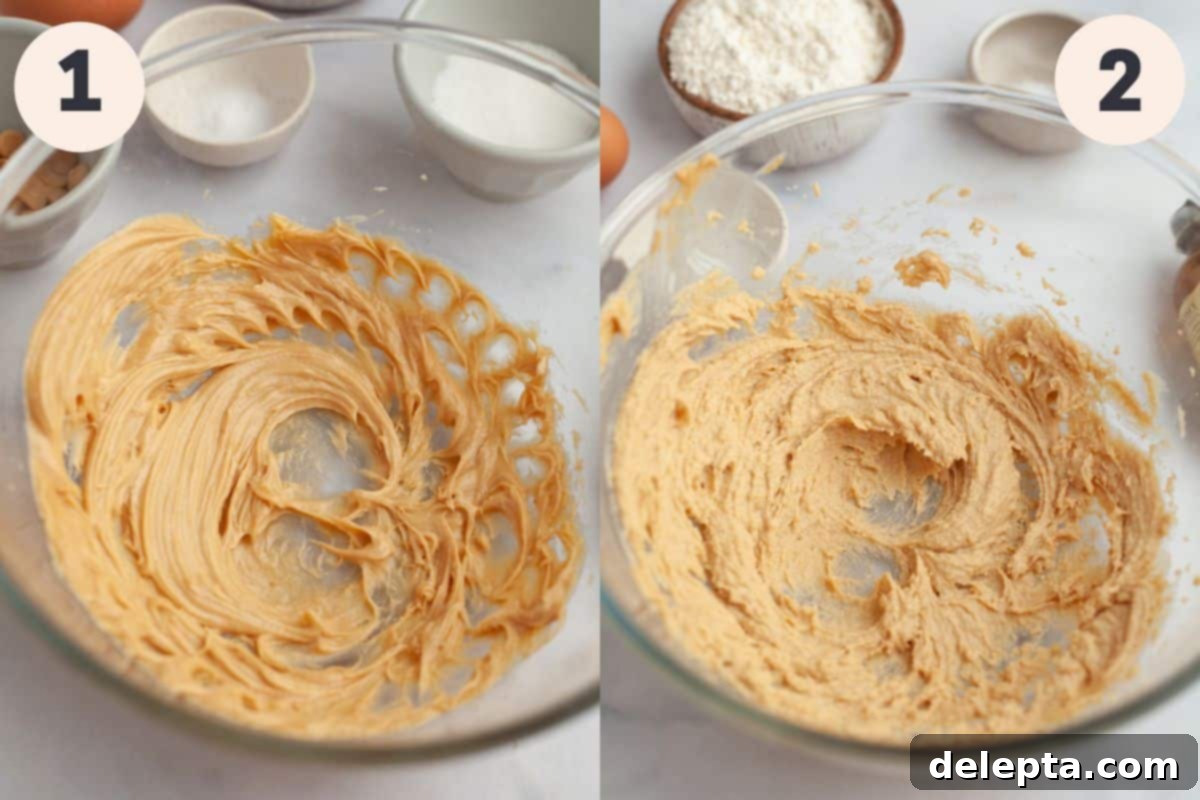
Step 1: Cream the Wet Ingredients. First, preheat your oven to 350°F (175°C) and line a small baking sheet with parchment paper. In a medium-sized mixing bowl, using either a hand-held mixer or a stand mixer fitted with the paddle attachment, cream together your room temperature unsalted butter and creamy peanut butter. Beat them together until the mixture is light, smooth, and well combined, ensuring no streaks of pure butter or peanut butter remain.
Step 2: Add Sugars, Egg Yolk & Vanilla. Next, incorporate both the white granulated sugar and the light brown sugar into the creamed butter and peanut butter mixture. Mix for another minute or so, until the sugars are fully integrated and the mixture becomes smooth and slightly fluffy. Then, add the egg yolk and vanilla extract. Beat until these additions are thoroughly combined, ensuring the vanilla aroma is distributed throughout the dough.
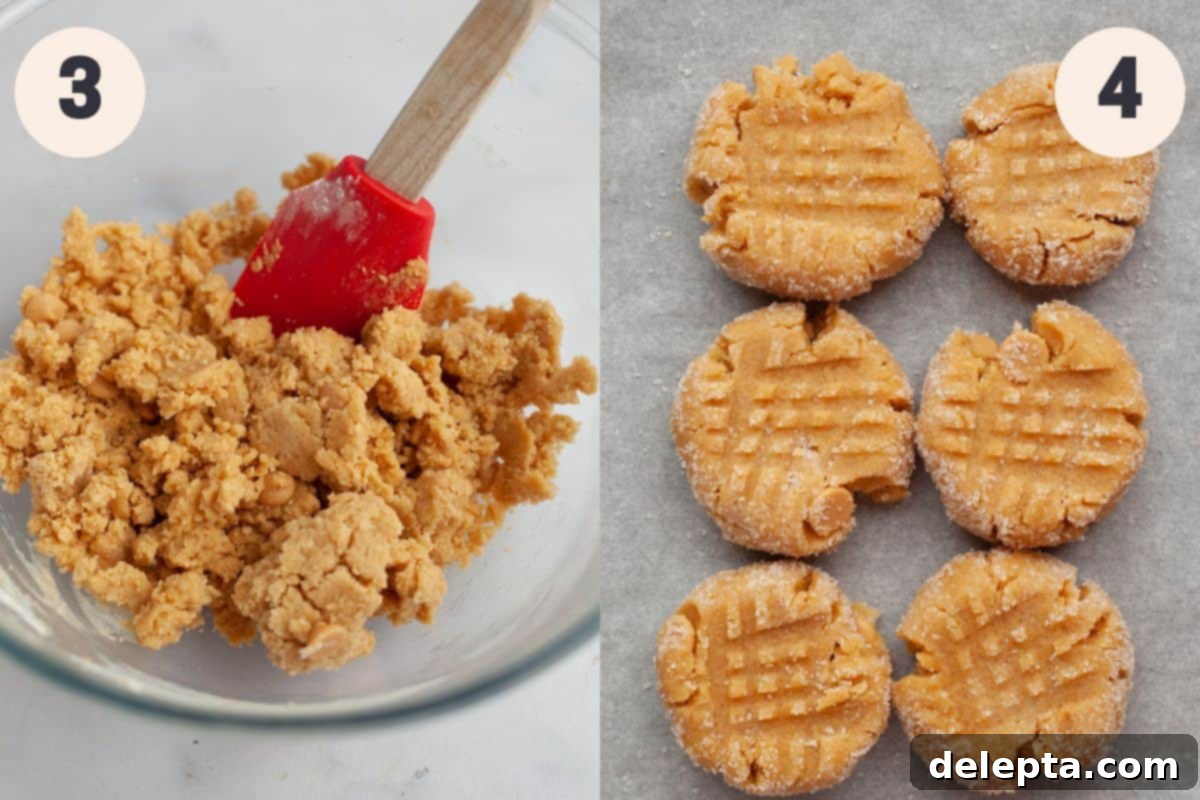
Step 3: Fold in Dry Ingredients & Peanut Butter Chips. It’s time for the dry ingredients! Add all-purpose flour, baking soda, and kosher salt to the wet mixture. Switch to a rubber spatula or wooden spoon and gently fold these dry ingredients into the dough until just combined, being careful not to overmix. Overmixing can lead to tough cookies. At this point, the cookie dough might appear a little bit dry and crumbly, but don’t worry – it will come together as you press and roll it. Finally, fold in your optional but highly recommended peanut butter chips for an extra burst of flavor.
Step 4: Form, Roll, Criss-Cross, and Bake! In a separate small bowl, pour your extra ¼ cup of white granulated sugar for rolling. Use a 2-tablespoon cookie scoop or simply scoop out about 2 tablespoons of the peanut butter cookie dough. Roll the dough between your hands to form a smooth ball. Even if it seems dry, gently squish and roll the dough, and it will hold its shape. Roll each cookie ball generously in the extra granulated sugar to coat it completely. Place the sugared dough balls on your prepared baking sheet, spaced a few inches apart. Using the tines of a fork, gently press down on each cookie ball to create a classic criss-cross pattern. Be gentle to avoid breaking the delicate dough. Repeat this process for the remaining cookie dough. Bake in the preheated oven for 9-10 minutes. The edges should be set, and the centers might still look slightly soft. Once baked, let them cool completely on the baking sheet before transferring, as they will firm up as they cool. Serve warm with a cold glass of milk for the ultimate treat!
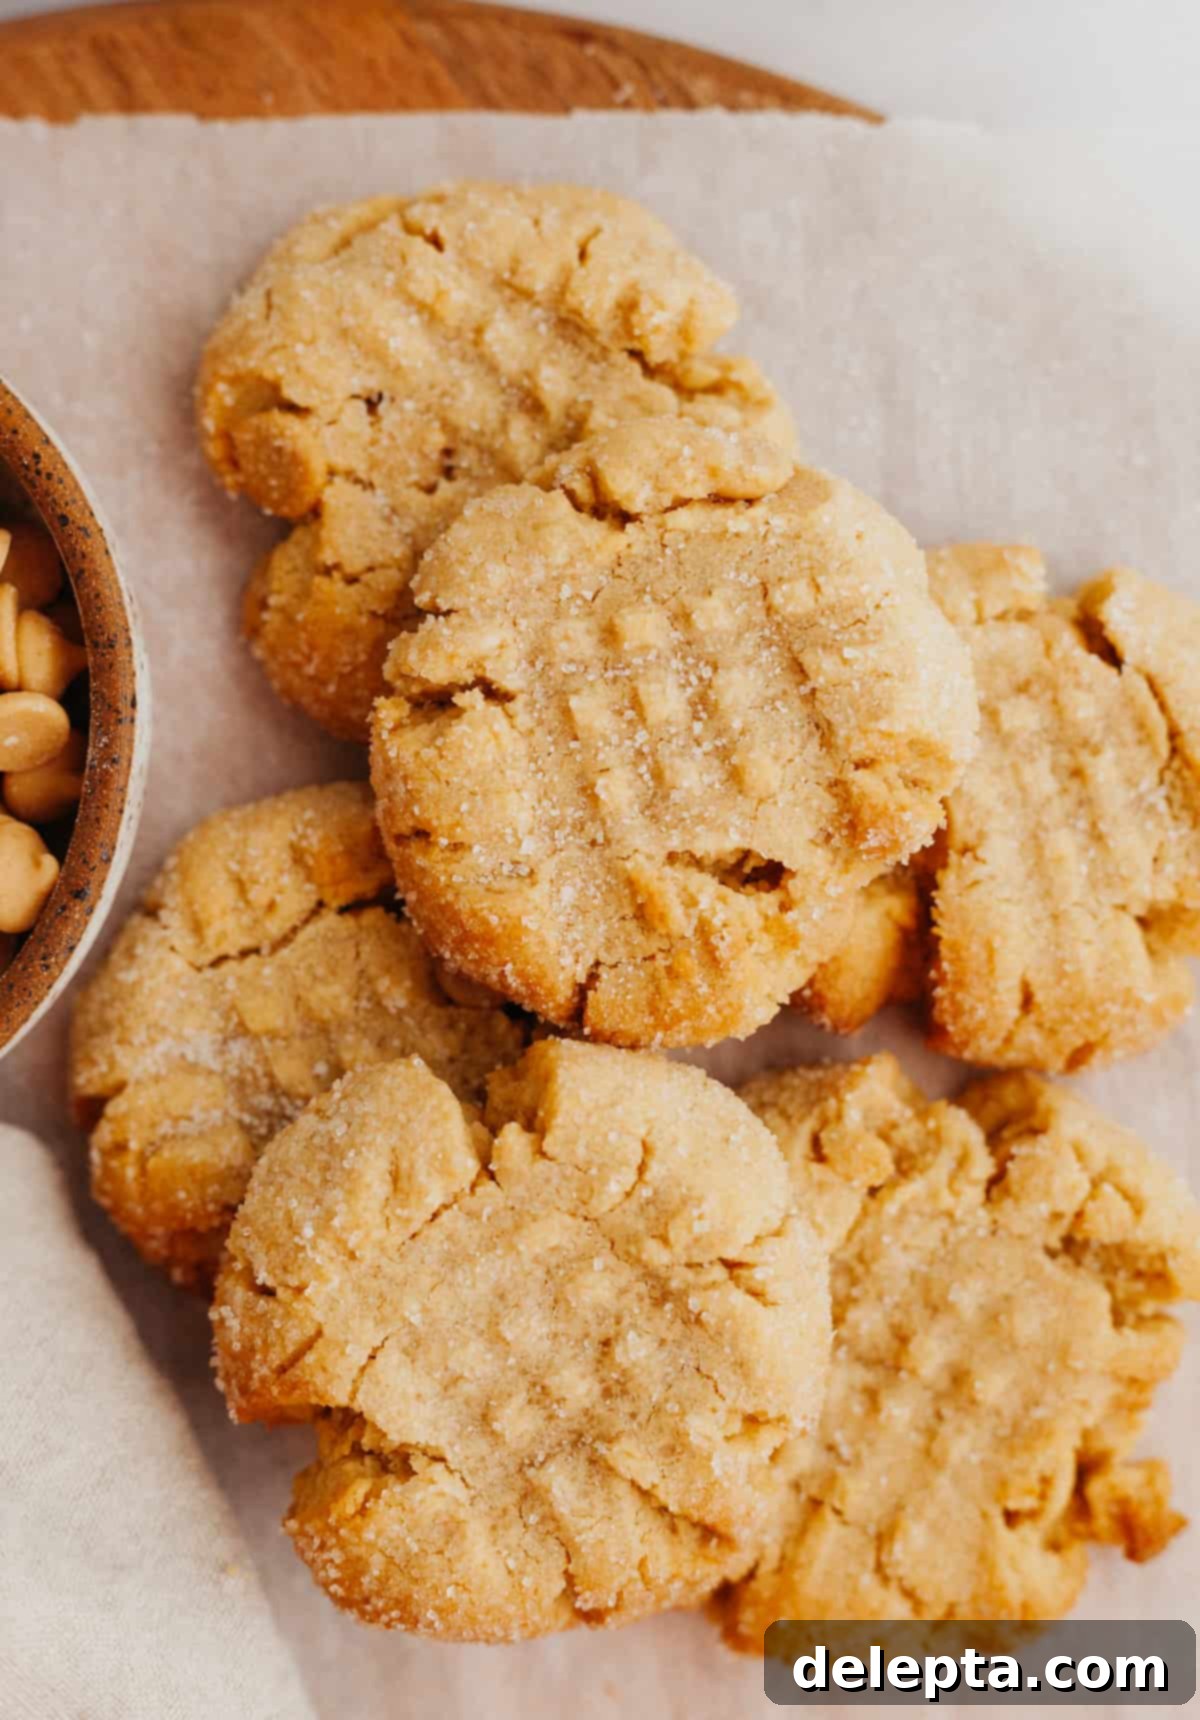
Expert Tips & Tricks for Perfect Peanut Butter Cookies
Achieving bakery-quality cookies at home is easier than you think, especially with these helpful tips and tricks:
- Fluff, Sprinkle & Scrape Method for Flour: If you aren’t using a kitchen scale to measure your ingredients (which is highly recommended for accuracy, especially with flour) and are instead using measuring cups, employ the “fluff, sprinkle, and scrape” method. First, fluff your flour in its container, then gently sprinkle it into your measuring cup without packing it down. Finally, scrape off any excess with a straight edge like a knife. Using too much flour is a common mistake that can lead to very dry, crumbly, and tough cookies.
- Room Temperature Ingredients are Key: Always make sure that all of your cold ingredients, particularly the butter and egg yolk, are at room temperature before you begin the recipe. Room temperature ingredients emulsify much better, meaning they blend smoothly and uniformly, creating a cohesive and well-structured dough that bakes evenly and results in a superior texture. Pull them out of the fridge at least 30-60 minutes before you plan to start baking.
- Perfecting the Crisscross Pattern: When creating the classic fork marks on top of your peanut butter cookies, be gentle. Don’t squish down your fork too hard on the cookie dough balls, or the delicate cookie might break or flatten too much. A light, even pressure is all you need for that iconic look.
- Mindful Baking Time: Every oven is different, so keep a close eye on your cookies as they bake. You’re looking for lightly golden edges and centers that still appear slightly soft but set. Overbaking can quickly turn these soft and chewy treats into dry, crumbly pucks. They will continue to cook slightly on the hot baking sheet even after being removed from the oven.
- Patience is a Virtue: Let the Cookies Cool: It’s tempting to grab them right away, but let the cookies cool on the baking sheet for at least 5-10 minutes before attempting to remove them. Peanut butter cookies can be a bit delicate and crumbly when warm, but they firm up beautifully as they cool, making them easier to handle and preventing breakage.
- Don’t Overmix the Dough: Once you add the flour, mix only until no streaks of dry flour remain. Overmixing develops the gluten in the flour too much, leading to tough and less tender cookies.
- Uniform Cookie Size: For even baking, use a cookie scoop to ensure all your dough balls are roughly the same size. This consistency means all your cookies will be perfectly done at the same time.
- Embrace the Peanut Butter Chips: Don’t skip the peanut butter chips if you can help it! They truly elevate the peanut butter flavor and add another layer of texture.
Frequently Asked Questions About Small Batch Peanut Butter Cookies
The iconic criss-cross pattern on peanut butter cookies isn’t just for aesthetics; it serves a crucial functional purpose. Because peanut butter dough is naturally denser and higher in fat compared to other cookie doughs, it doesn’t spread as much on its own during baking. By gently flattening the cookie dough balls with a fork, you help them spread evenly and ensure that the center bakes through completely, preventing an underdone middle. While a fork gives them a nostalgic charm, you could use another flat object if you prefer a different look!
Natural peanut butter, which typically has oil separation and a less uniform consistency, will not produce the same desired soft and chewy texture in these cookies. Its different fat and sugar content can lead to a much drier, more crumbly cookie that lacks the expected structure and moistness. For consistent results, stick to commercial creamy peanut butter (like Jif or Skippy) where oils and sugars are emulsified for stability.
Once completely cooled, store your small batch peanut butter cookies in an airtight container at room temperature. They will maintain their delicious soft and chewy texture for up to 1 week. For best freshness, enjoy them within the first 2-3 days.
Yes, you absolutely can double this recipe if you need more than six cookies! Simply multiply all the ingredient quantities by two. The prep time might increase slightly, but the baking time should remain roughly the same. Just be sure to use a larger bowl for mixing and possibly two baking sheets if needed, to ensure proper spacing between cookies for even baking.
While this recipe is designed for instant gratification, you can certainly freeze the shaped cookie dough balls for future baking! After rolling the dough balls in sugar and creating the criss-cross pattern, place them on a parchment-lined tray and freeze until solid (about 1-2 hours). Once frozen, transfer them to an airtight freezer-safe bag or container. When you’re ready to bake, place the frozen dough balls on a prepared baking sheet and bake as directed, adding 1-2 minutes to the baking time.
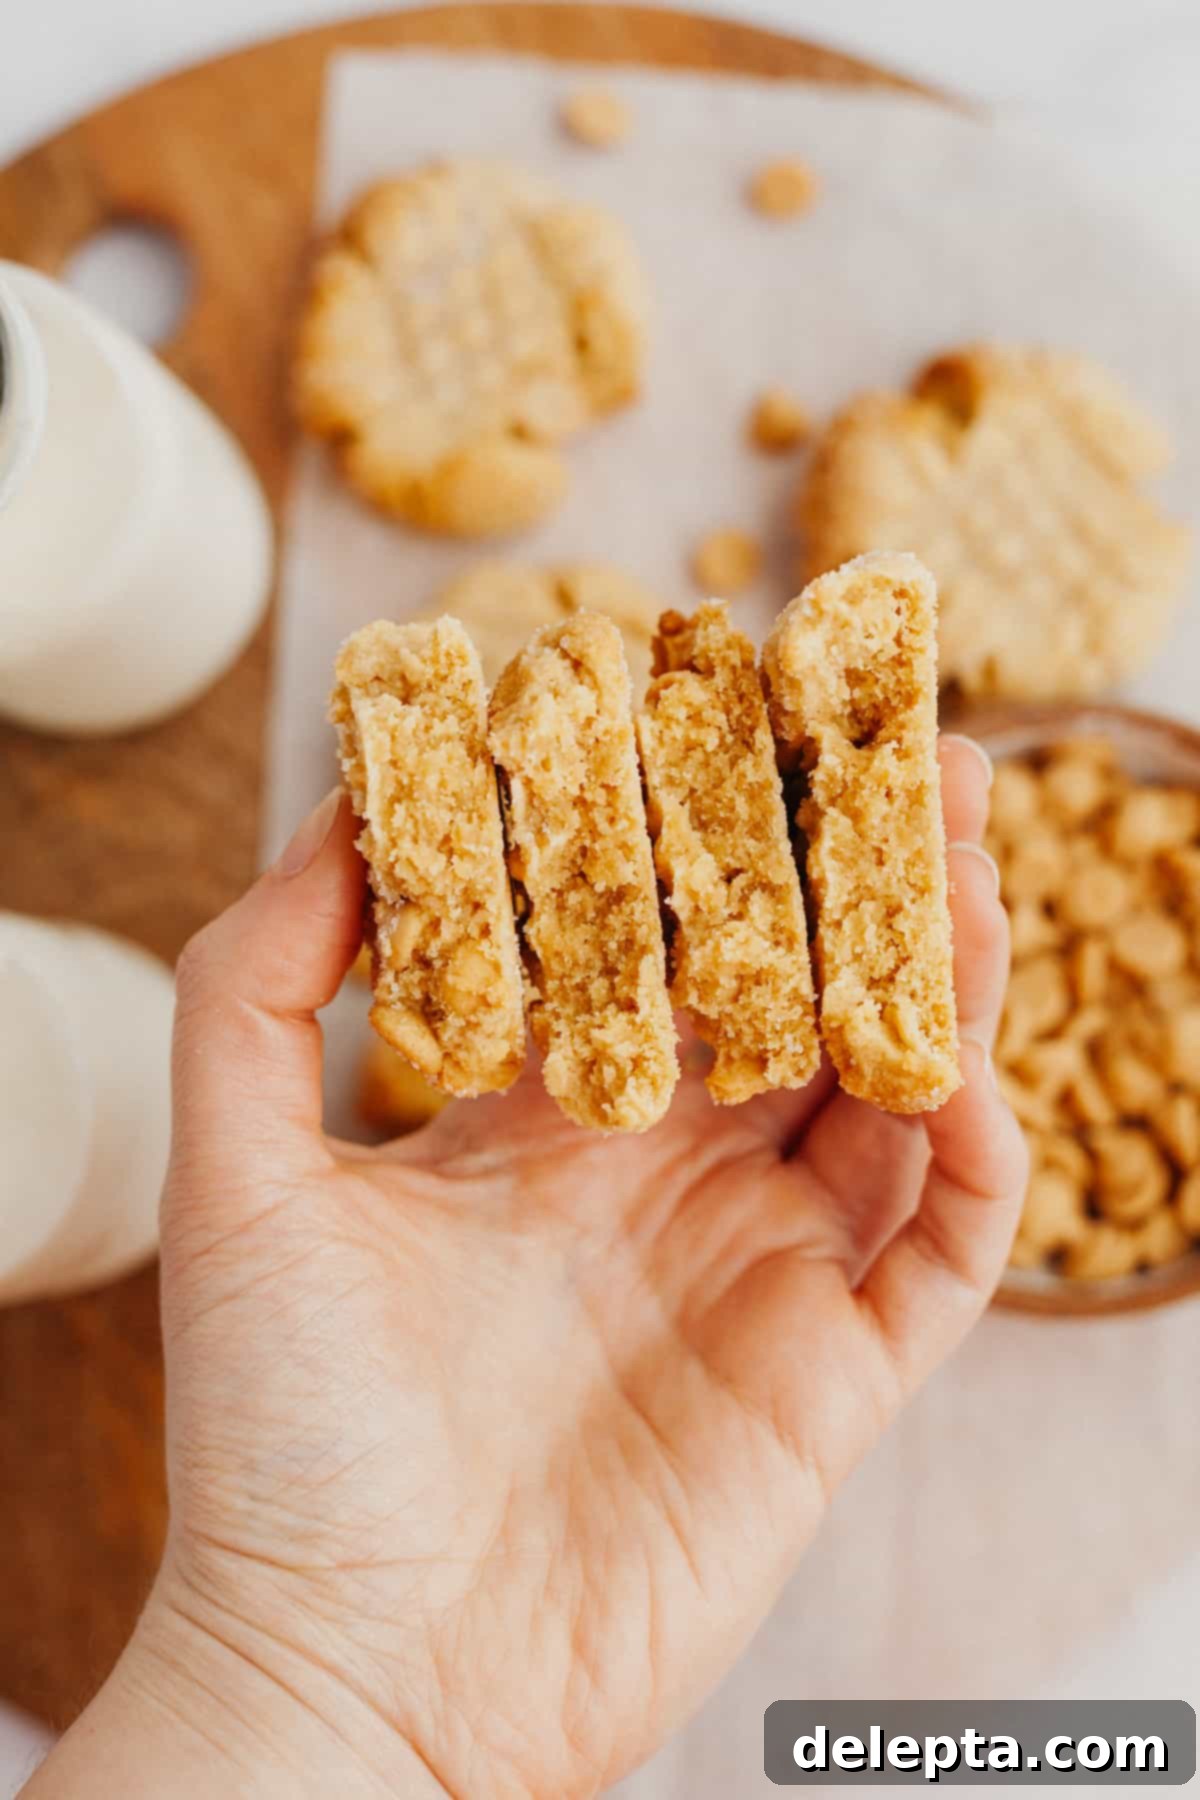
Delightful Serving Suggestions
These small batch peanut butter cookies are phenomenal on their own, but here are a few ideas to make them even more special:
- Classic with Milk: There’s no pairing more iconic than a warm peanut butter cookie with a tall, cold glass of milk. It’s simple perfection!
- Ice Cream Sandwich: For an indulgent treat, sandwich a scoop of your favorite vanilla or chocolate ice cream between two cooled peanut butter cookies.
- Coffee or Tea Companion: Enjoy these cookies as a delightful snack alongside your morning coffee or an afternoon cup of tea.
- Dessert Platter: Even though it’s a small batch, these cookies can be a charming addition to a small dessert platter with other treats for an intimate gathering.
- Melted Chocolate Drizzle: For an extra touch of decadence, once cooled, drizzle your cookies with a little melted dark or milk chocolate.
Expand Your Baking Repertoire: Try These Other Delicious Cookie Recipes!
- Chocolate Chip and Marshmallow Cookies
- Soft and Chewy Sprinkle Sugar Cookies
- The Best Biscoff Butter Cookies
- Peanut Butter Marshmallow Cookies
Have you made these incredibly soft and chewy small batch peanut butter cookies? We’d love to see your creations! Make sure to tag me on Instagram @alpineellaand leave a review below if you have. Your feedback helps other bakers! If you’re looking for more baking inspiration and delicious dessert ideas, you can also follow me on Pinterest.
Recipe Card: Small Batch Peanut Butter Cookies
Small Batch Peanut Butter Cookies
Ella Gilbert
Pin Recipe
Save RecipeSaved!
Ingredients
- 2 tablespoon unsalted butter room temperature
- 2 tablespoon white sugar
- 2 tablespoon light brown sugar
- 1 egg yolk
- 1 teaspoon vanilla extract
- ¼ cup creamy peanut butter
- ½ cup all purpose flour
- ¼ teaspoon kosher salt
- ¼ teaspoon baking soda
- 1 tablespoon peanut butter chips (optional, but recommended)
- ¼ cup white sugar for rolling the cookies
Instructions
-
Preheat your oven to 350°F/175°C and line a baking tray with parchment paper. Place a rack in the middle of the oven to ensure even baking.
-
In a medium bowl, using either a hand mixer or a stand mixer fitted with the paddle attachment, cream the room temperature peanut butter and butter together until the mixture is completely smooth and well combined, with a lighter texture.
-
Add in your white granulated sugar and light brown sugar, then mix again for approximately 1 minute, or until the mixture is smooth and creamy. Next, add the egg yolk and vanilla extract, mixing just until they are fully incorporated into the dough.
-
Stop the mixer and, using a rubber spatula or wooden spoon, gently fold in the dry ingredients – the all-purpose flour, baking soda, and kosher salt – by hand until there are no more visible streaks of flour. Be careful not to overmix the dough. Then, fold in your peanut butter chips. Note: this cookie dough tends to be a little bit dry, but don’t worry, it will come together as you shape it!
-
Use a 2-tablespoon cookie scoop or simply measure out 2 tablespoons of dough. Use your hands to gently bring the dough together, rolling it into a smooth ball between your palms. Roll each cookie dough ball generously in the extra ¼ cup of white sugar. Place the sugared balls on your prepared baking sheet, ensuring they are spaced a few inches apart. Using a fork, gently press down on each cookie to create a classic criss-cross pattern. Remember to be gentle, as these cookies can be delicate! Repeat this process with the remaining cookie dough.
-
Bake for 9-10 minutes. The edges should be lightly golden, and the centers may still appear slightly soft. Once you remove them from the oven, allow them to cool completely on the baking sheet for at least 5-10 minutes before transferring. This allows them to set and prevents them from breaking.
Notes
Butter: For best flavor and a rich, creamy texture, I use European-style butter, such as Kerrygold, in my recipes. This type of butter has a higher fat content and lower water content compared to American-style butter, which contributes to a more tender and flavorful finished bake.
Salt: I recommend using kosher salt for its clean taste and coarser crystals. If you don’t have kosher salt on hand and opt for fine table salt, please remember to halve the amount called for in the recipe. As a general rule, 1 teaspoon of kosher salt is roughly equivalent to ½ teaspoon of fine table salt.
Peanut Butter: It is crucial to use commercial creamy peanut butter (e.g., Jif, Skippy) for this recipe, not natural peanut butter that often has a layer of separated oil on top. Natural peanut butter has a different fat and sugar content and will completely alter the texture of these cookies, resulting in a drier and more crumbly product. Ensure your peanut butter is well-stirred if there is any slight separation, even with commercial brands.
Storage: Once baked and completely cooled, these delightful small batch peanut butter cookies should be stored in an airtight container at room temperature. They will remain wonderfully soft and chewy for up to one week.
Nutrition
