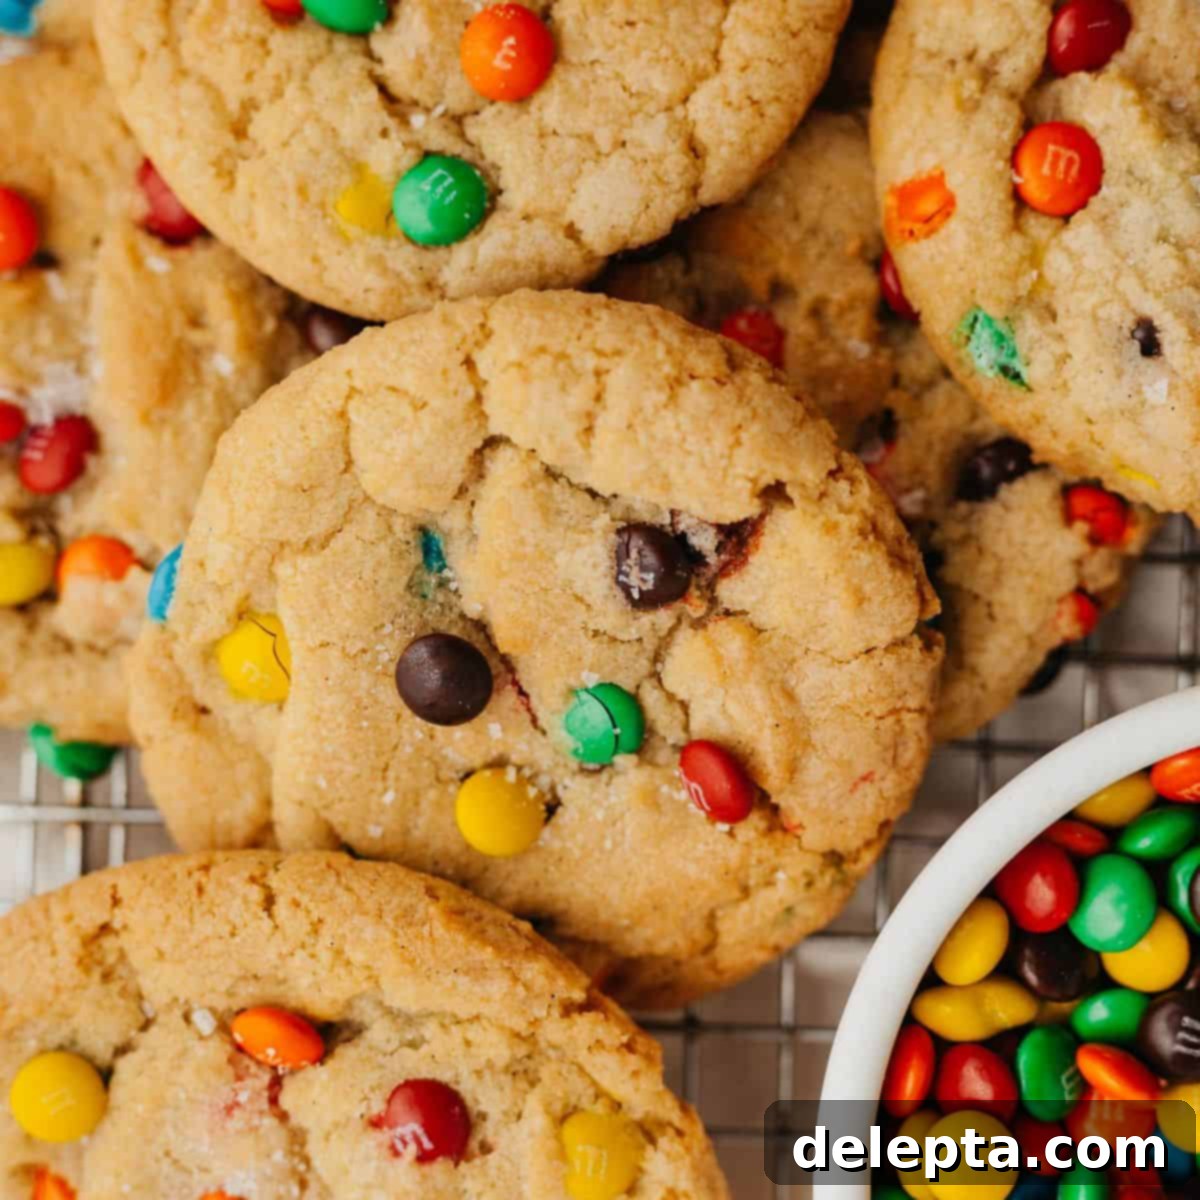
Soft, Chewy, & Easiest Mini M&M Cookies (One-Bowl, No Chill!)
Prepare yourself for the simplest, most delightful cookie experience! These thick, soft, and irresistibly chewy mini M&M cookies are an absolute dream come true for any dessert lover. Bursting with colorful mini M&M’s in every bite, this recipe stands out for its incredible ease: everything comes together in just one bowl, and there’s absolutely no chilling required. That means you can go from craving to warm, fresh-baked cookies in under 30 minutes! Perfect for a quick treat, a last-minute party dessert, or a fun baking session with the kids.
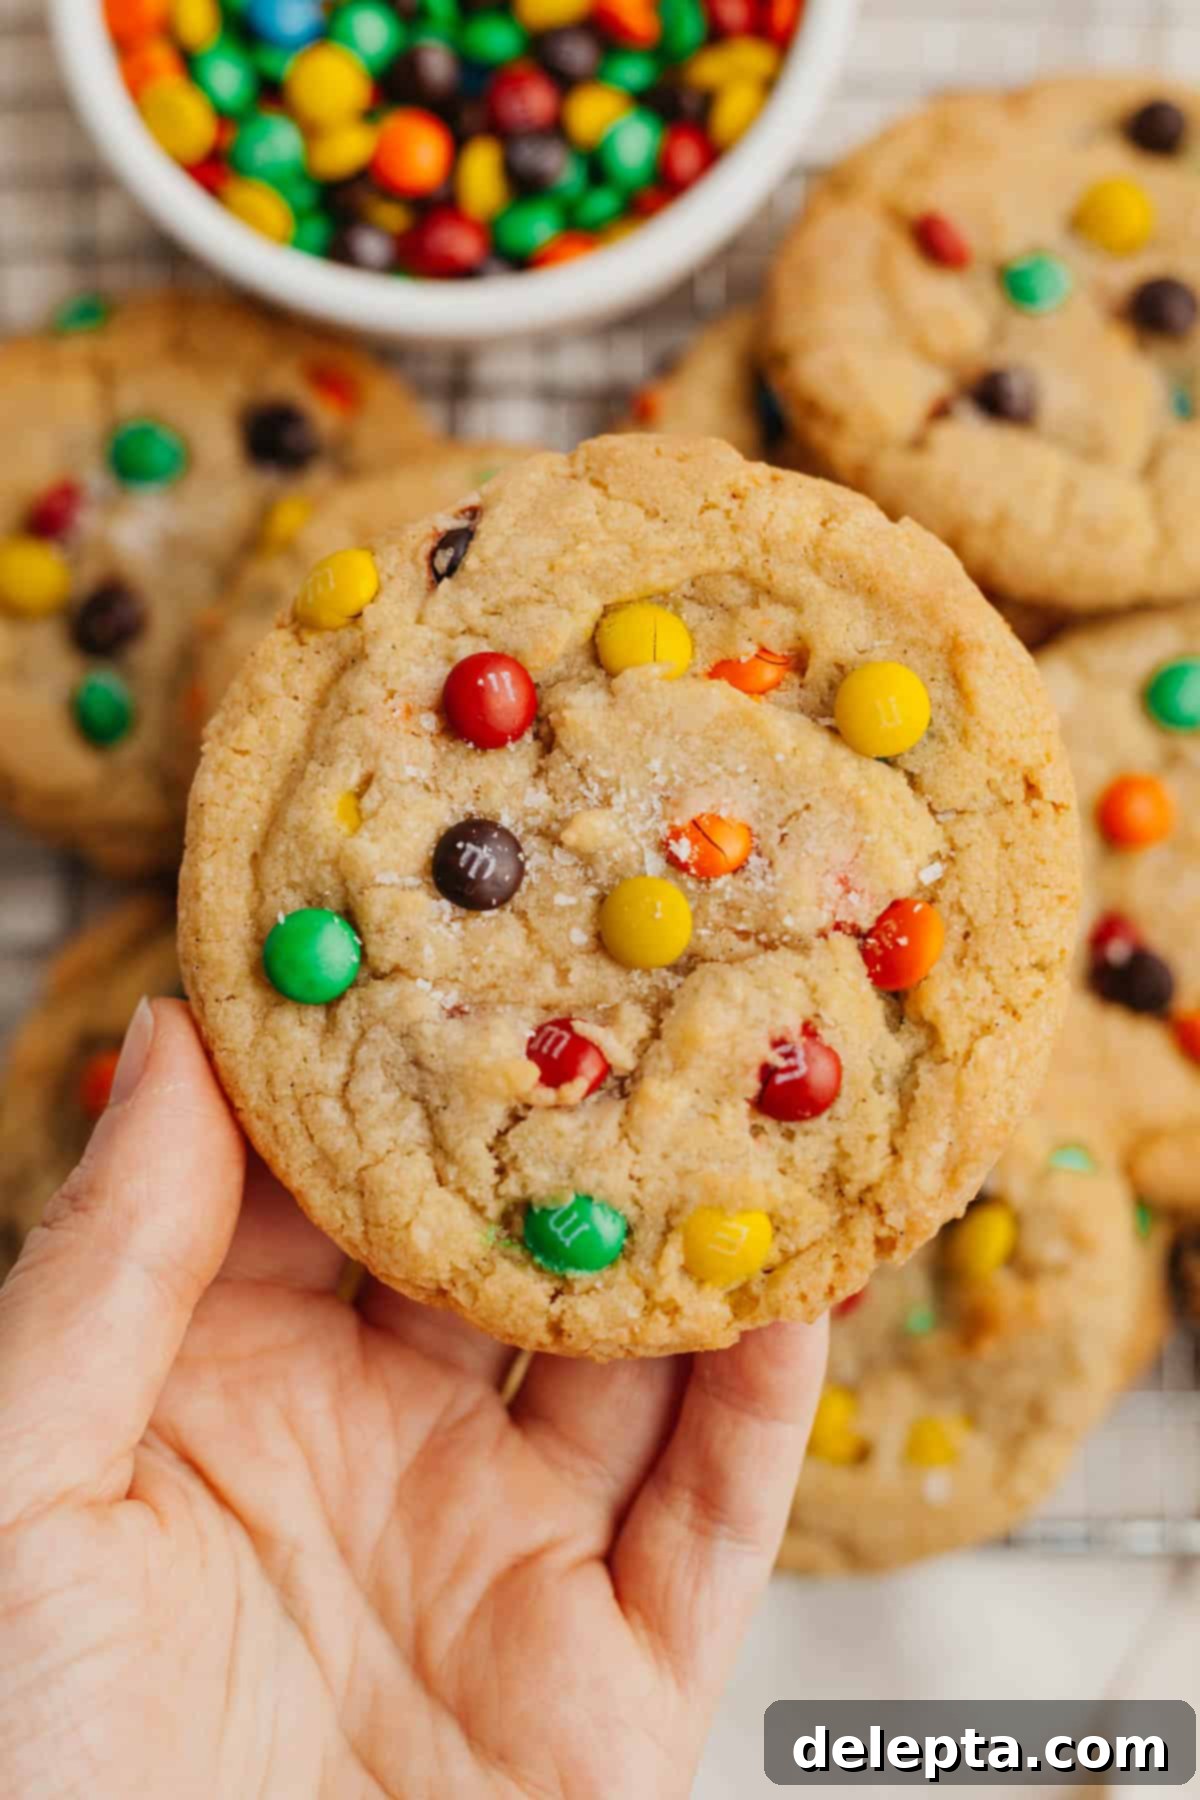
Drop cookies are a perennial favorite in my kitchen, especially when I need a sweet treat without the fuss. While some occasions call for something a bit more elaborate, like rich brown butter creations such as these Oreo chocolate chip cookies, most of the time, I’m after instant gratification. That’s where these phenomenal mini M&M cookies shine! They’re designed for speed and simplicity, requiring no fancy equipment and delivering maximum flavor in minimal time.
This recipe is a simplified adaptation of my beloved chocolate chip butterscotch cookies, thoughtfully tweaked to enhance convenience. I’ve opted for readily available melted butter instead of brown butter, which not only speeds up the process but also contributes to that wonderfully chewy texture. A slight increase in flour content ensures the dough maintains its perfect consistency, eliminating the need for any chilling time. The result? Cookies that are thick, soft, and ready to enjoy almost as soon as the craving hits!
[feast_advanced_jump_to]
Why You’ll Fall in Love with These Mini M&M Cookies!
- They’re made in just 1 bowl, meaning your cleanup is practically nonexistent! Forget hauling out a stand mixer or dirtying multiple bowls – this recipe is designed for ultimate convenience, leaving you more time to savor your delicious creations.
- You don’t need to chill the cookie dough. This is a game-changer! No waiting around for hours; these cookies can go straight from mixing bowl to oven, satisfying your cookie cravings almost instantly. If, however, you desire an even thicker, chewier cookie, a quick 30-60 minute chill can further enhance their texture.
- They’re generously loaded with mini M&M’s, ensuring a burst of chocolatey, colorful goodness in every single bite. The small size of the M&M’s means better distribution and a more consistent flavor experience throughout the cookie.
- These mini M&M cookies rely on simple, everyday ingredients that you likely already have stocked in your pantry and fridge. No special trips to specialty stores needed, making this recipe accessible and hassle-free.
- They boast a perfect balance of softness and chewiness, with slightly crisp edges. This ideal texture makes them incredibly satisfying and utterly addictive.
- They are incredibly versatile. While delicious on their own, you can easily adapt them with other mix-ins like chocolate chips or sprinkles for a different twist.
Essential Ingredient Notes for Perfect Cookies
Crafting the perfect cookie begins with understanding your ingredients. Here’s a deeper dive into what you’ll need and why:
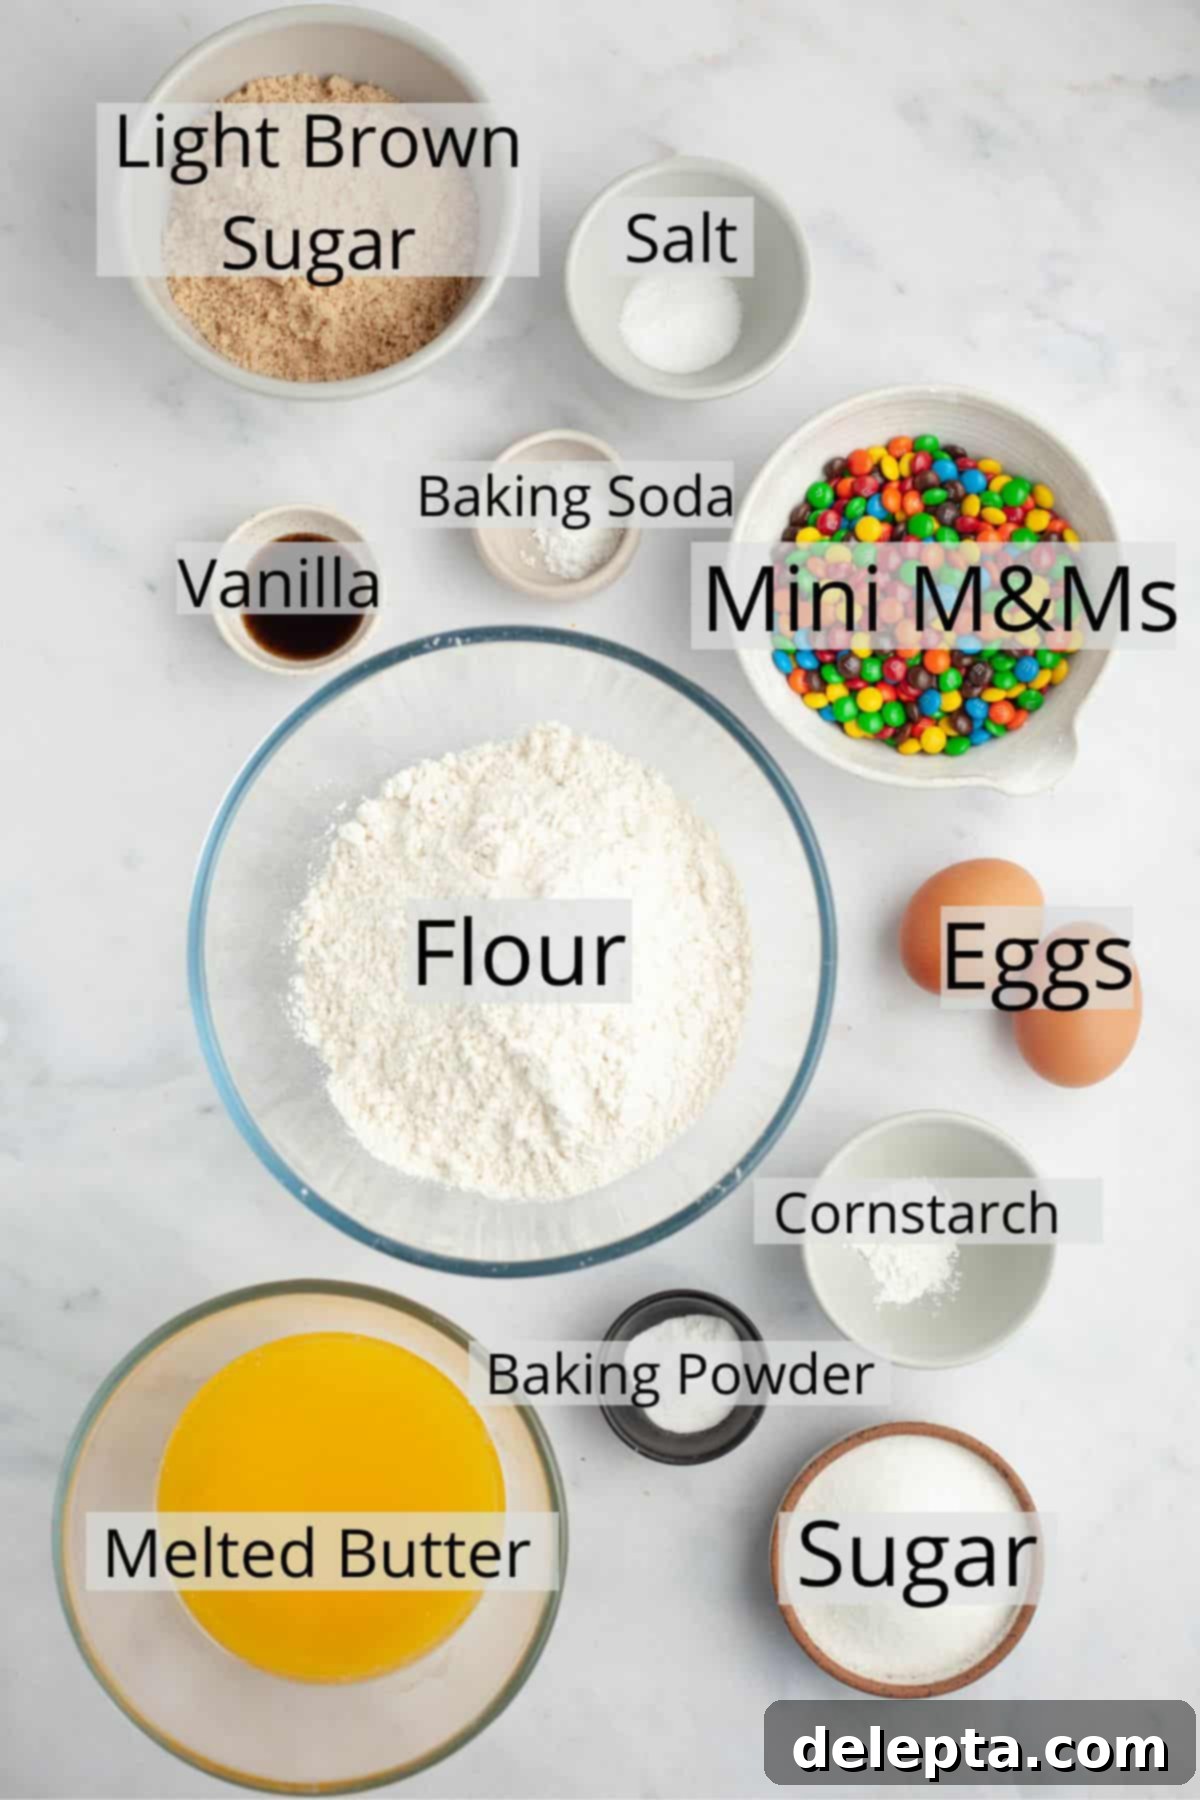
- Flour: This recipe was rigorously tested with standard all-purpose flour, yielding the best results for texture and structure. For those needing a gluten-free option, a 1-to-1 gluten-free all-purpose baking flour blend should work well as a direct substitute. Remember, proper flour measurement is key to soft, chewy cookies, so refer to the “Recipe Tips & Tricks” section for advice on measuring.
- Unsalted Butter: The use of melted butter in this recipe is crucial for achieving that wonderfully chewy texture, as it allows the sugars to dissolve more completely. I highly recommend using European-style butter (like Kerry Gold) due to its higher butterfat content. This extra richness translates into superior flavor and a more luxurious mouthfeel in your finished cookies. It’s absolutely vital that your melted butter is cooled to room temperature before combining it with the sugars to prevent the eggs from scrambling.
- White Sugar: Granulated white sugar contributes to the cookies’ structure, helps with browning, and provides a subtle crispness to the edges.
- Light Brown Sugar: This is a powerhouse ingredient for chewy cookies! Light brown sugar adds moisture, depth of flavor (thanks to its molasses content), and a soft, tender crumb. Using a higher ratio of brown sugar to white sugar directly impacts the chewiness factor.
- Cornstarch: This secret ingredient is your ticket to achieving an incredibly soft, almost cake-like interior in your cookies. It works by inhibiting gluten development, resulting in a more tender crumb. Don’t skip it!
- Eggs and Egg Yolk: The large egg provides structure and richness, while the extra egg yolk adds a significant boost of moisture and fat. This additional yolk is a key player in creating that desirable thick and chewy cookie texture. Ensure both the egg and egg yolk are at room temperature for better emulsification with the butter and sugars.
- Vanilla Bean Paste: To elevate the flavor profile, I prefer using vanilla bean paste over extract. It offers a more intense, complex vanilla flavor and beautiful flecks of vanilla bean. If vanilla bean paste isn’t available, simply substitute with an equal amount of good quality pure vanilla extract.
- Baking Powder & Baking Soda: These are your leavening agents. Baking soda reacts with the acidic brown sugar to create lift and spread, while baking powder provides additional lift, contributing to a thicker cookie.
- Kosher Salt: Salt is essential for balancing the sweetness and enhancing all the other flavors in the cookies. If you’re using fine table salt, remember to halve the amount, as it’s much denser than kosher salt.
- Mini M&M’s: The star of the show! I strongly recommend using the mini M&M’s rather than regular-sized ones. Their smaller size ensures even distribution throughout the dough, guaranteeing M&M goodness in every single bite without being too bulky.
Easy Step-by-Step Instructions to Bake Your M&M Cookies
Follow these simple steps to create perfectly soft and chewy mini M&M cookies with minimal effort:
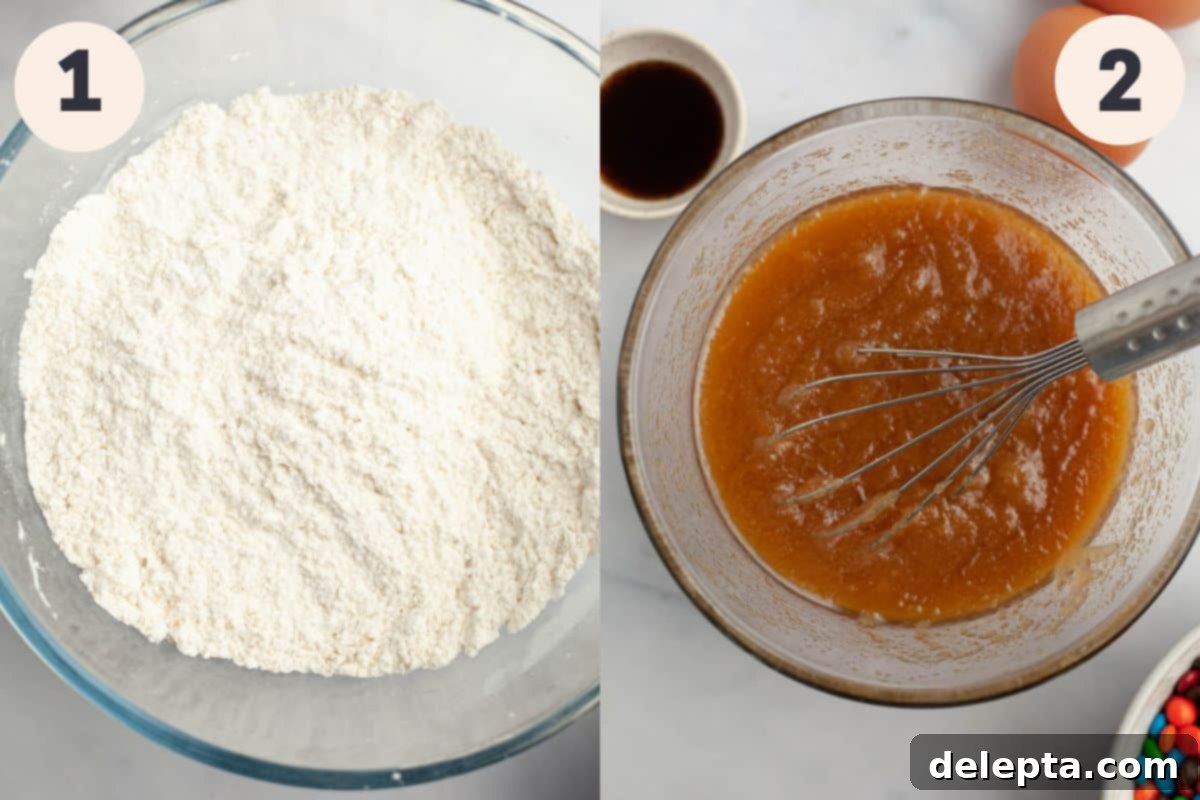
Step 1: Prepare Your Oven and Dry Ingredients. First, preheat your oven to 350°Fahrenheit (175°Celsius) and line two baking sheets with parchment paper. In a large bowl, whisk together all of your dry ingredients: flour, baking powder, baking soda, cornstarch, and kosher salt. While whisking dry ingredients separately ensures even distribution, for truly minimal cleanup and a one-bowl experience, you can add all dry ingredients directly in step 4.
Step 2: Combine Melted Butter and Sugars. Ensure your melted unsalted butter has cooled completely to room temperature. This is critical; hot butter can scramble your eggs in the next step. Add the light brown sugar and white sugar to the cooled melted butter in a large bowl. Whisk vigorously until the mixture is smooth, creamy, and well combined, with no visible sugar lumps.
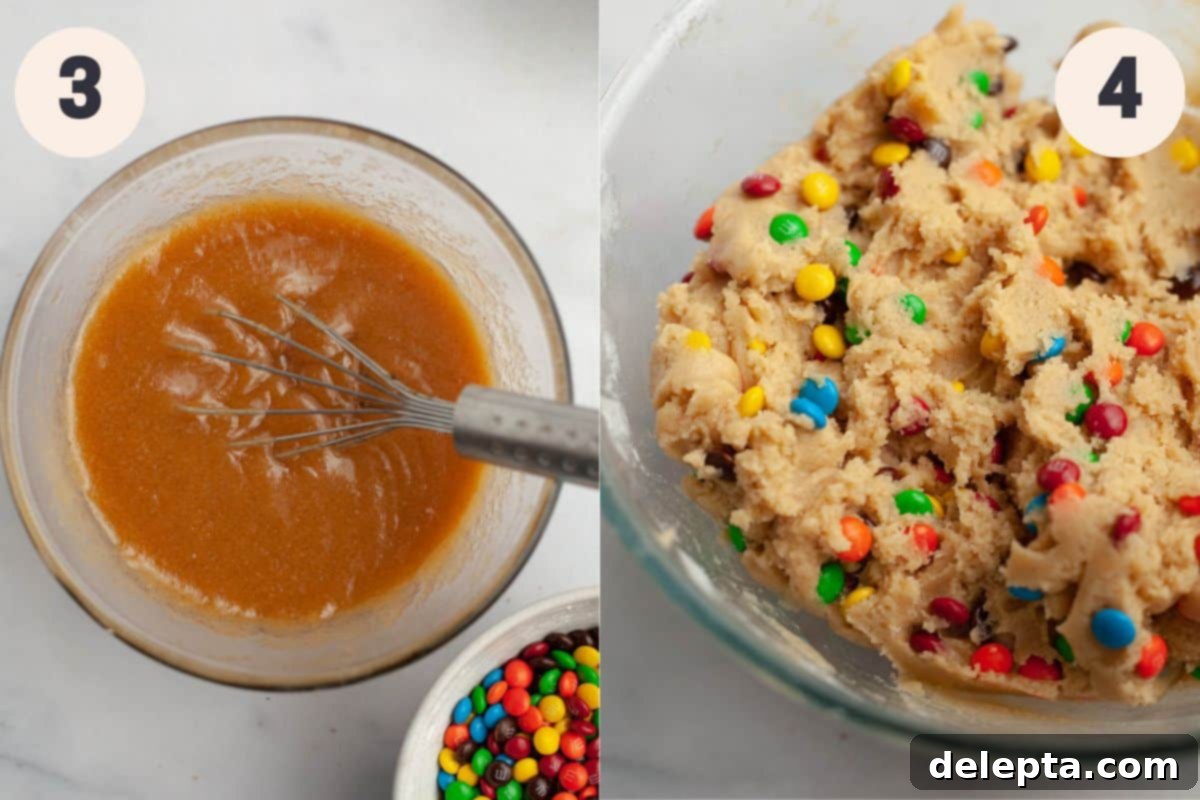
Step 3: Incorporate Eggs and Vanilla. To the butter and sugar mixture, add the large egg, the additional large egg yolk, and the vanilla bean paste (or extract). Whisk everything together again until the mixture is completely smooth and appears noticeably thicker and slightly lighter in color. This ensures all the wet ingredients are perfectly emulsified.
Step 4: Combine Wet and Dry Ingredients, Add M&M’s. Pour the prepared wet ingredients into the dry ingredients (or add the dry ingredients to the wet if you skipped whisking separately). Using a sturdy wooden spoon or a rubber spatula, gently fold everything together until just combined. This will take a few minutes as the flour absorbs the wet ingredients; resist the urge to overmix, as this can lead to tough cookies. Once the dough is formed and no dry streaks of flour remain, stir in the vibrant mini M&M’s until they are evenly distributed throughout the dough.
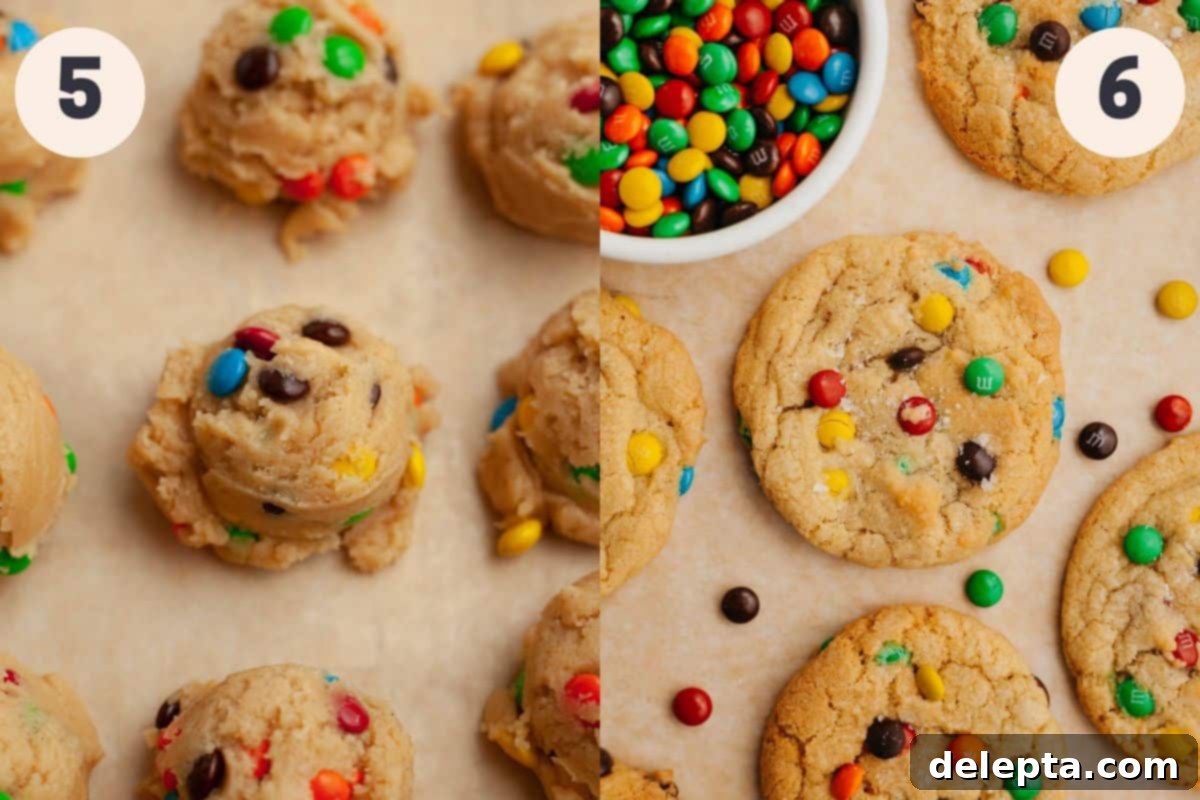
Step 5: Scoop and Bake! Grab a 1.5 tablespoon cookie scoop to portion out 24 uniform cookie dough balls. Arrange them on your two parchment-lined baking sheets, ensuring they are spaced about 2-3 inches apart to allow for proper spreading. Bake in your preheated oven for 9-12 minutes. The cookies are done when their edges are lightly golden and set, but the centers still look slightly soft and puffy. For any cookie dough not being baked immediately, cover and place it in the fridge.
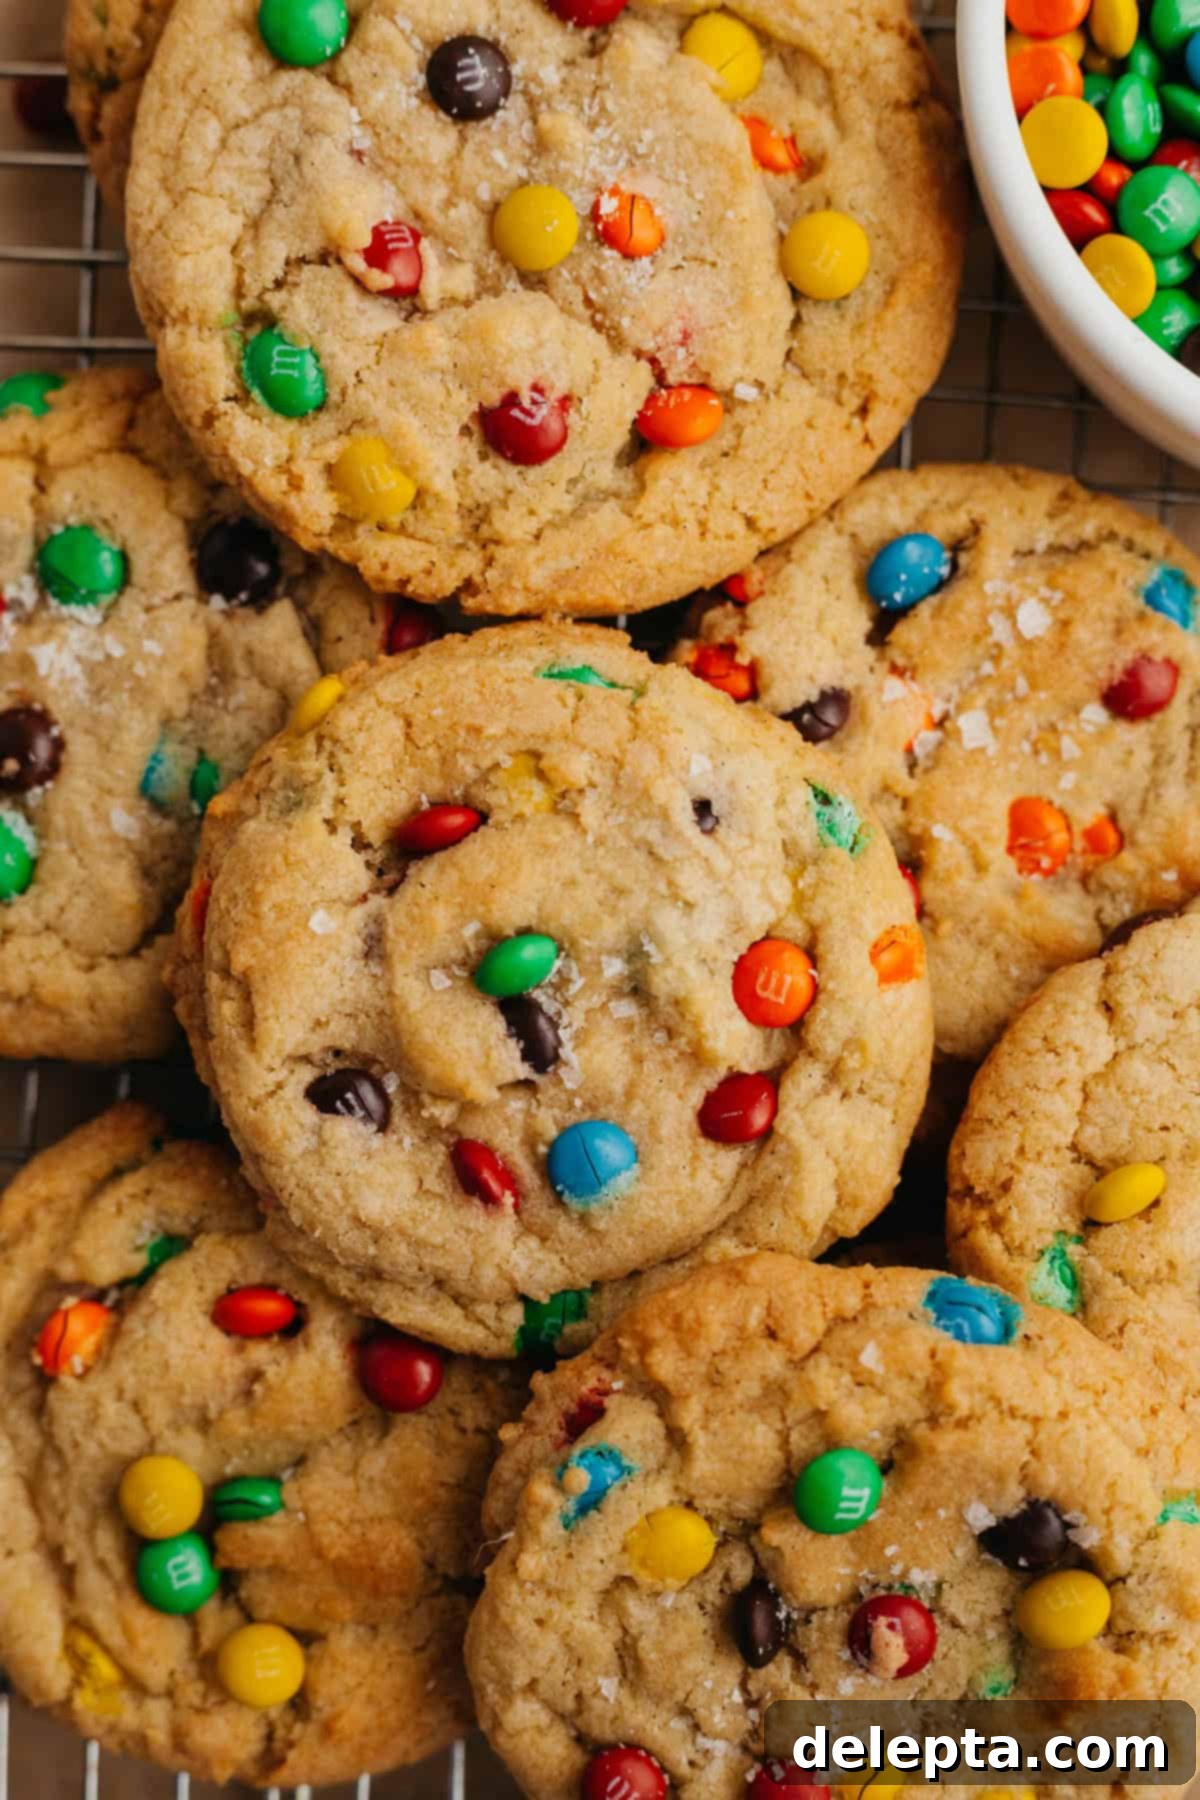
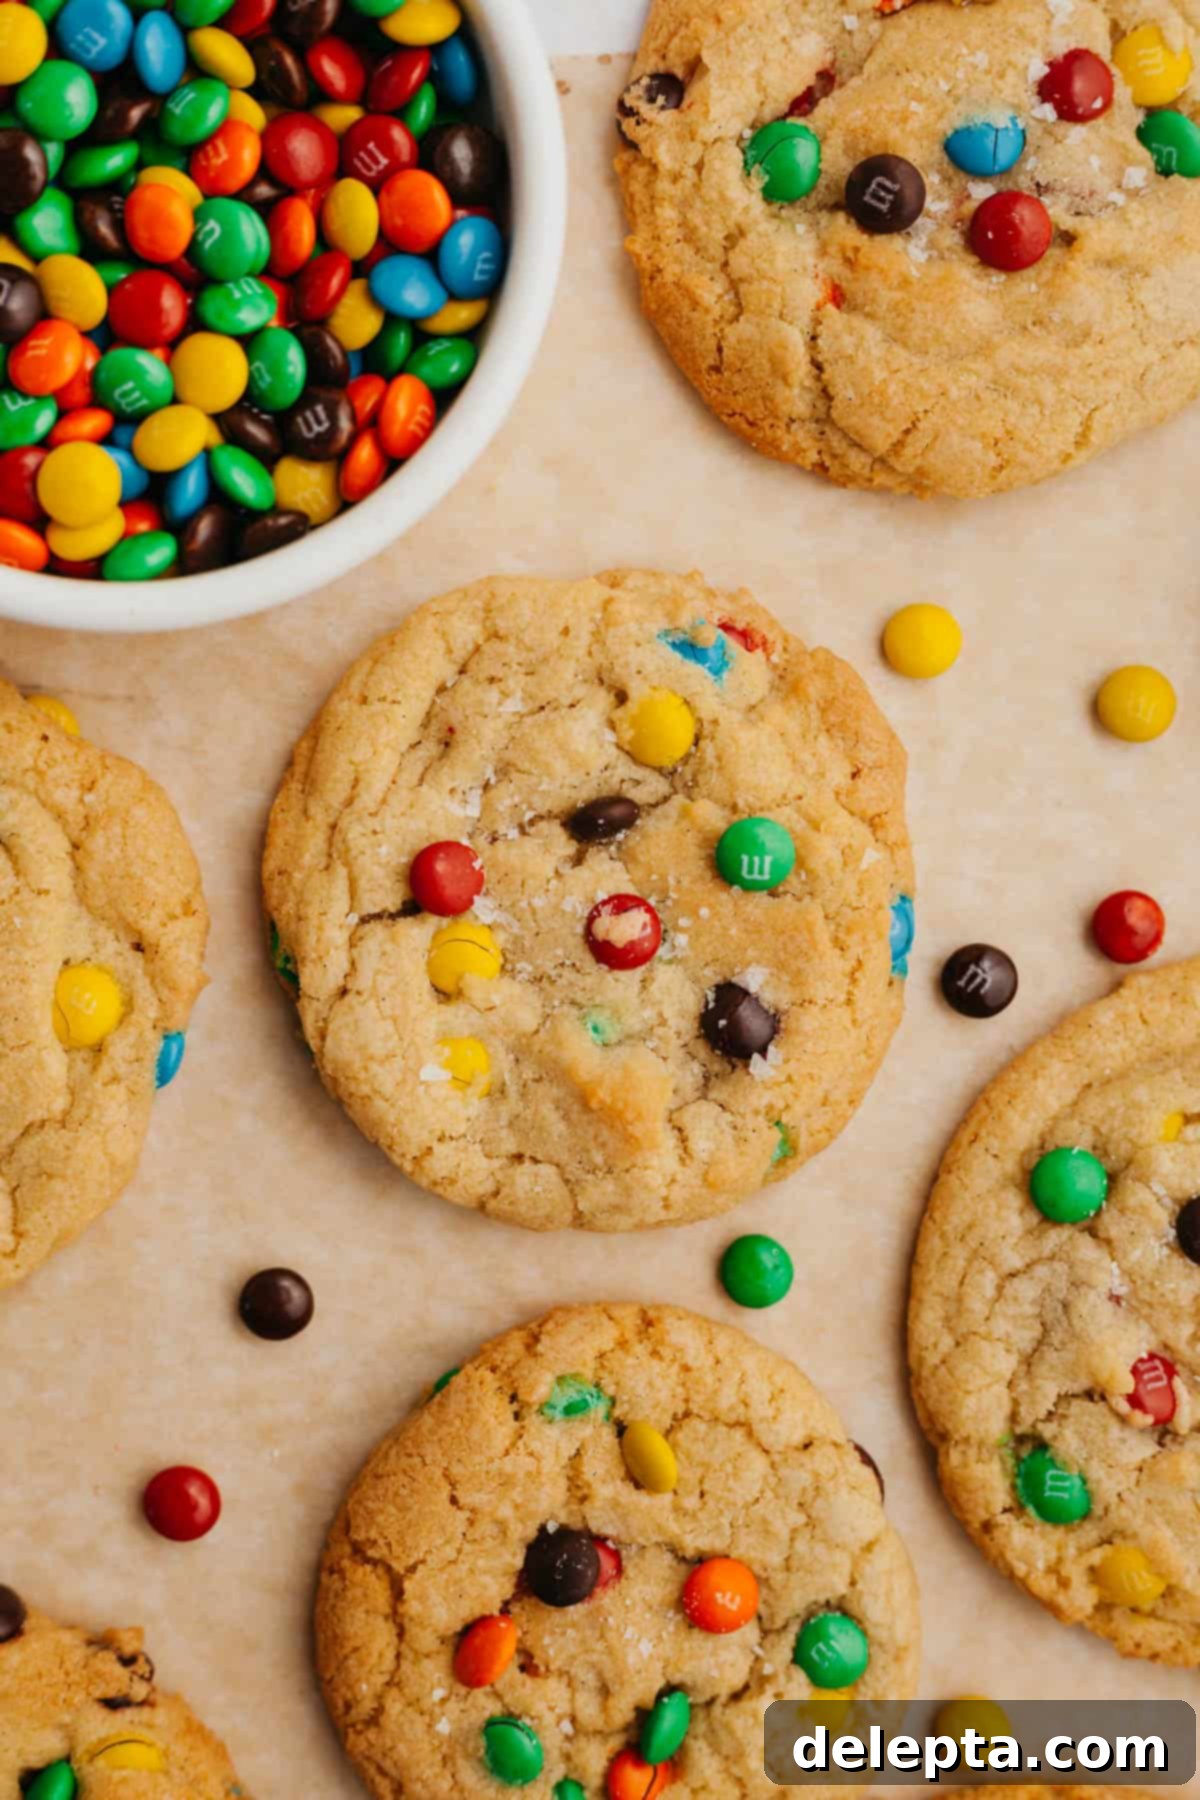
Step 6: The Bakery Finish (Optional but Recommended!). As soon as the cookies emerge from the oven, for that perfect bakery-style round shape, use a biscuit cutter or a large glass that’s slightly larger than your cookie. Place it around a warm cookie and gently ‘scoot’ it into a perfect circle. While still warm, gently press a few extra mini M&M’s onto the tops of the cookies for a vibrant finish. Finally, sprinkle a touch of flaky sea salt over them to enhance their sweetness and add a delightful crunch. Enjoy these warm cookies with a cold glass of milk for the ultimate treat!
Pro Tips & Tricks for Ultimate Cookie Success
Achieve cookie perfection every time with these helpful hints and baking insights:
- Accurate Measuring is Key – For consistent and professional-level baking results, I cannot stress enough the importance of using a reliable digital kitchen scale. Measuring your ingredients, especially flour, by weight (metric grams are best) is significantly more accurate than using measuring cups and will make a huge difference in the outcome of your cookies.
- Proper Flour Measurement (if not weighing) – If you absolutely must use measuring cups instead of a scale, employ the “fluff and sprinkle” method for flour. First, fluff the flour in its container with a spoon. Then, gently sprinkle it into your measuring cup until it’s overflowing, and level it off with the back of a knife without packing it down. For a visual guide, check out this link here. Using too much flour is a common culprit for dry, crumbly cookies instead of the desired soft and chewy texture!
- Room Temperature Ingredients Matter – Always ensure all your cold ingredients (eggs, butter if not melted) are at room temperature before you begin baking. This usually means pulling them out of the fridge an hour or two before you start the recipe. Room temperature ingredients emulsify better, creating a smoother dough and a more uniform bake.
- Achieve Bakery-Style Perfection – To give your cookies that enviable perfectly round, artisanal look, use a biscuit cutter or a large mug. Immediately after the cookies come out of the oven, place the cutter/mug around a warm cookie and gently swirl or ‘scoot’ it to reshape any irregular edges into a flawless circle. Don’t forget to gently press extra M&M’s on top and sprinkle a touch of flaky sea salt for enhanced visual appeal and flavor! Avoid adding too many extra M&M’s on top before baking, as I’ve found their colors can sometimes bleed into the dough.
- Using Full-Size M&M’s? – I highly recommend sticking with mini M&M’s for the best distribution and texture. However, if full-size M&M’s are all you have, I suggest roughly chopping them up before folding them into the cookie dough. This prevents them from being too large and overwhelming in the cookie.
- For Extra Thick & Chewy Cookies – If you desire an even thicker, chewier cookie with less spread, an optional chill time can be beneficial. Let the scooped cookie dough balls chill in the fridge for at least 1 hour, or even overnight, before baking. This allows the butter to solidify and the flour to fully hydrate, resulting in a more compact cookie.
- Don’t Overbake! – Cookies continue to cook slightly even after being removed from the oven. For that perfect soft and chewy texture, pull them out when the edges are set and golden but the centers still look a little soft and underdone.
Frequently Asked Questions About Mini M&M Cookies
Absolutely not! The beauty of this recipe is that it’s designed to be a no-chill cookie, meaning you can bake them immediately. The cookies shown in the pictures were not chilled, and they come out wonderfully soft and chewy. However, if you prefer an even thicker, slightly denser cookie with minimal spread, you certainly can chill the cookie dough balls in the fridge for at least 1 hour. This will give the butter a chance to firm up and the flavors to meld further, resulting in a slightly different, equally delicious texture.
Yes, you absolutely can use regular M&M’s if that’s what you have on hand! While I highly recommend mini M&M’s for optimal distribution and a seamless bite, regular M&M’s will also work. To prevent them from being too large and causing the cookies to spread excessively or crumble, I suggest roughly chopping up at least half (or even all) of them before adding them to the dough. This helps maintain the cookie’s structure and ensures more M&M’s in every bite.
You sure can, and it’s a fantastic idea if you want to amp up the chocolate factor! To incorporate chocolate chips, simply use half the specified amount of mini M&M’s (e.g., 5/8 cup) and then add an equal amount of mini chocolate chips. This will give you a delightful combination of crunchy M&M’s and gooey chocolate, creating a rich and varied texture in your cookies. Feel free to experiment with different types of chocolate chips, like milk chocolate, semi-sweet, or even white chocolate!
The most common reason for dry, crumbly, or cookies that don’t spread properly is too much flour. Ensure you’re measuring your flour accurately, ideally using a kitchen scale. If using measuring cups, follow the “fluff and sprinkle” method as described in the “Recipe Tips & Tricks” section to avoid compacting the flour. Overmixing the dough can also lead to tough, dry cookies, as it develops the gluten too much.
Yes, this recipe can be adapted for gluten-free baking! Replace the all-purpose flour with a 1-to-1 gluten-free all-purpose baking flour blend. Make sure the blend contains xanthan gum, or add 1/2 teaspoon per cup of flour if it doesn’t. The overall texture may vary slightly, but they should still be delicious.
Storage and Freezing Instructions for Freshness
Keep your delicious mini M&M cookies fresh for longer with these handy storage and freezing tips:
Storing Baked Cookies: Once baked and completely cooled, store your cookies in an airtight container at room temperature. They will retain their delightful soft and chewy texture for up to 1 week. To maintain optimal freshness, you can place a slice of bread in the container with the cookies; the cookies will absorb moisture from the bread, keeping them softer for longer. Alternatively, for even longer storage, baked cookies can be frozen in a freezer-safe bag or container for up to 3 months. Thaw at room temperature or warm briefly in the microwave for a fresh-out-of-the-oven experience.
Freezing Unbaked Cookie Dough: This recipe is perfect for making ahead! To freeze unbaked cookie dough balls, scoop them onto a parchment-lined baking sheet and freeze until solid (about 1-2 hours). Once firm, transfer the frozen dough balls to a freezer-safe bag or a heavy-duty ziplock bag, ensuring all excess air is removed. Label the bag with the date. The dough can be frozen for up to 2 months. When you’re ready to bake, there’s no need to thaw the dough! Simply place the frozen cookie dough balls on a parchment-lined baking sheet and bake as directed, adding an extra minute or two to the baking time, or until the edges are golden and the centers are just set.
Craving More? Discover More Irresistible Cookie Recipes!
If you loved the simplicity and deliciousness of these mini M&M cookies, you’re in for a treat! Explore some of my other favorite cookie recipes, perfect for any occasion:
- The Best Browned Butter Snickerdoodles
- Inside Out Chocolate Chip Cookies
- Homemade Oreo Chocolate Chip Cookies (1-Bowl)
- Classic Thumbprint Hershey Kiss Cookies
Have you made this incredibly easy and delicious recipe? Please take a moment to rate the recipe below and share your experience! Don’t forget to follow me on Instagram @alpineella and Pinterest to see more sweet treats and baking adventures!
Recipe Card: Soft and Chewy Mini M&M Cookies

Soft and Chewy Mini M&M Cookies
By Ella Gilbert
Pin Recipe
Save RecipeSaved!
Ingredients
- 1 ½ sticks unsalted butter melted and cooled to room temperature
- ½ cup white sugar
- 1 cup light brown sugar
- 1 large egg room temperature
- 1 large egg yolk room temperature
- 2 teaspoons vanilla bean paste
- ¾ teaspoon baking powder
- 1 teaspoon baking soda
- 1 ½ teaspoons kosher salt
- 1 teaspoon cornstarch
- 2 ¾ cups all purpose flour
- 1 ¼ cup mini m&ms
Instructions
-
Preheat your oven to 350°Fahrenheit (175°Celsius). Line 2 large baking sheets with parchment paper to prevent sticking and ensure even baking.
-
In a spacious mixing bowl, whisk together the completely cooled melted butter with both the white sugar and light brown sugar until the mixture is beautifully smooth and creamy.1 ½ sticks unsalted butter, ½ cup white sugar, 1 cup light brown sugar
-
Add the large egg, the extra large egg yolk, and the vanilla bean paste (or extract). Whisk vigorously again until all ingredients are thoroughly combined and the mixture looks thick and uniform.1 large egg, 1 large egg yolk, 2 teaspoons vanilla bean paste
-
Into the wet ingredients, add the all-purpose flour, baking soda, baking powder, cornstarch, and kosher salt. Using a wooden spoon or a flexible rubber spatula, gently fold everything together until just combined. It will take a few minutes for the dough to come together smoothly, but be careful not to overmix, as this can result in tough cookies!¾ teaspoon baking powder, 1 teaspoon baking soda, 1 ½ teaspoons kosher salt, 2 ¾ cups all purpose flour, 1 teaspoon cornstarch
-
Gently stir in the vibrant mini M&M’s until they are evenly distributed throughout the cookie dough.1 ¼ cup mini m&ms
-
Use a 1.5 tablespoon cookie scoop to portion out uniform cookie dough balls. Place them on the lined baking sheets, ensuring they are approximately 3 inches apart to allow for proper spreading during baking. Bake for 9-12 minutes, or until the edges are lightly golden and the centers appear just set. Any cookie dough not being baked right away should be covered and placed in the fridge.
-
For that perfect bakery-worthy finish, as soon as the cookies come out of the oven, take a small handful of extra mini M&M’s and carefully press them onto the warm cookies. If any cookies are not perfectly round, use a biscuit cutter or a large glass to gently ‘scoot’ the warm cookie into a beautiful circle. Finish with a delicate sprinkle of flaky sea salt for an extra touch of flavor and crunch. Serve warm and enjoy!
Notes
Butter Choice: For a truly rich and creamy bake, I prefer to use European-style butter, such as Kerry Gold, in my recipes. Its higher butterfat content contributes significantly to the cookies’ luxurious flavor and texture.
Salt Conversion: If you don’t have kosher salt on hand and are using fine table salt, please remember to halve the amount called for in the recipe. A general conversion is that 1 teaspoon of kosher salt is roughly equivalent to ½ teaspoon of fine salt.
M&M’s Size: While mini M&M’s are recommended for optimal distribution, you can certainly use regular-sized M&M’s. If you find them too large for the cookies, I suggest roughly chopping them up before incorporating them into the dough.
Chocolate Chip Addition: For an extra boost of chocolate flavor and varied texture, feel free to use half the amount of mini M&M’s and add an equal amount of mini chocolate chips. This creates a delightful combination of crunchy candy shells and gooey chocolate.
Storage for Freshness: Baked cookies can be stored in an airtight container at room temperature for up to 1 week. For longer preservation, freeze the unbaked cookie dough balls in a freezer-safe bag for up to 2 months. When you’re ready to bake from frozen, simply add an extra minute or two to the suggested baking time.
Nutrition
