Spooktacular Homemade Halloween Dirt Cups: Easy Oreo Chocolate Pudding Dessert for Parties
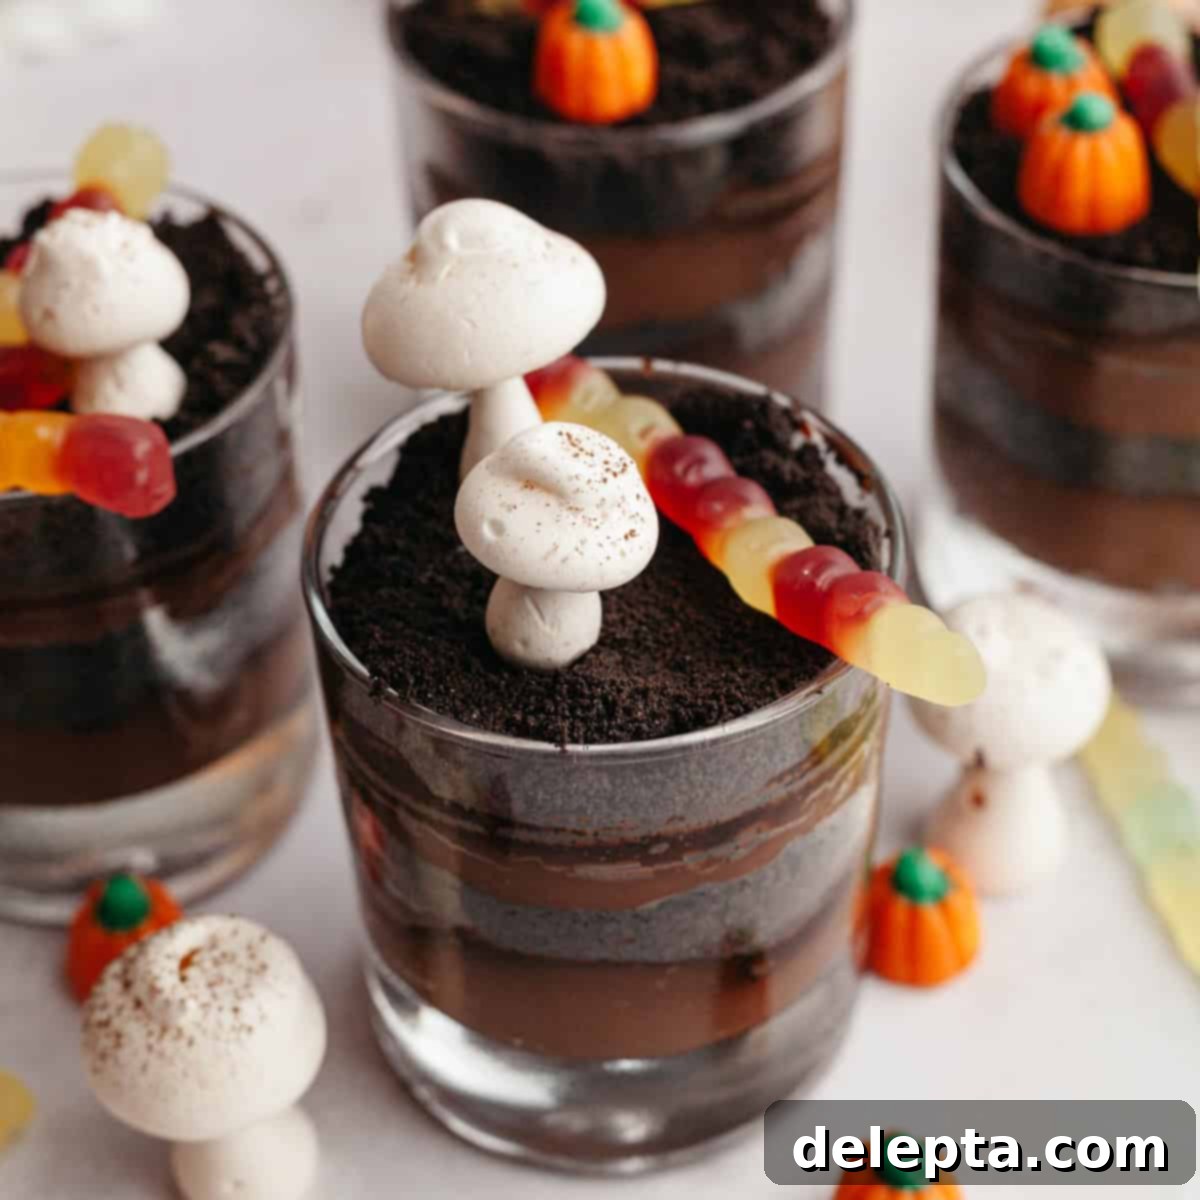
Get ready to embrace the enchanting spirit of spooky season with these absolutely delightful Halloween dirt cups! Imagine your favorite childhood treat, the classic nostalgic Oreo dirt cup, but elevated with a homemade touch and a festive twist perfect for fall. These charming chocolate pudding cups are meticulously layered with rich, crushed Oreo cookies, then imaginatively topped with playful gummy worms and whimsical meringue mushrooms, creating an edible mini-graveyard or enchanted forest scene right in a glass.
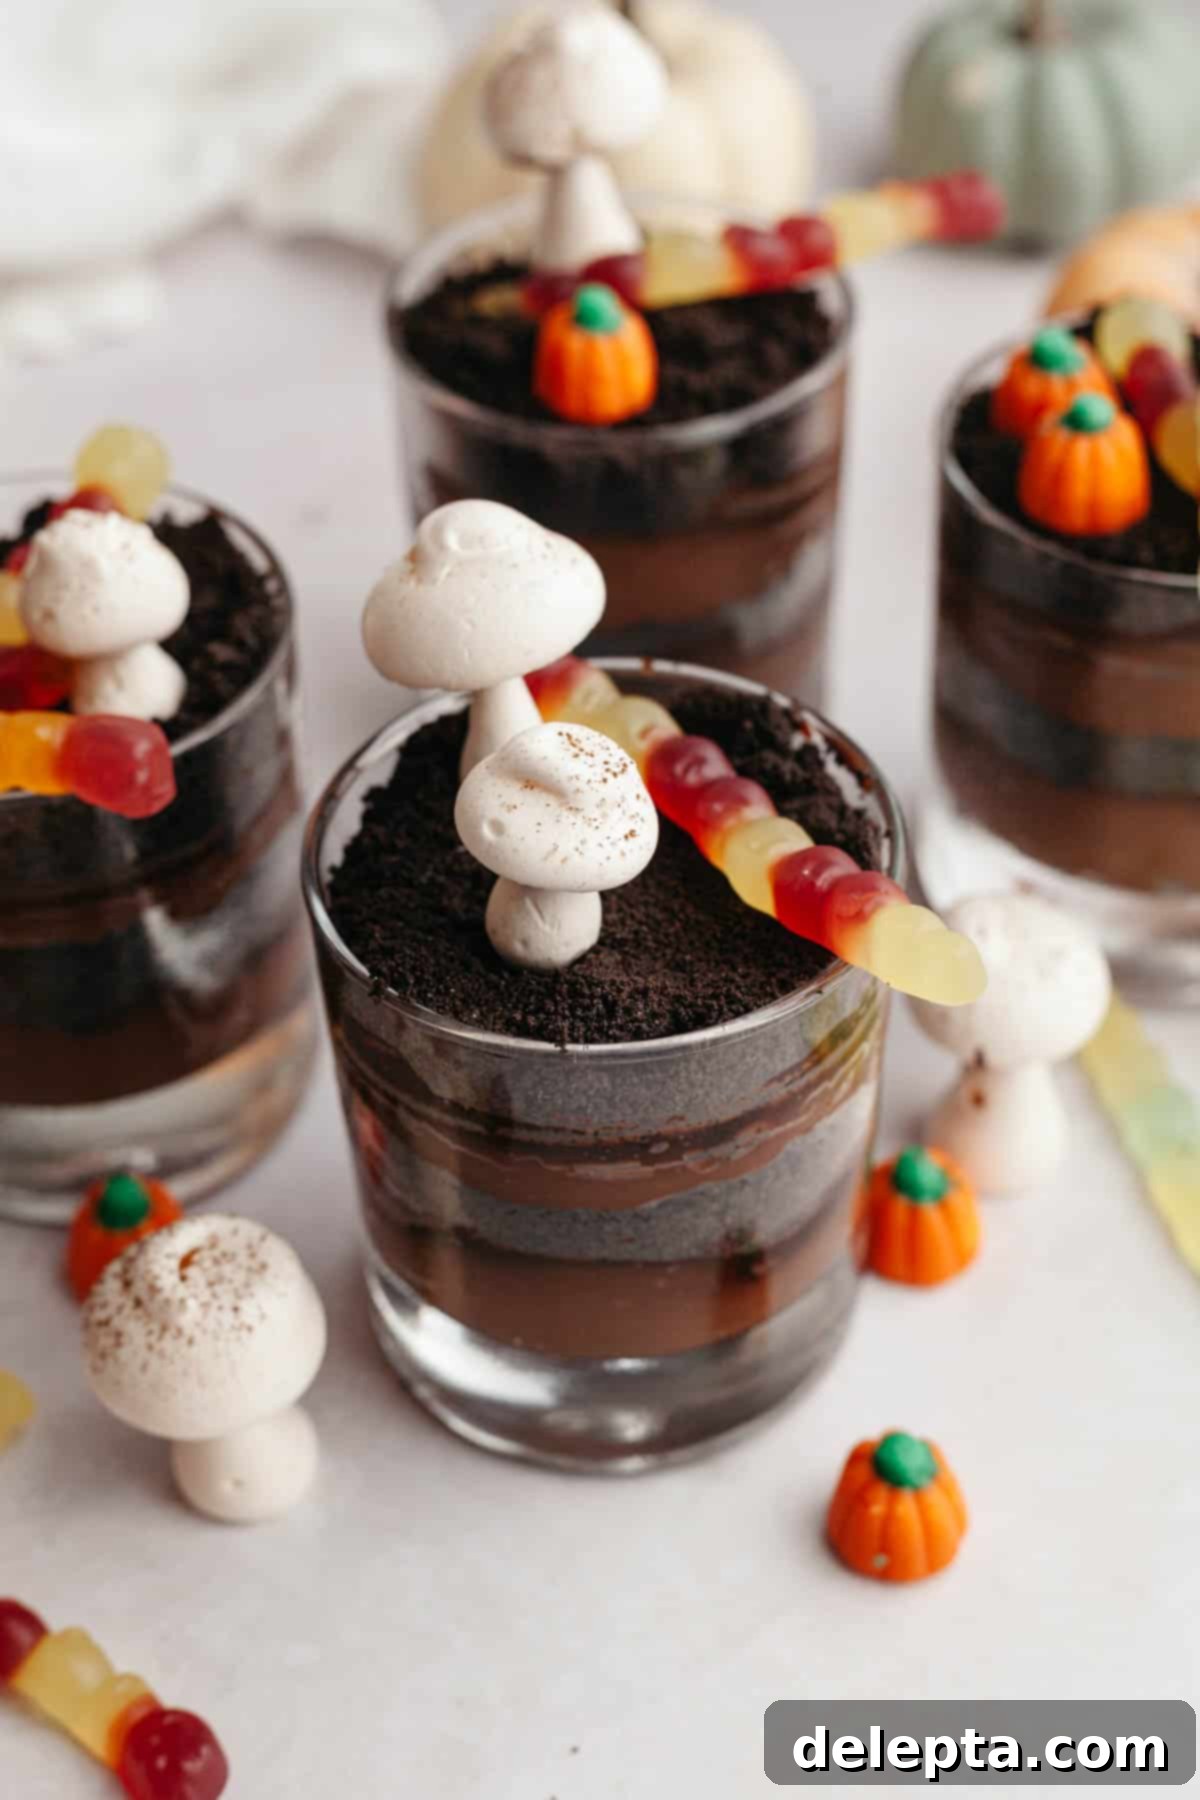
While the convenience of boxed instant pudding mix and a dollop of Cool Whip might tempt you, I firmly believe in the unparalleled joy and superior flavor of homemade desserts that are deceptively simple to create. And let me assure you, these Oreo dirt cups, featuring a creamy, homemade chocolate pudding, are incredibly easy to make from scratch, offering a taste and texture that instant mixes simply can’t replicate. Forget the overly sweet, artificial taste of store-bought pudding; this recipe delivers a truly rich, satisfying chocolate experience.
Originally, I considered adapting the chocolate pudding from my popular chocolate pudding pie recipe with a graham cracker crust. However, for these dirt cups, I decided to redevelop the pudding to be entirely egg-free. This means you can say goodbye to the tricky step of tempering eggs and the worry of accidentally ending up with lumpy pudding – a true win for simplicity and a smooth, velvety texture every time!
Each cup is thoughtfully layered with the iconic crushed Oreo cookies, providing that signature “dirt” texture and a delightful crunch. For decoration, I opted for classic gummy worms, peeking out as if they’re crawling through the soil, alongside charming homemade meringue mushrooms. The inspiration for these enchanting little fungi came from a charming store in Maine, and I just knew I had to incorporate them for an extra whimsical, forest-floor feel that’s perfect for Halloween.
If you’re looking for even more spine-tinglingly delicious desserts to complete your Halloween party spread, don’t miss out on my decadent black velvet cake and its adorable counterpart, the black velvet cupcakes! Or, if you’re craving more autumnal flavors, be sure to try my individual pumpkin pie cups, which are another fantastic seasonal treat. This recipe was first published in October 2020 and has since been completely revamped with a brand new, improved recipe and stunning new images to inspire your Halloween baking.
[feast_advanced_jump_to]
Why You’ll Adore These Halloween Dirt Cups
These Halloween dirt cups aren’t just a dessert; they’re a fun, creative activity and a delicious treat all rolled into one. Here’s why this recipe is bound to become a Halloween tradition:
- Effortlessly Simple Chocolate Pudding: This recipe features an incredibly easy-to-follow chocolate pudding recipe that comes together beautifully without any fuss. Despite its simplicity, it boasts an incredibly deep and rich chocolate flavor, thanks to the thoughtful combination of both high-quality cocoa powder and chopped bittersweet chocolate. The best part? It’s entirely egg-free, eliminating any concerns about tempering and making the process wonderfully straightforward for bakers of all levels.
- Ultimate Halloween Party Treats: These Oreo dirt cups are the quintessential dessert for any Halloween gathering. Their “dirt” appearance provides a perfect canvas for countless spooky customizations. You can effortlessly transform them into a truly ghoulish delight with fun additions like pumpkin-shaped candies, candy eyeballs, or even by using Milano cookies to create mini edible gravestones. They are individual portions, making them ideal for serving at parties without the need for plates and forks.
- Nostalgic and Fun: Revisit your childhood with a dessert that brings back fond memories, now with a festive Halloween twist. The familiar taste and playful presentation make these dirt cups a hit with both kids and adults.
- Customizable Decorations: From creepy crawlies to whimsical mushrooms, the decorating possibilities are endless. Let your creativity run wild and make each cup a unique Halloween masterpiece.
Gather Your Essential Ingredients
Creating these magical Halloween dirt cups begins with a selection of quality ingredients. Each component plays a vital role in achieving that perfect creamy pudding and classic “dirt” texture. Here’s a closer look at what you’ll need:
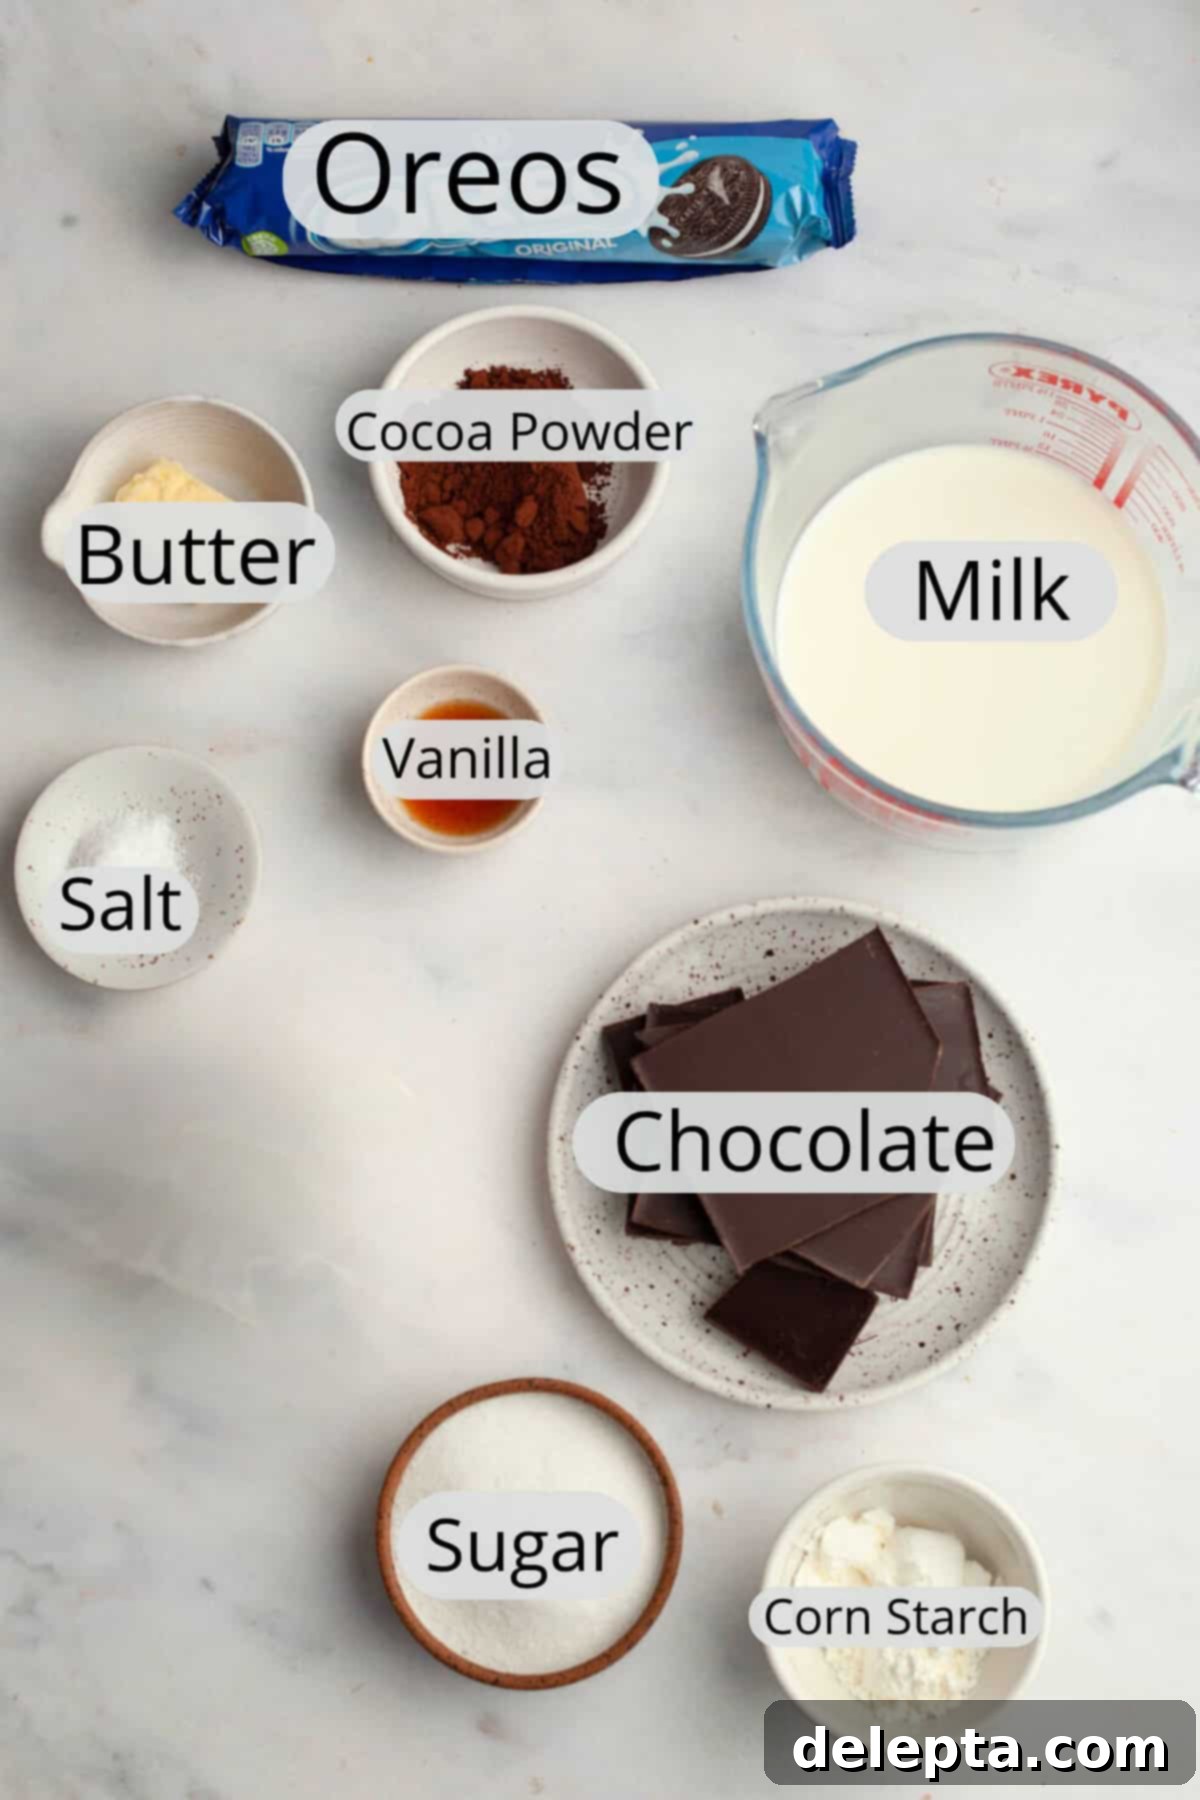
- High-Quality Chocolate: The type of chocolate you choose will significantly impact the depth of flavor in your pudding. I strongly recommend using a good quality chocolate bar, ideally bittersweet chocolate with around 70% cocoa content. This delivers a rich, intense chocolate taste that truly elevates the dessert. Chocolate chips, while convenient, often contain emulsifiers that can make them harder to melt smoothly, potentially affecting the pudding’s texture. However, if they are all you have, they will work in a pinch.
- Dutch-Processed Cocoa Powder: This recipe has been specifically developed using Dutch-processed cocoa powder. This type of cocoa is treated with an alkali, which neutralizes its acidity, resulting in a darker color and a mellower, richer chocolate flavor compared to natural cocoa powder. It contributes to the deep, earthy “dirt” color and intense taste.
- Whole Milk: For the creamiest, most luxurious chocolate pudding, whole milk is essential. Its higher fat content provides a richer mouthfeel and helps the pudding thicken beautifully. I haven’t tested this recipe with skimmed or low-fat milk, which may result in a thinner, less decadent pudding.
- Cornstarch: This is the crucial thickening agent for our homemade pudding. Don’t even think about skipping it! Cornstarch gives the pudding its wonderfully thick and spoonable consistency, ensuring it holds its shape when layered with the Oreo crumbs.
- Unsalted Butter: Adding a touch of butter at the very end of the pudding-making process is a secret weapon for an even richer, glossier, and silkier pudding. It melts in and enhances the overall texture and flavor, adding a touch of indulgence. Ensure your butter is at room temperature for easy incorporation.
- Crushed Oreo Cookies: A non-negotiable for any dirt cup! The iconic chocolate sandwich cookies provide the perfect “dirt” texture and a beloved flavor contrast to the creamy pudding. You can find pre-crushed Oreos at many grocery stores for convenience, or easily crush them yourself in a food processor for fine crumbs, or even by placing them in a Ziploc bag and using a rolling pin.
- Granulated Sugar: To sweeten the pudding to perfection, balancing the bitterness of the chocolate and cocoa.
- Kosher Salt: A pinch of salt is vital in any sweet recipe as it enhances all the other flavors, particularly the chocolate, making it taste even more pronounced and delicious.
- Vanilla Extract: A splash of good quality vanilla extract adds a warm, aromatic depth that complements the chocolate beautifully, rounding out the flavor profile of the pudding.
Creative Substitutions & Exciting Additions
One of the best things about these Halloween dirt cups is their versatility! Feel free to customize them to your taste, dietary needs, or simply to spark your creative flair for the spooky season:
- Cocoa Powder Alternatives: While Dutch-processed cocoa powder offers a deep, rich color and flavor, you can certainly use natural cocoa powder in a pinch. Just be aware that the pudding might have a slightly lighter color and a tangier chocolate note due to natural cocoa’s acidity. The overall flavor will still be delicious!
- Cookie Choices: Beyond the classic regular Oreo cookies, feel free to experiment with other crunchy cookie layers. Chocolate cookies, graham crackers (for a less intense chocolate flavor), or even golden Oreos could offer an interesting twist. If using plain graham crackers, consider adding a dash of cinnamon for warmth. For a gluten-free option, use gluten-free chocolate sandwich cookies.
- Whimsical Meringue Mushrooms: These adorable meringue mushrooms add a truly enchanting, fairytale forest touch to your dirt cups. I personally love their light, airy texture and delicate sweetness. You can follow this meringue mushroom recipe for homemade perfection. Alternatively, for a quicker solution, consider buying ready-made marzipan mushrooms, fondant mushrooms, or other mushroom-themed cake toppers from a specialty baking store or online. They provide a similar visual appeal with less effort.
- Gummy Worms & Beyond: Gummy worms are a classic dirt cup decoration. But don’t stop there! Think gummy spiders, candy corn, small plastic spiders, or even skeleton hands emerging from the “dirt.”
- Whipped Cream Layer: For a lighter, airier dessert, fold some freshly whipped cream into the chilled pudding before assembling, or add layers of whipped cream between the pudding and Oreo layers for a delightful contrast.
- Pumpkin Puree Swirl: For a fall-themed twist, warm a small amount of pumpkin puree with a touch of maple syrup and pumpkin spice, then swirl it into the pudding layers.
- Cream Cheese Layer: A sweetened cream cheese layer (cream cheese, powdered sugar, vanilla) can be added for a cheesecake-like element.
Crafting Your Spooky Dirt Cups: A Step-by-Step Guide
Follow these easy steps to create your delicious and visually appealing Halloween dirt cups:
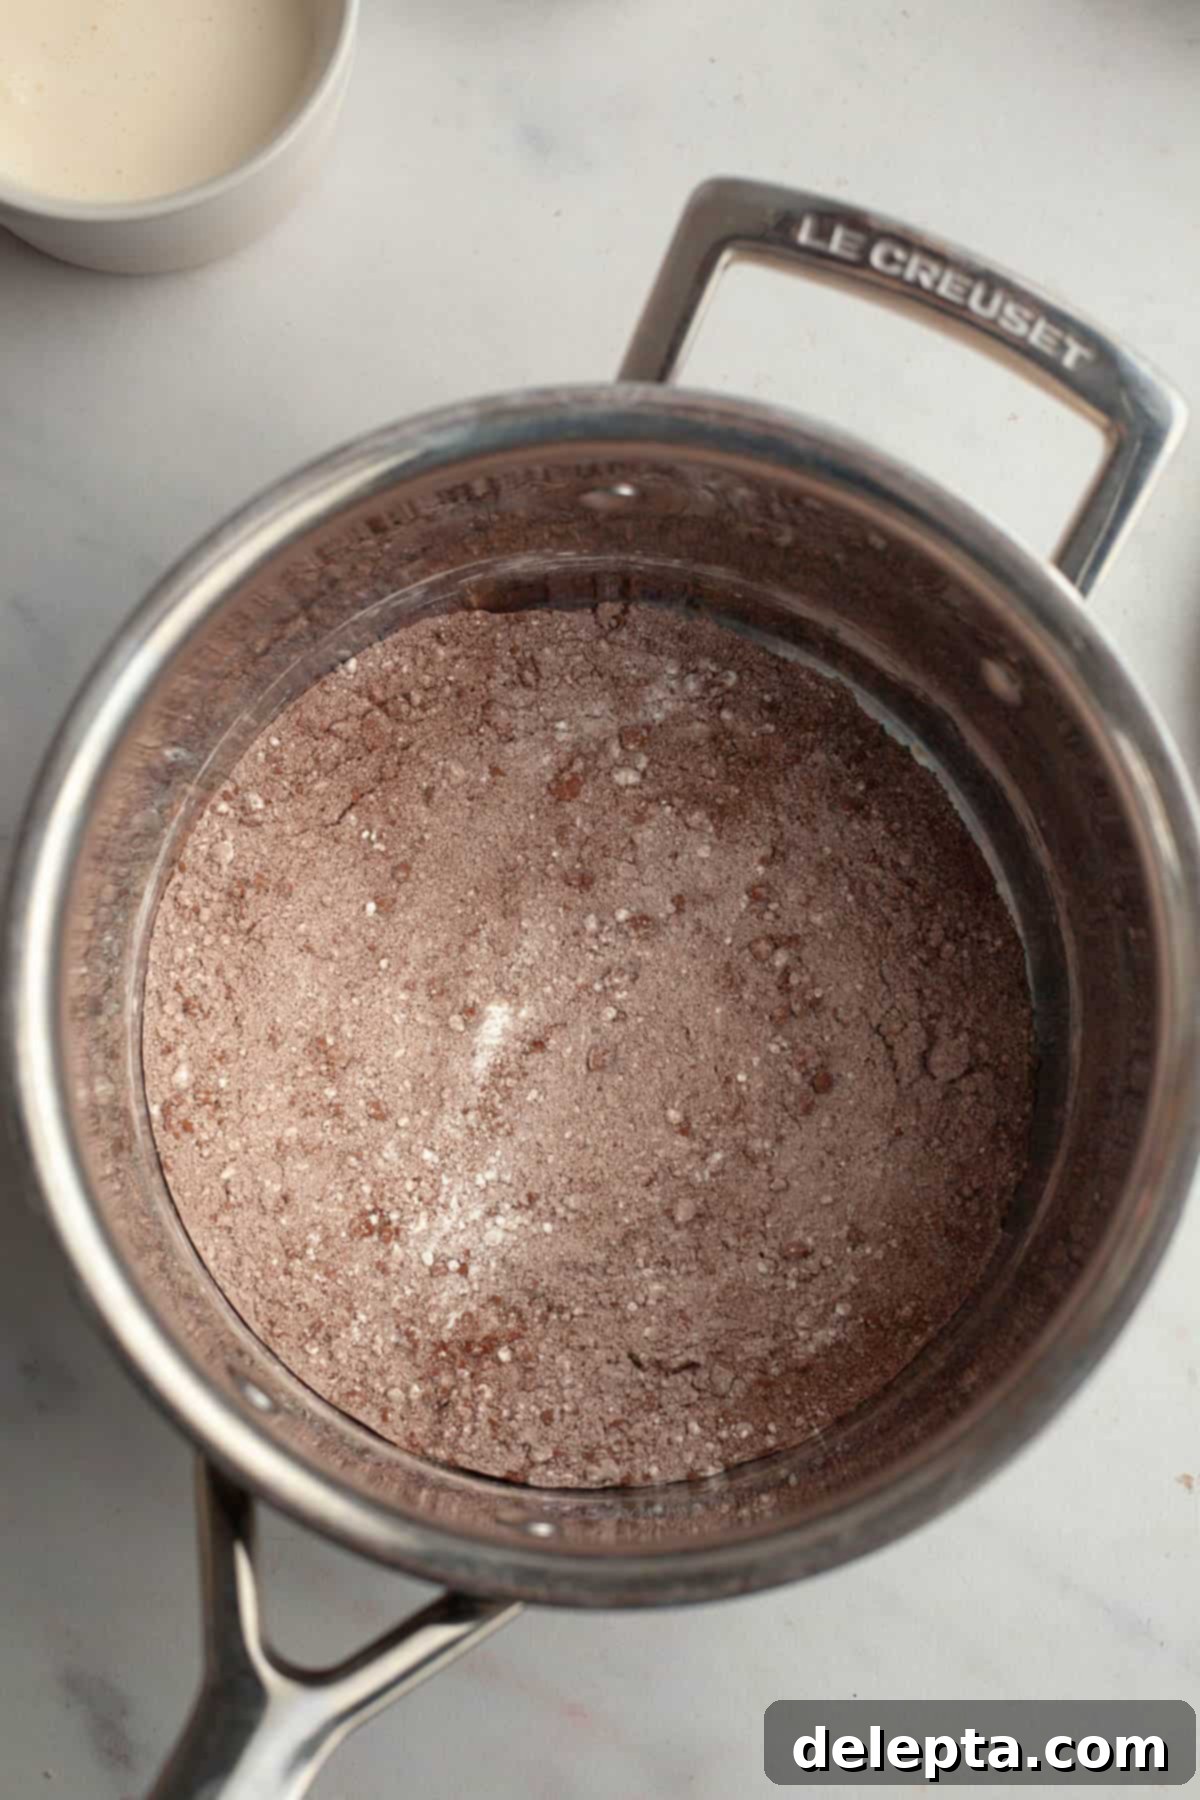
- Step 1: Prepare the Dry Ingredients. In a large, heavy-bottomed saucepan, combine the cornstarch, salt, granulated sugar, and cocoa powder. Whisk these dry ingredients together thoroughly. This ensures there are no lumps of cocoa or cornstarch, which is crucial for a smooth pudding.
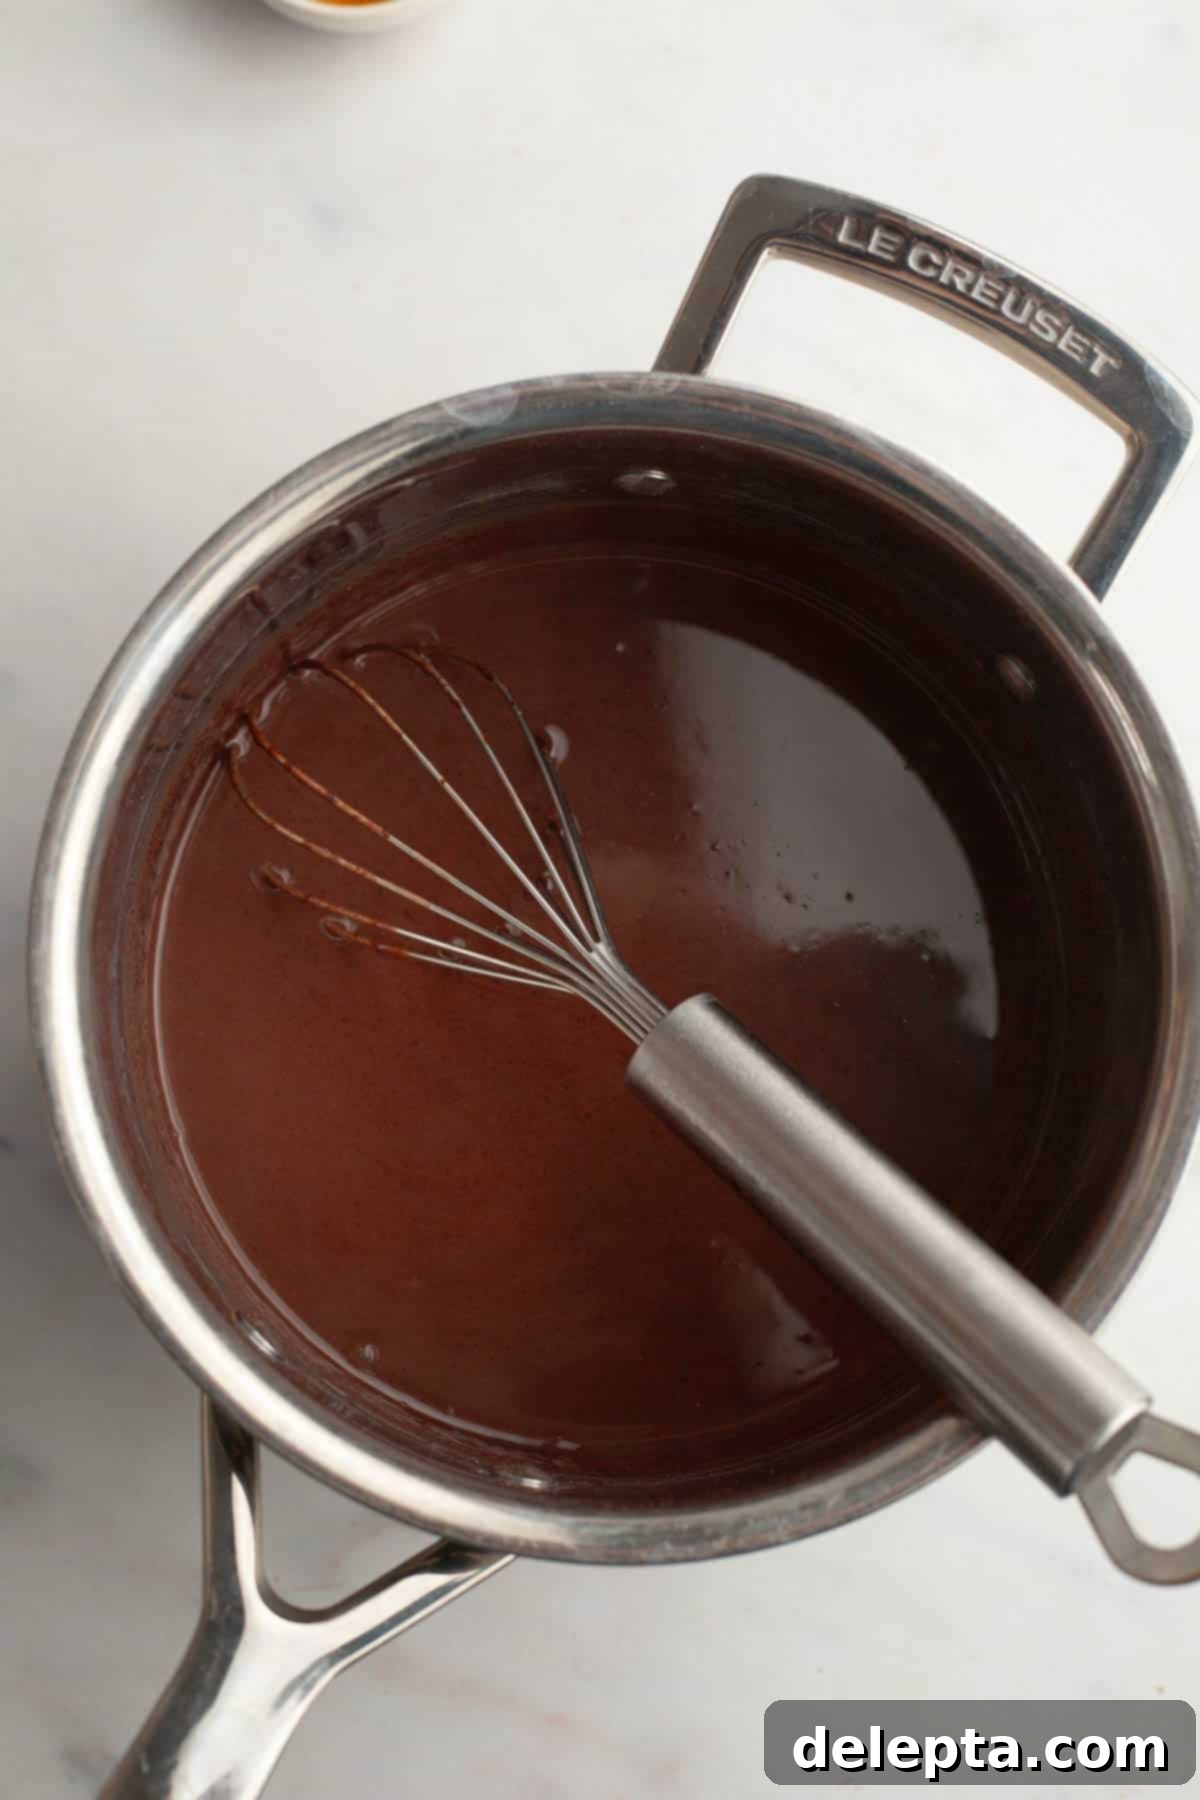
- Step 2: Incorporate the Milk. Place the saucepan on the stove over medium-low heat. Gradually and slowly whisk in the whole milk mixture. Continue to whisk constantly and gently as the pudding begins to warm. Consistency is key here to prevent scorching and ensure even cooking. Keep whisking until the mixture starts to steam, indicating it’s heating up.
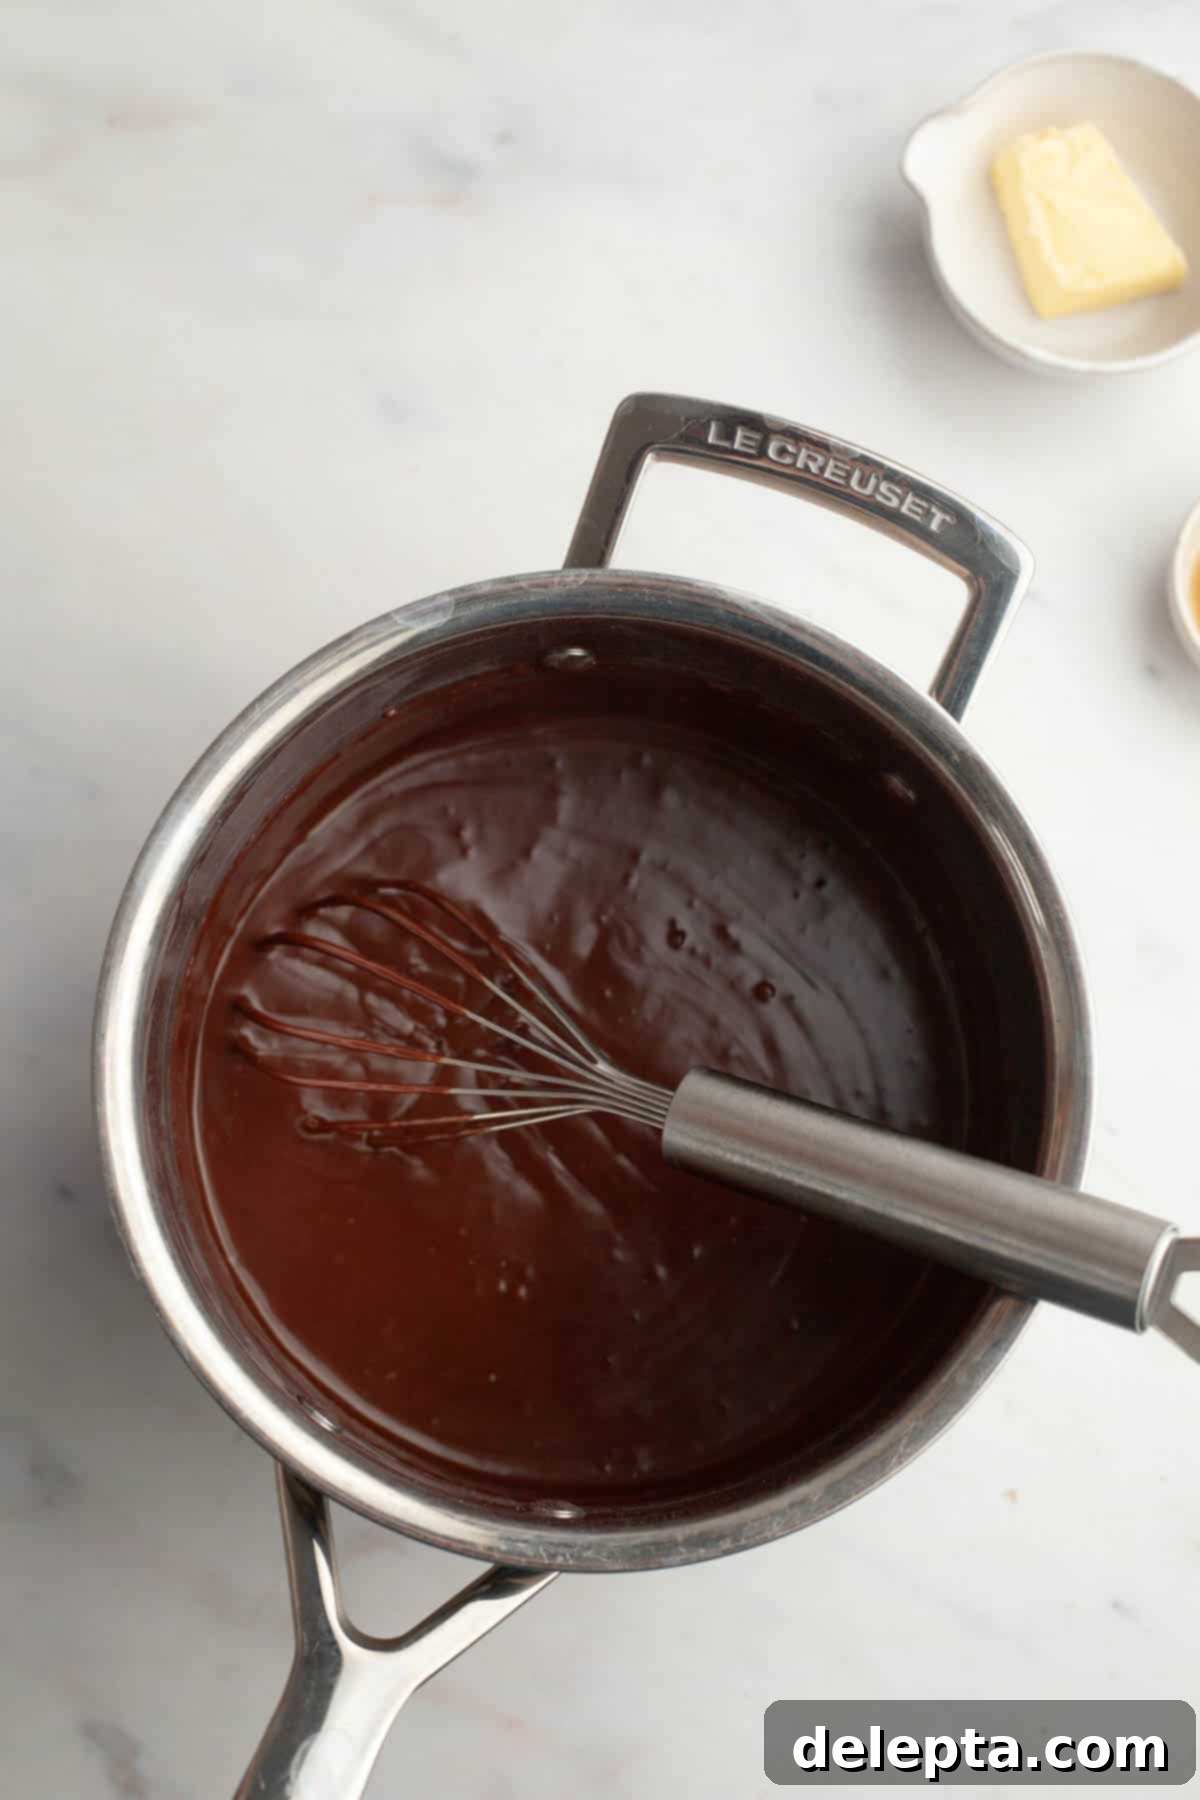
- Step 3: Melt the Chocolate and Thicken the Pudding. Once the mixture is steaming, add in the chopped bittersweet chocolate. Continue whisking diligently until the chocolate has completely melted and is fully incorporated, creating a smooth, dark chocolate base. Bring the pudding mixture to a gentle boil, ensuring you see bubbles on both the sides and in the center of the pan. Let it boil for precisely one minute, continuing to whisk to prevent sticking. During this minute, the pudding should noticeably thicken and be able to coat the back of a spoon.
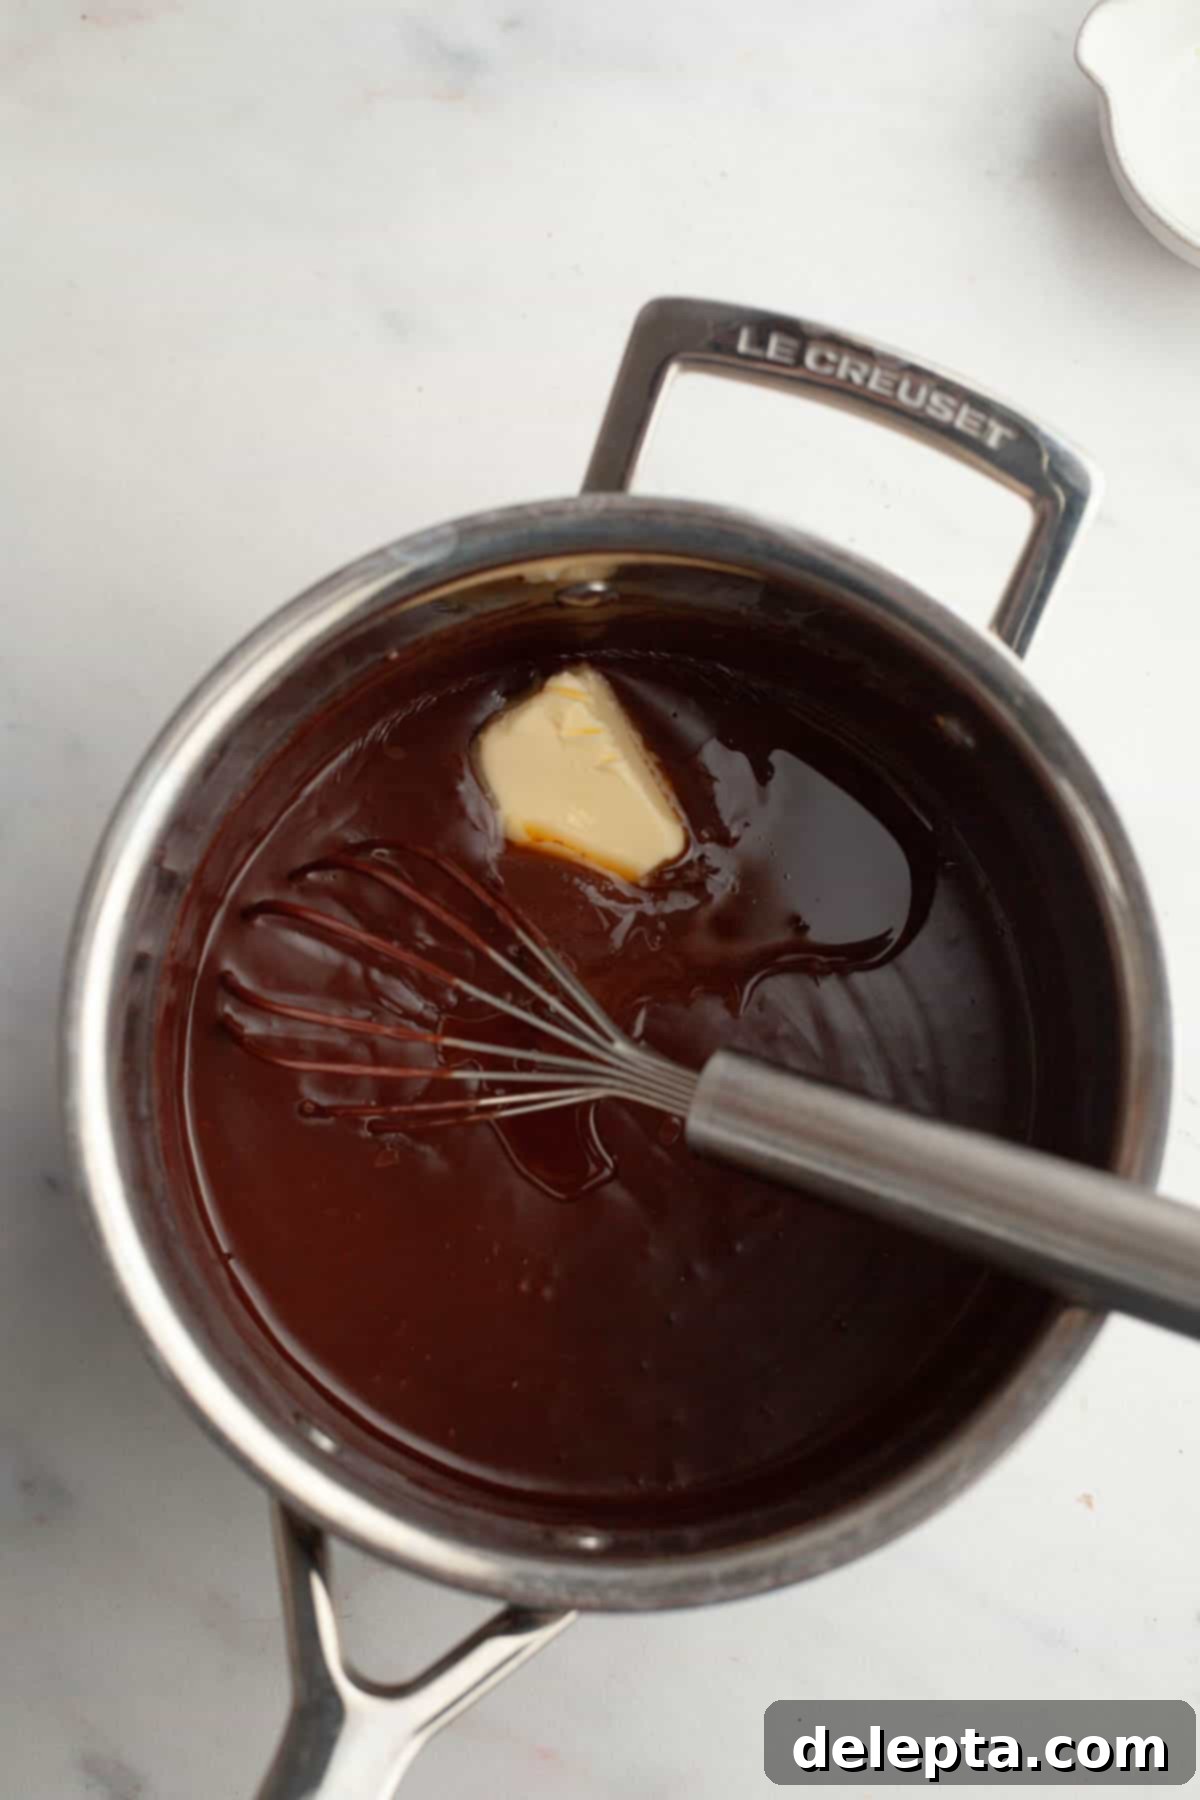
- Step 4: Finish with Flavor. Remove the pan from the heat. Stir in the vanilla extract and the room temperature butter. Whisk vigorously until both are fully combined, the butter has melted, and the pudding has a glossy, rich appearance. The vanilla adds aromatic depth, and the butter contributes to its luxurious texture.
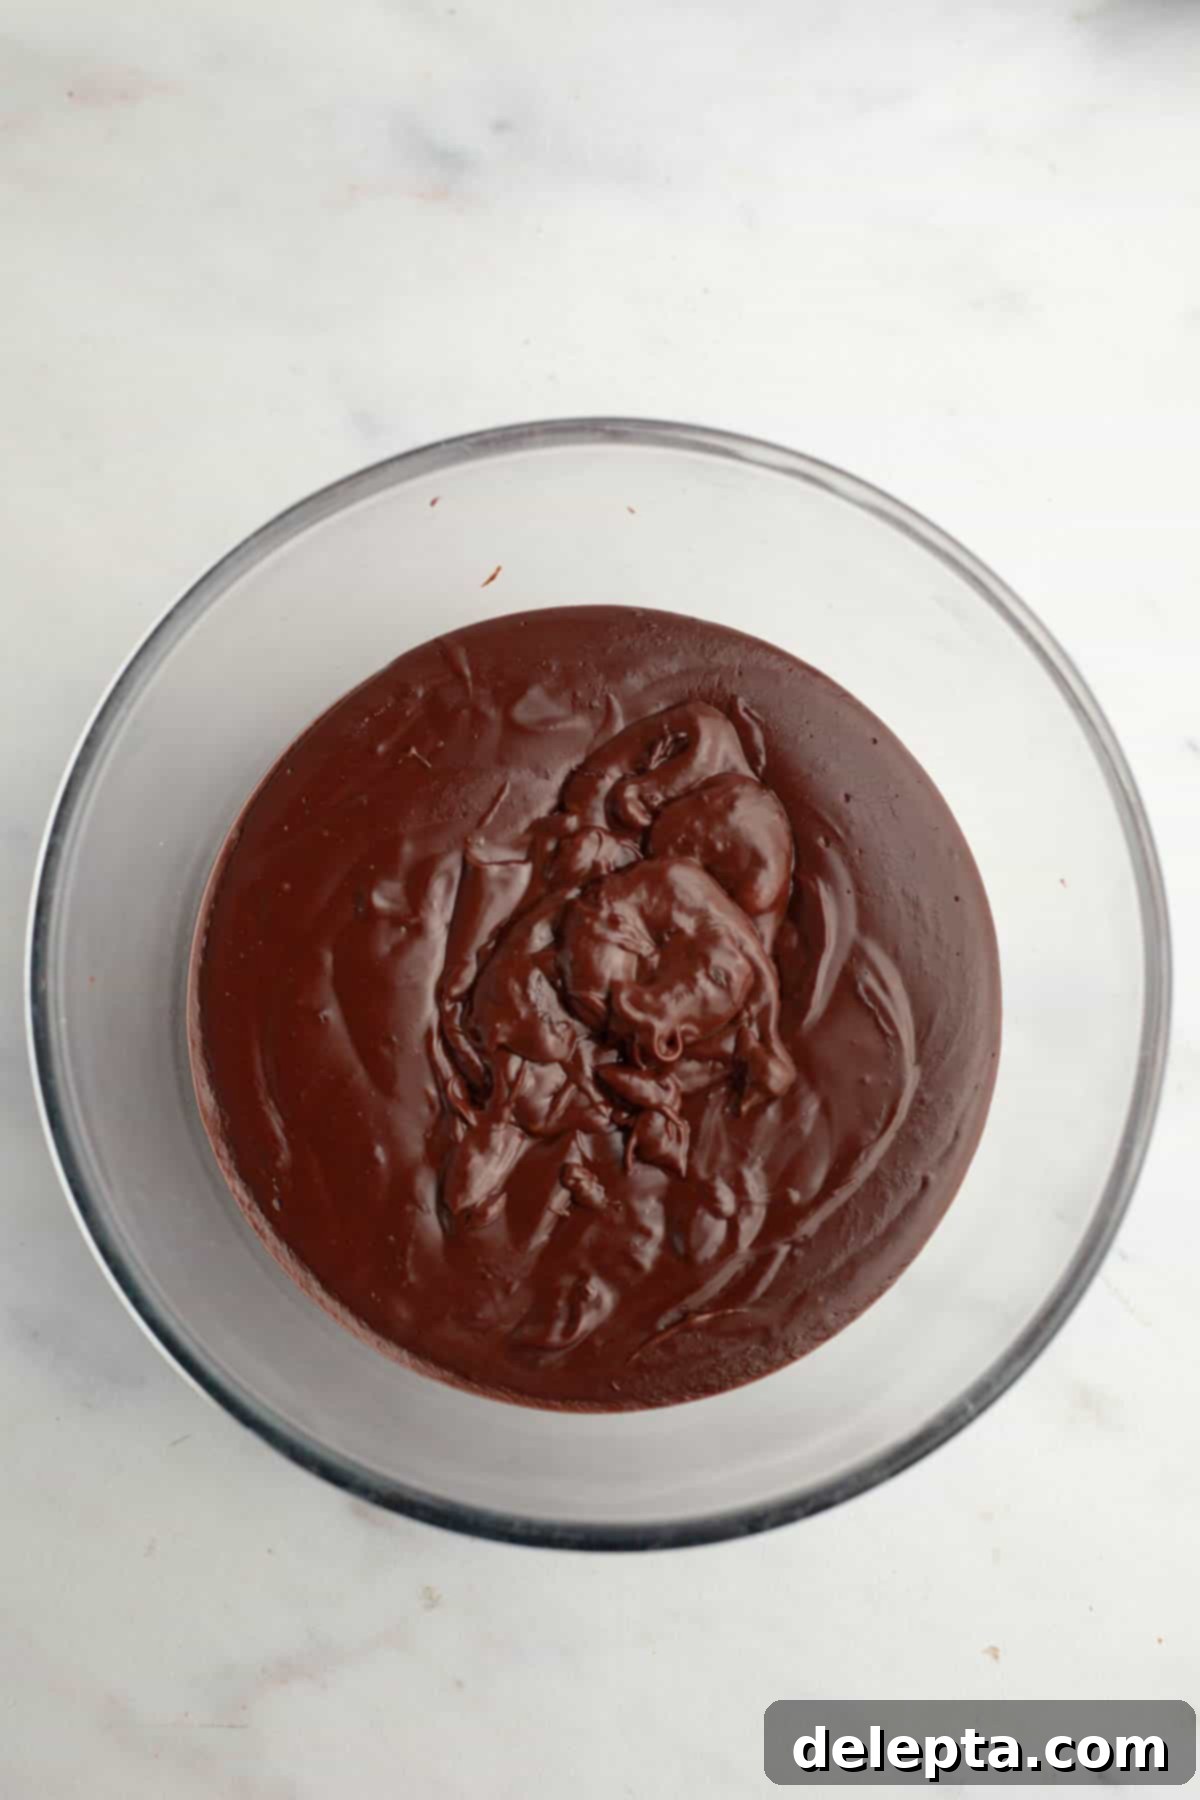
- Step 5: Chill the Pudding. Pour the warm pudding into a clean, heatproof mixing bowl. Immediately, gently press a piece of plastic wrap directly onto the surface of the pudding. This crucial step prevents a “skin” from forming as it cools. Place the bowl in the refrigerator for at least 1 hour to allow it to chill and set properly. It will firm up beautifully during this time.
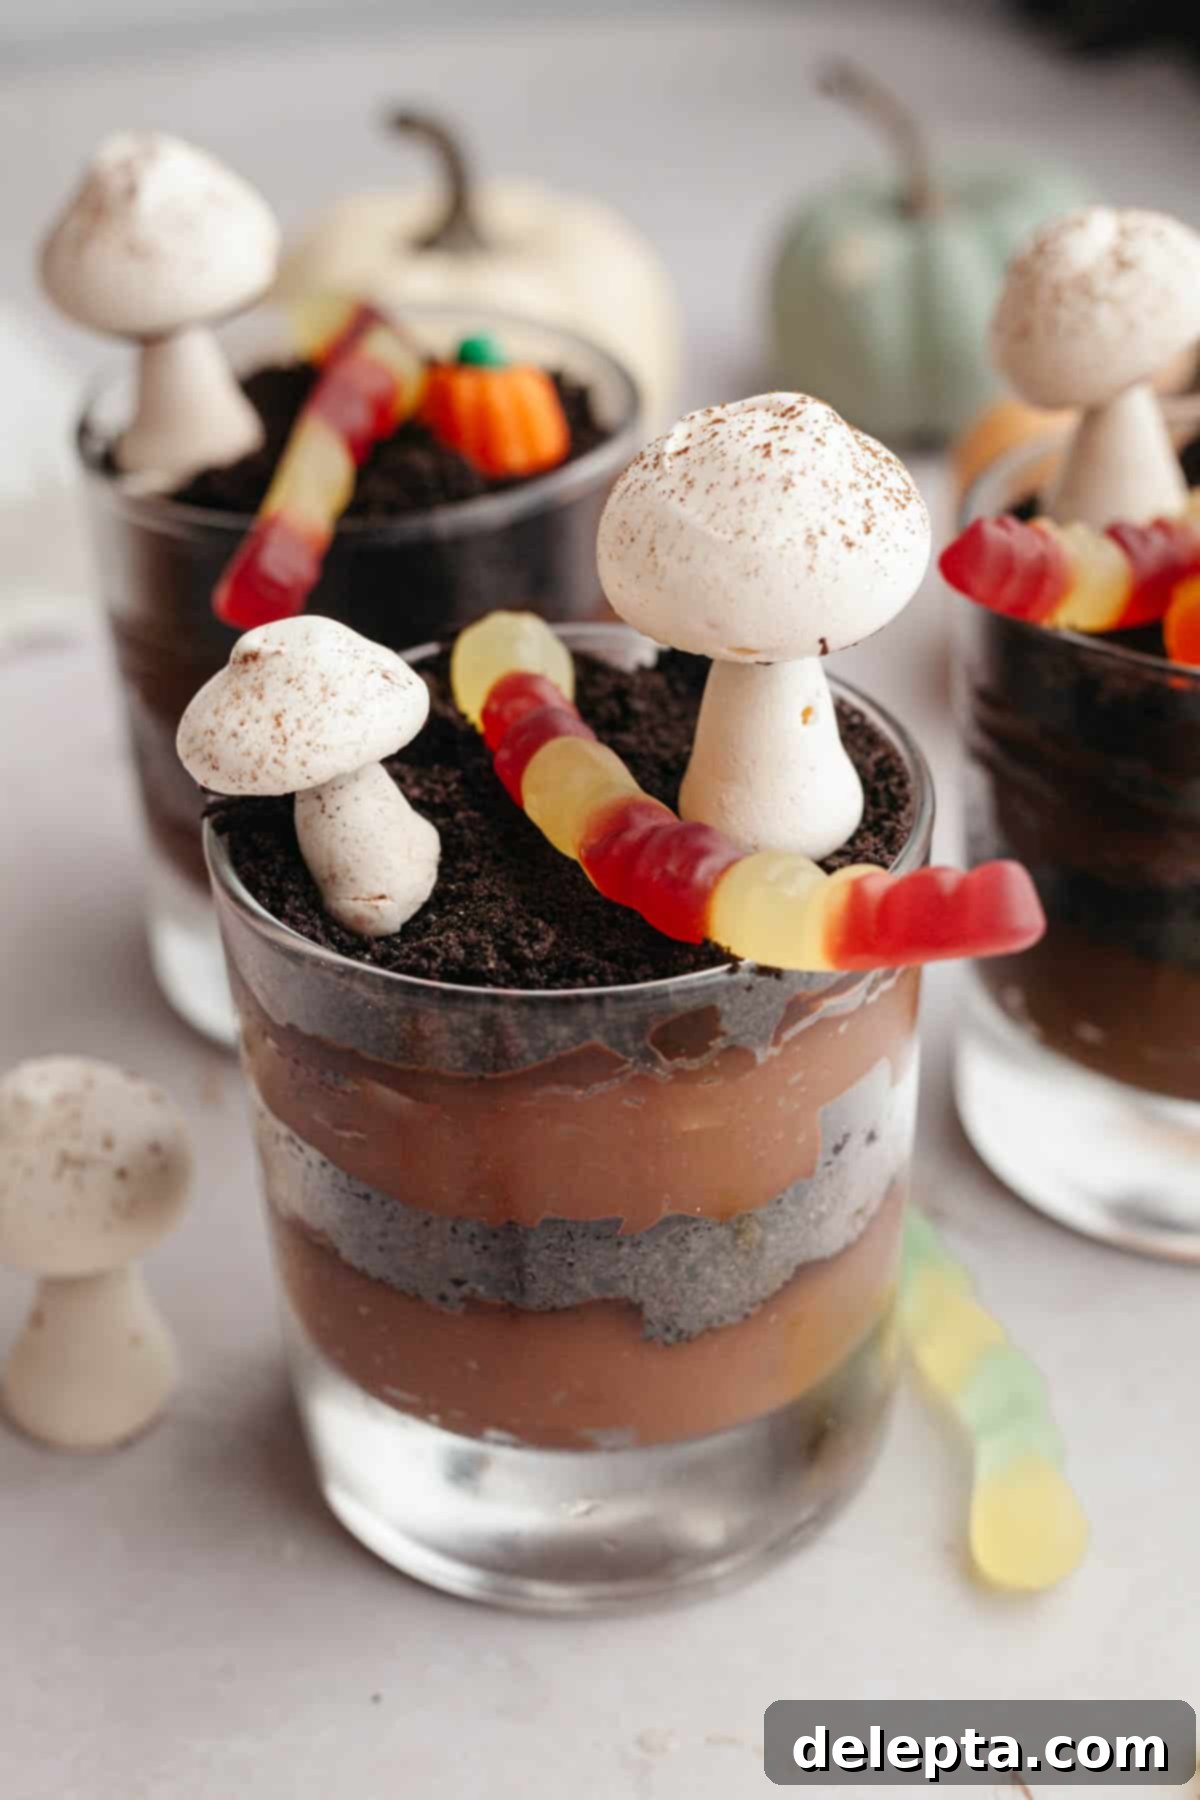
- Step 6: Assemble Your Dirt Cups. Once the pudding has chilled, retrieve your chosen serving cups – whether they’re glass jars, plastic dessert cups, or elegant glasses. The amount of pudding and crushed Oreos per cup will depend on their size. Use a large cookie scoop or a spoon to layer about two scoops of chocolate pudding into each cup. Generously sprinkle a layer of crushed Oreo cookie crumbs over the pudding. Repeat this layering process once more, ensuring you finish with a final layer of Oreo crumbs to create that authentic “dirt” appearance.
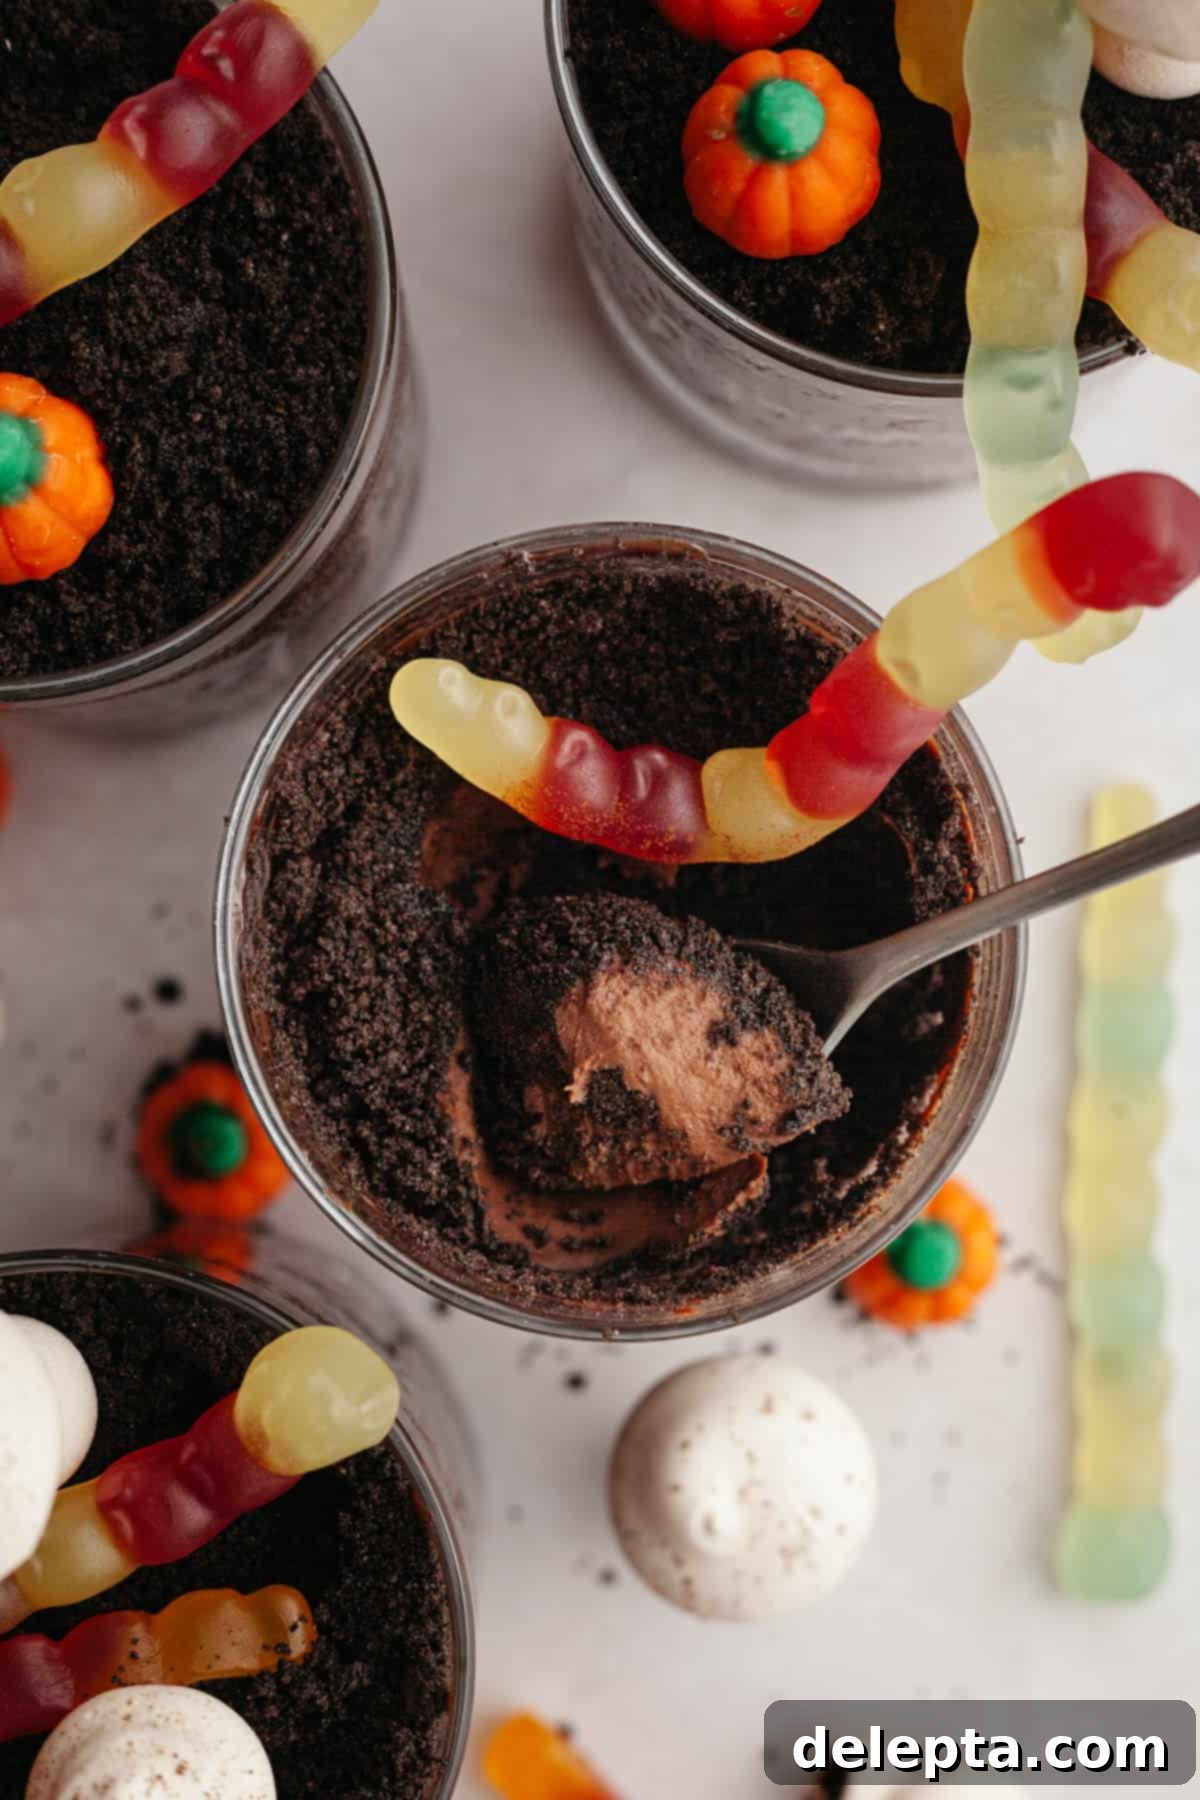
Once assembled, place the dirt cups back into the fridge for at least another 4 hours, or ideally, overnight. This crucial chill time allows the pudding to fully set and the flavors to meld beautifully. When you’re ready to serve and impress, decorate with your chosen spooky elements like gummy worms, meringue mushrooms, or any other fun Halloween candies. Enjoy your hauntingly good homemade treats!
Expert Baking Tips & Essential Notes
Achieving perfect Halloween dirt cups is simple when you keep a few key tips in mind. These insights will help ensure your homemade chocolate pudding is smooth, rich, and perfectly set, making your assembly process a breeze:
- Considering Different Cup Sizes: I typically use quite large drinking glasses, which yields about 4 generous servings with the specified pudding quantity. If you opt for smaller plastic cups or more traditional dessert cups, you’ll find that you can make many more individual dirt cups. Remember to adjust the distribution of pudding and Oreo crumbs accordingly to get the ideal layers in each cup.
- The Importance of Chilling: Allowing the chocolate pudding to chill for at least an hour in the fridge after cooking is vital. At this point, it will have cooled sufficiently to prevent the Oreo crumbs from dissolving too quickly upon contact, yet it will still be soft enough to scoop and layer easily without being overly firm. For the best final texture and flavor development, an overnight chill after assembly is highly recommended.
- Embrace Mise en Place: “Mise en place” is a French culinary term meaning “everything in its place,” and it’s a game-changer for baking, especially when making pudding on the stove. I highly recommend measuring out all your ingredients—chopping the chocolate, measuring milk, sugar, cocoa, and cornstarch—before you even turn on the heat. This preparation ensures a smooth, stress-free cooking process, allowing you to add ingredients precisely when needed without scrambling.
- Effortless Oreo Crushing: If you don’t have a food processor or a high-speed blender, crushing your Oreo cookies is still incredibly simple. Place the cookies in a sturdy Ziploc bag, seal it tightly, removing excess air, and then use a rolling pin or the bottom of a heavy pan to crush them until you achieve fine, dirt-like crumbs. This method is surprisingly effective and a great way to release a little stress!
- Preventing a Pudding Skin: The plastic wrap pressed directly onto the surface of the hot pudding after cooking is not just a suggestion; it’s essential. This creates an airtight seal that prevents a thick, rubbery “skin” from forming on top, ensuring your pudding remains perfectly smooth and creamy.
Creative Serving Suggestions for Extra Spooky Fun
These Halloween dirt cups are fantastic on their own, but with a few extra touches, you can transform them into truly unforgettable spooky season delights. Here are some ideas to make them even more festive and delicious:
- Elevate the Halloween Theme: To make these dirt cups even more eerie, creepy, and delightful for Halloween, consider adding a variety of themed candies and decorations. Think edible candy eyeballs peering out from the “dirt,” vibrant candy pumpkins for a pop of autumnal color, or even small tombstone cookies (like halved Milano cookies with “RIP” piped on them with icing) to create a miniature graveyard scene. You could also add ghost-shaped meringues or white chocolate ghosts for a hauntingly sweet touch.
- For a Slightly Sweeter and Lighter Treat: If you prefer your dirt cups to be a bit sweeter and have a lighter, fluffier texture, you can easily incorporate whipped cream into the chocolate pudding. To do this, whip 1 cup of heavy cream until it forms medium to stiff peaks. Once your homemade chocolate pudding is chilled, gently fold the whipped cream into it before assembling your cups. This not only lightens the texture and adds sweetness but will also yield more dirt cups, making it perfect for larger gatherings. Alternatively, you can create distinct layers of whipped cream within the cups, alternating between pudding, Oreo crumbs, and whipped cream for a beautiful visual and textural contrast.
- Warm Spiced Topping: Drizzle with a warm caramel sauce infused with a hint of cinnamon or pumpkin spice for an extra layer of fall flavor.
- Mini Chocolate Chips: Sprinkle mini chocolate chips on top of the “dirt” for added crunch and chocolatey goodness.
- Edible Flowers: For a more elegant “enchanted forest” look, especially if using meringue mushrooms, add a few small edible flowers or mint leaves.
Storage for Freshness
These delicious Halloween dirt cups are best enjoyed fresh, but they can be prepared in advance for convenience. Store any leftover dirt cups, covered tightly with plastic wrap, in the fridge for up to 3 days. The Oreos will soften slightly over time, but the pudding will remain perfectly creamy and delicious. If decorating with gummy candies, it’s best to add them just before serving to maintain their texture.
Discover More Hauntingly Good Halloween Recipes!
Looking to expand your repertoire of spooky season treats? Here are some other fantastic recipes that are perfect for fall gatherings, Halloween parties, or simply enjoying the flavors of the season:
- Simple Pumpkin Spice Latte Cake Recipe
- Black Velvet Cake
- M&M Rice Krispie Treats
- Black Velvet Cupcakes
If you’ve had the pleasure of making this recipe, please make sure to leave a ⭐️ rating and review below! Your feedback is invaluable, and I absolutely love seeing your culinary creations. Don’t forget to tag me on Instagram @alpineella so I can admire your spooky dirt cups! You can also keep up with my latest recipes and baking adventures by following along on Pinterest, Facebook, and TikTok!
Recipe
Easy Halloween Dirt Cups with Homemade Chocolate Pudding
Ella Gilbert
Pin Recipe
Save RecipeSaved!
Equipment
-
large saucepan
-
Whisk
-
Large Mixing Bowl
-
food processor
-
Plastic Cups or Jars
Ingredients
- 3.5 oz bittersweet chocolate
- 2 tablespoons cocoa powder dutch processed
- 3 cups whole milk
- 6 tablespoons sugar
- 4 tablespoons cornstarch
- 1 teaspoon kosher salt
- 2 tablespoons unsalted butter room temperature
- 1 teaspoon vanilla extract
- 28 Oreo cookies crushed
Instructions
-
In a large, heavy-bottomed saucepan, whisk together the cocoa powder, sugar, kosher salt, and cornstarch until thoroughly combined and lump-free.2 tablespoons cocoa powder, 6 tablespoons sugar, 1 teaspoon kosher salt, 4 tablespoons cornstarch
-
Place the saucepan over medium-low heat. Slowly pour in the whole milk, whisking constantly to ensure no lumps form and the mixture heats evenly. Continue whisking until the mixture begins to steam gently.3 cups whole milk
-
Once steaming, add the chopped bittersweet chocolate. Continue whisking until all the chocolate has completely melted and the pudding is smooth and homogenous.3.5 oz bittersweet chocolate
-
Bring the pudding mixture to a full boil, with visible bubbles on the sides and in the center. Let it boil for exactly one minute, whisking continuously to prevent sticking. At this point, it should be notably thick and coat the back of a spoon. Then, immediately remove the pan from the heat.
-
Stir in the vanilla extract and the room temperature unsalted butter until fully incorporated and the pudding is glossy and smooth.1 teaspoon vanilla extract, 2 tablespoons unsalted butter
-
Pour the hot pudding into a large, clean mixing bowl. After about a minute or two, place a piece of plastic wrap directly onto the surface of the pudding, ensuring it touches to prevent a skin from forming. Transfer to the fridge and chill for at least one hour, or until cooled and slightly set.
-
Prepare your serving cups (plastic, glass, or jars). The exact amount of pudding and crushed Oreo crumbs per cup will depend on their size. Evenly distribute about half of the chilled pudding among your cups, followed by a generous layer of crushed Oreo cookie crumbs. Repeat this layering process once more, ensuring the final layer is Oreo crumbs to resemble “dirt.”28 Oreo cookies
-
Return the assembled dirt cups to the fridge to chill for at least 3-4 hours, or ideally, overnight. This allows the pudding to fully set and the flavors to deepen. When ready to serve, adorn with gummy worms, homemade meringue mushrooms, candy pumpkins, or any other festive Halloween decorations you desire!
Notes
Yield based on Cup Size: I used quite large drinking glasses for this recipe, which yielded 4 substantial dirt cups. If you opt for smaller plastic cups or traditional dessert cups, you will likely get more servings from this recipe, so please keep that in mind when planning!
Chocolate Quality Matters: For the most luxurious and flavorful chocolate pudding, always use high-quality chocolate. If you’re in Europe, look for a chocolate bar with approximately 70% cocoa content for ideal richness.
Whole Milk for Richness: The use of whole milk is crucial for the intended thickness and creamy texture of the pudding. Using skimmed or semi-skimmed milk will result in a noticeably thinner pudding with a less decadent mouthfeel.
Lighter Pudding with Whipped Cream: If you desire a lighter texture and a slightly less intense chocolate flavor for your pudding cups, you can incorporate whipped cream. After the pudding is fully chilled, whip 1 cup of heavy cream until it reaches medium to stiff peaks. Gently fold this whipped cream into the chilled pudding before layering. This will also increase the yield of your dirt cups. Alternatively, you can layer the whipped cream directly into the cups alongside the pudding and Oreo crumbs.
Meringue Mushroom Guide: For those interested in making the charming meringue mushrooms, I followed this excellent recipe for guidance.
Storage Tips: These Halloween dirt cups can be stored, covered tightly, in the fridge for up to 3 days. For best presentation, add any delicate decorations like gummy candies or meringues just before serving.
Nutrition
