Irresistibly Chewy Brown Butter Mini Egg Chocolate Chip Cookies for Easter
Get ready to usher in Spring with the ultimate festive treat: these delightful chocolate chip mini egg cookies! Bursting with the beloved crunch of chopped Cadbury mini eggs and rich chocolate chips, these cookies are a true celebration of the season. What makes them even better? They’re incredibly easy to make in just one bowl, require no special equipment like a stand mixer, and best of all, there’s absolutely no chilling time for the dough! You’ll be enjoying warm, fresh-baked cookies in under 35 minutes, making them the perfect last-minute addition to any Easter gathering or a simple sweet craving.

This recipe was originally published in March 2021. It has since been updated with an improved recipe and new photos to bring you the best possible mini egg cookie experience.
Easter truly wouldn’t be complete without the iconic crunch and vibrant colors of Cadbury mini eggs! These incredible chocolate chip mini egg cookies are generously loaded with perfectly chopped mini egg candies and plenty of gooey chocolate chips. Imagine creating a stunning dessert table for your Spring or Easter celebration, featuring these festive mini egg cookies alongside other spring-inspired delights like refreshing lemon curd cookies and classic carrot cake cupcakes? Your guests will be enchanted by the variety and deliciousness.
Our recipe elevates the classic chocolate chip cookie to new heights by incorporating the delightful nuance of browned butter. This technique lends a rich, nutty depth of flavor that perfectly balances and complements the sweet intensity of the Easter candy. The result is an exquisitely soft and wonderfully chewy cookie that melts in your mouth. If you’re as obsessed with mini eggs as we are and craving more delightful treats, you simply must give my irresistible mini egg brownies a try next!
Why You’ll Adore These Mini Egg Cookies!
- Effortless One-Bowl Wonder: Say goodbye to mountains of dirty dishes! These mini egg chocolate chip cookies are cleverly designed to be made in a single bowl, simplifying the baking process immensely. Even better, you won’t need a bulky stand mixer or hand mixer; a simple whisk and spatula are all that’s required. This makes cleanup a breeze and baking accessible for everyone, regardless of their kitchen setup.
- Remarkably Soft and Chewy Texture: Prepare for cookie perfection! We’ve meticulously crafted this recipe to ensure every bite delivers an intensely soft, wonderfully chewy cookie. There’s no risk of dry, crumbly cookies here. The secret lies in a balanced ingredient ratio and specific baking techniques that guarantee a tender interior with slightly crisp edges, a hallmark of a truly great cookie.
- Zero Chilling Time for Instant Gratification: Who has time to wait? One of the best features of these mini egg cookies is that they require absolutely no chilling time for the dough. This means from the moment you start mixing, you’re only about 35 minutes away from enjoying warm, freshly baked cookies straight from your oven. It’s perfect for spontaneous baking sessions or when you need a quick dessert.
- Infused with Irresistible Brown Butter Flavor: For an unparalleled depth of flavor, these cookies are made with brown butter. This simple technique transforms regular butter into a rich, nutty, caramel-like essence that adds a sophisticated complexity to the cookies. It’s a game-changer that makes these cookies stand out from any ordinary recipe, elevating them to gourmet status.
- The Ultimate Easter Celebration Treat: With their vibrant Cadbury mini eggs, these cookies are tailor-made for Easter and Spring festivities. Their colorful appearance and delightful taste make them a show-stopping addition to any holiday table, a charming gift for friends and family, or simply a fun way to celebrate the season. They capture the joyous spirit of Easter perfectly!
Essential Ingredients for Your Mini Egg Cookies
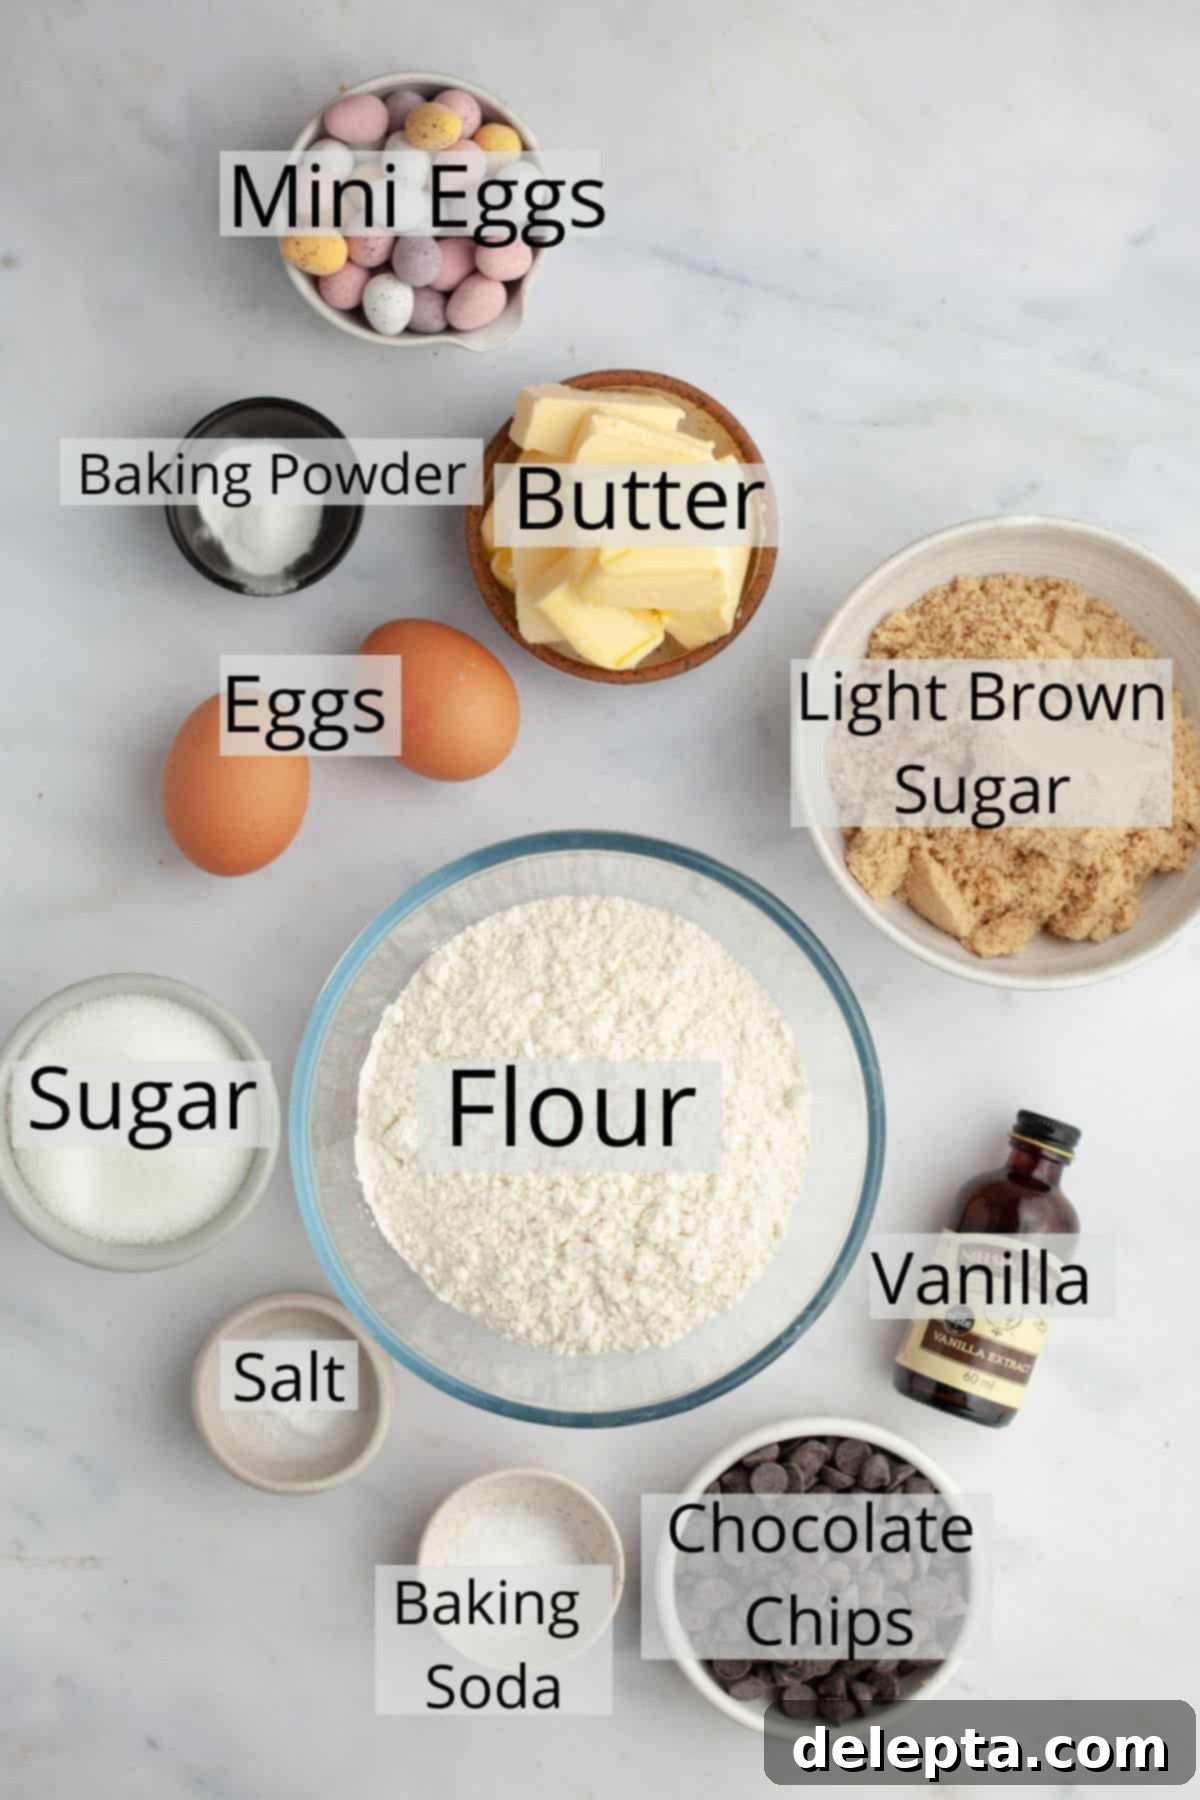
Creating these magical mini egg cookies starts with a few key ingredients. Quality matters here, as each component plays a vital role in achieving that perfect soft, chewy texture and rich flavor.
- All-Purpose Flour: For consistent results and the ideal cookie structure, we highly recommend using standard all-purpose flour. It provides the necessary gluten structure without making the cookies tough. While other flours might work, we’ve only thoroughly tested this recipe with all-purpose flour to ensure perfect outcomes every time.
- Premium Chocolate Chips: While we’ve personally used delicious dark chocolate chips for a rich, balanced flavor profile, feel free to customize! You could easily opt for semi-sweet chips if you prefer a sweeter cookie, or even milk chocolate for a milder taste. The key is to choose high-quality baking chips that melt beautifully and distribute evenly throughout the dough.
- Cadbury Mini Eggs: The star of the show! It wouldn’t be mini egg cookies without the iconic Cadbury mini eggs. Their crunchy candy shell and creamy chocolate interior add a unique texture and unmistakable Easter charm. Make sure to chop them roughly to get a mix of smaller pieces that blend into the dough and larger chunks for satisfying bites.
- Unsalted European Style Butter: For superior flavor and texture, we always reach for unsalted European-style butter. Its higher fat content and lower water content contribute to a more creamy, rich, and flavorful brown butter, which is foundational to this recipe’s deliciousness. If you use salted butter, remember to adjust the added salt in the recipe accordingly.
- Eggs (Whole Egg + Extra Yolk): You’ll need one large whole egg and one additional large egg yolk, both at room temperature. The whole egg provides structure and moisture, while that extra egg yolk is your secret weapon for achieving an unbelievably chewy texture and richer flavor. Don’t skip it – it makes a significant difference in the final cookie!
See the recipe card below for the precise measurements and full information on all ingredients and quantities.
Effortless Step-by-Step Baking Guide
Baking these brown butter mini egg cookies is a straightforward process, even for beginner bakers. Follow these simple steps for perfect results every time!
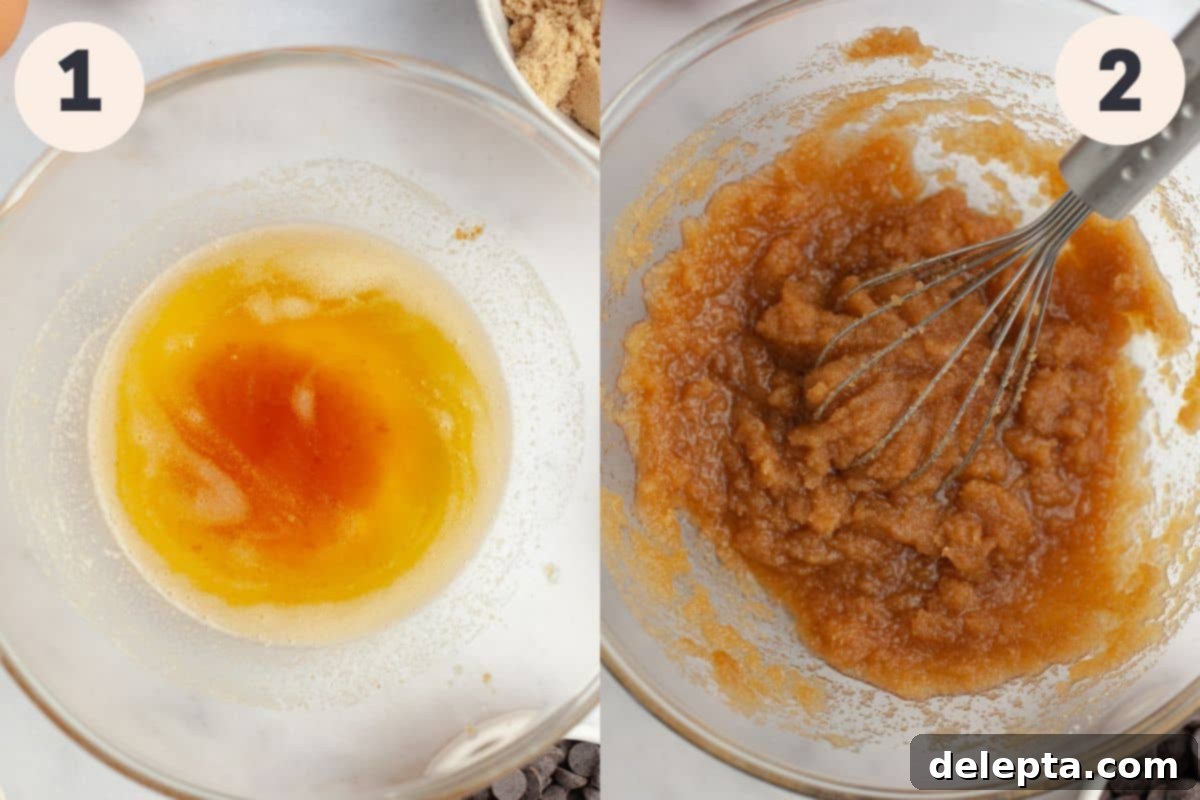
Step 1: Achieving Golden Brown Butter. Begin by placing your unsalted butter in a small, light-colored saucepan over medium-low heat. The light color of the pan will help you monitor the browning process effectively. Allow the butter to melt completely. Once melted, continue heating, stirring gently with a rubber spatula as it starts to foam and sputter. You’ll notice white specks forming at the bottom – these are the milk solids. Continue to stir and cook; you might need to reduce the heat to low to prevent burning. The goal is for these milk solids to turn a beautiful light brown and for the butter to emit a wonderfully toasted, nutty aroma. Immediately pour the browned butter (including all the browned bits!) into a large mixing bowl and let it cool completely. This cooling step is crucial, as hot butter can cook your eggs in the next step.
Step 2: Combining Sugars and Preparing Your Workspace. Once your glorious brown butter has cooled to room temperature (it should no longer feel warm to the touch), whisk in the light brown sugar, white granulated sugar, kosher salt, and vanilla extract until thoroughly combined. The brown sugar contributes to the cookies’ chewiness and depth of flavor, while white sugar ensures crisp edges. Simultaneously, preheat your oven to 350°Fahrenheit (175°Celsius) and line a large baking tray with parchment paper. This preparation ensures you’re ready to go once the dough is mixed.
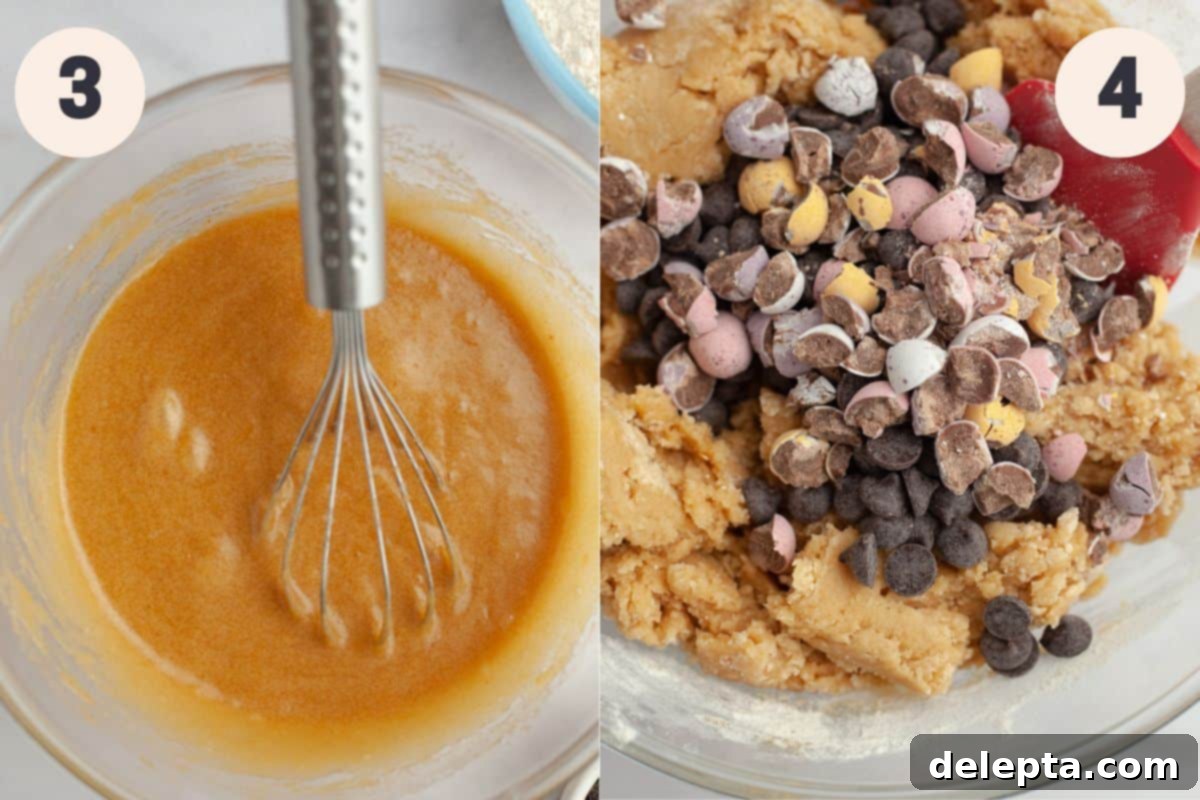
Step 3: Incorporating Eggs for Structure and Chew. Add the large whole egg and the extra large egg yolk to your sugar-butter mixture. Whisk vigorously again until the mixture becomes smooth, thick, and looks slightly pale. The eggs bind the ingredients, add moisture, and contribute significantly to the cookies’ signature chewy texture. Ensure they are fully incorporated.
Step 4: Folding in Dry Ingredients and Festive Mix-ins. Pour in the all-purpose flour, baking powder, and baking soda. Using a rubber spatula, gently fold everything together until the cookie dough is just combined. Be careful not to overmix, as this can lead to tough cookies. Once the dry ingredients are mostly incorporated, stir in the chocolate chips and the roughly chopped mini eggs. Remember to reserve a small handful of both the chocolate chips and mini egg pieces to add on top of each cookie dough ball before baking – this creates that appealing “bakery-style” finish!

Step 5: Scooping and Decorating Your Cookie Dough. For perfectly portioned and sized cookies, use a large cookie scoop or a tablespoon to scoop out generous mounds of about 3 heaping tablespoons of cookie dough per ball. Roll each portion gently into a uniform ball and place them onto your prepared baking sheet, leaving ample space between each to allow for spreading. Now, take the extra chocolate chips and mini egg pieces you set aside earlier and press them gently onto the top of each cookie dough ball. This simple trick ensures a beautiful presentation once baked.
Step 6: Baking to Golden Perfection and Cooling. Bake your cookies in batches of 6 at a time for 10-12 minutes. While one batch bakes, place the remaining cookie dough balls in the fridge to keep them cool and prevent premature spreading. The cookies are ready when their edges are lightly golden brown, but their centers still appear slightly underbaked and soft – this is key for that perfect chewy interior! Remember, they will continue to set as they cool. Allow the cookies to cool on the baking sheet for a crucial 10 minutes before carefully transferring them to a wire cooling rack to cool completely. This cooling period on the hot sheet helps them firm up without becoming dry.

Expert Tips & Tricks for Perfect Mini Egg Cookies
Unlock the secrets to baking truly exceptional mini egg cookies with these expert insights and techniques:
- Accurate Ingredient Measuring is Key – Baking is a science, and precision makes all the difference. I cannot stress enough the importance of using a digital kitchen scale and measuring your ingredients by weight rather than by volume (cups). This simple switch will dramatically improve the consistency and quality of your baking, ensuring you don’t accidentally add too much or too little of a crucial ingredient like flour, which can drastically alter texture.
- The “Fluff and Sprinkle” Method for Flour – If you absolutely must use measuring cups instead of a scale, then master the “fluff and sprinkle” method for measuring flour. First, aerate your flour by gently fluffing it with a fork or spoon in its container. Then, lightly spoon the flour into your measuring cup until it overflows, and finally, level it off with a straight edge (like the back of a knife). Avoid scooping directly with the cup, as this compacts the flour, leading to using too much. Too much flour is the most common culprit for dry, dense, and crumbly cookies instead of the soft and chewy kind you desire.
- Smart Chopping of Mini Eggs – Cadbury mini eggs have a surprisingly tough candy shell, which can be challenging to chop with a knife and potentially damage your blade. For safety and efficiency, I highly recommend two alternative methods: either chop them quickly in a food processor (pulse just a few times to avoid creating powder) or, my personal favorite, place them in a sturdy ziploc bag, seal it, and crush them with a rolling pin. This technique yields beautifully varied pieces, from fine shards to larger chunks, adding wonderful textural interest to your cookies.
- Achieving Bakery-Style Cookie Perfection – Want your homemade cookies to look like they came from a professional bakery? Here’s how: before your cookie dough balls go into the oven, take those extra chocolate chips and chopped mini egg pieces you reserved and gently press them onto the top and sides of each dough ball. This ensures plenty of delicious mix-ins are visible on the surface. Then, immediately after pulling your cookies out of the oven, while they’re still warm and pliable, use a large biscuit cutter or the rim of a glass slightly larger than your cookie to gently scoot and swirl each cookie into a perfectly round shape. This trick creates beautifully uniform, picture-perfect cookies every time.
- Don’t Overbake! For that signature soft and chewy texture, resist the urge to overbake. Cookies should look slightly underdone in the very center when you pull them from the oven. Their edges should be set and lightly golden, but the middle will appear soft. They will continue to cook and set as they cool on the baking sheet, ensuring they remain perfectly tender.
Recipe FAQs for Mini Egg Chocolate Chip Cookies
Absolutely! Freezing cookie dough is a fantastic way to prepare ahead. Simply scoop the cookie dough into individual balls, exactly as you would for baking, and place them in an airtight container or a freezer-safe bag. They can be frozen for up to 2 months. When you’re ready to bake, there’s no need to thaw! Bake them directly from frozen, but you may need to add an extra minute or two to the baking time to ensure they’re cooked through and achieve that perfect golden edge.
While Cadbury mini eggs are a holiday staple, this recipe is incredibly versatile! If mini eggs are out of season or you want to experiment, you can easily substitute them with other candies. Try adding in festive M&Ms, colorful Reese’s Pieces, or your favorite chopped candy bar. Just ensure the quantity remains roughly the same as the mini eggs for the best dough consistency and balance of flavors.
Yes, you certainly can! If you prefer smaller, more bite-sized cookies, simply scoop out approximately 1.5 tablespoons of dough per cookie instead of the suggested 3 tablespoons. When baking smaller cookies, you will need to adjust the baking time down by a few minutes. Keep a close eye on them, as they will bake faster, typically around 8-10 minutes, until the edges are golden and the centers are just set.
Once baked and completely cooled, store your mini egg cookies in an airtight container at room temperature. They will stay wonderfully fresh and chewy for up to 5-7 days. For longer storage, you can also freeze the baked cookies for up to 3 months. Just be sure to let them thaw completely at room temperature before enjoying.
Browning butter requires a watchful eye! Burning usually occurs if the heat is too high or the butter is not stirred frequently enough. Make sure to use a light-colored saucepan to clearly see the color change. Start with medium-low heat, stir continuously with a spatula, and reduce the heat to low as the milk solids begin to turn golden. The process should take about 5-7 minutes. If it smells burnt rather than nutty, it’s best to discard it and start over.

Expand Your Baking Repertoire: Try These Cookie Recipes Next!
If you loved baking these mini egg cookies, you’re in for a treat with these other fantastic cookie recipes. Each one offers a unique flavor and texture profile, perfect for any occasion:
- Soft Lemon Blueberry Cookies
- Small Batch Oatmeal Chocolate Chip Cookies
- Red Velvet Oreo Cookies
- Soft and Chewy Mini M&M Cookies
If you’ve made this incredibly delicious recipe, we’d absolutely love to hear from you! Make sure to leave a ⭐️ rating and a thoughtful review below to share your experience and help other bakers. I adore seeing your creations, so please tag me on Instagram @alpineella so I can admire your beautiful bakes! You can also follow along on Pinterest, Facebook, and TikTok for more delicious recipes and baking inspiration!
Recipe Card

Brown Butter Mini Egg Chocolate Chip Cookies
Ella Gilbert
Pin Recipe
Save RecipeSaved!
Ingredients
- 1 ½ sticks unsalted butter (European style recommended)
- 1 cup packed light brown sugar
- ½ cup granulated sugar
- 1 teaspoon kosher salt (Diamond Crystal recommended)
- 2 teaspoons pure vanilla extract
- 1 large egg room temperature
- 1 large egg yolk room temperature
- 2 ½ cups all purpose flour (measured by weight for best results)
- ½ teaspoon baking soda
- ¾ teaspoon baking powder
- ⅔ cup dark chocolate chips (or semi-sweet, your preference)
- ⅔ cup Cadbury mini eggs roughly chopped (plus extra for topping)
Instructions
-
Preheat your oven to 350°F (175°C) and line a large baking sheet with parchment paper. This will prevent sticking and ensure even baking. While prepping your ingredients, remember to set aside a small handful of both the chocolate chips and the chopped mini eggs. These will be used later for topping your cookies, giving them that irresistible bakery-style look.
-
In a small, light-colored saucepan over medium-low heat, melt the unsalted butter. Once the butter is fully melted, increase the heat slightly to medium and allow it to begin foaming. Continuously cook and stir the butter with a rubber spatula. You’ll observe white specks forming at the bottom of the pan – these are the milk solids. Keep stirring and cooking until these milk solids turn a beautiful light brown and the butter emits a distinct, nutty, toasted aroma, typically within 2-3 minutes after foaming begins. Be careful not to burn it! Immediately pour the browned butter, ensuring you scrape out all the delicious browned bits stuck at the bottom of the pan, into a large mixing bowl. Set aside to cool completely to room temperature. This step is crucial for flavor and consistency.1 ½ sticks unsalted butter
-
Once the brown butter has completely cooled, add the light brown sugar, granulated sugar, kosher salt, and pure vanilla extract to the bowl. Whisk everything together thoroughly until the mixture is smooth and well combined. Next, add the large whole egg and the extra large egg yolk. Continue to whisk vigorously until the batter is smooth, thick, and has a slightly lighter, creamy consistency. This ensures all the wet ingredients are perfectly incorporated.1 cup packed light brown sugar, ½ cup granulated sugar, 1 teaspoon kosher salt, 2 teaspoons pure vanilla extract, 1 large egg, 1 large egg yolk
-
Now, gently add in the all-purpose flour, baking soda, and baking powder into the wet mixture. Using a rubber spatula, carefully fold all the ingredients together until the cookie dough is just combined and no streaks of dry flour remain. Be mindful not to overmix the dough, as excessive mixing can develop gluten and result in tough cookies. Finally, stir in the chocolate chips and the roughly chopped mini eggs until they are evenly distributed throughout the dough.2 ½ cups all purpose flour, ½ teaspoon baking soda, ¾ teaspoon baking powder, ⅔ cup dark chocolate chips, ⅔ cup Cadbury mini eggs
-
Using a large cookie scoop or measuring about 3 heaping tablespoons, scoop out portions of cookie dough. Roll each portion gently into a uniform ball, then place them on your prepared baking sheet. Ensure there’s enough space between each cookie (about 2-3 inches) as they will spread. For that professional bakery-style finish, take the extra chocolate chips and mini eggs that you reserved earlier and press them directly onto the top of each cookie dough ball. You’ll bake these large cookies in batches of 6 at a time to prevent overcrowding.
-
Bake the cookies for 10-12 minutes for gorgeously soft and chewy centers with perfectly set edges. If you prefer a slightly crispier cookie, bake them for an additional minute or two. Remember that the cookies will continue to bake and firm up as they cool. Once out of the oven, allow the cookies to cool on the baking sheet for a vital 10 minutes. This cooling period on the hot sheet helps them set without falling apart, and then you can carefully transfer them to a wire cooling rack to cool completely. Enjoy your perfect brown butter mini egg cookies!
Notes
Crushing Mini Eggs: For the best texture and ease, I strongly recommend putting the Cadbury mini eggs into a sturdy ziplock bag and smashing them with a rolling pin. This method yields a lovely variety of sizes, from fine shards to larger chunks. Avoid chopping them with a knife, as their hard candy shell can be difficult and potentially unsafe to cut.
Salt: The type of salt used can significantly impact the flavor. This recipe calls for 1 teaspoon of kosher salt. Please note that I use Diamond Crystal Kosher Salt, which has a larger flake and is less salty by volume than table salt or Morton’s Coarse Kosher Salt. If you are using fine salt (like table salt), you should halve the amount to ½ teaspoon to prevent your cookies from becoming too salty. Coarse kosher salt like Morton’s can also be much too salty at a 1:1 ratio.
Storage: To maintain their freshness and delicious chewiness, store the baked cookies in an airtight container at room temperature for up to 1 week. If you’re planning ahead, you can freeze unbaked cookie dough balls for up to 2 months. When you’re ready to bake them, simply take them out of the freezer and bake at the same specified temperature, but allow for an extra minute or two of baking time. For already baked cookies, freeze them in an airtight container for up to 3 months and thaw at room temperature.
Nutrition
