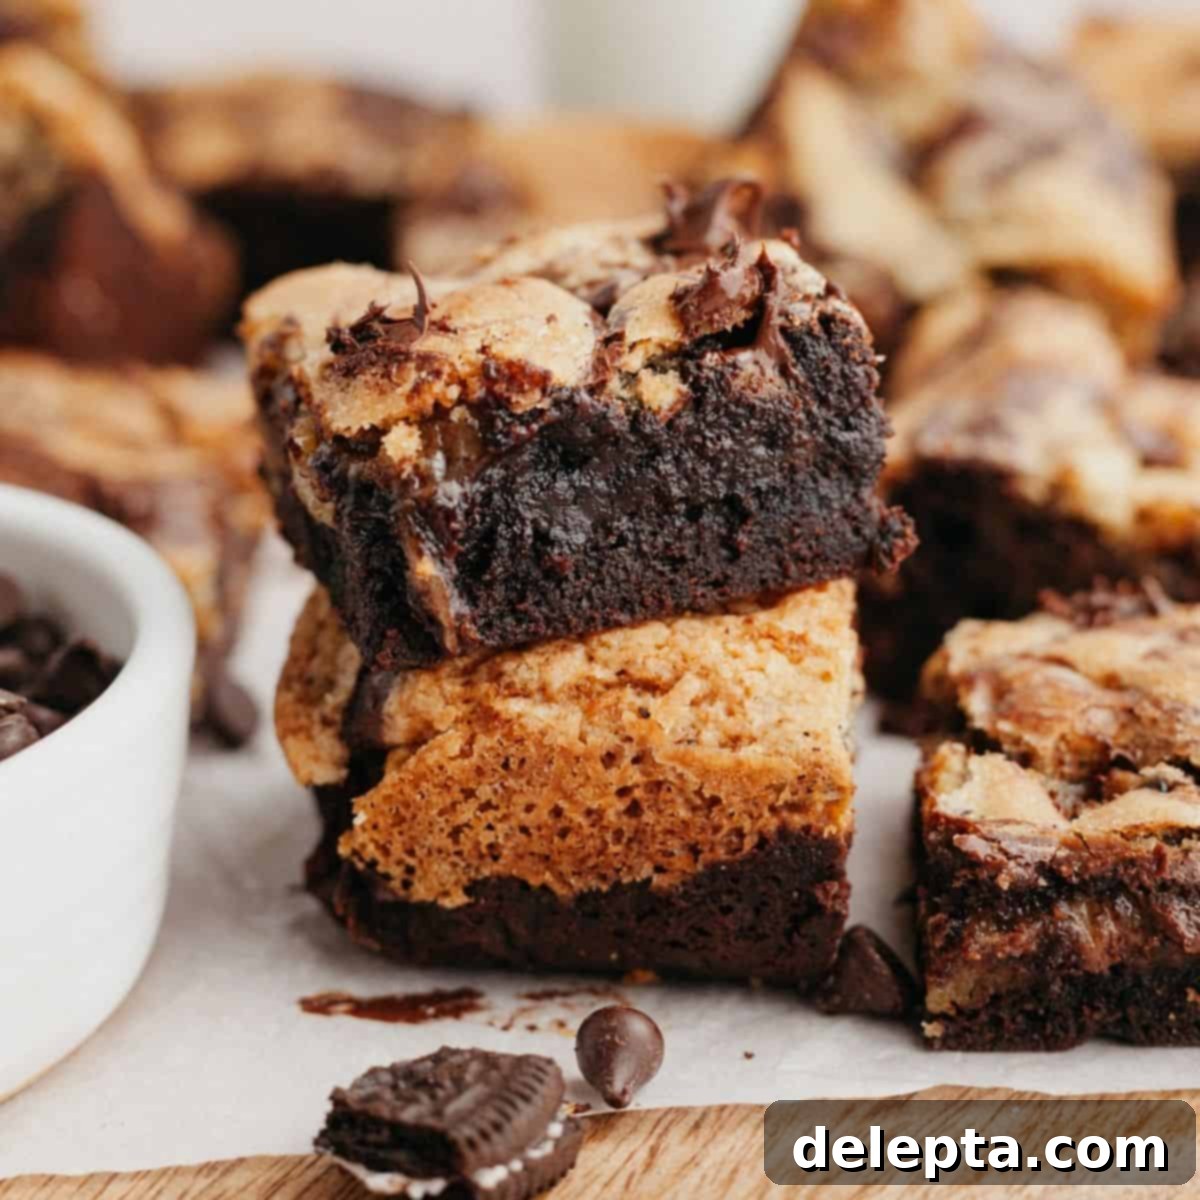
The Ultimate Oreo Brookies Recipe: Fudgy Brownie & Chewy Chocolate Chip Cookie Bars
Prepare for a dessert experience that transcends expectations with these incredible Oreo brookies! This recipe flawlessly combines the decadent richness of fudgy Oreo brownies with the irresistible chewiness of classic chocolate chip cookies. Every single bite delivers a harmonious blend of textures and intense chocolate flavors, making it an absolute dream come true for any dessert lover. You only need 12 key ingredients to create this masterpiece, and the process is surprisingly straightforward, promising a rewarding baking adventure for both novice and experienced bakers alike.
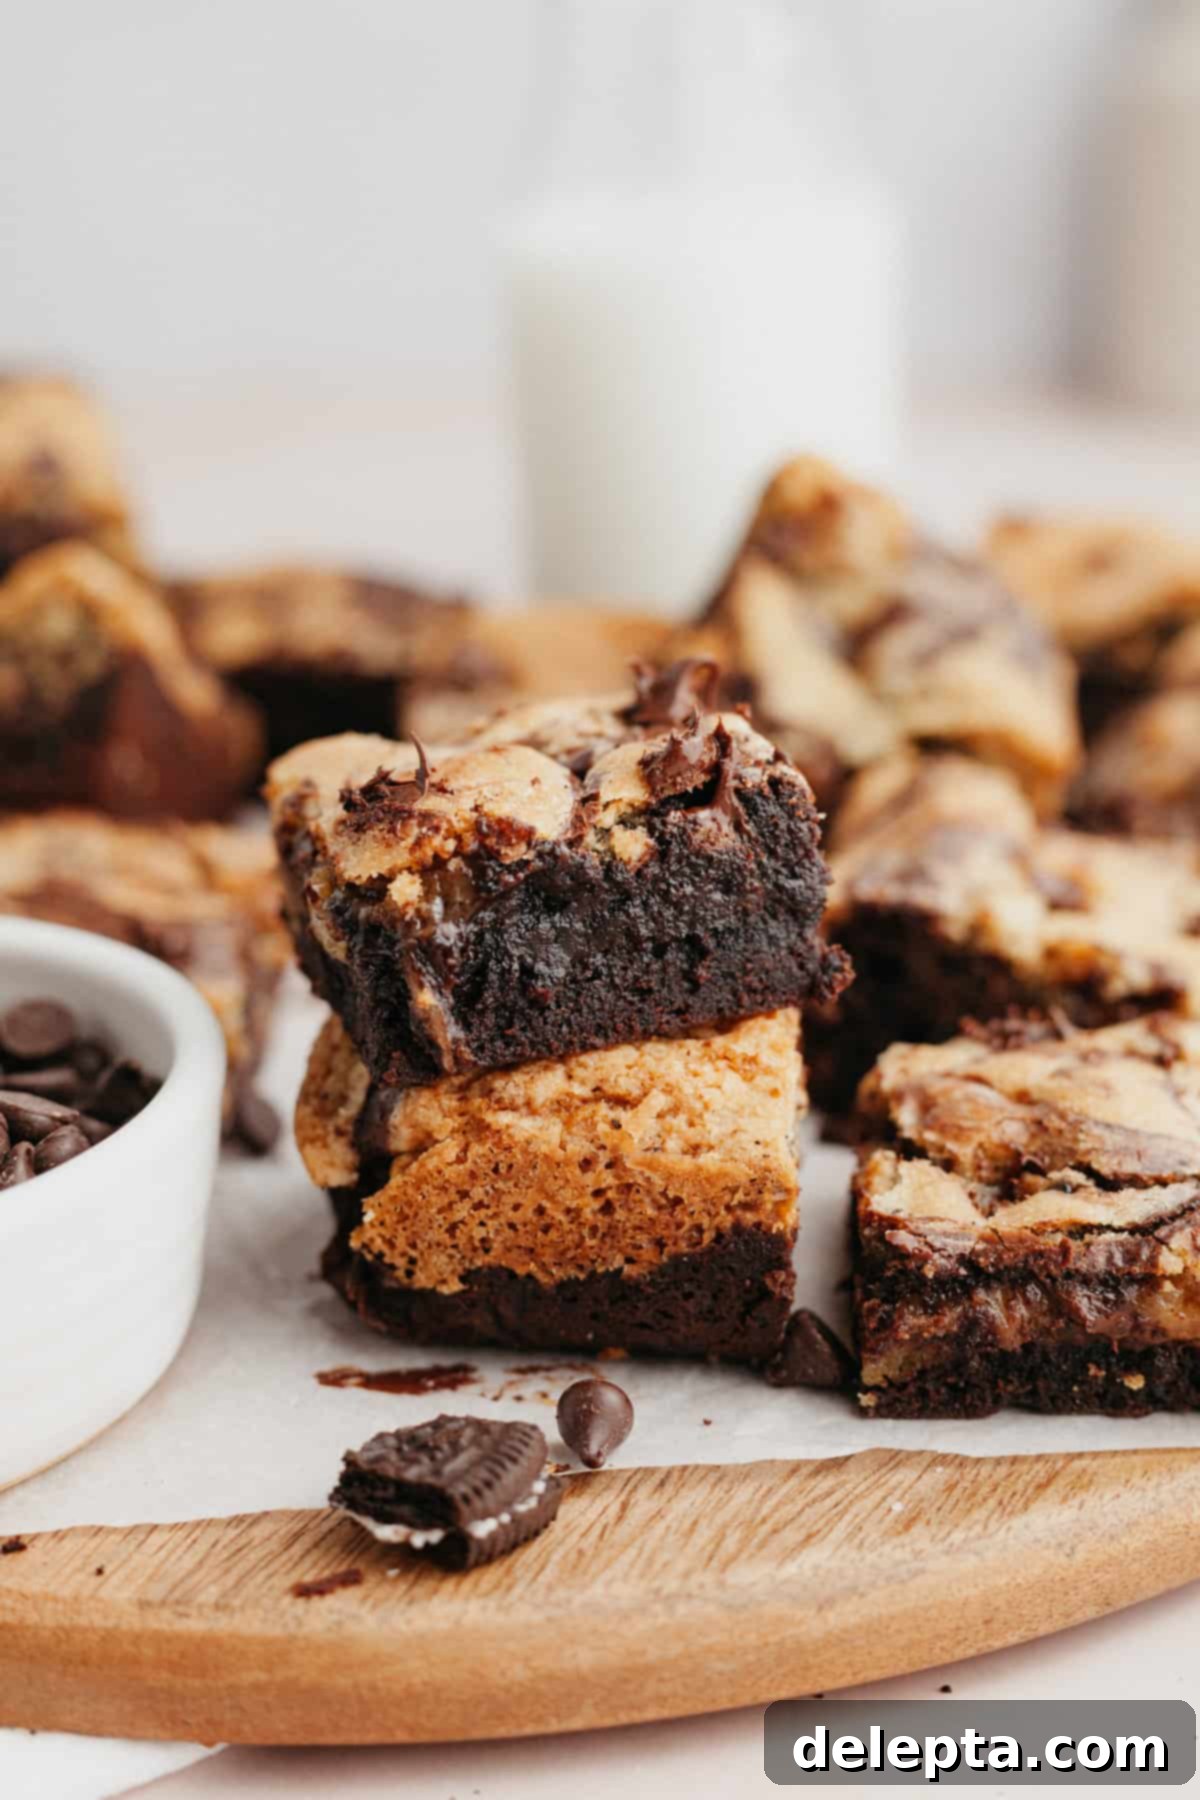
Chocolate chip cookies and brownies have always held a special place in my heart as go-to desserts. Their comforting familiarity and delightful flavors are unmatched. While delicious on their own, merging them elevates them to an entirely new level. The beauty of this brookie recipe lies in its approachable nature; the brownie batter comes together effortlessly in a single large bowl, while the chocolate chip cookie dough can be whipped up with the convenience of a hand mixer or a stand mixer. This truly is a next-level treat that brings together the best of both worlds, offering an explosion of flavor and texture in every square.
If you’re eager to explore more creative takes on classic desserts, be sure to check out my birthday cake brownies for a festive twist, or dive into the swirling deliciousness of my marbled cheesecake brownies!
Why You’ll Fall in Love with These Oreo Brookies!
- Luxuriously Fudgy Brownie Layer: This isn’t just any brownie; it’s a rich, intense chocolate experience. Our brownie base is crafted with a powerful duo of high-quality cocoa powder and luscious melted dark chocolate, ensuring a deep, complex chocolate flavor that will satisfy even the most ardent chocoholic. To elevate it further, we generously load the brownie batter with chopped Oreo pieces, adding an irresistible crunch and that iconic cookies-and-cream flavor. This layer is inspired by my consistently praised brownies with peanut butter cups, guaranteeing supreme fudginess.
- Perfectly Chewy Chocolate Chip Cookie Layer: Nestled on top of the brownie, this cookie layer provides the perfect textural contrast. Based on my trusted chocolate chip cookie recipe, it’s designed for ease and deliciousness. You have the flexibility to customize it with your favorite chocolate chips – whether you prefer the bittersweet notes of dark chocolate, the classic sweetness of semi-sweet, or the creamy indulgence of white chocolate chips. This ensures a chewy, flavorful cookie experience in every bite.
- Effortlessly Easy to Make: Don’t let the impressive appearance fool you; these Oreo brookies are surprisingly simple to prepare. The entire recipe comes together in under 30 minutes of active prep time. You’ll start by making the rich brownie batter, followed by the soft and pliable chocolate chip cookie dough. The magic truly happens when you artfully swirl the two batters together in the pan before baking. It’s an easy process that yields spectacular results, making it ideal for bakers of all skill levels.
- A Crowd-Pleasing Dessert for Any Occasion: Brookies are the ultimate hybrid dessert, catering to both brownie and cookie enthusiasts simultaneously. Their unique combination of flavors and textures makes them an instant hit at parties, potlucks, family gatherings, or simply as a special treat for yourself. They are guaranteed to impress and disappear quickly!
- Customization Opportunities: While classic Oreos are fantastic, this recipe offers plenty of room for creative twists. Experiment with different flavored Oreos (mint, golden, peanut butter), or mix in other candies, nuts, or chocolate varieties into either the brownie or cookie layer. The possibilities are endless, allowing you to tailor this dessert to your personal preferences.
Essential Ingredients for Your Oreo Brookies
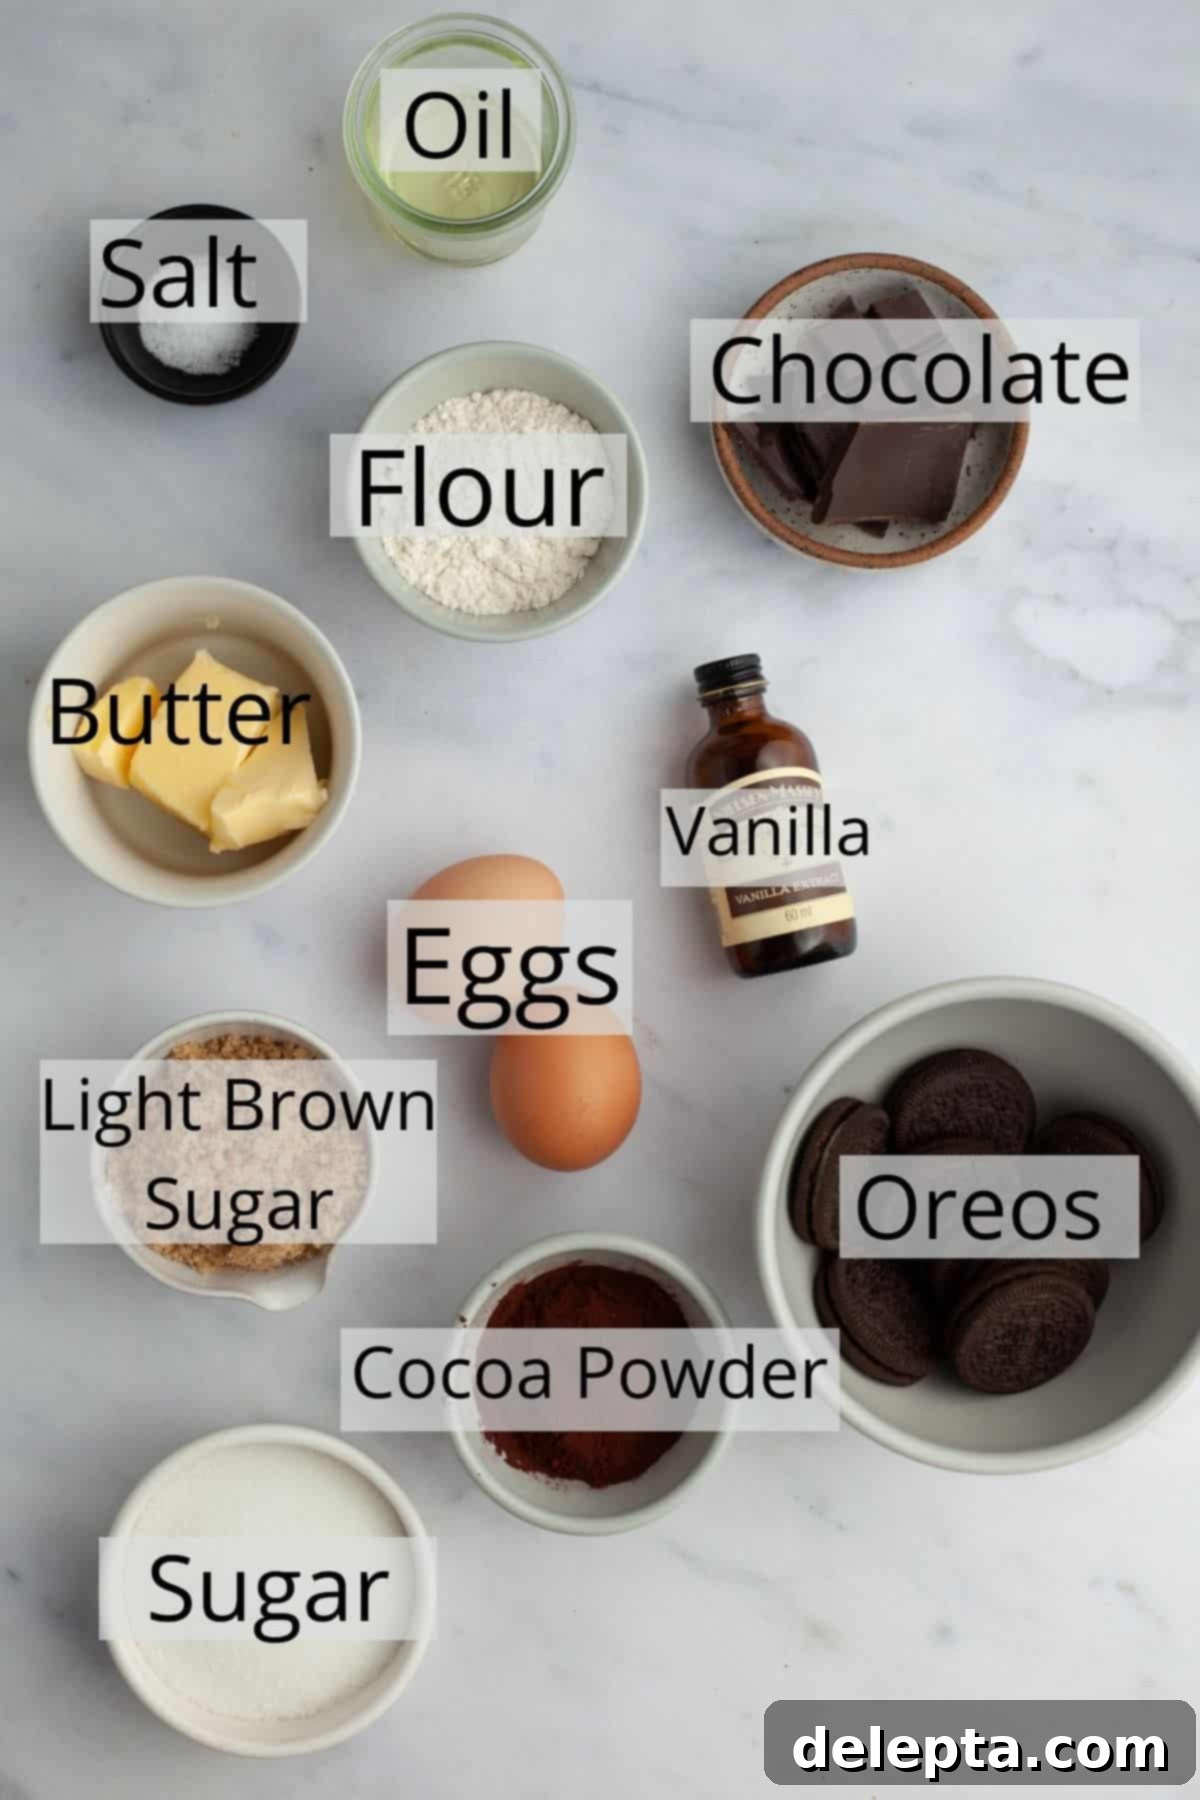
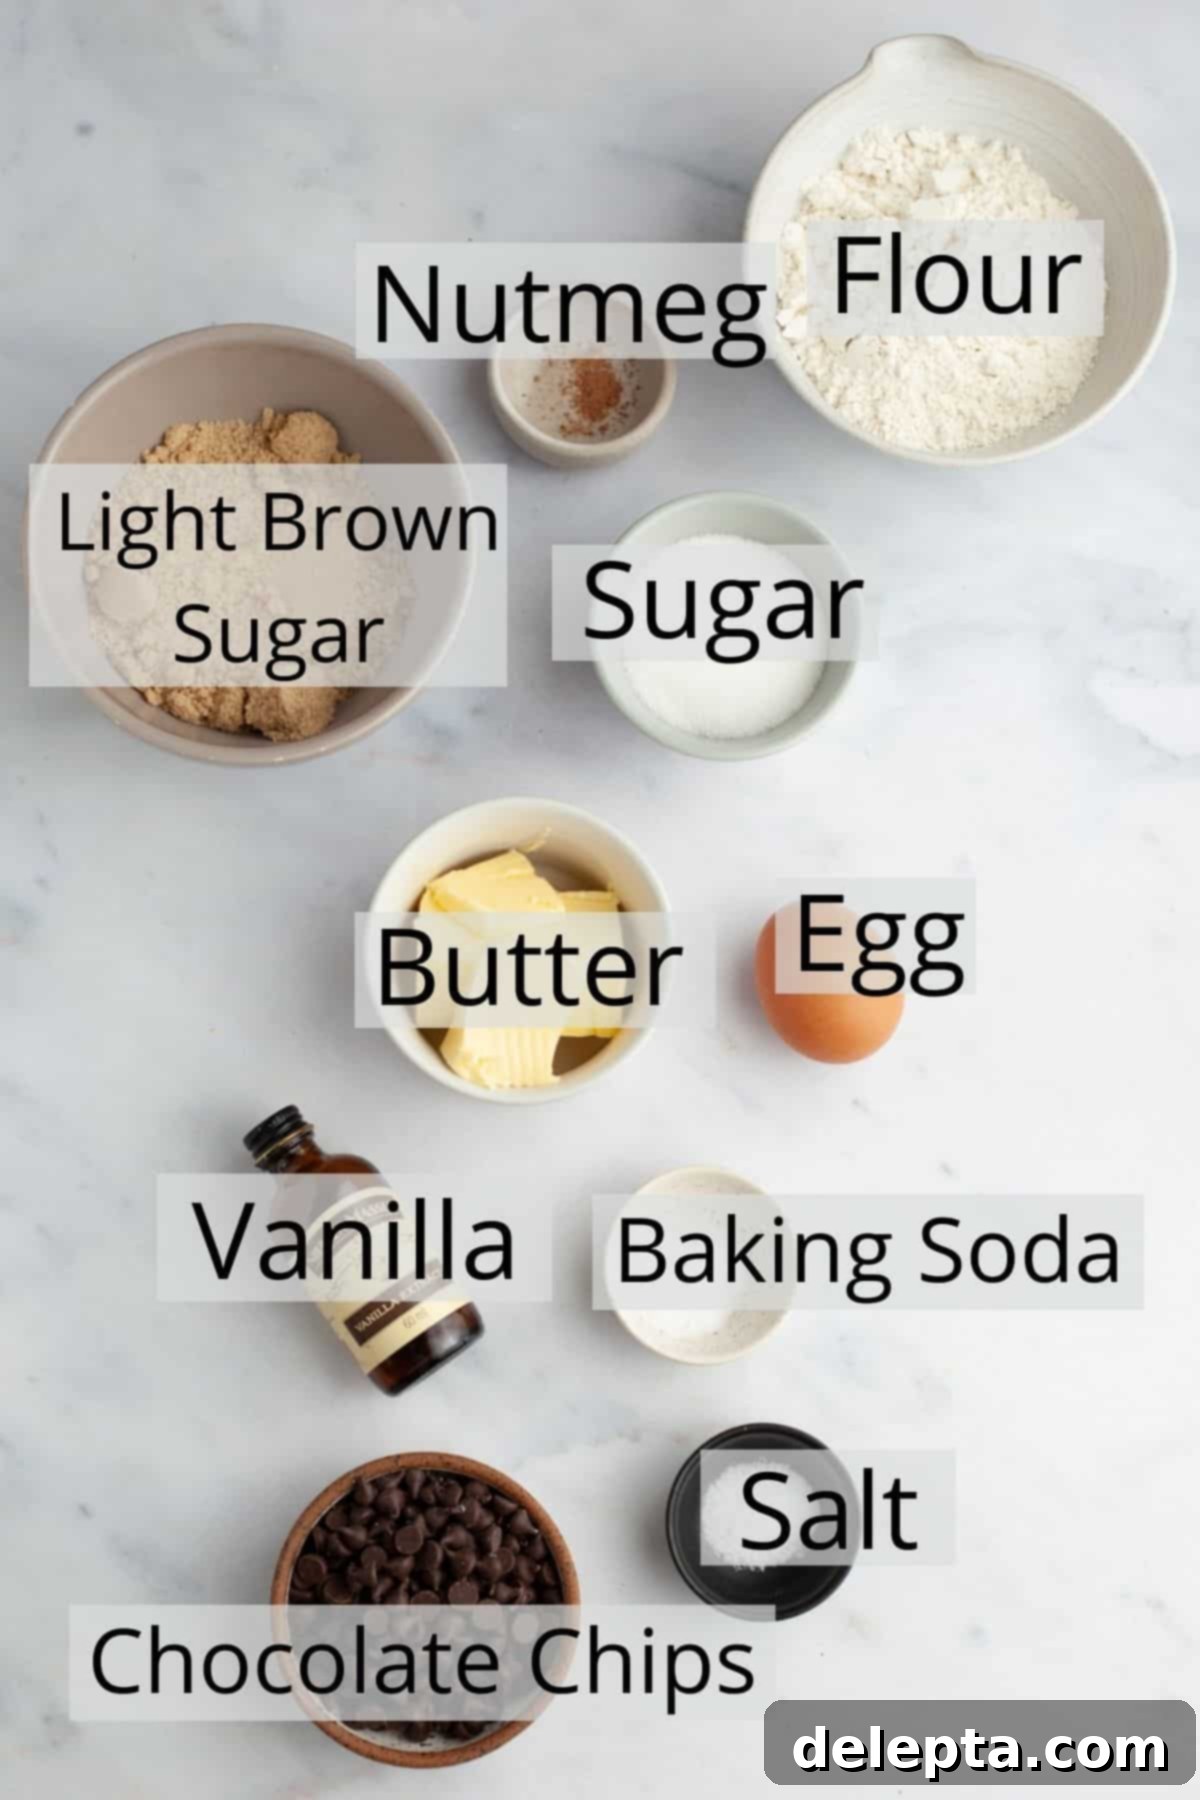
- All-Purpose Flour: This is the structural backbone for both your brownie and cookie layers. For consistent results, I’ve strictly tested this recipe with all-purpose flour. While some bakers have experimented with gluten-free alternatives, I haven’t personally tested them, so results may vary. For best accuracy, always weigh your flour or use the “fluff and sprinkle” method (see expert tips) to avoid a dry outcome.
- Granulated Sugar & Light Brown Sugar: You’ll need both types of sugar for their distinct contributions. Granulated sugar provides crispness and sweetness, particularly in the cookie layer, while light brown sugar imparts moisture, chewiness, and a subtle caramel note, essential for that classic soft cookie texture and fudgy brownie consistency.
- Baking Soda: A crucial leavening agent specifically for the chocolate chip cookie dough. Baking soda reacts with acidic ingredients (like brown sugar) to create carbon dioxide, giving the cookies a slight lift and a tender crumb. Critically, we omit baking soda from the brownie batter to preserve its signature dense, fudgy texture, preventing it from becoming cakey.
- Oreos: The star of the show! It simply wouldn’t be an Oreo brookie without these iconic sandwich cookies. For the best integration and flavor, I recommend crushing them into coarse crumbs. This can be easily done by placing them in a ziplock bag and rolling over them with a rolling pin, or for a quicker method, pulsing them in a food processor. Be sure to leave the creamy white filling in – it adds extra moisture, sweetness, and that unmistakable Oreo flavor to the brownies.
- Unsalted Butter: My go-to choice for baking, as it allows for precise control over the overall salt content in the recipe. For an even richer taste and superior texture, I opt for European-style butter, which boasts a higher butterfat content compared to standard American butter. This higher fat content contributes significantly to the melt-in-your-mouth quality of both layers. Ensure your butter is at room temperature for the cookie dough for proper creaming.
- Dutch Processed Cocoa Powder: This type of cocoa powder has been treated with an alkali to reduce its acidity, resulting in a darker color and a milder, less bitter chocolate flavor. This contributes to the deep, dark hue and smooth taste of our brownie layer. To check if your cocoa powder is Dutch process, look for “alkali” or “acidity regulators” in the ingredient list. If you’re using natural cocoa powder, you might need to adjust leavening agents in other recipes, but for this brownie, stick to Dutch process for the intended fudginess.
- Vegetable Oil: A secret weapon for achieving truly fudgy and rich brownies. While butter provides flavor, oil ensures a consistently moist and tender crumb that stays soft for days. I typically use vegetable oil, but canola oil is also an excellent substitute. Avoid using strong-flavored oils like olive oil, as they can impart an undesirable taste to your dessert.
- Eggs: Essential binders and emulsifiers for both layers, contributing to the structure, moisture, and richness. Using room temperature eggs is vital, especially for the cookie dough, as they emulsify more easily with other ingredients, creating a smoother, more uniform batter.
- Vanilla Extract: A flavor enhancer that beautifully complements the chocolate and cookie notes, adding depth and warmth to the overall taste profile. Use a good quality pure vanilla extract for the best results.
- Dark Chocolate (for brownie layer): Chopped dark chocolate is melted into the brownie batter alongside the butter, contributing to its intense chocolate flavor and incredibly fudgy texture. The quality of your chocolate will significantly impact the final taste, so opt for a good baking chocolate.
- Chocolate Chips (for cookie layer): These are folded into the cookie dough, melting slightly during baking to create pockets of gooey chocolate goodness. Feel free to use your favorite variety: dark, semi-sweet, milk, or even white chocolate chips will work wonderfully.
- Kosher Salt: A fundamental ingredient that balances the sweetness and enhances all the other flavors in both the brownies and cookies. If using fine table salt, remember to halve the amount, as kosher salt has larger flakes and is less dense.
- Ground Nutmeg: This might seem like an unconventional addition to chocolate chip cookies, but a pinch of ground nutmeg is a subtle yet powerful flavor enhancer. It adds a warm, almost mysterious depth that elevates the cookie layer beyond the ordinary without being overtly spicy. Don’t skip it!
For a comprehensive breakdown of all ingredients and precise quantities, please refer to the detailed recipe card provided below.
Easy Step-by-Step Guide to Making Oreo Brookies
Follow these straightforward instructions to create your own batch of irresistible Oreo Brookies!
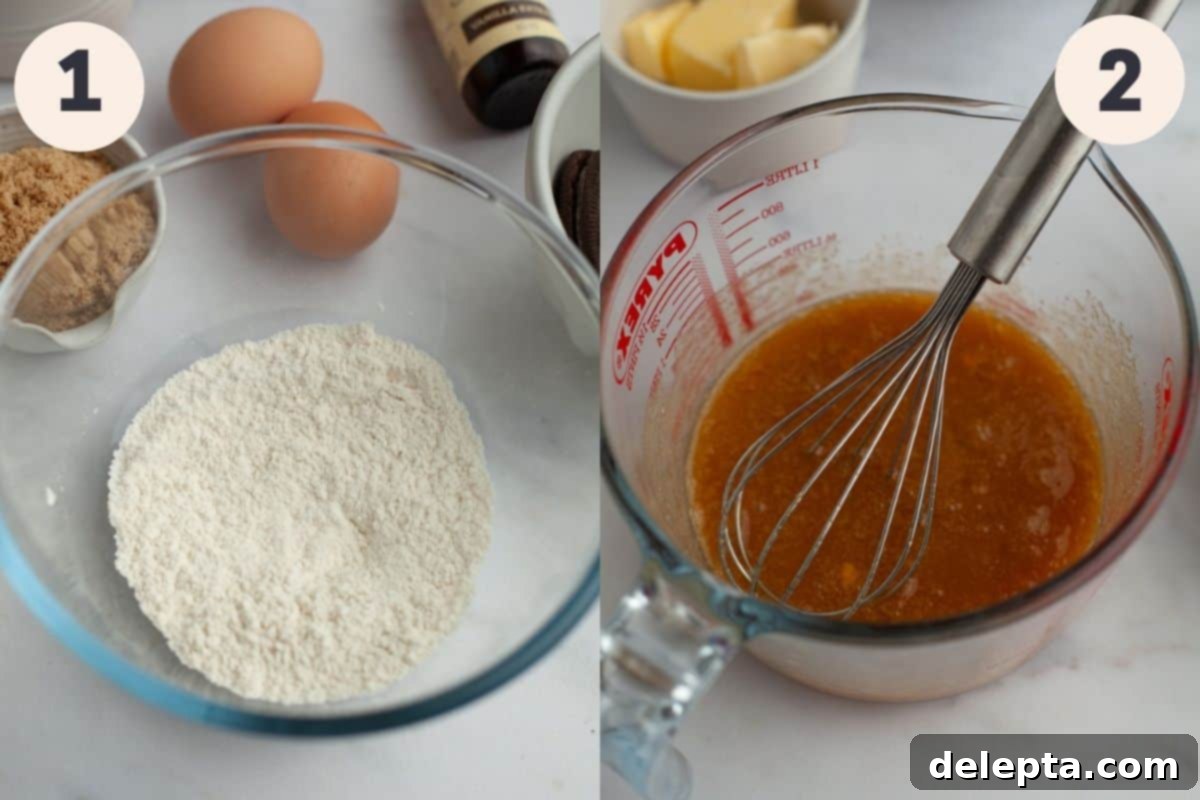
Step 1: Prepare Dry Ingredients for Brownies. In a small bowl, combine the all-purpose flour and kosher salt. Whisk them together thoroughly until uniformly mixed. This ensures that the salt is evenly distributed throughout the brownie batter.
Step 2: Prepare Wet Ingredients for Brownies. In a separate large jug or mixing bowl, whisk together the room temperature eggs, both granulated and light brown sugars, vegetable oil, and vanilla extract. Whisk vigorously until the mixture is light in color and well combined. Room temperature eggs are crucial here for better emulsification.
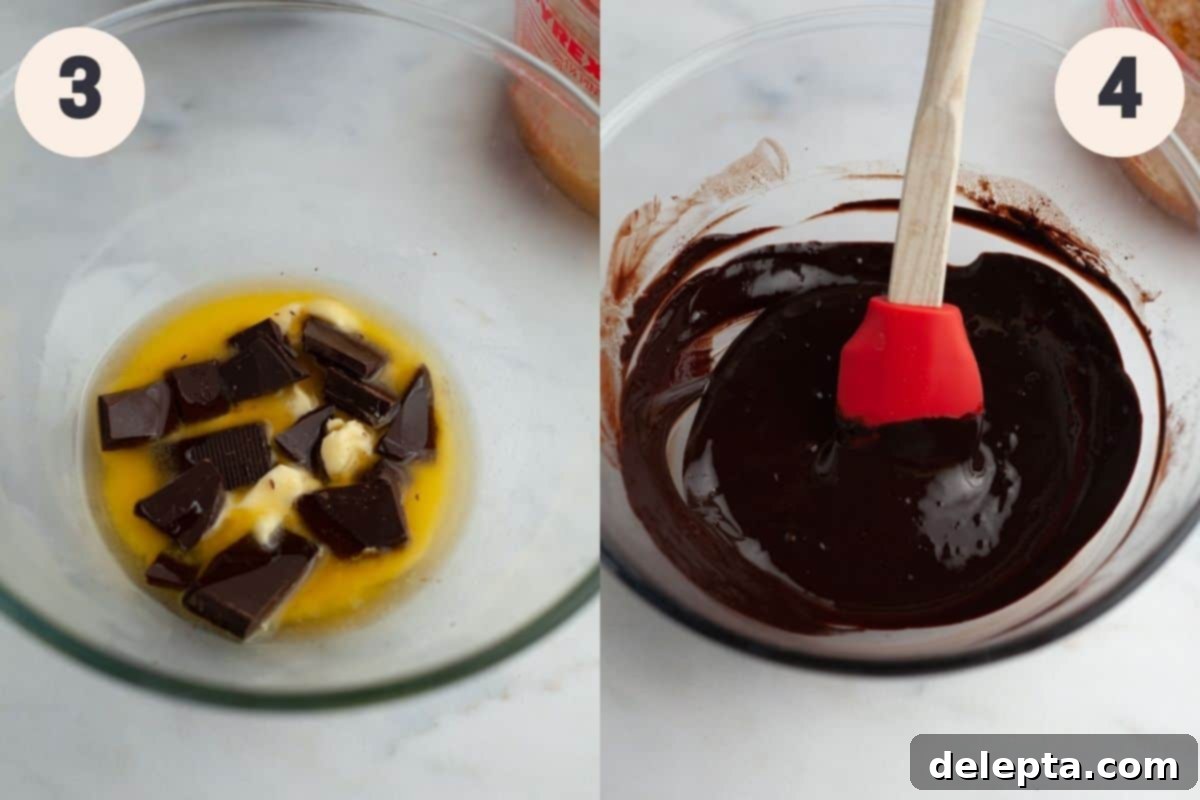
Step 3: Melt Butter and Chocolate. Place your unsalted butter in a microwave-safe bowl. Microwave in short bursts of 20 seconds, stirring between each, until completely melted. Immediately add your chopped dark chocolate to the hot melted butter. The residual heat from the butter should begin to melt the chocolate. If it doesn’t fully melt, return the bowl to the microwave in 10-15 second increments, stirring until smooth and glossy. Alternatively, you can melt these together over a double boiler for a gentler, more controlled melt.
Step 4: Combine Brownie Mixtures. Once the butter and chocolate are completely melted and smooth, whisk them together to form a rich chocolate base. Next, whisk in the Dutch processed cocoa powder until it’s fully incorporated and the mixture is smooth and lump-free. Finally, pour the sugar-egg mixture (from Step 2) into the chocolate mixture and whisk everything together until beautifully smooth and homogenous. Do not overmix; just combine until smooth.
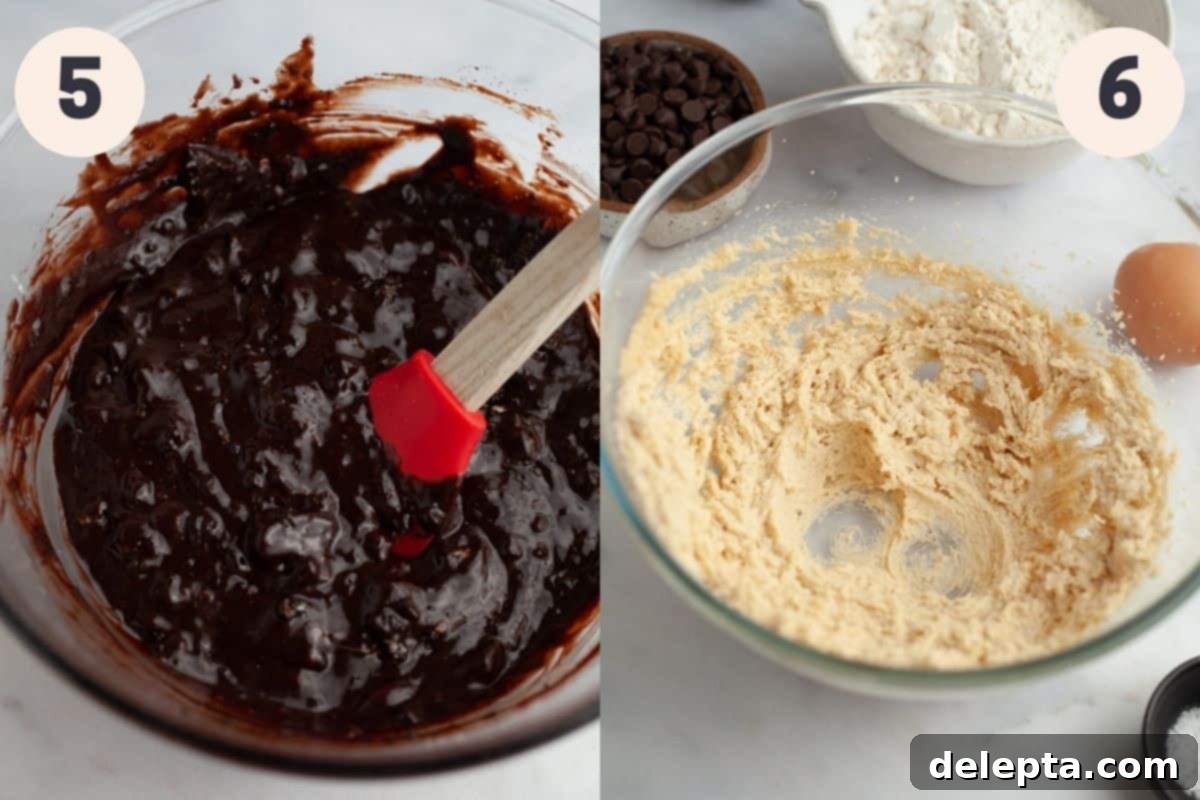
Step 5: Finish Brownie Batter. Gently pour your prepared flour and salt mixture (from Step 1) into the chocolate mixture. Using a rubber spatula, carefully fold the ingredients together until just combined. Be careful not to overmix, as this can develop the gluten and lead to tougher brownies. Ensure there are no pockets of dry flour remaining. Finally, fold in the crushed Oreos, distributing them evenly throughout the batter. Set this bowl aside while you prepare the chocolate chip cookie dough.
Step 6: Cream Butter and Sugars for Cookies. In a stand mixer fitted with the paddle attachment, or in a large bowl with a hand mixer, place your room temperature unsalted butter. Beat on medium speed for about 1 minute until the butter is smooth and creamy. Add both the white granulated sugar and the light brown sugar. Continue to cream the butter and sugars together on medium speed for 2-3 minutes, until the mixture becomes light, fluffy, and noticeably pale in color. This creaming process incorporates air, essential for a soft and chewy cookie.
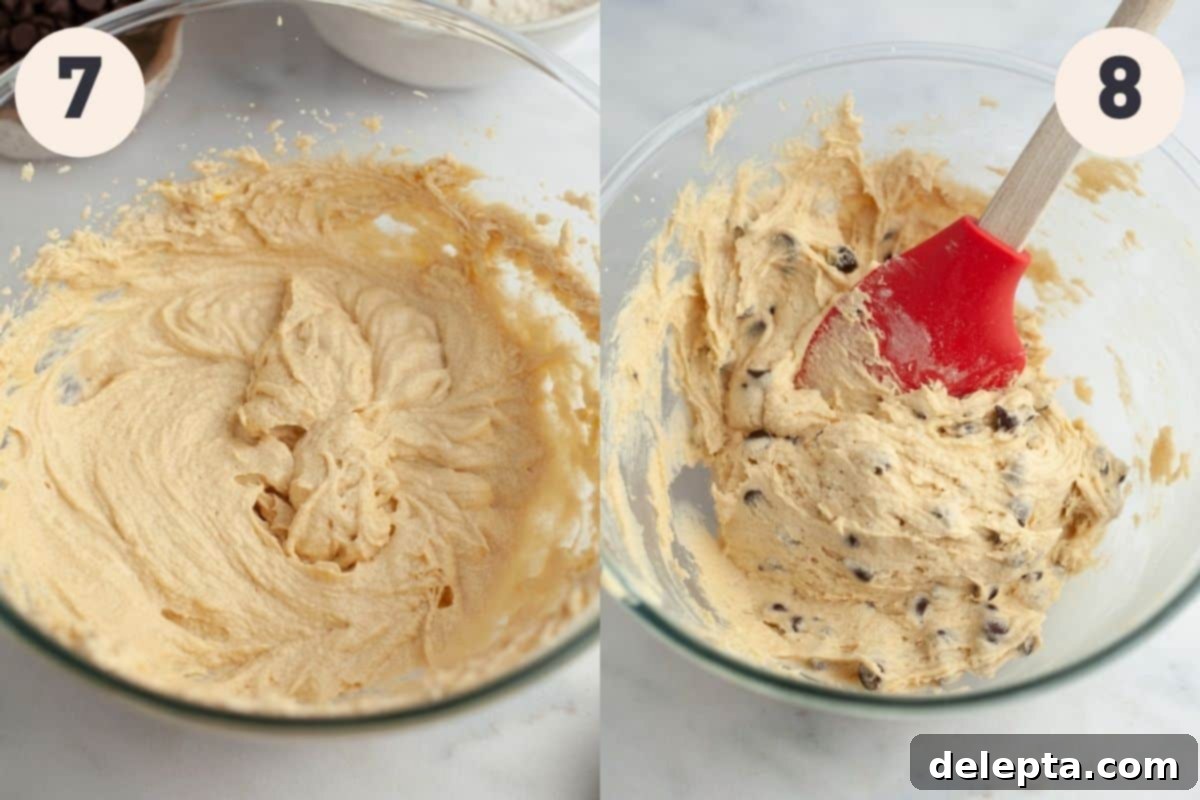
Step 7: Add Egg and Vanilla to Cookie Dough. Crack in the room temperature egg and add the vanilla extract to the creamed butter and sugar mixture. Beat again on medium speed until the egg is fully incorporated and the mixture is smooth. Scrape down the sides of the bowl as needed to ensure everything is well combined.
Step 8: Combine Cookie Dough Ingredients. In a small, separate bowl, whisk together the flour, ground nutmeg, baking soda, and kosher salt. This step ensures that the leavening and seasonings are evenly distributed. Gradually add this dry mixture to the wet cookie ingredients, folding with a rubber spatula until just combined. Again, avoid overmixing. Finally, fold in your chocolate chips until they are evenly distributed throughout the dough.
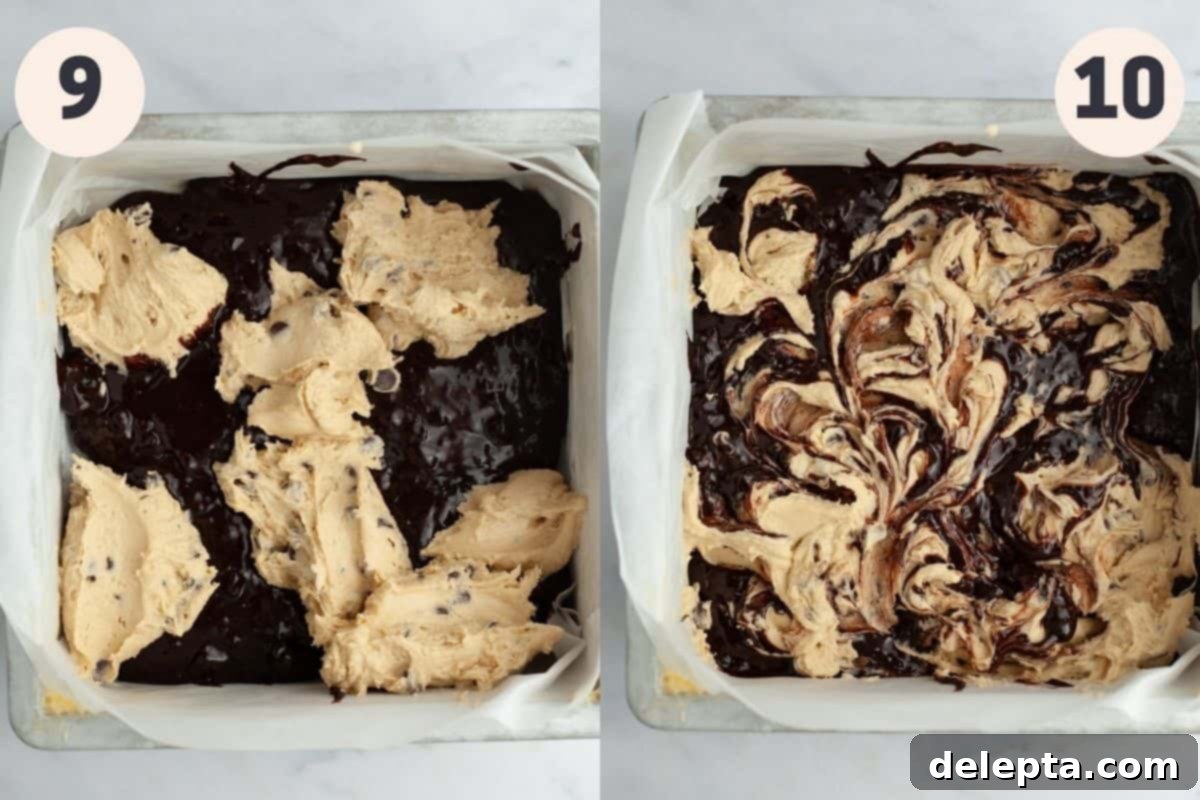
Step 9: Assemble the Brookies. Preheat your oven to 350°F (175°C). Lightly grease an 8×8 inch baking pan and line it with parchment paper, leaving an overhang on two sides. This overhang will act as “handles” to easily lift the cooled brookies out of the pan. Now, start dolloping alternating spoonfuls of the rich brownie batter and the chocolate chip cookie dough into the prepared pan. Aim for an almost checkerboard pattern, or simply ensure you leave spaces for both batters to be evenly distributed.
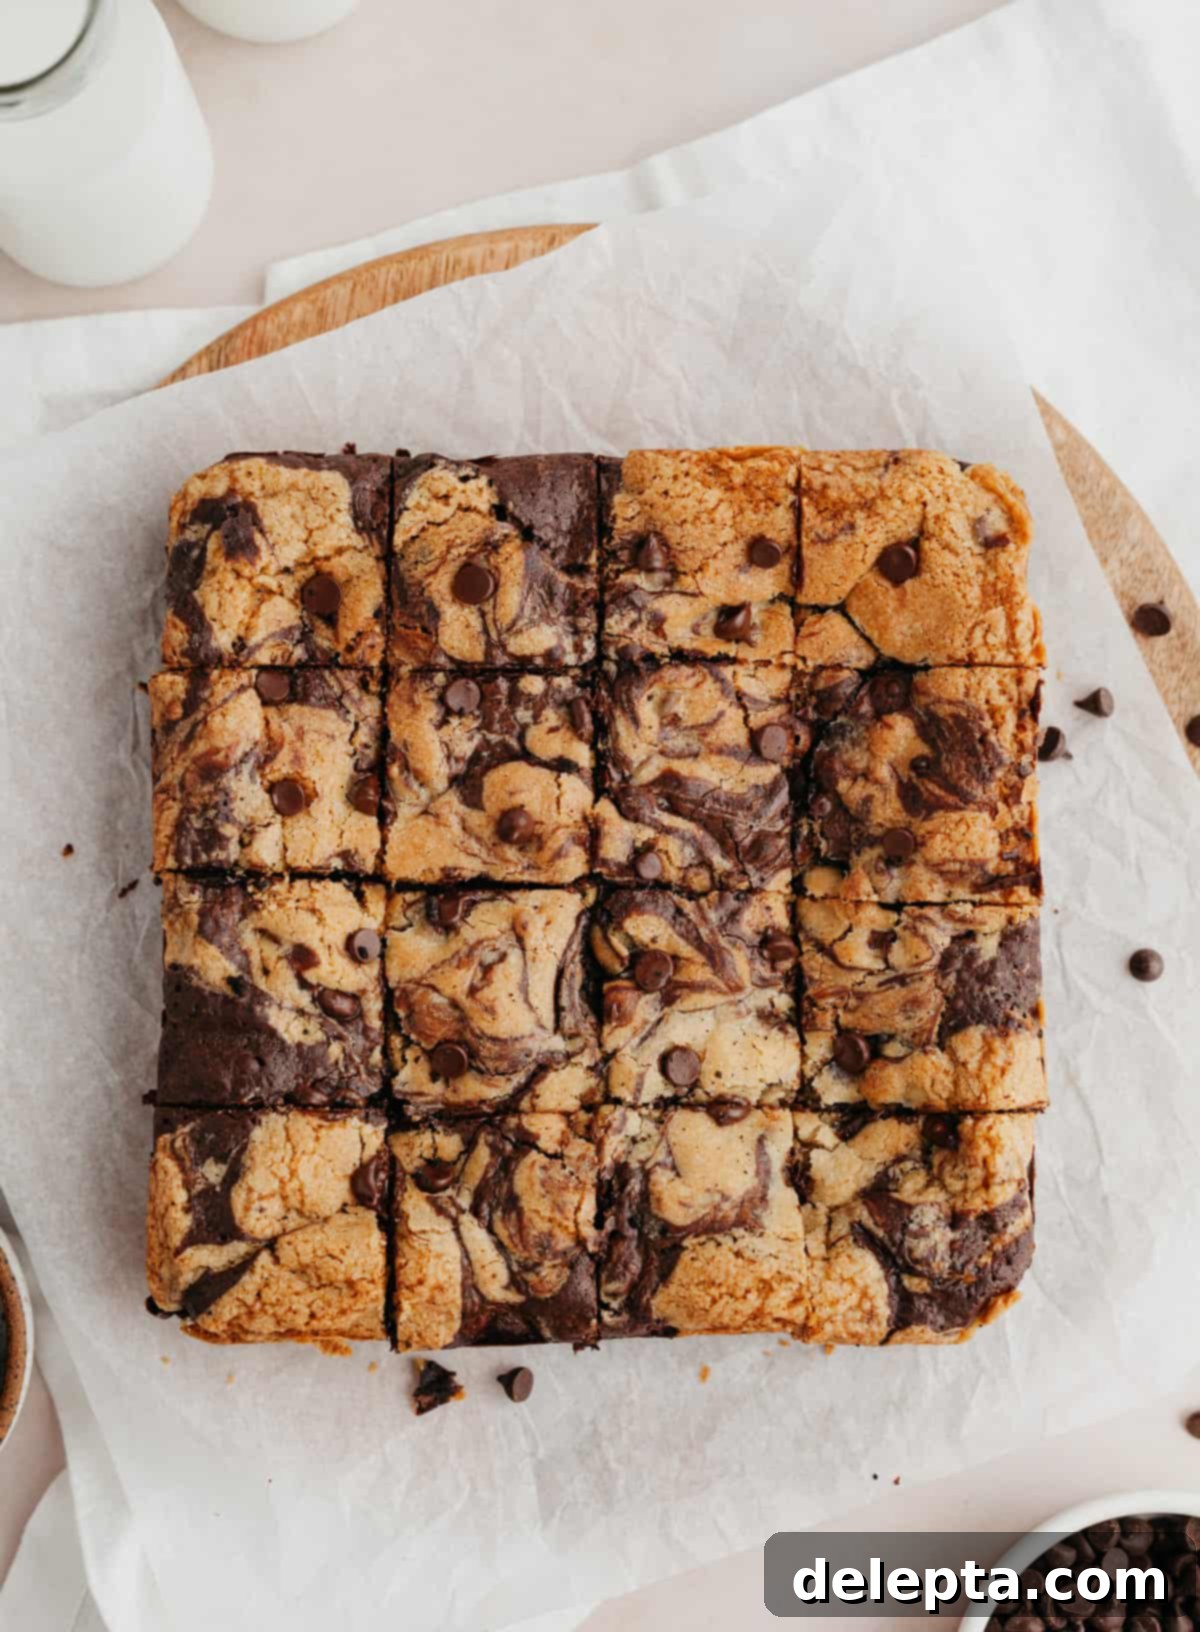
Step 10: Swirl and Bake. Once all the batter and dough are in the pan, take a butter knife or a skewer and gently swirl the two mixtures together. Be careful not to overmix; you want distinct swirls, not a fully blended batter. The goal is to create beautiful marbled patterns that showcase both layers. Bake in the preheated oven for 25-30 minutes. The edges of the brookies should appear set and golden brown, but the very center might still look slightly underdone and soft – this is absolutely perfect for fudgy brookies! Overbaking will result in dry brookies. Remove from the oven and allow them to cool completely in the pan before attempting to slice. Cooling is crucial for the brookies to set properly and achieve their ultimate fudgy and chewy texture.
Let them cool completely in the pan before slicing for the best texture and clean cuts.
Expert Tips & Tricks for Perfect Oreo Brookies
- Precision with Weighing Ingredients: For consistently perfect baking results, I cannot emphasize enough the importance of using a digital kitchen scale to measure your ingredients, especially flour and sugar, using the metric system. This is by far the most accurate method for baking, eliminating the variability that comes with volumetric measuring cups and ensuring your brookies achieve the ideal texture every time.
- The “Fluff & Sprinkle” Method for Flour: If a weighing scale isn’t available and you’re using measuring cups, employ the “fluff and sprinkle” method. First, fluff up your flour in its container with a spoon. Then, gently spoon the flour into your measuring cup until it’s overflowing. Finally, level off the top with the straight edge of a knife without compacting the flour. Packing too much flour into your cup is a common mistake that can lead to dry, dense brookies instead of the desired fudgy texture.
- Resist the Urge to Overmix Your Dough: Whether you’re making the brownie batter or the cookie dough, overmixing is the enemy of a tender bake. Overworking the flour develops the gluten, resulting in a tougher, drier, and less desirable texture. Mix only until the ingredients are just combined and no streaks of dry flour remain.
- Ensure All Ingredients are at Room Temperature: This is a golden rule in baking! For the best emulsion and smoothest batters, make sure all cold ingredients (like butter and eggs) are at room temperature before you begin. Plan ahead and pull them out of the fridge at least 1-2 hours before you start baking. Room temperature ingredients combine more easily and create a more uniform batter, which contributes to a superior final product.
- Boost the Visual Appeal with Extra Chocolate Chips: Once your Oreo brookies emerge from the oven, immediately scatter a handful of extra chocolate chips over the warm surface. The residual heat will melt them slightly, creating an inviting, glossy finish that makes your brookies look professionally baked and utterly bakery-worthy. Otherwise, many of the chocolate chips tend to sink into the batter during baking, leaving the top less adorned.
- Patience is Key: Let Them Cool Completely: I know the aroma filling your kitchen is intoxicating, but it’s vital to let your brookies cool entirely in their baking pan before attempting to lift them out or slice them. If you try to remove or cut them while still warm, they may crumble, collapse, or be difficult to slice cleanly. Cooling allows the fats to solidify and the structure to set, ensuring perfectly fudgy and intact bars.
- Proper Pan Preparation: Always grease your baking pan thoroughly and line it with parchment paper, leaving an overhang on two sides. This parchment “sling” will make it incredibly easy to lift the entire slab of cooled brookies out of the pan for neat slicing.
Oreo Brookies Recipe FAQs
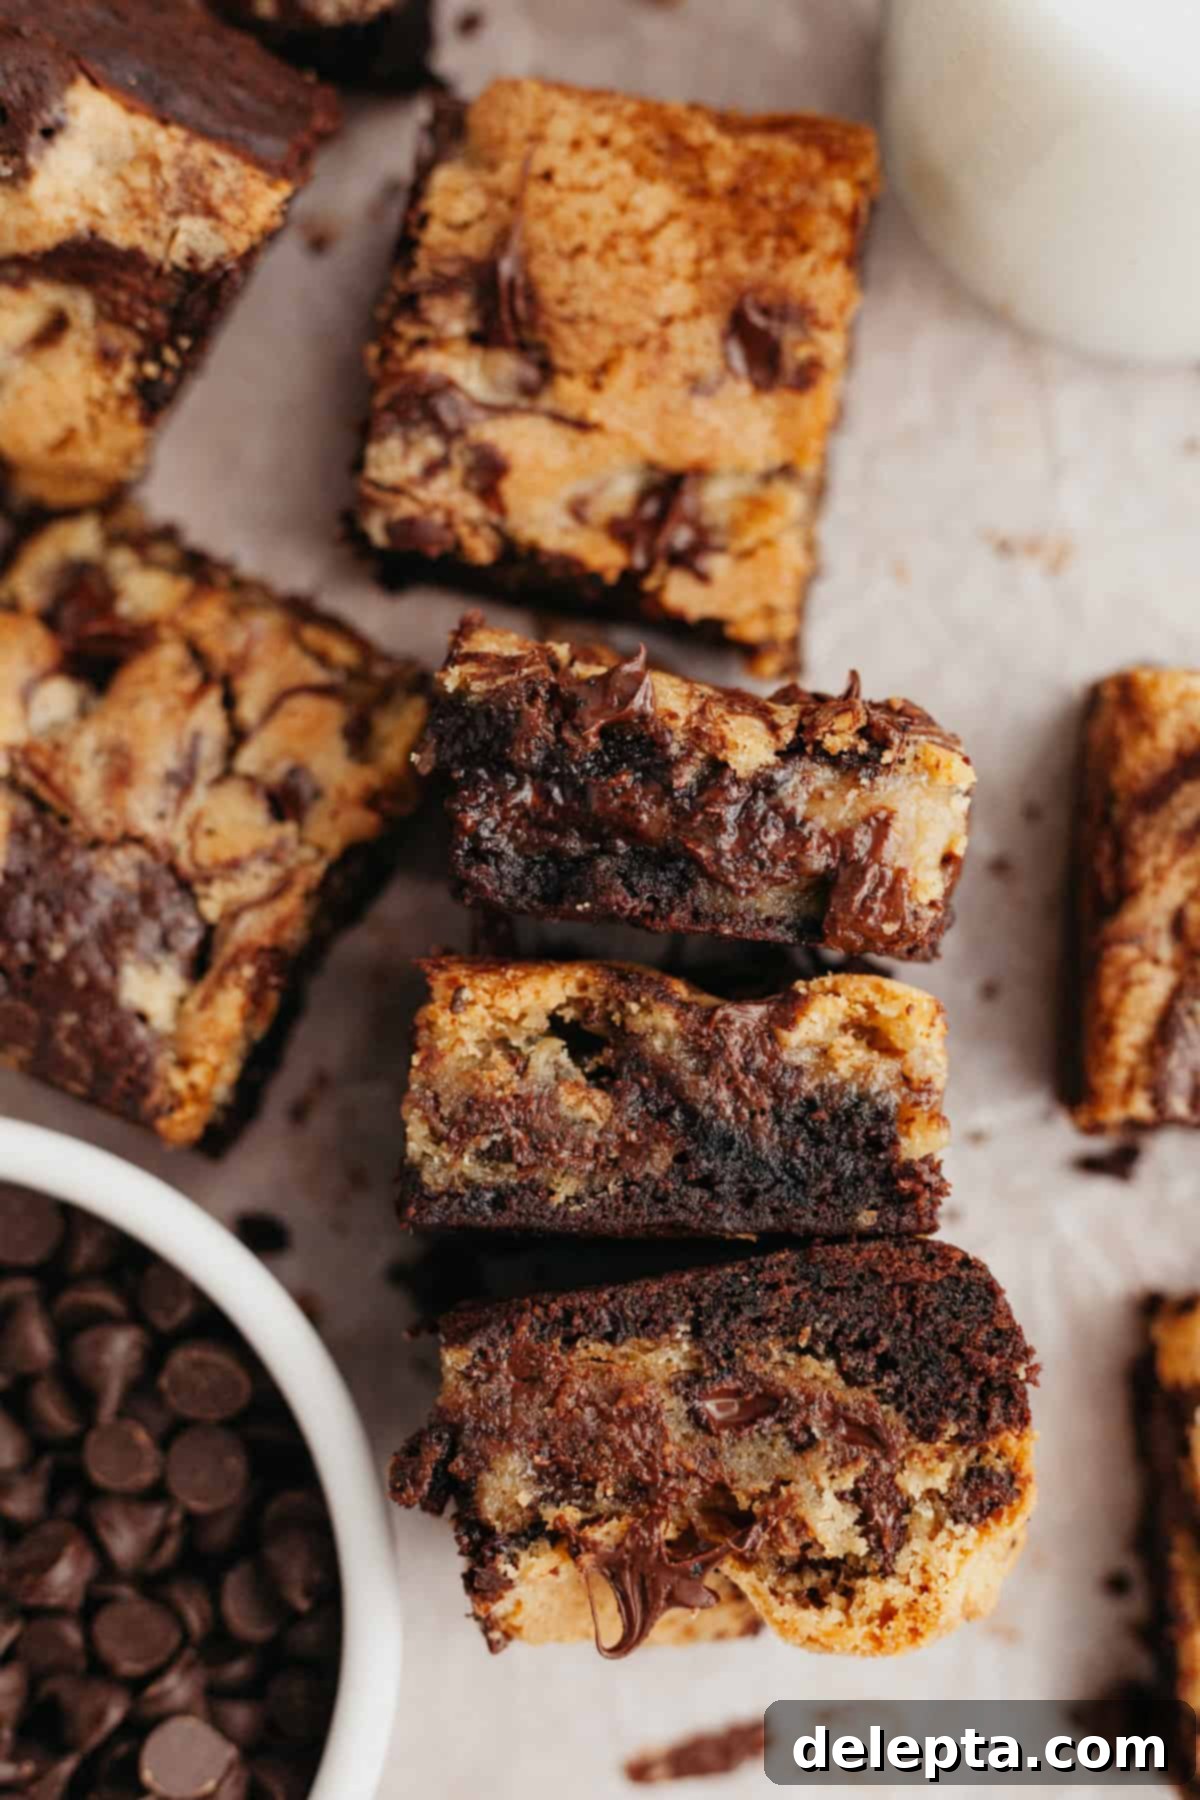
The brookies are ready when their edges are set and a beautiful golden brown color. The center, however, should still appear slightly soft and perhaps a little underbaked – this is exactly what you want for that signature fudgy texture! Keep in mind that the brookies will continue to set and firm up as they cool in the pan due to residual heat, a process known as carryover cooking. If you bake them until the center is completely firm in the oven, they will likely turn out dry and overdone once cooled.
To maintain their freshness and deliciousness, store the cooled Oreo brookies in an airtight container at room temperature for up to 5 days. For longer storage, these brookies freeze beautifully! Wrap individual slices or the entire slab tightly in plastic wrap, then aluminum foil, and store in a freezer-safe bag or container for up to 3 months. When ready to enjoy, simply let them defrost in the refrigerator overnight or at room temperature for a few hours. You can even warm them slightly in the microwave for a gooey treat!
Expand Your Baking Repertoire with These Bar Recipes!
- Brownies with Peanut Butter Cups
- One Bowl Brown Butter Biscoff Blondies
- Chocolate Chip Peanut Butter Oatmeal Bars
- Strawberry Cheesecake Brownies from Scratch
If you’ve whipped up this delightful recipe, we’d absolutely love to hear from you! Make sure to leave a ⭐️ rating and a thoughtful review below to share your experience. I adore seeing your culinary creations, so don’t hesitate to tag me on Instagram @alpineella so I can admire what you’ve made! You can also stay connected and follow along on Pinterest, Facebook, and TikTok for more delicious recipes and baking inspiration!
Recipe
Oreo Brookies
Ella Gilbert
Pin Recipe
Save Recipe
Saved!
25 minutes
25 minutes
50 minutes
16 bars
169 kcal
Equipment
-
1 8×8 baking pan
Ingredients
Oreo Brownie Layer
-
¼ cup all purpose flour -
½ teaspoon kosher salt -
2 eggs room temperature -
½ teaspoon vanilla extract -
¼ cup light brown sugar -
⅓ cup white sugar -
⅛ cup vegetable oil -
¼ cup unsalted butter -
2 ounces dark chocolate chopped -
¼ cup cocoa powder dutch processed -
8 Oreos crushed
Chocolate Chip Cookie Layer
-
¾ stick unsalted butter room temperature -
¼ cup white sugar -
½ cup light brown sugar -
1 egg room temperature -
1 teaspoon vanilla extract -
½ teaspoon baking soda -
pinch ground nutmeg -
½ teaspoon kosher salt -
1 cup all purpose flour -
½ cup chocolate chips
Instructions
-
Preheat your oven to 350°F (175°C). Lightly grease an 8×8 inch baking pan, then line it with parchment paper, ensuring the parchment slightly overhangs on two opposite sides. This simple trick creates convenient “handles” that will make it significantly easier to lift the cooled brookies out of the pan once they’ve finished baking and set.
Make Brownie Layer
-
In a small bowl, thoroughly whisk together the all-purpose flour and kosher salt until they are well combined. This ensures even distribution of the salt throughout the brownie batter.
-
In a large jug or mixing bowl, vigorously whisk together the room temperature eggs, both the granulated sugar and light brown sugar, vegetable oil, and vanilla extract. Continue whisking until the mixture is uniform and slightly lighter in color.
-
Melt the unsalted butter and chopped dark chocolate. You can do this gently over a double boiler set over low heat, stirring until completely melted and smooth. Alternatively, place them in a microwave-safe bowl and microwave in 20-second increments, stirring well after each, until smooth and fully melted. Remove from heat.
-
Add the Dutch processed cocoa powder to the melted butter and chocolate mixture. Whisk thoroughly until the cocoa powder is fully incorporated and the mixture is smooth, dark, and glossy.
-
Pour the whisked sugar-egg mixture into the chocolate-cocoa mixture. Whisk gently until everything is smoothly combined and no streaks of either mixture are visible. Be careful not to overmix at this stage.
-
Add the flour-salt mixture to the wet ingredients. Using a rubber spatula, carefully fold the dry into the wet until just combined. Ensure there are no pockets of dry flour, but stop mixing as soon as it’s incorporated to avoid developing gluten. Finally, gently fold in the crushed Oreo crumbles until they are evenly distributed throughout the brownie batter. Set this bowl aside.
Make Cookie Layer
-
In a stand mixer fitted with the paddle attachment, or in a large bowl using a hand mixer, beat your room temperature unsalted butter until it is smooth and creamy, about 1 minute.
-
Add both the white granulated sugar and the light brown sugar to the creamed butter. Beat on medium speed for 2-3 minutes until the mixture is light in color, fluffy, and aerated. This creaming process is essential for chewy cookies.
-
Add the room temperature egg and vanilla extract to the mixture. Beat once more, scraping down the sides of the bowl as needed, until the egg is fully incorporated and the mixture is smooth and cohesive.
-
In a small separate bowl, whisk together the remaining all-purpose flour, baking soda, kosher salt, and the pinch of ground nutmeg until uniformly combined.
-
Gradually add the dry ingredients to the wet ingredients of the cookie dough. Use a rubber spatula to gently fold them together until they are just combined and no dry flour streaks remain. Remember, less mixing is better for tender cookies.
-
Finally, gently fold in your chosen chocolate chips until they are evenly distributed throughout the cookie dough.
-
Now for the fun part: assembling the brookies! Dollop spoonfuls of the rich brownie batter into the prepared 8×8 inch pan, leaving some gaps. Then, dollop spoonfuls of the chocolate chip cookie dough into the empty spaces and on top of the brownie batter. Aim for an almost checkerboard or alternating pattern to ensure an even distribution of both layers. Once both batters are in the pan, take a butter knife or a skewer and gently swirl the two together to create beautiful marbled patterns. Be careful not to overmix; you want distinct layers and swirls, not a uniform blend.
-
Bake for 25-30 minutes. You’ll know they’re done when the edges are set and a lovely golden brown, but the very center might still appear slightly soft and perhaps a little underdone. This is crucial for achieving that ultimate fudgy texture – they will continue to set as they cool. Remove the pan from the oven and allow the brookies to cool completely, undisturbed, in the pan before attempting to remove and slice them. Patience here is key for clean, perfect bars!
Notes
Salt Usage: This recipe calls for kosher salt, which has a larger flake and less dense crystal structure compared to fine table salt. If you don’t have kosher salt on hand and plan to substitute with fine salt, remember to halve the amount specified in the recipe. For example, if the recipe calls for 1 teaspoon of kosher salt, use only ½ teaspoon of fine salt to prevent your brookies from becoming overly salty.
Butter Quality: For an undeniably richer taste and a more superior, melt-in-your-mouth texture in your baked goods, I highly recommend using European-style butter, such as Kerrygold. These butters typically have a higher butterfat content than standard American butter, which contributes to a creamier, more luxurious mouthfeel and a more intense flavor profile in your finished brookies.
Storage Instructions: Once completely cooled, these delicious Oreo brookies can be stored in an airtight container at room temperature for up to 4 days, maintaining their fudgy and chewy texture. For longer preservation, they are also excellent for freezing! Wrap individual bars or the entire slab tightly in plastic wrap, then an additional layer of aluminum foil, and place them in a freezer-safe bag or container. They will keep well for up to 3 months in the freezer. To enjoy, simply let them defrost in the refrigerator overnight, or at room temperature for a few hours until softened.
Nutrition
Calories:
169
kcal
Carbohydrates:
24
g
Protein:
1
g
Fat:
8
g
Saturated Fat:
5
g
Polyunsaturated Fat:
1
g
Monounsaturated Fat:
2
g
Trans Fat:
1
g
Cholesterol:
13
mg
Sodium:
136
mg
Potassium:
57
mg
Fiber:
1
g
Sugar:
20
g
Vitamin A:
134
IU
Calcium:
14
mg
Iron:
1
mg
Tried this recipe?
Leave a comment below! You can also tag me on Instagram @alpineella so I can see what you made!
