Irresistible Cocoa Blossom Cookies: Four Festive Flavor Variations for Every Occasion
Get ready to elevate your holiday baking and impress everyone with these truly irresistible Cocoa Blossom Cookies! These charming chocolate treats, crowned with a delightful Hershey’s Kiss, are a beloved classic with a rich, fudgy center and a subtly crisp exterior. Perfect for festive gatherings, cozy evenings, or as thoughtful homemade gifts, our recipe offers not just one, but four incredible variations: classic chocolate peppermint, rich mocha, vibrant red velvet, and warmly spiced chocolate gingerbread. Forget complicated desserts; this recipe is designed to be incredibly simple and fun, even for novice bakers. Dive into the world of delicious chocolate kiss cookies and discover your new favorite holiday tradition!

This recipe was originally published in December 2022. It has since been meticulously updated and expanded with new images, detailed tips, and exciting flavor variations to make your baking experience even better.
There’s something uniquely enchanting about a simple cookie, especially during the festive season. These merry little chocolate blossom cookies are an homage to the timeless classic peanut butter blossoms, but with a decadent cocoa twist. Our original vision started with a singular peppermint chocolate blossom cookie, but we quickly realized the potential for so much more. This revamped recipe now empowers you to create a quartet of delightful flavor combinations, ensuring there’s a perfect cookie for every palate and every celebration.
These blossom cookies are more than just a treat; they’re an experience. Imagine serving them at a Christmas get-together, a lively holiday party, or as your star contribution to a cookie exchange. Their charming appearance, combined with their incredible taste, makes them an instant hit. What makes them even better is that they rely on common pantry staples, meaning you probably have most of the ingredients on hand already. The resulting cookies are pure bliss: wonderfully fudgy in the center, offering a melt-in-your-mouth experience, perfectly contrasted by a delicate crispness on the outside. Each bite, especially with the soft, melty chocolate kiss, is pure perfection!
If you’re on the hunt for more sensational holiday cookies to share or exchange, these cocoa blossom cookies would be a fantastic companion to our no-spread sugar cut-out cookies, rich chocolate-dipped butter cookies, and comforting browned butter snickerdoodles. Together, they create an unforgettable holiday cookie platter!
[feast_advanced_jump_to]
Why You’ll Fall in Love with These Cocoa Blossom Cookies!
These chocolate blossom cookies aren’t just another recipe; they’re a ticket to easy, delicious, and versatile holiday baking. Here’s why they’re destined to become a staple in your kitchen:
- They utilize simple, accessible pantry ingredients that you likely already have stocked in your kitchen. No need for special shopping trips or obscure items – just classic baking essentials transformed into something magical. This makes them incredibly convenient for last-minute baking cravings or unexpected guests.
- You can magically conjure 4 distinct variations from a single, versatile cookie dough! This means less prep work for more variety. Imagine being able to offer chocolate peppermint, mocha, red velvet, and gingerbread chocolate kiss cookies all from one batch, catering to every preference without doubling your effort. It’s a baker’s dream for holiday cookie platters!
- The cookie dough itself is incredibly easy and straightforward to prepare, even for beginner bakers. While it does require a crucial 1-hour chilling period, this step is largely hands-off and essential for the cookies’ perfect texture and shape, preventing them from spreading too much in the oven.
- You have creative freedom to roll them in white granulated sugar, festive sprinkles, or elegant powdered sugar, depending on the desired aesthetic. This allows for personalization, making them perfect for any holiday theme or special occasion. A roll in sugar adds sparkle and a lovely textural contrast to the soft cookie.
- The convenience of this recipe extends to make-ahead options! You can easily freeze the raw cookie dough balls, ensuring you have these delightful chocolate thumbprint cookies ready to bake at a moment’s notice. This is a game-changer for busy holiday seasons, allowing you to enjoy freshly baked cookies whenever the craving strikes, or simply saving time when preparing for a party.
Essential Ingredients for Perfect Cocoa Blossom Cookies
Crafting these delicious cocoa blossom cookies starts with a selection of quality ingredients. While simple, each component plays a vital role in achieving that perfect fudgy texture and rich chocolate flavor. Here’s a closer look at what you’ll need and why:
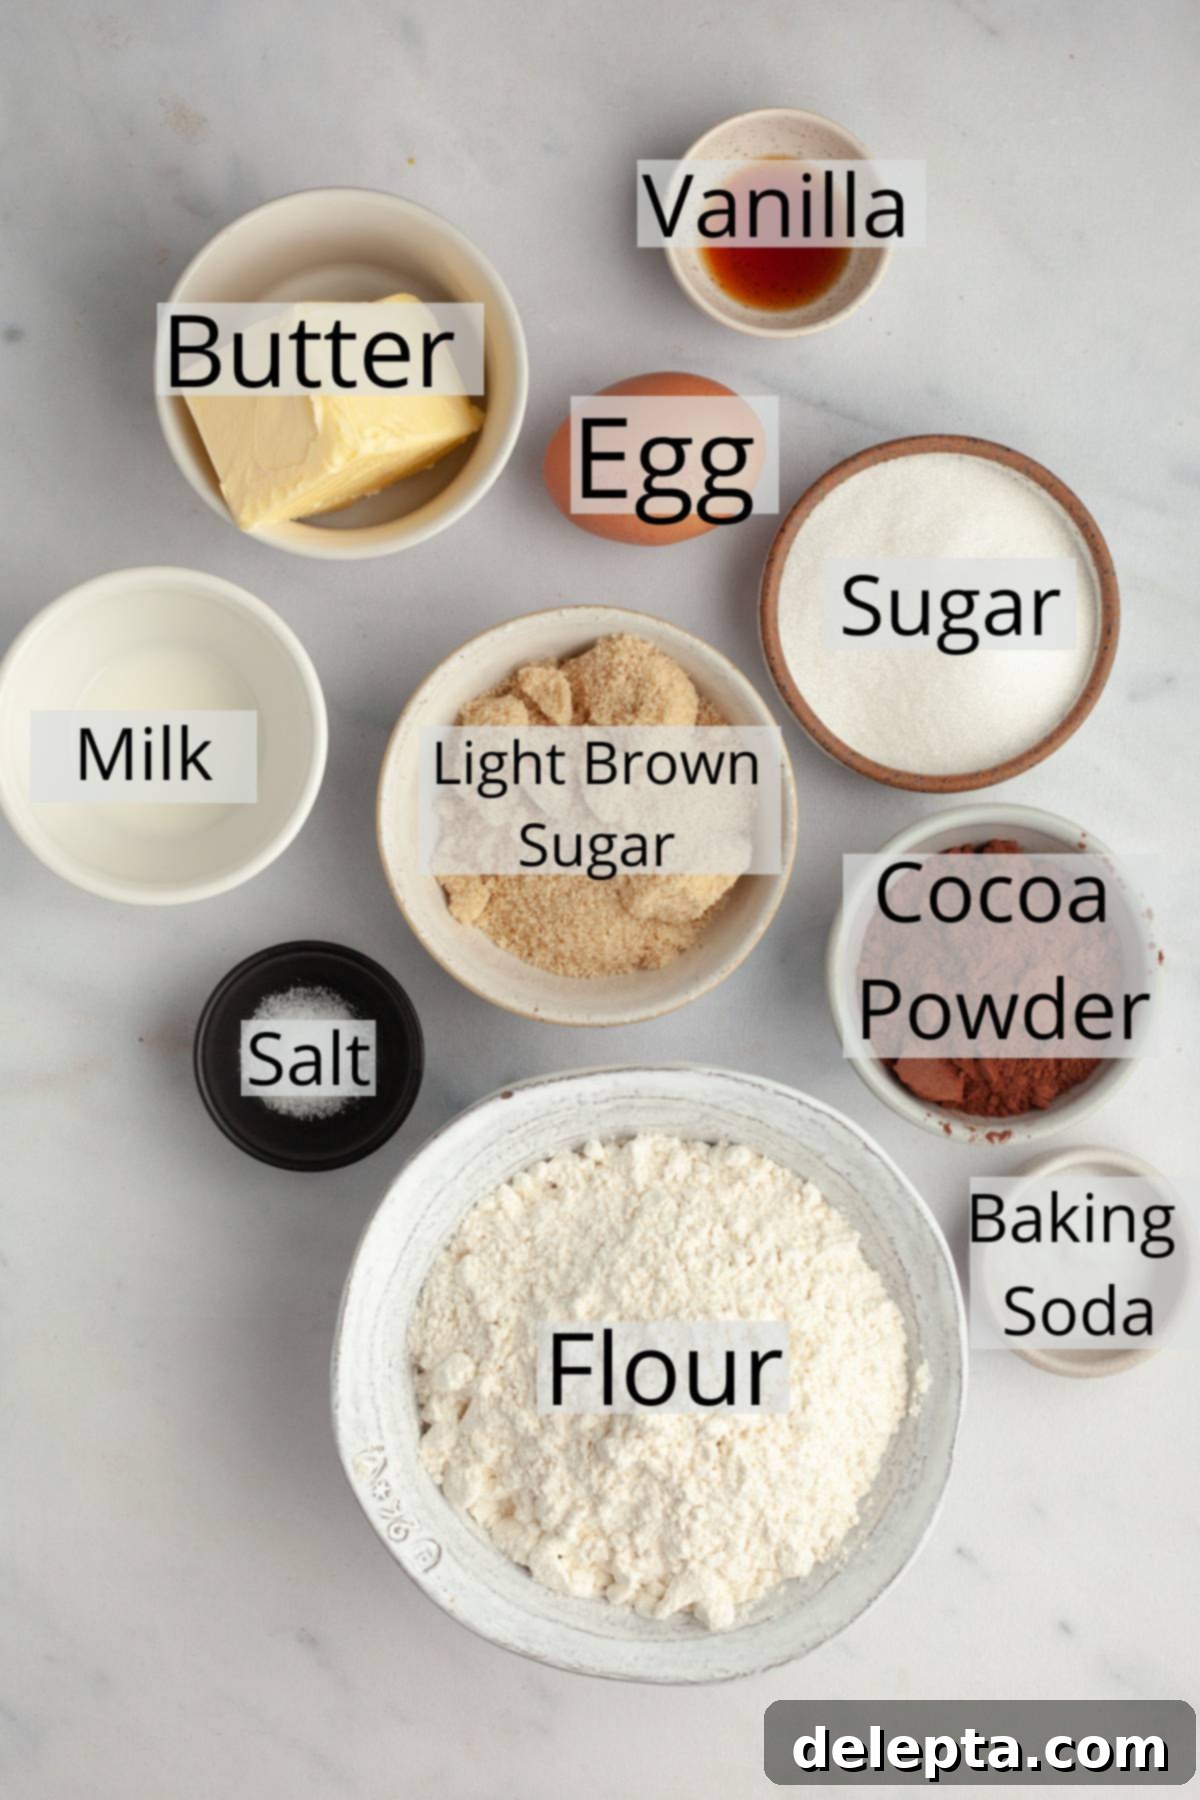
- All-Purpose Flour: This forms the foundational structure of our cookies. We’ve exclusively tested this recipe with all-purpose flour to ensure consistent results. Its balanced protein content provides the perfect chewiness without making the cookies tough.
- Unsalted Butter: For superior flavor and texture, we highly recommend using European-style unsalted butter. It boasts a higher fat content than most American butters, contributing to a richer, creamier, and more tender cookie. Always use unsalted butter to control the overall saltiness of your bake. Ensure it’s at room temperature for optimal creaming with sugar.
- Unsweetened Cocoa Powder: This is where our cookies get their deep, intense chocolate flavor. It’s crucial to use unsweetened cocoa powder, often labeled “natural cocoa powder,” rather than Dutch-processed cocoa powder. Natural cocoa reacts differently with baking soda, ensuring the proper rise and texture for these blossom cookies.
- Whole Milk: Just a splash of whole milk is added to bring the dough together, ensuring it reaches the ideal consistency without becoming too dry or crumbly. Its fat content also contributes to the cookies’ richness.
- Granulated Sugar & Light Brown Sugar: A combination of these two sugars creates the perfect balance of sweetness, texture, and moisture. Granulated sugar contributes to the crisp exterior, while light brown sugar adds a delightful chewiness and subtle caramel notes, keeping the cookies soft and fudgy on the inside.
- Baking Soda: This leavening agent works with the natural cocoa powder to help the cookies rise and achieve their signature soft, slightly airy texture.
- Kosher Salt: A pinch of kosher salt is vital for balancing the sweetness and enhancing all the chocolate flavors. It truly makes a noticeable difference in the overall taste profile.
- Large Egg: The egg binds all the ingredients together, adds moisture, and contributes to the richness and structure of the cookies. Make sure it’s at room temperature for better emulsion with the butter and sugar.
- Vanilla Extract: A touch of vanilla extract complements and deepens the chocolate flavor, adding a warm, aromatic note that is essential in almost any chocolate dessert.
Exciting Flavor Variations for Your Cocoa Blossom Cookies
The beauty of this recipe lies in its adaptability! Starting with one versatile chocolate dough, you can effortlessly transform your cocoa blossom cookies into four distinct and equally delicious flavors. This makes them perfect for tailoring to different tastes or creating a diverse holiday cookie platter. Here’s how to create each unique variation:
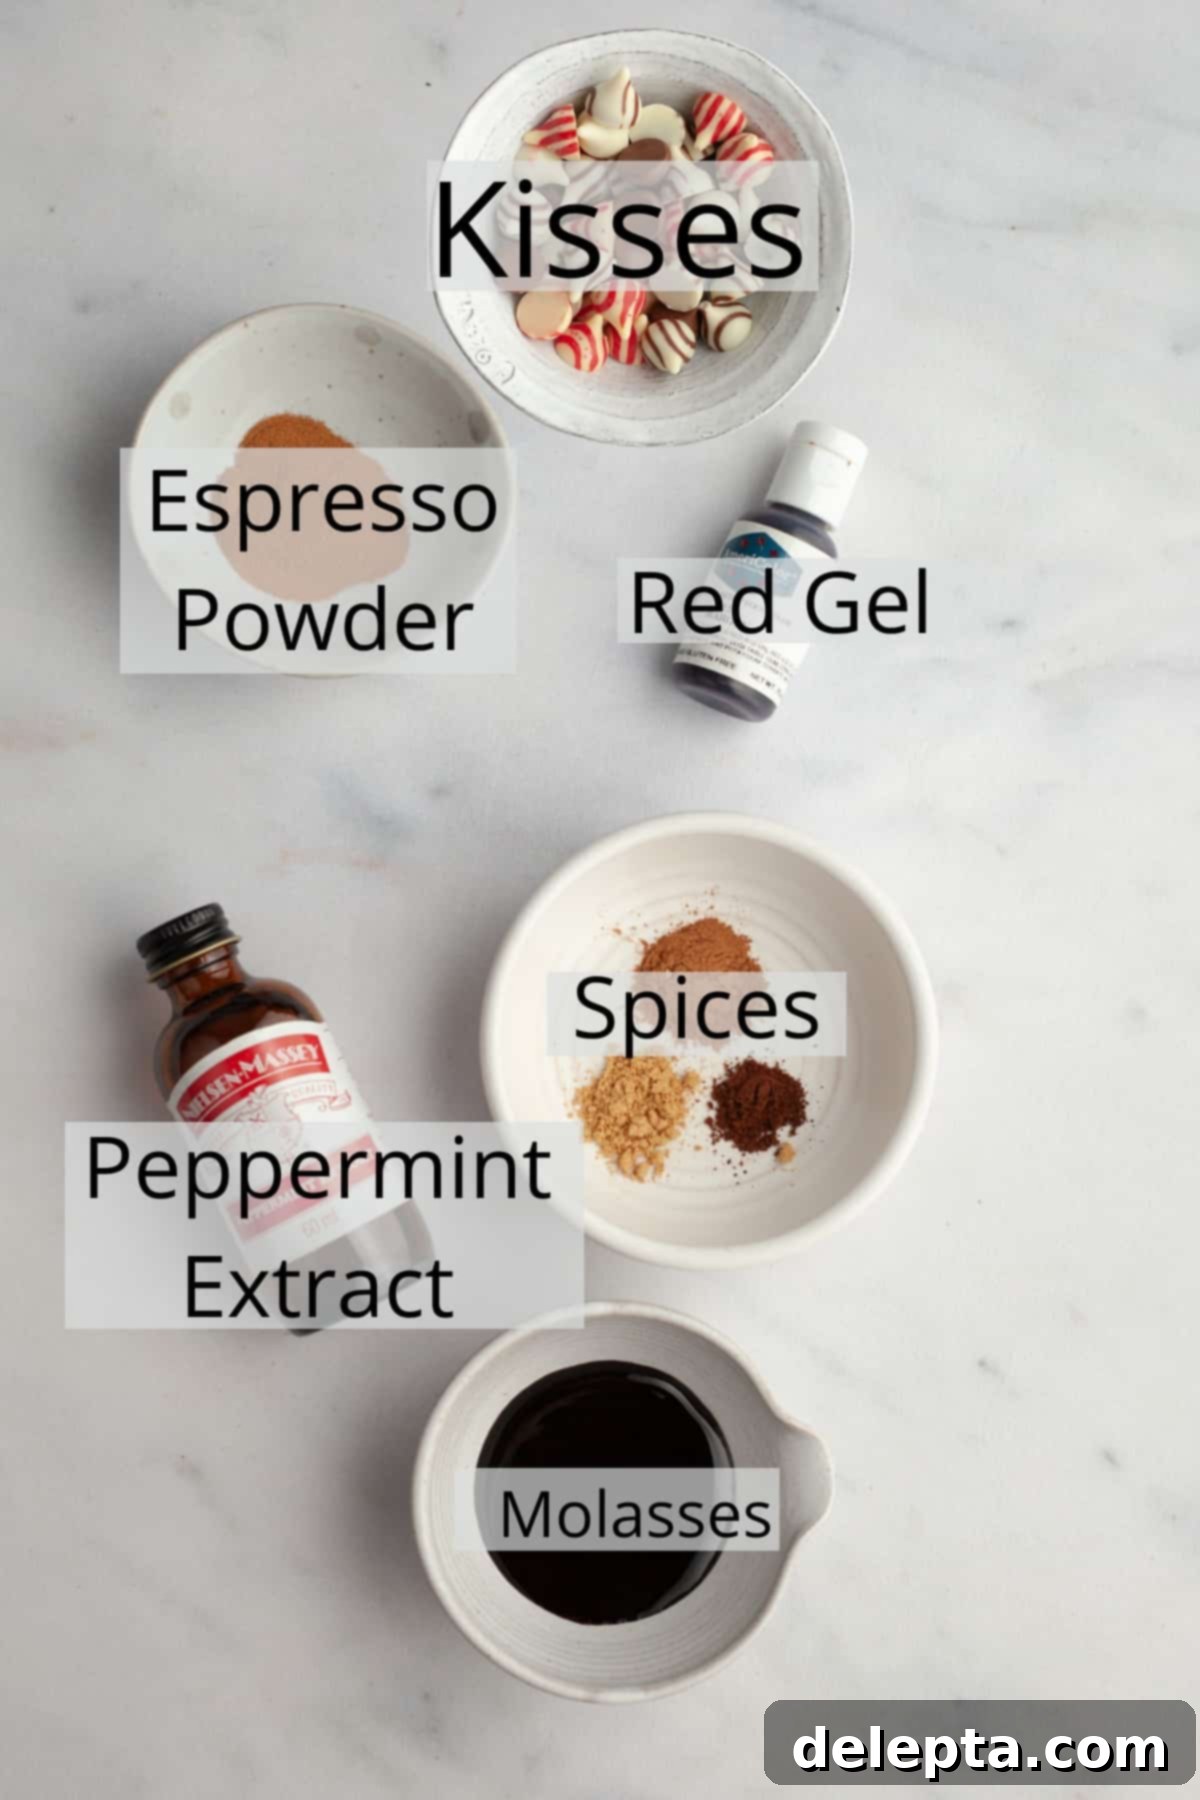
- Gingerbread Blossom Cookies: Infuse your chocolate dough with the warm, comforting flavors of the holidays. Simply add a hint of rich molasses, aromatic ground ginger, fragrant ground cinnamon, and a tiny pinch of ground cloves to the cookie dough. The result is a deep, spiced chocolate cookie that perfectly captures the essence of gingerbread, making it an ideal choice for Christmas celebrations. Pair these with striped Hershey’s Hugs for a visually appealing and complementary flavor experience.
- Peppermint Chocolate Blossom Cookies: For a refreshing and invigorating holiday treat, add a delightful peppermint candy cane kick. A small amount of peppermint extract stirred into the dough will transform these into cool, minty chocolate wonders. These are especially popular during the Christmas season. Consider topping them with Hershey’s Candy Cane Kisses to enhance the peppermint theme and add a festive pop of color.
- Red Velvet Blossom Cookies: Achieve the iconic vibrant hue and subtle tang of red velvet. Incorporate a few drops of red food gel (gel food coloring provides a more intense color without altering consistency) into the cookie dough. The cocoa provides the classic red velvet chocolate base, while the red coloring adds that characteristic visual appeal. These are beautiful for Valentine’s Day or any elegant occasion. Sugar Cookie Kisses make a lovely, less overwhelming chocolate topping here.
- Mocha Chocolate Blossom Cookies: Elevate your chocolate cookies with a sophisticated coffee depth. By adding some instant espresso powder to the dough, you’ll create a wonderfully rich and aromatic chocolate mocha cookie. The espresso doesn’t make the cookies taste overtly like coffee; rather, it intensifies and brightens the chocolate flavor, creating a more complex and satisfying profile. Hershey’s Hugs also work beautifully with these, providing a swirl of white chocolate to balance the rich mocha.
- Choosing Your Kisses & Hugs: Don’t underestimate the power of your chocolate topping! The type of Hershey’s Kiss or Hug you choose can significantly enhance both the flavor and visual appeal of your blossom cookies.
- For Gingerbread and Mocha varieties, we love using the striped Hershey’s Hugs for their creamy white chocolate swirls, which offer a delightful contrast.
- Red Velvet cookies shine with Hershey’s Sugar Cookie Kisses, which add another layer of festive sweetness and color.
- And of course, for the classic Chocolate Peppermint variation, Hershey’s Candy Cane Kisses are the absolute perfect choice, bringing extra minty flavor and vibrant red flecks.
- Don’t be afraid to experiment with other seasonal or flavored Kisses to create your own unique combinations!
Step-by-Step Guide to Baking Perfect Cocoa Blossom Cookies
Baking these delightful cocoa blossom cookies is a straightforward process, but following these steps carefully will ensure a perfect batch every time. Remember, the chilling time is essential for the best texture and shape!
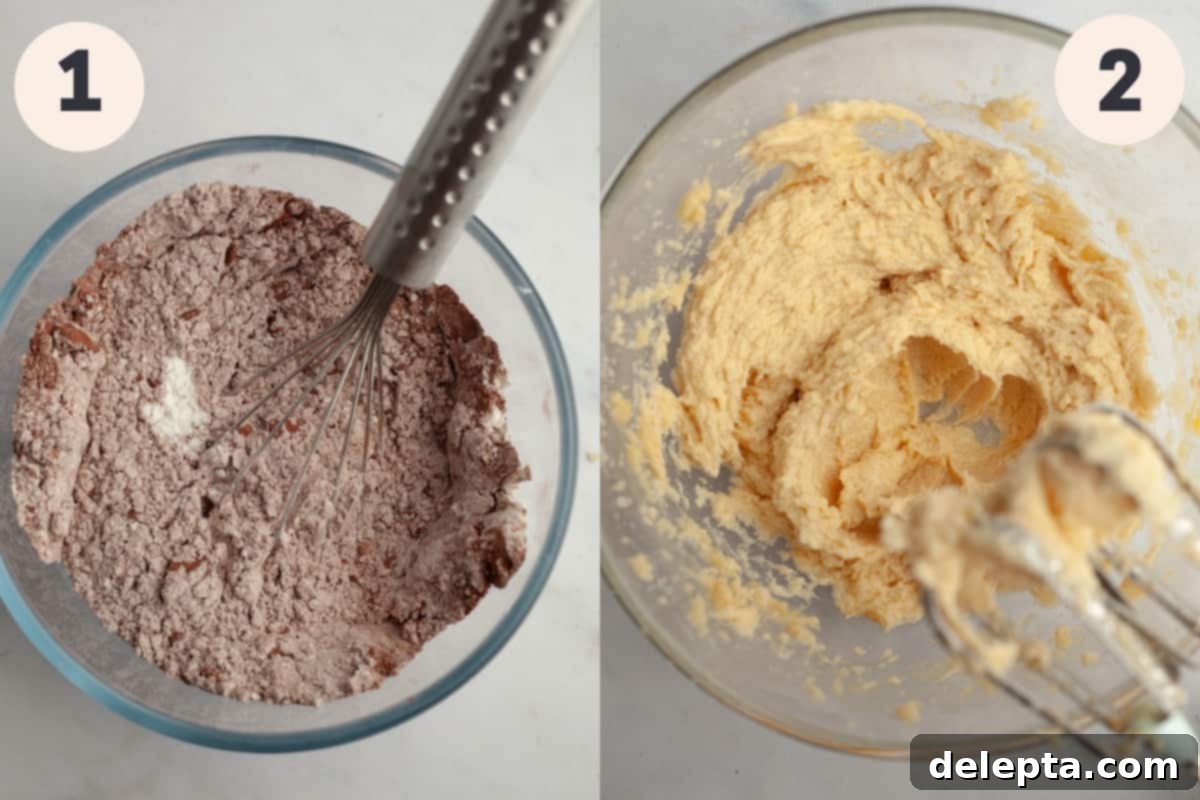
Step 1: Prepare Your Dry Ingredients. In a large mixing bowl, combine the all-purpose flour, unsweetened cocoa powder, baking soda, and kosher salt. Use a whisk to thoroughly blend these ingredients together. This ensures that the leavening agent and salt are evenly distributed throughout the flour mixture, which is crucial for uniform cookies. Set this bowl aside for now.
Step 2: Cream Butter and Sugars. In the bowl of a stand mixer fitted with the paddle attachment (or using a large bowl and a handheld electric mixer), combine the softened unsalted butter, light brown sugar, and granulated sugar. Beat these on medium-high speed for approximately 2-3 minutes. You’re looking for a mixture that is light in color, fluffy in texture, and well aerated. This creaming process incorporates air into the butter, which contributes to the cookies’ light texture. Once fluffy, stop the mixer and scrape down the sides of the bowl with a rubber spatula to ensure everything is evenly combined. Then, add the large egg and vanilla extract. Continue to beat on medium-high speed for another minute until the egg is fully incorporated and the mixture is smooth.
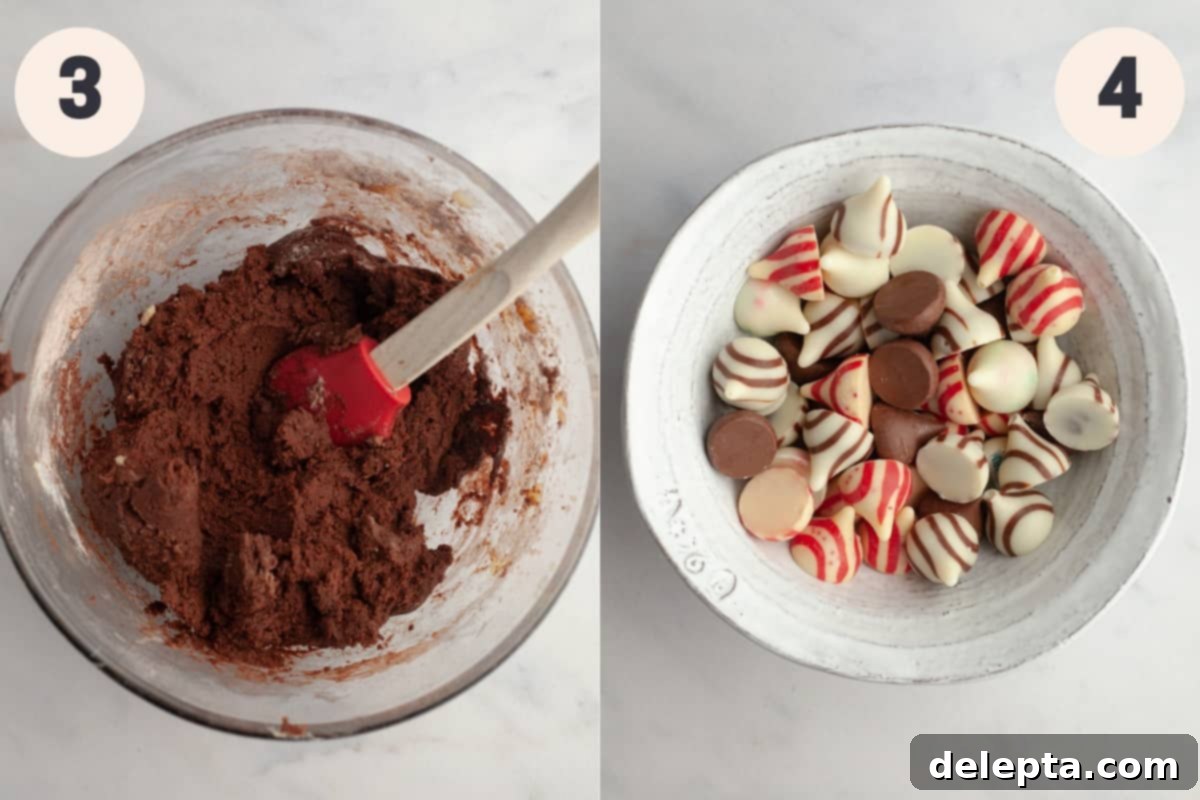
Step 3: Combine Wet and Dry Ingredients, Add Variations. With the mixer on low speed, gradually add the dry ingredients mixture to the wet ingredients. Mix until just combined. Be careful not to overmix, as this can lead to tough cookies. Once the dry ingredients are mostly incorporated, add the whole milk and continue to beat on low speed until the dough is uniform and no streaks of flour remain. As soon as the dough comes together, stop the mixer. If you plan to make any of the delightful variations (gingerbread, peppermint, red velvet, or mocha), this is the ideal moment to incorporate those additional ingredients into your freshly made dough. Gently mix them in until just combined.
Step 4: Prepare Your Hershey’s Kisses. This is a crucial step to prevent your chocolate kisses from melting prematurely on your warm cookies! Unwrap all 35 of your chosen Hershey’s Kisses or Hugs and place them in a freezer-safe ziploc bag or an airtight container. Pop them into the freezer. They should chill for at least an hour, coinciding with the dough chilling time.
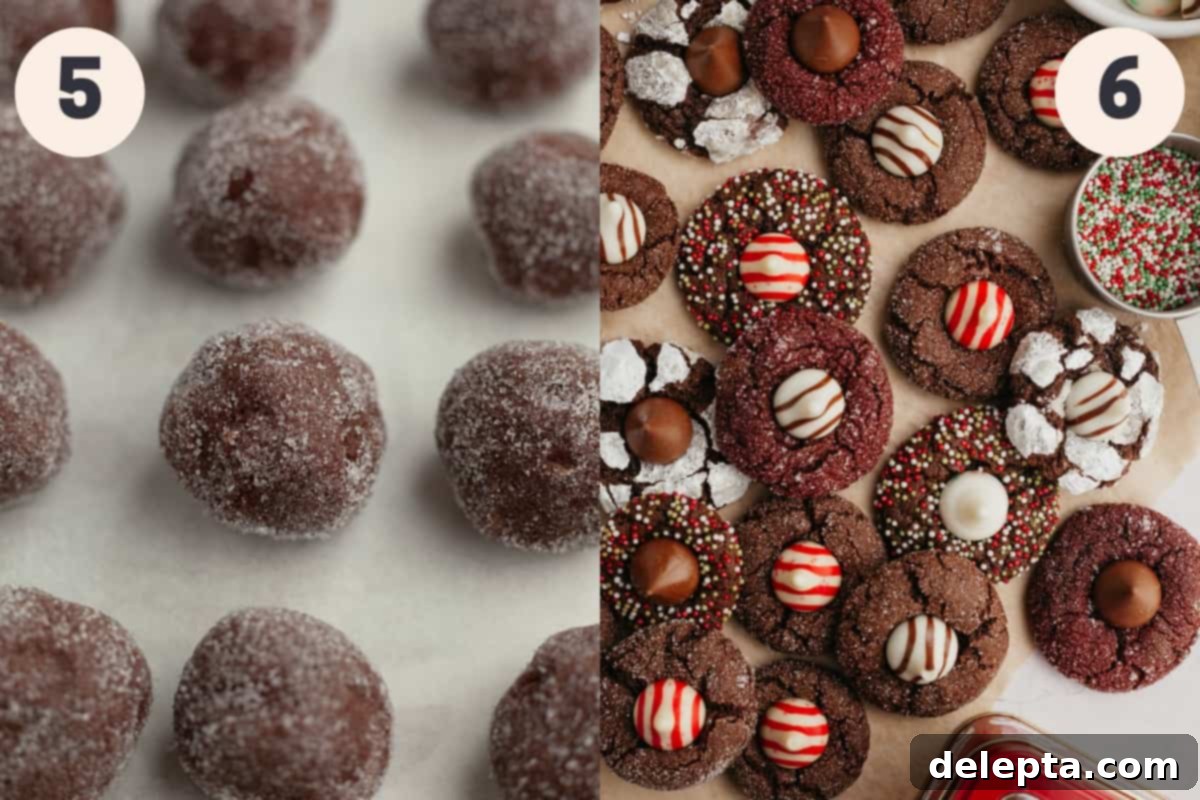
Step 5: Scoop, Roll, and Chill the Dough. Using a cookie scoop (about 1 tablespoon in size) or a spoon, scoop out portions of the chocolate cookie dough. Roll each portion between your palms to form a smooth, uniform ball. Then, roll each dough ball in the extra granulated sugar (or sprinkles, or a combination with powdered sugar for the crinkle effect as described in the tips). Place the sugared dough balls onto a parchment-lined baking sheet or plate, ensuring they aren’t touching. Repeat this process until all the cookie dough is used – you should yield approximately 35 cookies. Once all balls are formed, place the entire tray of cookie dough into the fridge to chill for a minimum of 1 hour. This chilling step is non-negotiable for perfectly shaped cookies that don’t spread too thin.
Step 6: Bake and Finish. After the dough has chilled for an hour, preheat your oven to 350°F (175°C). Line two baking sheets with fresh parchment paper. Arrange the chilled cookie dough balls on the prepared baking sheets, leaving a few inches of space between each cookie to allow for slight spreading. They should fit comfortably on two sheets. Bake one sheet at a time on the middle rack of your oven for 11-13 minutes. While the first batch is baking, retrieve the frozen Hershey’s Kisses from the freezer. Once the cookies are out of the oven, they should look set around the edges with a few cracks, but still soft in the center. Immediately but gently press one frozen Hershey’s Kiss into the center of each warm cookie. The residual heat from the cookie will slightly soften the chocolate kiss, helping it adhere perfectly without fully melting. Allow the newly adorned chocolate cookies to cool on the baking sheet for 10-15 minutes. This cooling time on the hot sheet allows them to set further and prevents them from breaking when transferred. Finally, transfer them to a wire cooling rack to cool completely. Repeat the baking and pressing process with the second sheet of cookie dough.

Expert Tips & Tricks for Flawless Cocoa Blossom Cookies
Achieving bakery-quality cocoa blossom cookies is easier than you think with these expert tips and tricks. Pay attention to these details for the best possible results:
- Accurate Ingredient Measuring is Key: For consistent and professional baking results, I cannot stress enough the importance of using a digital kitchen scale. Measuring ingredients in metric grams is the most precise method and significantly impacts the final texture and outcome of your baked goods. While cup measurements are provided, they are less accurate and can lead to variations.
- Master the “Fluff and Sprinkle” Method for Flour (if not weighing): If you must use measuring cups for flour instead of a scale, do so correctly to avoid dry, crumbly cookies. Lightly fluff your all-purpose flour with a spoon, then gently spoon it into your measuring cup until it’s overflowing. Do not pack it down. Finally, level off the top with a straight edge (like the back of a knife). This method prevents over-measuring flour, which is a common cause of dense, dry cookies. You can find more detailed instructions on how to measure flour the right way here.
- Don’t Skip the Dough Chilling! This is perhaps the most critical step for these blossom cookies. The 1-hour chill time is absolutely essential for the dough to firm up. Chilled dough spreads less in the oven, helping your cookies maintain their ideal shape and thickness, resulting in that perfect fudgy-crisp texture. Warm dough will spread too much, leading to thin, flat cookies.
- The Secret to Non-Melting Kisses: A common issue with kiss cookies is the chocolate melting and losing its shape on the hot cookie. To flawlessly prevent this, simply freeze your unwrapped Hershey’s Kisses or Hugs for the same 1-hour duration that your cookie dough is chilling. By the time the cookies come out of the oven, your kisses will be rock-hard, allowing them to soften just slightly when pressed into the warm cookie, maintaining their iconic shape beautifully.
- Creating the Perfect Powdered Sugar Crinkle: If you desire a rustic, crinkly appearance with powdered sugar, here’s how to achieve it. After rolling your cookie dough into balls and letting them chill for 1 hour, first give them a light roll in granulated sugar. Then, immediately roll them heavily in powdered sugar just before baking. The granulated sugar layer helps the powdered sugar stick and creates a beautiful crinkle effect as the cookies bake and spread.
- Get Creative with Sprinkles and Sanding Sugar: For an extra festive touch, skip the plain sugar roll altogether! Instead, roll your cookie dough balls directly in colorful sprinkles or sparkling sanding sugar before chilling and baking. This adds a vibrant pop of color and an appealing crunch, making them even more visually appealing for parties and holiday platters.
- Room Temperature Ingredients: Ensure your butter and egg are at room temperature. This allows them to emulsify properly, creating a smoother, more uniform dough and a better final cookie texture.
- Don’t Overbake: These chocolate blossom cookies are best when they are slightly underbaked in the center, leading to that desirable fudgy texture. Bake until the edges are just set and the centers still look a little soft. They will continue to set as they cool on the baking sheet.
Frequently Asked Questions About Cocoa Blossom Cookies
Here are some common questions we receive about making these delicious chocolate kiss cookies, along with our expert answers to help you achieve perfect results every time:
Yes, absolutely! The chilling step for this cocoa blossom cookie dough is non-negotiable. This dough is naturally quite soft and sticky. If baked without proper chilling, the butter in the dough will melt too quickly in the oven, causing your cookies to spread excessively and become thin and flat. Chilling allows the butter to re-solidify and the flour to fully hydrate, resulting in thicker, chewier cookies that hold their shape beautifully.
While not strictly mandatory for the cookie to bake properly, rolling the cookie dough balls in granulated sugar (or another coating like sprinkles) adds a delightful sparkle, a subtle crunch, and a beautiful finished appearance. It also contributes to that classic “blossom” aesthetic. You can certainly just roll them into plain dough balls and chill, but for that extra visual appeal and textural contrast, we highly recommend the sugar coating!
This is a fantastic and very common question! The trick to perfectly placed, non-melted kisses is to freeze them. While your cookie dough is chilling in the fridge for its required hour, unwrap all your Hershey’s Kisses (or Hugs) and place them in a freezer-safe bag or container in the freezer. When the baked cookies come out of the oven, immediately press a frozen kiss into the center of each. The extreme coldness of the kiss will prevent it from completely melting on contact with the warm cookie, allowing it to soften just enough to adhere while retaining its signature shape. Do keep in mind that some varieties, like Hershey’s Hugs, tend to soften a bit faster than solid chocolate kisses, so work quickly!

Expand Your Baking Repertoire: Try These Cookie Recipes Next!
If you’ve enjoyed baking these versatile cocoa blossom cookies and are looking for more delightful treats to add to your baking rotation, we have plenty of other fantastic cookie recipes that are perfect for any occasion, especially during the holidays. Expand your skills and impress your friends and family with these proven favorites:
- No Spread Sugar Cookies
- Molasses Crinkle Cookies
- Soft and Chewy Mini M&M Cookies
- Cream Cheese Spritz Cookies
Have you made this delightful recipe? Please take a moment to rate the recipe below! We love seeing your creations, so don’t forget to follow me on Instagram @alpineella and Pinterest, and tag us so we can admire your beautiful bakes!
Recipe Card: Irresistible Cocoa Blossom Cookies

Cocoa Blossom Cookies
Ella Gilbert
Pin Recipe
Save RecipeSaved!
Ingredients
- 2 cups all purpose flour
- ½ cup unsweetened cocoa powder
- 1 teaspoon baking soda
- ½ teaspoon kosher salt
- ½ cup unsalted butter room temperature, European style recommended
- ½ cup light brown sugar
- ½ cup granulated sugar
- 1 large egg room temperature
- 2 teaspoons vanilla extract
- 1 tablespoon whole milk
- ¼ cup granulated sugar for rolling (or sprinkles/powdered sugar)
- 35 Hershey’s Kisses or Hugs chilled or frozen
For Gingerbread Variation (add to dough in Step 3)
- ½ tablespoon molasses
- ½ teaspoon ground ginger
- ½ teaspoon ground cinnamon
- pinch ground cloves
For Mocha Variation (add to dough in Step 3)
- 2 teaspoons instant espresso powder or instant coffee
For Red Velvet Variation (add to dough in Step 3)
- red food gel a few drops, as desired
For Peppermint Variation (add to dough in Step 3)
- ¼ teaspoon peppermint extract
Instructions
-
In a medium-sized bowl, thoroughly whisk together the all-purpose flour, unsweetened cocoa powder, baking soda, and kosher salt. Ensure there are no lumps and the ingredients are well combined. Set this dry mixture aside.2 cups all purpose flour, ½ cup cocoa powder, 1 teaspoon baking soda, ½ teaspoon kosher salt
-
In the bowl of a stand mixer fitted with the paddle attachment (or using a large bowl with a handheld electric mixer), combine the room temperature unsalted butter with both the light brown sugar and granulated sugar. Cream these ingredients together on medium-high speed for 2-3 minutes until the mixture is visibly light, fluffy, and aerated. This step is crucial for the cookies’ tender texture.½ cup unsalted butter, ½ cup light brown sugar, ½ cup granulated sugar
-
Stop the mixer and use a rubber spatula to scrape down the sides and bottom of the bowl, ensuring all ingredients are well incorporated. Add the large room temperature egg and vanilla extract. Beat again on medium-high speed for about 1 minute until the egg is fully mixed in and the mixture is smooth and cohesive.1 large egg, 2 teaspoons vanilla extract
-
Reduce the mixer speed to low. Gradually add the reserved dry ingredients to the wet mixture, mixing until just combined. Once the flour mixture is nearly incorporated, add the tablespoon of whole milk. Continue to mix on low speed until the dough is uniform and no dry streaks of flour are visible. Be very careful not to over-mix, as this can develop the gluten too much and result in tough cookies. If you are making one of the variations (gingerbread, mocha, red velvet, or peppermint), stir in the specific additional ingredients for your chosen flavor at this stage until just combined.1 tablespoon whole milk
-
Now is the time to decide on your flavor profile! If you’re not making regular cocoa blossom cookies, gently fold in the ingredients for your chosen variation: peppermint, mocha, gingerbread, or red velvet. This ensures a consistent flavor throughout your batch.
-
Using a 1-tablespoon cookie scoop or a measuring spoon, portion out the cookie dough. Roll each portion between your clean hands to form smooth, uniform balls. Then, roll each cookie dough ball generously in the extra granulated sugar (or your chosen coating like sprinkles or powdered sugar). Place the coated dough balls onto a parchment-lined baking sheet or plate, ensuring they are not touching. Continue this process until all the dough is used; you should have approximately 35 cookies.¼ cup granulated sugar
-
Place the baking sheet with the formed cookie dough balls into the fridge to chill for a minimum of 1 hour. This chilling step is absolutely crucial for preventing the cookies from spreading excessively in the oven and maintaining their ideal shape. While the dough chills, unwrap all 35 Hershey’s Kisses or Hugs. Place them in a freezer-safe container or ziploc bag and put them in the freezer. Freezing the kisses will prevent them from completely melting when pressed into the hot cookies later.35 kisses
-
After the 1-hour chilling period, preheat your oven to 350°F (175°C). Line two baking sheets with fresh parchment paper. Arrange the chilled cookie dough balls on the prepared baking sheets, ensuring you leave at least 2 inches of space between each cookie to allow for proper air circulation and slight spreading. You should be able to fit the entire batch on two baking sheets. Bake one sheet at a time on the middle rack of the oven for 11-13 minutes. While the cookies are baking, take the frozen Hershey’s Kisses out of the freezer and keep them nearby.
-
Once the cookies are baked, they should appear set around the edges with some delicate cracks, but the centers may still look slightly soft and gooey. This is perfect for a fudgy texture! Immediately remove the baking sheet from the oven and, working quickly, gently press one frozen Hershey’s Kiss into the center of each warm cookie. Press down just enough so the kiss adheres firmly but doesn’t sink completely. Repeat this baking and pressing process with the second sheet of cookie dough.
-
Allow the freshly baked and “kissed” cookies to cool on the baking sheet for a crucial 10-15 minutes. This cooling time allows them to firm up and fully set without breaking. After this initial cooling, carefully transfer the cookies to a wire cooling rack to cool completely. Enjoy your perfect batch of cocoa blossom cookies!
Video Tutorial
Baker’s Notes
Butter Choice Matters: I consistently use European-style unsalted butter, such as Kerrygold, in my baking. This type of butter has a higher fat content and a richer flavor, which significantly contributes to a more tender, creamy, and decadent finished cookie. If using American-style butter, your results may vary slightly.
Salt Specifications: The recipe calls for kosher salt. Please note that I use Diamond Crystal Kosher Salt, which has larger flakes. If you only have fine table salt, you should halve the amount specified in the recipe (e.g., if the recipe calls for 1 teaspoon of kosher salt, use ½ teaspoon of fine salt) to avoid over-salting your cookies. Coarse kosher salt has a different density, so adjust accordingly.
Hershey’s Kiss Variety: Feel free to customize your cocoa blossom cookies by experimenting with different types of Hershey’s Kisses! Beyond the regular milk chocolate kisses, candy cane kisses, sugar cookie kisses, or even Hershey’s Hugs (milk chocolate with white chocolate stripes) can add unique flavor and visual appeal to your cookies. Match them to your chosen variation for the best results!
Achieving a Crinkle Cookie Look with Powdered Sugar: For those who love the classic crinkle cookie aesthetic, you can give these cocoa blossom cookies a beautiful powdered sugar finish. First, roll the chilled cookie dough balls lightly in white granulated sugar. Immediately after, roll them heavily in powdered sugar just before they go into the oven. As the cookies bake and expand, the powdered sugar will absorb some moisture and create those desirable, elegant cracks.
Storage & Freezing for Freshness:
- Baked Cookies: Store your cooled cocoa blossom cookies in an airtight container at room temperature for up to 5 days. For longer storage, you can freeze the baked cookies for up to 2 months. Simply thaw them to room temperature before serving for the best taste and texture.
- Unbaked Cookie Dough: For incredible convenience, you can also freeze the raw, unbaked cookie dough balls. After forming and rolling them (with sugar or sprinkles), place them on a parchment-lined tray and freeze until solid. Once frozen, transfer the solid dough balls to a freezer-safe ziploc bag or airtight container. They will keep for up to 2 months. When you’re ready to bake, you can bake them directly from frozen, but you may need to add an extra minute or two to the specified baking time.
Nutrition Information
