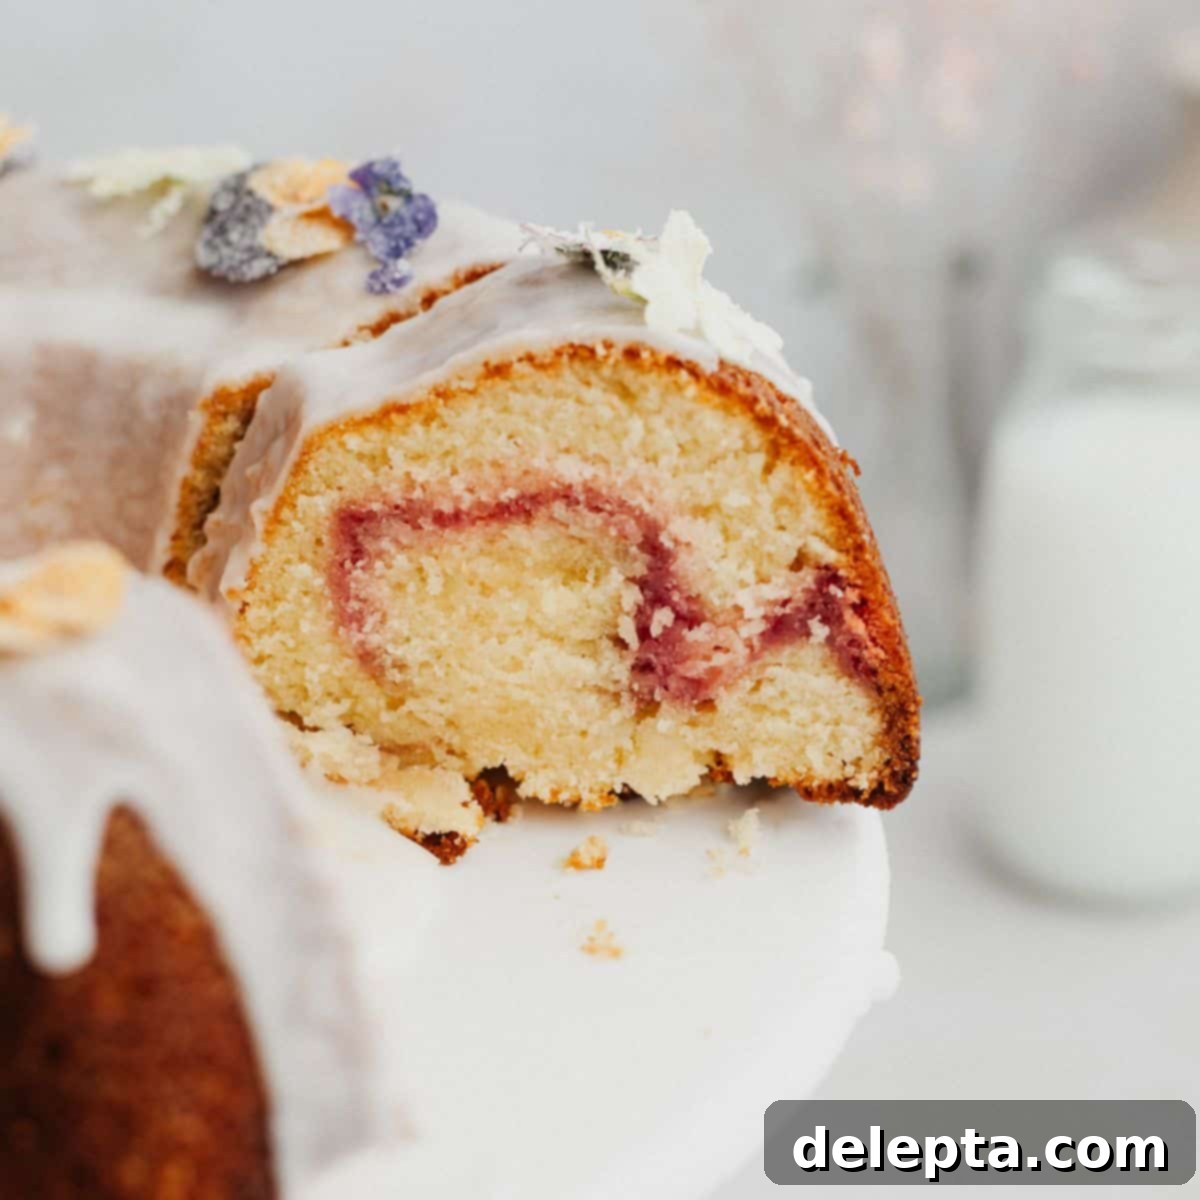
Soft and Fluffy Raspberry White Chocolate Bundt Cake: Your Ultimate Guide to a Perfect Dessert
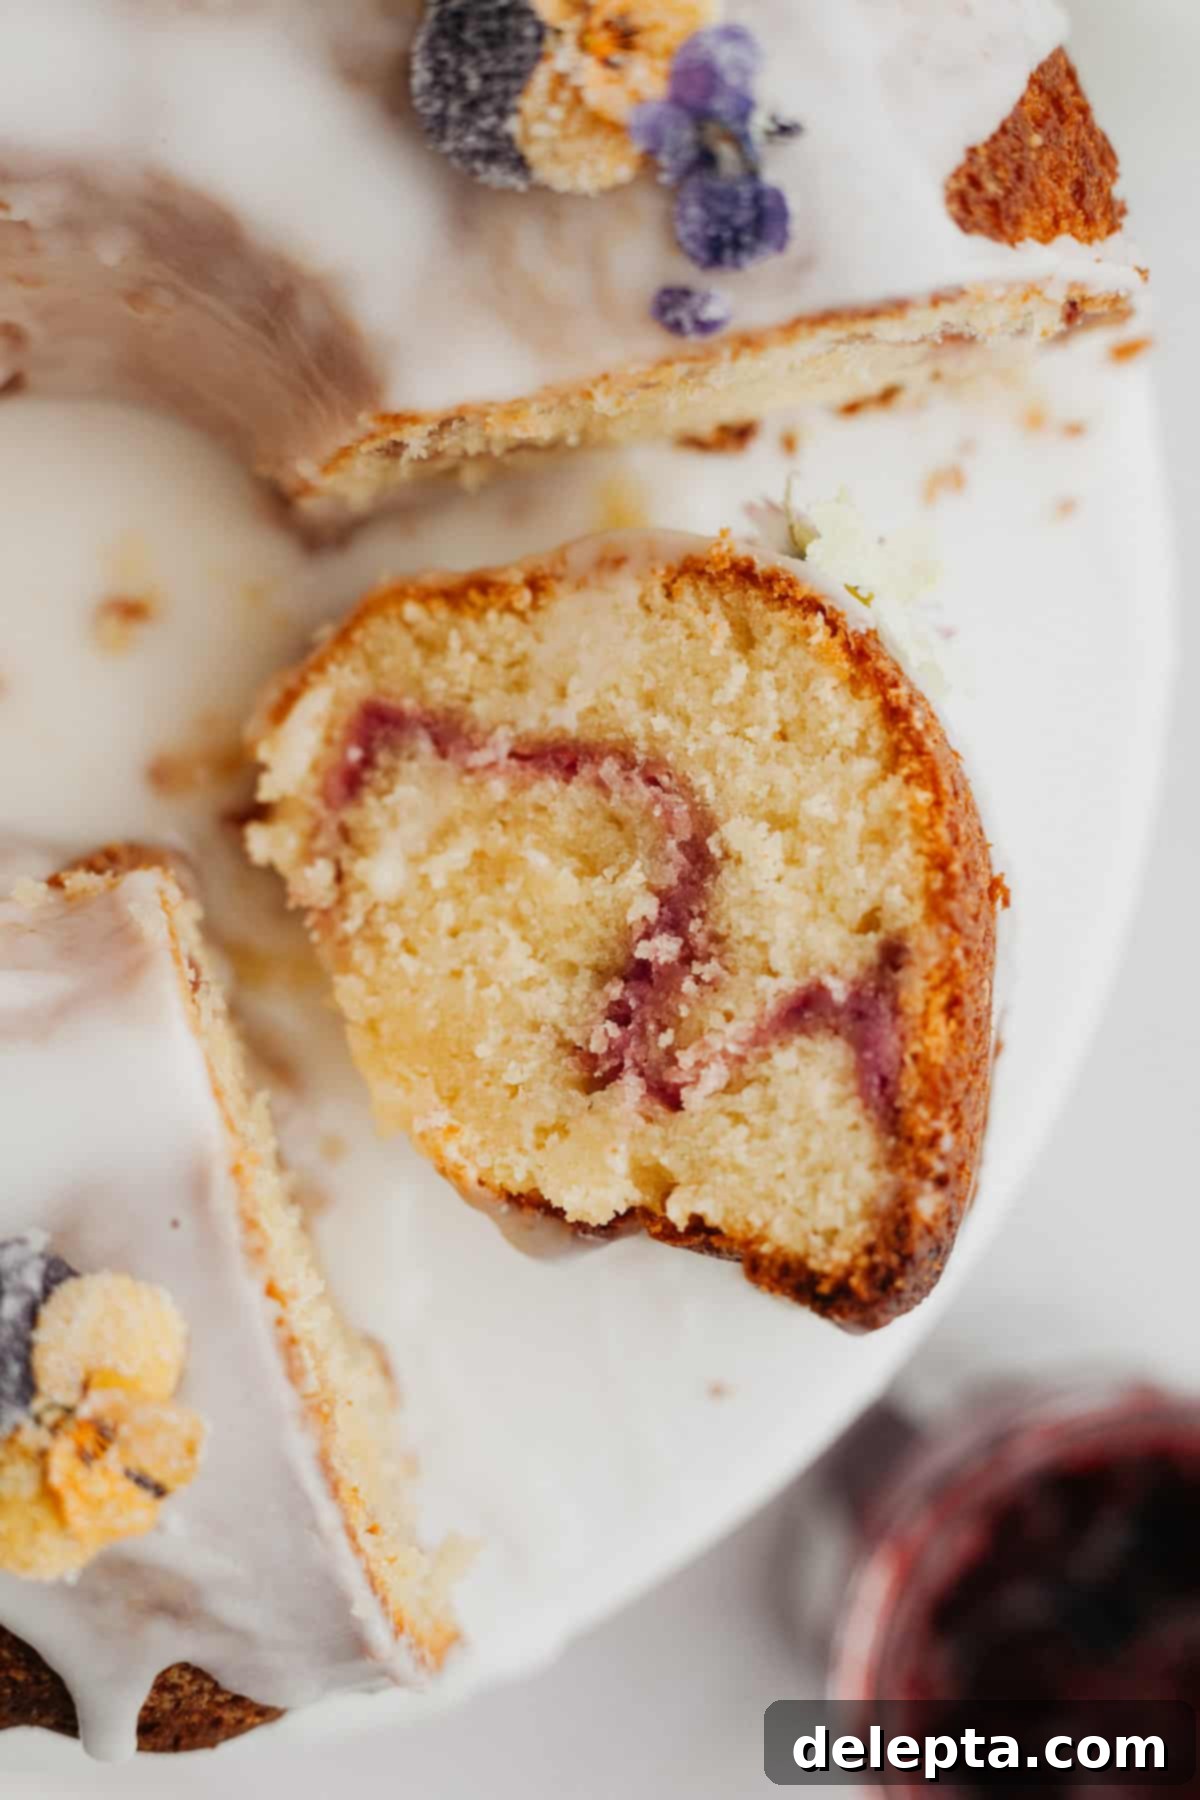
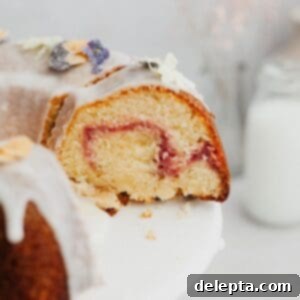
Indulge in the exquisite flavor and remarkably tender texture of this soft and fluffy raspberry white chocolate bundt cake. Each slice of this decadent dessert is generously studded with sweet white chocolate chips and boasts a beautiful, vibrant raspberry swirl that elegantly winds through the moist crumb. What makes this recipe even more appealing is its simplicity: with just about 18 minutes of active prep time and a mere 10 essential ingredients, you can create a show-stopping cake that tastes like it came from a gourmet bakery. This isn’t just a cake; it’s a celebration of classic flavors and a testament to how easy baking can be when you have the right recipe.
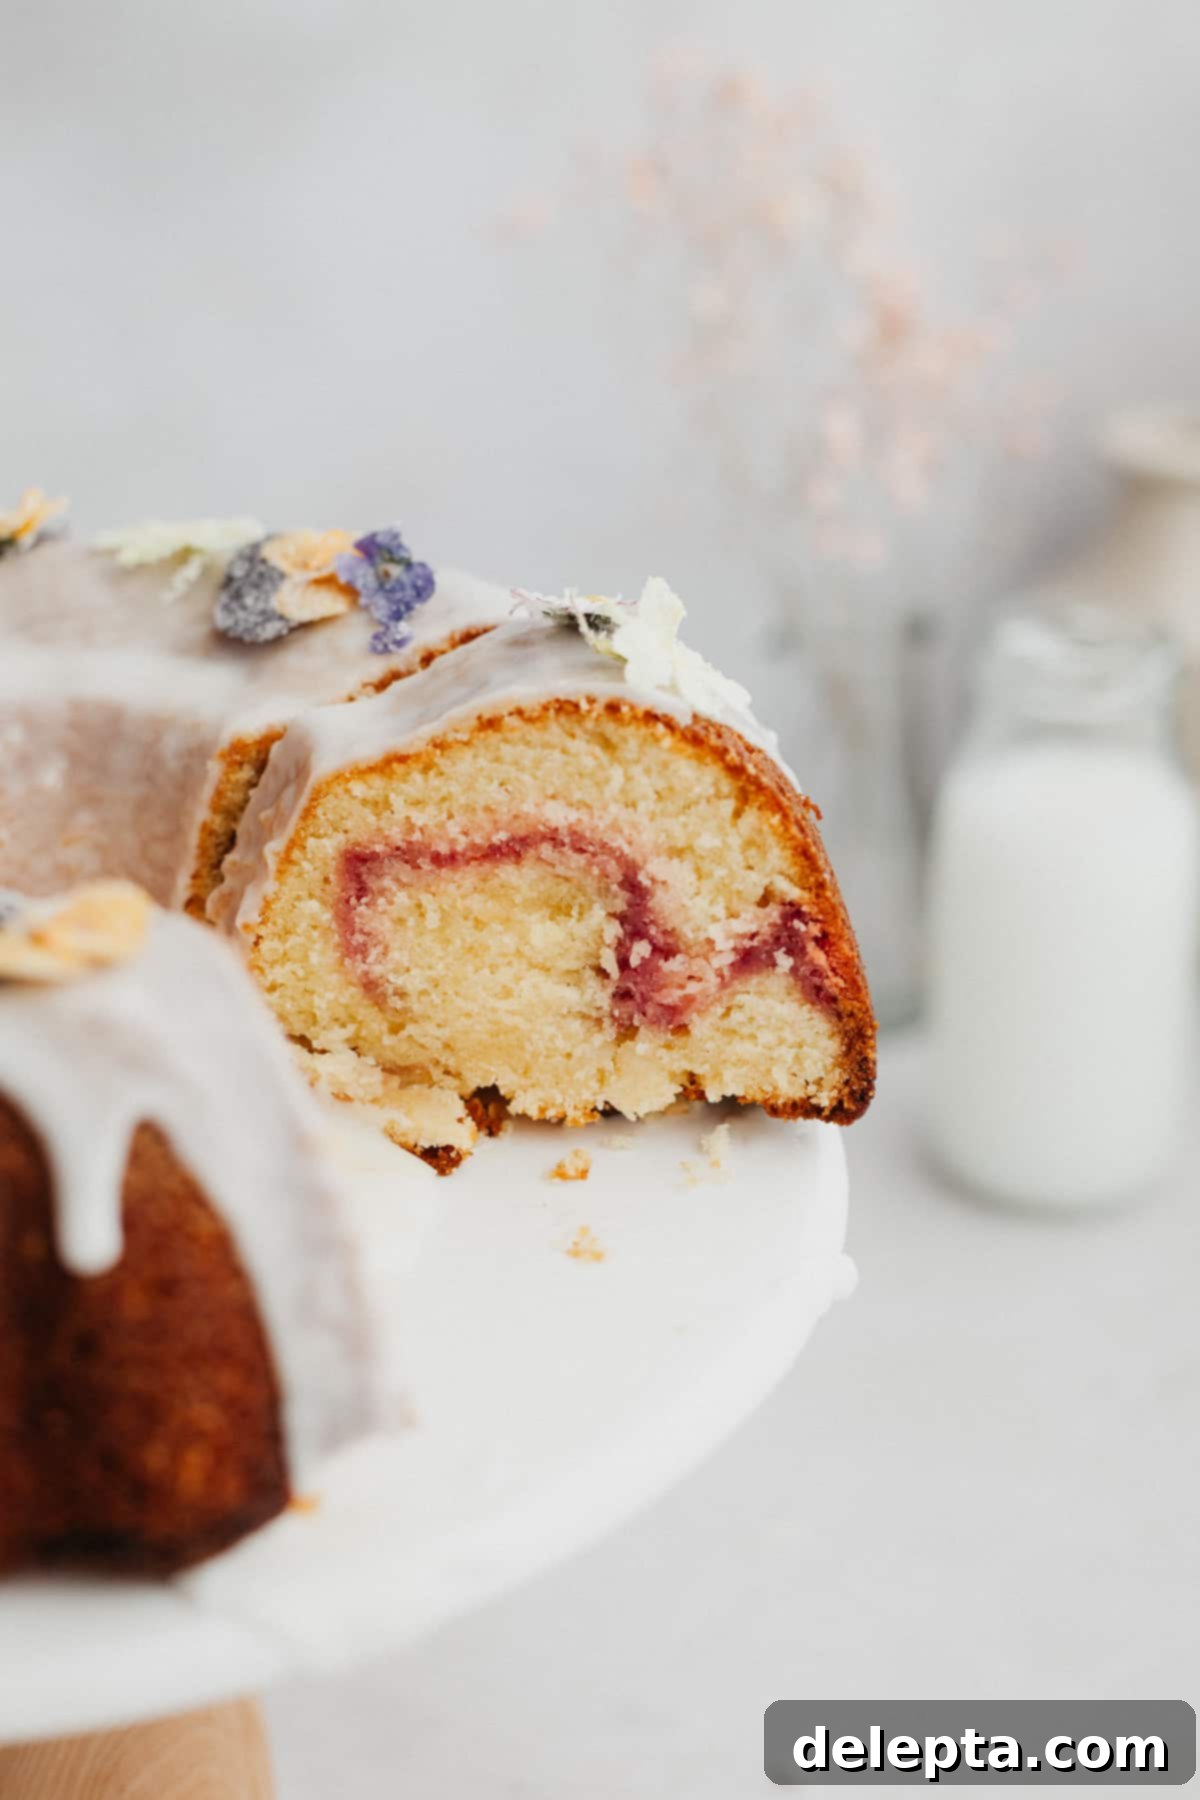
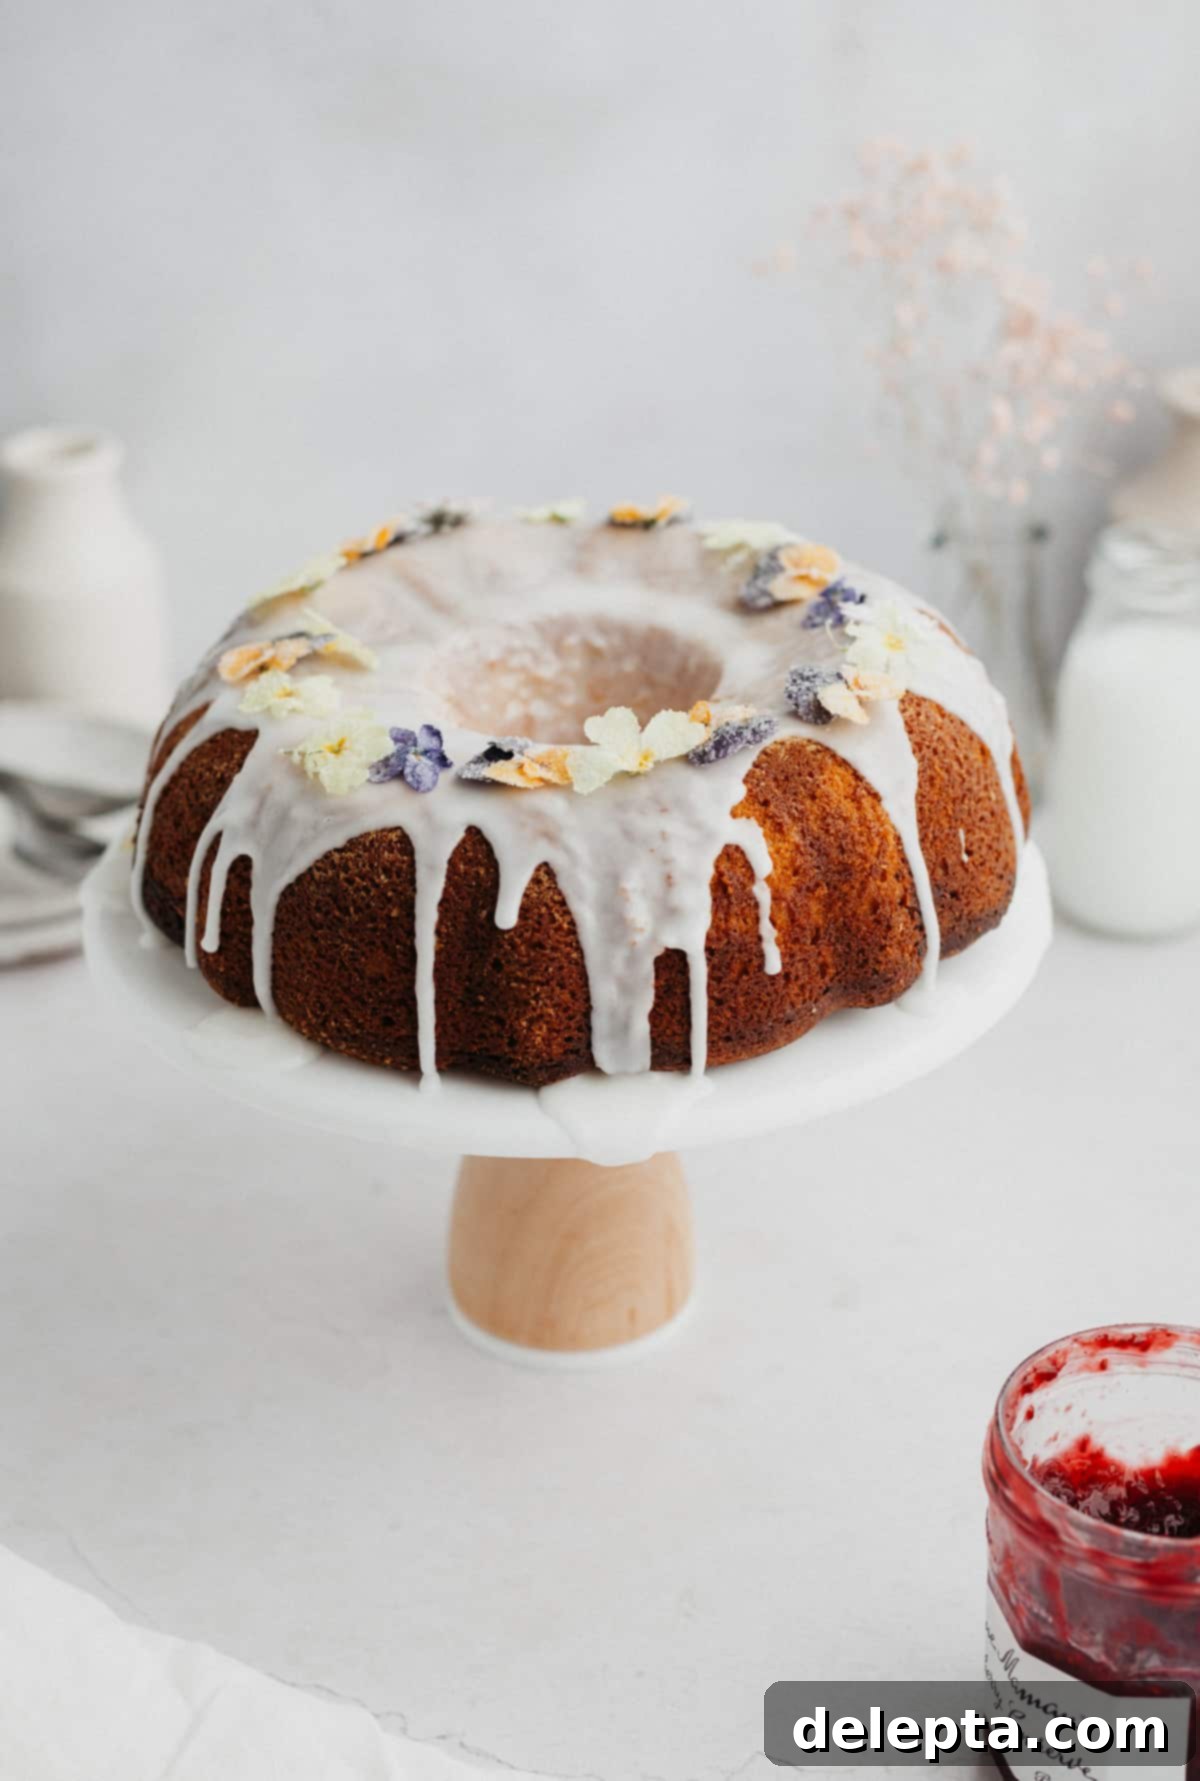
This delightful white chocolate raspberry bundt cake is more than just a treat; it’s the perfect centerpiece for a multitude of special occasions. Imagine it gracing the table at a joyous baby shower, a heartfelt Mother’s Day brunch, an elegant bridal shower, or as a spectacular birthday cake. Its charming appearance, especially when adorned, elevates any gathering. For instance, I’ve previously embellished this moist bundt cake with delicate candied flowers, a technique you can master by following the detailed instructions in my blueberry filled cake recipe. The versatility of this bundt cake means it’s equally at home as an impressive holiday dessert, a thoughtful hostess gift, or simply a comforting weekend bake to enjoy with loved ones.
If you find yourself craving even more of that irresistible raspberry goodness, explore my other beloved recipes. Be sure to try these delightful raspberry blondies, the incredibly moist raspberry white chocolate muffins, and the equally scrumptious raspberry white chocolate loaf cake! Each offers a unique way to enjoy the sweet and tart combination of raspberries and white chocolate.
This recipe was originally published in June 2021 and has been significantly updated with new images, expanded tips, and enhanced instructions to provide an even better baking experience for you.
Why You’ll Adore This Raspberry White Chocolate Bundt Cake
This bundt cake isn’t just another recipe; it’s a meticulously crafted experience designed to deliver maximum flavor and an unforgettable texture. Here’s a deeper look into what makes this particular raspberry white chocolate bundt cake so special and why it’s guaranteed to become a new favorite:
- Unrivaled Softness and Moisture: The foundation of this white chocolate raspberry bundt cake is directly inspired by my highly popular lemon and poppy seed bundt cake. The secret to its incredibly soft and perfectly moist texture lies in the generous addition of buttermilk. Buttermilk’s acidity reacts with the leavening agents, creating a lighter, more tender crumb that truly melts in your mouth. It also imparts a subtle tang that beautifully complements the sweetness of the white chocolate and raspberries.
- White Chocolate in Every Bite: I believe a truly great white chocolate bundt cake should deliver on its promise. That’s why I’ve incorporated an abundance of high-quality white chocolate chips throughout the cake batter. This ensures that with virtually every forkful, you’ll encounter pockets of sweet, creamy white chocolate, creating a delightful textural contrast and a burst of flavor.
- A Delightful Raspberry Ripple: Instead of fresh raspberries that can sometimes break down too much during baking, this recipe cleverly uses raspberry jam to create a stunning, vibrant swirl. Part of the cake batter is gently mixed with a good quality raspberry jam, which is then carefully layered into the bundt pan. This technique not only gives you a beautiful, surprising ripple effect when you slice into the cake, but it also means you can enjoy this delicious treat all year round, regardless of berry season. The concentrated flavor of the jam adds an intense fruitiness that balances the sweetness of the cake.
- Versatile Topping Options: While the cake is delicious on its own, it truly shines when adorned with a topping. You can opt for a rich and glossy white chocolate glaze for an extra layer of decadence, a simple yet elegant vanilla glaze, or simply dust it with powdered sugar and garnish with a few fresh berries for a lighter touch. Each option allows you to customize the cake to your preference and the occasion.
- Quick & Easy Preparation: Despite its impressive appearance and gourmet taste, this bundt cake is surprisingly straightforward to prepare. With minimal hands-on time and readily available ingredients, it’s an ideal recipe for both novice and experienced bakers looking for a rewarding baking project without the fuss.
Essential Ingredient Notes for Your Best Bundt Cake
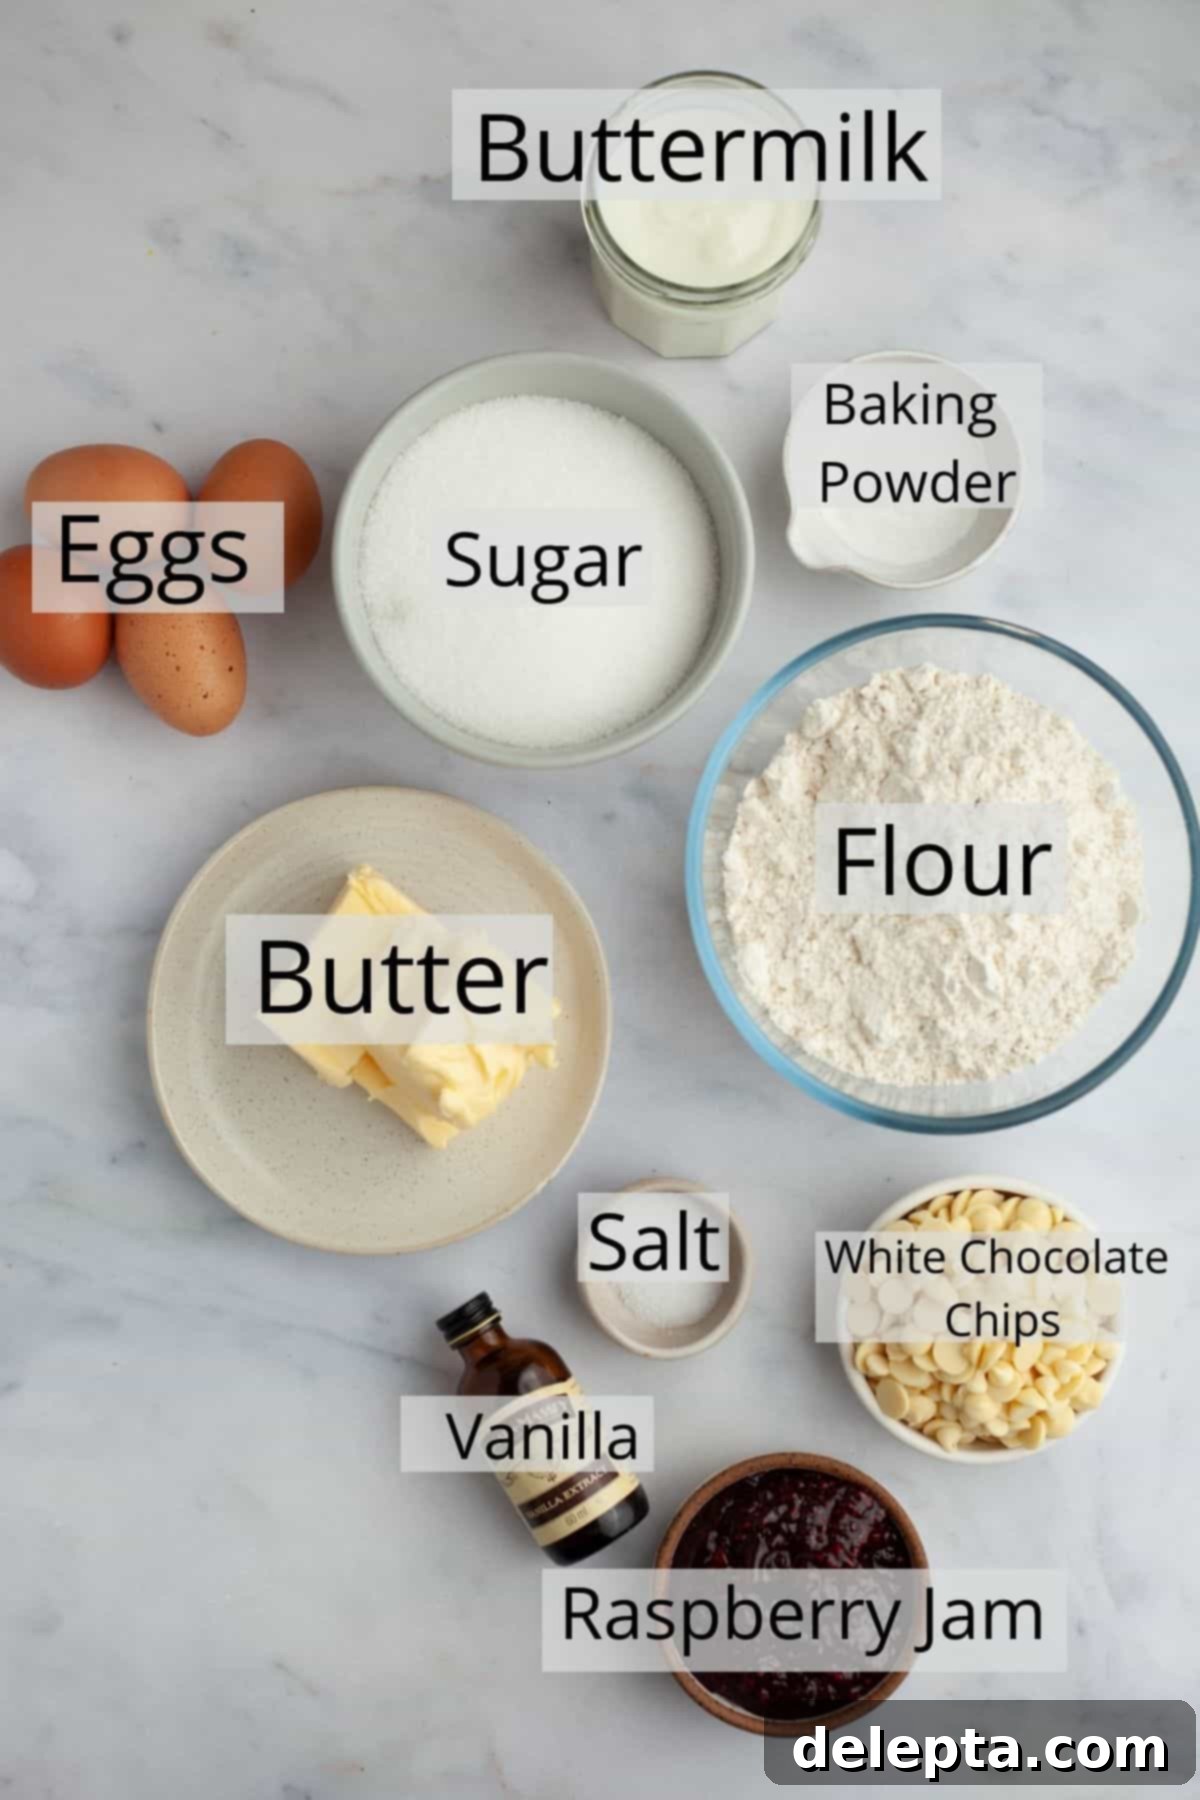
Understanding the role of each ingredient is key to achieving a perfectly moist and flavorful bundt cake. Here’s a closer look at the components that make this recipe shine:
- Buttermilk: This ingredient is a true MVP in baking. Buttermilk is naturally acidic, and when combined with baking powder (or baking soda, if used), it creates a chemical reaction that produces carbon dioxide bubbles. These bubbles contribute to a superior lift, a softer crumb, and an incredibly moist texture. The acidity also adds a lovely, subtle tang that complements the sweet elements. If you don’t have buttermilk on hand, don’t despair! You can easily make a substitute by adding 1 tablespoon of acid (like lemon juice or white vinegar) to a liquid measuring cup, then filling the rest of the cup with regular milk (dairy or non-dairy) and letting it sit for about 5 minutes until it slightly curdles. Alternatively, full-fat sour cream can be used as a direct substitute for a similarly rich and moist result.
- Unsalted Butter: For this recipe, I always opt for high-quality, European-style unsalted butter, such as Kerrygold. European butters typically have a higher butterfat content and lower water content compared to their American counterparts. This results in a much creamier texture and a richer flavor, which translates directly into a more luxurious and tender cake. Ensuring your butter is at proper room temperature is also crucial; it should be soft enough to indent with your finger but not melted. This allows it to cream effectively with the sugar, incorporating air that leads to a light and fluffy cake.
- Raspberry Jam: The quality of your raspberry jam will significantly impact the flavor of your swirl. Choose a good quality jam with a rich, authentic raspberry flavor. Brands like Bonne Maman are excellent choices, known for their high fruit content and natural taste. Using jam rather than fresh raspberries ensures a consistent, concentrated flavor and prevents the cake from becoming too wet.
- All-Purpose Flour: This recipe has been carefully developed and tested using standard all-purpose flour. It provides the right balance of protein to create a tender yet structured cake. While other flours might work, sticking to all-purpose flour will give you the most consistent and reliable results for this specific recipe. Proper measurement of flour is also critical; spooning it into the measuring cup and leveling it off (rather than scooping directly from the bag) prevents over-measurement and a dry, dense cake.
- Large Eggs (Room Temperature): Eggs play several vital roles in baking: they provide structure, moisture, and richness, and they help bind ingredients together. Using room temperature eggs is incredibly important because they emulsify much more easily with other room temperature ingredients like butter and buttermilk. This creates a smooth, homogenous batter that traps air more effectively, leading to a lighter, more evenly textured cake.
- Granulated Sugar: Beyond sweetness, sugar contributes to the cake’s moisture, tenderness, and beautiful golden-brown crust. It works with the butter to create tiny air pockets during the creaming process, further enhancing the cake’s texture.
- Baking Powder: This is our primary leavening agent, responsible for the cake’s lift and airy texture. It’s a double-acting leavener, meaning it creates carbon dioxide bubbles both when it comes into contact with liquid and again when exposed to heat in the oven. Ensure your baking powder is fresh for optimal rise.
- Fine Sea Salt: A touch of salt is essential in baking to enhance and balance the flavors of all the other ingredients, preventing the cake from tasting bland or overly sweet.
- Vanilla Extract: High-quality pure vanilla extract adds a warm, aromatic depth that complements both the raspberry and white chocolate, tying all the flavors together beautifully.
- White Chocolate Chips: These chips are crucial for the bursts of creamy sweetness throughout the cake. Opt for a good quality brand that melts smoothly and has a pleasant flavor. You can use standard chips, mini chips, or even chop up a white chocolate bar for varied textures.
Step-by-Step Guide to Making This Delicious Bundt Cake
Creating this raspberry white chocolate bundt cake is a rewarding process. Follow these detailed steps to ensure a perfect bake every time, complete with that beautiful swirl and tender crumb.
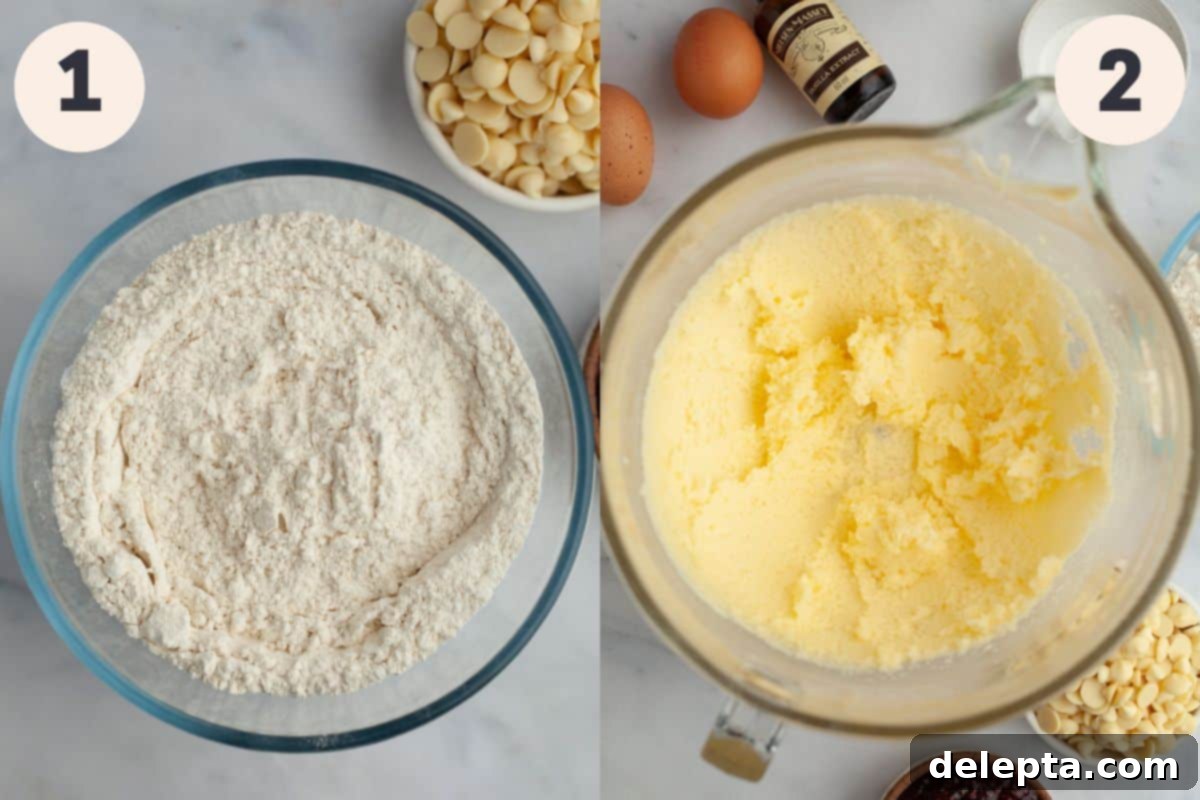
Step One: Prepare the Dry Ingredients. In a large mixing bowl, thoroughly whisk together your all-purpose flour and baking powder. This crucial step ensures that the leavening agent is evenly distributed throughout the flour, which will lead to a consistent rise and texture in your finished cake. Set this bowl aside while you work on the wet ingredients.
Step Two: Cream Butter and Sugar. In the bowl of your stand mixer, fitted with the paddle attachment, combine the softened unsalted butter, granulated sugar, and fine sea salt. Beat these ingredients together on medium-high speed for a full 2-3 minutes. This creaming process is vital; it incorporates air into the butter and sugar mixture, creating a light and fluffy base. This trapped air is what gives your finished bundt cake its wonderfully soft, tender, and airy texture.
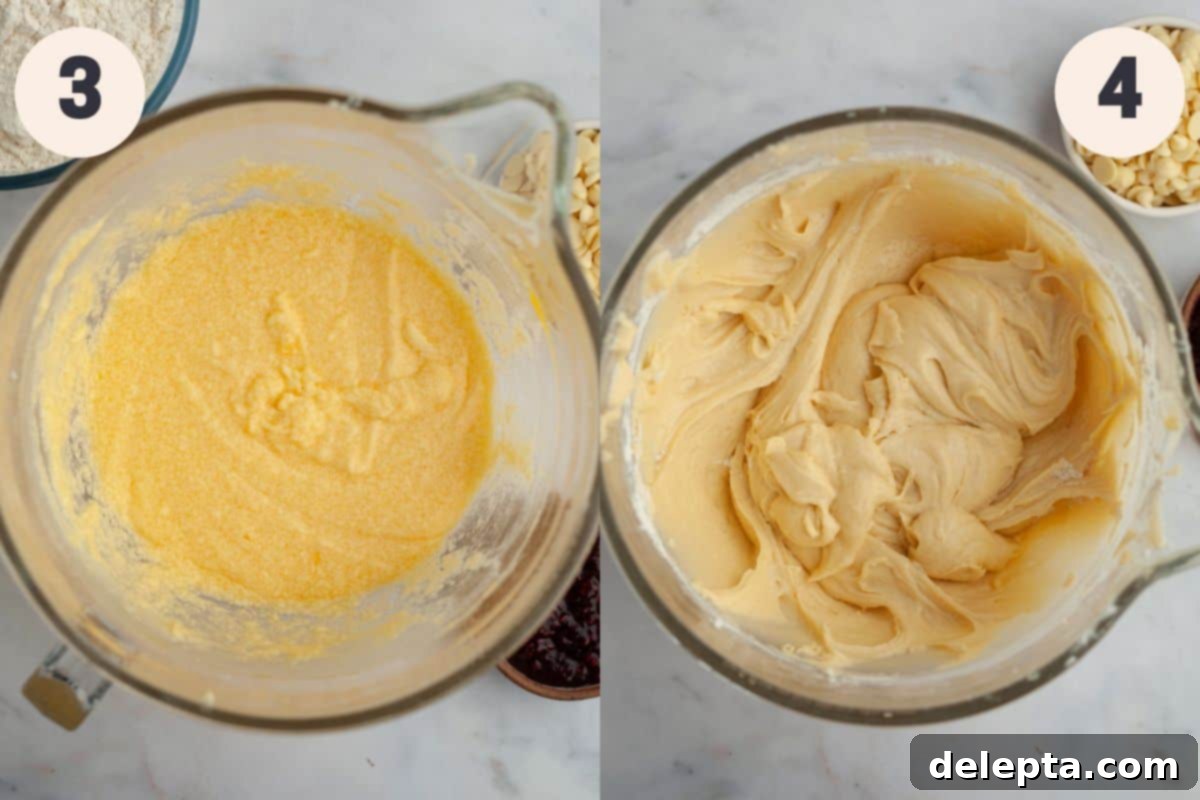
Step Three: Incorporate Eggs and Vanilla. Add your room temperature eggs one at a time to the creamed butter and sugar mixture. After each egg is added, beat on medium-high speed for about one minute, allowing it to fully incorporate before adding the next. This ensures a stable emulsion, preventing the batter from curdling. Remember to frequently scrape down the sides and bottom of the bowl with a rubber spatula to ensure all ingredients are thoroughly mixed. Finally, add the vanilla extract and whip just until combined, infusing the batter with its warm aroma.
Step Four: Alternate Dry and Wet Ingredients. Now, it’s time to gently combine the dry ingredients and the buttermilk with the wet mixture. Add the dry ingredients in three separate additions, alternating with two additions of the buttermilk. Always begin and end with the dry ingredients. Beat on medium speed only until just combined after each addition. The reason for this alternating method is twofold: it helps prevent overmixing the flour, which can lead to a tough cake, and it ensures that the delicate air bubbles created during the creaming process are not crushed, thereby maintaining the cake’s light and fluffy structure.
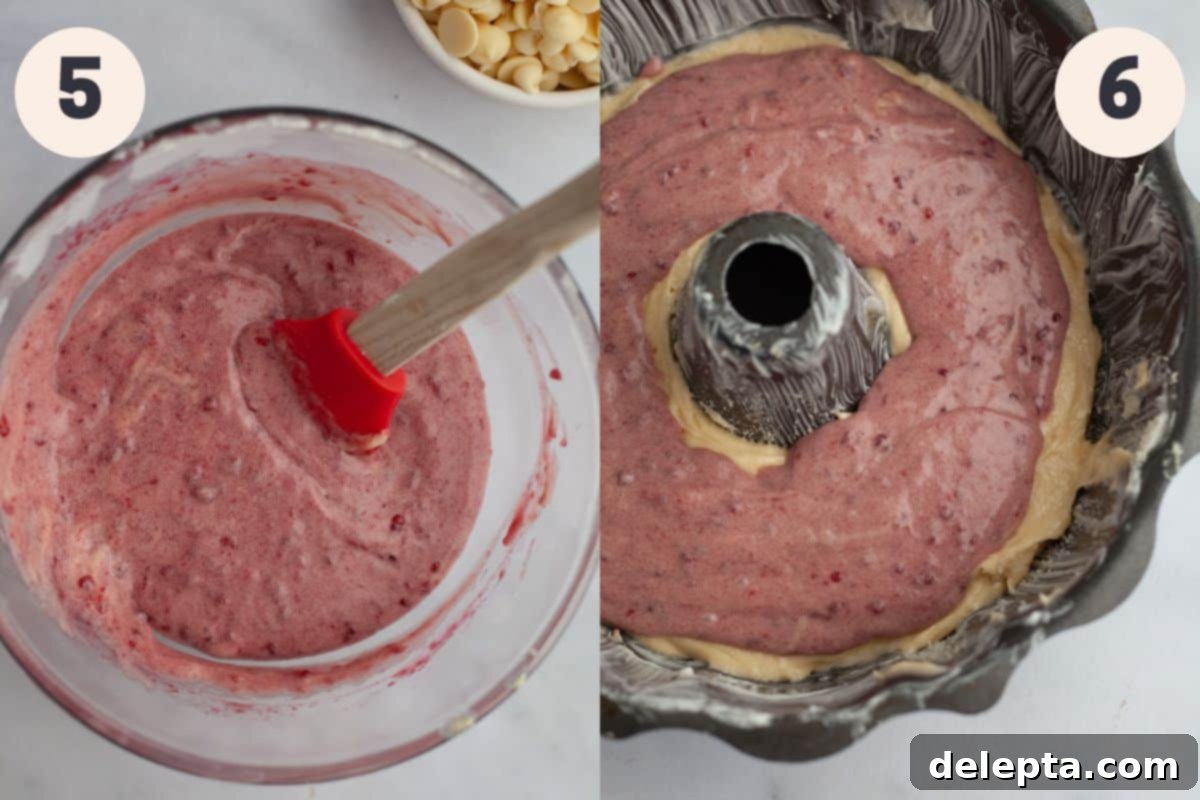
Step Five: Create the Raspberry Swirl Batter. Carefully scoop out about half a cup of the prepared cake batter into a separate medium bowl. Add the raspberry jam to this small portion of batter. Gently mix them together until the jam is fully incorporated and the mixture is smooth. This beautifully colored, flavorful mixture will form the stunning raspberry swirl within your bundt cake.
Step Six: Assemble and Bake the Bundt Cake. To the remaining, larger portion of white chocolate batter, gently fold in your white chocolate chips. Be careful not to overmix at this stage, as excessive mixing can develop the gluten in the flour, resulting in a tougher, less tender cake texture. Pour half of this white chocolate chip-studded batter evenly into your meticulously prepared bundt pan. Next, either use a spoon or a piping bag (for more precision) to create a circle of the raspberry filling on top of the first layer of batter. It’s important to keep the raspberry filling centered and away from the sides of the pan; this ensures that the beautiful swirl remains a pleasant surprise inside the cake and doesn’t bake directly onto the pan’s edges, where it might stick. Carefully pour the remaining white chocolate chip batter over the raspberry layer, taking care not to disturb the layers underneath. Bake the bundt cake in a preheated oven at 350°F (175°C) for 45-60 minutes. The baking time can vary slightly depending on your oven and bundt pan material. The cake is done when a wooden skewer or toothpick inserted into the center comes out with just a few moist crumbs attached, or completely clean. Avoid overbaking, as this can lead to a dry cake.
Recipe Tips & Tricks for Bundt Cake Success
Achieving a perfect bundt cake, with its impressive shape and delicious texture, often comes down to a few key techniques. Here are some indispensable tips and tricks to ensure your Raspberry White Chocolate Bundt Cake turns out flawlessly every time:
- Embrace a Weighing Scale for Accuracy: For truly consistent and professional baking results, I cannot stress enough the importance of using a digital kitchen scale to measure your ingredients, especially flour, butter, and sugar, using metric units. Volume measurements (cups) can be notoriously inaccurate due to variations in how ingredients are packed. A scale eliminates guesswork and ensures you’re using the precise amounts needed for the recipe to work as intended.
- Master the “Fluff and Sprinkle” Method for Flour: If you absolutely must use volume measurements instead of a scale, ensure you’re measuring your flour correctly. The common mistake is scooping flour directly from the bag, which compacts it and leads to too much flour. Instead, use the “fluff and sprinkle” method: first, gently fluff the flour in its container with a spoon. Then, lightly spoon the flour into your dry measuring cup until it’s overflowing. Finally, level it off with the back of a straight knife or flat edge. This prevents a dense, dry, and crumbly cake. Learn more about precise flour measurement here.
- All Ingredients at Room Temperature: This is a golden rule in baking, particularly for cakes. Ensure all your perishable ingredients, including butter, eggs, and buttermilk, are at true room temperature before you begin. Room temperature ingredients emulsify much better, creating a smooth, cohesive batter that traps air more efficiently. This leads to a more uniform texture and a higher, lighter rise in your finished cake.
- Baking Time Varies by Bundt Pan: Be aware that the material and color of your bundt pan can significantly affect baking time. Lighter-colored metal pans typically require longer baking times, often around 60 minutes, as they reflect heat. Darker metal pans, which absorb heat more readily, will bake faster, usually in about 45-50 minutes. Always rely on the toothpick test rather than just the clock, but keep these guidelines in mind for initial timing.
- Proper Bundt Pan Preparation is Key: A common frustration with bundt cakes is sticking. To prevent this, thoroughly grease your bundt pan. Use a pastry brush to apply a generous and even layer of softened butter or use a baking spray specifically designed for intricate pans. Don’t miss any nooks or crannies! For extra insurance, after greasing, lightly flour the pan, tapping out any excess. This creates a non-stick barrier.
- The Art of Cooling and Unmolding: Patience is key when unmolding a bundt cake. After baking, let the cake cool in the pan for precisely 5-10 minutes on a wire rack. This allows the cake to set and firm up slightly, preventing it from breaking when inverted. After this initial cooling, carefully place a wire rack over the top of the bundt pan and, using oven mitts, confidently flip the cake over. Let it sit for another 5 minutes before gently lifting the pan off. If you try to remove it too soon, it might tear; too late, and it might stick.
- Avoid Overmixing the Batter: Once you start adding flour, mix the batter only until the ingredients are just combined. Overmixing develops the gluten in the flour, which can lead to a tough, rubbery cake instead of a tender, fluffy one.
- Don’t Peek Too Early: Resist the urge to open the oven door during the first 3/4 of the baking time. Sudden temperature changes can cause the cake to collapse or sink in the middle.
Frequently Asked Questions About Your Bundt Cake
To maintain its freshness and delightful texture, store your bundt cake tightly wrapped in plastic wrap or in an airtight container at room temperature for up to 4 days. If your kitchen is particularly warm, or if your cake is topped with a cream cheese glaze, you might consider refrigerating it. Bring it back to room temperature before serving for the best flavor and texture.
Absolutely! This cake freezes beautifully. For best results, freeze the cake without any glaze or topping. Once completely cooled, slice up the cake into individual portions or wrap the whole cake tightly in several layers of plastic wrap, followed by a layer of aluminum foil. It can be frozen for up to 2 months. When you’re ready to enjoy it, simply let it defrost in the refrigerator overnight, then bring it to room temperature before serving or adding your desired topping.
Definitely! This recipe is incredibly versatile and encourages experimentation. Feel free to mix up the jam flavors – strawberry, apricot, cherry, or even blueberry would be delicious alternatives for the swirl. Similarly, you can customize the chocolate chips. While white chocolate chips provide a classic pairing, milk chocolate or dark chocolate chips could offer a different, equally delightful flavor profile. Consider even adding a mix of chips for an interesting twist!
The most common reason for a bundt cake sticking is insufficient greasing and flouring of the pan. Ensure you thoroughly coat every crevice with softened butter or a high-quality non-stick baking spray, then lightly dust with flour, tapping out the excess. Also, attempting to unmold the cake too soon or too late after baking can cause sticking. Follow the cooling instructions carefully: 5-10 minutes in the pan, then invert onto a rack and wait another 5 minutes before lifting the pan.
While this recipe is specifically formulated for a 10-cup bundt pan, you can adapt it. For loaf pans, you might get two standard loaves, and the baking time would need to be adjusted (likely shorter, around 50-60 minutes). For a regular round cake pan (like two 8-inch or 9-inch layers), you would also need to adjust baking times and possibly reduce the batter slightly depending on pan depth. Always fill pans about two-thirds full and adjust baking time, checking for doneness with a toothpick. The distinct swirl effect might be harder to achieve perfectly in other pan shapes.
Try These Other Delightful Cake Recipes Next!
If you’ve enjoyed baking and tasting this Raspberry White Chocolate Bundt Cake, you’re in for a treat with these other fantastic cake recipes. Each offers a unique flavor and baking experience:
- No Bake Cheesecake with Mascarpone
- Easy Lemonade Bundt Cake
- Pecan Sour Cream Coffee Cake
- White Forest Cake
Don’t forget to follow me on Instagram @alpineella and Pinterest! Your feedback and shares are incredibly appreciated!
Recipe Card: Raspberry White Chocolate Bundt Cake
Raspberry White Chocolate Bundt Cake
Ella Gilbert
Pin Recipe
Save Recipe
Saved!
18
minutes
45
minutes
1
hour
3
minutes
Breakfast, Dessert, Snack
American
12
slices
698
kcal
Equipment
-
10 cup bundt pan
Ingredients
Raspberry White Chocolate Bundt Cake
-
1 cup unsalted butter room temperature -
1 ¾ cup sugar -
1 teaspoon fine sea salt -
1 teaspoon vanilla extract -
4 eggs room temperature -
3 cups all purpose flour -
2 teaspoon baking powder -
1 cup buttermilk room temperature -
½ cup raspberry jam -
1 cup white chocolate chips
White Chocolate Ganache
-
10 ounces white chocolate chopped -
⅔ cup heavy cream -
1 tablespoon unsalted butter room temperature
Instructions
-
Preheat your oven to 350°F/175°C. Generously butter your bundt pan using a pastry brush and softened butter (or you could use a spray), making sure you get every bit of the pan’s intricate design. For extra assurance against sticking, you can lightly flour the buttered pan, tapping out any excess.
-
In a stand mixer fitted with the paddle attachment, cream together the room temperature butter, sugar, and fine sea salt for 2-3 minutes on medium-high speed until the mixture is visibly lightened in color and fluffy. This step is crucial for incorporating air into the cake batter.
-
Add the room temperature eggs one at a time, beating well after each addition until fully incorporated. After each egg, scrape down the sides of the bowl with a rubber spatula to ensure even mixing. Finally, add the vanilla extract and mix until just combined.
-
In a separate bowl, whisk together the all-purpose flour and baking powder. Gradually add the dry ingredients to the wet mixture in three additions, alternating with the buttermilk. Begin and end with the dry ingredients. Mix on low speed only until just combined after each addition to prevent overmixing and developing tough gluten.
-
Scoop out approximately ½ cup of the prepared cake batter and place it into a small, separate bowl. Add the raspberry jam to this small portion of batter and whisk gently until the jam is smooth and fully incorporated. This creates your vibrant raspberry swirl.
-
To the remaining, larger portion of batter, gently fold in the white chocolate chips using a spatula. Be careful not to overmix at this stage; just fold until the chips are evenly distributed.
-
Pour half of the white chocolate chip batter evenly into your prepared bundt pan, spreading it gently to cover the bottom.
-
Carefully spoon or pipe the raspberry batter in a circular fashion on top of the first batter layer. Ensure the raspberry mixture remains in the middle and does not touch the sides of the pan. This technique keeps the swirl “hidden” until you slice into the cake, creating a lovely surprise.
-
Gently pour the remaining white chocolate chip batter over the raspberry layer, taking care not to disturb the layers underneath. Smooth the top lightly. Bake for 45-60 minutes. Keep in mind that baking time varies: a dark metal bundt pan may take closer to 45 minutes, while a lighter metal pan could require 10-15 minutes longer.
-
The cake is ready when a wooden skewer or toothpick inserted into the center comes out clean or with just a few moist crumbs. Let the cake cool in the pan for exactly 10 minutes on a wire rack. Then, place a cooling rack directly on top of the bundt pan. Using oven gloves, carefully flip the cake and pan over so the cooling rack is now on the bottom. Allow it to sit for another 5 minutes before gently lifting the bundt pan off the cake. Let the cake cool completely on the wire rack before glazing.
-
For the White Chocolate Ganache: Place your chopped white chocolate in a heatproof bowl. In a small saucepan, bring the heavy cream to a gentle simmer (do not boil). Pour the hot cream over the white chocolate and let it sit undisturbed for one minute. After a minute, take a rubber spatula and slowly begin to mix from the center outwards until the white chocolate has completely melted and a smooth, glossy ganache forms. Stir in the room temperature butter until fully incorporated. Allow the ganache to cool and thicken slightly until it reaches your desired consistency – either pourable like a glaze or thicker for a more substantial coating. Pour over the cooled bundt cake.
Notes
Butter: For the best flavor and texture, I highly recommend using European-style butter, such as Kerrygold, in this recipe. Its higher butterfat content contributes to a much creamier, richer, and more tender finished cake.
Storage: Keep your delightful bundt cake covered tightly with plastic wrap or in an airtight container at room temperature for up to 4 days to maintain its optimal freshness and moisture.
Pouring Ganache: For an elegant finish, the best way to drizzle or pour ganache is to transfer it into a spouted jug or a measuring cup. Place your cooled cake on a serving stand with parchment paper underneath to catch drips. Slowly turn the stand while pouring the ganache evenly over the cake, allowing it to naturally cascade down the sides.
Freezing: This bundt cake freezes exceptionally well without the ganache. Once the cake is completely cool, you can slice it into individual portions or wrap the whole cake. Wrap tightly in several layers of plastic wrap, then an additional layer of aluminum foil to prevent freezer burn. Freeze for up to 2 months. To serve, let it thaw in the refrigerator overnight, then bring to room temperature before adding your desired topping.
Nutrition
Calories:
698
kcal
Carbohydrates:
87
g
Protein:
8
g
Fat:
36
g
Saturated Fat:
22
g
Trans Fat:
1
g
Cholesterol:
126
mg
Sodium:
354
mg
Potassium:
218
mg
Fiber:
1
g
Sugar:
60
g
Vitamin A:
820
IU
Vitamin C:
2
mg
Calcium:
169
mg
Iron:
2
mg
Tried this recipe?
Leave a comment below! You can also tag me on Instagram @alpineella so I can see what you made!
