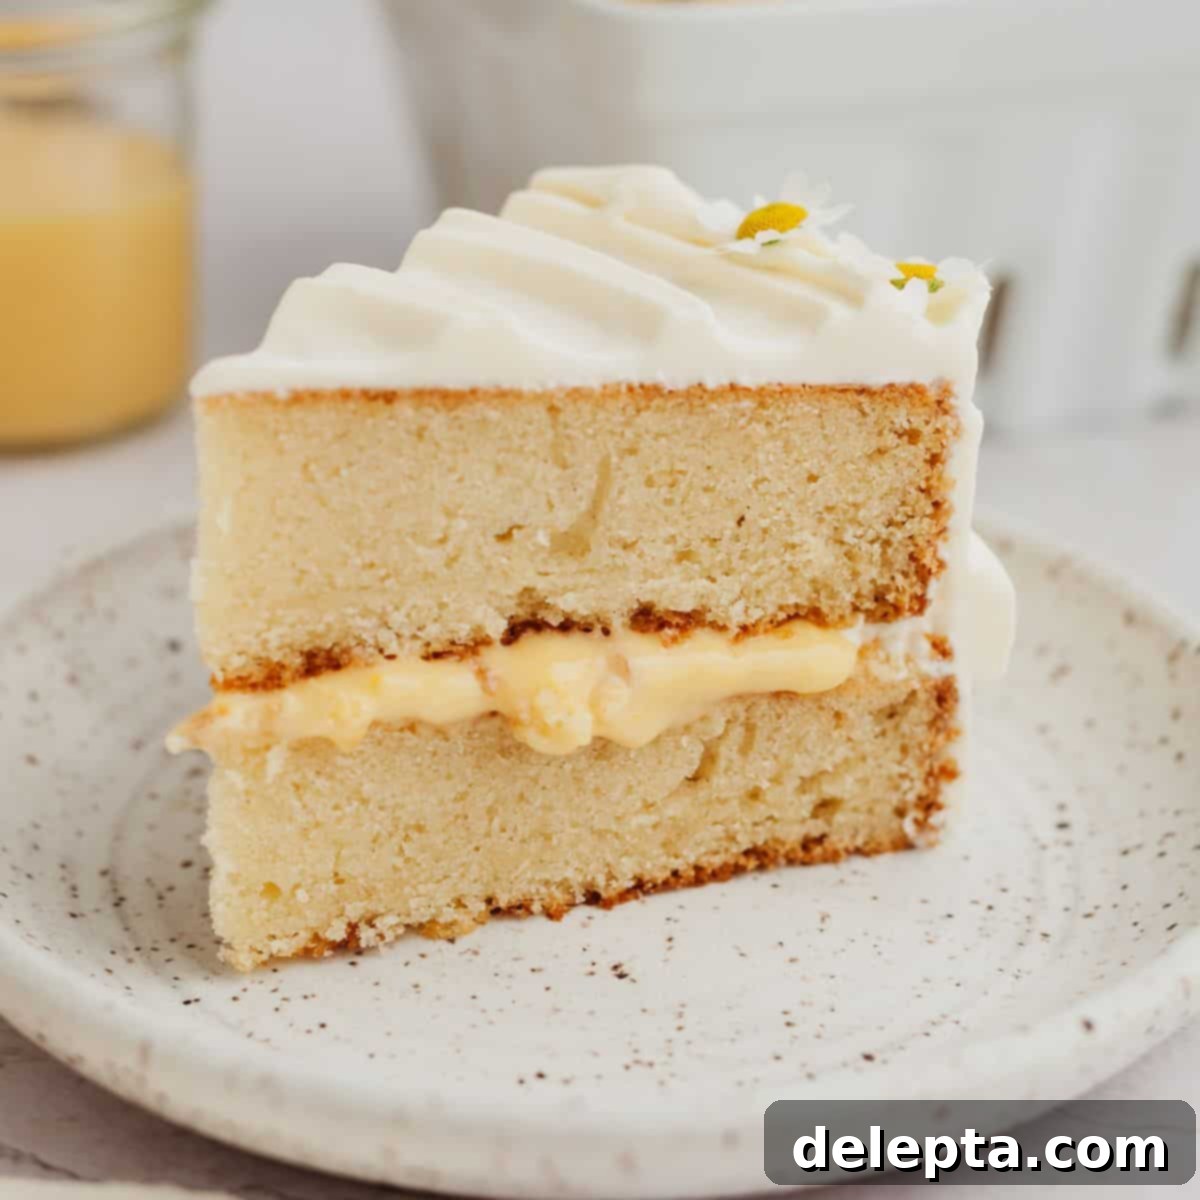
Zesty Homemade Lemon Curd Cake with Dreamy Cream Cheese Frosting: Your Ultimate Lemon Layer Cake Recipe
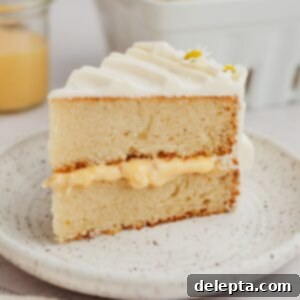
Indulge in the bright, refreshing flavors of this incredible **Homemade Lemon Curd Cake**. This exquisite lemon and vanilla layer cake features tender, moist cake layers generously filled with vibrant lemon curd made from scratch, all enveloped in the dreamiest, airy cream cheese frosting. Every bite delivers a burst of fresh lemon zest and juice, creating a truly unforgettable dessert experience that’s perfect for any occasion, from casual gatherings to special celebrations. Forget store-bought mixes; this recipe guides you through creating a show-stopping cake that tastes as good as it looks.
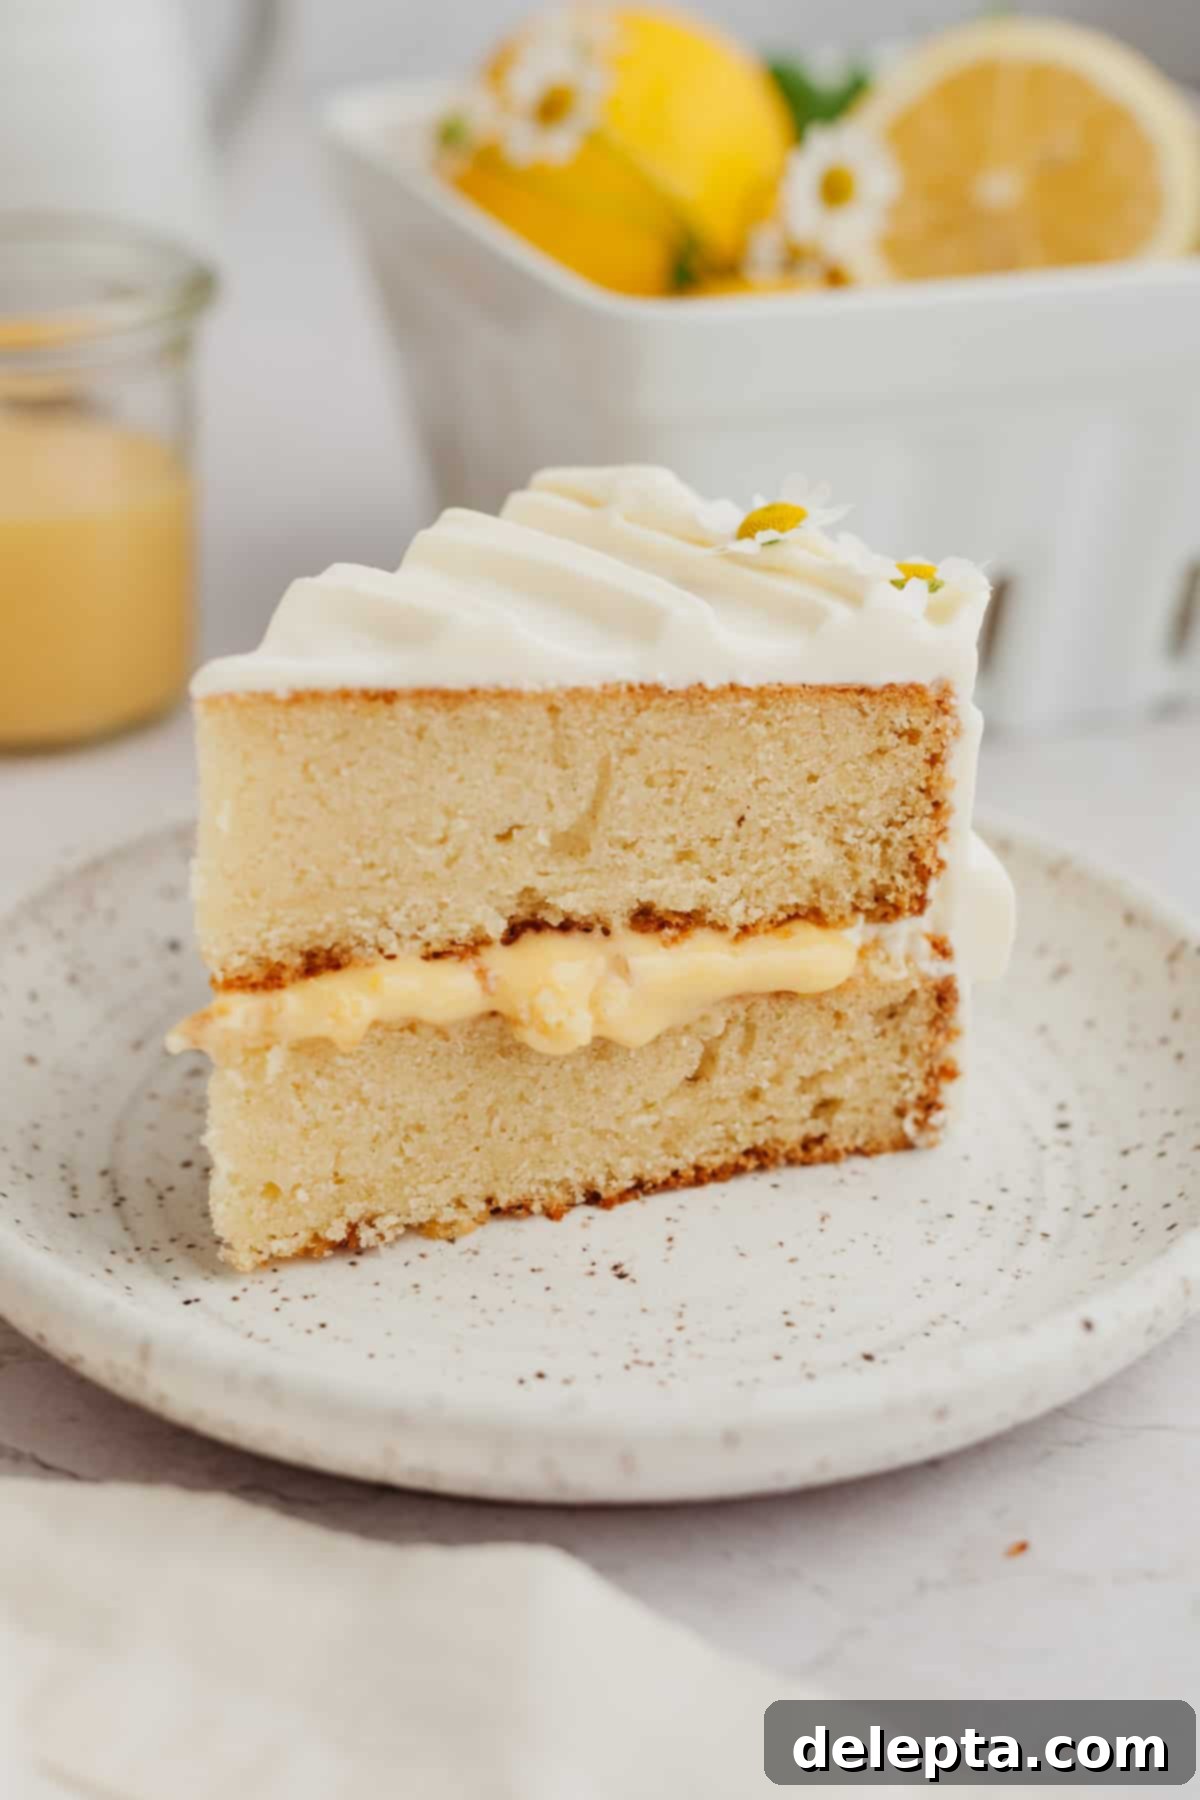
While many lemon desserts offer a hint of citrus, this particular lemon curd cake recipe is designed to spotlight that pure, fresh, and irresistibly zingy lemon flavor. Unlike other cakes that might combine lemon with other fruits, this creation focuses solely on delivering an intense lemon experience, beautifully balanced with the subtle sweetness of vanilla and the richness of cream cheese. We’ll be making the luscious lemon curd right in your kitchen, ensuring maximum freshness and flavor (though a high-quality store-bought option can be used in a pinch!). The cake layers themselves are infused with fresh lemon juice, ensuring a consistent citrus note throughout.
If your heart beats for tangy citrus treats, you absolutely must add this lemon curd cake to your baking repertoire. And if you’re looking to explore more delightful lemon recipes, be sure to try my lemon and poppy seed cupcakes, lemon white chocolate cookies, and lemon curd muffins for even more citrusy goodness!
Why You’ll Adore This Lemon Curd Cake Recipe!
- Achieve Unmatched Tenderness with the Reverse Creaming Method: This recipe employs the highly effective reverse creaming method, a technique I frequently use in my cake recipes for its superior results. Instead of creaming butter and sugar first, this method mixes the butter into the dry ingredients before adding liquids, coating the flour particles in fat. This inhibits gluten development, resulting in an exceptionally tender, fine-crumbed, and moist cake that truly melts in your mouth. You’ll notice the difference in texture immediately!
- Flexible for Your Schedule: Homemade or Store-bought Curd Options: While I highly recommend making your own homemade lemon curd for its unparalleled freshness and intense flavor, this recipe is designed to be adaptable. If you’re short on time or prefer convenience, feel free to use a good quality store-bought lemon curd. The cake will still be absolutely delicious, allowing you to enjoy this delightful dessert even on busy days.
- Excellent Make-Ahead Potential for Stress-Free Baking: Planning ahead makes baking a joy, not a chore! If you choose to craft the lemon curd from scratch, you can prepare it up to a week in advance and store it in the refrigerator. The cake layers can also be baked a day or two ahead, wrapped tightly, and refrigerated. This flexibility allows you to spread out your baking tasks, making assembly on serving day quick and easy, perfect for entertaining.
- Dreamy Whipped Cream Cheese Frosting: The cake is beautifully complemented by my favorite whipped cream cheese frosting. This frosting is not only incredibly light and fluffy but also perfectly balanced in sweetness, providing a wonderful contrast to the tartness of the lemon curd and the bright lemon cake layers. Its smooth, creamy texture and slight tang make it the ideal finishing touch for this vibrant dessert.
Essential Ingredients for Your Lemon Curd Cake
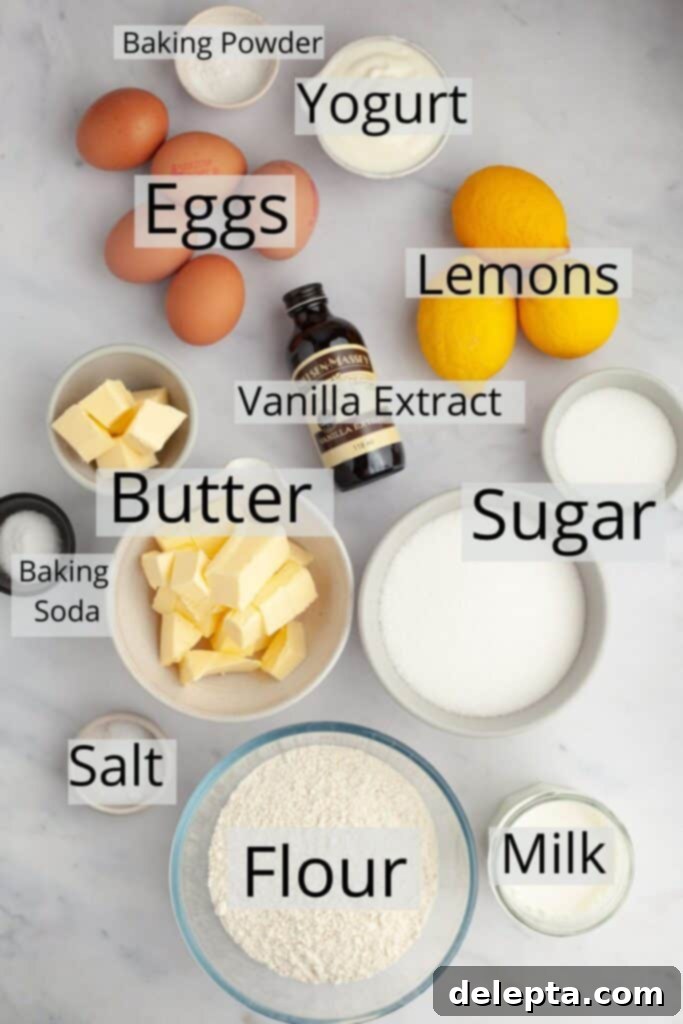
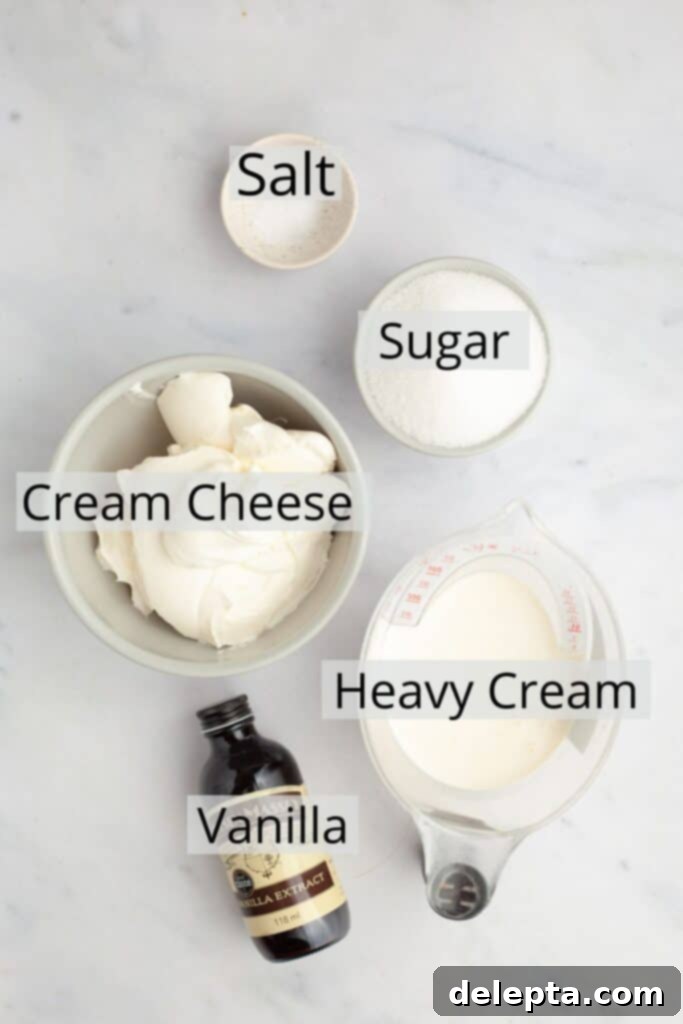
- All-Purpose Flour: For best results and consistency, this recipe has been thoroughly tested with all-purpose flour. Using a kitchen scale to measure your flour is highly recommended for accuracy, as cup measurements can vary and impact the cake’s texture.
- Fresh Lemons: The star of the show! You’ll need about 2-3 medium-sized, fresh, ripe lemons to yield enough juice and zest for both the homemade lemon curd and to infuse the cake layers with vibrant citrus flavor. Always choose bright yellow, firm lemons for the best results. The zest contains essential oils that deliver intense lemon aroma and flavor.
- Eggs: A fantastic aspect of this recipe is its efficiency! The egg yolks are used for the rich, creamy lemon curd, while the egg whites are reserved for the tender cake layers. This ensures no part of the egg goes to waste and contributes to the distinct textures of each component. Ensure all eggs are at room temperature for optimal mixing and emulsification in the cake batter.
- Baking Powder & Baking Soda: These leavening agents are crucial for the cake’s rise and tender crumb. Always check their expiration dates before baking; expired leaveners can lead to a flat, dense cake. Baking soda reacts with the acidic lemon juice and yogurt to create lift, while baking powder provides additional structure.
- Full-Fat Yogurt: Incorporating full-fat natural yogurt into the cake batter is a secret to its exceptional moistness and tender texture. The acidity in the yogurt also works with the baking soda to create a light, fluffy crumb. Ensure your yogurt is at room temperature for smooth integration into the batter.
- Granulated Sugar: Simple white granulated sugar is all that’s needed for both the cake and the lemon curd. It provides sweetness and helps create the beautiful texture of the cake and the glossy finish of the curd.
- Extract: For the cake, while vanilla extract is a perfectly lovely choice, I adore using Fiori di Sicilia. This unique extract offers a delightful combination of lemon and vanilla notes, providing a truly aromatic and complex flavor boost that elevates the cake. For the lemon curd and frosting, classic vanilla extract perfectly complements the other flavors.
- Unsalted Butter: Essential for both the cake and lemon curd, unsalted butter allows you to control the overall saltiness of the recipe. For the cake, ensure it’s softened to room temperature for proper emulsification using the reverse creaming method. For the curd, it’s added at the end to create a smooth, glossy, and rich finish.
- Whole Milk: Used in the cake batter, whole milk adds moisture and richness, contributing to the tender crumb. Like other wet ingredients, it should be at room temperature.
- Kosher Salt: A pinch of salt enhances all the other flavors in both the cake and the lemon curd. For specific details on salt types, refer to the expert notes below.
Refer to the detailed recipe card at the end of this article for precise measurements and quantities for all ingredients.
Step-by-Step Guide to Baking Your Lemon Curd Cake
Follow these detailed instructions carefully to achieve a perfectly moist lemon cake, rich homemade lemon curd, and delightful cream cheese frosting.
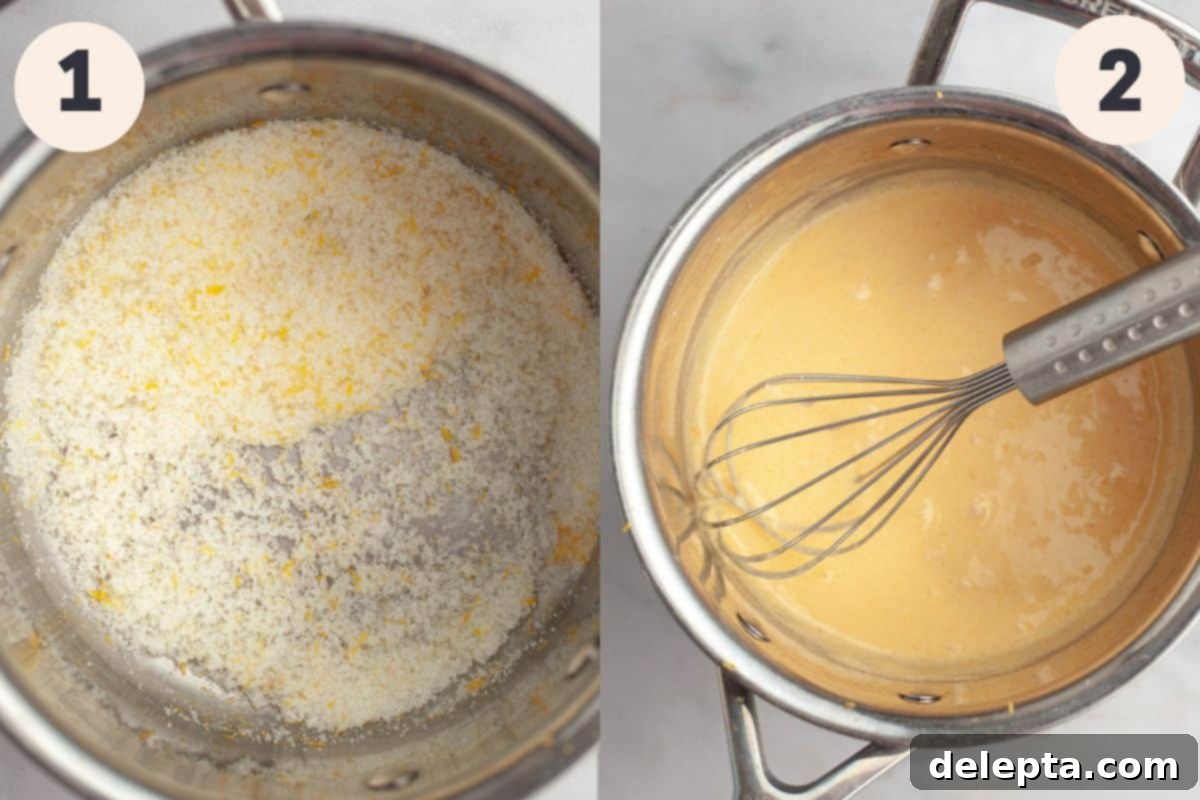
Step 1: Begin with the Lemon Curd. In a small, heat-proof saucepan, combine the granulated sugar with the fresh lemon zest. Use your fingers to rub the zest into the sugar for a minute or two. This vital step releases the fragrant oils from the lemon zest, infusing the sugar with intense citrus flavor and turning it a very pale yellow. This technique ensures maximum lemon aroma in your finished curd.
Step 2: Incorporate Egg Yolks. Add the three large egg yolks to the lemon-sugar mixture in the saucepan (remember to save those egg whites for the cake batter!). Whisk vigorously for approximately 2 minutes until the mixture becomes noticeably pale in color and thick in consistency. This aeration is important for the final texture of the curd.
Step 3: Cook the Curd to Perfection. Pour in the fresh lemon juice and a pinch of salt into the saucepan. Place the saucepan over low heat. It’s crucial to whisk constantly during this stage to prevent the eggs from curdling and to achieve a smooth, creamy texture. Continue whisking for up to 10 minutes, or until the mixture becomes very thick, glossy, and coats the back of a spoon heavily. The constant motion ensures even cooking and prevents scorching.
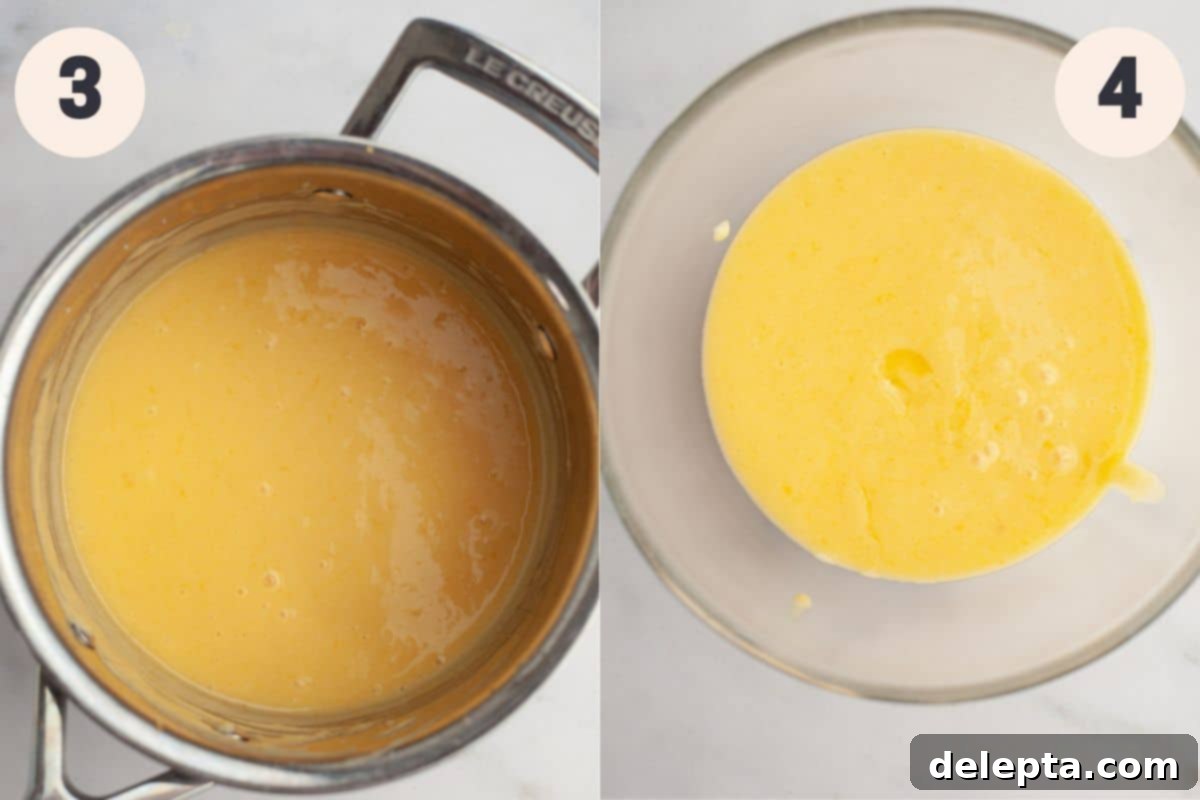
Step 4: Finish the Lemon Curd. Remove the saucepan from the heat immediately. Gradually add the cubed unsalted butter, one piece at a time, whisking continuously until each piece is fully melted and incorporated before adding the next. This method helps maintain the curd’s smooth emulsion. Finally, whisk in the vanilla extract. Pour the finished lemon curd into a clean bowl or jar, cover the surface directly with plastic wrap to prevent a skin from forming, and allow it to cool completely at room temperature before chilling thoroughly in the refrigerator for at least 2 hours, or up to a week.
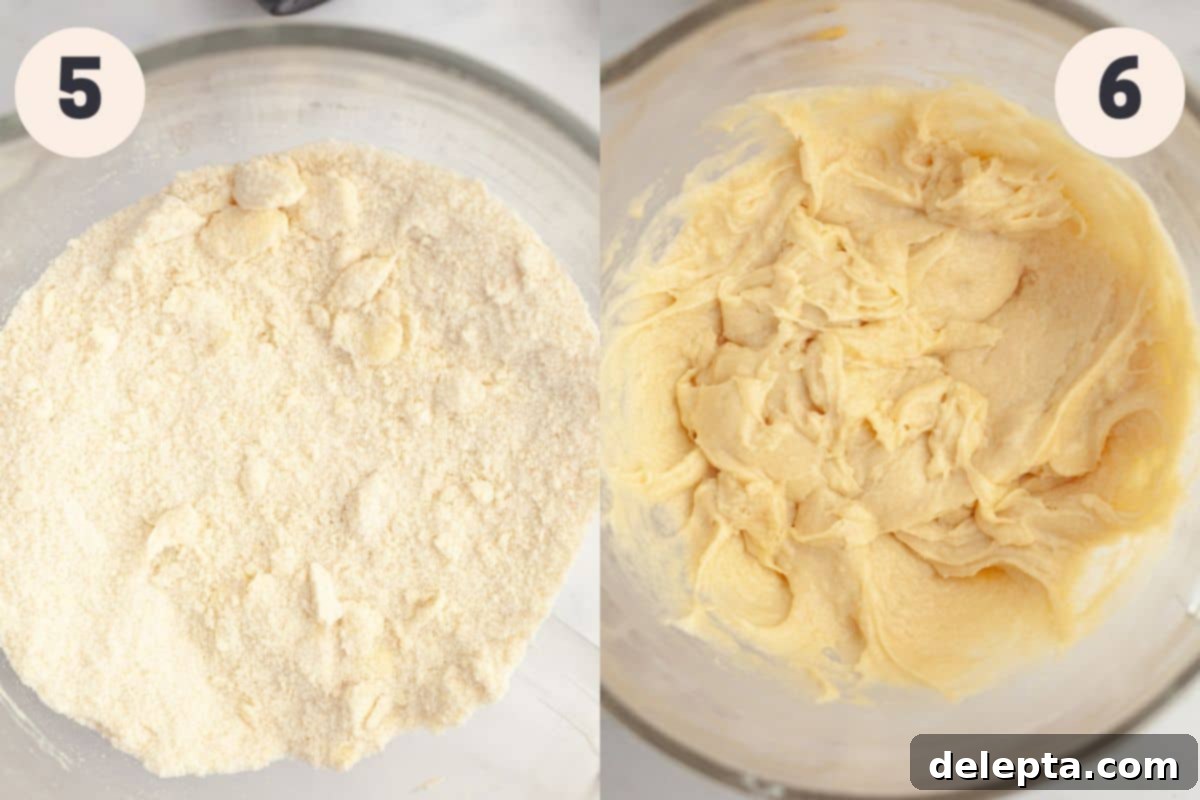
Step 5: Prepare the Cake Batter (Reverse Creaming Method). Preheat your oven to 350°F (175°C). Prepare two 8-inch round baking pans by greasing them thoroughly and lining the bottoms with parchment paper. In the bowl of a stand mixer fitted with the paddle attachment, or using a large bowl and a hand mixer, combine all of your dry ingredients (flour, sugar, baking powder, baking soda, and kosher salt). Add the softened unsalted butter and beat on low speed until the mixture is fully combined and resembles coarse, wet sand. This coating of fat around the flour is key to the tender crumb.
Step 6: Add Eggs to the Cake Batter. With the mixer still on low speed, add the reserved egg whites one at a time, allowing each to incorporate fully before adding the next. Once all egg whites are in, add the whole egg and continue mixing until just combined. Scrape down the sides and bottom of the bowl periodically to ensure all ingredients are well incorporated.
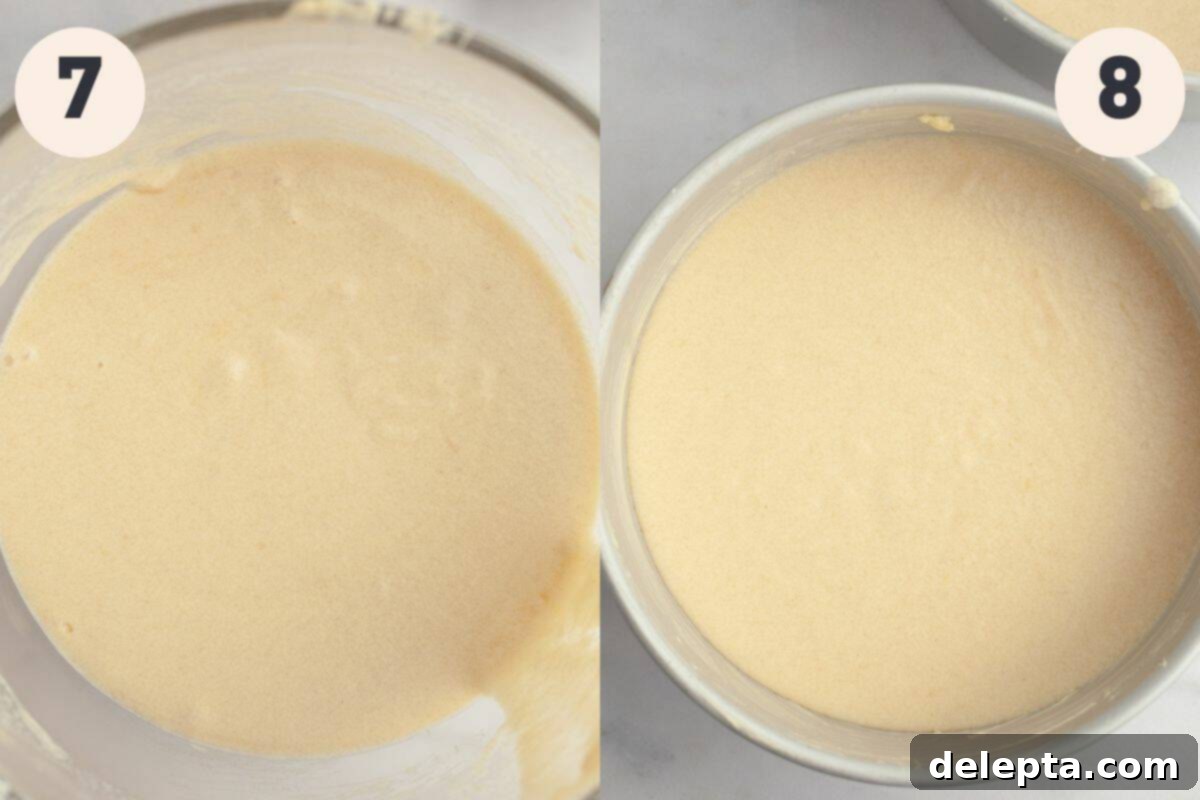
Step 7: Incorporate Wet Ingredients. In a separate jug or medium bowl, whisk together all of the remaining wet ingredients: vanilla extract (or Fiori di Sicilia), whole milk, full-fat yogurt, and lemon juice until thoroughly combined. Gradually pour one-third of this wet mixture into the dry ingredients in the stand mixer, mixing on low speed until just incorporated. Repeat this process twice more, adding the remaining wet ingredients in two additions, mixing slowly after each. The batter will be quite liquidy, which is perfectly normal for this method.
Step 8: Bake the Cake Layers. Divide the cake batter evenly between the two prepared 8-inch baking pans. Bake in the preheated oven for approximately 30-32 minutes, or until a wooden skewer or toothpick inserted into the center of the cakes comes out clean. Remove the pans from the oven and let the cake layers cool in their pans for about 20 minutes before carefully inverting them onto a wire cooling rack to cool completely. Ensure they are completely cool before frosting to prevent the frosting from melting.
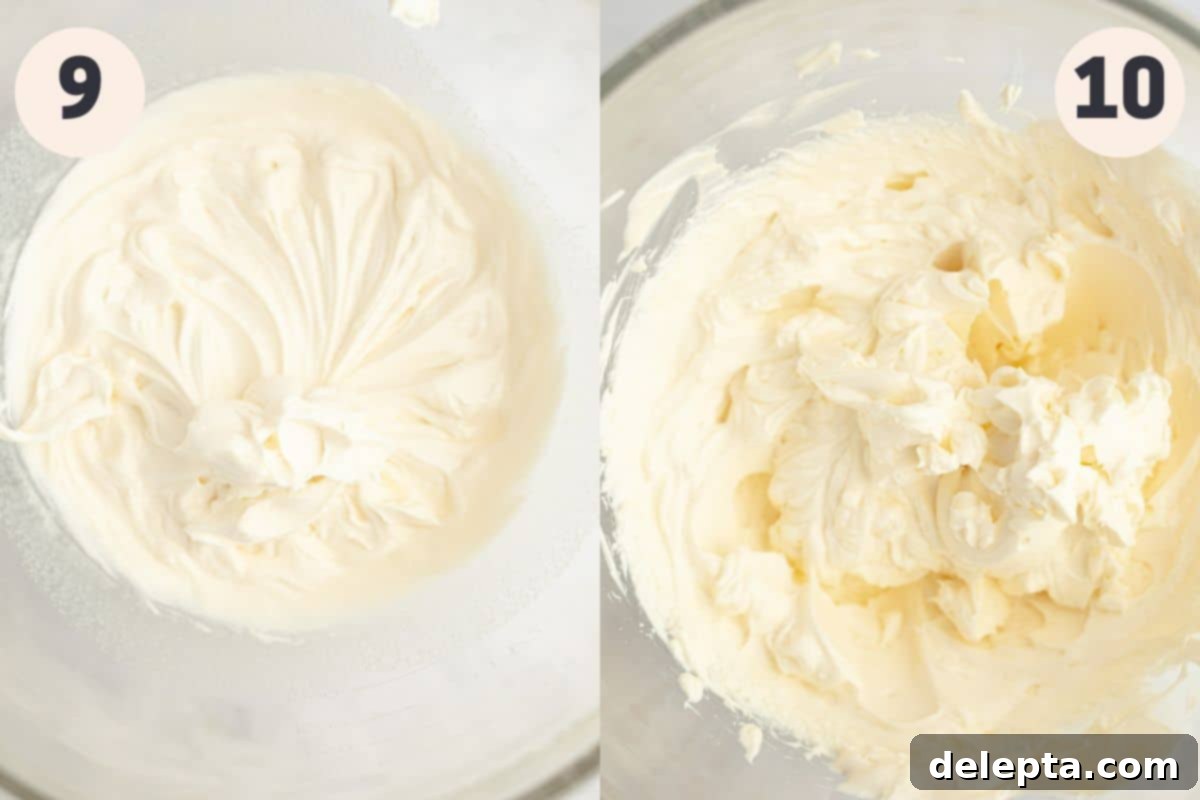
Step 9: Prepare the Whipped Cream Cheese Frosting (Part 1). In the bowl of a stand mixer fitted with the whisk attachment, or using a large mixing bowl with a hand-held mixer, combine the cold heavy cream, granulated sugar, kosher salt, and vanilla extract. Beat on low speed for 2 minutes, allowing the sugar to dissolve completely. Then, increase the speed to medium-high and continue beating for another 2 minutes until the mixture thickens significantly and resembles the consistency of thick Greek yogurt. It won’t be fully stiff yet, but it should be visibly thickened.
Step 10: Prepare the Whipped Cream Cheese Frosting (Part 2). Reduce the mixer speed to low. Add the very cold cream cheese, one spoonful at a time, allowing it to incorporate into the cream mixture. Once all the cream cheese has been added, stop the mixer and use a rubber spatula to scrape down the sides and bottom of the bowl, ensuring everything is thoroughly mixed. Finally, increase the mixer speed to high and beat for another 2 minutes until the frosting is delightfully fluffy, smooth, and evenly blended. Be careful not to overbeat, as this can make the frosting too thin.
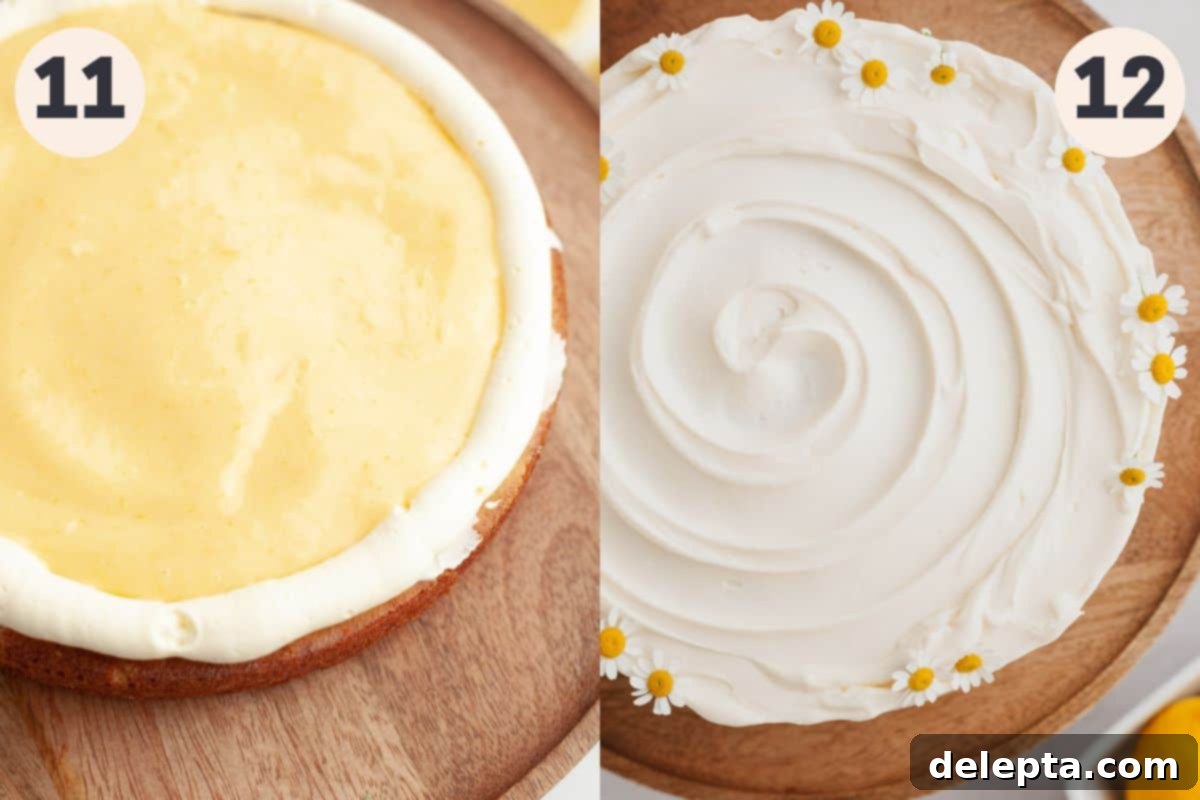
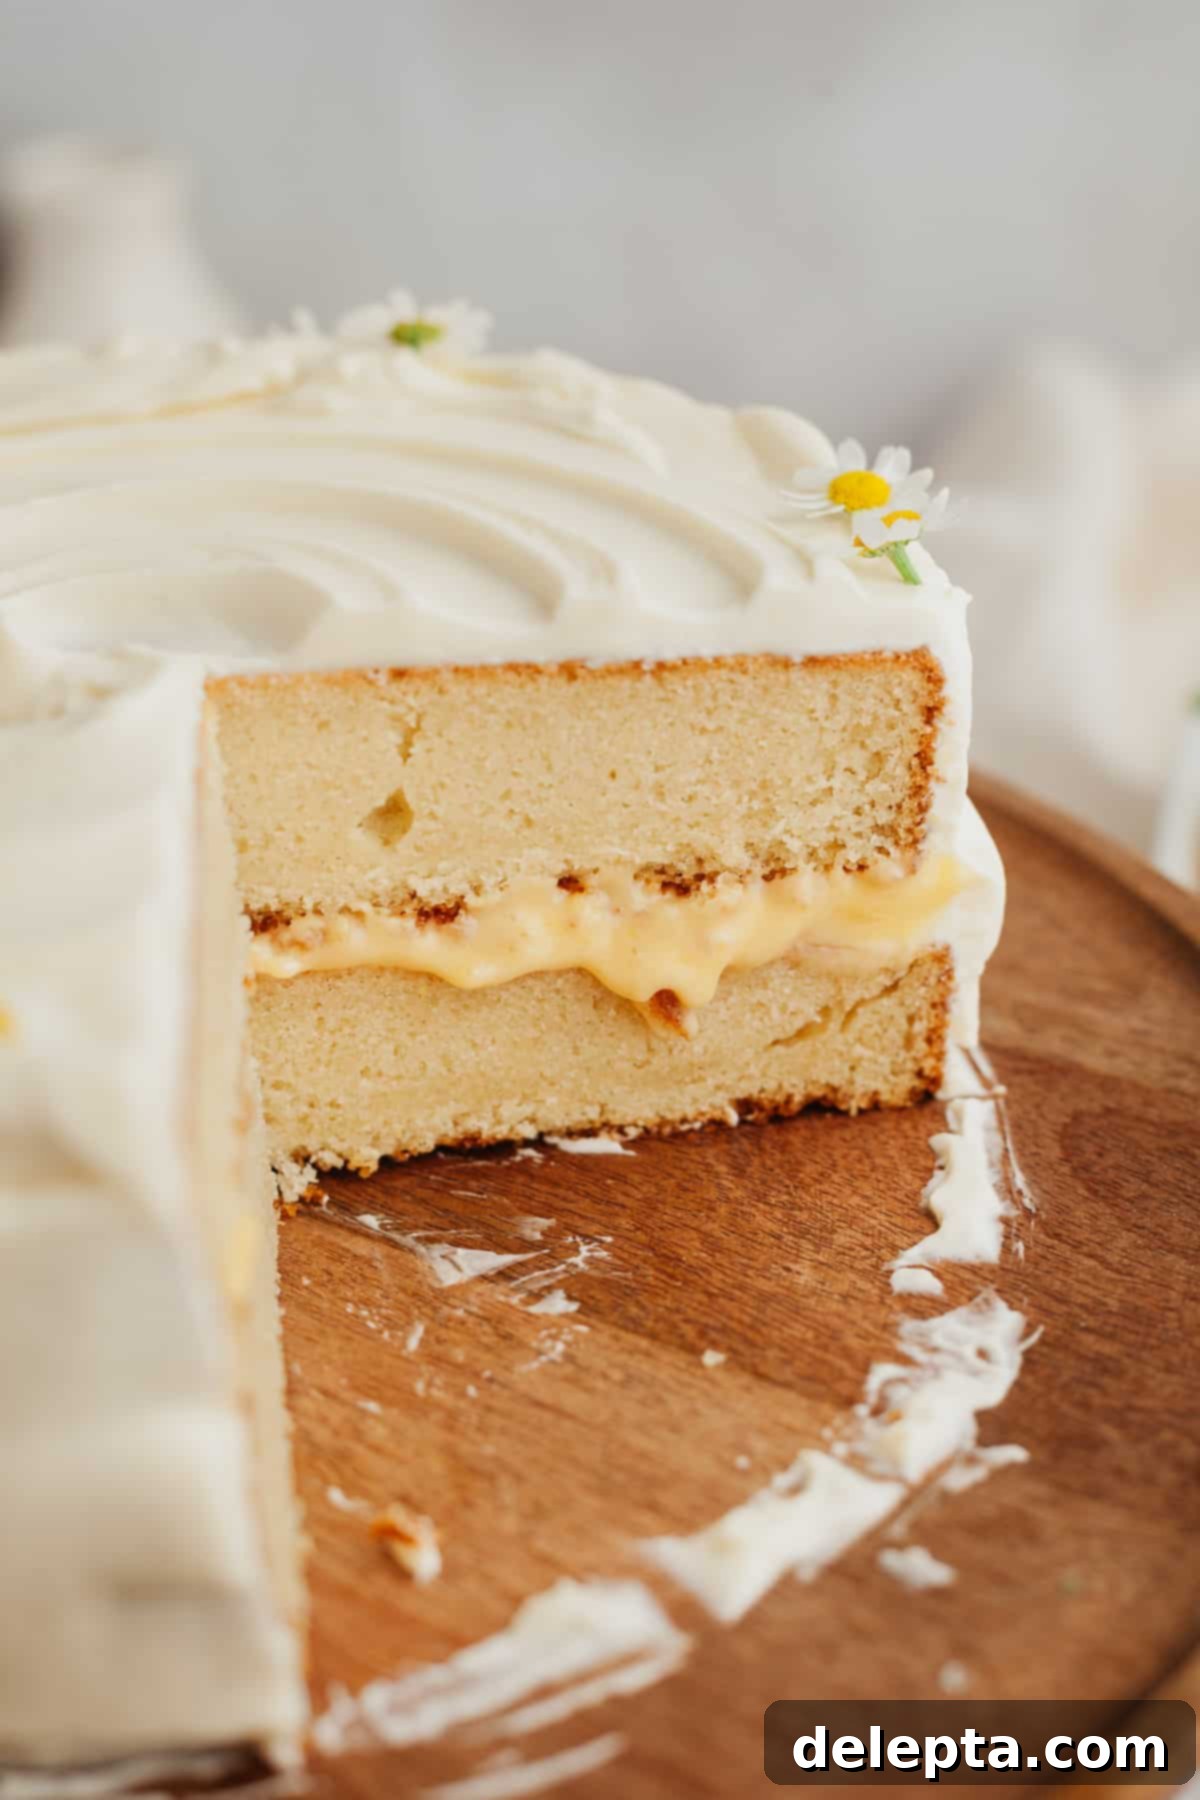
Step 11: Assemble the Cake – Layer One. Once both cake layers are completely cool, place one layer onto your serving plate or cake stand. Use a small offset spatula to spread a very thin, even layer of the cream cheese frosting over the top of the cake. This “crumb coat” helps seal in any loose crumbs. Next, fill a small piping bag with some of the remaining frosting and pipe a generous border around the very edge of this cake layer. This piped barrier is essential for containing the lemon curd and preventing it from seeping out the sides of your cake. Spoon a generous amount of the chilled homemade lemon curd into the center of the piped border and gently spread it evenly within the frosting ring.
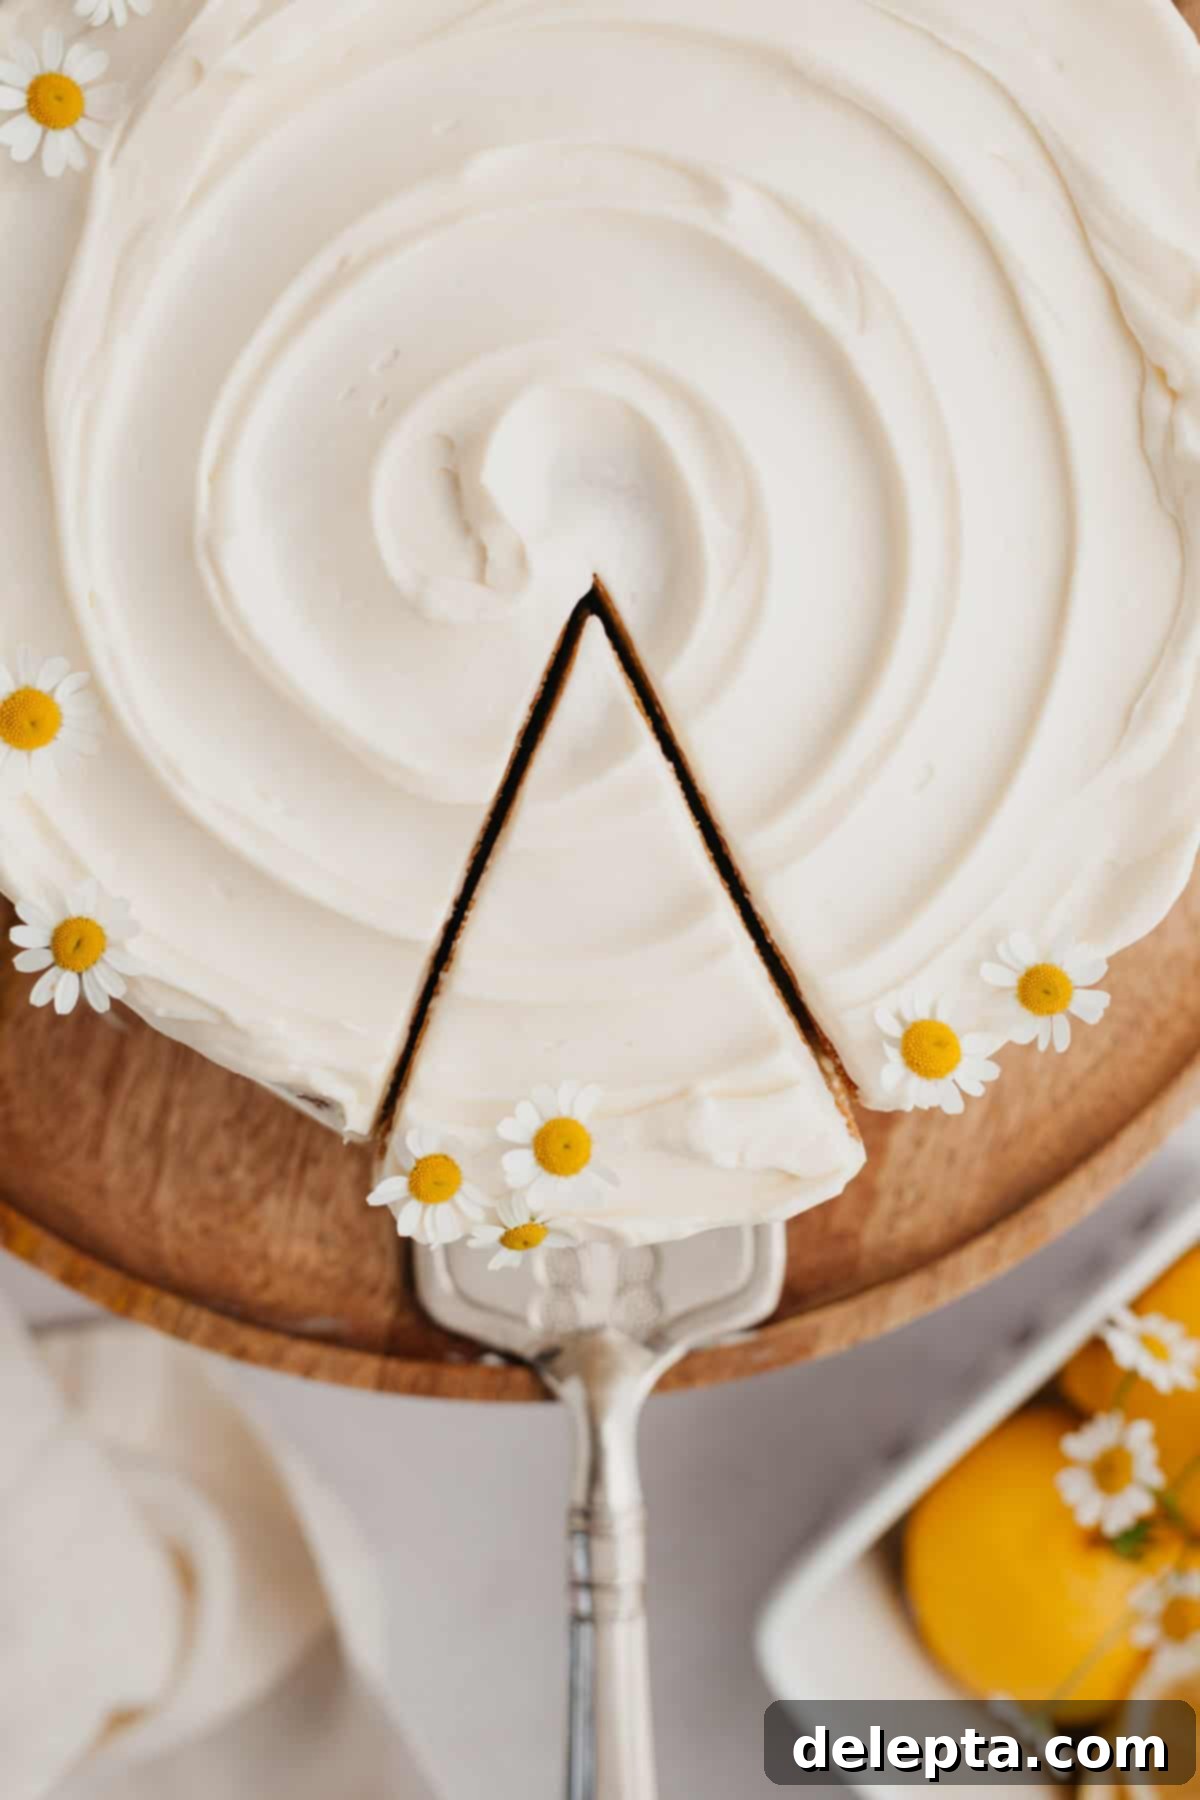
Step 12: Assemble the Cake – Final Layer and Frosting. Carefully place the second cooled cake layer directly on top of the lemon curd filling. Gently press down to secure it. Using the remaining cream cheese frosting, evenly cover the sides and top of the entire cake. Use an offset spatula or bench scraper to smooth the frosting for a clean finish. For the best presentation and stability, place the assembled cake in the refrigerator for at least 30 minutes to allow the frosting to set before slicing and serving. This setting time also enhances the flavors.
Expert Tips & Tricks for a Perfect Lemon Curd Cake
- Always Weigh Your Ingredients for Baking Accuracy: This is arguably the most important tip for consistent baking success! I cannot stress enough the importance of using a digital kitchen scale to measure your ingredients, especially flour. Volume measurements (cups) can vary wildly based on how ingredients are scooped and packed, leading to inconsistent results, such as a dense or dry cake. Weighing ensures precise amounts every time, guaranteeing the tender, moist crumb this recipe promises.
- Exploring Different Buttercream Options: While our cream cheese frosting is divine, if you’re looking for an alternative or a different flavor profile, consider a lemon buttercream. You can find an excellent lemon buttercream recipe from my blueberry-filled cake post, which would also pair wonderfully with this lemon cake!
- Transform into a Three-Layer Cake: Craving an even grander presentation? This recipe can easily be adapted into a three-layer cake! Simply pour the cake batter into three 8-inch baking pans. Be sure to adjust your baking time accordingly; three thinner layers will bake faster, typically requiring only about 22-26 minutes. Always perform the toothpick test to confirm doneness.
- The Golden Rule: Room Temperature Ingredients (Mostly!): For the cake layers, ensure all your refrigerated ingredients like eggs, milk, and yogurt are at room temperature. Cold ingredients don’t emulsify properly with butter and sugar, leading to a lumpy batter and a potentially tough, dry cake with an inconsistent texture. The only exceptions are the cream cheese and heavy cream for the frosting, which must be kept very cold to achieve that perfect whipped, fluffy consistency.
- Prepare the Lemon Curd in Advance: To simplify your baking day and reduce stress, I highly recommend making the lemon curd at least one day ahead. This allows it ample time to chill and properly set, making it thicker and easier to spread. Plus, it’s one less task on the main baking day! As mentioned, high-quality store-bought lemon curd is also a fantastic time-saver if needed.
- Create a Frosting Barrier to Contain the Curd: To prevent the luscious lemon curd filling from oozing out the sides of your assembled cake, always pipe a sturdy border of cream cheese frosting around the perimeter of each cake layer before adding the curd. This creates a dam that holds the filling securely in place, resulting in cleaner slices and a more stable cake.
Storage and Make-Ahead Tips
To keep your lemon curd cake fresh and delicious, store the assembled cake in an airtight container or tightly wrapped in plastic wrap in the refrigerator for up to 5 days. For the best flavor and texture, allow slices to come to room temperature for about 20-30 minutes before serving.
The homemade lemon curd can be prepared up to 2 weeks in advance and stored in a sealed jar in the refrigerator. The baked cake layers can also be made ahead of time; once completely cooled, wrap each layer tightly in several layers of plastic film and place them in the refrigerator for up to 2 days, or freeze them for up to 2 months. If frozen, thaw them in the refrigerator overnight and bring them to room temperature before frosting and assembling the cake.
Expand Your Citrus Horizons: Try These Lemon Recipes Next!
- Soft Lemon Blueberry Cookies
- Blackberry Lemon Bread
- Lemon Curd Cookies
- Lemon Meringue Pie
Have you made this delightful recipe? Please take a moment to rate it below and share your experience! Don’t forget to tag me on Instagram @alpineella and Pinterest so I can see your wonderful creations!
Recipe
Lemon Curd Cake
Ella Gilbert
Pin Recipe
Save RecipeSaved!
Equipment
-
2 8-inch cake pans
Ingredients
Cake
- 2 ½ cups all purpose flour
- 12 tablespoons unsalted butter room temperature
- 1 ⅔ cup sugar
- 2 teaspoons baking powder
- ½ teaspoon baking soda
- 1 ½ teaspoons kosher salt
- 4 egg whites room temperature
- 1 egg room temperature
- 2 teaspoons vanilla extract or fiori di sicilia extract
- 1 cup whole milk room temperature
- ½ cup full fat yogurt room temperature
- 2 teaspoons lemon juice
Lemon Curd
- 3 large egg yolks room temperature
- 5 tablespoons granulated sugar
- pinch salt
- 1 tablespoon lemon zest
- 6 tablespoons lemon juice
- 4 tablespoons unsalted butter cubed
- ½ teaspoon vanilla extract
Cream Cheese Frosting
- ½ teaspoon kosher salt
- 1 cup heavy cream cold
- 12 oz cream cheese cold
- ¾ cup granulated sugar
- 3 teaspoons vanilla extract
Instructions
Make Lemon Curd
-
In a small, heat-proof saucepan, combine the granulated sugar and fresh lemon zest. Use your fingertips to gently rub the zest into the sugar for about 1-2 minutes. This crucial step extracts the flavorful oils from the zest, intensifying the lemon aroma and causing the sugar to turn a very pale yellow. You’ll know it’s done when the vibrant lemon scent is strong and clear.
-
Add the three large egg yolks to the lemon-infused sugar mixture in the saucepan (remember to save your egg whites for the cake!). Whisk vigorously for approximately 2 minutes until the mixture becomes pale yellow and noticeably thick, incorporating air for a lighter texture.
-
Place the saucepan over low heat and pour in the fresh lemon juice and a pinch of salt. Whisk constantly without stopping to prevent the eggs from curdling. Continue whisking for up to 10 minutes, or until the mixture thickens considerably and becomes very glossy. To check for doneness, dip the back of a spoon into the curd; it should thickly coat the spoon and leave a clean line when you run your finger across it.
-
Remove the pan from the heat. Add the cubed unsalted butter, one piece at a time, whisking well after each addition until fully melted and incorporated. This creates a smooth, emulsified finish. Finally, whisk in the vanilla extract to combine once more.
-
Pour the finished lemon curd into a clean jar or bowl. If you prefer a completely smooth curd, you can strain it through a fine-mesh sieve at this point to remove any zest pieces. Press a piece of plastic wrap directly onto the surface of the lemon curd to prevent a skin from forming as it cools. Allow it to cool completely to room temperature before transferring to the refrigerator for at least 2 hours, or ideally overnight, before using. It can be stored in the fridge for up to 1 week.
Make Cake
-
Preheat your oven to 350°F (175°C). Prepare two 8-inch round cake pans by greasing them thoroughly with butter or baking spray, then lining the bottoms with parchment paper to prevent sticking.
-
In the bowl of a stand mixer fitted with the paddle attachment (or a large bowl with a hand mixer), combine all of your dry ingredients: all-purpose flour, granulated sugar, baking powder, baking soda, and kosher salt. Mix on low speed until well blended. Add the softened unsalted butter and continue mixing on low speed until the mixture is fully incorporated and takes on the consistency of damp, coarse sand. This “reverse creaming” method helps create an incredibly tender cake.
-
With the mixer still on low speed, add the egg whites one at a time, allowing each to fully incorporate before adding the next. Once all egg whites are in, add the whole egg and beat until just combined. Throughout this process, make sure to scrape down the sides and bottom of the bowl frequently with a rubber spatula to ensure all ingredients are evenly mixed and no pockets of unmixed batter remain.
-
In a separate small jug or bowl, whisk together the vanilla extract (or Fiori di Sicilia), full-fat yogurt, fresh lemon juice, and whole milk until thoroughly combined and smooth. Ensure all these wet ingredients are at room temperature for optimal mixing.
-
With the mixer on low speed, slowly pour in one-third of the milk mixture into the dry ingredients. Mix until just incorporated. Repeat this process two more times, adding the remaining milk mixture in two additions, mixing slowly after each. Be cautious, as the batter will be quite liquidy, and can splash if mixed too quickly.
-
After all wet ingredients have been added, increase the mixer speed to medium and beat for 2 minutes. Your cake batter will have a noticeably liquidy consistency; this is entirely normal and contributes to the cake’s moist texture.
-
Divide the finished cake batter evenly between your two prepared 8-inch pans. Bake in the preheated oven for 25-30 minutes. The cakes are done when a wooden skewer or toothpick inserted into the center comes out clean or with only a few moist crumbs attached. Remove the cakes from the oven and let them cool in their pans for 15 minutes before carefully inverting them onto a wire cooling rack to cool completely. It is essential for the cakes to be fully cooled before frosting to prevent any melting.
Make Frosting
-
In the bowl of a stand mixer fitted with the whisk attachment (or a large bowl with a handheld mixer), combine the cold heavy cream, granulated sugar, kosher salt, and vanilla extract. Beat on low speed for 2 minutes, ensuring the granulated sugar has completely dissolved into the cream. This initial slow mixing helps prevent sugar crystals in your frosting.
-
Increase the mixer speed to medium-high and continue beating for another 2 minutes. During this time, the mixture will thicken significantly and begin to resemble the consistency of thick Greek yogurt or soft-serve ice cream. It should hold soft peaks.
-
Decrease the speed to low. Add the very cold cream cheese, one spoonful at a time, allowing each addition to incorporate before adding the next. Once all the cream cheese has been added, stop the mixer and scrape down the sides and bottom of the bowl thoroughly with a rubber spatula. Finally, increase the speed to medium-high and beat for another 2 minutes until the frosting is light, fluffy, perfectly smooth, and well combined. Be careful not to overbeat, as this can cause the frosting to become grainy or too thin.
Assemble
-
Place one of your completely cooled cake layers onto your desired serving plate or cake stand. Use a small offset spatula to spread a very thin, even layer of cream cheese frosting over the entire top surface of this cake layer. This initial thin layer acts as a “crumb coat” to catch any loose crumbs and ensure a clean finish. Next, transfer some of the remaining frosting into a small piping bag (fitted with a round tip, or simply snip off the corner). Pipe a continuous, sturdy border around the very edge of the cake layer – this will act as a dam to hold the lemon curd in place. Spoon approximately ½ to ¾ of your chilled homemade lemon curd into the middle of the piped frosting border and gently spread it evenly within the ring, ensuring it doesn’t touch the cake’s edge.
-
Carefully place the second cooled cake layer on top of the lemon curd filling, aligning it as best as possible. Gently press down on the top layer to ensure it’s secure and level. Using the remaining cream cheese frosting, evenly cover the sides and top of the entire cake. Use an offset spatula or a bench scraper to create a smooth, professional-looking finish. For the best stability and to allow the frosting to firm up beautifully, place the assembled cake in the refrigerator for at least 30 minutes before slicing and serving. This setting time also helps to meld the flavors together.
Notes
For optimal emulsification and a smooth batter, it’s crucial that all cake ingredients (such as eggs, milk, yogurt, and butter) are at room temperature before you begin baking. The only exceptions are the heavy cream and cream cheese for the frosting, which must be kept very cold to achieve their desired whipped consistency.
Butter: For the best flavor and texture, I use European-style butter, such as Kerry Gold, in all my recipes. Its higher butterfat content contributes to a richer, creamier bake and a more luxurious frosting.
Salt: This recipe specifies kosher salt. If you are using fine table salt instead, please halve the amount called for, as fine salt is much denser and saltier than kosher salt. As a general guide, 1 teaspoon of kosher salt is approximately equal to ½ teaspoon of fine salt. I specifically use Diamond Crystal kosher salt, not Morton Salt, which tends to be saltier.
Vanilla Extract: You have the option to use traditional vanilla extract in the cake batter for a classic flavor profile. Alternatively, I highly recommend Fiori di Sicilia, an Italian extract that offers a fragrant blend of lemon and vanilla, providing a unique and delightful aromatic boost to your cake.
Lemon Curd: While homemade lemon curd offers superior flavor and freshness, if time is a constraint, feel free to use a high-quality store-bought lemon curd. The cake will still be incredibly delicious!
Storage: The assembled lemon curd cake should be stored tightly wrapped or in an airtight container in the refrigerator for up to 5 days. For the best tasting experience, allow slices to come to room temperature for about 20-30 minutes before serving.
Making Ahead: This recipe is perfect for making ahead! The cake layers can be baked up to 2 days in advance. Once completely cooled, wrap each layer tightly in plastic wrap to prevent drying, and store them in the refrigerator. For longer storage, the layers can be frozen for up to 2 months. If frozen, thaw them in the refrigerator overnight and bring them to room temperature before assembling and frosting. The homemade lemon curd can also be made well in advance, up to a week prior, and kept in a sealed jar in the refrigerator. This allows for a stress-free assembly process on the day you plan to serve.
Nutrition
